
Divi and its image gallery module continues to be a convenient and useful tool for creating stunning image galleries for your site. The built-in design settings allow you to get all the necessities and more. But, in this tutorial, we are going to take the image gallery design to a new level with a unique staggering animation effect. Using a combination of Divi’s built-in design options anime.js, This staggering animation resembles a type of ripple effect that unveils each image within the gallery one after the other with a smooth design animation. This will be perfect for those of you looking for a unique presentation of your gallery for visitors and an impressive transition when navigating through each page of the gallery.
Let’s get started!
Sneak Peek
Here is a quick look at the design we’ll build in this tutorial.
And here is a codepen that demonstrates the same concept.
Download the Layout for FREE
To lay your hands on the designs from this tutorial, you will first need to download it using the button below. To gain access to the download you will need to subscribe to our newsletter by using the form below. As a new subscriber, you will receive even more Divi goodness and a free Divi Layout pack every Monday! If you’re already on the list, simply enter your email address below and click download. You will not be “resubscribed” or receive extra emails.

To import the section layout to your Divi Library, navigate to the Divi Library.
Click the Import button.
In the portability popup, select the import tab and choose the download file from your computer.
Then click the import button.

Once done, the section layout will be available in the Divi Builder.
Let’s get to the tutorial, shall we?
What You Need to Get Started

To get started, you will need to do the following:
- If you haven’t yet, install and activate the Divi Theme.
- Create a new page in WordPress and use the Divi Builder to edit the page on the front end (visual builder).
- Choose the option “Build From Scratch”.
After that, you will have a blank canvas to start designing in Divi.
How to Add Staggering Animation to a Divi Image Gallery
Part 1: Designing the Gallery Page Layout
The Section
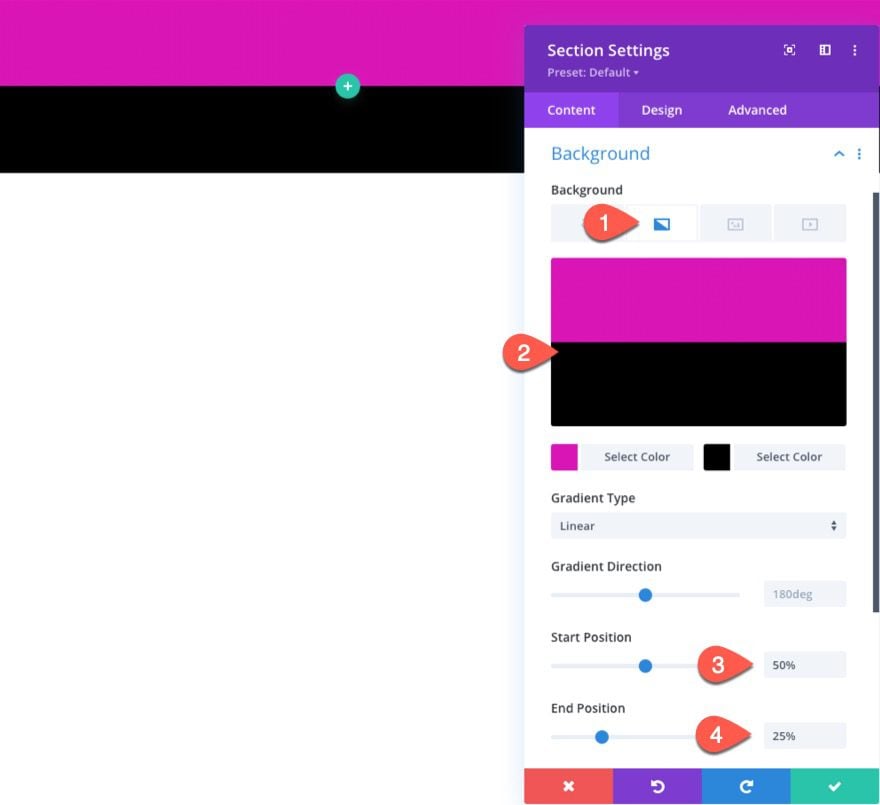
To begin, open the settings for the existing section and give it a background gradient as follows:
- Background Gradient Left Color: #d915b5
- Background Gradient Right Color: #000000
- Start Position: 50%
- End Position: 25%
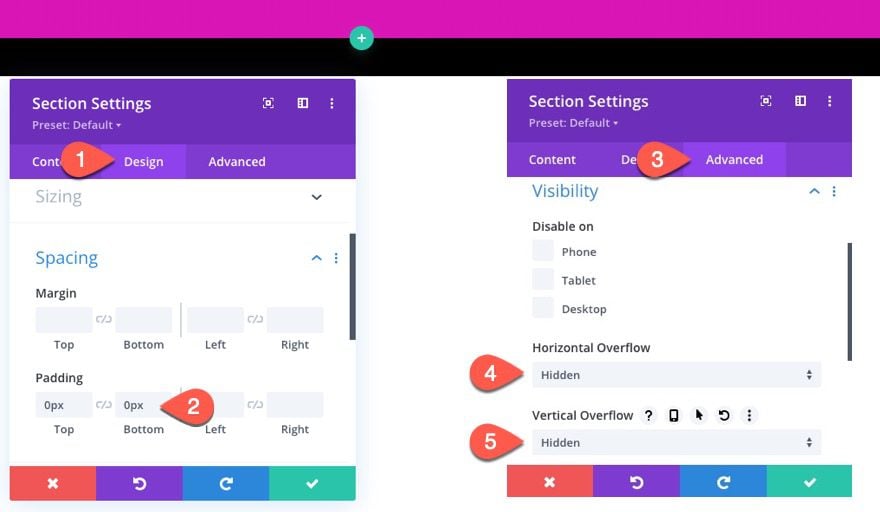
Under the design tab, update the padding:
- Padding: 0px top, 0px bottom, 0px left, 0px right
Under the advanced tab, update the following:
- Horizontal Overflow: Hidden
- Vertical Overflow: Hidden
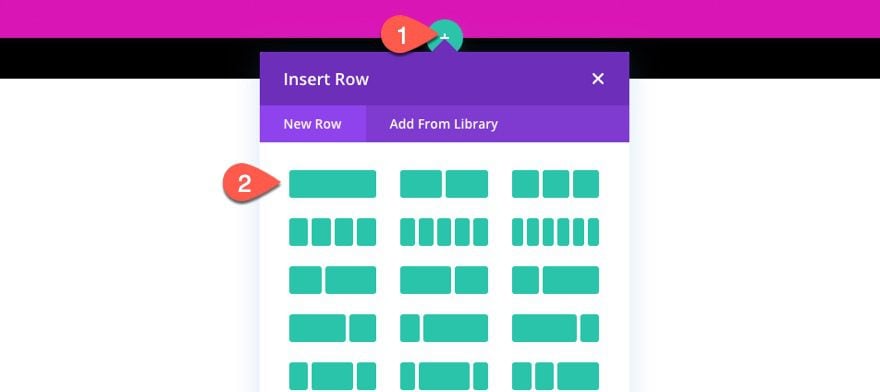
The Row for the Page Title
Inside the section, add a one-column row. This will hold our page title.
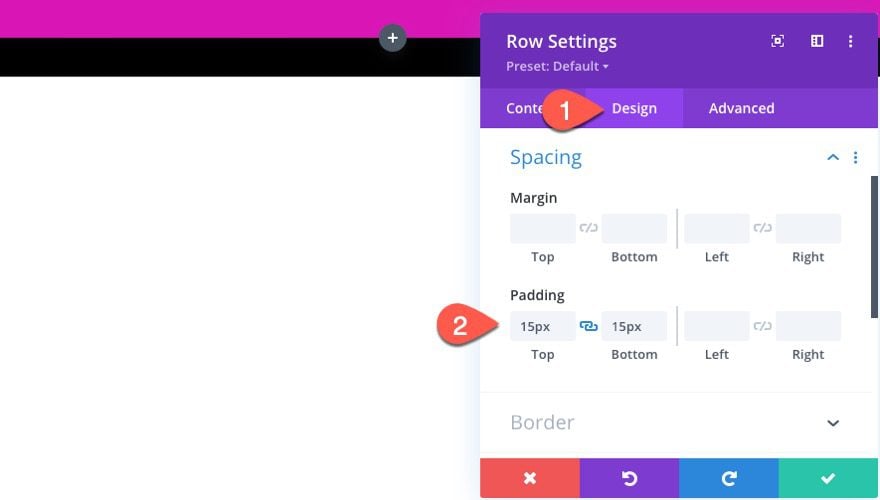
Open the row settings and update the padding:
- Padding: 15px top, 15px bottom
The Title Text Module
To create the page title, add a text module to the row/column.
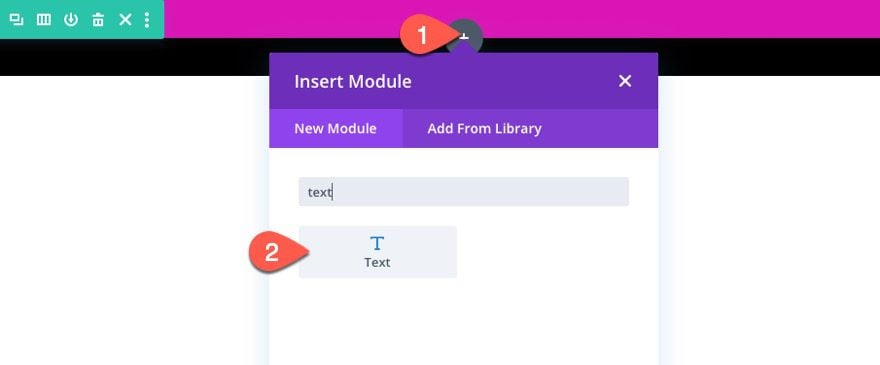
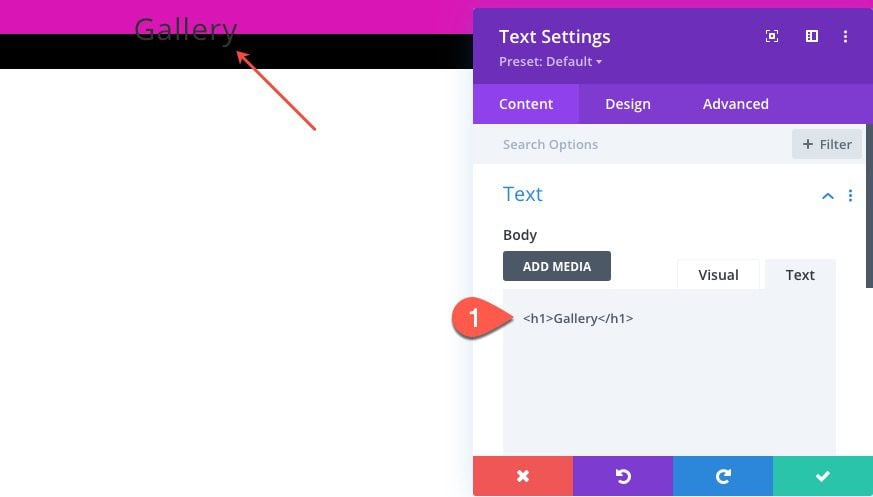
Then update the body content with the following H1 heading:
<h1>Gallery</h1>
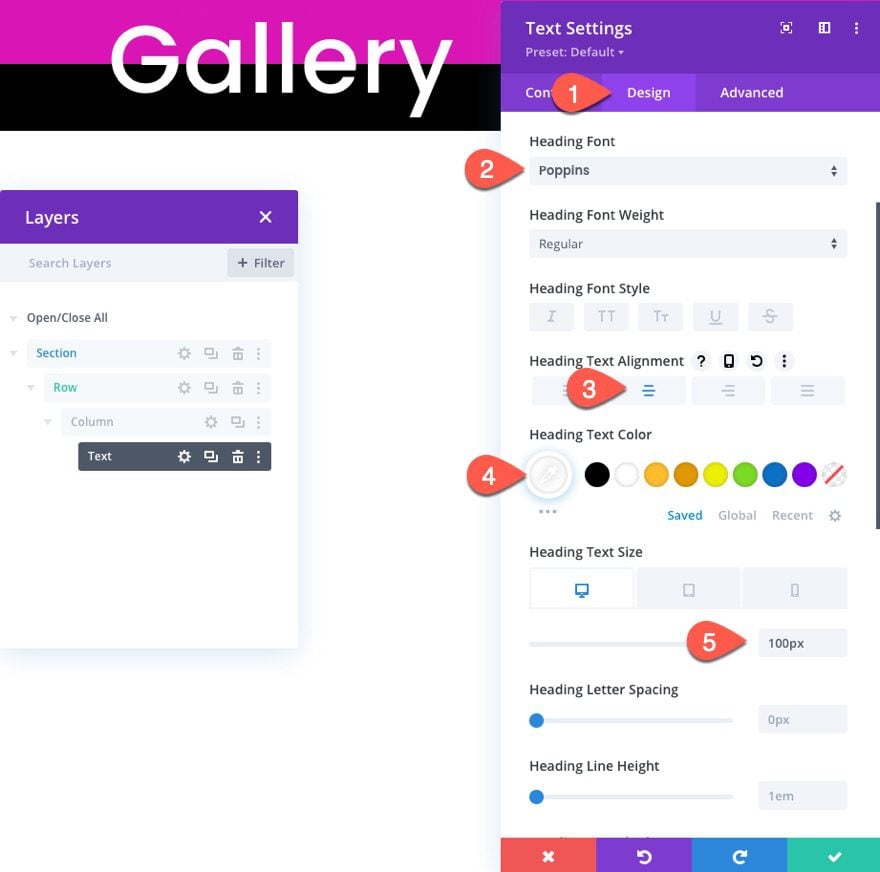
Under the text design settings, update the following:
- Heading Font: Poppins
- Heading Text Alignment: center
- Heading Text Color: #ffffff
- Heading Text Size: 100px (desktop), 80px (tablet), 60px (phone)
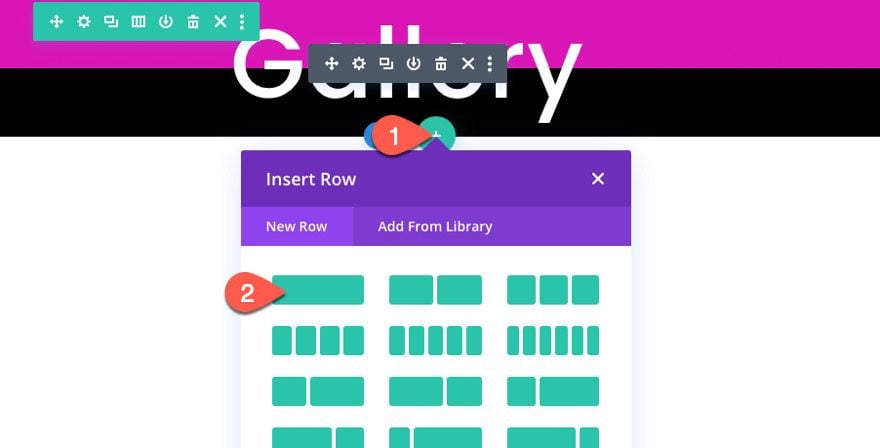
The Row for the Gallery Module
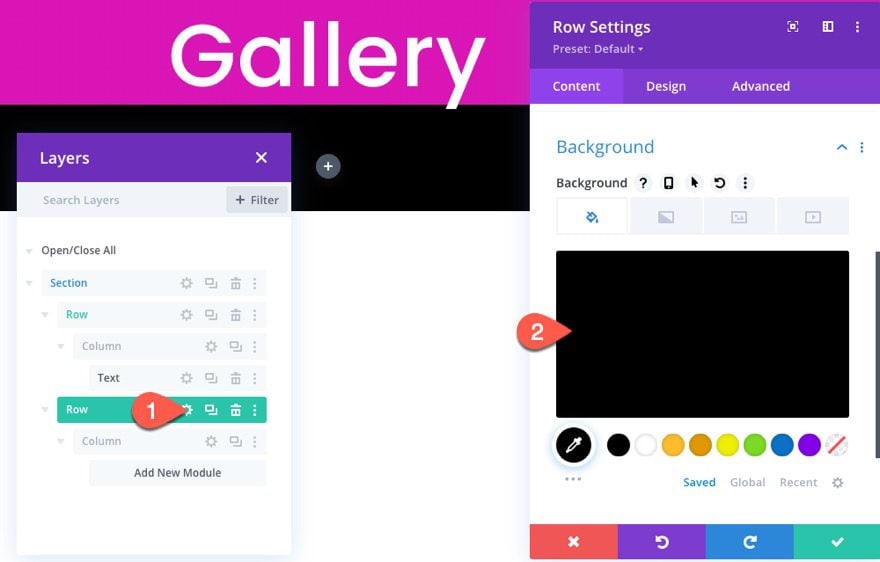
In the same section, create a new one-column row which will hold the gallery module.
Open the row settings and give it a black background:
- Background Color: #000000
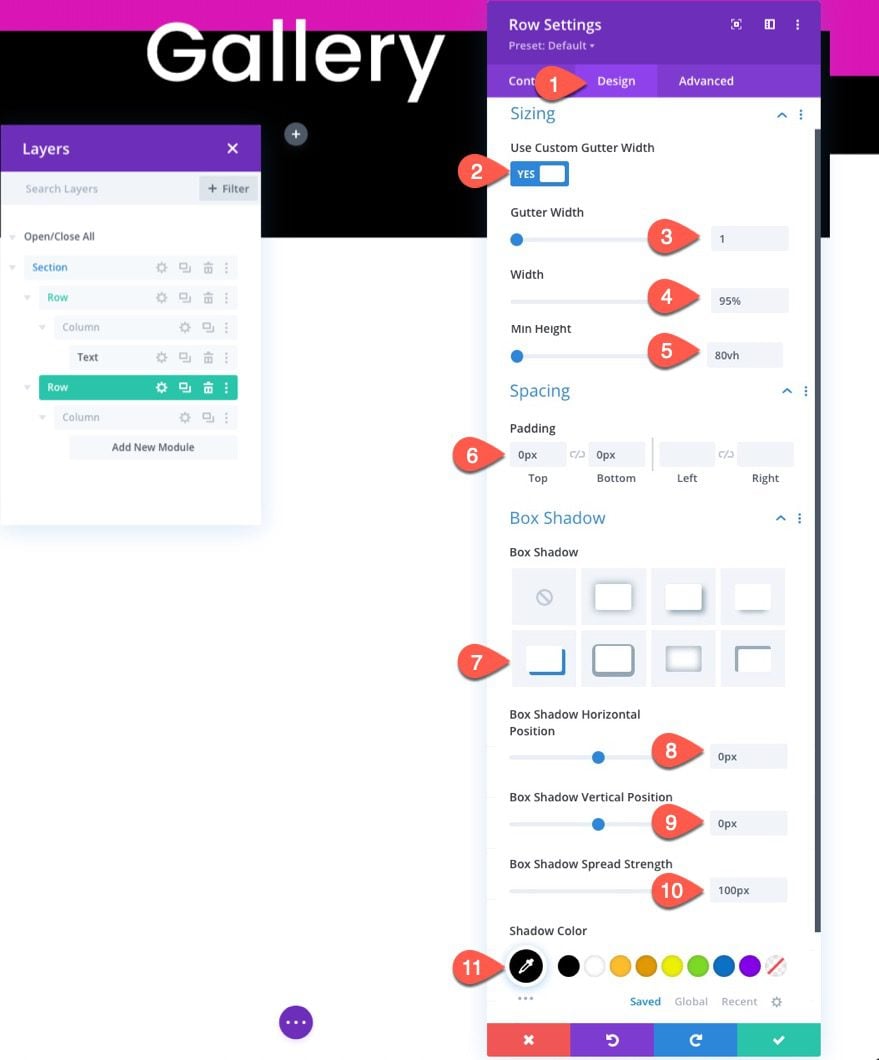
Under the design settings, update the following:
- Use Custom Gutter Width: YES
- Gutter Width: 1
- Width: 95%
- Min Height: 80vh
- Padding: 0px top, 0px bottom
- Box Shadow: see screenshot
- Box Shadow Vertical Position: 0px
- Box Shadow Horizontal Position: 0px
- Box Shadow Spread Strength: 70px
- Shadow Color: #000000
Part 2: Designing the Gallery Module
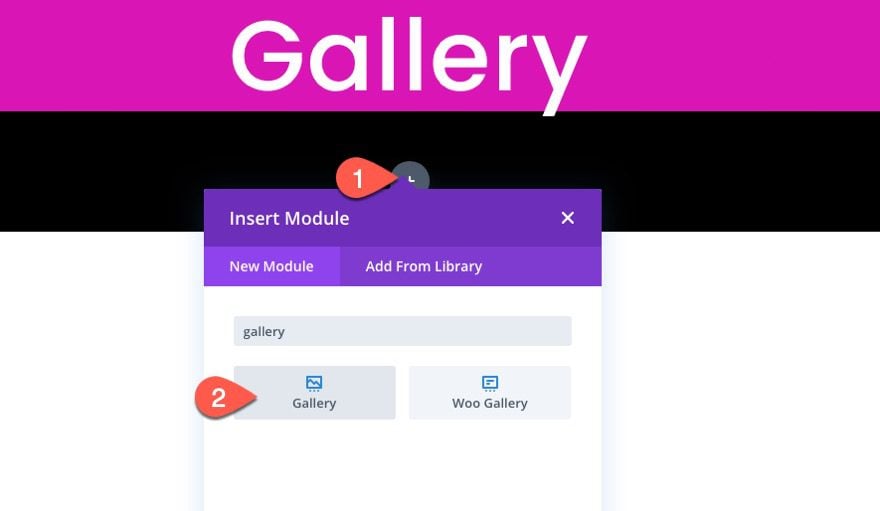
Finally, we are ready to add and design the gallery module. To create the gallery, add a new gallery module to the row.
The Images
Under the content tab of the Gallery settings, add the images you want to use for the gallery. For this example, we are going to add 65 images (or at least over 25). This will give us a nice number of gallery items to showcase our staggering animation effect and pagination.
Once the images are uploaded to the gallery, update the following:
- Image Count: 25
- Show Title and Caption: NO
- Show Pagination: YES
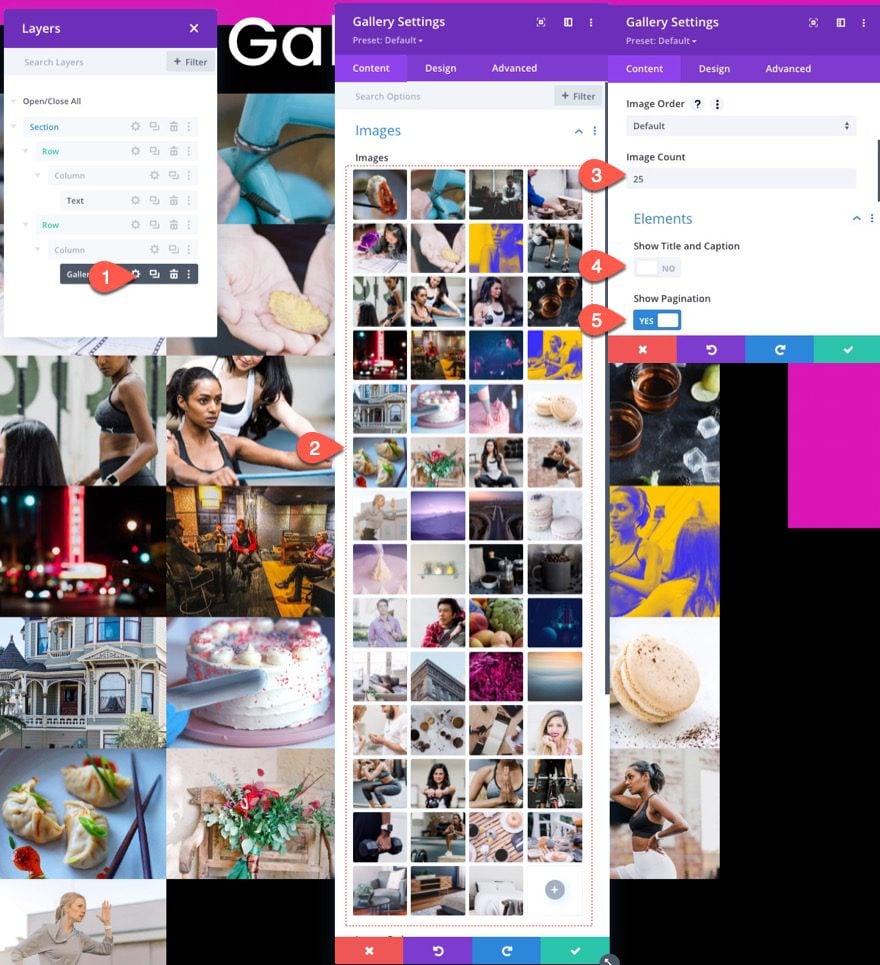
NOTE: Setting the image count to “25” defines the number of images that will be displayed per page when clicking the pagination links. The staggering grid animation that we will add with custom code is based on the image gallery having 5 rows of 5 images (25 images) per page. For best results, make sure you have at least 25 images and the image count set to 25.
Overlay and Pagination Design
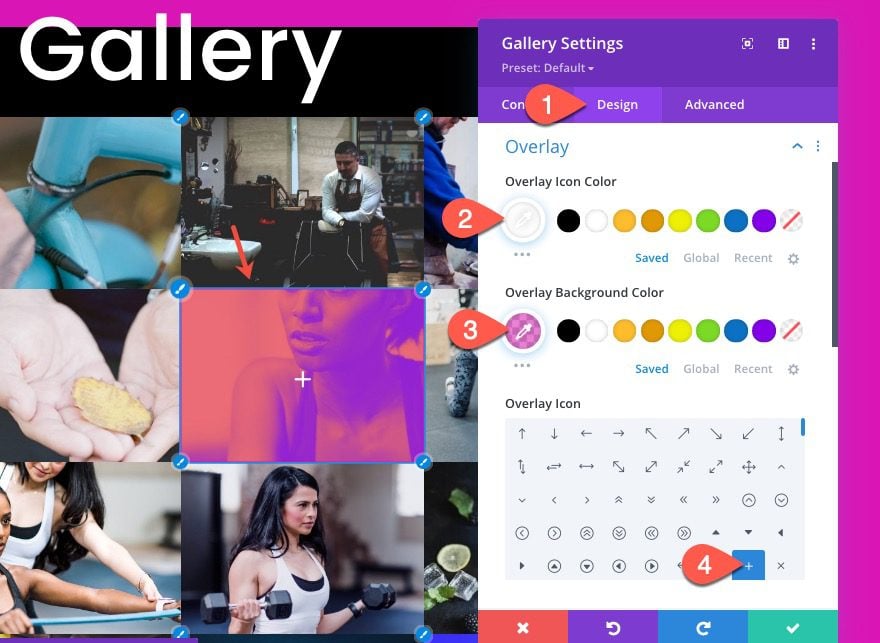
Under the design tab, update the overlay design:
- Overlay Icon Color: #ffffff
- Overlay Background Color: rgba(217,21,181,0.55)
- Overlay Icon: plus icon (see screenshot)
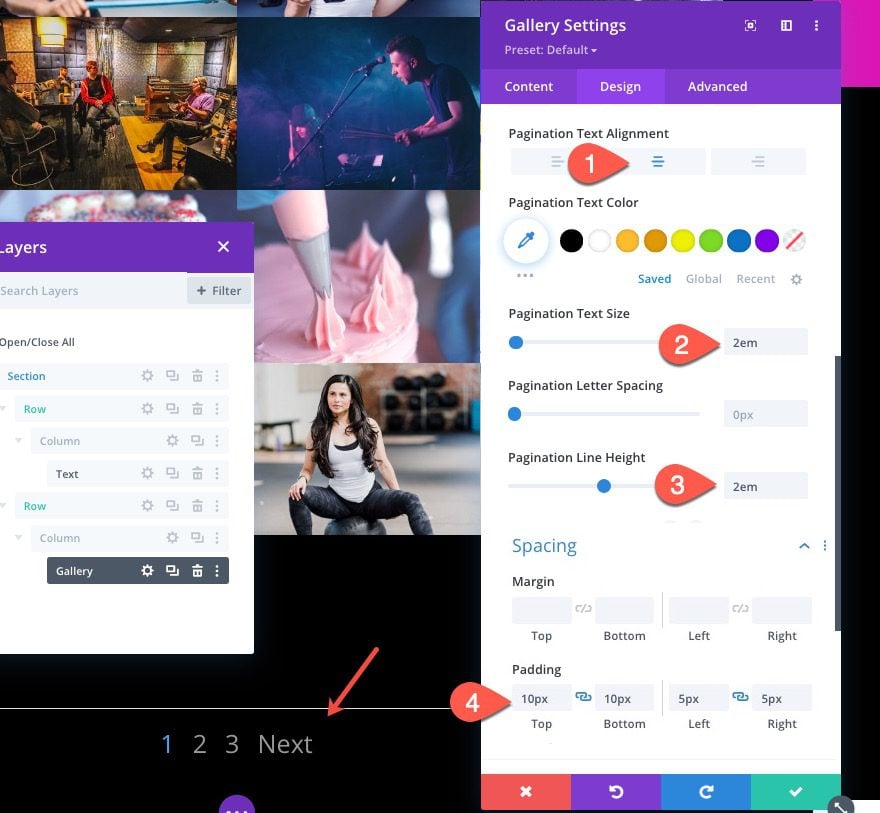
- Pagination Text Alignment: Center
- Pagination Text Size: 2em
- Pagination Line Height: 2em
- Padding: 10px top, 10px bottom, 5px left, 5px right
Advanced Styling
Next, we are going to add some advanced styling to the gallery module. The main reason for doing this is to control the number of images displayed per row on different devices.
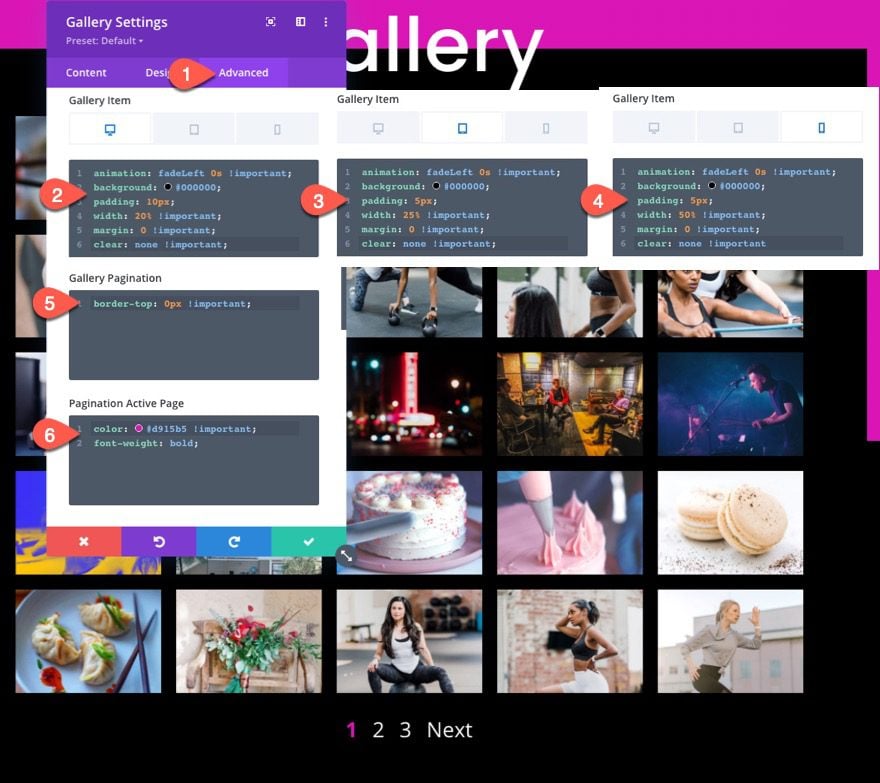
First, let’s add some CSS to the Gallery Item as follows:
Gallery Item CSS (desktop)
animation: fadeLeft 0s !important;
background: #000000;
padding: 10px;
width: 20% !important;
margin: 0 !important;
clear: none !important;
Gallery Item CSS (tablet)
animation: fadeLeft 0s !important;
background: #000000;
padding: 5px;
width: 25% !important;
margin: 0 !important;
clear: none !important;
Gallery Item CSS (phone)
animation: fadeLeft 0s !important;
background: #000000;
padding: 5px;
width: 50% !important;
margin: 0 !important;
clear: none !important
Notice the width of each gallery item changes on each device. The 20% width on desktop will create 5 images per row. The 25% width on tablet will create 4 images per row. And the 50% width on phone will create 2 images per row.
Next, take out the pagination border but adding the following CSS to the Gallery Pagination box:
border-top: 0px !important;
padding-top: 20px;
Finally, add a custom color and font-weight to the active pagination link:
color: #d915b5 !important;
font-weight: bold;
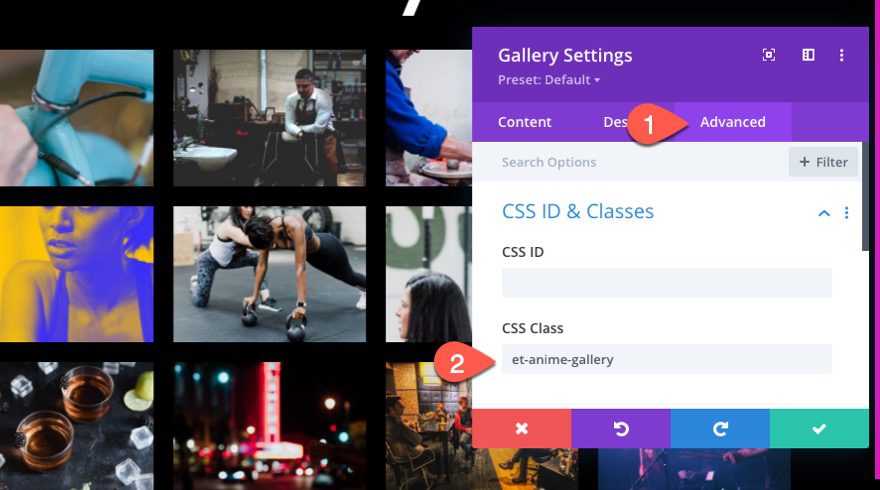
Before we save it, make sure to add the following CSS Class to the Gallery Module:
- CSS Class: et-anime-gallery
Part 3: Adding the Staggering Animation Effect to the Gallery with JQuery and Anime.js
Now that the design is complete, we have a simple and professional image gallery layout. All we need to do is add the code necessary to create the staggering animation the image gallery.
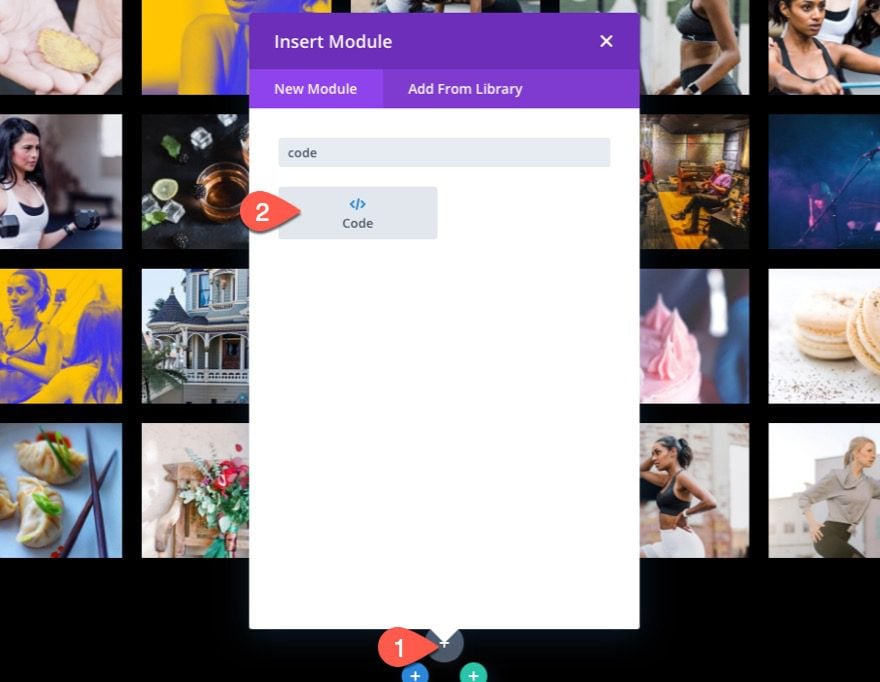
To do this, add a code module under the gallery module.
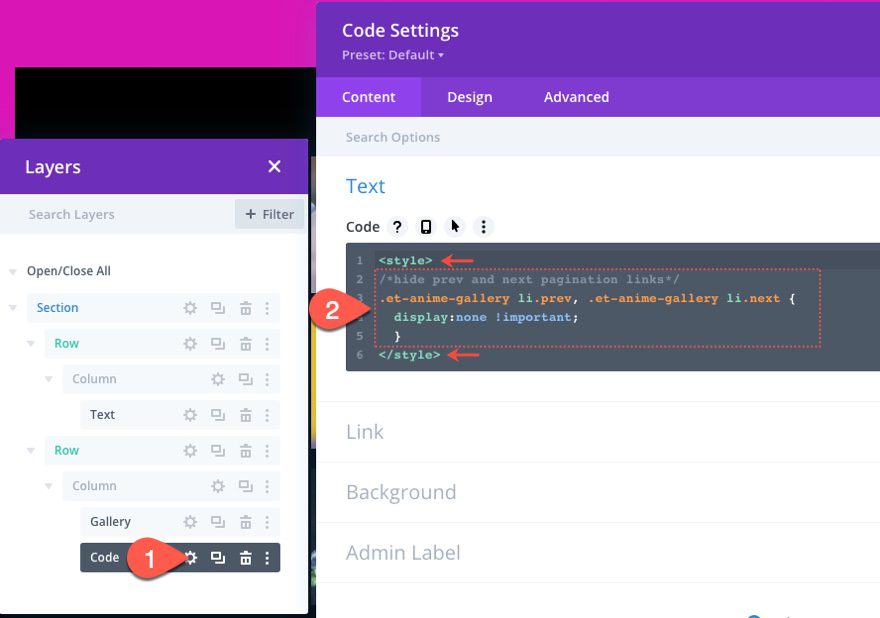
The CSS
In the code content box, paste the following CSS making sure to wrap the CSS in the necessary style tags:
/*hide prev and next pagination links*/
.et-anime-gallery li.prev, .et-anime-gallery li.next {
  display:none !important;
  }
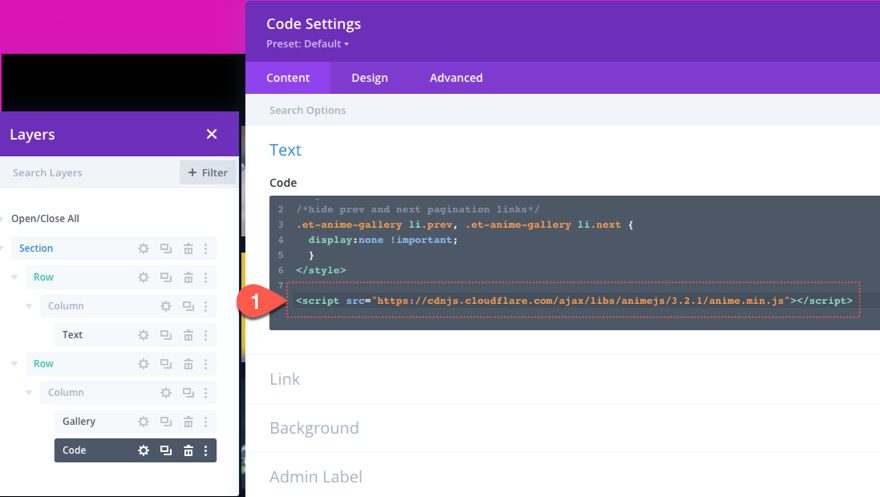
The Anime.js Library
Below the ending style tag, paste the following src with a script tag to call the anime.js library so that we can use it for our JavaScript/Jquery below it.
src="https://cdnjs.cloudflare.com/ajax/libs/animejs/3.2.1/anime.min.js"
The script should look like this…

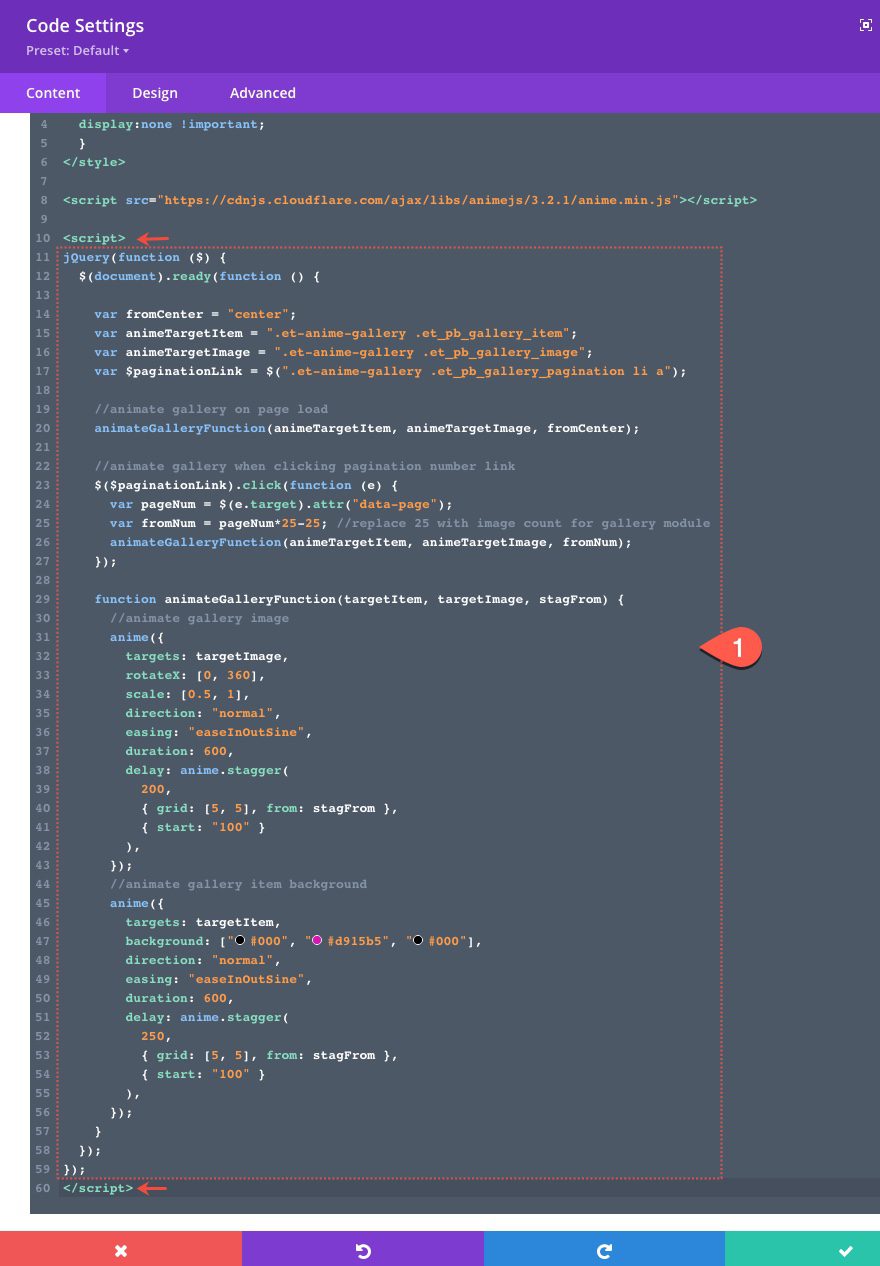
The JQuery
Under the script that is calling the anime.js library, paste the following JQuery and wrap it with the necessary script tags.
jQuery(function ($) {
  $(document).ready(function () {

    var fromCenter = "center";
    var animeTargetItem = ".et-anime-gallery .et_pb_gallery_item";
    var animeTargetImage = ".et-anime-gallery .et_pb_gallery_image";
    var $paginationLink = $(".et-anime-gallery .et_pb_gallery_pagination li a");

		//animate gallery on page load
    animateGalleryFunction(animeTargetItem, animeTargetImage, fromCenter);

    //animate gallery when clicking pagination number link
    $($paginationLink).click(function (e) {
      var pageNum = $(e.target).attr("data-page");
      var fromNum = pageNum*25-25; //replace 25 with image count for gallery module
      animateGalleryFunction(animeTargetItem, animeTargetImage, fromNum);
    });

    function animateGalleryFunction(targetItem, targetImage, stagFrom) {
      //animate gallery image
      anime({
        targets: targetImage,
        opacity: [0, 1],
        rotateX: [0, 360],
        scale: [0.5, 1],
        direction: "normal",
        easing: "easeInOutSine",
        duration: 600,
        delay: anime.stagger(
          200,
          { grid: [5, 5], from: stagFrom },
          { start: "100" }
        ),
      });
      //animate gallery item background
      anime({
        targets: targetItem,
        background: ["#000", "#d915b5", "#000"],
        direction: "normal",
        easing: "easeInOutSine",
        duration: 600,
        delay: anime.stagger(
          250,
          { grid: [5, 5], from: stagFrom },
          { start: "100" }
        ),
      });
    }
  });
});
Final Result
Updating the Gallery and Code
There are a few tips to keep in mind whenever you are wanting to make changes to the gallery and animation effects to fit your own site. First, if you want to change the gallery image count to something other than 25, you will want to update the code to reflect that new value. For example, if you change it to 20, you will also need to change the numbers in the following variable:
var fromNum = pageNum*25-25;
to this…
var fromNum = pageNum*20-20;
You may also need to update the grid value of the delay property on both animations. For example, if you only have 20 images per page on desktop, you will only have 4 rows of 5. Therefore you will need to change the following value:
grid: [5, 5]
to this…
grid: [4, 5]
Also, you can change the animation property values as needed. For example, if you want to change the colors of the gallery item background animation, you can update the following:
background: ["#000", "#d915b5", "#000"]
to this…
background: ["#000", "#ffffff", "#000"]
This will change the pink background color to white during the animation.
Final Thoughts
Once all of the design is complete using the Divi builder, adding staggering animation to your image gallery can be a great way to take the design to the next level. The key to the animation is harnessing the power of the anime.js library to target the images and backgrounds to perform multiple animations. Feel free to learn more about grid staggering with Anime.js on their website. Feel free to adjust the properties and values of the code to add your own flare to the design.
I look forward to hearing from you in the comments.
Cheers!


Awesome tutorial! How do you animate the gallery on scroll instead of on page load? I want to put the gallery below the fold and we miss the animation since it happens on page load. Thank you!
Jason your article was very informative and detailed . Thanks for the article .Keep up the good work .I am excited to try this out on my website!
Thank you so much for the awesome content that you have provided us , every details is absolute perfection! your great work.
Love this stuff! Well done, Jason! Keep it comin’! 🙂
is magnificent ! Can’t wait to try. But I’m still at the beginning of my site
Thanks Jason!
So glad you liked it, Marco. Thanks!
Thanks, John-Arild! Will do.