
One of the main goals of most websites is form submission. It is how companies get sales leads, email subscribers, and more. Effective web design can make form submission more engaging for visitors and one way to boost the engagement, even more, is to add additional styling to forms during the “filling out” process. To do this, we can harness the power of the focus state in CSS. In fact, Divi has focus style options for form fields built-in to Divi’s form modules (Contact, Email Optin, etc.) so you don’t have to rely on external CSS to style those form fields in the focus state.
In this tutorial, we are going to introduce an exciting way to change the style of multiple elements when a visitor clicks a field on a Divi form. Not only will you be able to add Divi’s built-in focus styles for the specific field in focus, but you will also be able to change the style of the elements surrounding the field as well. This will allow you to improve the UI of form submission with subtle animations and design.
Let’s get started!
Sneak Peek
Here is a quick look at the design we’ll build in this tutorial.
Download the Layout for FREE
To lay your hands on the designs from this tutorial, you will first need to download it using the button below. To gain access to the download you will need to subscribe to our newsletter by using the form below. As a new subscriber, you will receive even more Divi goodness and a free Divi Layout pack every Monday! If you’re already on the list, simply enter your email address below and click download. You will not be “resubscribed” or receive extra emails.

To import the section layout to your Divi Library, navigate to the Divi Library.
Click the Import button.
In the portability popup, select the import tab and choose the download file from your computer.
Then click the import button.

Once done, the section layout will be available in the Divi Builder.
Let’s get to the tutorial, shall we?
What You Need to Get Started

To get started, you will need to do the following:
- If you haven’t yet, install and activate the Divi Theme.
- Create a new page in WordPress and use the Divi Builder to edit the page on the front end (visual builder).
- Choose the option “Build From Scratch”.
After that, you will have a blank canvas to start designing in Divi.
Using the :focus-within CSS Pseudo-Class
Because Divi already has built-in options for styling a form field in the focus state, this tutorial is about extending that focus style to other elements as well. To achieve the additional focus state styling, we will be using the Divi Builder and a few snippets of custom CSS that use the :focus pseudo-class.
Don’t worry, it’s not as complicated as it may seem.
Difference Between :focus and :focus-within
:focus
Similar to :hover, the :focus pseudo-class in CSS is used to apply styling to an element whenever it is in the focus state. The focus state is usually triggered by clicking on an element like an input field on a form. For example, once a user clicks inside a form field, it activates the focus state for the field. This allows you to use the :focus psuedo-class to target the style of that field in CSS.
:focus-within
The :focus pseudo-class targets (or represents) the styling of the element that is in the focus state. However, the :focus-within pseudo-class takes this a step further. The :focus-within pseudo-class target the styling of the element in focus and also and any element that contains an element in focus. This means that you can target any parent element of the element in focus and apply those styles while the element is in focus. In other words, I can click inside a form field and change the form field background color (using :focus) and similtaneously use change the form field’s parent section background color (using :focus-within).
Adding Focus State Styling to Elements When Filling Out a Divi Form
Now that we have somewhat of a grasp on how :focus and :focus works, let’s test it by adding some focus state styling together in this tutorial.
Add Premade Layout
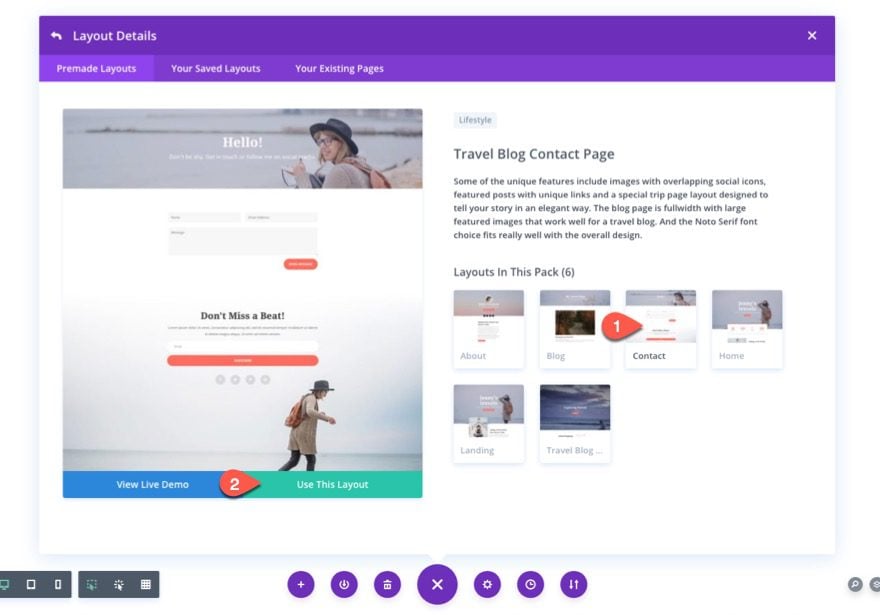
To start, add the Travel Blog Contact page premade layout to jumpstart the design for this tutorial and get a contact form ready to use as our example. To do this, click the load from library icon from the builder settings menu. Under the premade layouts tab, click on the Travel Blog Layout Pack and then select the contact page layout. Then click the ‘Use This Layout” button.
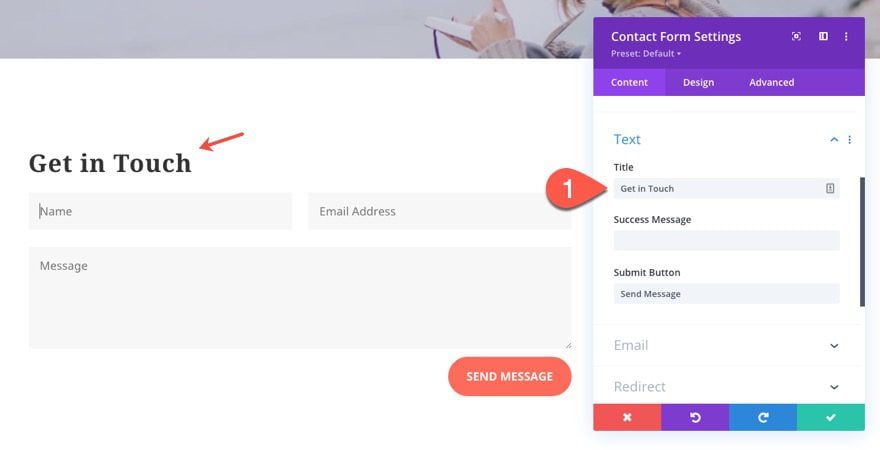
Update Contact Form Settings
On the contact page layout, open the settings for the contact form module and update the title with the text “Get in Touch”.
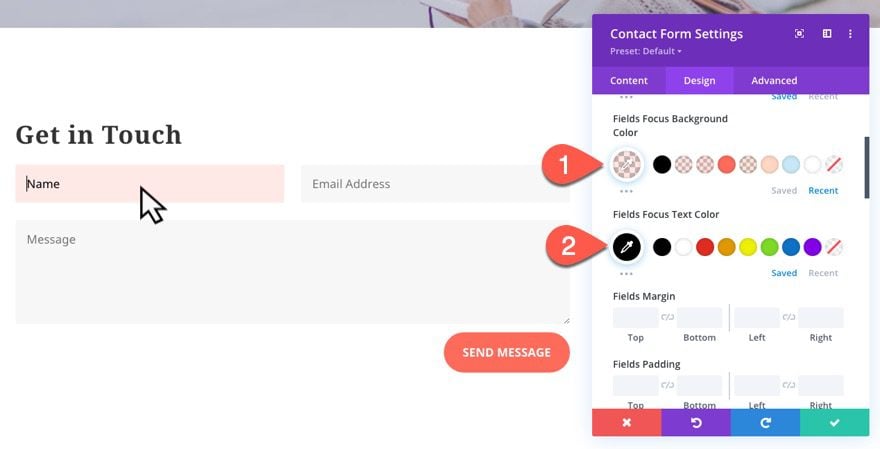
Field Focus Style
Under the design tab, update the field focus style as follows:
- Fields Focus Background Color: rgba(255,107,90,0.15)
- Fields Focus Text Color: #000000
This will style the focus state of the actual field (an option conveniently native to the Divi Builder settings).
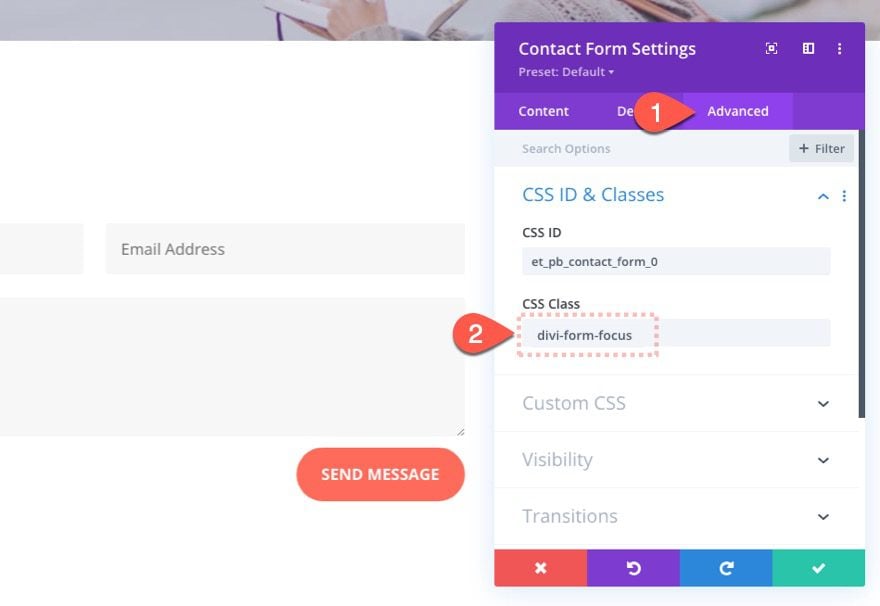
Contact Form CSS Class
Next, add a custom CSS to the contact form under the advanced tab as follows:
- CSS Class: divi-form-focus
This will be the class we use to target form styles when a form field is focused.
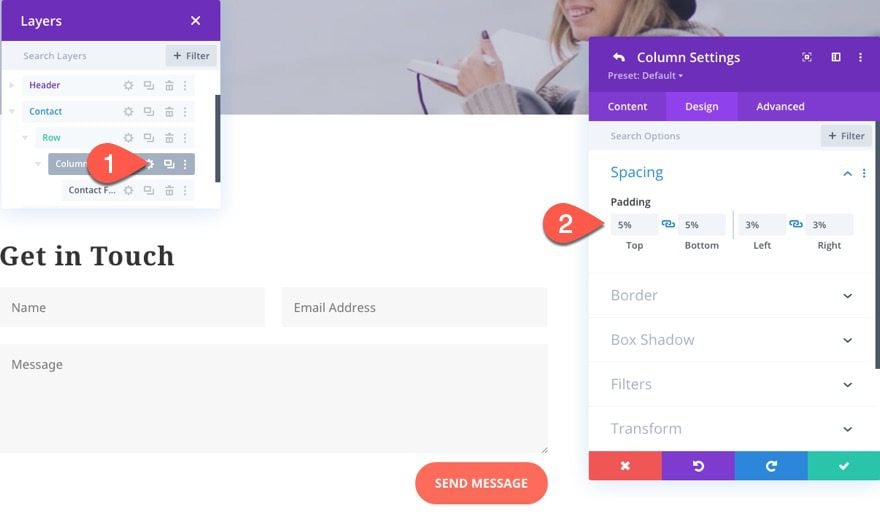
Update Column Settings
Next, open the settings for the parent column of the contact form.
Padding
- Padding: 5% top, 5% bottom, 3% left, 3% right
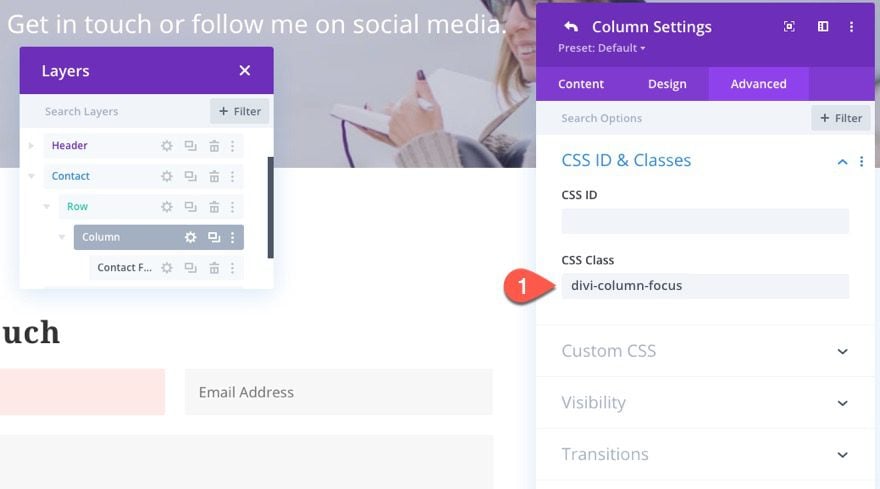
Column CSS Class
Under the advanced tab, give the column the following CSS Class:
- CSS Class: divi-column-focus
This will be the class we use to target the column styles when the form field (a child element) is focused.
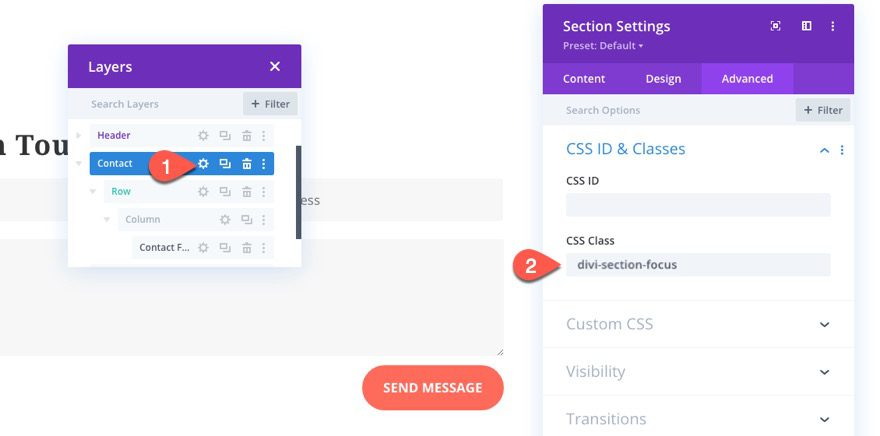
Add Section CSS Class
In order to use CSS to target the section styles when a form field (also a child element of the section) is focused, open the settings for the section containing the contact form and add the following CSS Class:
- CSS Class: divi-section-focus
Adding Custom CSS with a Code Module
As discussed earlier, we will be using the :focus CSS pseudo-class to style other Divi elements when the form field is focused. The elements we are going to style (the form, the column, and the section) have already been given a custom class we can use to target them in our CSS (“divi-form-focus”, “divi-column-focus”, “divi-section-focus”).
Now, all we need to do is add our CSS code. To do that, add a code module under the contact form module.
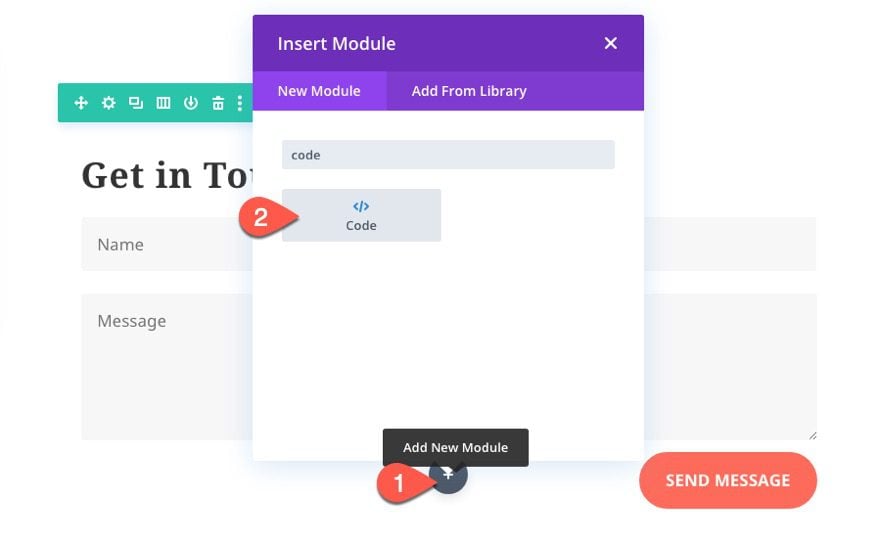
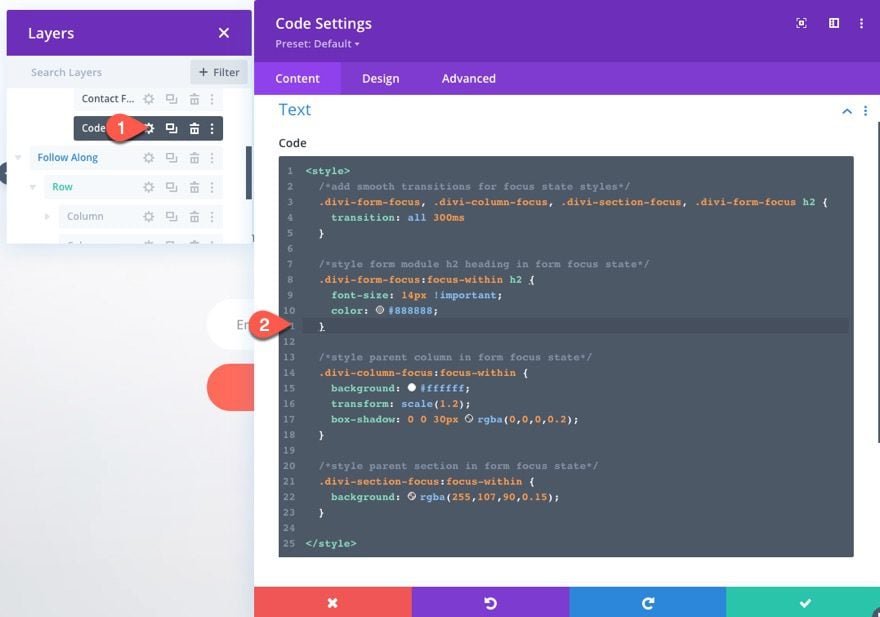
Then paste the following code inside the code content area:
Make sure to wrap the code with the necessary style tags.
  /*add smooth transitions for focus state styles*/
  .divi-form-focus, .divi-column-focus, .divi-section-focus, .divi-form-focus h2 {
    transition: all 300ms
  }

  /*style form module h2 heading in form focus state*/
  .divi-form-focus:focus-within h2 {
    font-size: 14px !important;
    color: #888888;
  }

  /*style parent column in form focus state*/
  .divi-column-focus:focus-within {
		background: #ffffff;
    transform: scale(1.2);
    box-shadow: 0 0 30px rgba(0,0,0,0.2);
  }

  /*style parent section in form focus state*/
  .divi-section-focus:focus-within {
    background: rgba(255,107,90,0.15);
  }
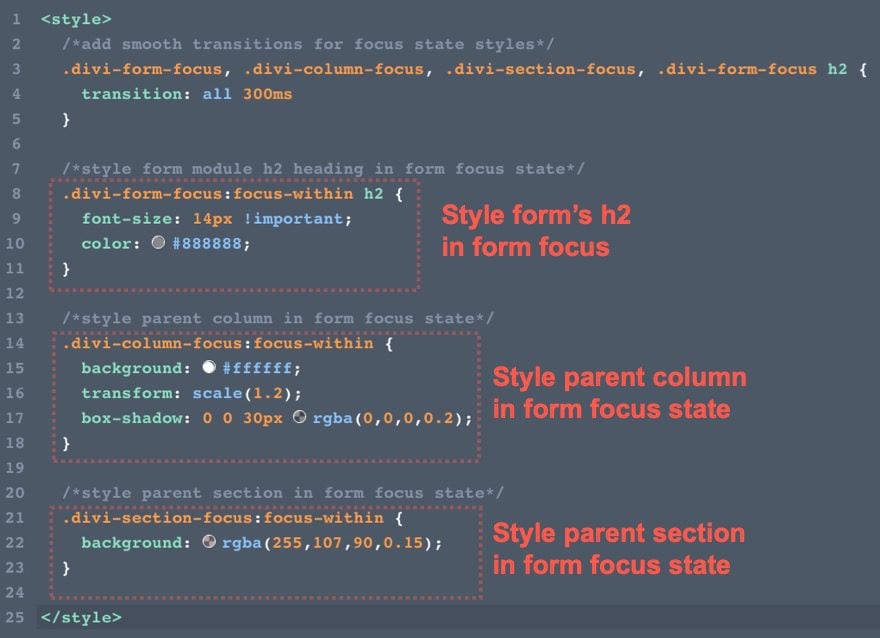
Notice each of the CSS snippets that have the element’s CSS class (i.e. “divi-column-form”) has the :focus-within pseudo-class in order to represent the style of that element class when the form field is focused. One snippet styles the form’s h2 (or title) in the form’s focus state. One snippet styles the parent column in the form’s focus state. And one snippet styles the parent section in the form’s focus state.
Final Result
Here is the final result. Notice how the different elements change style when filling out the form.
Final Thoughts
Adding CSS focus styles to elements when filling out a form in Divi can really boost the user experience of form submission. The key is to use the :focus-within pseudo-class along with the custom classes you add to the elements you want to style when the form is in the focus state. This can be done with minimal custom CSS added to the page, and if you are familiar with adding your own custom CSS, the possibilities are immense.
I look forward to hearing from you in the comments.
Cheers!


Any chance the focus state will be a setting in all modules like the hover state is now?
Hi,
Very useful tutorial tip, even adding it step by step on the website is a breeze.
The effect is impressive too.
Thanks
Patrick
hello again Jason
I tried it on a form, unfortunately it is not working on a checkbox field.
When checking the box the CSS code is returning to pre-focus state
Any solution to keep it?
thanks
Avi, thanks for pointing this out. I should have tested the functionality of this. Sorry about that. I took a look and it looks like the actual input is being hidden for the check boxes because of the nature of how you normally build a check box – making it impossible to activate the focus state.
My first thought would be to override the default hidden state of the check box input with the following CSS:
  .divi-form-focus .input[type=checkbox] {
    display:block !important;
  }
But that doesn’t seem like the best solution because the input focus state toggles on and off when clicking another checkbox. It’s not a smooth transition like the field inputs. Sorry I couldn’t be more helpful. Maybe use this option for simple forms that don’t require checkboxes for now.
it’s really not easy… to make divi modules or stuff little perfect need a lot of hard work and technical skills. Most of us arent a designers, in this 2021, we still run after css, why not should easy do stuff
Great and very useful tutorial, as always! I would be very curious how much more would be involved in doing this with a Caldera form, since the Divi forms are somewhat limited in terms of features compared to Caldera, and because I have already created a gazillion forms with Caldera across multiple sites 😉 Thanks!
Great, thank you Jason
please make another one or add instruction on how to do this for the ‘submit a commnt’ form
thanks
Great suggestion, Avi. I can see that the comment form would require more targeting specific elements within the comment module. Much like I targeted the h2 heading in the contact form in this tutorial.
This really help me and it has added to my CSS knowledge. Hope to get more tips here.
Awesome, Yustet!
I love your CSS/JS tutorials! More please 🙂
nice