

If you are trying to sell products on your website, there are certain elements you can add to boost conversions. This is especially true for big-ticket items like a car.
Let’s face it, not all of us have the money (or discipline) to throw down 30k in cash for a car. That’s why when you are looking to buy a new car, online payment calculators can play a key role in the buying process. Aside from the math wizardry working behind the scenes, payment calculators help the buyer with a convenient tool right there on your website which can really boost conversions for the seller.
Another way to incentivize a user to click a button is to add a countdown timer on a featured deal to make it more obvious to the user that the deal will be expiring soon.
In this use-case tutorial, I’m going to show you how to add a payment calculator and a limited-time deal to your website. To add the payment calculator, I’ll be using the Calculated Fields Form plugin and customizing the design with the Visual Builder to match the Car Dealer Financing Page Layout. I’ll also show how you can use elements from the Car Dealer Listings Page layout and combine them with a Countdown timer to create a limited-time featured deal.
Let’s Get Started!
Sneak Peek
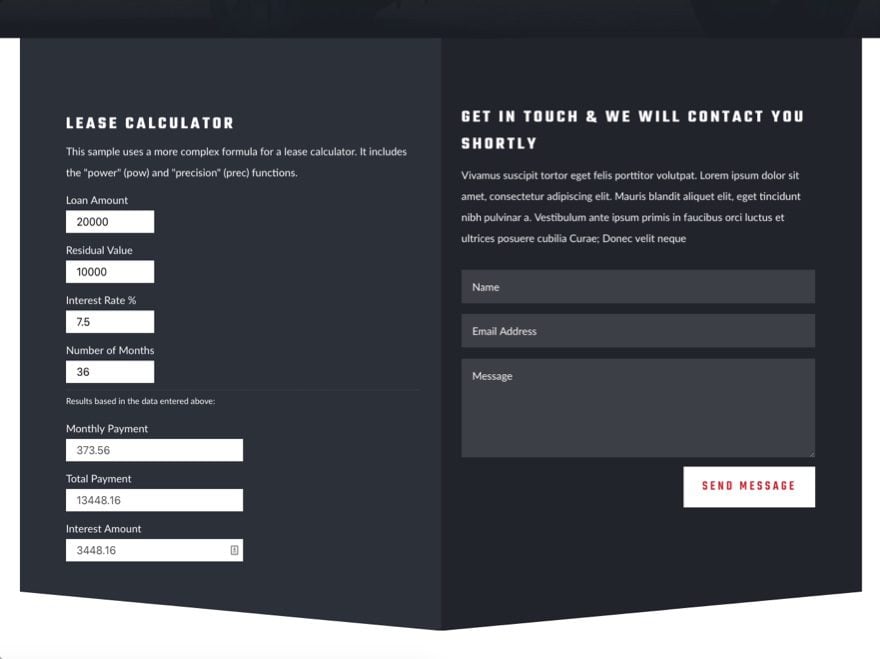
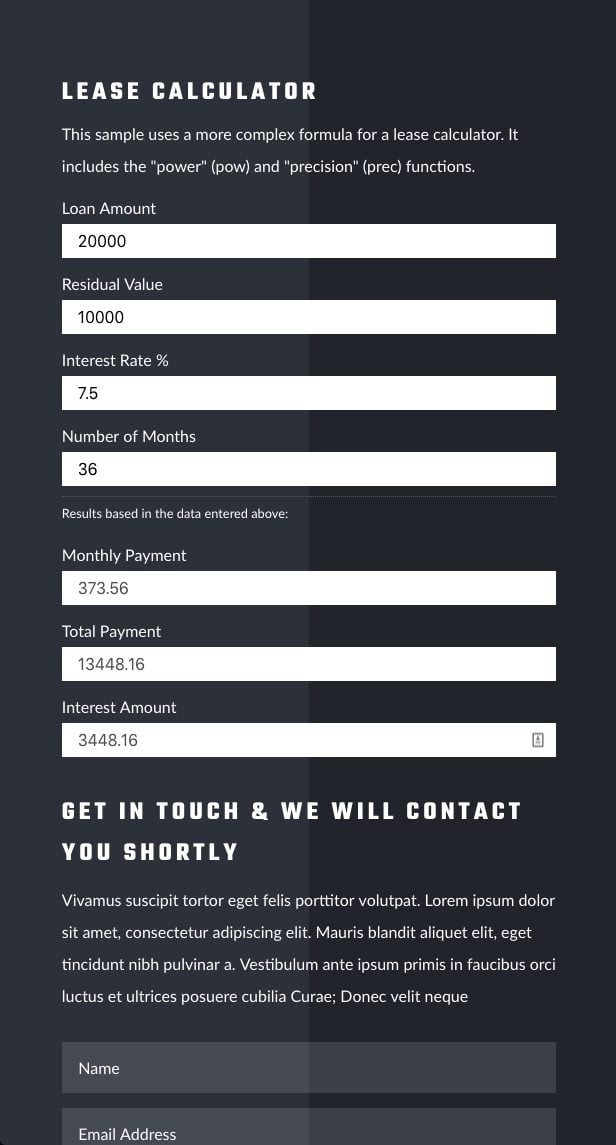
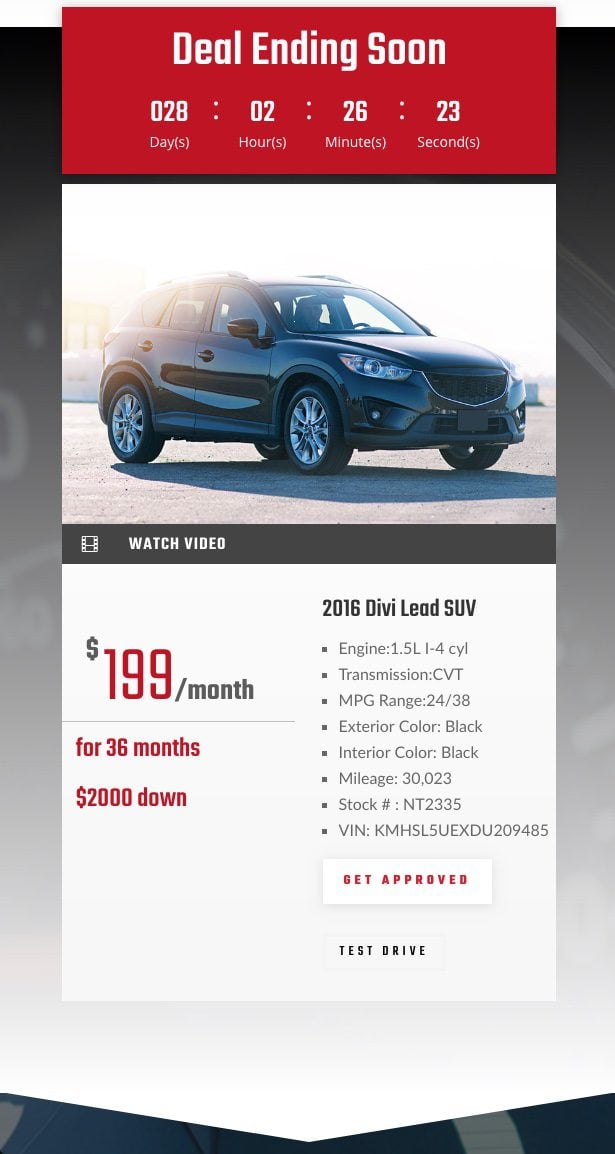
Here is a sneak peek of the payment calculator and the limited-time featured deal we will be creating:

What you Need for this Tutorial
For this use case tutorial, you will need:
- The Divi Theme
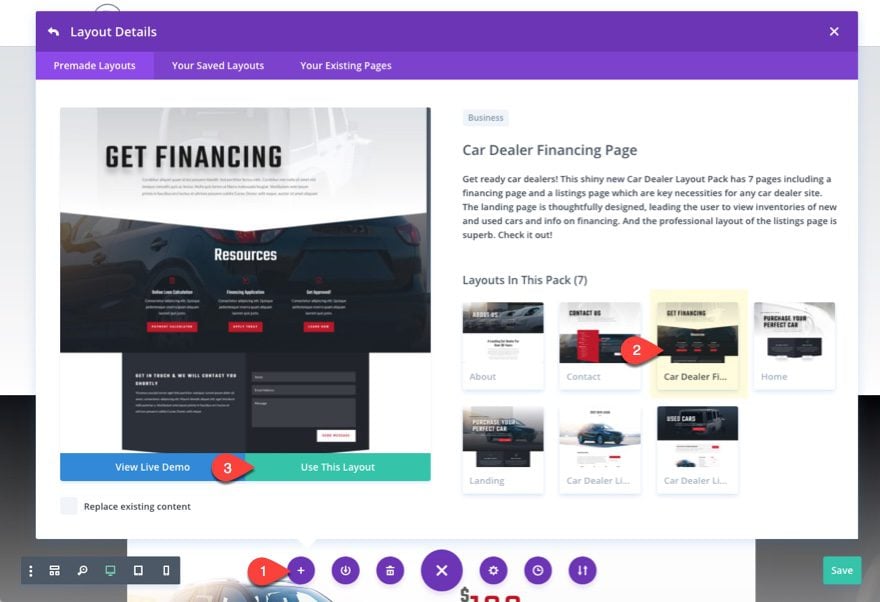
- The Car Dealer Layout Pack (The Financing Page and the Listings Page Layout) is accessible from the Visual Builder.
- The Calculated Fields Form plugin
Exploring the Plugin Functionality
The Calculated Fields Form Plugin is a powerful tool for creating any kind of calculation you could dream up if you know what you are doing. But if you want to make your life easier (I’m speaking to you nonmathematicians out there) you should look into the pro versions of the plugin for easier implementation. For example, the Developer or Platinum versions include a financial module that makes implementing financial equations a lot easier.
Thankfully, the free version offers some helpful pre-built forms for getting you up and running including a Lease Calculator Form.
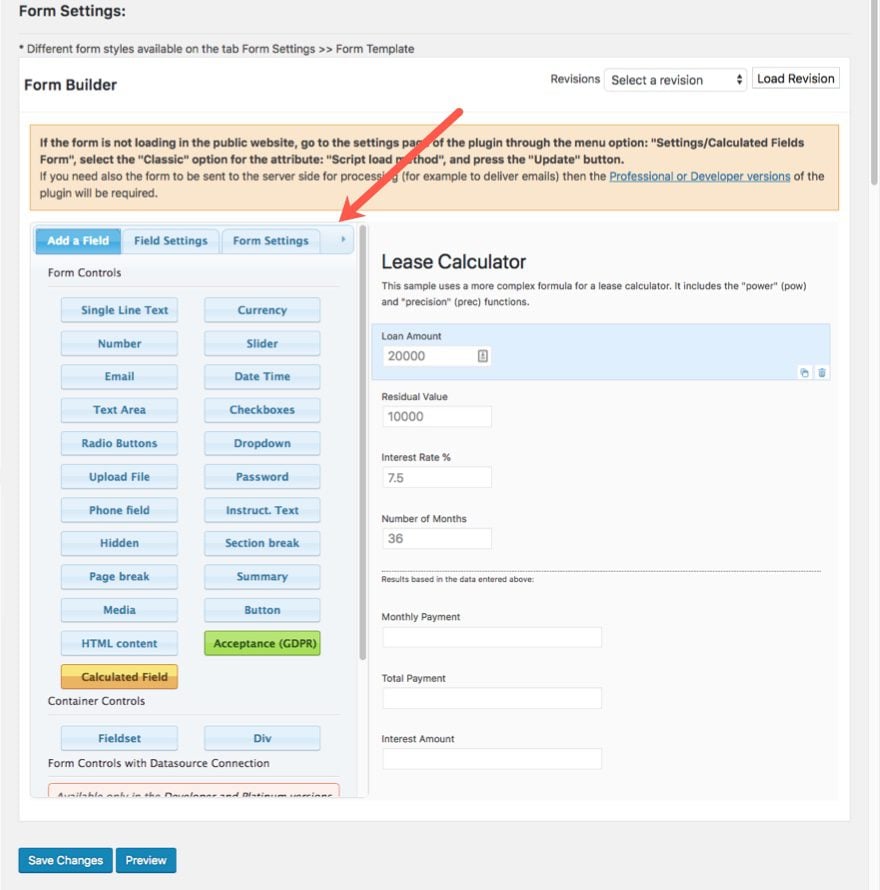
Let’s take a glimpse of how these forms are built. Click to view the settings for the Lease Calculator Form. There you will see the Form Builder where you can add new fields and edit field and form settings.
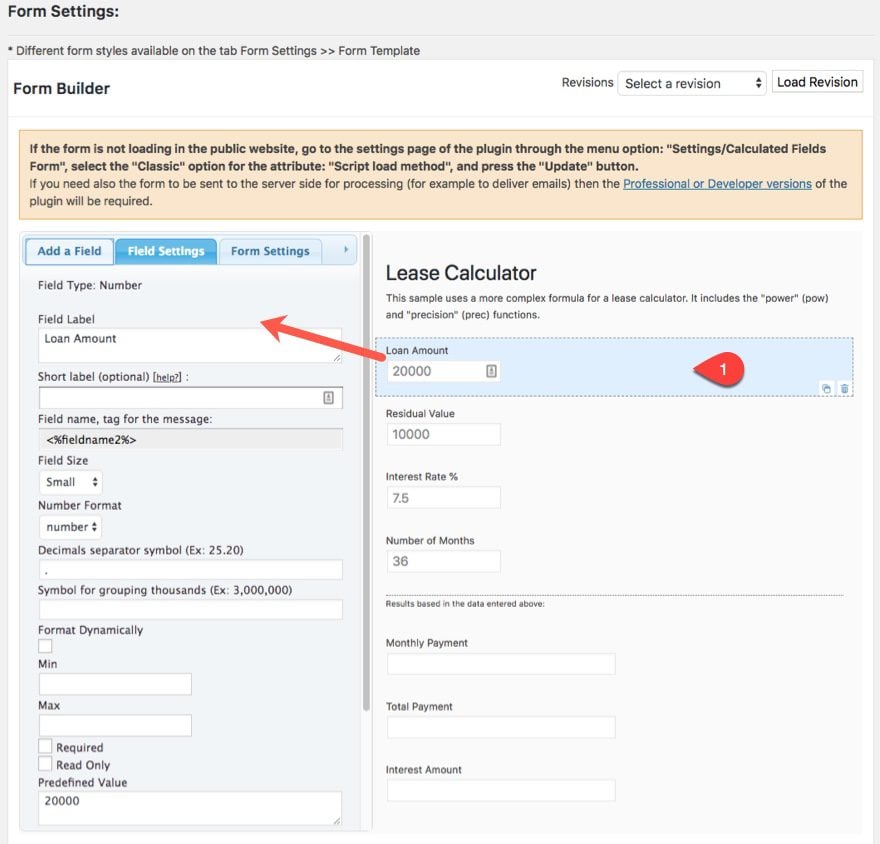
To edit a particular field, simply hover over the field in the form builder on the right and the field settings will appear on the left.
This Lease Calculator form has three Calculated Fields that calculate Monthly Payment, Total Payment, and Interest Amount. These special calculated fields will generate new calculations based on what the user enters for the number input fields (Loan Amount, Interest Rate%, etc…).
Click on the Monthly Payment Calculated Field to see how the equation being used to generate that field.

Without going into too much detail on the math behind this equation (I couldn’t even if I wanted to), I do want to point out the different field name variables being used in the equation. The different variables correlate to certain fields on the form. And those variables are replaced with actual numbers once the form fields are entered allowing the equation to spit out the calculated field (in this case the Monthly Payment). Feel free to check out the different equation formats used for this form.
Adding the Payment Calculator Shortcode to Your Page
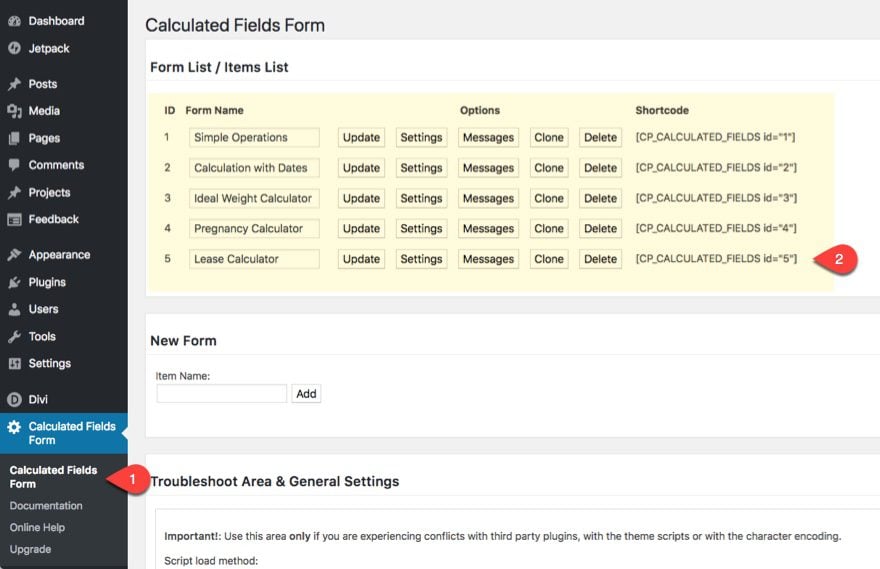
To add the Lease Calculator Form Shortcode to your page, first go back to the form list and copy the shortcode next to the Lease Calculator Form.
Then go to your page with the Car Dealer Financing Page Layout. If you don’t have one yet, create a new page and import the layout using the Divi Builder.
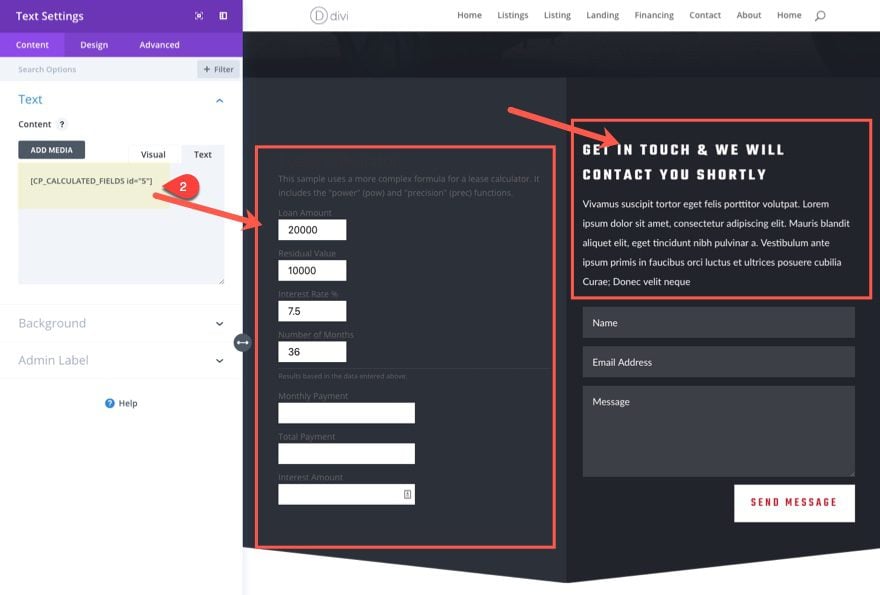
Locate the section right below the section titled “Resources”. This section has a two column row with a contact form on the right and a text module on the left. Move the Text Module in the left column to the top of the right column just above the contact form.
Now we can add our calculator to the left column using our shortcode. Go ahead and add a new text module and paste the shortcode in the content box.
Customizing the Design the Payment Calculator
Before we get to styling our form to match out layout, I want to point out that the plugin does include some pre-designed templates you can use to give your form a custom skin. You can access this option from the form settings.
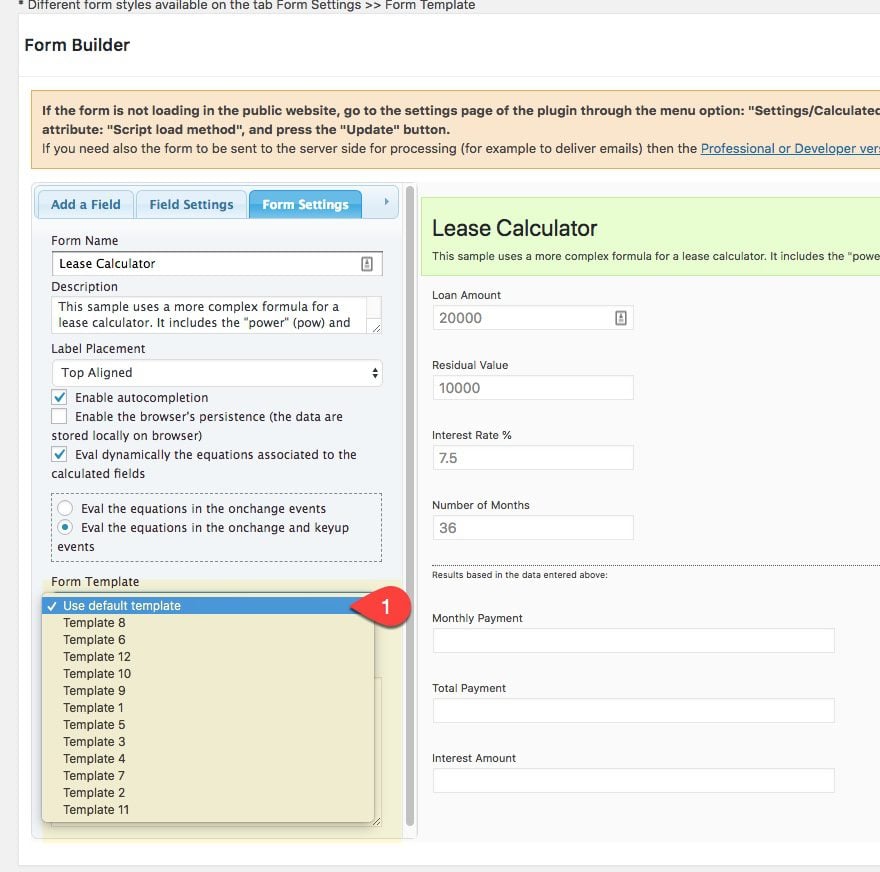
But keep in mind that this does limit your ability to override the template’s css in the text module settings. So I feel it best to keep the form to the default template and add styling with the Divi Builder as much as possible.
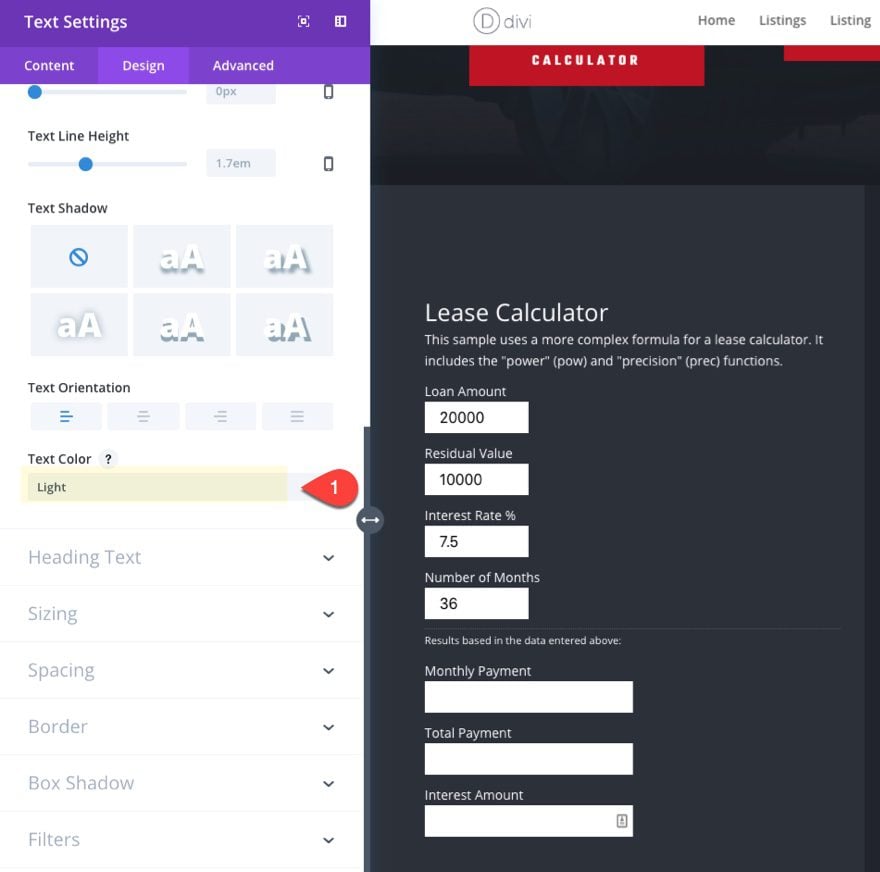
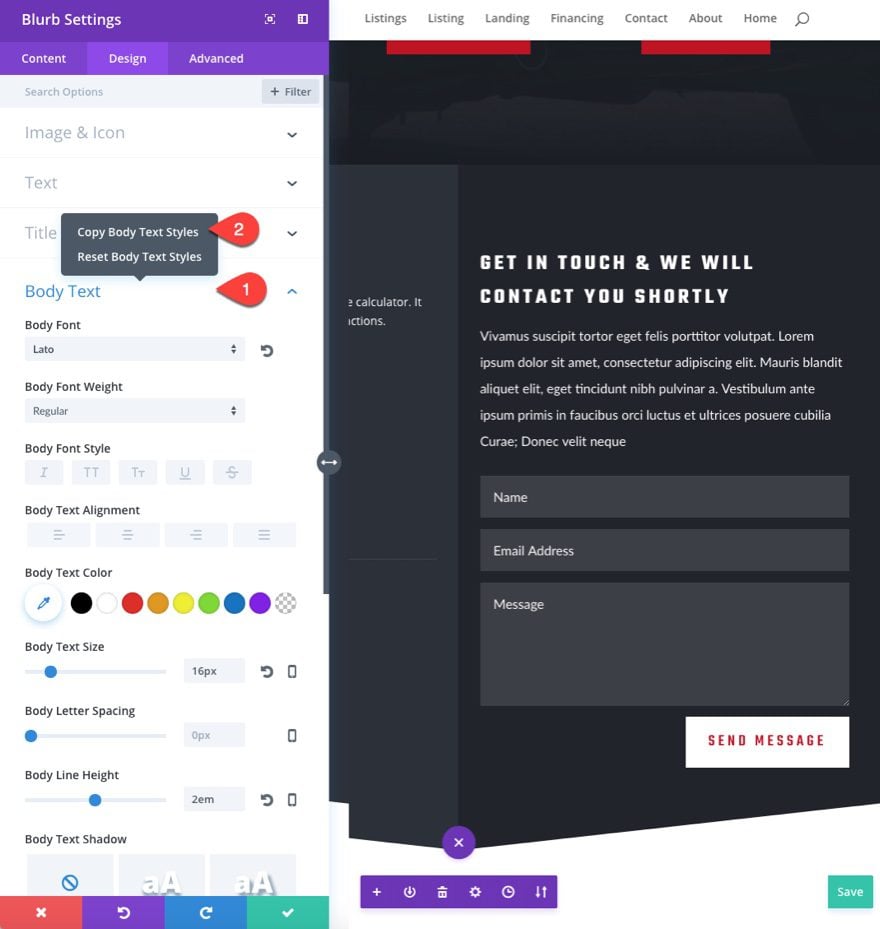
Go to your text module with your shortcode and change the text color to light.
A quick way to match the rest of the text with your layout is to go the blurb module in the right column and copy the body text style being used.
Then right click on the text module in the left column and paste the body text styles to the module.
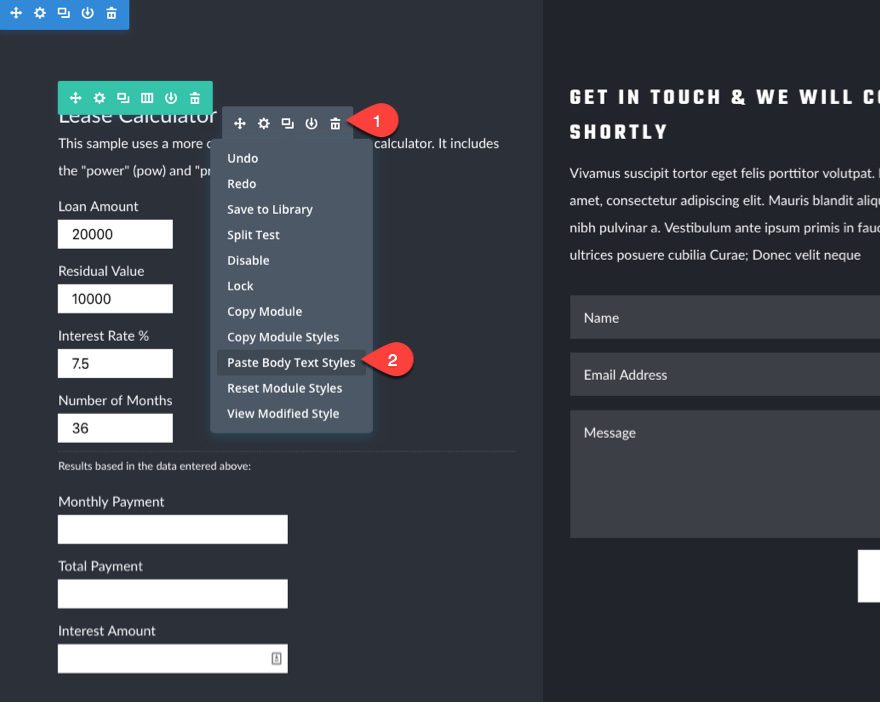
This will update the text settings to match the layout.
Now go back to the blurb module and copy the Title Text Styles.
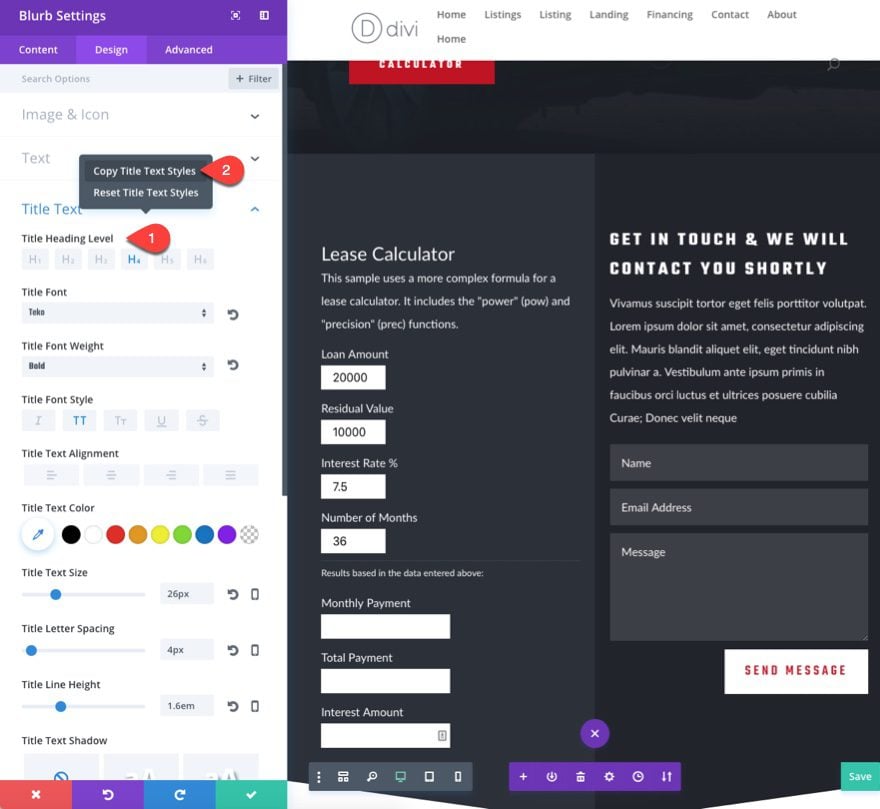
Then paste them to the text module. This will update the header text of your calculator form to match your layout.
Now that your form text is matching your layout, you will need one final touch of custom CSS to design the form fields. You can find the CSS ID’s and Classes used by the plugin to target different elements on the form on the FAQ page.
Since we want to target all of the input fields, go to Theme Customizer > Additional CSS and enter the following CSS:
#fbuilder input,
#fbuilder textarea,
#fbuilder select {
border: none;
padding: 0.5em 0.2em 0.5em 1em;
font-size: 16px;
}
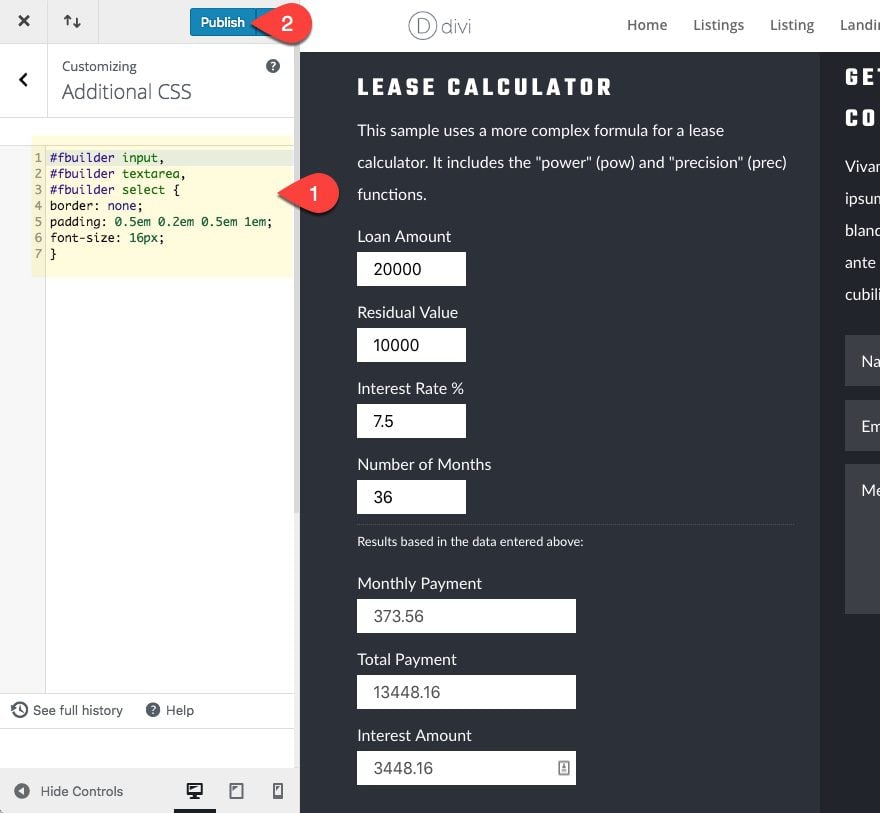
All this css does is give our input fields more padding, takes out the ugly border, and increases the font size.
Now your form is ready to go!

Creating a Limited Time Deal
With our payment calculator in place, we are ready to create a featured limited-time deal. To do this, we are going to use a car listing from the Car Dealer Listings Page layout to get a jump on the design elements we need. Then we are going to add a pricing table module to get the price text design we are looking for along with a countdown timer to create the limited-time incentive.
Using the Car Listing to Jumpstart the Design
First go to the Car Dealer Listings Page Layout and deploy the visual builder. Locate the first row with the featured listing and save the row to your Divi library by clicking the “Add to library” icon in your row menu. Give your layout a name and click “Save to Library”.
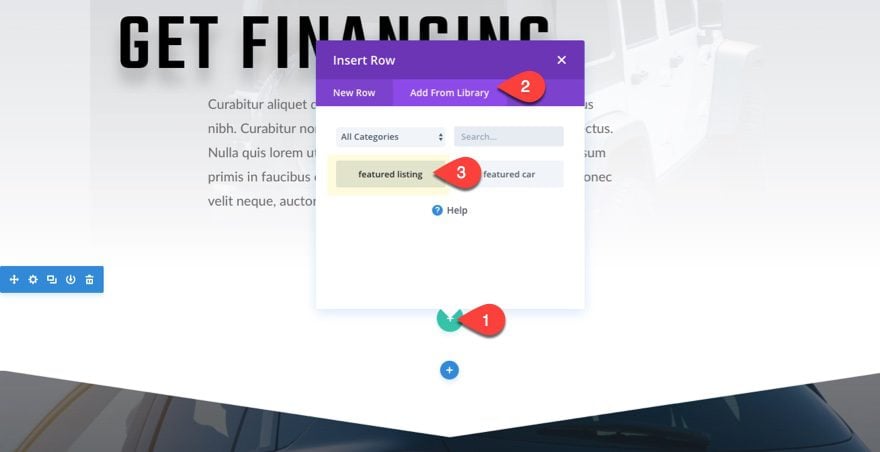
Now go back to your page with the Financing Page Layout and add a new regular section under the top header section. Then add the row you saved to your divi library by clicking the insert row circle icon, clicking the add from library tab, and then selecting your saved row from the list.
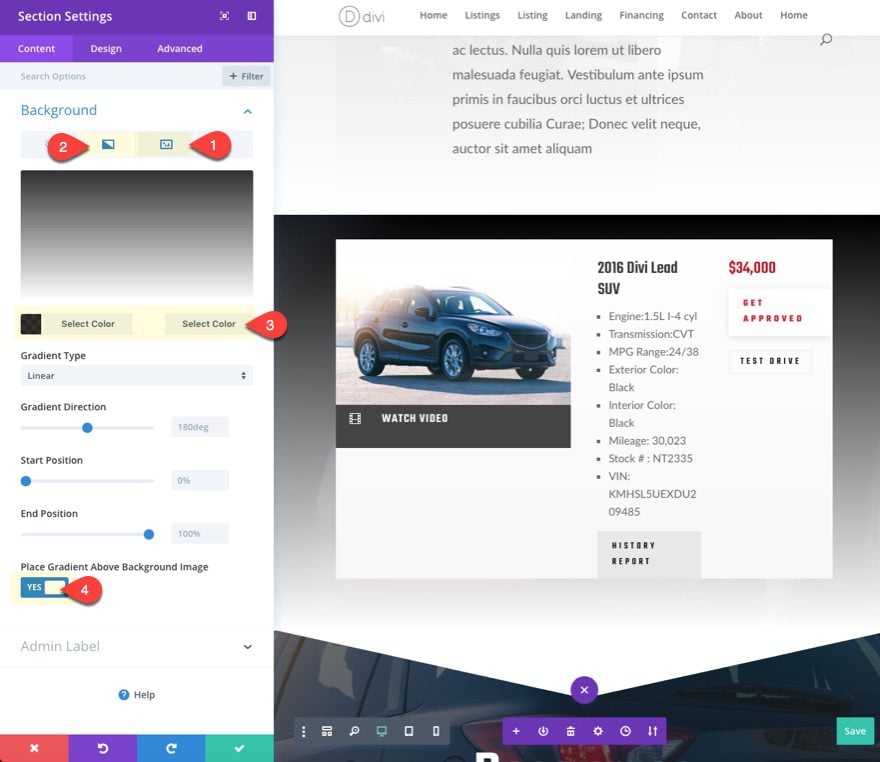
Update your section settings as follows:
Insert background image
Background Gradient Left Color: rgba(0,0,0,0.8)
Background Gradient Right Color: #ffffff
Place Gradient Above the Background Image: YES
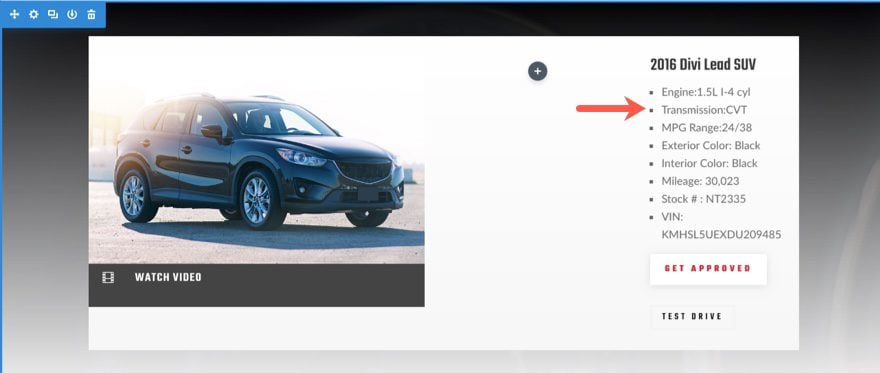
Now move the text module containing the vehicle specs from the middle column of your row to the top of the right column. Delete the History Report Button and the text module with the price “$34000”.
Adding a Pricing Table to Create Custom Price Text
The the empty middle column, add a new Pricing Tables Module. Using the Pricing Tables module will allow you use the price design for your featured deal without having to use custom html/css.
In the pricing tables settings, delete one of the pricing tables that are generated by default so that only one table remains. Then update the following:
Show Bullet: NO
Background Color: rgba(255,255,255,0)
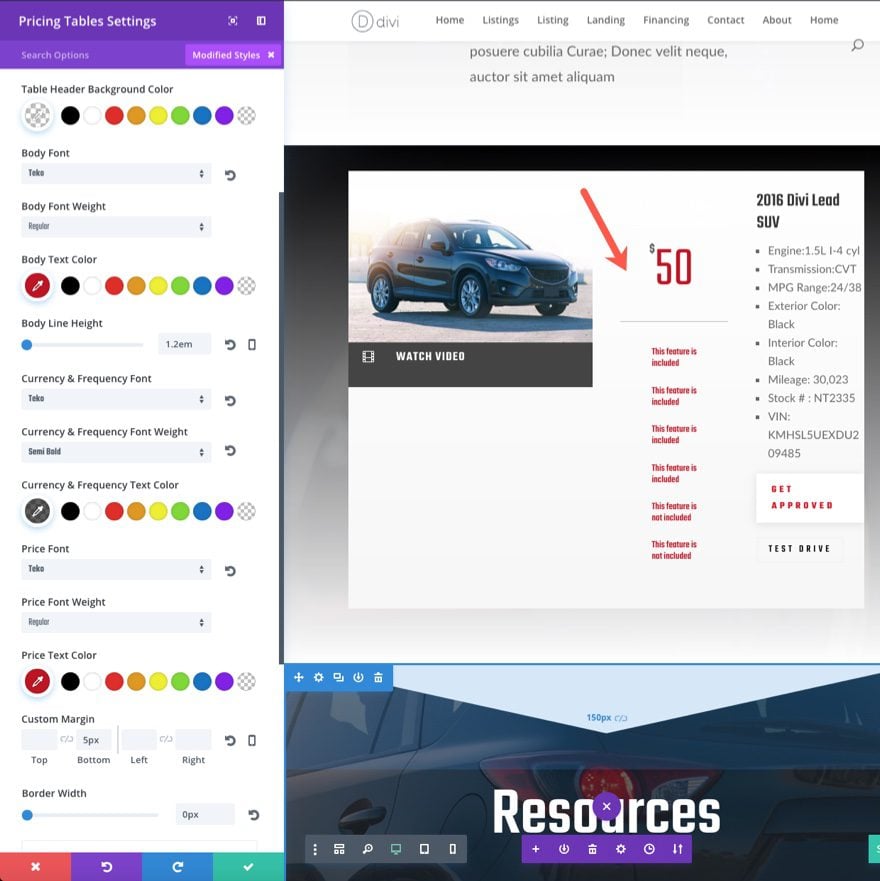
Then update the design settings as follows:
Table Header Background Color: rgba(0,0,0,0)
Body Font : Teko
Body Font Weight: Regular
Body Text color: #c10f1b
Body Line Height: 1.2em
Currency & Frequency Font: Teko
Currency & Frequency Font Weight: Semi Bold
Currency & Frequency Text Color: rgba(0,0,0,0.63)
Currency & Frequency Text Size: 30px
Price Font: Teko
Price Font: Weight: Regular
Price Text color: #c10f1b
Custom Margin: 5px bottom
Border Width: 0px
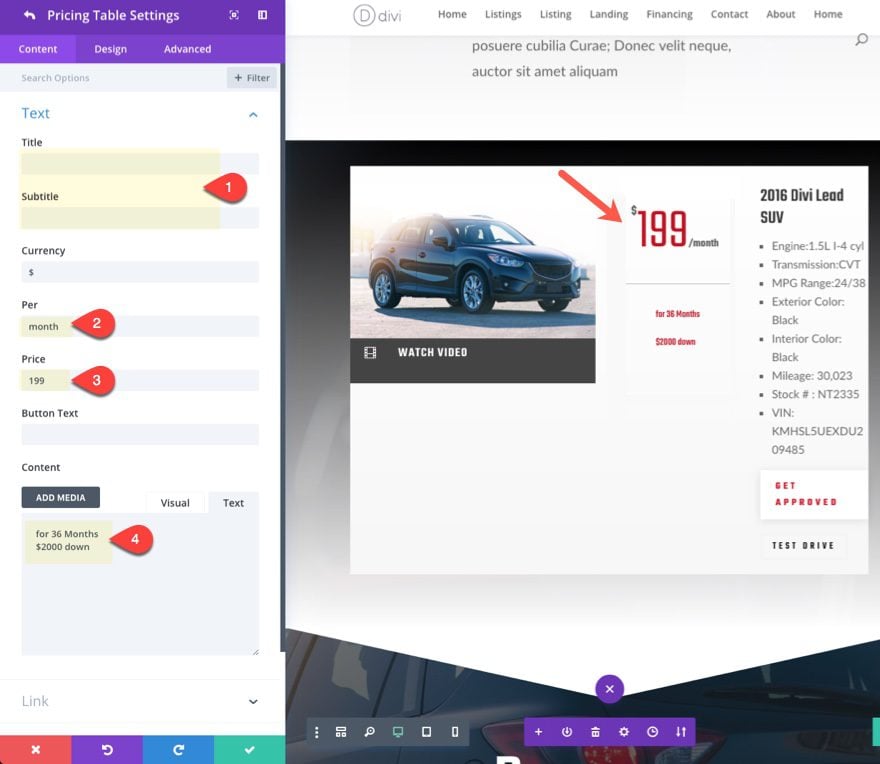
Now go back to the content tab and click to update the settings for the specific pricing table as follows.
Take out the Title and the Subtitle.
Per: month
Price: 199
And add the following to replace the text in the content box:
for 36 Months
$2000 down
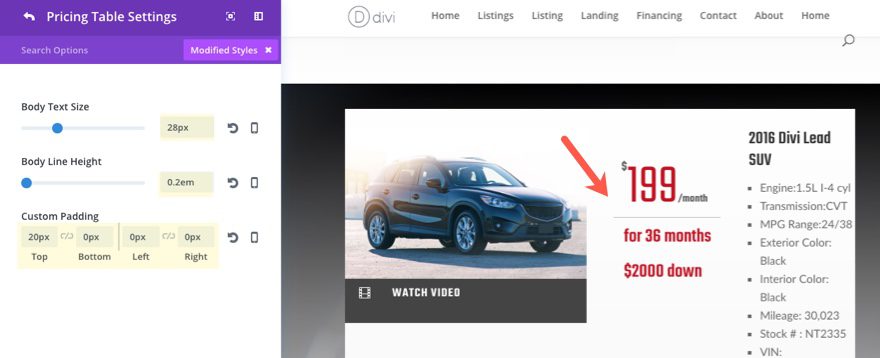
Under the design settings, update the following:
Body Text Size: 28px
Body Line Height: 0.2em
Custom Padding: 20px Top, 0px bottom, 0px Left, 0px Right
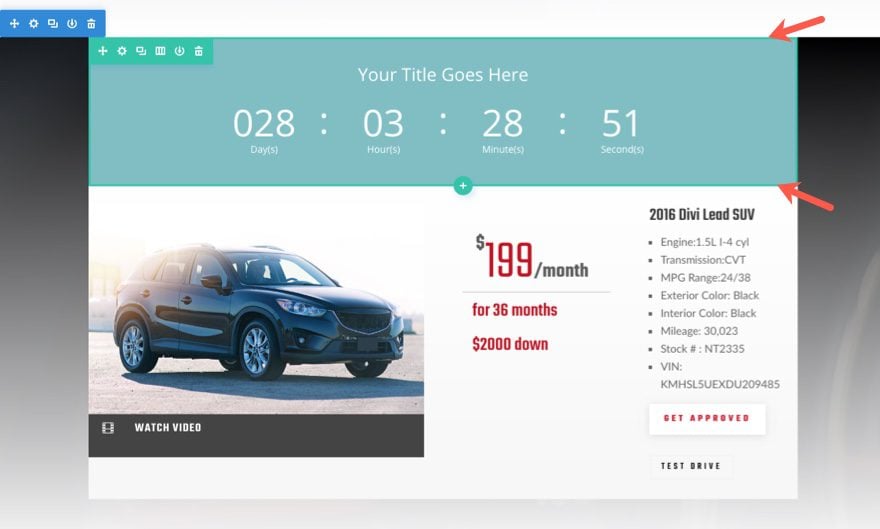
Adding a Countdown Timer to the Featured Deal
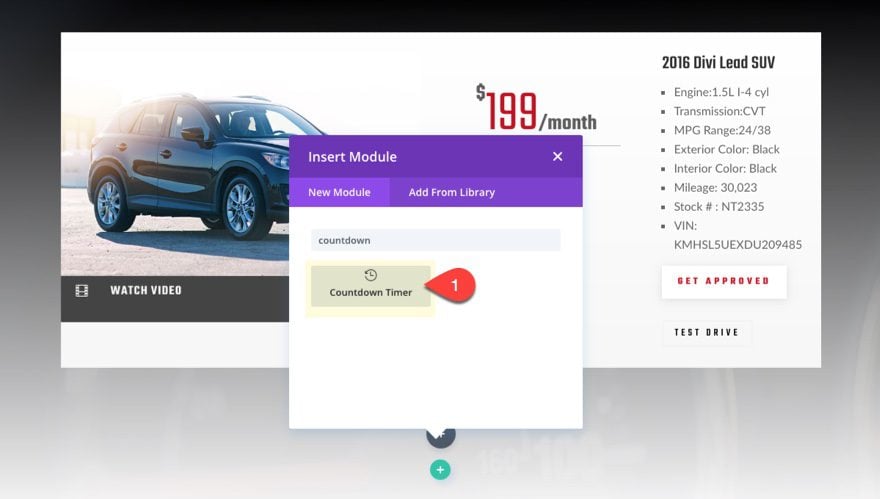
To create the limited time offer, we are going to add a countdown timer above the row with the featured deal.
First add a new one column row and add a countdown timer module to the row.
Drag the new row above the row with the featured deal. Remove the Section Top Padding and remove the top and bottom padding of the new row.
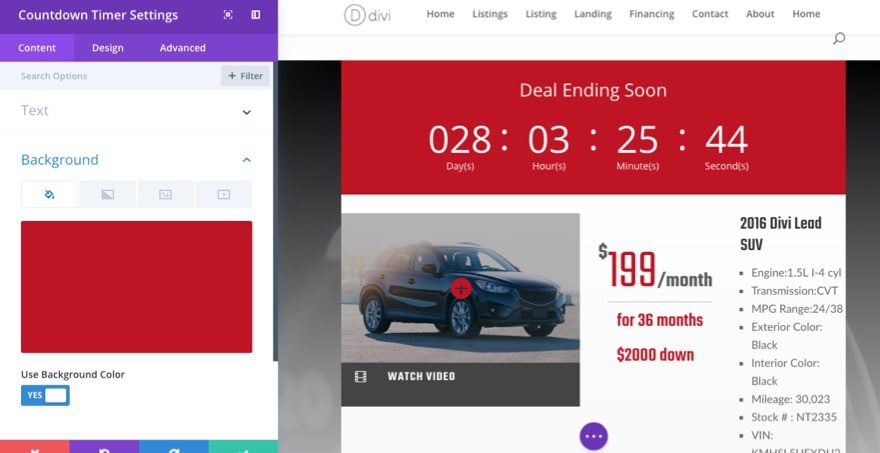
Now update the Countdown Timer settings as follows:
Countdown Timer Title: Deal Ending Soon
Background Color: #c10f1b
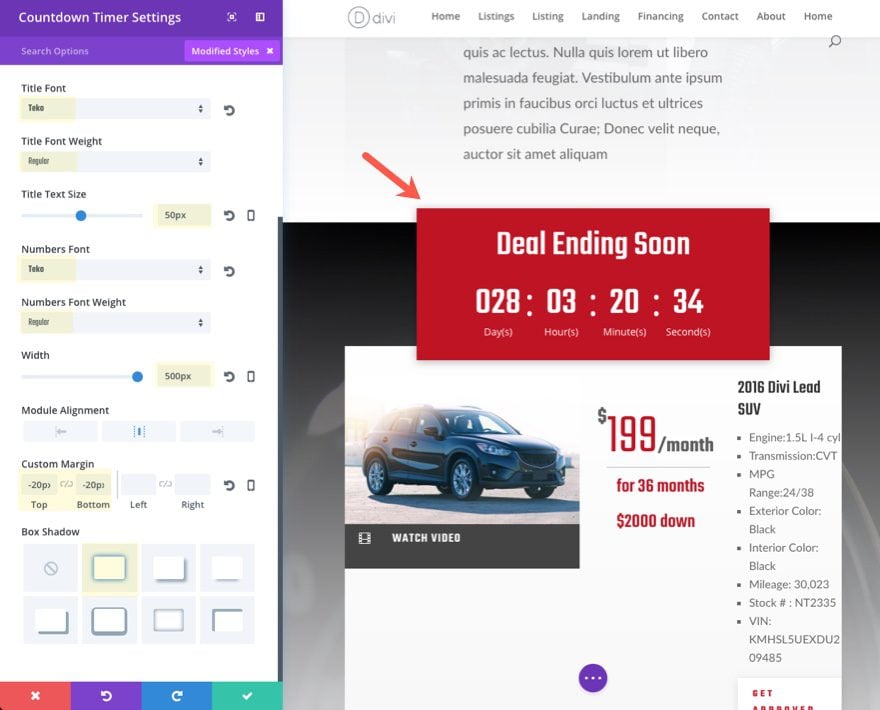
Title font: Teko
Title Text Size: 50px
Numbers Font: Teko
Width: 500px
Module Alignment: Center
Box Shadow: see screenshot
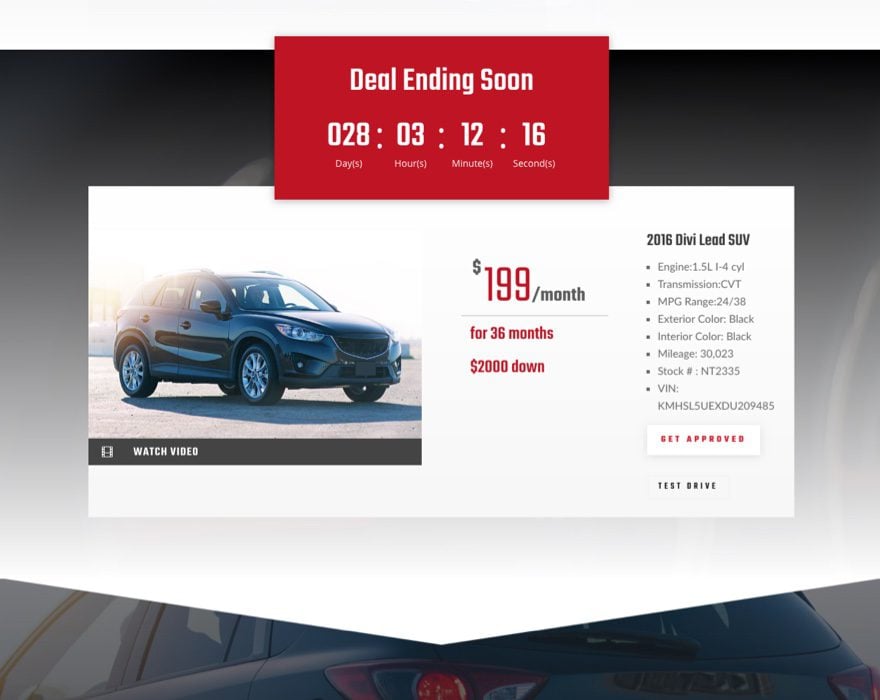
You will need to add a 5% top padding to the row below your countdown timer to give your bottom box shadow some breathing room.

Now check out the final result.
Final Thoughts
The Calculated Fields Form plugin will allow you to create forms to calculate just about anything you want, but the learning curve does seem a bit steep for advanced calculations. Thankfully, the free version of the plugin comes with a lease calculator that will work right out of the box. And adding it to Divi is as easy as embedding a shortcode and updating a few settings. If you rather, you can check out the best WordPress form plugins and see if their mathematical operations are robust enough to create the calculator form you are envisioning.
One of the great things about using a premade layout is that you don’t have to start from scratch to add additional elements to your site. Creating the limited-time featured deal was quick and easy since we used the design of a car listing to get things rolling.
I hope this will help smooth the process of adding those necessary elements for boosting conversions on your own site.
I look forward to hearing from you in the comments.
Cheers!


When I copy the form shortcode as a Text Module, it does work… but as soon as I make a slight change as the text color, the form stops working… any idea? 🙁
Hey! I have read your Blog this So Nice and Awesome service you have provided, I learn many new things from here and want to implement my website. If you are also Know for something New related to this then visit my website.
Hello there,
I am a non-techie but I love the stuff…is there a plug-in order form that you can suggest that will calculate in an “if this then that” sort of manner…I am an Artist, Art teacher…I would like to have a few basic sizes and
a few basic substrates and
about a dozen background colors
for clients to choose from on an order form
I am not sure if I already have that capability with my Divi theme as it is (shopping cart).
I would be more than happy for you to take a peek at my website so that you can see what I have already going with multiple landing pages my graphic designer set up.
However—the gallery/shopping cart pages are still there but I would like to build some kind of a store—not just the landing pages—I may be going about it backwards!!
Maybe the landing pages are the new normal—
—If you have any suggestions–or if there are any Divi designers on board that are willing to talk with me or even accept the challenge of building/suggesting another artist/gallery template—
—please let me know—Thank you ——————Bernade
Very nice, well-made tutorial good information without breaking the bank on buying plugins… unless you want to.
Thanks Michael!
Hello
Can we hide the sales text once the account has ended?
Thank you
The countdown timer doesn’t support this functionality unfortunately.
The plugin looks great and has good features
The CFF developer provides custom programming for about 20,-/h and they have great additional functions in the pro version as also several useful plugin extensions. This plugin can do all kind of JS calculations, conditional logic, can read/import values from CSV files, can read/write from/to DB (values and strings, think at wp meta fields), can create wp user (with an addon), can work not only with numbers but also alpha strings or field names, and much more. This plugin can do more then all other form plugins together.
Thanks Alberto. I got that feeling when I was using it. Good to know!
This is a great tutorial and a nice plugin. I will try it on a site and see how it work. We just put up a new site designed in Dive.
Still confused about whether to drop shortcode into a code module or text module. What are the pros of using the TEXT module for shortcode?
Great question, Alain. The text module allows you to style the content of the shortcode by targeting things like h2 h3 h4, links, etc…
FOR just a shortcode if you use the code module you wind up with SLIGHLY less created code than using the text module.
The limited time offer deal is nice only if you use something like the DIVI Display logic plugin as well.
That way you can either change the deal to new one or change some text saying the deal is over when the time is up.