
The Divi Map module integrates with Google Maps seamlessly and is an easy way to add an interactive map to your Divi website. This is great for showing your business’s location or creating a local guide of your favorite boutiques and businesses.
In this post, we’re going to show you how to add a button to the location info box for one of your pinned addresses.
Design Preview
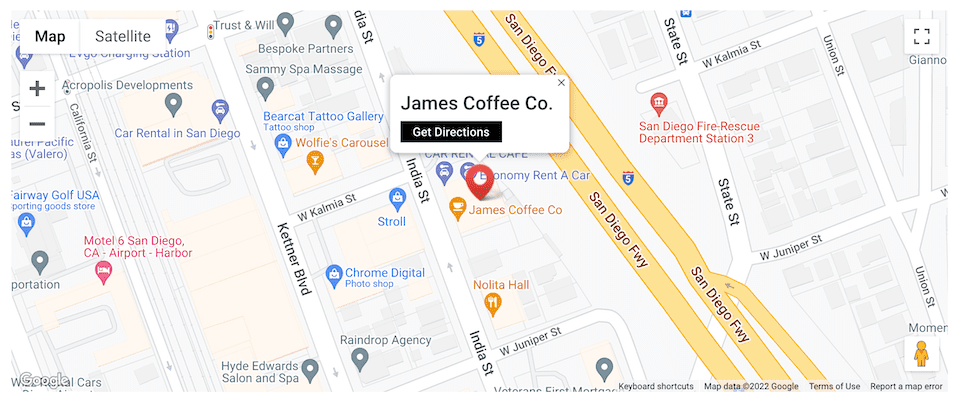
First, let’s take a look at what we’re trying to accomplish. With some simple HTML, we’ll be able to accomplish adding a button inside the location info box for a pinned address.
Let’s dive in!
What You Need to Get Started
To get started, you will need to do the following:
- Install Divi on your WordPress website.
- Add a Page, give it a title, and publish it.
- Enable the Visual Builder.
- Create your Google API Key.
Select Build From Scratch
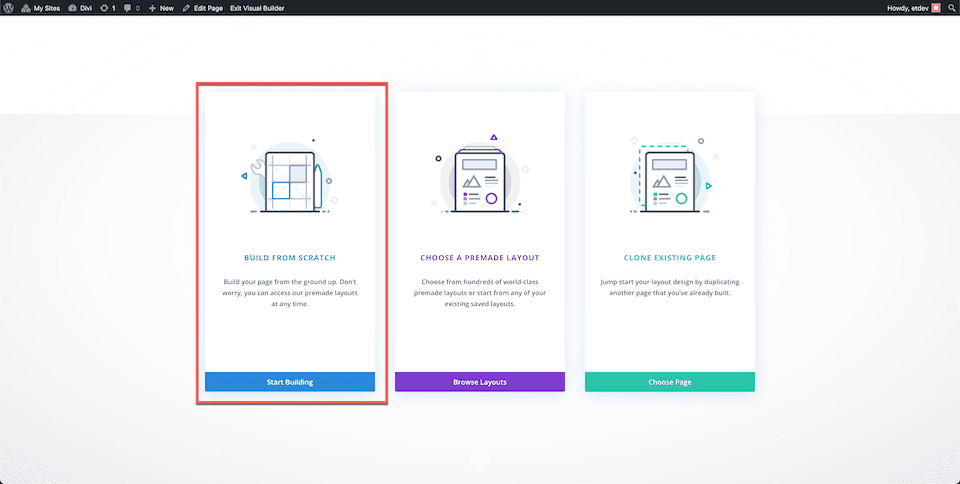
Once you click the “Use Divi Builder” button the page will reload using Divi’s drag and drop builder interface. Three options will pop up – Build From Scratch, Choose A Premade Layout, and Clone Existing Page. For today’s purposes, select “Build From Scratch”. This will give us a blank slate where we can build our designs.
Add Your Google API Key
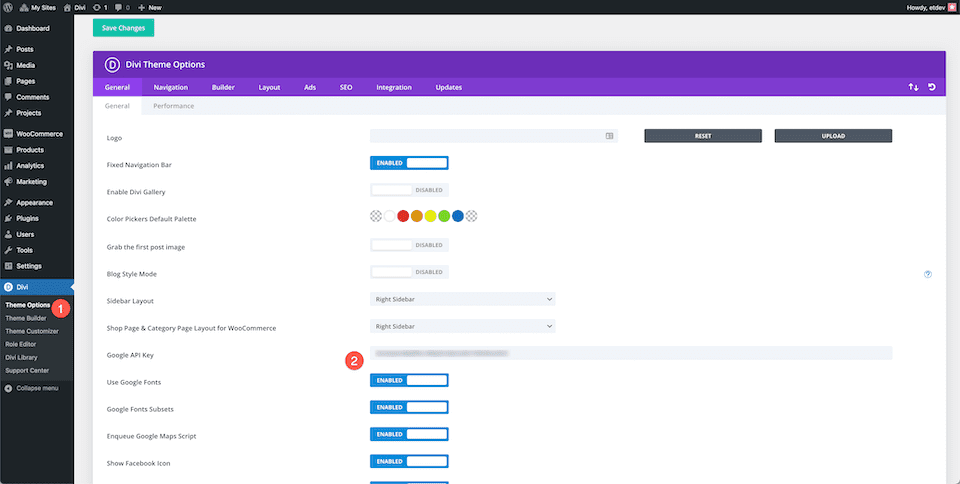
Before we’ll be able to fully use the map module and its functionalities, you’ll need to add your Google API Key to your Theme Options.
- From your WordPress dashboard, go to Divi > Theme Options and paste your Google API Key.
- Click “Save Changes”.
Let’s get into the tutorial! Here’s how to add a button to the location info box.
Add a Section and Row and the Map Module
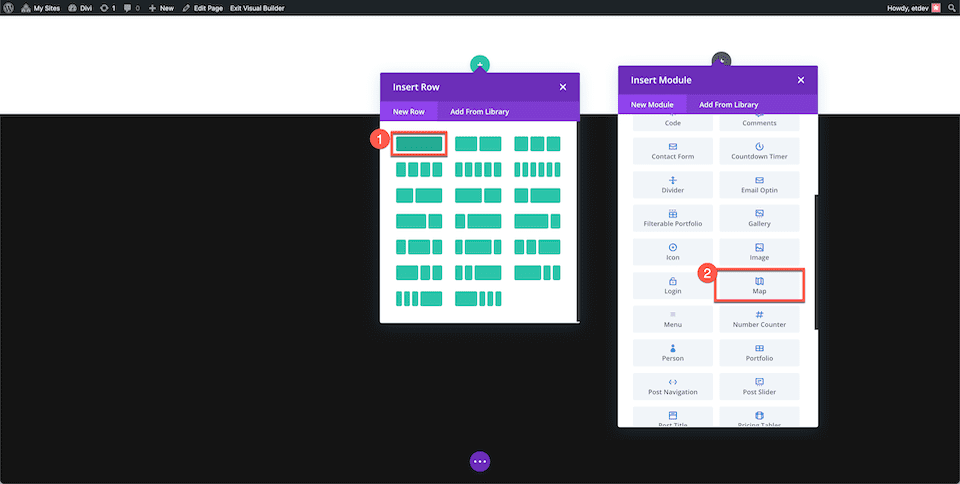
Navigate back to the page you just created and add a section and a one-column row to your page. Then load the module library and click Map. Once added, the module window will pop up with all the settings and functionalities available within the map module.
Add a Pin
Click “Add New Pin” to add a pin to your map. This will bring up that pin’s settings where you can type in a title and add a description text. To add a button in the text area, add the following HTML:
<a href="#google-map-link-here" class="et_pb_button">Get Directions</a>
The key here is to add the class of et_pb_button to the link’s HTML so that it becomes a button. Don’t forget to replace the # sign with the URL you want this button to link to.
Then add your pin’s location in the Map tab in the Map Pin Address field and click find.
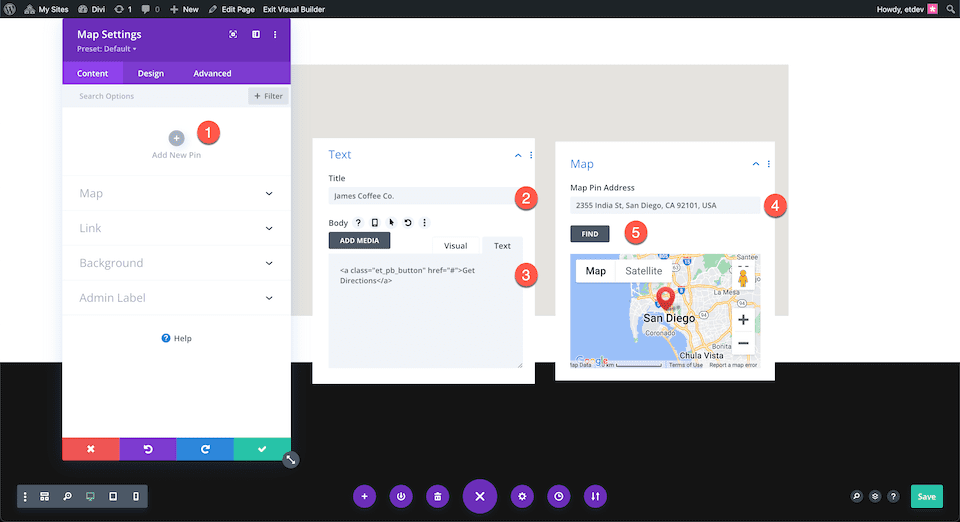
And there you have it! A button appears in the pin’s location info box.
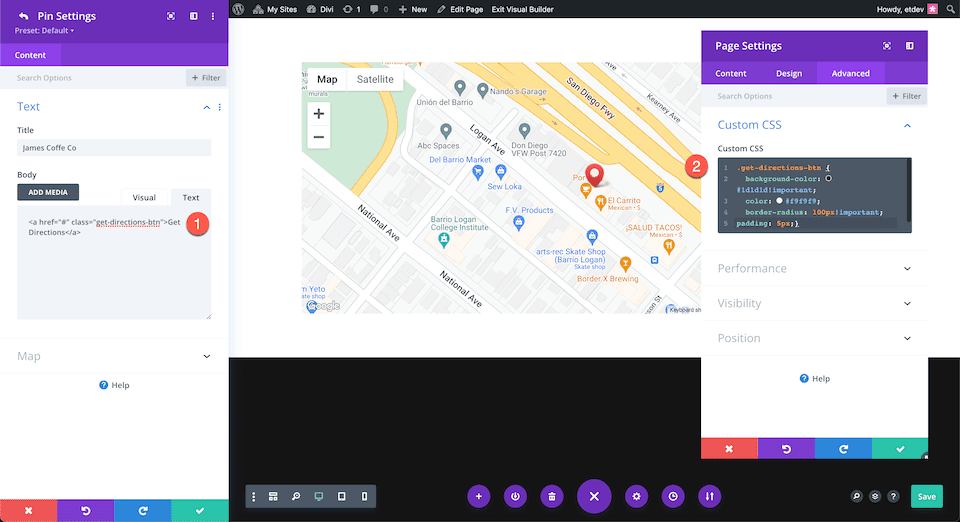
There’s also another way to achieve this and it’s to add a unique CSS class to the HTML to style the button. Here is the HTML you’ll need:
<a class="get-directions-btn" href="#paste-link-here">Get Directions</a>
The unique CSS class we added was get-directions-btn. We can use this CSS class to apply unique styles to the button. You can do this by pasting on-page CSS or by using your child theme’s style sheet. In today’s example, we’re going the paste the CSS in our Page Settings.
To achieve the button style below, copy and paste this CSS in to your Page Settings:
.get-directions-btn {
  background-color: #1d1d1d!important;
  color: #f9f9f9;
  border-radius: 100px!important;
  padding: 5px;}
Final Thoughts
Adding a button to your pin’s location box offers a clean direction button link that makes it easy for your visitors to get directions fast. You can also style the button using CSS added to your page! With that, the styling options are endless. Have fun customizing!


Yes, in Europe, we can’t use this way anymore, another way to do this? With another map system or plugin?
This may be helpful:
https://devowl.io/2021/embed-google-maps-gdpr/
Unfortunately the Google map does not conform to European data protection legislation. What can we use instead? And: are there any plans to have alternatives for google fonts?
Thanks,
Petra