
There are all different kinds of ways to design hero sections on your website. You could use plain colors, background images or you could also use textured backgrounds that make your website more sophisticated and modern at the same time. In this post, we’re going to share 5 pre-made textured backgrounds that you can download for free. On top of that, we’re also going to show you how to use these textured backgrounds with Divi and modify the color palette of it to your needs.
- 1 Result
- 2 Download This Tutorial’s Files
- 3 Download For Free
- 4 Download 5 Free, Abstract & Unique Hero Section Background Textures for Divi
- 5 Recreate Hero Section
- 6 Add Textured Background #1
- 7 Add Textured Background #2
- 8 Add Textured Background #3
- 9 Add Textured Background #4
- 10 Add Textured Background #5
- 11 Add CSS Parallax for Interaction
- 12 Result
- 13 Final Thoughts
Result
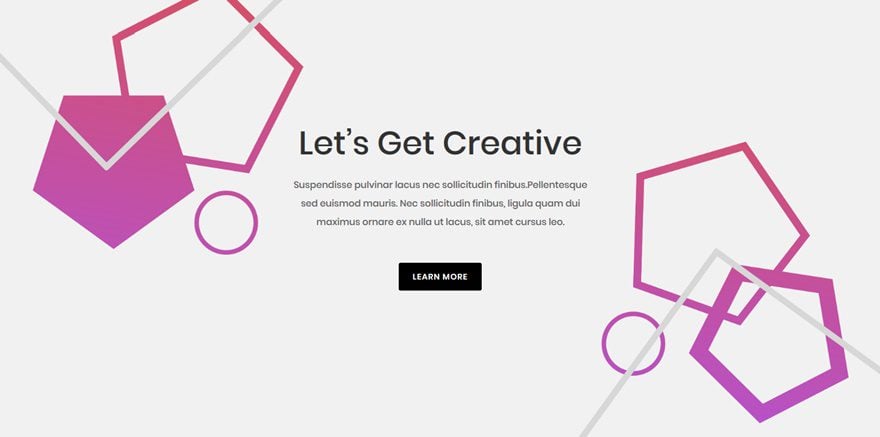
Before diving into the tutorial, let’s take a quick look at the different textured backgrounds you’ll be able to download for free after they’ve been added to a page and modified with Divi.
Textured Background #1
Textured Background #2
Textured Background #3
Textured Background #4
Textured Background #5
Download This Tutorial’s Files
To lay your hands on these free textured backgrounds, you will first need to download it using the button below. To gain access to the download you will need to subscribe to our newsletter by using the form below. As a new subscriber you will receive even more Divi goodness and a free Divi Layout pack every Monday! If you’re already on the list, simply enter your email address below and click download. You will not be “resubscribed” or receive extra emails.

Download 5 Free, Abstract & Unique Hero Section Background Textures for Divi
Subscribe To Our Youtube Channel
Recreate Hero Section
Section Settings
Spacing
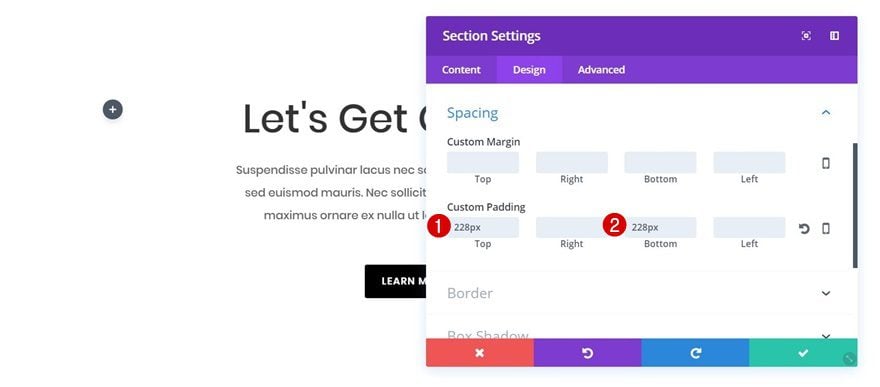
Start by creating a new standard section and add the following padding to the Spacing subcategory:
- Top: 228px
- Bottom: 228px
First Row Settings
Column Structure
Immediately continue by adding a row to that section with the following column structure:
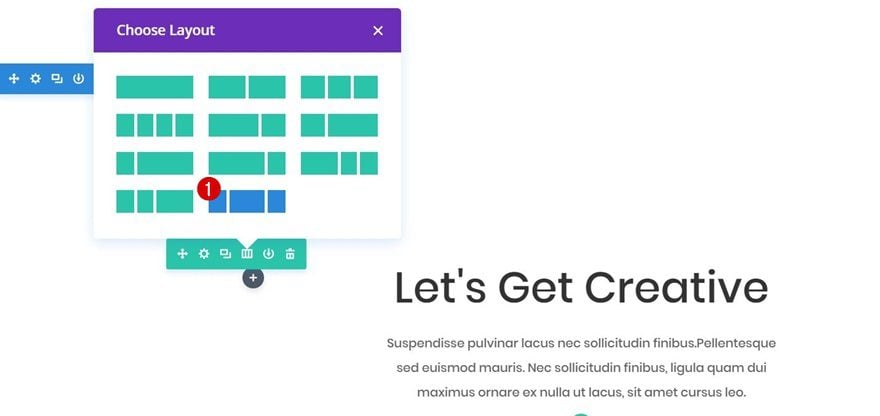
Second Row Settings
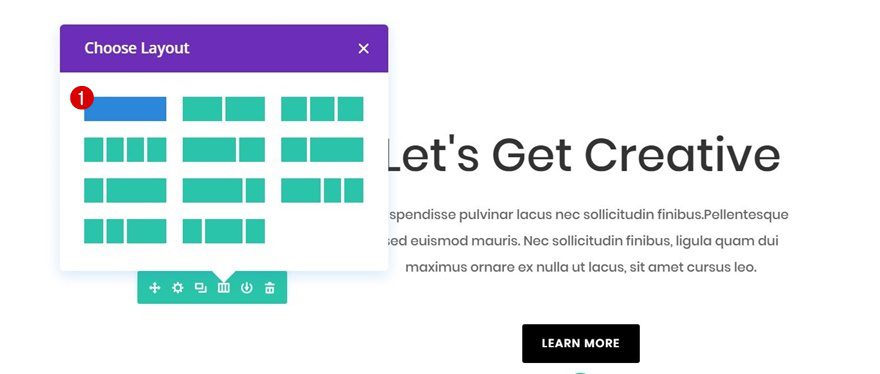
Column Structure
Right below the row you’ve just created, add another row with one column.
First Text Module
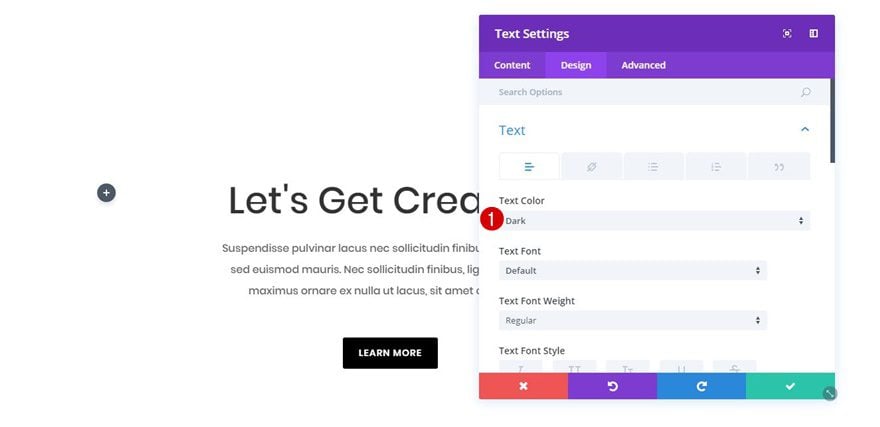
Text Settings
Now, go back to the first row you’ve created, add a Text Module to the second column and use ‘Dark’ as the Text Color in the Text subcategory.
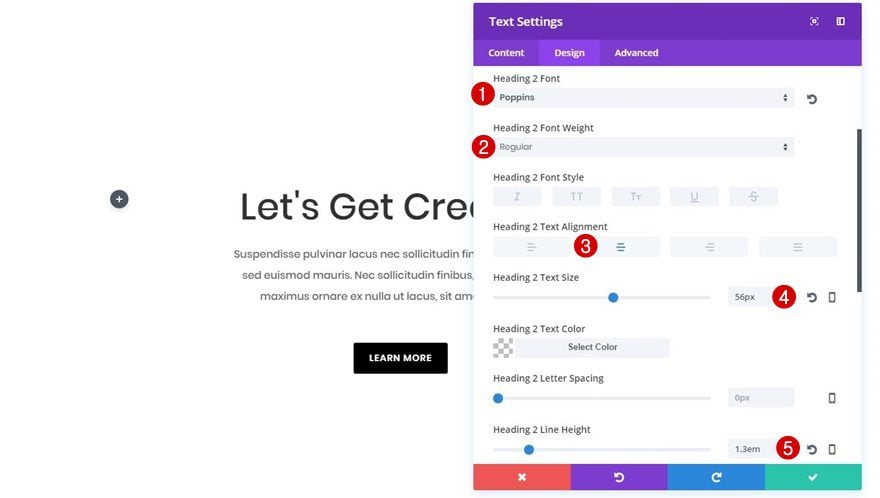
Heading Text Settings
Next, open the Heading Text subcategory and apply the following settings:
- Heading Font: Poppins
- Heading Font Weight: Regular
- Heading Text Alignment: Center
- Heading Text Size: 56px
- Heading Line Height: 1.3em
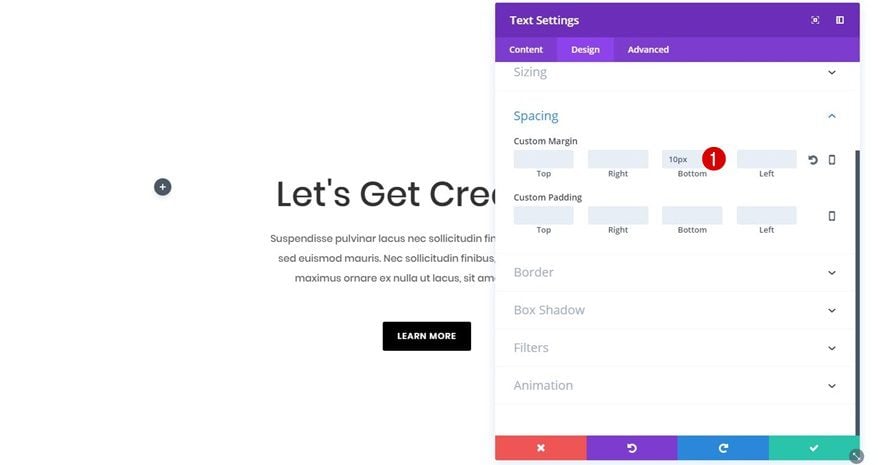
Spacing
Continue by opening the Spacing subcategory and adding ’10px’ to the bottom margin.
Second Text Module
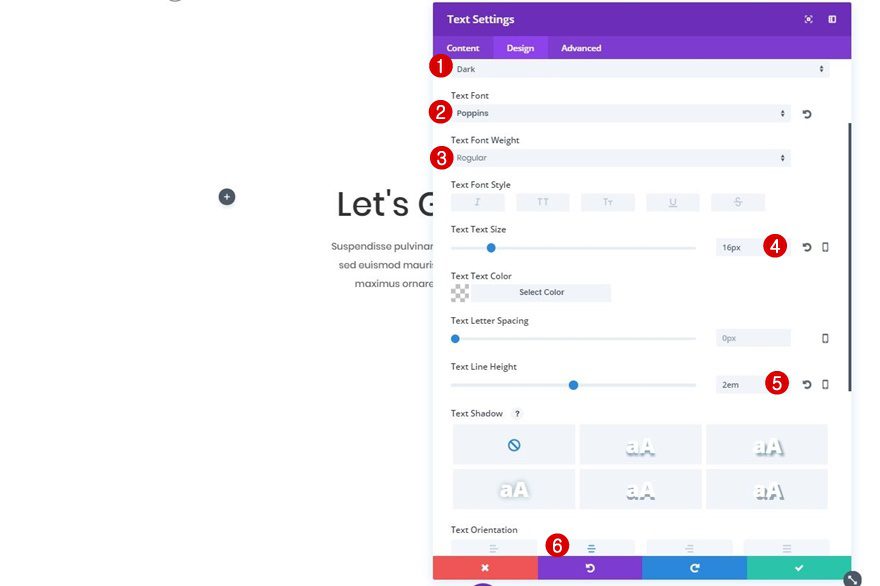
Text Settings
Right below the previous Text Module, add another Text Module as well and apply the following settings to the Text subcategory:
- Text Color: Dark
- Text Font: Poppins
- Text Font Weight: Regular
- Text Size: 16px
- Text Line Height: 2em
- Text Orientation: Center
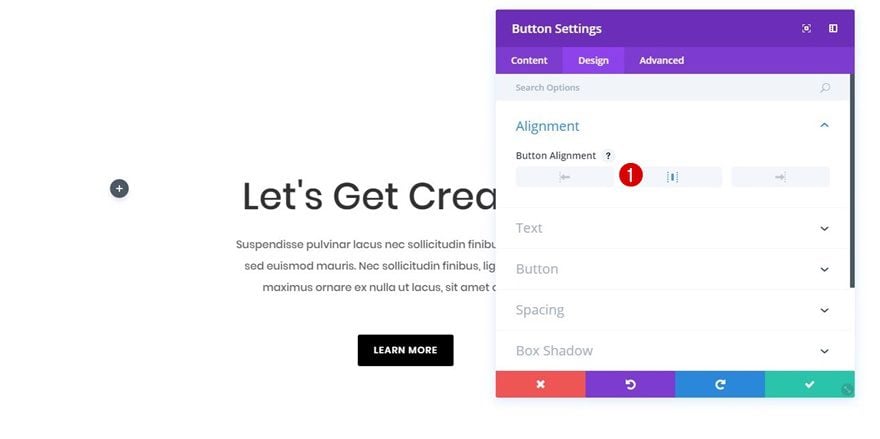
Alignment
Now that you’re done with the first row, move on to the next row, add a Button Module and choose ‘center’ as the Button Alignment.
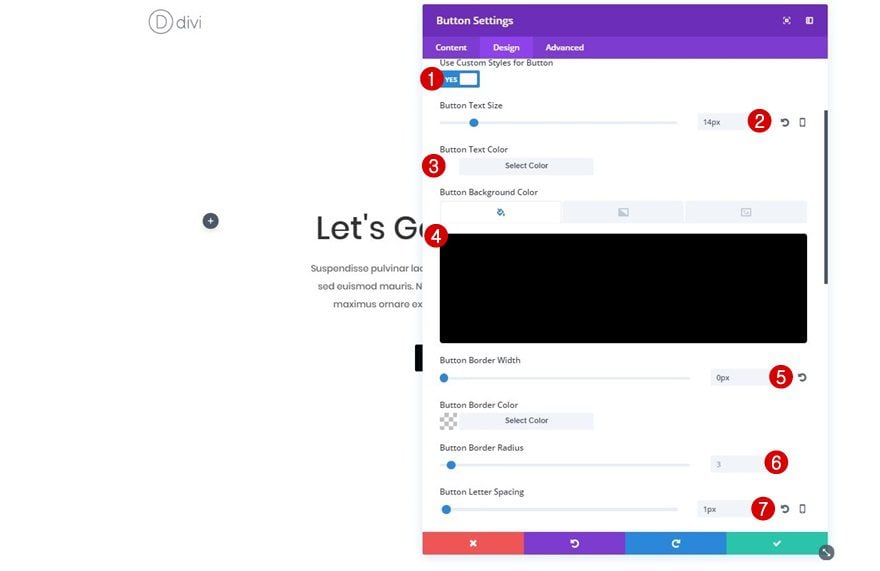
Button Settings
Next, open the Button subcategory and make use of the following settings:
- Use Custom Styles for Button: Yes
- Button Text Size: 14px
- Button Text Color: #FFFFFF
- Button Background Color: #000000
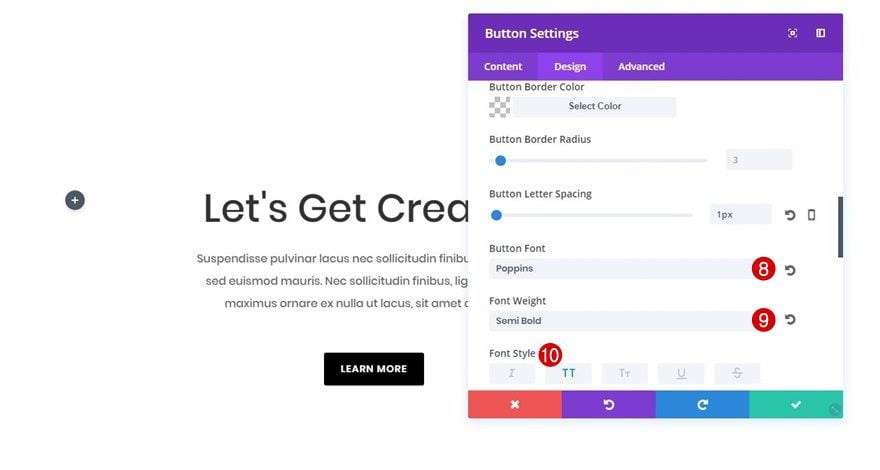
- Button Font: Poppins
- Font Weight: Semi Bold
- Font Style: Uppercase
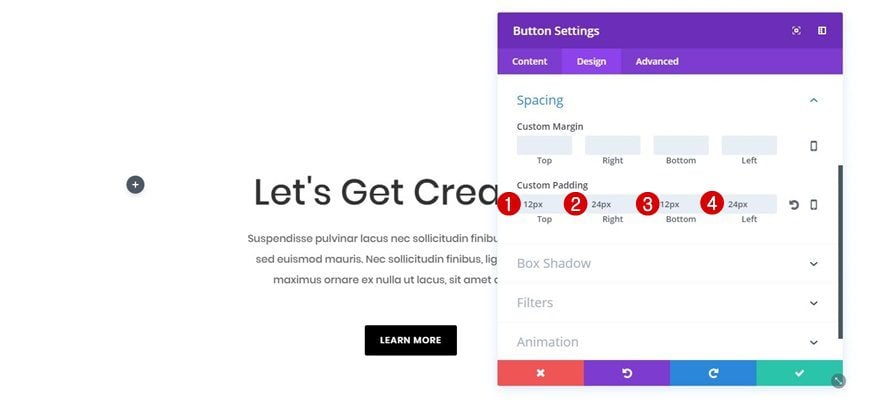
Spacing
Lastly, open the Spacing subcategory and add the following Custom Padding to your button:
- Top: 12px
- Right: 24px
- Bottom: 12px
- Left: 24px
Add Textured Background #1
Background Image Settings
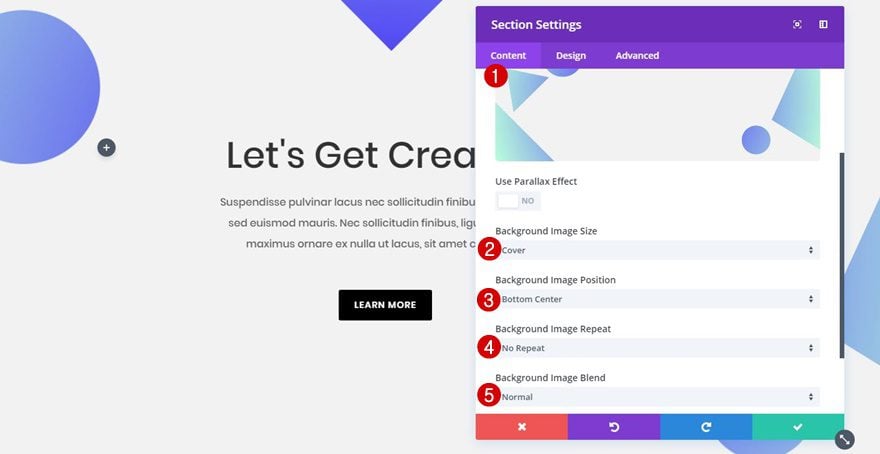
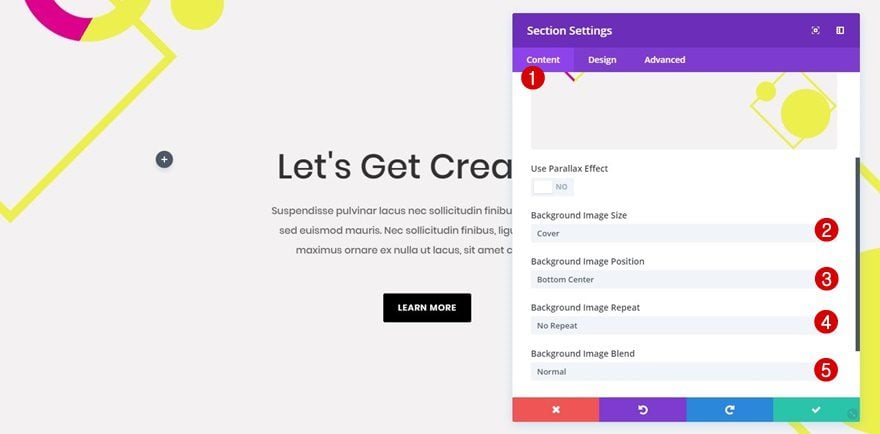
Locate the ‘textured-background-1.png‘ file in the folder you’ve downloaded at the beginning of this post and add it as the background image of your section along with the following settings:
- Background Image Size: Conver
- Background Image Position: Bottom Center or Center
- Background Image Repeat: No Repeat
- Background Image Blend: Normal
Gradient Background
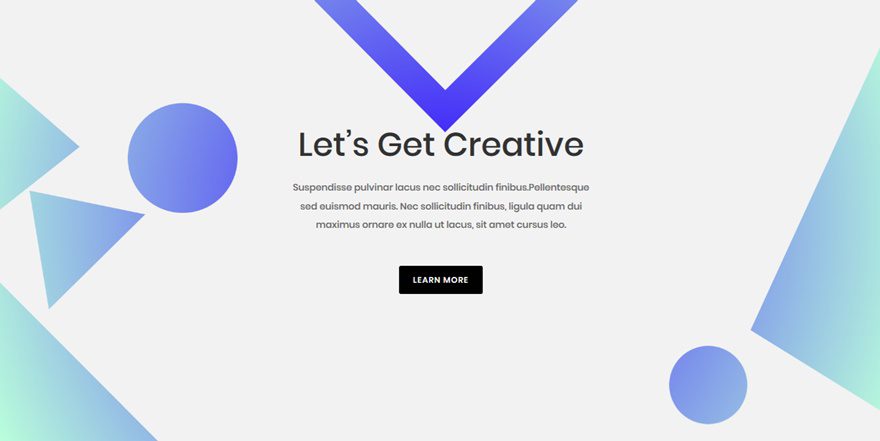
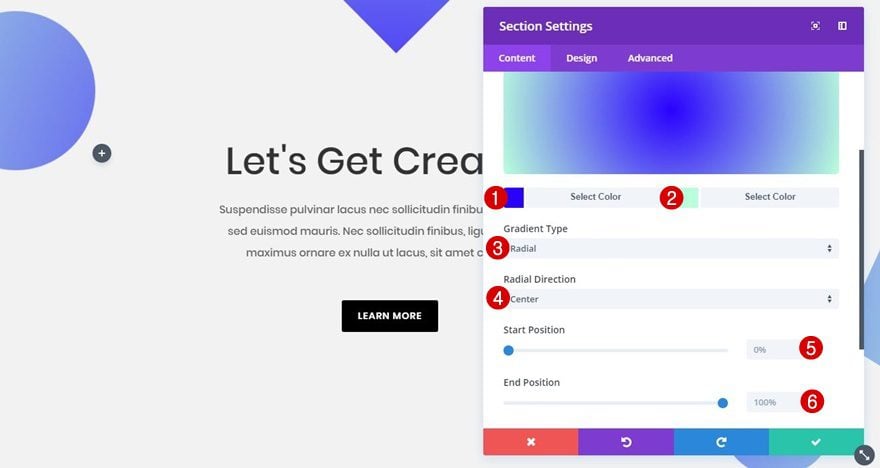
The textured backgrounds include some transparent shaped parts that allow you to add a gradient or one-color background without having to apply it to your entire image. You can choose whichever gradient background you want (one that matches your website’s color palette), but for the example we’ve set up below, we’ve chosen the following settings:
- First Color: #2a00ff
- Second Color: #baffdb
- Gradient Type: Radial
- Radial Direction: Center
- Start Position: 0%
- End Position: 100%
Add Textured Background #2
Background Image Settings
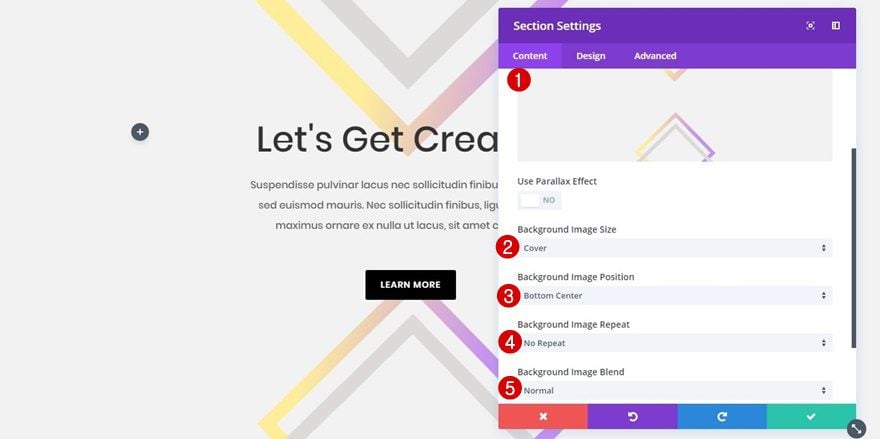
If you want to add the second textured background instead, locate the ‘textured-background-2.png‘ file in the folder you’ve downloaded at the beginning of this post, use it as your section background image and apply the following settings to it:
- Background Image Size: Cover
- Background Image Position: Bottom Center or Center
- Background Image Repeat: No Repeat
- Background Image Blend: Normal
Gradient Background
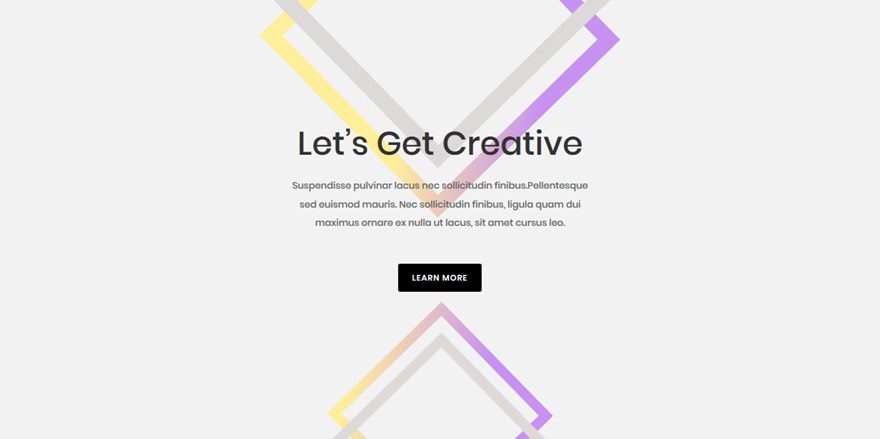
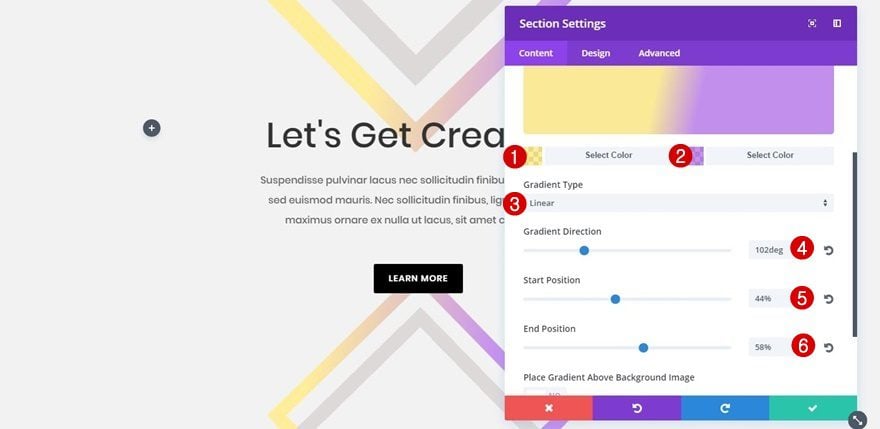
Use the following gradient background (or any other type of gradient background) along with it:
- First Color: rgba(255,229,102,0.66)
- Second Color: rgba(172,95,232,0.68)
- Gradient Type: Linear
- Gradient Direction: 102deg
- Start Position: 44%
- End Position: 58%
Add Textured Background #3
Background Image Settings
For the third textured background, locate the ‘textured-background-3.png‘ file in the downloaded folder and use the same settings as for the two previous textured backgrounds.
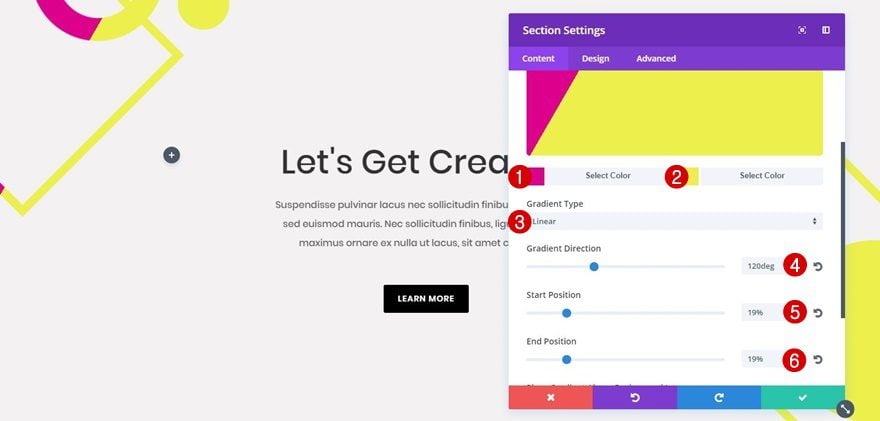
Gradient Background
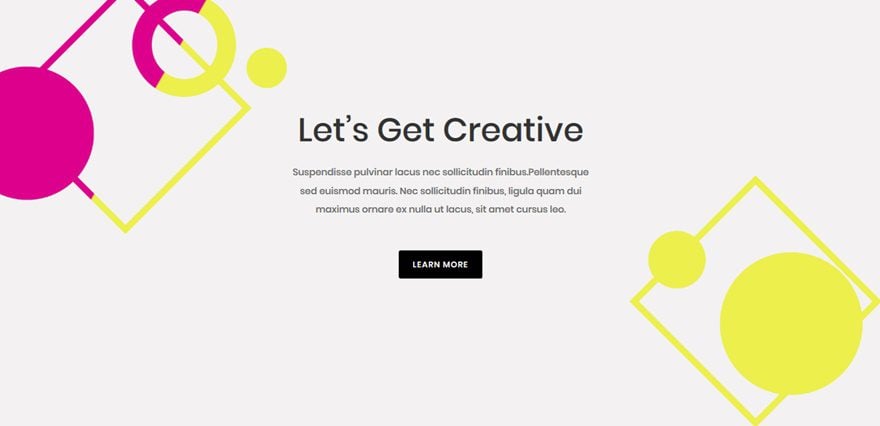
We’ve used this textured background along with the following gradient background:
- First Color: #dd008c
- Second Color: #ecef4c
- Gradient Type: Linear
- Gradient Direction: 120deg
- Start Position: 19%
- End Position: 19%
Add Textured Background #4
Background Image Settings
For the next textured background, locate the ‘textured-background-4.png‘ file in the downloaded folder and use the same settings for it as in the previous examples.
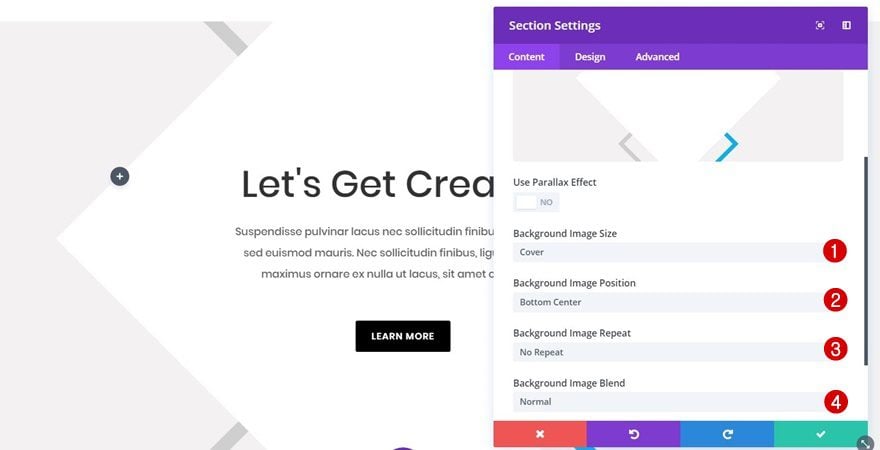
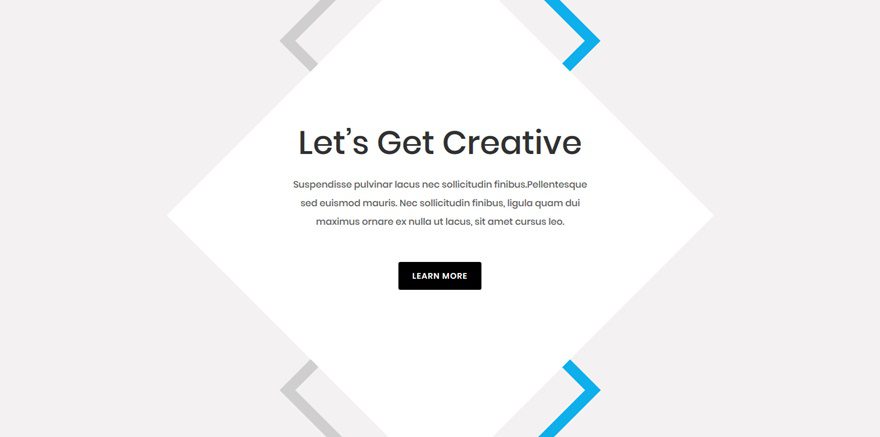
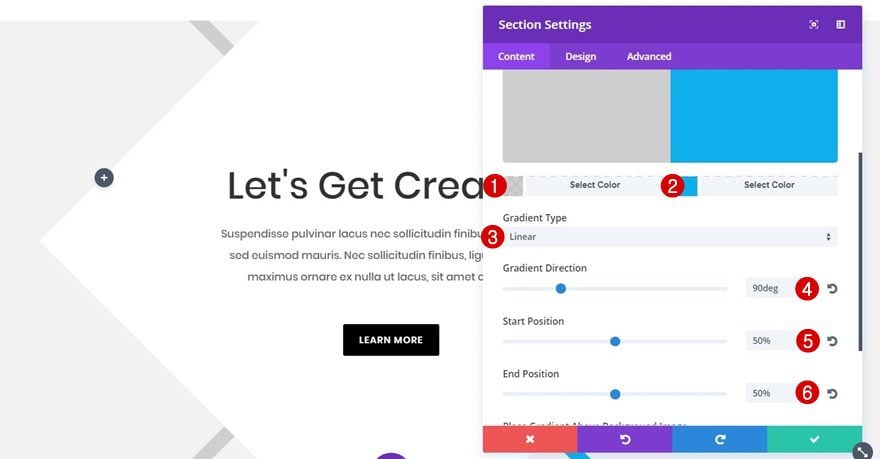
Gradient Background
Along with the textured background, use the following gradient background:
- First Color: rgba(198,198,198,0.84)
- Second Color: #0eafea
- Gradient Type: Linear
- Gradient Direction: 90deg
- Start Position: 50%
- End Position: 50%
Add Textured Background #5
Background Image Settings
The last textured background image file is called ‘textured-background-5.png‘. Upload it as your section background image and maintain the same settings as for the previous textured backgrounds. 
Gradient Background
For this last example, we’re using the following gradient background:
- First Color: #e04f47
- Second Color: rgba(131,0,233,0.68)
- Gradient Type: Linear
- Gradient Direction: 190deg
- Start Position: 0%
- End Position: 100%

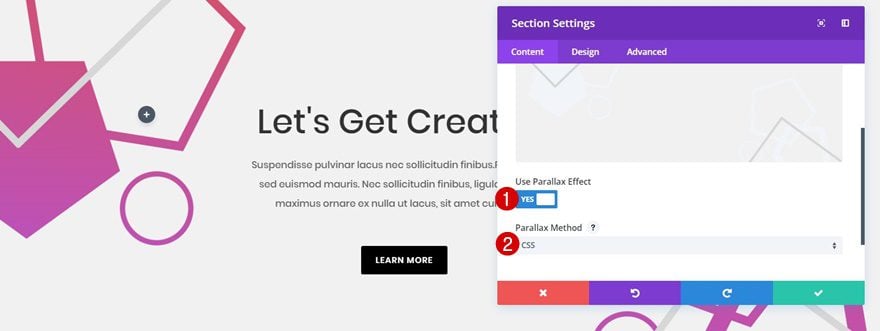
Add CSS Parallax for Interaction
Background Image Settings
You can apply this parallax effect to each one of the textured backgrounds by going to the background image tab, enabling the ‘Use Parallax Effect’ option and selecting the ‘CSS’ Parallax Method.
Result
Now that we’ve gone over all of the textured backgrounds, let’s take a final look at the result.
Textured Background #1 in Action
Textured Background #2 in Action
Textured Background #3 in Action
Textured Background #4 in Action
Textured Background #5 in Action
Final Thoughts
We hope you’ve enjoyed this blog post and all of the free resources that came along with it. Using textured backgrounds for your next project can really help elevate the design of your website, especially in the creative sector. If you have any questions or suggestions; make sure you leave a comment in the comment section below!


I love stuff like this! This is definitely my kind of design style. Thanks for the freebies! You guys should release more stuff like this. I love abstract stuff.
You know I like all the videos here, showing what you do.
However: YOU EXPLAIN NOTHING! There is ZERO explanation of the WHY behind all your design – ie padding, gutters, widths, etc. You zip through everything and leave me with no framework as to why you just did what you did.
Like Dad doing your homework for you and wondering why you didn’t learn anything….
Hey there Don, sorry to hear you feel that way. This post, however, mainly focuses on the textured backgrounds and how to combine them with a gradient background. Some settings (such as padding) become pretty self-explanatory when following the steps and seeing changes happen in real time. I’ll keep your feedback in mind, though 🙂
Thank you for all these tutorials.
It’s awesome.
Nice but where are the demo links? A demo means more than 1000 words (or images). 😉
Thanks for showing us more great design ideas, it just gets better! I love working with layers.
Good to hear, Desirée 🙂
All in all funky but even funkier if you add different animations to each section.
Donjete, you’re an angel, thank you
You’re welcome, Matthew!
These look good.
But a small but not insignificant observation, even when alternative fonts sizes are applied for tablet/mobile. If I size my browser window to about 1300px the “Lets Get Creative” text bunches up. I have noticed this before, requiring custom styling for media queries to match breakpoints, other than the tablet portrait and mobile options offered with Divi.
I am open to other suggestion to fix this.
@Irishetcher – I Agree. I’m curious if they have a known fix for this. Thanks for mentioning this 🙂
I submitted some tickets on this very matter.
good stuff.. thanks!
ooooohhhhh they look nice. I guess major theme update on Thursday then??
Glad to hear you like them, Richard!