
Find It In The Divi Marketplace
Image Intense is available in the Divi Marketplace! That means it has passed our review and has been found to meet our quality standards. You can visit Superfly in the marketplace to see all of their available products. Products purchased from the Divi Marketplace come with unlimited website usage and a 30 day money back guarantee (just like Divi).
Image Intense is a third party premium plugin by the folks over at Superfly that adds a new module to the Divi Builder for both Divi and Extra. The new module combines features from three Divi modules (image, text, and button modules) and then adds new features to add overlay and hover effects to images. Features include 22 image hover transitions, buttons, opacity settings, mix blend modes, text links, and lots more.
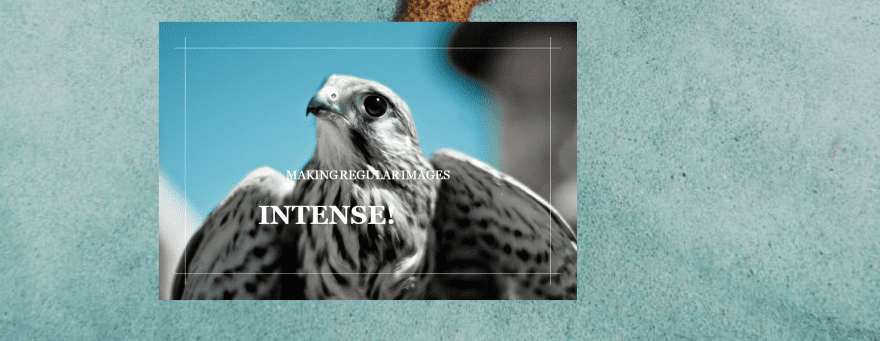
Image Intense is a great way to add micro-interactions that give your readers feedback and call attention to your call-to-action (CTA). Animations include zooming the image in or out, stretching the image, compressing the image, adding an overlay, swiping across, revealing text, etc.
In this plugin highlight we’ll take a look at what the plugin can do. Images are taken from Unsplash.com.
Installation and Settings
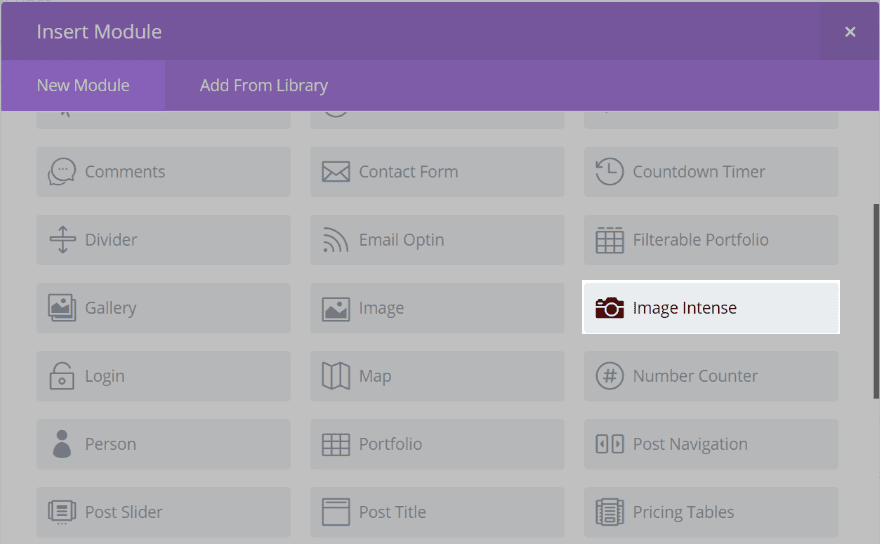
The plugin adds a module to the Divi Builder. To install the module simply upload and activate the plugin. Use the Divi Builder as normal and place the Image Intense module within your layout. It can be used in place of an image module.
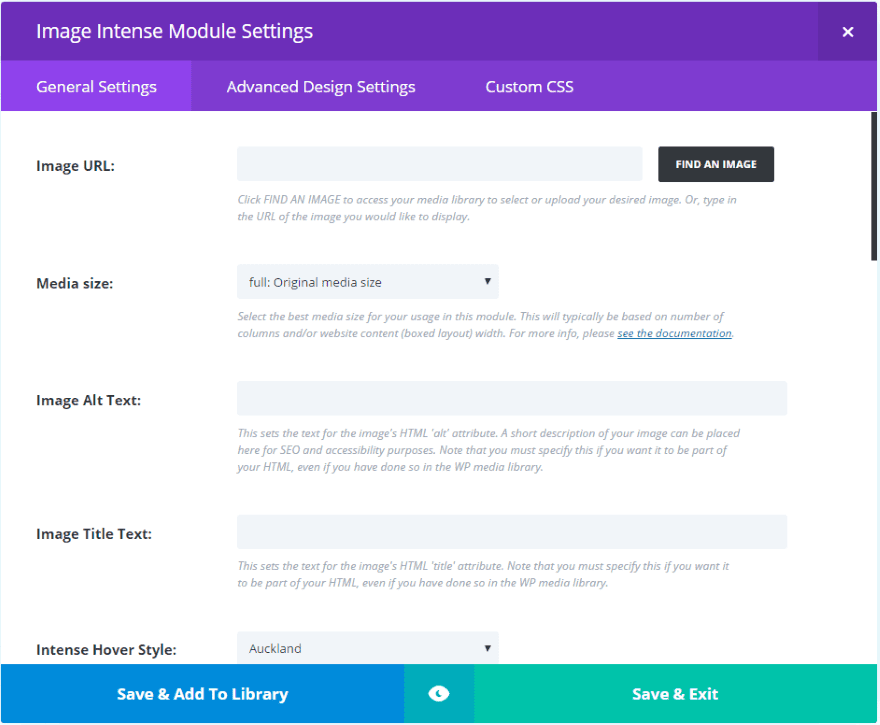
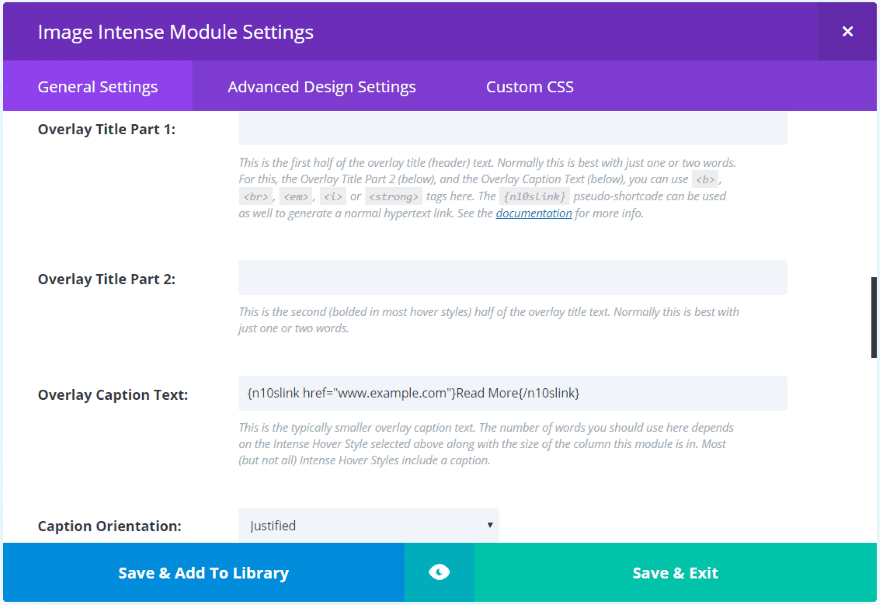
The General Settings includes image URL, media size, hover style, titles, caption, caption orientation, button, animation direction, etc. These are familiar settings and include a short descriptions. New settings include links to documentation for more information.
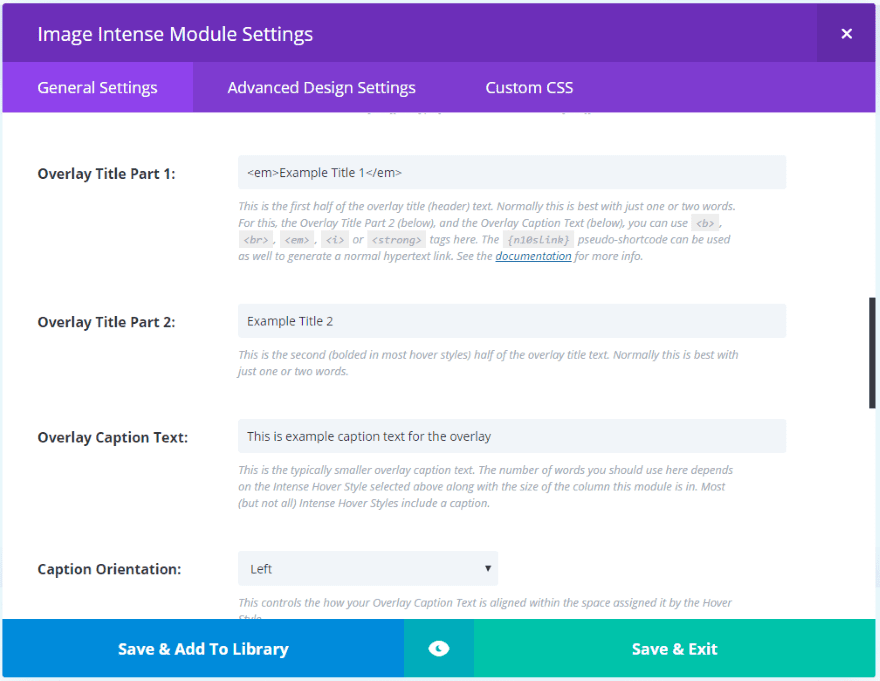
The overlay titles can use markup. Here you can add links, bold the text, etc.
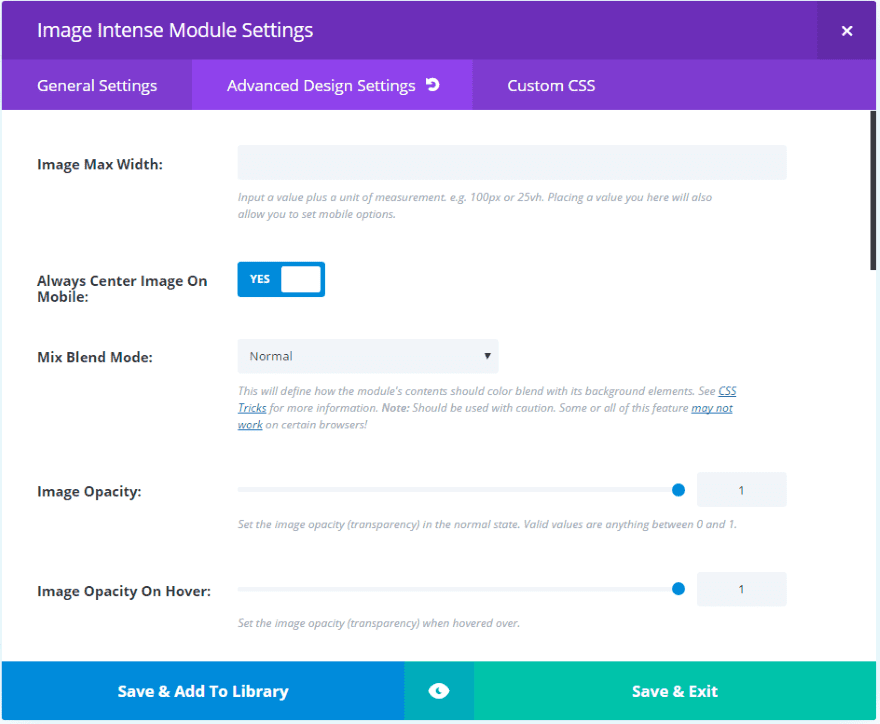
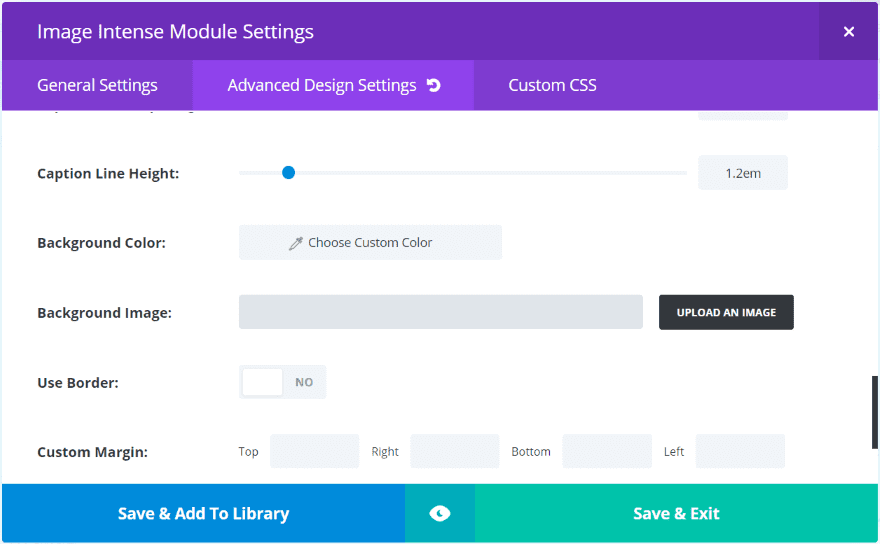
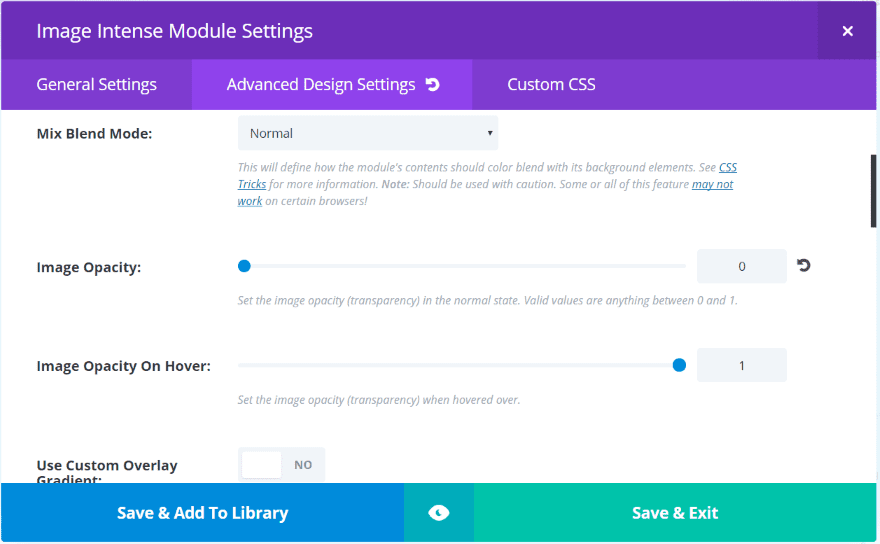
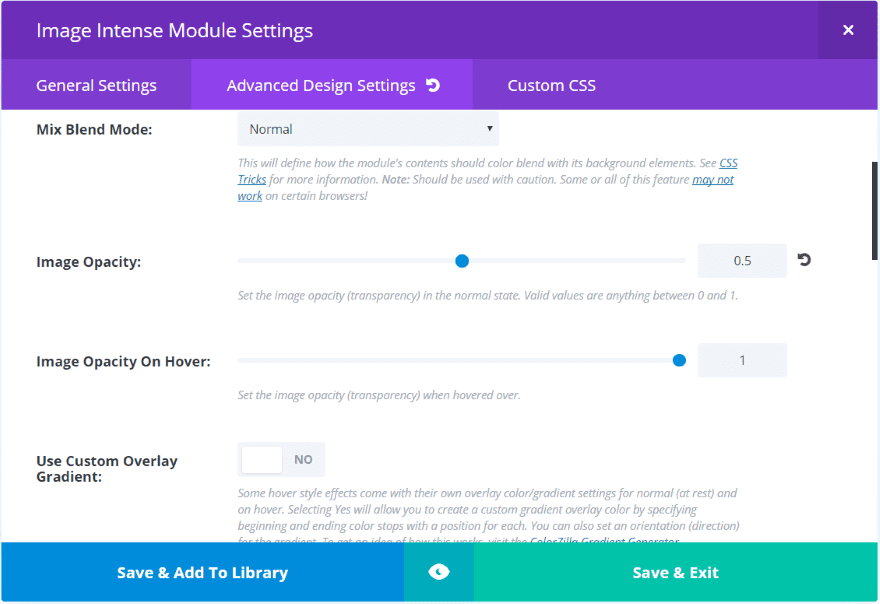
Advanced Design Settings include image width, mix blend mode, opacity, opacity on hover, custom overlay gradient, etc. It includes the expected font, background, border, color, and padding choices, as well as Custom CSS.
Examples – Putting Image Intense to Work
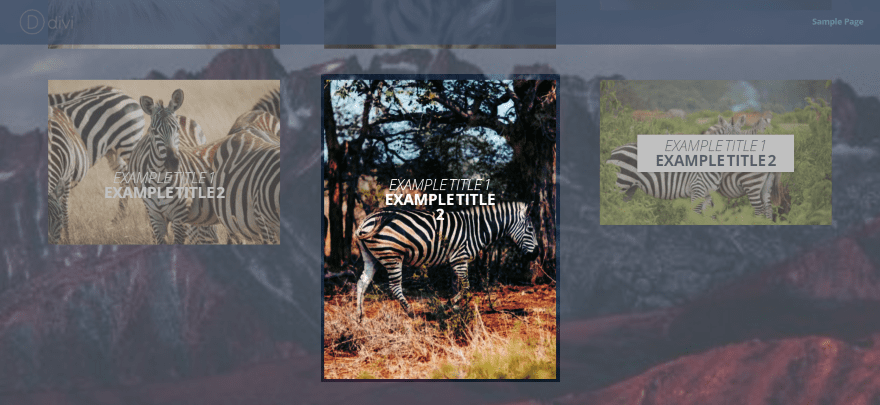
To see what it can do I created several layouts and added several Image Intense modules. Here’s a look at some of the animations and features.
Animations and Image Sizes
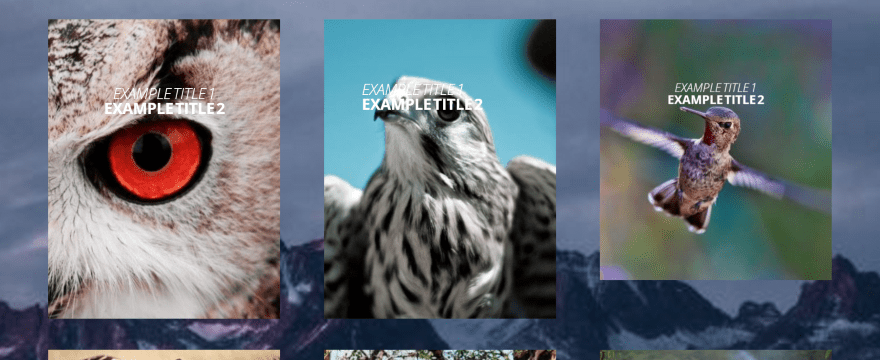
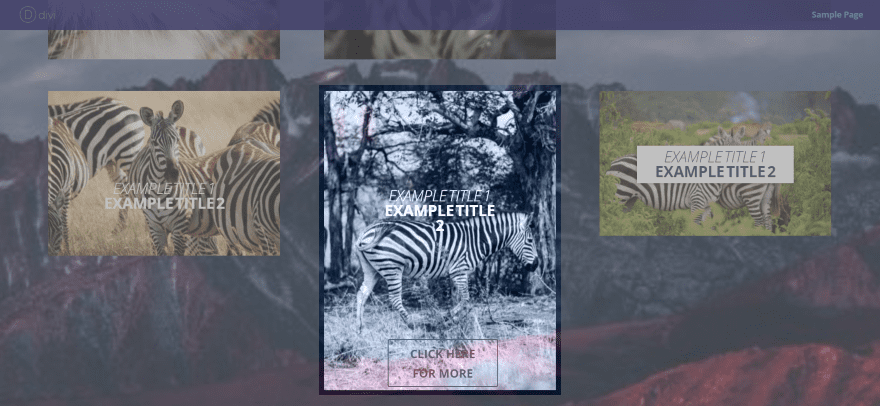
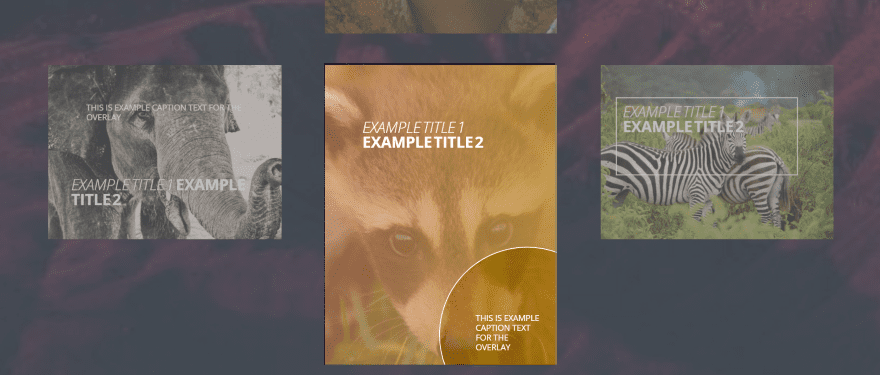
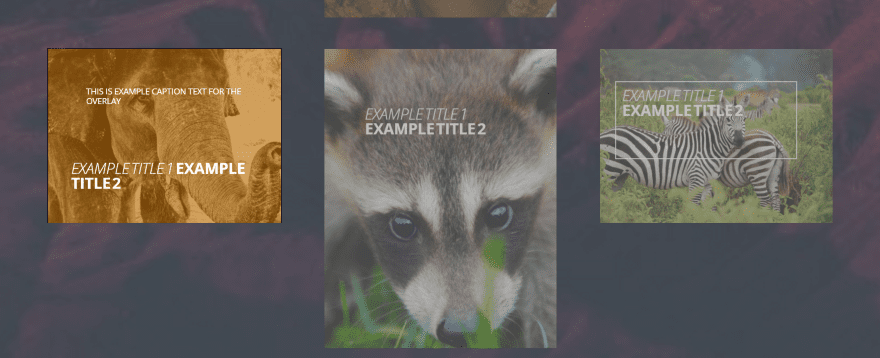
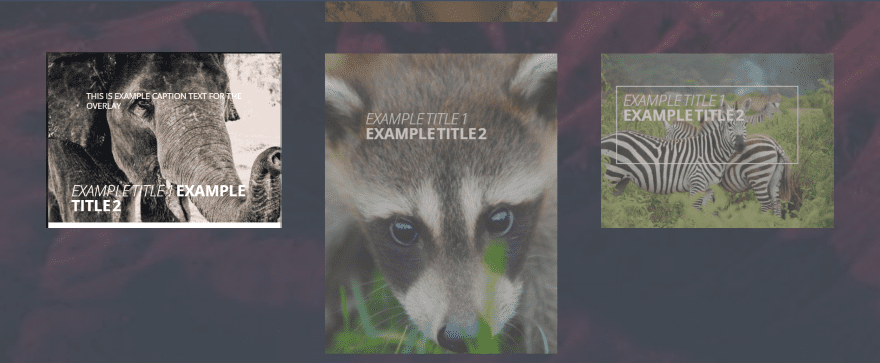
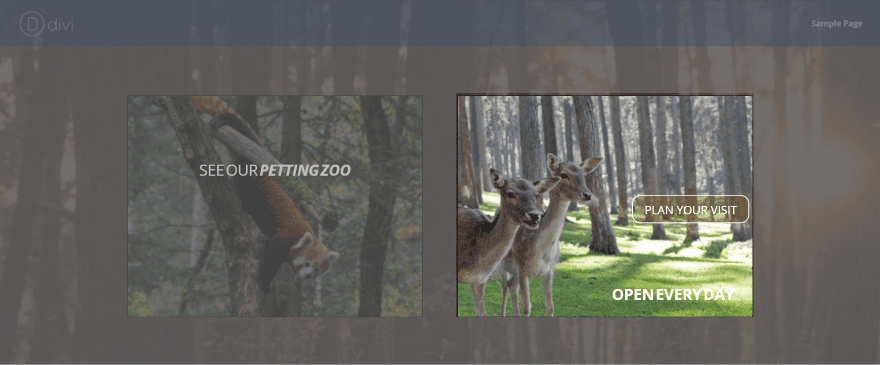
In this example you can see the cropped size of the images with two overlay titles. The image on the left uses the 400 x 516 cropped setting for the media size and Auckland for the animation.
The image zooms out slightly and shows an overlay with a message. The font color and size can be adjusted if needed.
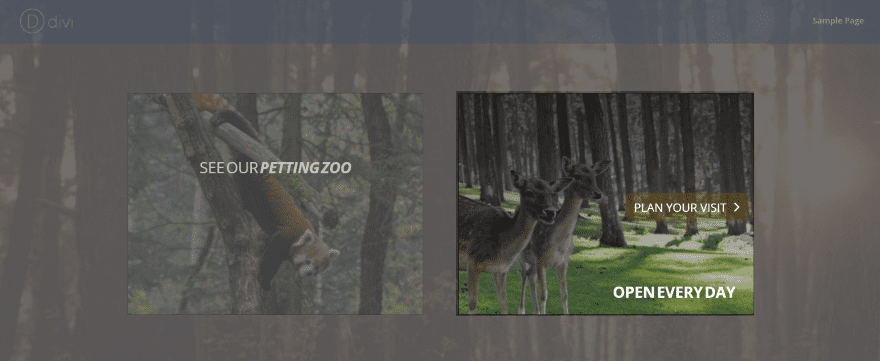
The image on the right is zoomed in and includes the message in an overlay. This one is more obvious of the difference. It uses the Jerusalem hover style.
The image in the center uses the Douala hover style.
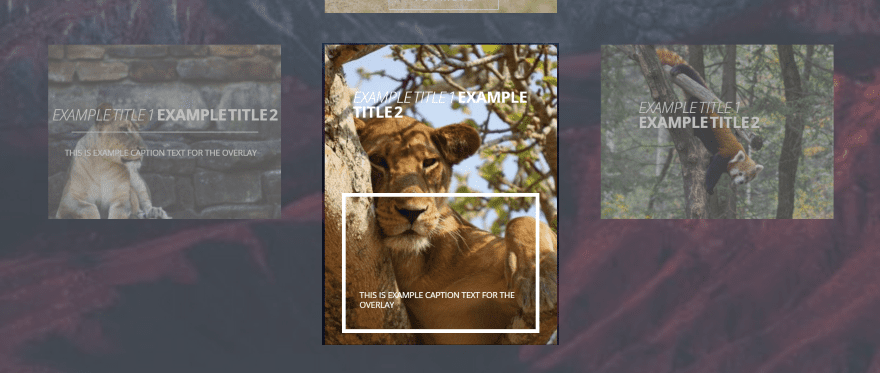
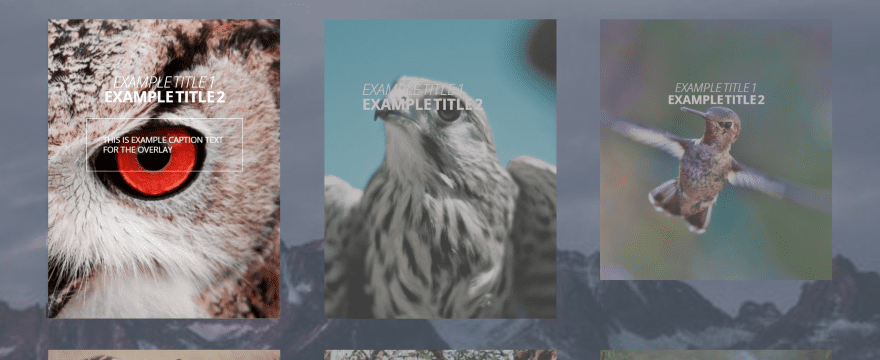
You can see in this image the frame moved to the bottom of the image and now displays the message.

The image in the center uses the Madison overlay style.
You can see here how it places an overlay over the image that reduces the opacity while keeping the focus on the circled area that includes the message.
Mix Blend Mode
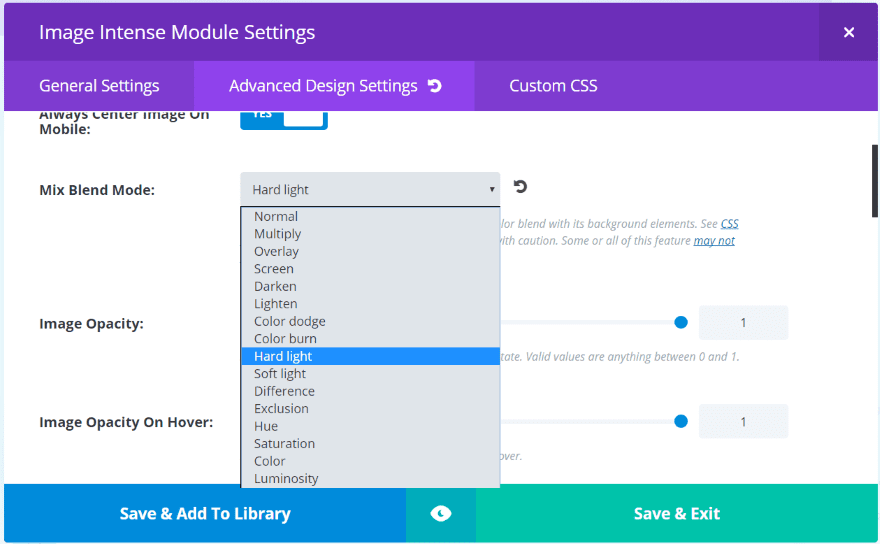
Mix Blend Mode is an easy way to apply CSS attributes to the image. It blends the module’s color with its background. It can create some wild effects and some settings work better with certain colors, so this will require some experimenting. Some of the features might not work with all browsers, so you’ll want to use this feature with caution.
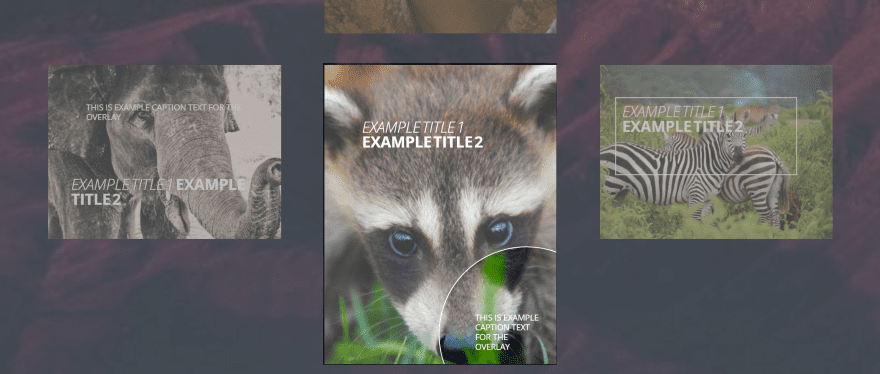
The image in the center is using the Mixed Blend Mode called Hard Light.
This one uses Luminosity. I’ve also added a button at the bottom center and setup custom styling.
Opacity
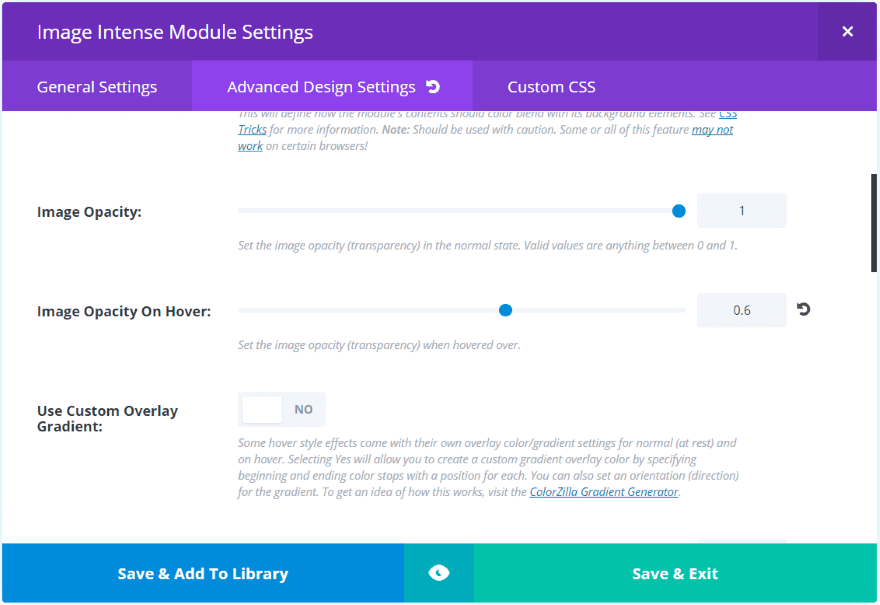
Opacity is how transparent an image is. The more opaque an image is the less transparency it has. The opacity is also effected by the animation style and the mix blend mode that you choose. You can use them in various combinations to see what types of effects you can create. You can apply different opacity levels to the normal image and the hover image.
This is the normal image with no opacity. I’m using the full original size for the media size setting.
Here the image on hover. I’ve set the opacity rating to 0.6. This one uses the Cali hover style.
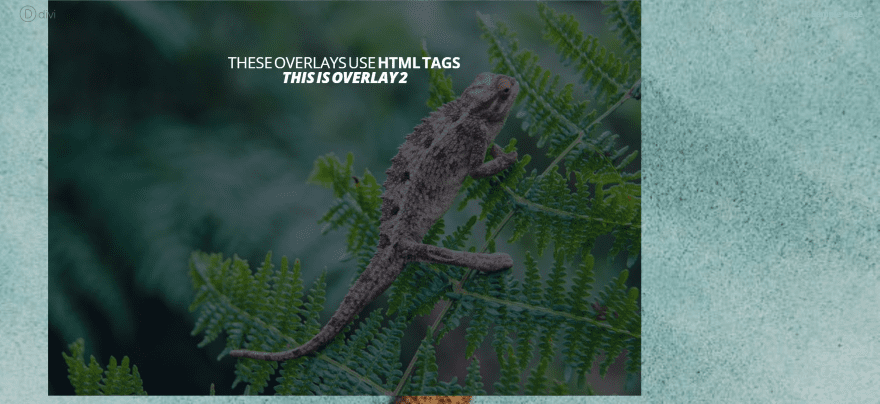
This one uses a large image of 1024×1024 with no cropping and an image opacity of 0.4. Both of the overlay titles use HTML tags. I’m using tags for strong, emphasis, and break. It’s using the Portland hover style.
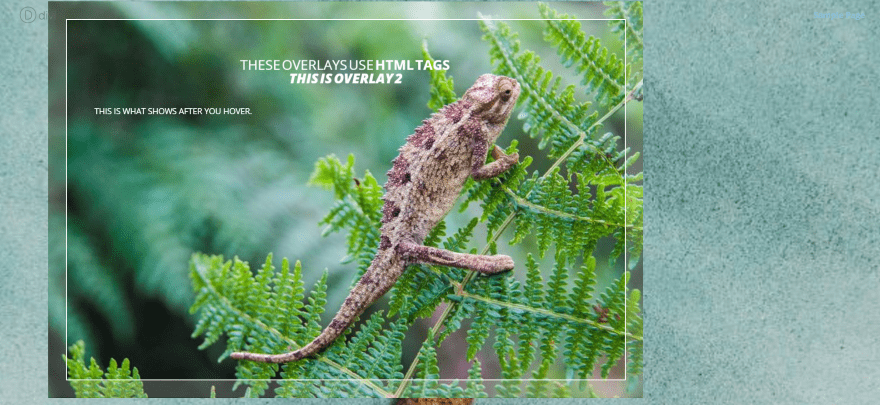
I’ve set the hover opacity to 1 so the image is fully revealed on hover.
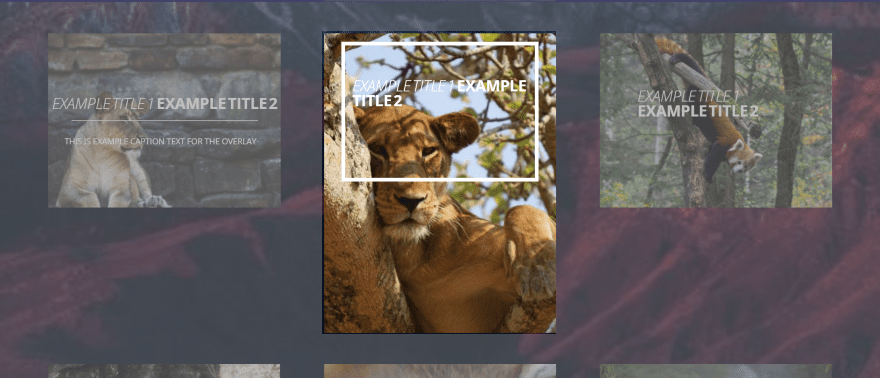
Adding a Custom Gradient
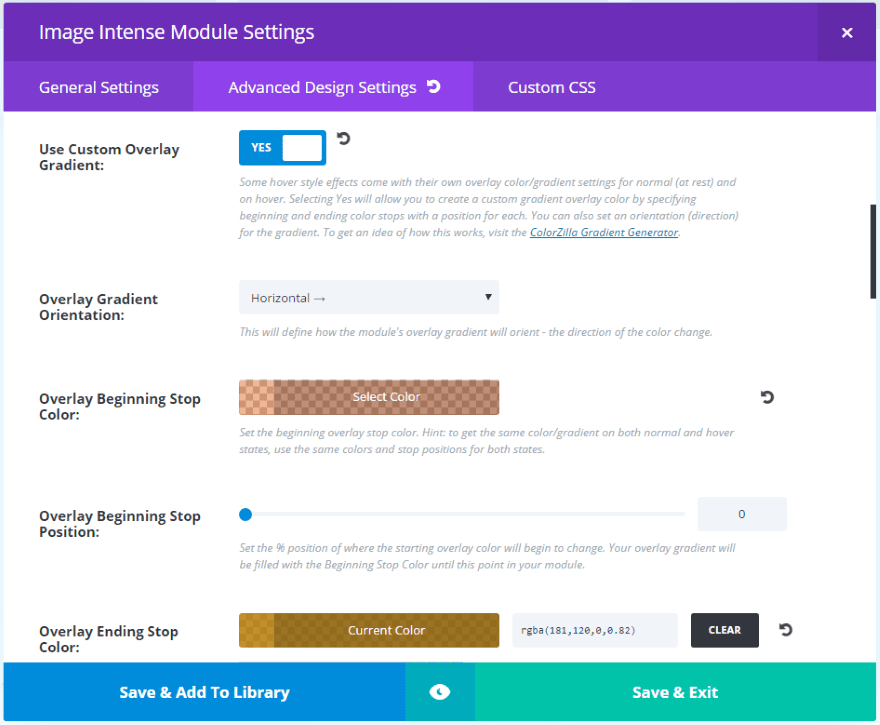
In the Advanced Design Settings I’ve selected Use Custom Overlay Gradient. This opens a new set of options where I can select the starting and ending gradient color, the gradient orientation, and the beginning and ending stop position for both the regular image and the hover image.
Here’s a look at the gradient using the Madison overlay style.
The image on the left displays an overlay before hover.
On hover the overlay is removed to reveal the image. This one’s using the Hanoi hover style.
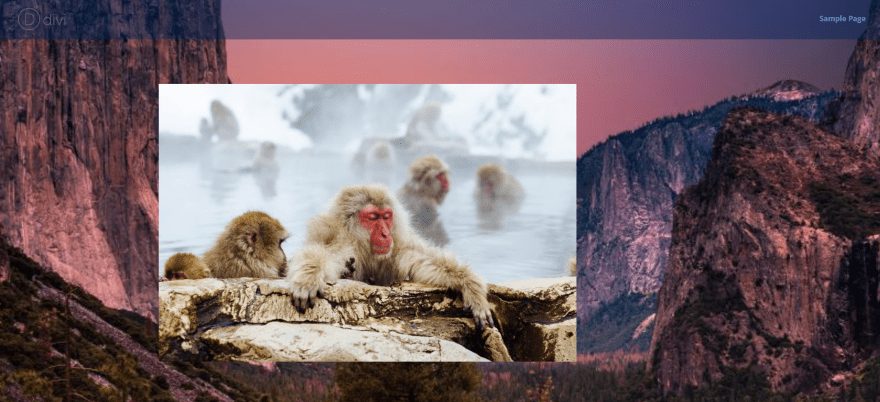
Image Swap
In this example I wanted to swap one image for another. This is done by adding an image as the module’s background image in the Advanced Design Settings.
Next set the opacity level so one image shows without hover and the other image shows on hover. The one that shows on hover will also display a message.
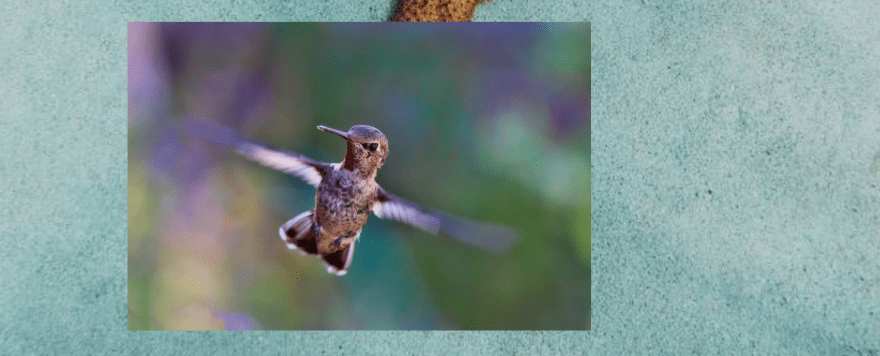
I’ve chosen this image as the background image and I set the module’s image to have an opacity of 0.
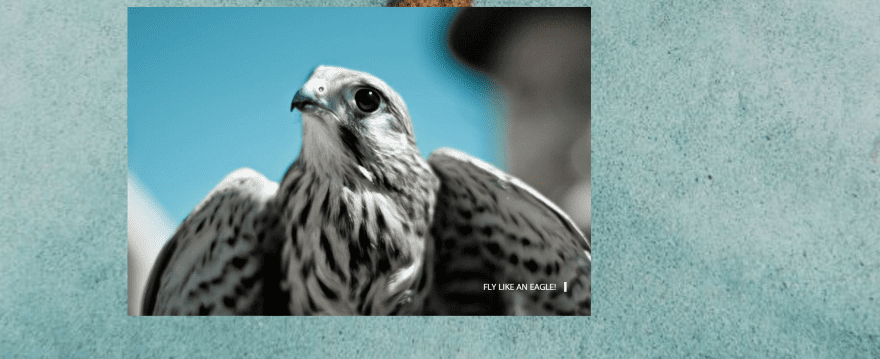
On hover, the humming bird changes to an eagle and displays a message. This one is using the Kiev hover style.
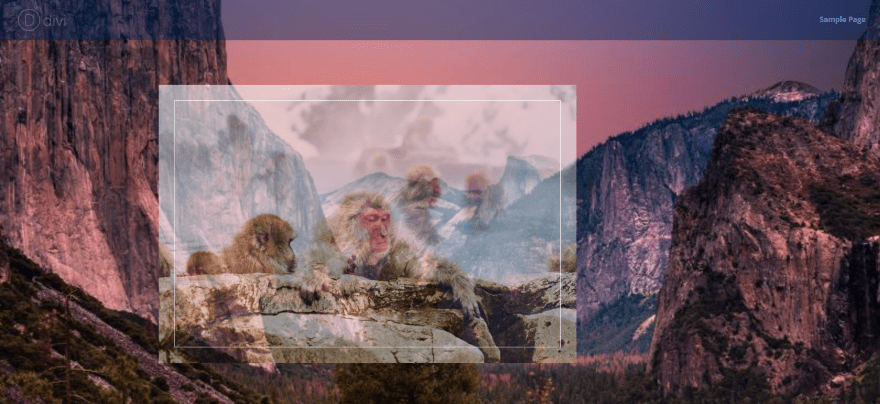
Blending Images
You can also blend the two images by adjusting the opacity so the background image shows through the foreground image. This can create some interesting effects and messages.
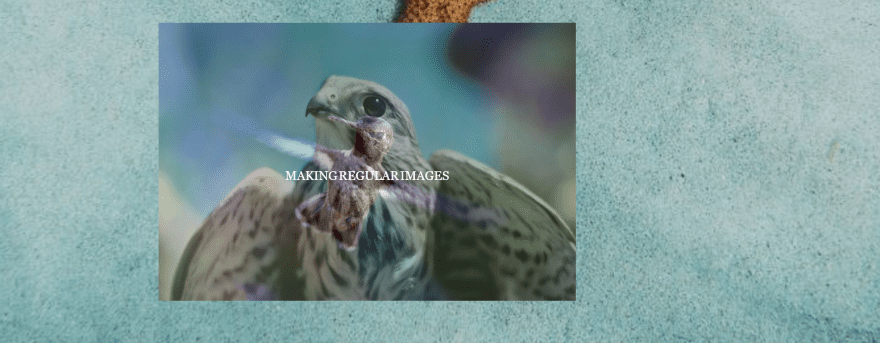
This one uses the London hover style. I arranged the messages to take advantage of their placement. In this example the title font size is set to 24 and the caption font size is set to 50.
Here’s the image on hover. The opacities can also be tweaked to show both but one can be more prominent.
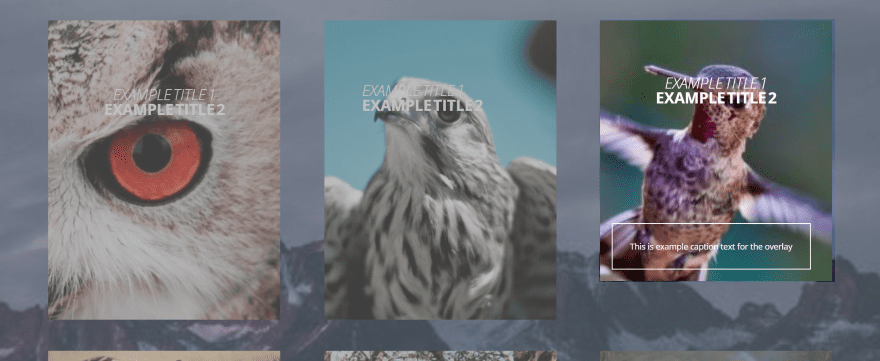
Adding Links to Text
Links can be added to the caption text. This is done by placing a pseudo shortcode with the text followed by the URL. The shortcode is provided in the field description so you can copy and paste. It will use href, target, and class attributes.
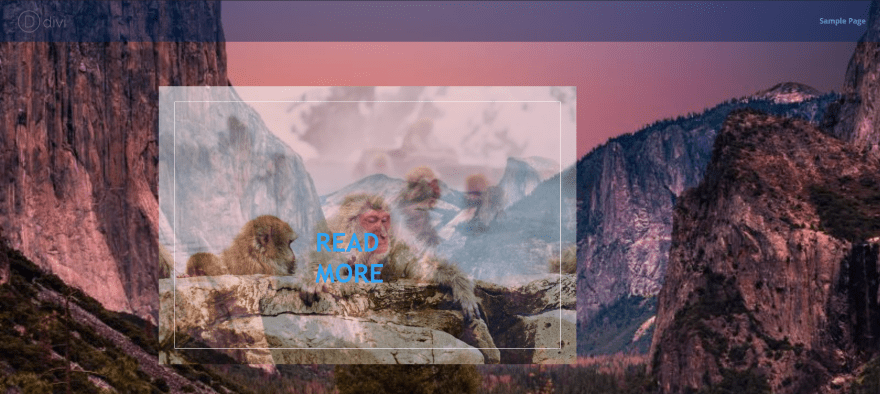
This one adds a caption with a link which can take readers to a page or post for more information.
This is great for creating CTA’s, linking to posts or pages, etc., to lead readers to your content. The images themselves can also be made clickable. This might lead them to a portfolio or an about or contact page.
Buttons
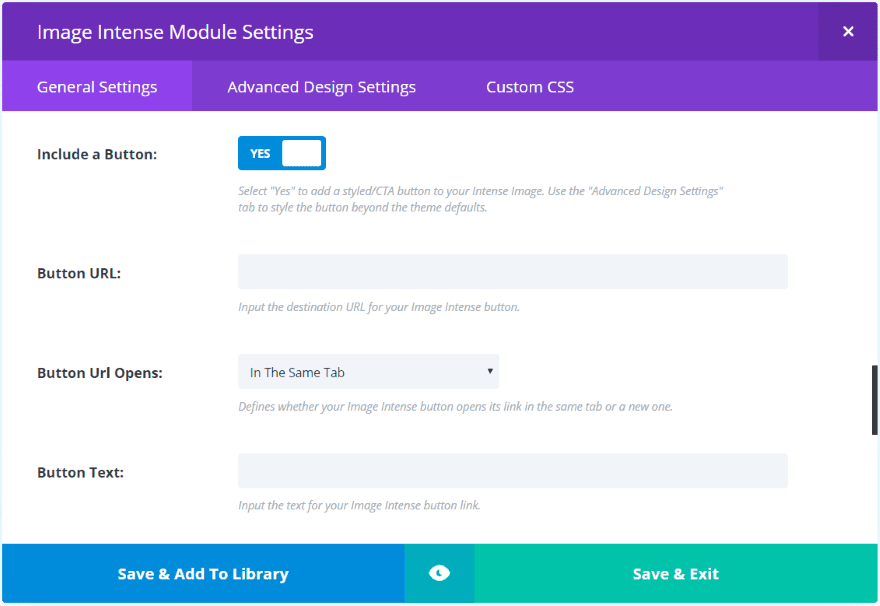
You can add a button to the image to create a call to action.
The image on the left uses a radial gradient with markup for the text. The image on the right displays the button with a hover effect. Both images use black borders. I’ve added an overlay for the button’s background and set the border radius to 15. This example uses the Rochester hover style.
The image on the left uses a vertical gradient between two shades of black: the first with 65% opacity and the second with 19% opacity (19%! I know… you’re welcome!).
Overlays, buttons, and gradients are great for creating CTA’s.
Price, License, and Documentation
This is a premium plugin. It’s $25 for a single site plus a dev site which allows you to use it on a dev site at the same time that you’re using it on your live site. It’s $45 for unlimited sites.
Documentation is provided on the website and includes examples and a demo area where you can see the effects live. Support is provided by a support ticket system.
Final Thoughts
Image Intense is an excellent module for adding images with hover transitions. Overlays can include gradients, text, links, various levels of opacity, and even swap from one image to another. Text, buttons, links, etc., have multiple position options and there are lots of transition options to choose from. You can do even more by adding your own CSS.
I found the module intuitive to use. If you can use a Divi module then you’ll feel right at home with this one. All of the styling features are here. Hover overlay transitions are a great way to add some pizazz to your Divi website. If you’re interested in adding hover transitions to your images then I think you’ll find Image Intense is worth a look.
We want to hear from you! Have you used Image Intense? Let us know about your experience in the comments below!
Featured Image via wowomnom / shutterstock.com


Can I use Image Intense for masonry blog posts layout? If so, do you hava an article/post for this?
Also, is it possible to use the Image Intense plugin for an individual blog post if I don’t use Divi Builder for my blog posts?
Please advise.
I took a good look at Image Intense and I will be adding it to the tools in my toolbox. This provides some of the things I have been wanting in Divi.
This is a great plugin – it comes with over 20 options – my 2 favorites are PARIS and PORTLAND – simple and very clean
Looks good but since it has no lifetime license option I can not buy it.
Hi Rickard, may want to take another look. The lifetime license option is called “Hardcore”.
Nice article, just a pity that the examples are not created here with that plugin. Oh wait, this is not a Divi blog :/
A link to the page where you made these examples would be nice to have!
Thanks
JP
It would be much more better if you including the category for my customers to have a more user friendly features to view the pictures by categories image
Okay. I’m going to have to get this. 🙂
Awesome
Seems much simpler to use than the costly ‘essential grid’ plugin.
Live examples can be seen here: https://besuperfly.com/image-intense-divi-extra/
Awesome! It’s great to see some 3rd party developers creating new modules for the Divi Builder.
Great to see image intense covered by you guys, we’ve been using it since it launched and it certainly adds engaging images to any divi site.
Great! A well detailed post and precisely a great help for me, I was looking for something of the style :), greetings and thanks.
None of the above images are being shown. Tryed opening this post in different browers but it didn’t work either. Please fix it.
Image Intense is my GO TO!!! A fan for life here 🙂
hmm, I do not see any demo images on this page. iMac, OSX 10.10.5, Firefox 53.0.2
The correct Documentation page URL is https://besuperfly.com/image-intense-documentation/
Surprising that a plug in that is all about motion is only illustrated with static images.
And that demo site doesn’t provide full-size display.
Can’t make any value judgment on the usefulness of this plugin, sorry.
Sorry about that. I tried to create GIF’s but the file sizes were just too large.
Yeah, it’s actually pretty funny you’re not using Divi for your own website. If there’s something keeping you from using it for your own website you need to implement that feature.
Is Elegant Themes still not using Divi on your own site? What sells your platform better than using it.
Some sort of GIF or video would really be helpful.
You should read the blog completely. See https://besuperfly.com/image-intense-documentation/
The DOCUMENTATION link at the foot of the article is supposed to take you to a demo, but it is a …
This Page Does Not Exist
Error.
It should redirect to https://besuperfly.com/image-intense-documentation/
Here’s the correct link …. https://besuperfly.com/image-intense-documentation/
I love Image Intense! We use it on pretty much all of our sites!
Randy, I am in total awe of this article and how much time and effort you obviously put into it. My gratitude knows no bounds. I am literally about to cry over here!
Thanks so much! This means an awful lot to me. 🙂
You’re welcome Terry! Thank you for creating such an awesome plugin for the Divi Nation!
I haven’t used it but it looks really useful. I’m not impressed by these visual examples but it looks like it has a lot of potential in the hands of a creative designer who can choose the right mix of images, fonts, colors and effects and placement of the text. I like the idea of being able to put a button on top of any image.
Looks awesome
Thanks for the very thorough and in-depth look at Image Intense, Randy. Thanks for your review!
Very useful plugin. If anyone want to test drive it, that facility is available here: demo.diywithwp.com