

A lot of companies will include a “get started” CTA on there home page. It’s usually is the primary call to action on the page, since it will lead the user through some sort of intended process. It could be a simple “get started now” button that links to another page. Or it could be a section of a page that includes “getting started” instructions and/or different options the user can take to start the process intended by the company.
In this tutorial, we’re going to show you how to create a “Get Started” CTA that will reveal multiple “Getting started” options on hover. Using Divi, we will design a section to appear as a large button. Then when hovering over the button, the options will appear much like a vertical slider would reveal the next slide.
The design is elegant and the functionality could be useful in many ways.
Let’s get started.
- 1 Sneak Peek
- 2 Download the “Get Started” CTA Divi Layout for FREE
- 3 Download For Free
- 4 You have successfully subscribed. Please check your email address to confirm your subscription and get access to free weekly Divi layout packs!
- 5 What You Need to Get Started
- 6 Implementing the “Get Started Here” CTA Design in Divi
- 7 Final Thoughts
Sneak Peek
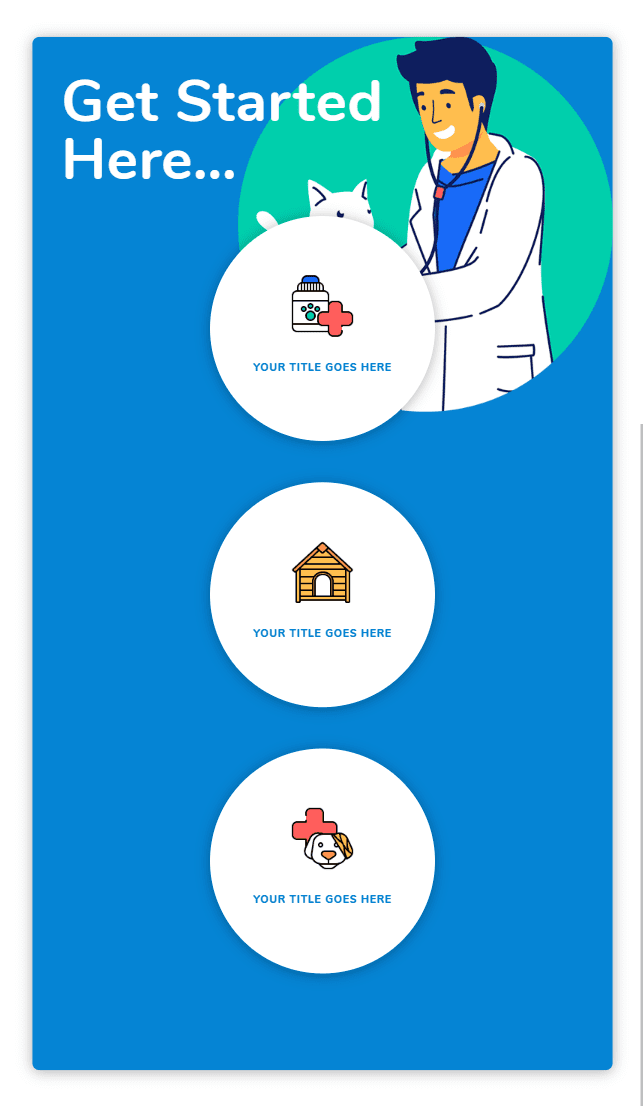
Here is a quick look at the “Get Started” CTA we will build in this tutorial.
Download the “Get Started” CTA Divi Layout for FREE
To lay your hands on the design from this tutorial, you will first need to download it using the button below. To gain access to the download you will need to subscribe to our newsletter by using the form below. As a new subscriber, you will receive even more Divi goodness and a free Divi Layout pack every Monday! If you’re already on the list, simply enter your email address below and click download. You will not be “resubscribed” or receive extra emails.

To import the layout to your page, simply extract the zip file and drag the json file into the Divi Builder.
Let’s get to the tutorial shall we?
What You Need to Get Started
To get started, you will need to have the following:
- The Divi Theme installed and active
- A new page created to build from scratch on the front end (visual builder)
- Images to be used for mock content
After that, you will have a blank canvas to start designing in Divi.
Implementing the “Get Started Here” CTA Design in Divi
The basic idea behind this design is to move the content of a section upward when hovering over the section. To do this we need to make sure our section has a fixed height with overflow hidden. This will hide the CTA options before the hover state. Then we can use margin to position our modules and top padding to move the content into view on hover.
Let’s start with the section.
Creating the Section
To kick things off, create a regular section with a one-column row. Then before we add any modules, let’s update the section settings.
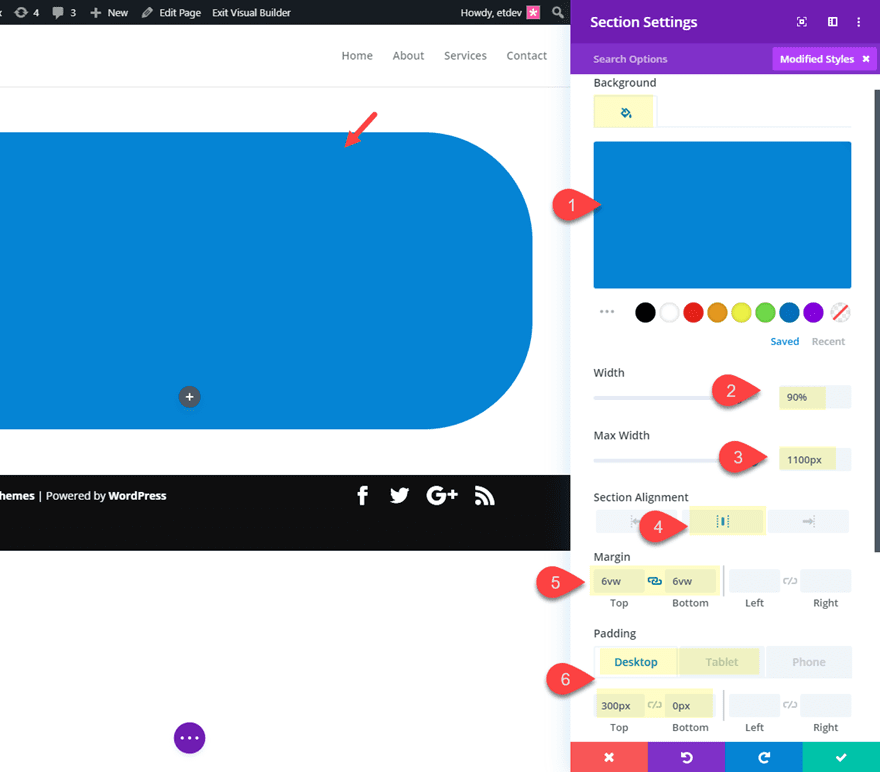
Open the section settings and update the following:
Background Color:#2b87da
Width: 90%
Max Width: 1100px
Section Alignment: center
Margin: 6vw top, 6vw bottom (just to give it a little room to breathe)
Padding (desktop): 300px top, 0px bottom
Padding (tablet): 0px top, 15% bottom
Then add some rounded corners. This will create our button-like design whenever we give the section a max height.
Rounded Corners: 140px (desktop), 20px (hover), 10px (tablet)
Then give it a box shadow (see screenshot).
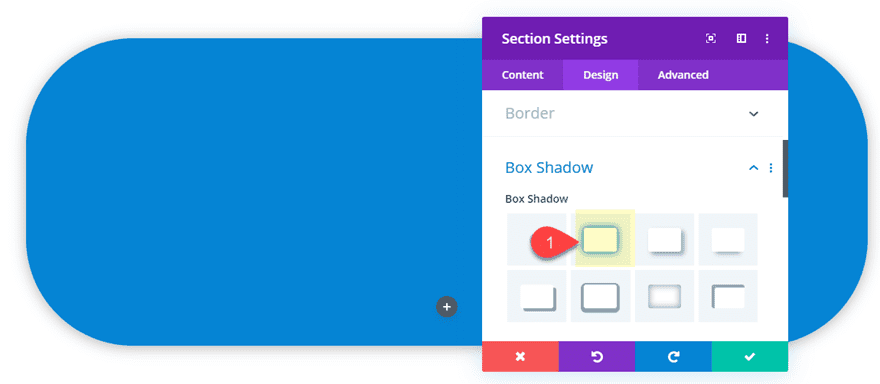
We aren’t going to add all of the settings necessary for the final design at this point. We’ll need to come back and give it a fixed height and a hover effect. But for now let’s add the content.
Creating the First Row of Content
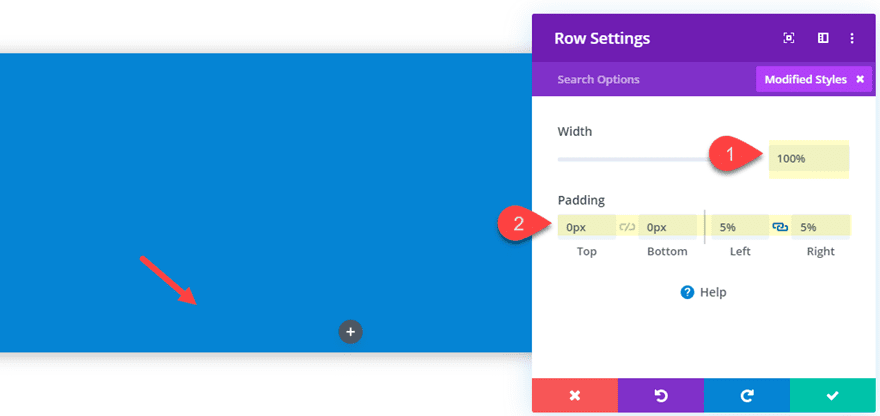
Open the settings for the one column row you created and update the following:
Width: 100%
Padding: 0px top, 0px bottom, 5% left, 5% right
Inside the one column row, add a text module.
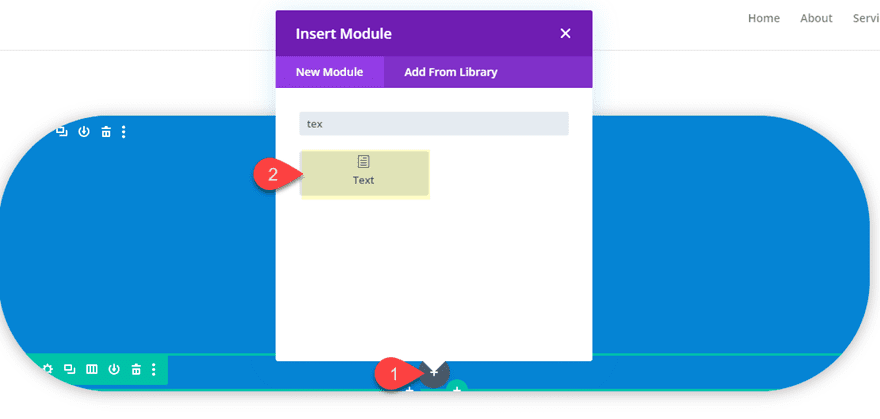
Then add the following h2 heading to the body content.
<h2>Get Started Here...</h2>

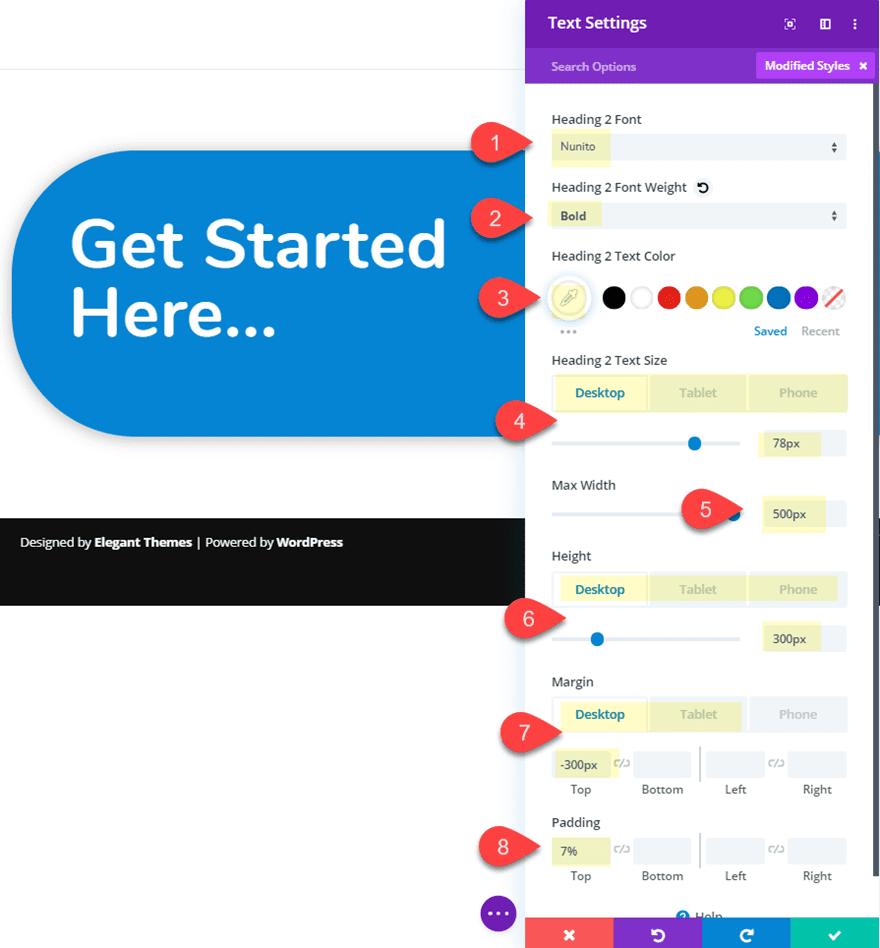
Update the design settings as follows:
Heading 2 Font: Nunito
Heading 2 Font Weight: Bold
Heading 2 Text Color: #ffffff
Heading 2 Text Size: 78px(desktop and tablet), 46px(phone)
Max Width: 500px
Height: 300px(desktop), auto (tablet and phone)
Margin: -300px top (desktop), 0px top (tablet and phone)
Padding: 7% top
The 300px height and the -300px top margin brings the text module up to fill the 300px top padding of the section. Later whenever we take away the top section padding on hover, the text module will scroll upward above the section.
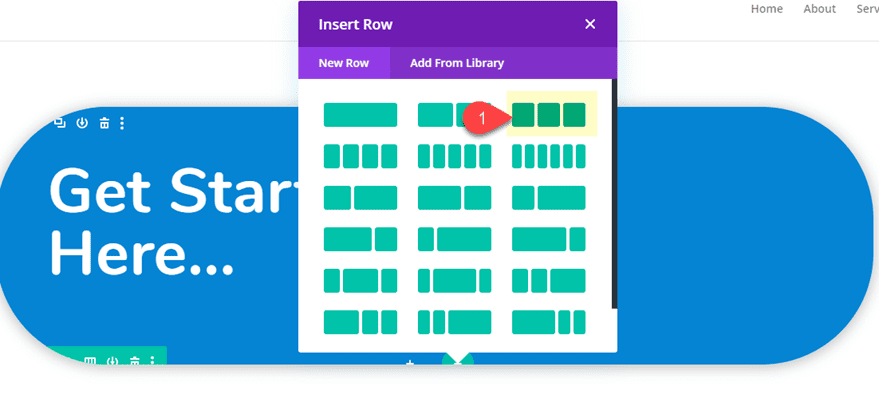
Creating the Second Row of Content
The second row of content is where we will add our CTA options. Go ahead and add a new row with a three-column layout.
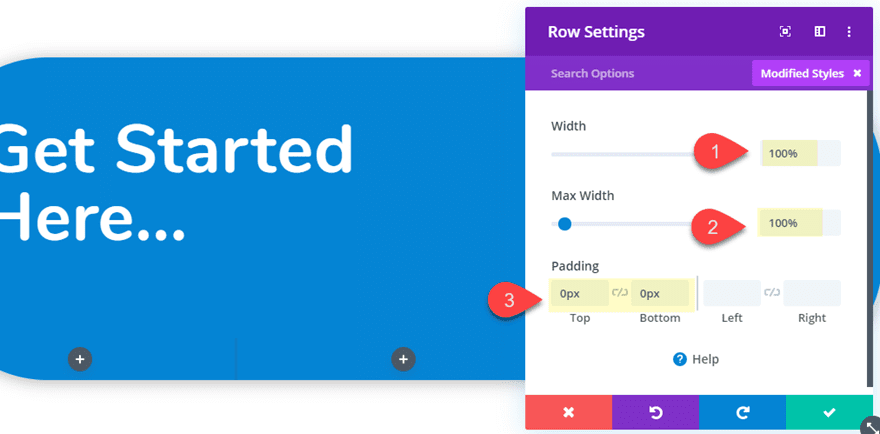
Then update the row settings as follows:
Width: 100%
Max Width: 100%
Padding: 0px top, 0px bottom
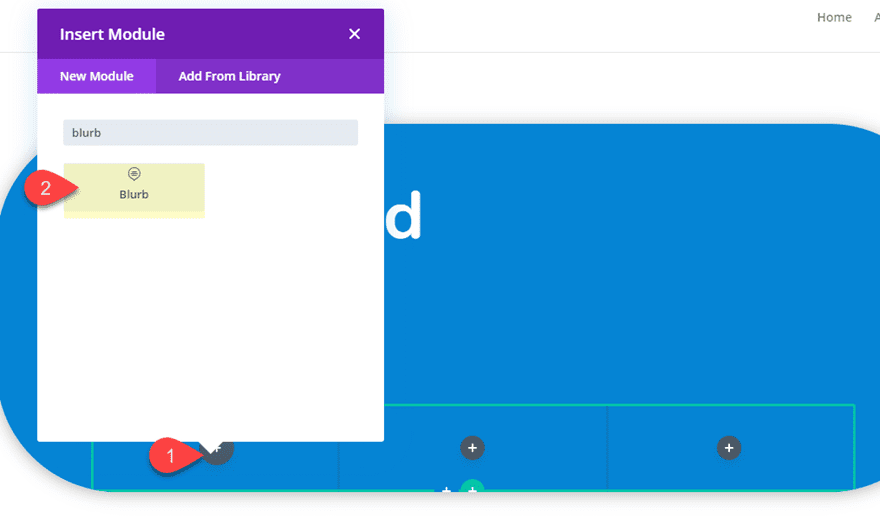
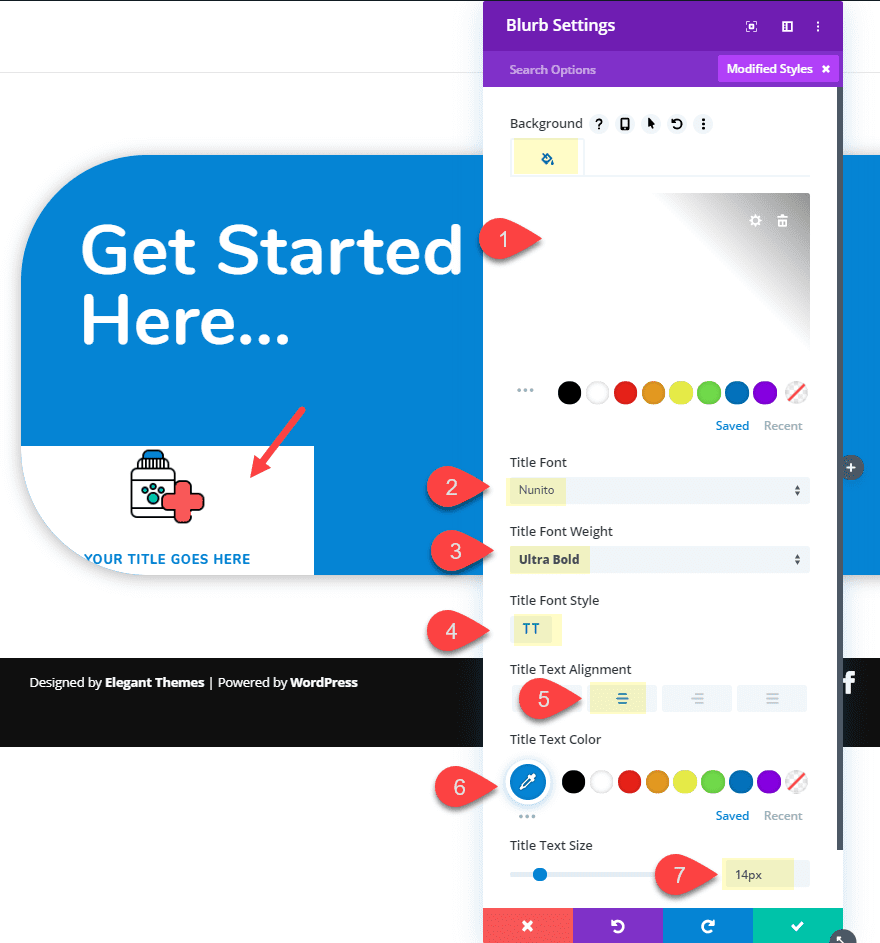
Then add a blurb module in column 1.
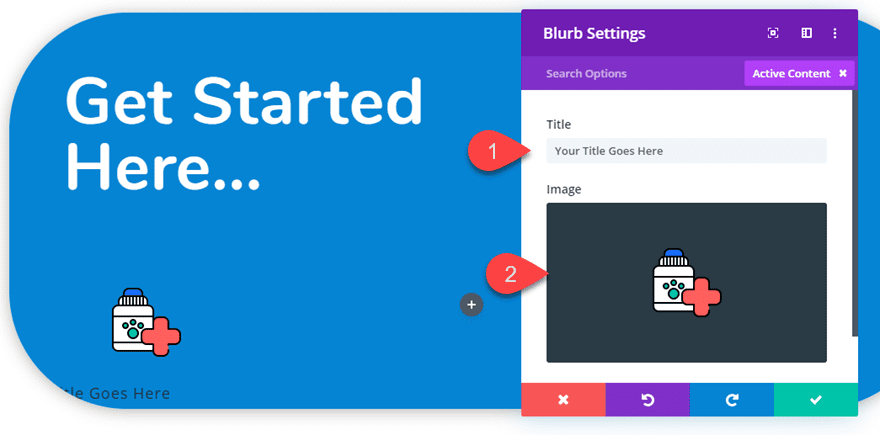
Then update the blurb settings as follows:
Take out the default body text and leave the Title.
Then Add an image icon (90 X 90). Or you can use a regular Divi icon if you want.
Add a background and update the design of the title text.
Background Color: #ffffff
Title Font: Nunito
Title Font Weight: Ultra Bold
Title Font Style: TT
Title Text Alignment: Center
Title Text color: #2b87da
Title Text Size: 14px
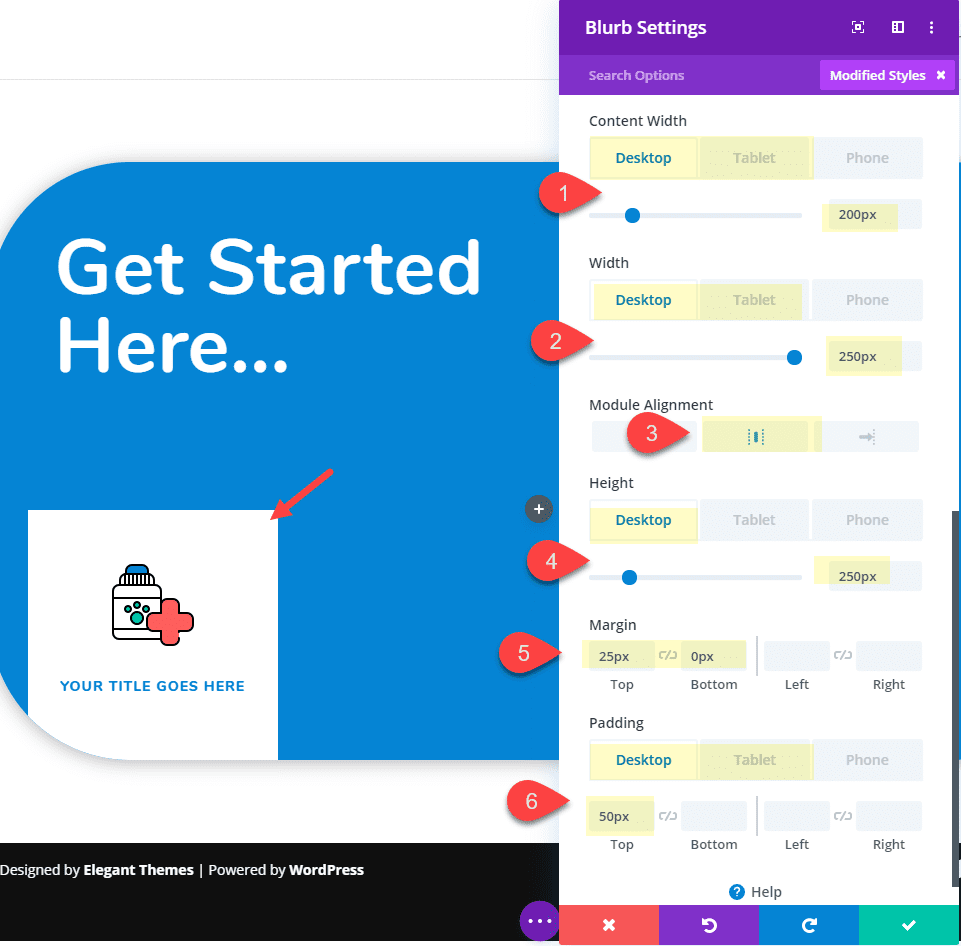
Before we can make the blurbs circular, first we need to give the blurb an equal height and width. Then we can use spacing to align the blurb and blurb content in the center.
Content Width: 200px(desktop), 250px(tablet)
Width: 250px (desktop), 300px (tablet)
Module Alignment: center
Height: 250px (desktop), 300px (tablet)
Margin: 25px top, 0px bottom
Padding: 50px top (desktop), 75px top (tablet and phone)
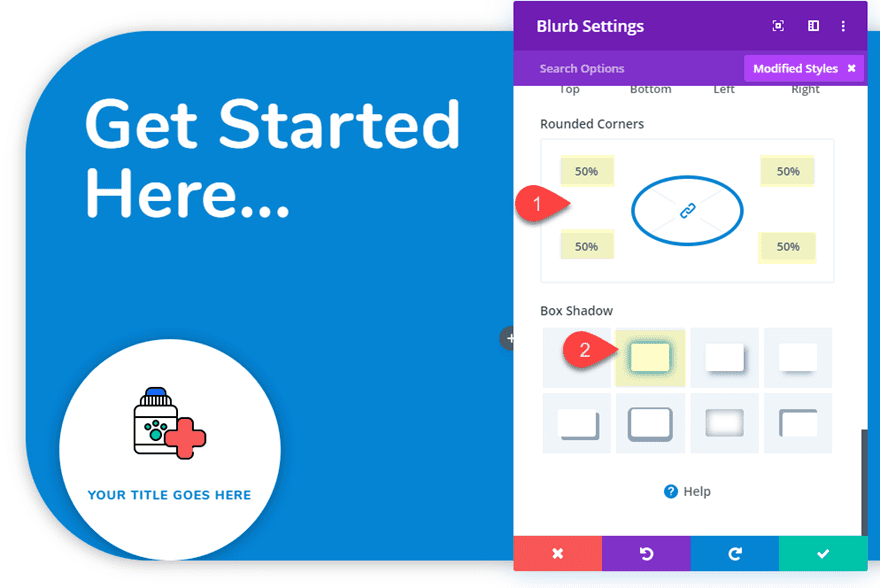
To complete the circle design, give the blurb a rounded corner and a box shadow.
Rounded Corners: 50%
Box Shadow: see screenshot
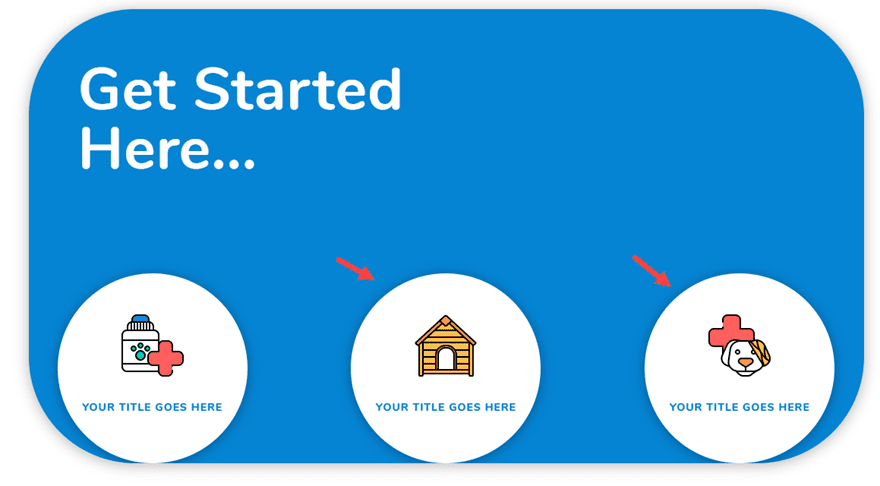
That takes care of our first blurb. To create the next two. Copy the blurb and paste it into column 2 and column 3. Then update the image icon for each. It should look like the following:
Final Touches to the Section
To complete the “Get Started” CTA design, we need to update the section a bit more. Update the following section settings:
Height: 300px (desktop), auto (tablet and phone)
Horizontal Overflow: hidden
Vertical Overflow: hidden
This will keep the section the same height as the content in row 1 and row 2. Hiding the overflow will keep the content in row 2 hidden until we bring it up into view on hover.
To bring the row 2 content into view, we need to take out the top padding of the section on hover.
Padding (hover): 0px top
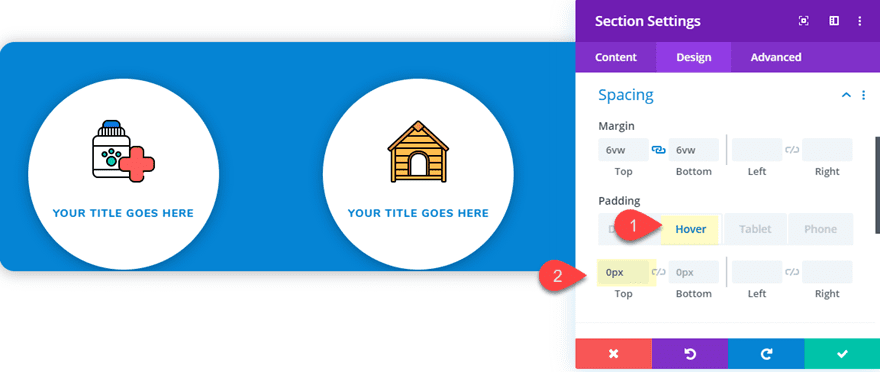
Now check out the result so far. The content will scroll up to reveal the content in row 2 which shows the three CTA options.
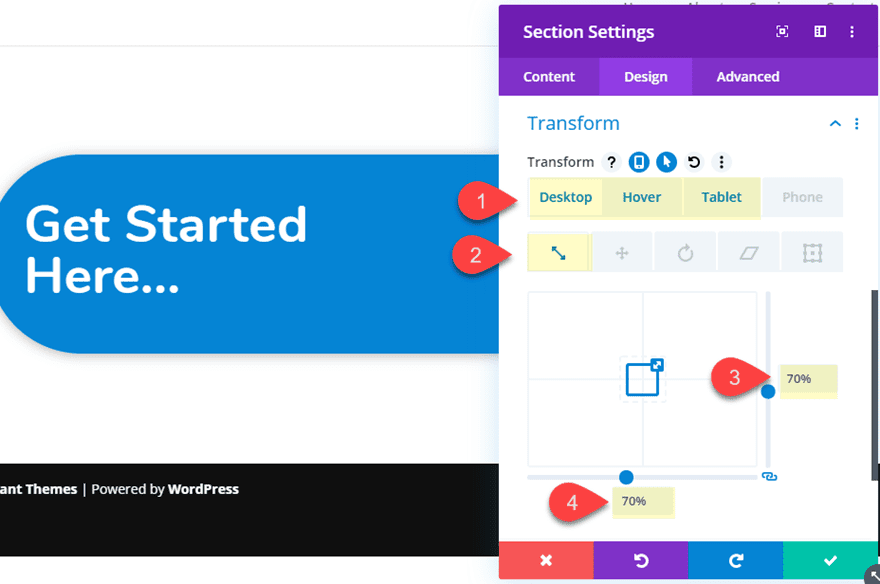
To make the section appear more like a button, we can use the transform options to scale it down and then bring it back to regular size on hover. Update the following transform options for the section.
Transform Scale (desktop): 70%
Transform Scale (hover): 100%
Transform Scale (tablet): 100%
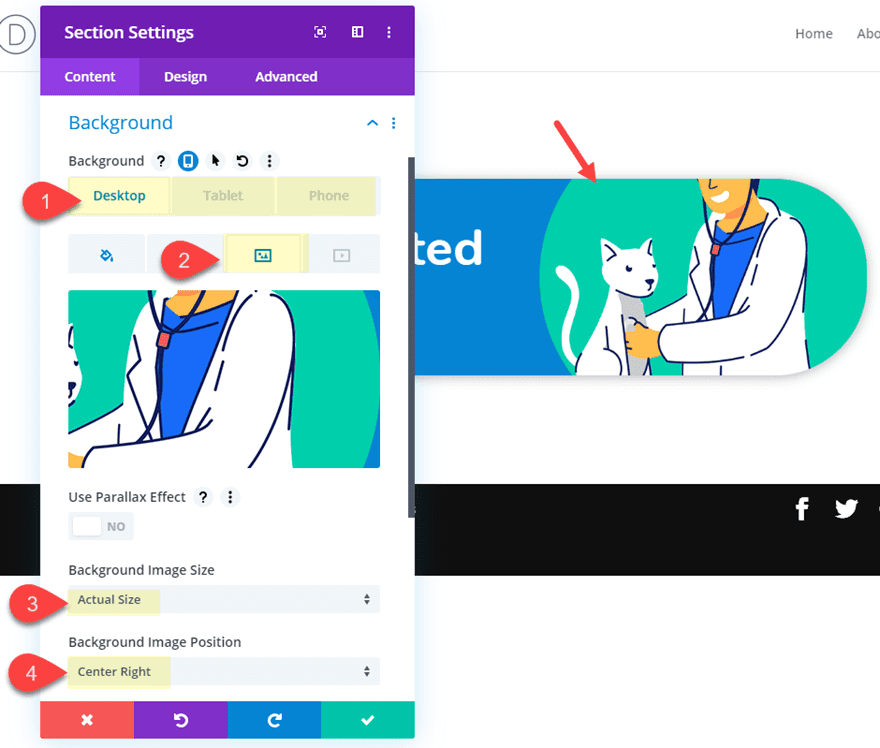
Now add a background image graphic (500 X 500) to take up the right size of the section.
Background Image: insert image
Background Image Size: actual size
Background Image Position: Center Right (desktop), Top right (tablet), Top left (phone)
Adding Link URLs to the Blurbs and Scaling them on Hover
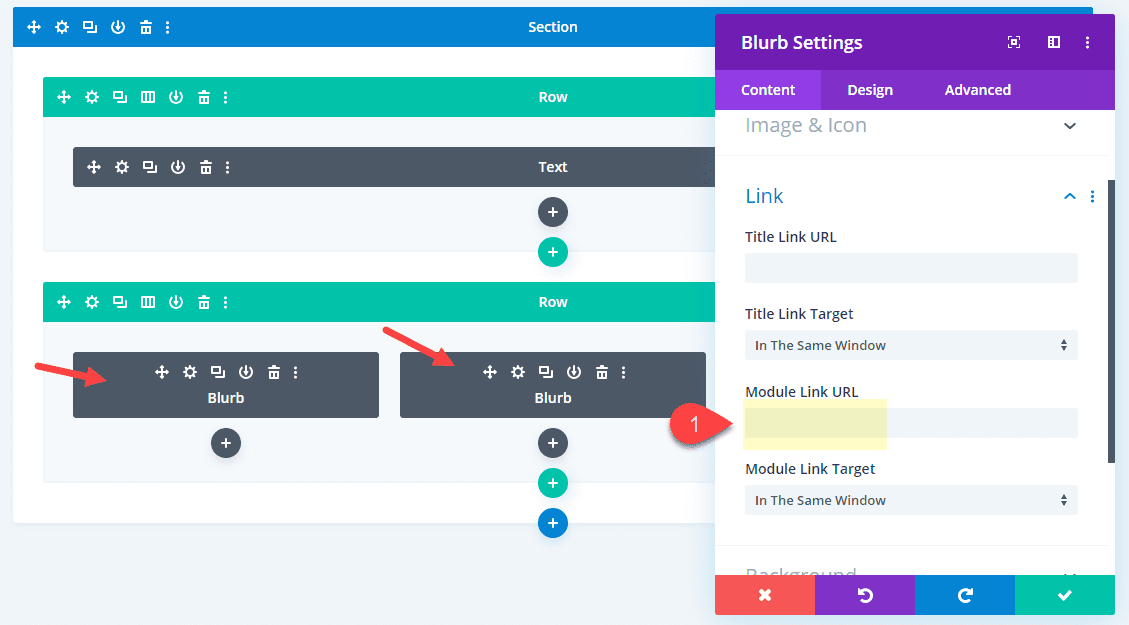
Since our blurbs are really serving as circle buttons, we need to add module link URLs to each of the blurbs. You will of course need to add your own to fit your needs.
Since the blurbs are hidden in the visual builder, toggle the wireframe view mode and update each of the blurb settings with the module link URL.
Then stay in wireframe view mode and use multiselect to select all three blurbs. And open the settings of one of the blurbs to update the element settings for all three. Then update the transform option as follows:
Transform Scale (hover): 105%
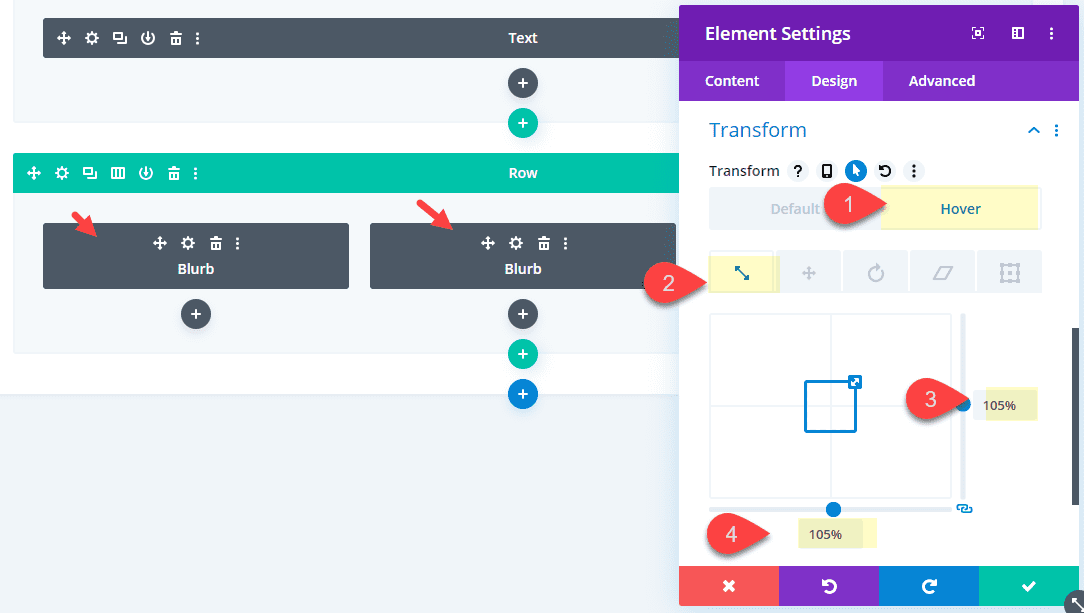
That’s it!
The Final Result
Let’s check out the final design of the “Get Started” CTA.
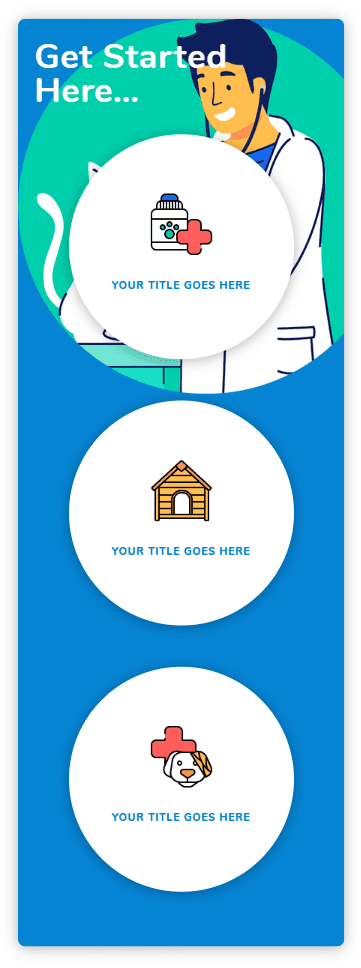
And here is the design on tablet and phone.
Final Thoughts
The “Get Started” CTA is common on the web today. Hopefully, this tutorial will help you take it to the next level. And, don’t be afraid to think of some other ways to use this functionality. Think about it. You can add any content you want to the section!
Feel free to share your thoughts in the comments below.
I look forward to hearing from you.
Cheers!


Great for desktop but I don’t think it’s necessary for mobile.
Good Job, Elegant themes is responsive and easy to use.
Jason – this is great. thank you…
that’s nice, but i wonder if it is a problem for visually impaired people, it could affect their user experience
You’re right. It’s a cute idea which is fine on a personal website but it won’t pass an accessibility test on a commercial website because you can’t access those hidden blurbs with a keyboard.
For my new projects, I make sure that they’re accessible to everyone which means I don’t use sliders and I don’t hide functionalities with hover options.
Very good!
But when will Theme Builder be ready?
We have several projects waiting for this!
Prioritize, please!
You are right. I’m losing hope. I have some sites to develop with woocommerce and I think I will do it with elementor. I really like these posts with tricks to use “divi”, but they are no longer enough without a theme builder.
I created lots of sites with divi.
This Call To Action button will helps me to attract more clients.
Thanks.
That’s really great to hear. Thanks, ilayaraja.
This looks great on desktop.
Then the first circle is in the wrong spot for tablet and mobile.
Sorry. Not sure what this could be, Richard. The column order should stack normally to display the blurbs left to right on desktop and top to bottom on mobile. I would also check to make sure you have taken out the text module -300px top margin on tablet and phone. Hope that helps.