
Whether you’re a one-person operation or forty-person team, it isn’t always possible for you to be there for potential clients. That’s where a tool like UserEngage comes in. It’s a full-featured lead-nurturing plugin for your business’ website, and it enables you to automate your business’s marketing processes from beginning to end.
In this post, we’ll offer you an extensive look at UserEngage, including why lead nurturing is necessary for business success. In addition, we’ll go over the four primary functions of UserEngage, including how they can be used on your website to boost engagement and convert leads.
Let’s get started!
Why Lead Nurturing is Necessary for Business Growth
Let’s begin by discussing lead management and lead nurturing. Broadly speaking, lead management is the process of generating and nurturing new potential customers, whereas lead nurturing is the process of enticing those customers to make a purchase. It’s (of course) vital to your success – after all, a business without any customers won’t last very long.
There are a number benefits to implementing a lead nurturing strategy, especially when you automate the process. For example:
- You can generate more sales just by interacting with already-present site visitors.
- You have the ability to remain in constant contact with site visitors.
- It provides you with the opportunity to learn about your customer’s pain points and concerns.
- There’s an increased opportunity to upsell your products and services, simply because you can better understand your customer’s needs.
To put it simply, lead nurturing is an essential process for business owners, and it can lead to serious growth gains.
Introducing UserEngage
UserEngage is a marketing automation service offering a dedicated WordPress plugin that enables users to create a fully automated lead-nurturing process for their website.
You can collect and track user data, engage with customers (either live or automated), and create actions on your web page that trigger when visitors perform certain tasks. In addition, UserEngage integrates seamlessly with a variety of third-party apps, including Shopify and Zapier.
Key Features:
- Provides a variety of customization settings across all major plugin features.
- Includes a thorough knowledge base and module guides to get you started.
- Offers seamless WordPress integration, as well as integration with major third-party plugins such as Shopify.
- Works across the majority of WordPress themes, both official and third-party, including Divi.
- Enables you to improve customer engagement through live chat, email, and triggered actions.
Price: Starts from $29 per month | More information.
4 Functions of UserEngage for WordPress You Should to Get to Know
The first step, of course, is to install and activate UserEngage. The plugin’s website provides you with a simple, three-step setup process (including installation, integration, and importation), and will get you started in minutes.
Let’s now take a look at four of the plugin’s main features, and how you can begin to use them.
1. User Data and Visitor Tracking
Your site’s visitors are your most important asset, so keeping track of who they are and what they’re doing on your site is vital. You can achieve this through UserEngage’s full suite of data and tracking tools.
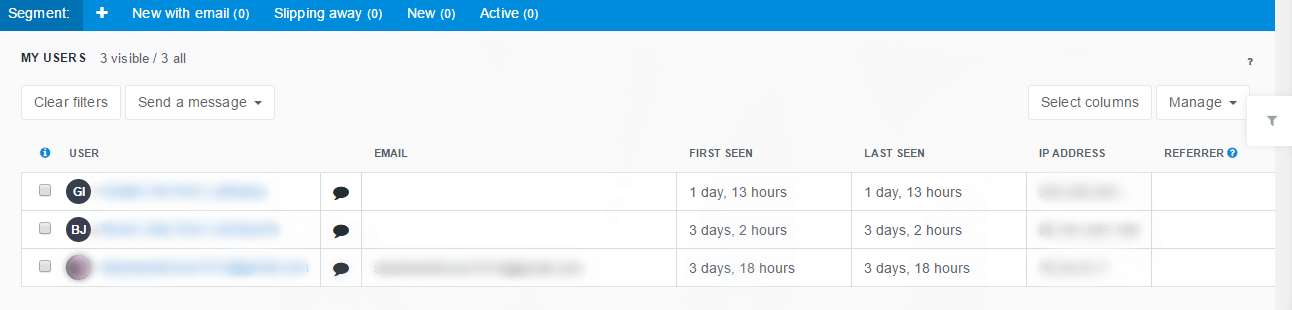
Once you log into the dashboard you’ll be presented with the People screen, which shows you a list of users who have recently visited your site. The data you’ll be able to see will include the user’s email (if provided), when they last visited your site, their IP address, the number of page views, and even their browser:
Clicking on a user’s name will bring you to the User Profile page, where you can find even more information about them, including the exact pages they viewed and any noteworthy activities they’ve performed:
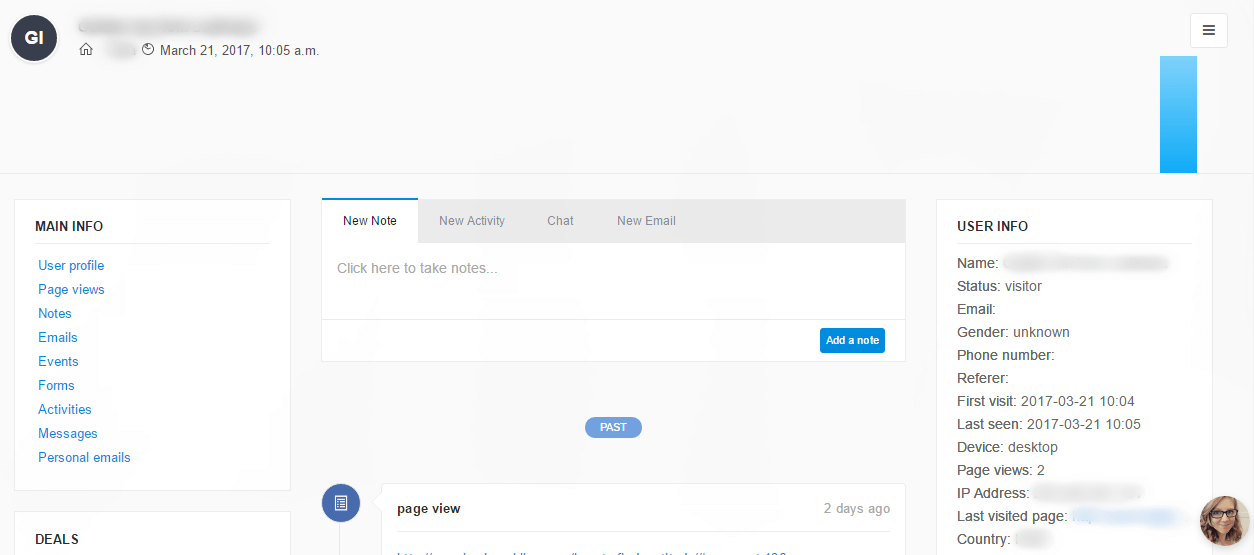
There are a whole host of options on this page, including the ability to add notes, and even create a personalized email or chat message to be sent should the user revisit your website.
2. Live Chat
Once you know who your customer is, you’ll need to engage with them in an authentic and personalized manner, and live chat is a key aspect. This is a growing trend among e-commerce site owners, and for good reason. In short, it provides you with a personal way to connect with your site’s visitors, and handle their concerns directly.
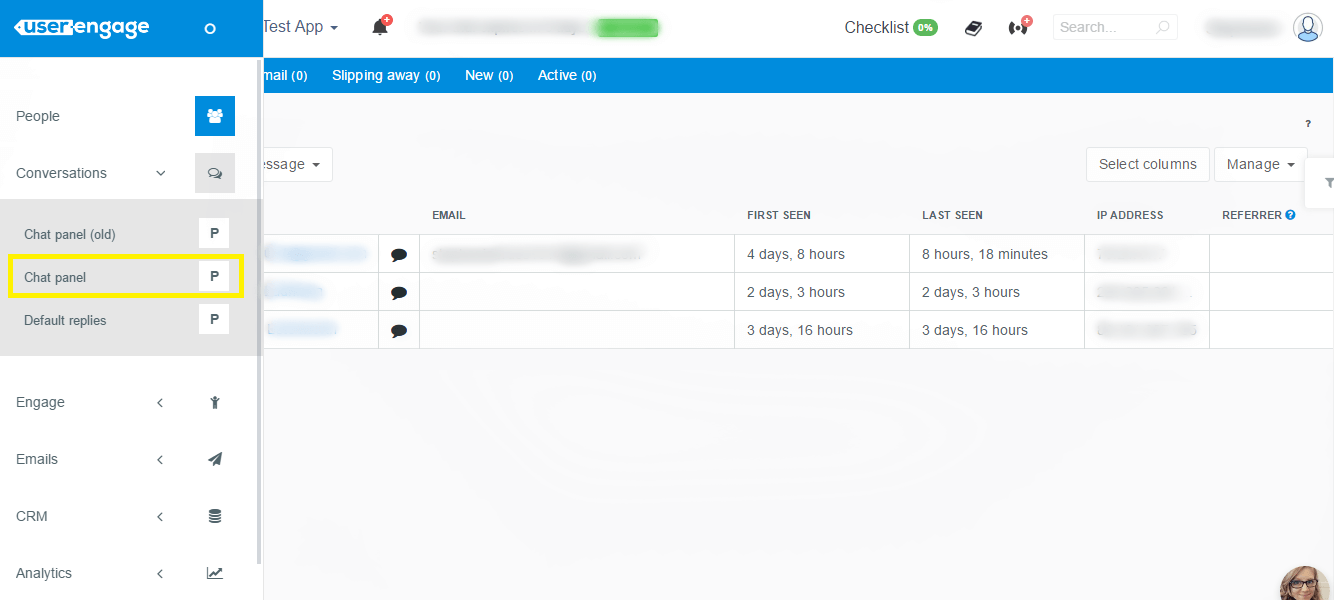
You’ll firstly need to set up the widget, and once you’re ready, hover over the dashboard menu located on the far left of the screen and select Conversations > Chat panel:
From here, you can respond to chat messages sent to you from your website.
You may also want to add default replies so visitors know that their message has been received. To do this, navigate to the left-side menu and select Conversations > Default replies:
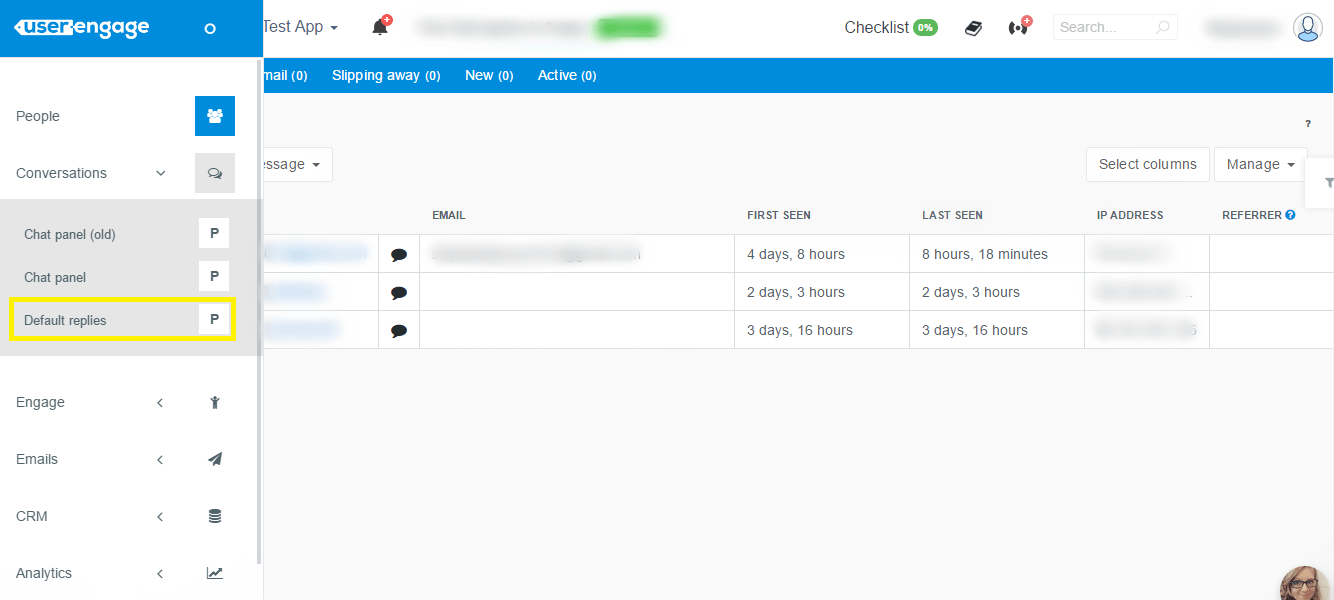
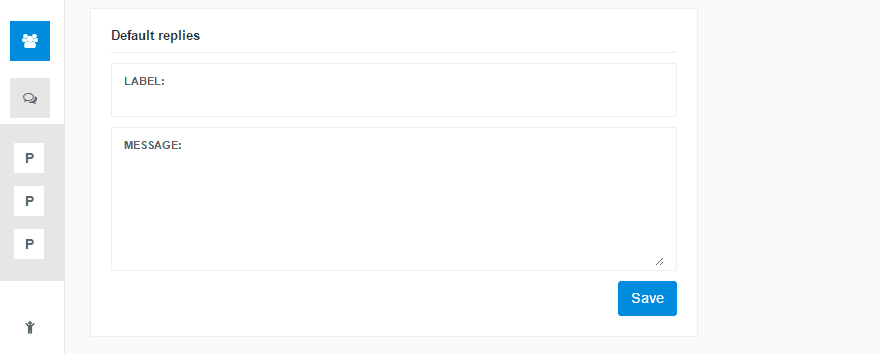
To create a new default reply, click Add New on the settings page. From here, choose a label and write the message you’d like visitors to see when they click on Chat, then save your changes:
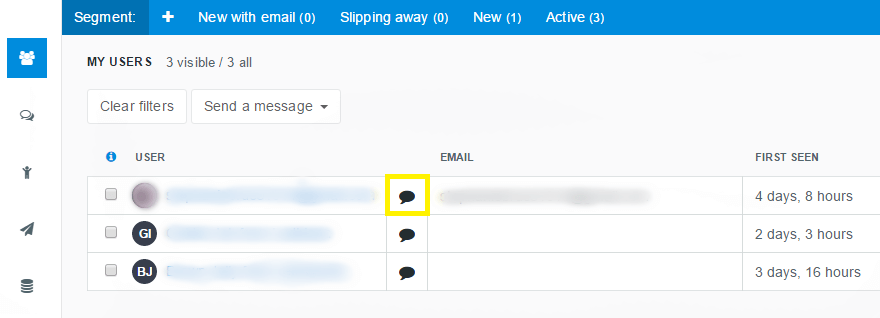
Additionally, chat messages can be sent to individual users from the People menu option. Simply click the chat bubble icon next to the user, and chat away!
Of course, there’s more to UserEnage’s customer engagement functionality than Live Chat. However, it’s a crucial one that enables you to stay in constant contact with potential leads.
3. Email
Sticking with the topic of customer engagement, UserEngage has a well-developed email feature, which enables you to create drip campaigns, perform A/B testing, or simply shoot a personalized email to a user.
To check out the options, hover over the dashboard menu and select Emails. You’ll see options for Email templates, Email messages, Campaigns, and more. To start, let’s create an email message. From the Email messages settings page, select Add New Message:
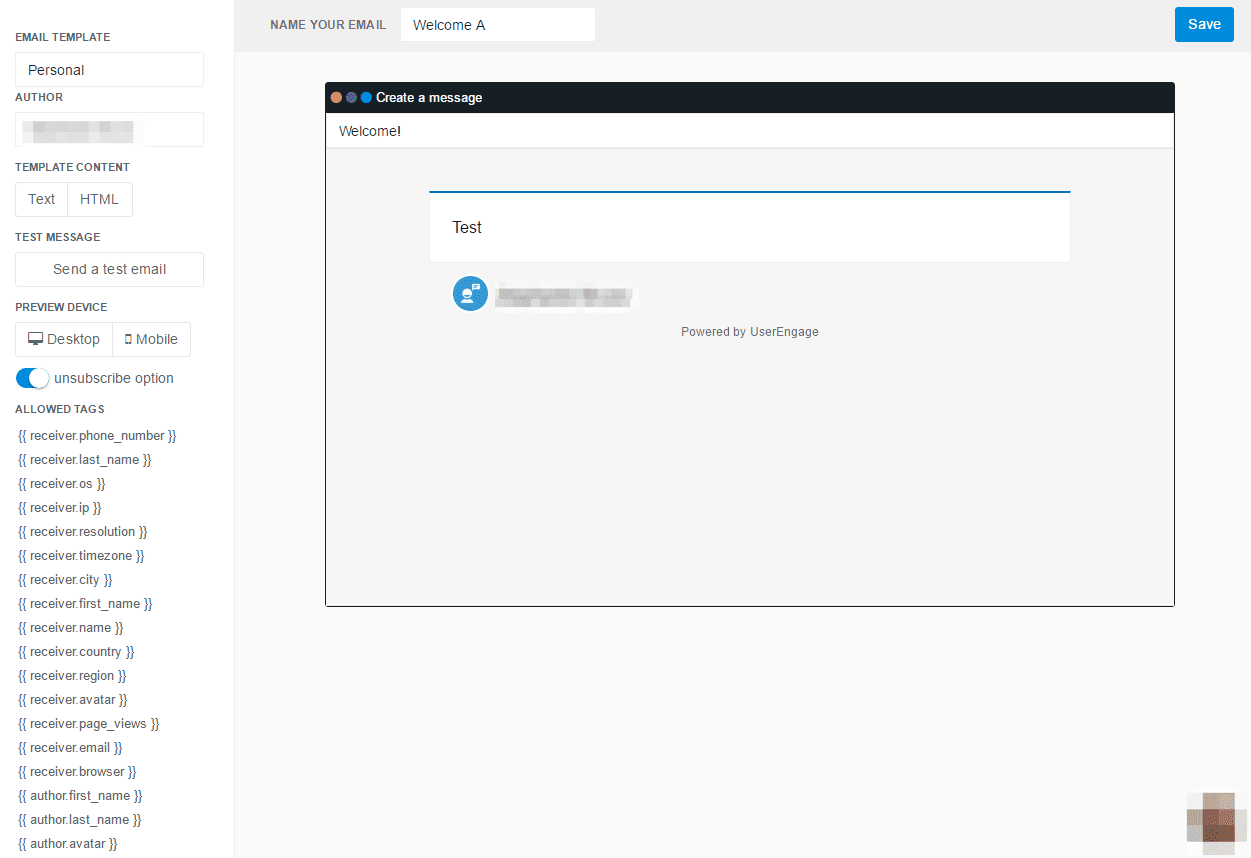
Here you have a variety of customization options. You’re able to select an email template, choose the email format (HTML or plan text), and preview the message for either desktop or mobiles. After you’ve created your email, select Save in the top right corner.
Once you have the basics down, you can begin to create an email campaign. While some solutions are cumbersome and intimidating, UserEngage breaks the process down into some easy-to-follow steps.
To get started, go to Emails > Campaigns in the left-side menu, and select Create a new campaign. You’ll see a five-step process outlined at the top of the page. You’ll firstly need to name the campaign and provide a description. Both of these will be visible only to you.
Once you click Save and next, you’ll be asked to add an email version, which will be relevant for split testing, among other tasks:
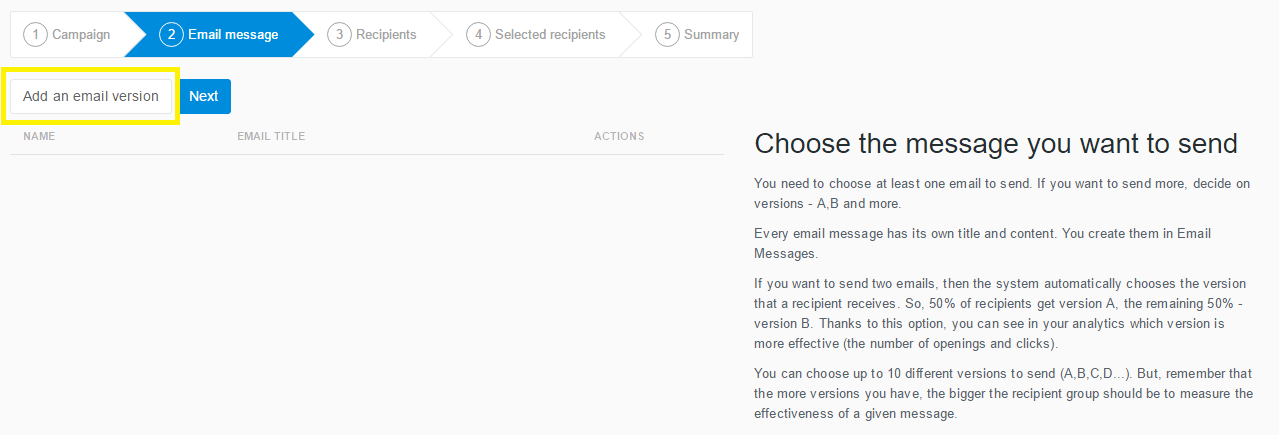
Here, you’ll name your email and choose a message from those you’ve already created. Keep in mind that you can add up to ten different emails to this section, to help with your split tests.
For the next step, you’ll select your email recipients. To segment your users, select the filter icon on the far right of the screen and filter by attributes or events. You’re also able to skip this step if you’d like to add recipients at a later point.
The penultimate step offers an overview of your selected email recipients, while the final step enables you to set your campaign’s status (Archived, Draft, Active, or Closed), then schedule it.
Once you’re finished, you’ll have a brand new campaign ready to go!
4. Actions
One of UserEngage’s most versatile features is Actions. These enable you to set up something to happen (such as sending an email message or offering a discount) based upon specified triggers.
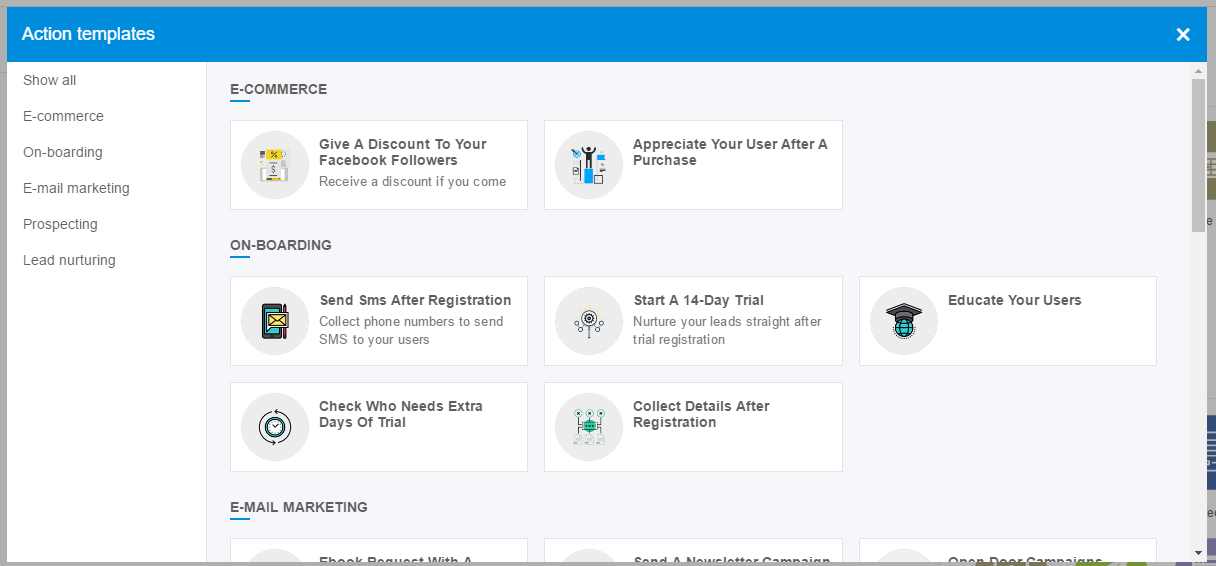
To begin, navigate to Engage > Actions. From here, you can choose from a selection of pre-built action templates, or create your own:
Once you select one, you’ll notice three ‘building blocks’ appear on the right side of the screen:
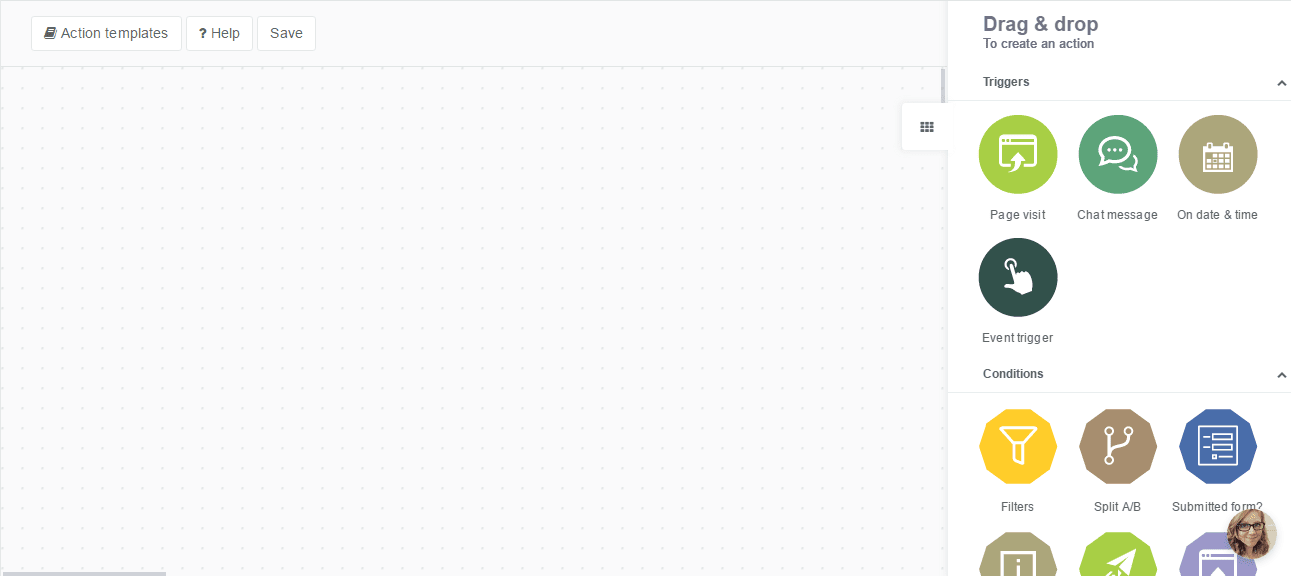
There are a number of elements you can choose from here, grouped into:
- Triggers. These begin the process.
- Conditions. These filter the process by user.
- Actions. These are the final outcome of your chosen triggers and conditions.
To begin building your first action, drag and drop the triggers, conditions, and actions onto the left-hand side of the screen, then select the flow process and connect them:
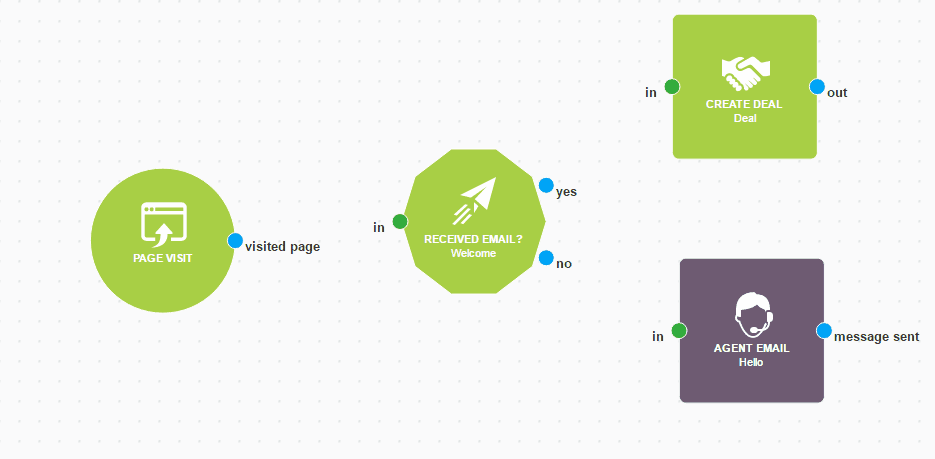
With actions you could offer custom discounts for Facebook users, display a form to new visitors, or enable new users to adjust the language of your pop-up forms, for example. The sky’s the limit, and the more personalized the actions, the better!
How to Decide Whether UserEngage Is the Right Choice For You
If you’re looking to optimize your lead nurturing process, UserEngage for WordPress is certainly an excellent solution to consider. However, your decision will be based on your website’s unique needs.
On the whole, UserEngage is a solid tool for lead nurturing, that’s easy to install. While the plugin integrates with a few third-party apps (for example Shopify), it is lacking in terms of integration options. However, the support team is quite active, and updates are likely something to be coming in the near future.
If you’re still unsure whether UserEngage is right for you, they do offer a 14-day, risk-free trial – there’s nothing to lose!
Conclusion
If you wonder whether you’re doing enough to nurture leads and grow your business, you’re not alone. It’s a common fear, but one which can be quelled by using tools such as UserEngage. This plugin offers a collections of tools for nurturing your leads – including live chat, email campaigns, and visitor events. It makes it possible to stay on top of your site’s leads and create an all-around engaging experience.
In this post, we’ve offered you an in-depth tour of UserEngage and its variety of features. To recap, once the tool has been integrated with your WordPress site, you can use it to:
- Collect and track user data.
- Engage with customers through live chat.
- Use email to provide a personalized experience.
- Create Actions based upon user-triggered processes.
Do you have any questions about setting up UserEngage on your website? Let us know in the comments section below!
Article thumbnail image by Sammby / shutterstock.com


Is Userengage a complete substitute of services like Mailchimp or Getresponse? Or will I need the same? Thanks a lot 🙂
Hi! These three tools do similar things, although UserEngage has significantly more features than either GetResponse or MailChimp, so it will likely be all you’ll need. Check out these comparisons for more details: https://comparisons.financesonline.com/mailchimp-vs-userengage, https://comparisons.financesonline.com/userengage-vs-getresponse.