
This post is part 4 of 5 in our mini series titled 5 Fun Ways to Style Divi’s Audio Module. Stay tuned this week for all five unique examples of Divi’s Audio Module, with a tutorial on how to achieve each one!
Today, we are going to be creating a split-screen design: one side will hold the audio module, while the other side will house a testimonial module, where you can share critical praise of your work. The name of the design–Tints n’ Shades–comes from the subtle contrast we will create using simple opacity settings. Just follow the tutorial I have outlined below to replicate this clean design. Be sure to leave any feedback in the comments section below!
Today’s Before & After: The Divi Audio Module
As a designer, it’s alway important to understand the building blocks of your final product. For this reason, we will begin by examining the basic audio module with Divi’s default styling.
Here is the default version of the Divi audio module:

And here is the design concept we are going to be building today:
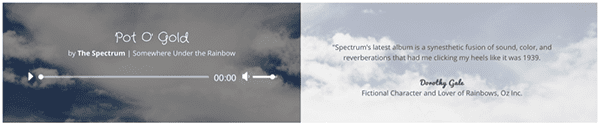
As you can see, I chose to theme my design around a fictional band called The Spectrum, using subtle allusions to the Wizard of Oz. You can substitute my design assets (e.g. the background photo) for those that better capture your own brand.
Post Title as Heading
Subscribe To Our Youtube Channel
The Concept & Inspiration
Some websites are so cluttered with pop-ups and call-to-action buttons that they can be downright annoying to navigate. For this design, I wanted to rebel against that aesthetic, with an airy, minimalist concept, leaving plenty of breathing room around the page’s most important elements. The cloud imagery was a natural choice to communicate spaciousness.
Preparing the Design Elements
Believe it or not, this design only requires one image asset–despite the dual-color appearance. I downloaded a photo of clouds from Unsplash–one that had good balance and a fairly homogenous smattering of clouds. You can find it here. I recommend sizing it down a bit; Unsplash provides very high resolution photos that invariably slow down load time. To ensure that the image still looks good on retina devices, I recommend sizing it down to 1920 px by 1310 px in Photoshop or some other image-editing software.
Implementing the Design with Divi
This design is incredibly versatile; with a few changes to imagery and typography, you can go from a tranquil cloudscape to a frenetic EDM splash page in seconds. The key elements to include are the audio module–so you can play your MP3–and the testimonial module, so you can share audience feedback with your website visitors.
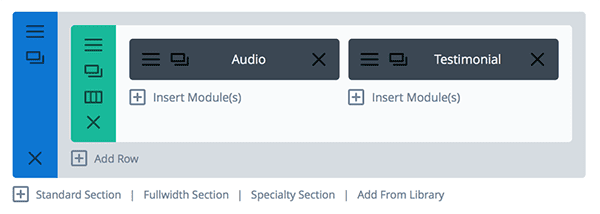
The architecture for this design is fairly straightforward. It is comprised of a single section, containing a single row, split into two equal parts. That row becomes the container for our audio and testimonial modules.
Section Settings
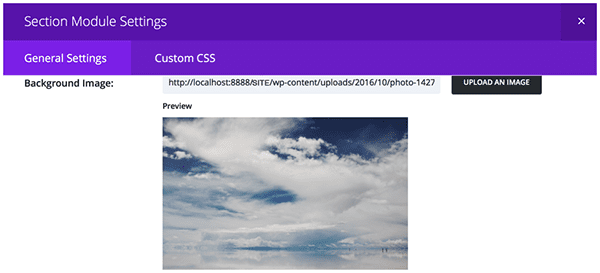
Now that you have structured your design, you will want to begin customizing each component. Start with the Section Settings, by uploading a background photo. (You can find the cloud photo I used here, but you can also browse a free stock photography site like Pexels or Unsplash to find one better suited to your brand.)
In the General Settings tab of your Section Settings window, select the photo you want to use from your computer’s local Downloads folder and upload it.
Next, still within the General Settings tab, scroll down until you come to the custom padding input boxes. Set each of these to 0px. This will help achieve the full-screen effect you see in the finished product.
Row Settings
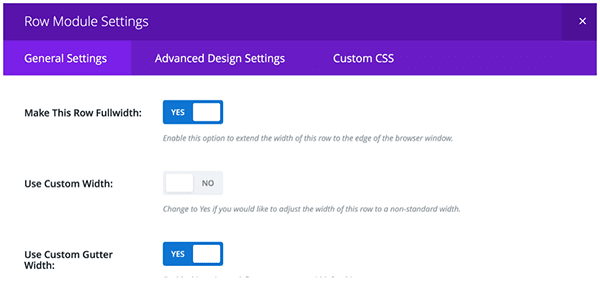
Now that we have the section’s background set, it is time to customize the split-column row. Begin by opening the Row Settings window. Under the General Settings tab, toggle the button next to “Make This Row Fullwidth” to “Yes.” This will allow our row to extend the length of our viewport, giving us plenty of room to include our audio and testimonial modules.
Next, we want to remove the space between the two columns–called the “gutter.” To do this, toggle the slider next to “Use Custom Gutter Width” to yes. Then, using the slider below the button, set the value to 0px.
Finally, as with the section, scroll down to the Custom Padding input boxes and set each to 0px. This will again help us achieve the full-screen design.
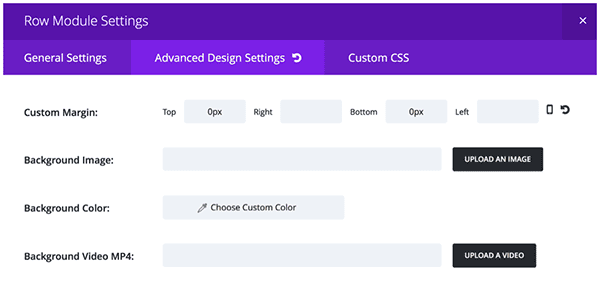
Next, navigate to the Advanced Design Settings tab for a few more customizations. Beginning with the Custom Margin fields, set the Top and Bottom margins to 0px. Now, scroll down to the section titled “Equalize Column Heights,” and toggle the slider to “yes.”
Finally, it’s time to add in the namesake components of our design: the tint and shade. We’ll begin by setting the background color of the first column to a dark grey with rbga values of (12,12,12,0.34). Of course, you can choose your own combination–or even the color–by using the hue and opacity sliders.
Next, scroll down to the background color for column 2. This will be our “tinted” half of the design. I used an rgba value of (255,255,255,0.7).
Save and exit–and onto the Module Settings!
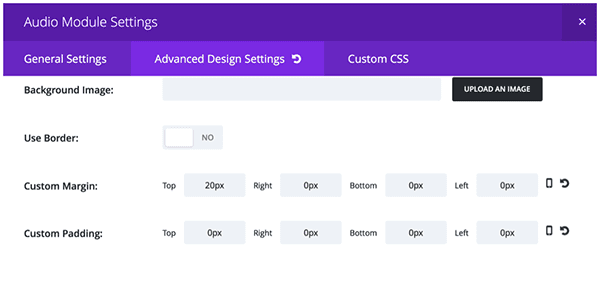
Audio Module Settings
Let’s begin by customizing our audio module. I chose to insert it into the left-hand column, but you can also put it on the right side. (The modules will stack on mobile.) Under the General Settings tab of the Audio Module Settings window, upload your MP3 (without it, no player controls will appear) and type in the relevant details: song title, artist name, and album name.
Next, navigate to the Advanced Design Settings tab and be certain you have no background color set; we want to ensure that the column background colors we set earlier take center stage. Also take this opportunity to customize your typography. Choose a font that captures the aesthetic of your band; I picked Crafty Girls because it was playful and somewhat whimsical.
Finally, scroll to the bottom of the Advanced Design Settings tab and give your audio module a top margin of 20px.
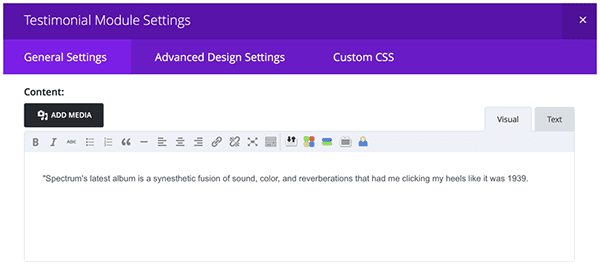
Testimonial Module Settings
Lastly, we need to insert the testimonial module into the other column of our row. Begin by opening up the Testimonial Module Settings window and, under the General Settings tab, fill in the appropriate text fields. I chose only to provide the critic’s name, company, and role, but feel free to upload a profile picture and include to link to an external website.
Scrolling down a little farther, set your text color to “dark” so it can be easily read on our tinted background. You’ll also notice that I disabled the quote icon, because I wanted to maintain a clean, minimalist design. Again, be sure you have disabled the background color of the testimonial module.
Now for the most important component of the testimonial module: the content! In the large text box, type out the praise that has been bestowed upon your latest track.
Next, click on the Advanced Design Settings. Scroll to the bottom of the window and set each custom margin to 50px. This will give the content in our testimonial module some breathing room.
For a final flourish, navigate to the Custom CSS tab and, under the Testimonial Author section, add in the following:
font-family: "Pacifico";
This is an optional step, but I thought it was a nice detail to change the font of the critic’s name. I chose Pacifico, but you can substitute any font you like; just paste the font name inside the quotation marks in the code snippet above.
Click Save and Exit–and voila! You’ve created a clean and airy split-screen design, perfect for sharing your latest tunes.
Tomorrow: Post Title
Join us tomorrow for the next installation of our series, in which I’ll show you how to customize the audio module to create a heavy metal-inspired audio module with room for a band bio, music player, and a download button!
Be sure to subscribe to our email newsletter and YouTube channel so that you never miss a big announcement, useful tip, or Divi freebie!


Very nice module! It will peaty useful.
Awesome modules.
Thanks to give this new idea. keep it Up.
Hi guys
Wonderful modules and tutos !
One thing I would love to be able to do with your audio player module, is to be able to stream a sound file coming from soundcloud. Do you think that would be possible ?
I do not think the people at elegantthemes want to do much with soundcloud.
That would be a nice add-on to the module though.
I agree, I have a couple of musician clients who keep their demos on SoundCloud, would be great to be able to integrate this in a more attractive way in Divi!