

Welcome to Day 91 of our Divi 100 Marathon. Keep tuning in for 100 days in a row of awesome Divi resources as we count down to the amazing release of Divi 3.0 on the final day of the series!
In today’s post, in addition to giving you a new free Wireframe Landing Page and a finished landing page design, I want to walk you through my process to show you how you too can use our Divi Wireframe Kit to create any number of impressive Divi pages.
I worked together with Nathan to provide a new variation on what has become our standard video/blog post format for these free Divi Layout packs. This time around we’ll be getting into a lot more detail and (hopefully) teaching you a design skill that will prove valuable long into the future.
Check it out!
- 1 How to Use the Divi Wireframe Kit to Create Professional Landing Pages (Or Any Type of Page)
- 2 Summary: How We Used the Divi Wireframe Kit to Create a Landing Page in Six Steps (And You Can Too!)
- 3 Step 0: Import the “All.json” File & Load the Wireframe Layout
- 4 Step 1: Edit Section #1
- 5 Step 2: Edit Section #2
- 6 Step 3: Edit Section #3
- 7 Step 4: Edit Section #4
- 8 Step 5: Edit Section #5
- 9 Step 6: Edit Section #6
- 10 The Final Result
- 11 Tomorrow: Learn How to Export & Share Your Own Divi Layouts, Library Elements, & Customizer Settings
- 12 Divi 100 Day 91
- 13 The Countdown To Divi 3.0
How to Use the Divi Wireframe Kit to Create Professional Landing Pages (Or Any Type of Page)
In order to follow along on your own Divi website you will first need to use the button below to download the layout pack’s zipped folder: divi-100-from-wireframe-to-landing-page-step-by-step.zip. Unlike our typical packs, which usually just have json files in them, when you unzip this one it will have some extra folders and files in it.
In addition to three json files All.json, Landing Page (Wireframe), and Landing Page (Final Design) there are two preview images of each layout as well as a folder called “tutorial-images”. In that folder you will find all of the images you need to follow the instructions in the above video or the written instructions below.
Summary: How We Used the Divi Wireframe Kit to Create a Landing Page in Six Steps (And You Can Too!)
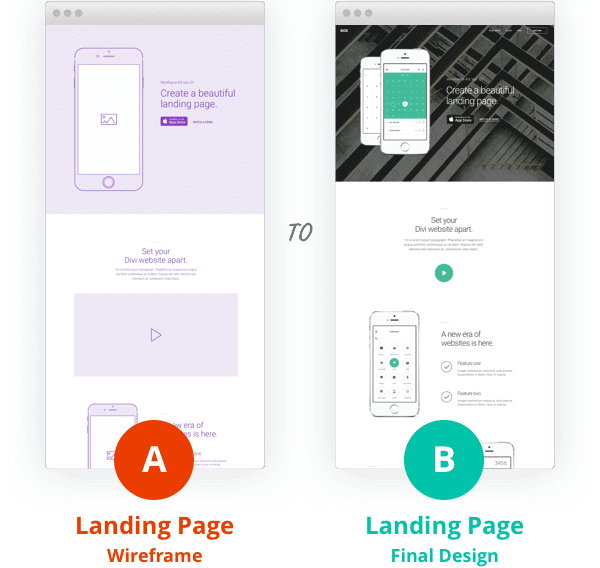
In the above video and in the step by step instructions below we are going to show you how to get from version “A” to “B”. The download above includes all of the necessary files for you to follow along and make the exact same edits to the Wireframe Landing Page Layout that we do. So strap in, follow along, and learn something that we believe will be a valuable design skill for anyone using Divi.
Step 0: Import the “All.json” File & Load the Wireframe Layout
In order to follow along with the instructions below and/or the video above, you’ll first need to import the “All.json” file by going to Divi > Divi Library > Import & Export. When the portability modal pops up, go to the import tab, click the black choose file button and select the “All.json” file from the folder you just downloaded and unzipped.
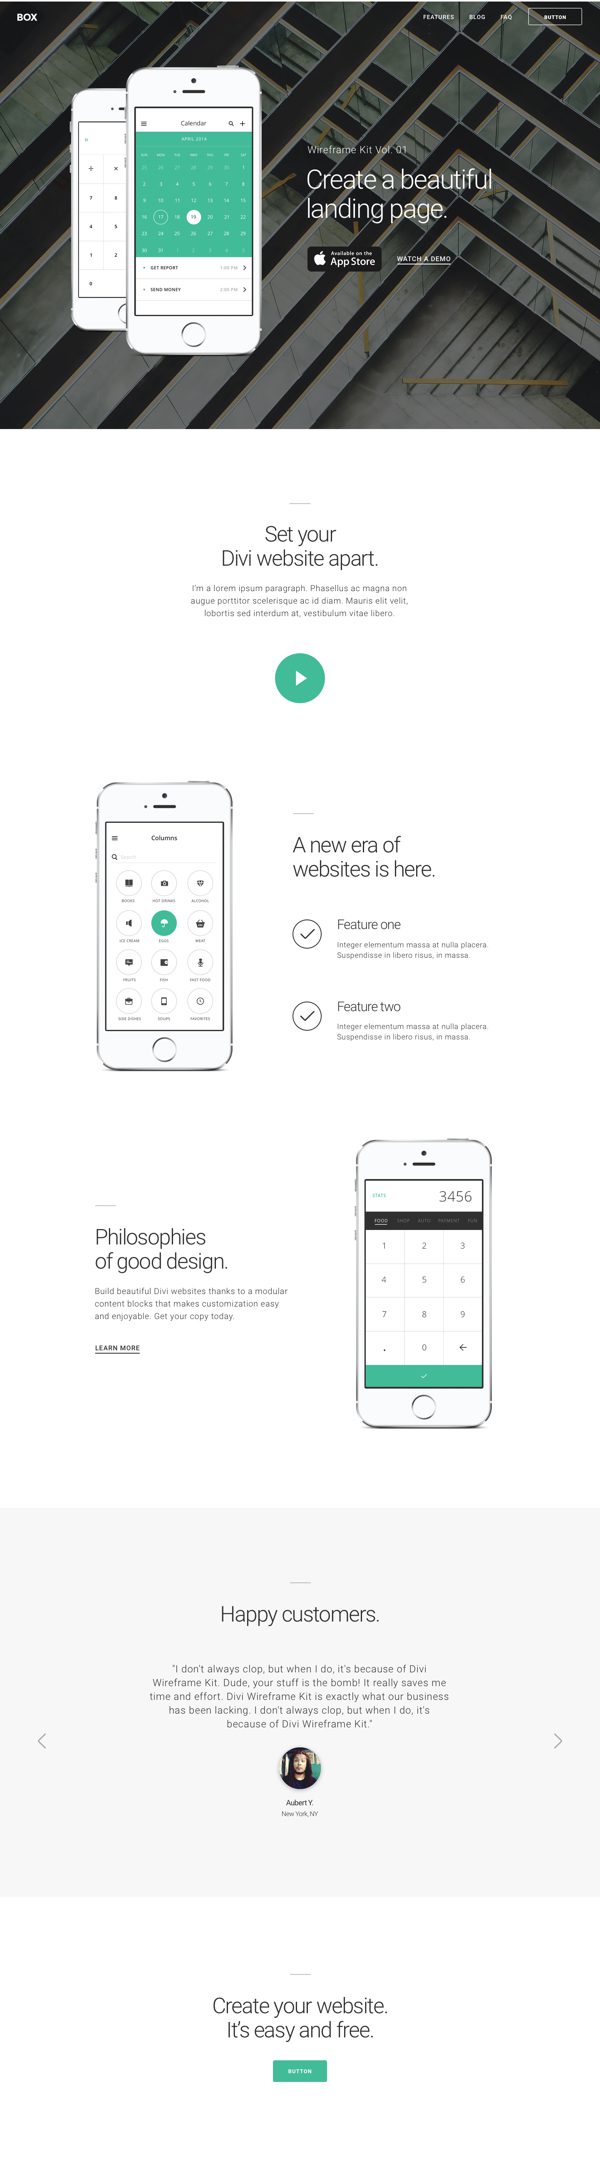
Once you have the layouts imported, you’ll want to create a new page by going to Pages > Add New. I’d recommend calling this page: Landing Page Tutorial. Then click the purple Use Divi Builder button, go to Load From Library > Add To Library and load the layout “Landing Page (Wireframe). When you save and preview it on the front end it should look like the image below.
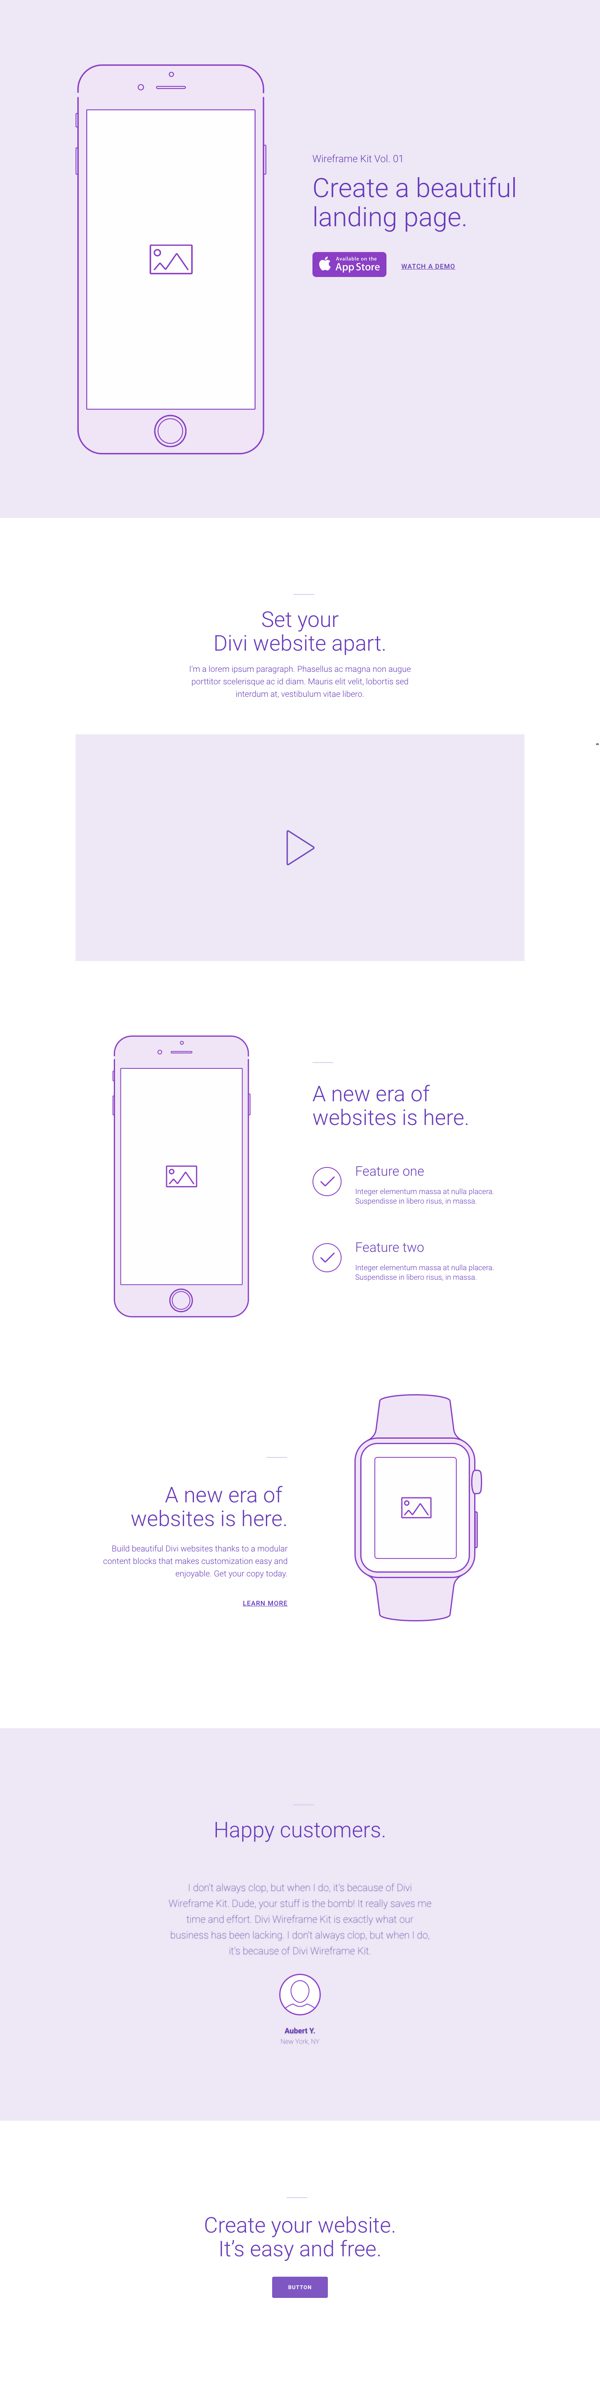
The Wireframe Landing Page
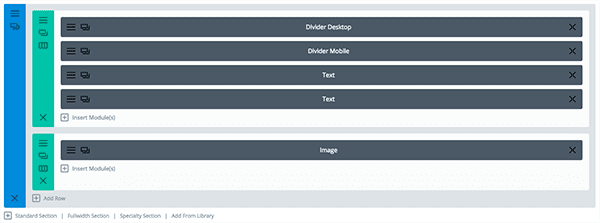
Step 1: Edit Section #1
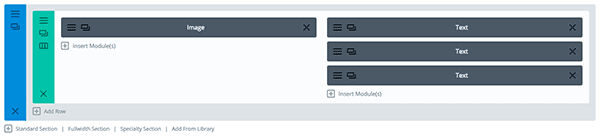
Section #1 Backend
Section Settings:
- Open the blue section settings and add the image “01.jpg” from the “tutorial-images” folder as the background of the section.
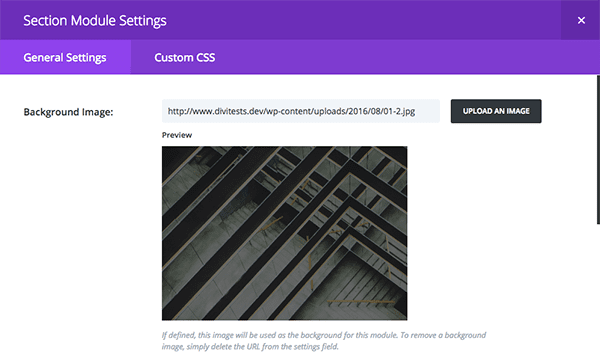
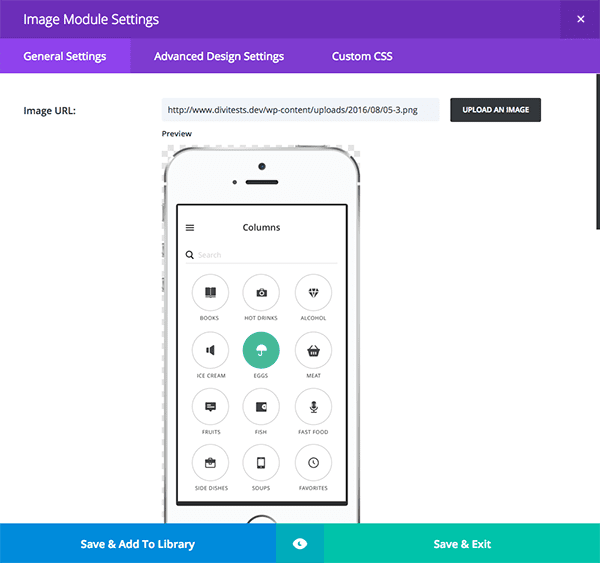
Image Module Settings:
- Add the “02.png” image from the “tutorial-images” folder to the image module under the General Settings Tab.

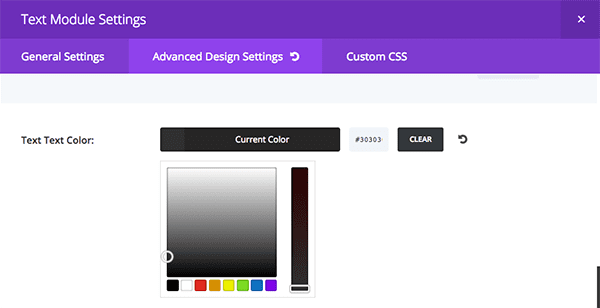
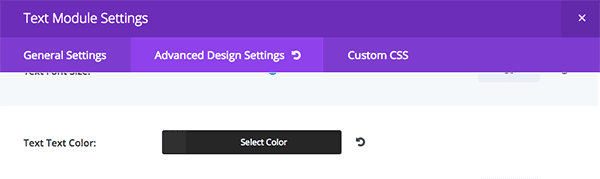
Text Module Settings:
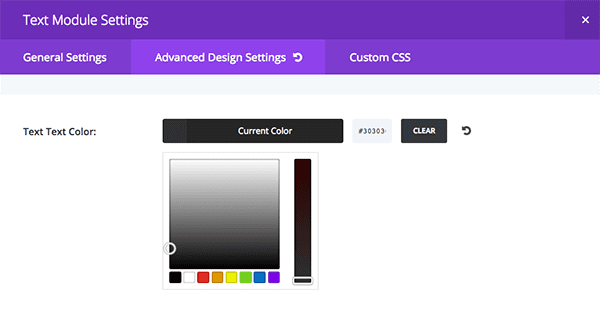
- Under the Advanced Design Settings Tab, change the text color for all of the text modules to #ffffff.
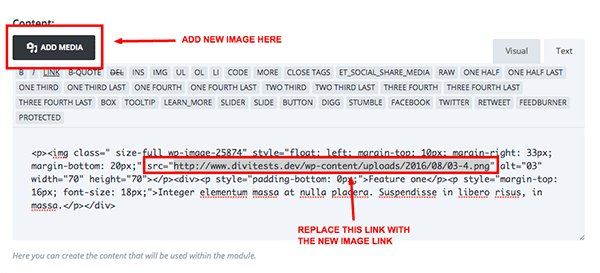
- In the third text module (bottom) replace the App Store logo image with image file “03.png” from the “tutorial-images” folder.
- The easiest way to do that is to simply replace the “src” image link in the content area’s text tab. This will preserve the in-line styles already applied to the image.
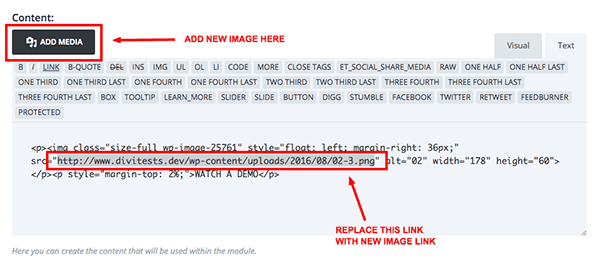
If you accidentally delete the inline styles you can copy them from the snippet below:
<p><img class="size-full wp-image-25761" style="float: left; margin-right: 36px;" src="IMAGE LINK TO 03.JPG" alt="02" width="178" height="60"></p><p style="margin-top: 2%;">WATCH A DEMO</p>
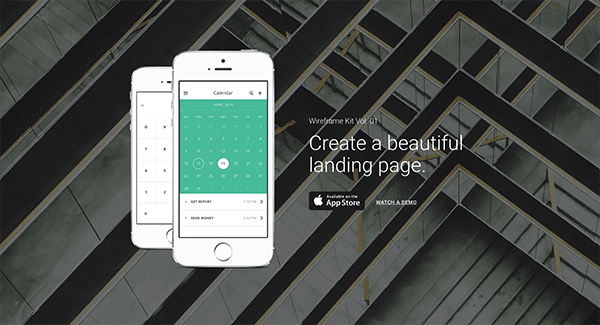
When you save all of your settings, include the page itself, and preview the results you should now have a top section that looks like this.
Step 2: Edit Section #2
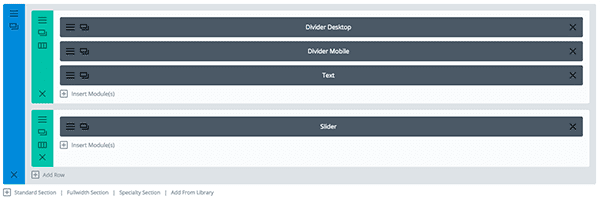
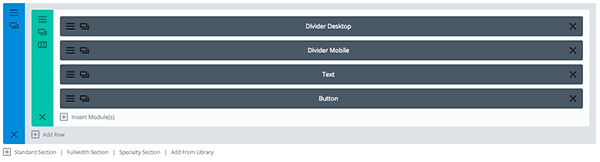
Section #2 Backend
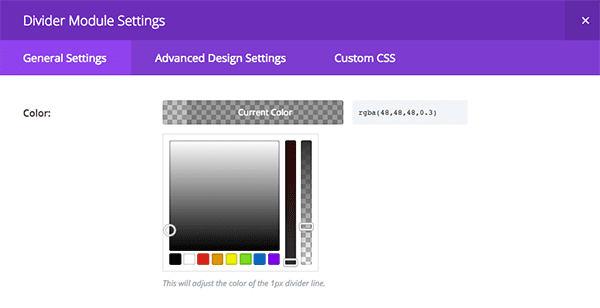
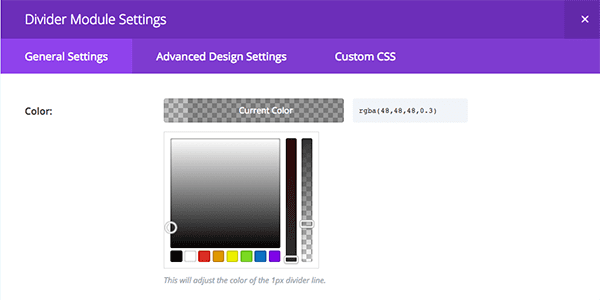
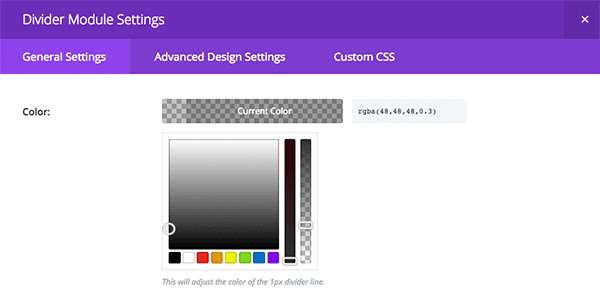
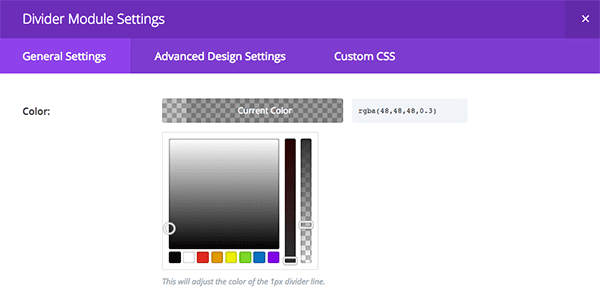
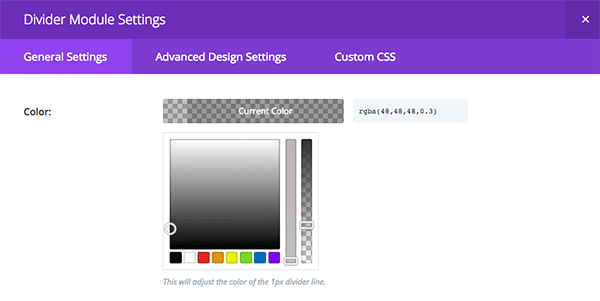
Divider Module Settings:
- In both the desktop and mobile divider modules add this color code under the General Settings Tab: rgba(48,48,48,0.3)
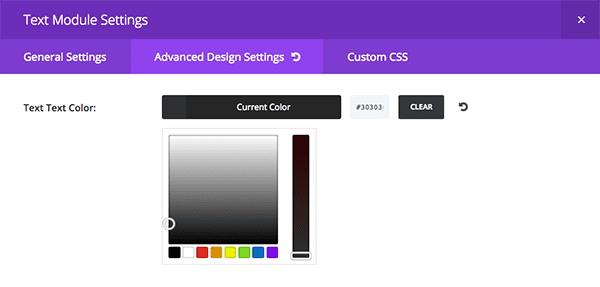
Text Module Settings:
- Inside each text module’s Advanced Settings Tab change the text color to #303030.
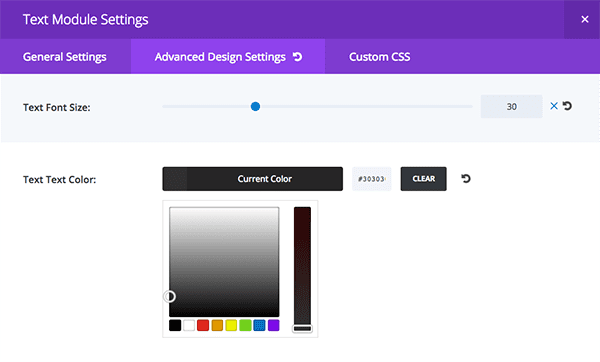
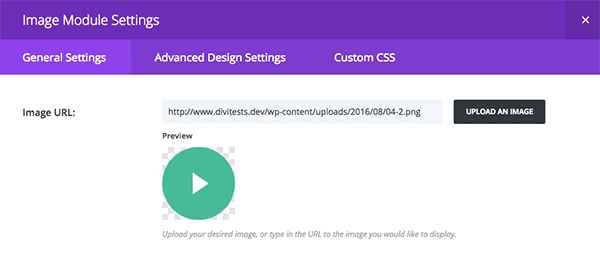
Image Module Settings:
- Inside the image module change the image to “04.png” from the “tutorial-images” folder and change it’s alignment to center.
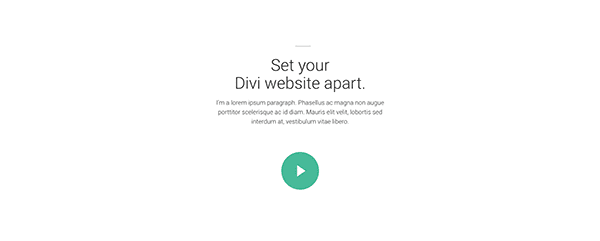
When all these settings have been configured and saved, save the page again and preview it on the frontend. It should look like this.
Step 3: Edit Section #3
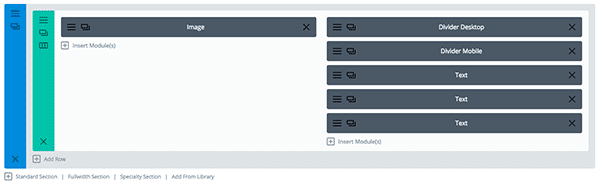
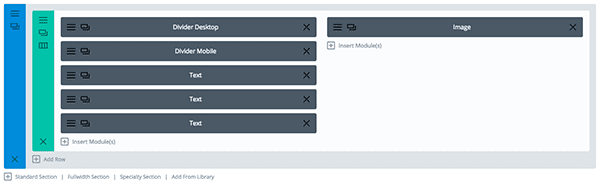
Section #3 Backend
Image Module Settings:
- Inside the image module replace the image with the file named “05.png” from the “tutorial-images” folder.
Divider Module Settings:
- Inside each divider module change the color to this code: rgba(48,48,48,0.3)
All Text Module Settings:
- Inside each text module under the Advanced Design Settings Tab change the text color to #303030.
Second & Third Text Module Settings:
- Inside the second and third text modules (the bottom two) replace the check icon image located inside the content area wth the image file “06.png” from the “tutotial-images” folder.
- Be sure to use the same technique of replacing the src link that we used above to retail the inline styles.
If you accidentally delete the inline styles you can get them from the snippet below.
<p><img class=" size-full wp-image-25874" style="float: left; margin-top: 10px; margin-right: 33px; margin-bottom: 20px;" src="http://www.divitests.dev/wp-content/uploads/2016/08/06-3.png" alt="03" width="70" height="70"></p><div><p style="padding-bottom: 0px;">Feature two</p><p style="margin-top: 16px; font-size: 18px;">Integer elementum massa at nulla placera. Suspendisse in libero risus, in massa.</p></div>
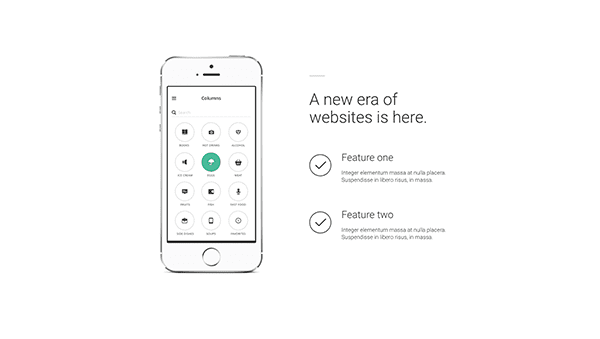
When all of your settings have been configured and saved, save the page and preview it on the front side. The third section should now look like this.
Step 4: Edit Section #4
Section #4 Backend
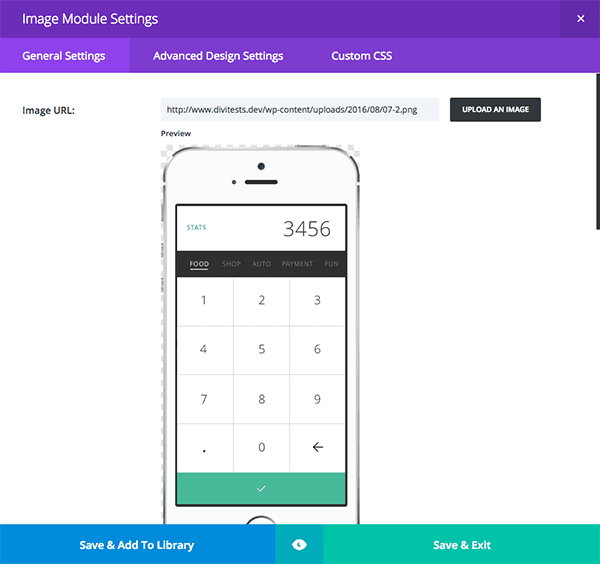
Image Module Settings:
- Inside the image module add the image file named “07.png” from the “tutorial-images” folder.
Divider Module Settings:
- Inside each divider module add this color code: rgba(48,48,48,0.3)
Text Module Settings:
- Inside each text module under the Advanced Design Settings Tab change the text color to #303030.
When all of your settings have been configured and saved, save the page and preview the result on the front end. It should now look like the image below.

Step 5: Edit Section #5
Section #5 Backend
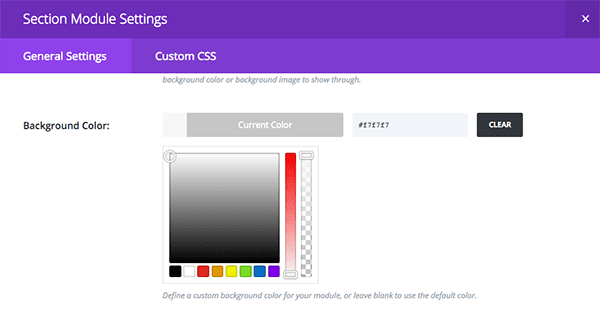
Section Settings:
- In the section settings under the General Settings Tab change the background color to: #f7f7f7.
Divider Module Settings:
- Inside each divider module add this color code: rgba(48,48,48,0.3)
Text Module Settings:
- Inside the text module under the Advanced Design Settings Tab change the text color to #303030.
Slider Module Settings:
- Inside the slider module’s Advanced Design Settings Tab change the text colors to #303030.
- Inside the slider module’s slide settings, under the Advanced Design Settings Tab, change all the text colors to #303030 and change the Arrows Custom Color as well as the Dot Nav Custom Color to #303030.
- In the slide’s content section, replace the user’s image with the file named “08.png” from the “tutorial-images” folder. Replace the link only in order to keep the inline settings intact.
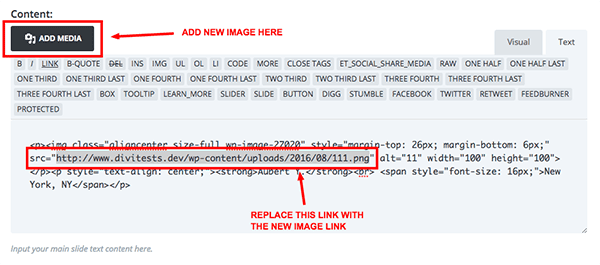
If you accidentally deleted the other text and inline code you can get it all from the snippet below.
<p><img class="aligncenter size-full wp-image-27020" style="margin-top: 26px; margin-bottom: 6px;" src="http://www.divitests.dev/wp-content/uploads/2016/08/08-2.png" alt="11" width="100" height="100"></p><p style="text-align: center;"><strong>Aubert Y.</strong><br> <span style="font-size: 16px;">New York, NY</span></p>
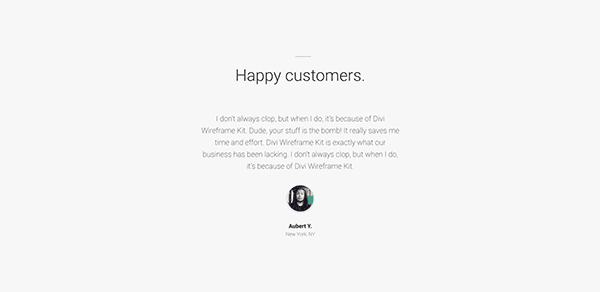
When you’ve configured all of these settings and saved them, save the page and preview the result on the front end. This section should now look like the image below.
Step 6: Edit Section #6
Section #6 Backend
Divider Module Settings:
- Inside each divider module add this color code: rgba(48,48,48,0.3)
Text Module Settings:
- Inside the text module change the text color to #303030.
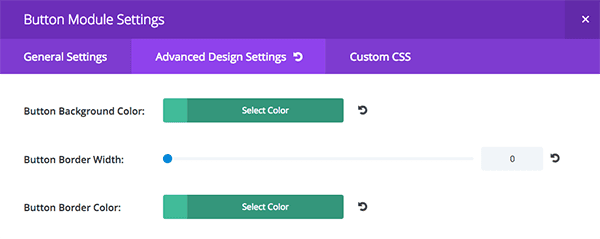
Button Module Settings:
- Inside the button module change the button background and border colors (as well as the hover button background and border colors) to #41bb99.
When all of your settings are configured and saved, save the page and preview the section on the front end.

The Final Result
By this point you should now have a final design layout converted from our Wireframe Kit to something you can use on a live website. Of course in this case we’re still using example content, but when you do the same process for yourself you’ll be using your own original content or content given to you by a client.
The Final Landing Page Design
As a sort of follow up to today’s tutorial, tomorrow Nathan will be showing you our recommended best practices for exporting and sharing your own Divi json files for layouts, individual library elements, and customizer settings. See you there!
Be sure to subscribe to our email newsletter and YouTube channel so that you never miss a big announcement, useful tip, or Divi freebie!
Divi 100 Day 91
The Countdown To Divi 3.0
This post is part of our Divi 100 marathon. Follow along as we post free Divi resources for 100 days in a row! This 100-day countdown will end with the game-changing release of Divi 3.0, including our brand new visual editor built from the ground up using React. Divi 3.0 will change the way you build websites with the Divi Builder forever!
Let the countdown begin.


These wireframes are super helpful. It does bring up a need though. Is there a way I can create and save a layout, then download the json file for use on another site?
I commented too soon, lol. Just found this page https://www.elegantthemes.com/gallery/divi/documentation/library-import/
It is Incredible. I had to wait for 100 days, but it looked like 1000 days to me.
Jeff, also from Mississippi. I agree with David from Mississippi. I find Divi useful however I also find that there are waay too many elements to edit. I could probably free hand code faster than I can edit most of these modules. That being said, to create landing pages for my Clients I like to first build them with Divi to get a look/feel. Btw, anyone know where I can simply download ALL of the wireframe and layouts at once?
So~ inspiring…
Great tutorial & resources…✨
I will love to see all the layouts in one page!
And on day 99 you probably tell us that all of the Divi 3.0 Marathon Layouts etc. will be included in Divi 3.0, right? 😉
We are very excited about the release of Divi 3.0
Thank you.
STEVE
I always like these tutorials. It gives a good look at what we all can do with Divi-Builder.
This one is great too. Keep up the good work you all at ET and I’m looking forward to all the next interesting posts! 🙂
Thanks Herman!
Most Excellent Nathan!
I have not converted any of the Wireframe layouts/kits to actual pages yet, but I loaded them all into the Divi library of a development site yesterday for the purpose of creating my own process for doing this, so it is great to see how a pro does it before I begin.
You, the Elegant Themes team, the contributors who post here on this blog, those who share on Facebook, and via their own websites sure do make my job easier.
Hopefully, someday I will be capable of creating something useful to share with the community.
In the meantime, a sincere Thank You to everyone who contributes to this awesome theme!
Our pleasure James 🙂
Nathan, this is an EXCELLENT tutorial. It does a very good job not only of showing us how to use a wireframe layout pack, but it also gives us some insight as to your workflow and techniques.
I believe the latter is every bit as useful to us as the former.
As someone who for years has taught teaching techniques to subject matter experts, I hope you won’t mind a couple of suggestions for how to make these excellent tutorials even better, and for how to improve your process.
First, I am quite experienced with computers, and somewhat with WordPress, and maybe a year with Divi – and I found it challenging to keep up with what you were doing. The main reason for this is that even though you narrated a good portion of your actions, it is imperative in a tutorial video such as this to narrate every action you take. It doesn’t have to be much, but you should never take an on-screen action without narrating what you are doing, the actual keystrokes and mouse clicks.
For example, in a text module, when you are replacing the URL for an image SRC, you say, “I just get the URL…” I understood that perfectly, but some newer people might find it more useful if you said, “I triple-click to select the entire URL, then Command-C copy…”
This suggestion could be applied throughout any tutorial video, and while not taking any more time to say, would make it significantly more “followable.”
=====================
One of the workflow habits I have adopted that perhaps you and other readers here might find helpful is to pay a lot more attention to admin labels.
For example, I notice each of your text modules simply keeps the default “Text” admin label. When you come back to this website six months or two years from now, and you’ve got this all-in-one landing page with eleventy-kajillion elements on it, and your client has asked you to edit it in three places (or wants to do it themselves), how will you find which one of all these elements you need to edit, among all the choices?
What I do is edit the admin label so it indicates the content as well as the type of element. For example, I could edit one label so it would say “Design Philosophy Header Text,” and the next so it said “Design Philosophy Details Text.” It would then be very easy to find which element to edit later on.
This important not just for modules, but also for rows and sections, because isn’t the admin label what’s displayed when each of these is collapsed?
In this tutorial, you have six sections, each labeled by number: #1, #2, etc. Wouldn’t it be more intuitive (for finding later) to have them labeled “Header Section,” “Philosophies Section,” “Contact Us Section,” etc.?
One of the suggestions I have submitted to Divi is to move the Admin Label element for each section, row, and module to be the very first element in each editor. This would make it very easy to set these labels to permit easy visual classification of your entire Divi Builder view.
As an illustration of why allowing us to see your workflow is so important, before this video, I had no clue why there were admin labels on sections and rows. I had no clue we could collapse those elements. Now I know this and will definitely use it to keep my edit pages cleaner looking.
Finally, how about putting on your tutorials-creation calendar to redo this tutorial in the near future – using Div 3.0?
Thanks again for an excellent tutorial.
David, Here is how I label things:
Header Text | Design Philosophy
Text | Design philosophy description
Image | Eiffel Tower
Type of module first, specific content second.
I often copy the title I give an image and paste it as the second element in the label.
“I triple-click to select the entire URL, then Command-C copy…”
I hate to have to say it but if someone doesn’t understand how to Copy then they probably should take 10 steps back and learn something way more basic than this.
I personally don’t feel it’s necessary to dumb everything down to a 5-year-old’s level. 🙂
Thanks for all of your suggestions David, appreciate the input 🙂
“One of the suggestions I have submitted to Divi is to move the Admin Label element for each section, row, and module to be the very first element in each editor. This would make it very easy to set these labels to permit easy visual classification of your entire Divi Builder view.”
+1!
Or…..you could simply scroll to the bottom. Why take up real estate for a label?
Because the Label is arguably more important for modifications down the track.
Very useful resource to create beautiful landing pages.
As always Mario is a Maestro!
Mario is indeed the design Maestro!
Will all the free layout packs still be available to download after the Divi 100 countdown is over. I’ll probably be buying the lifetime subscription in the Winter. Will I still have access?
Yes they will all remain available 🙂
And can we have a page with all of them neatly available for downloading? 🙂
I agree. A nice section to download all the extra divi stuff provided during the 100 days would be amazing.
You need a “layouts” page on the website with all the divi 100 templates in one place (with demo pages…. also user submitted ones
As usual, no word on how to achieve the menu we see here:
https://cdn.elegantthemes.com/blog/wp-content/uploads/2016/08/02.jpg
That menu is not actually part of the layout. However, if you want to achieve something like it you can use our Header UI Kit, another free design pack. https://www.elegantthemes.com/blog/divi-resources/free-divi-download-the-divi-header-ui-kit
Well, the issue is with the Header UI Kit that it’s not a menu. Just a bunck of styled links not linked to the wordpress menu fonctions.
The real question is how do style the menu.
Something like the Divi Builder but just for the menu would be great.
Thanks for your fast reply, though.
Yes, you’re right, those menus are not created with the menu settings in the customizer. As the post they’re shared in states, they are for special instances–not necessarily a great fit for large sites. I just wanted to point out that the menu in the mockup is from the Header UI Kit.
In the past we’ve published a pretty good deal of menu/header modifications. As well as providing quite a few options built-in. That said though, alternate menu designs are one of our biggest requests. And we’re listening! I’m actually working on a fourteen day mini-series for after Divi 100 that will share a new header/menu tweak or design every day.
Nice! Does that mean we can expect other “Mini-series” as well moving forward? I assume this was based on the success of Divi 100? Great to hear!
Yep! I’ll be writing up a post about it to end the Divi 100 series but, in short, we’d like to continue publishing daily Divi content right along-side our regular WordPress and Web Design content.
I only can say: “Great!” 🙂
Marvelous!
Excited to hear this! The Divi 100 marathon has been invaluable to me as someone very new to Divi. It’s made for a very smooth learning curve. 🙂