
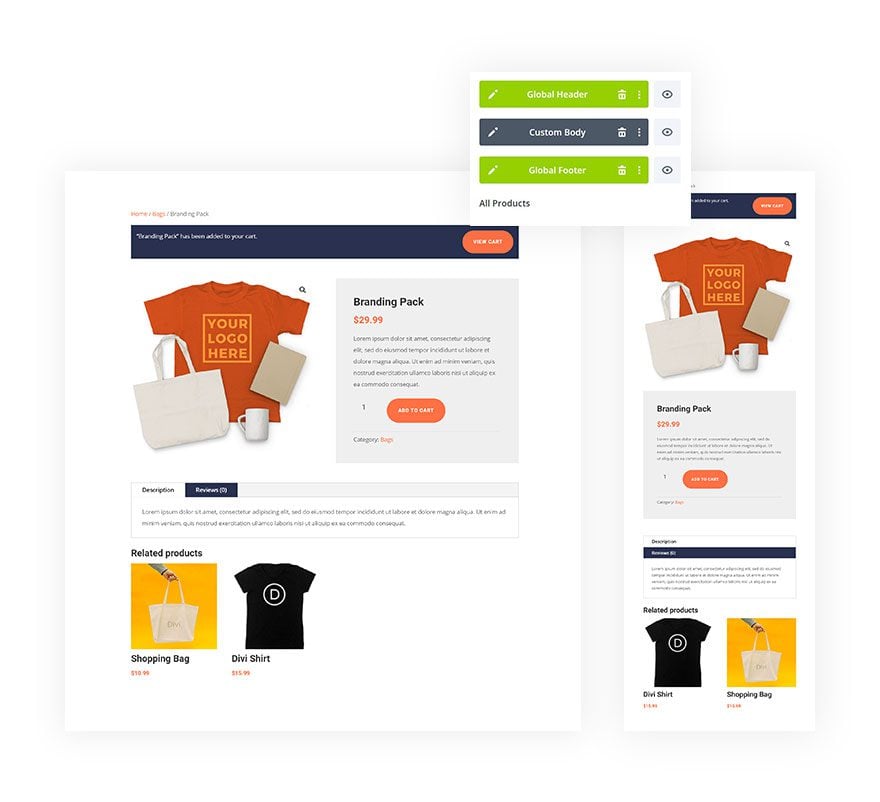
Divi’s new Theme Builder automates the way we build our Divi websites. When designing product pages, for instance, we only have to go through the creation process once, and from there, we can assign the design to all our product pages. That’s exactly what we’ll show you in today’s use case tutorial. We’ll guide you through setting up a site-wide woo product page template using Divi. We’ll start by styling the default woo product page of one particular product, to match it with the Screen Printing Layout Pack. We’ll continue by saving the layout to our Divi Library and then use it as the global body on a new template we create.
Let’s get to it!
- 1 Preview
- 2 Download The Example Product Page Template for FREE
- 3 Download For Free
- 4 1. Enable Divi Builder on Existing Product
- 5 2. Customize Layout to Match Website/Layout Pack’s Style
- 6 3. Create New Template for Products & Import Product Page Layout in Body Area
- 7 4. Save Theme Builder Options & View Template on Existing Products
- 8 Preview
- 9 Final Thoughts
Preview
Download The Example Product Page Template for FREE
To lay your hands on the free example product page template, you will first need to download it using the button below. To gain access to the download you will need to subscribe to our newsletter by using the form below. As a new subscriber, you will receive even more Divi goodness and a free Divi Layout pack every Monday! If you’re already on the list, simply enter your email address below and click download. You will not be “resubscribed” or receive extra emails.

1. Enable Divi Builder on Existing Product
Enable Divi & Modify Page Settings
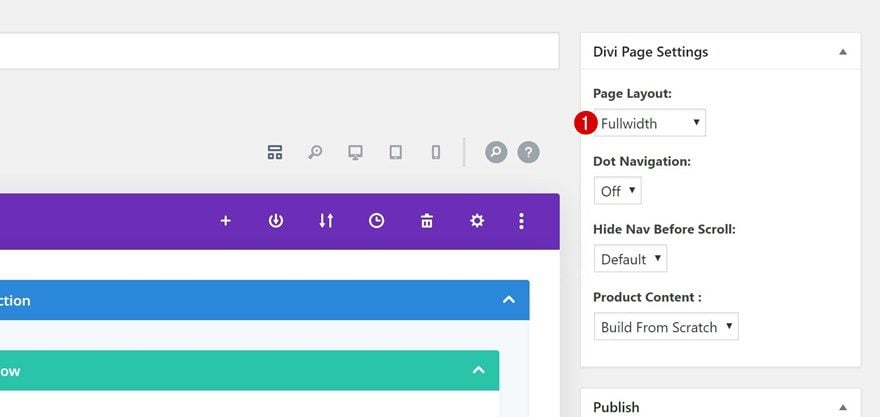
There are two ways to approach creating a product page template; you can start editing the global body inside your product page template, or you can create the design on an individual product page first. I personally prefer creating the design on an individual product page first. It allows you to publish the design and see the live result before actually applying it to all your product pages at once. That’s the approach we’ll take on today, so go ahead and open one of your existing pages and change the page layout to fullwidth.
Switch Over to Visual Builder
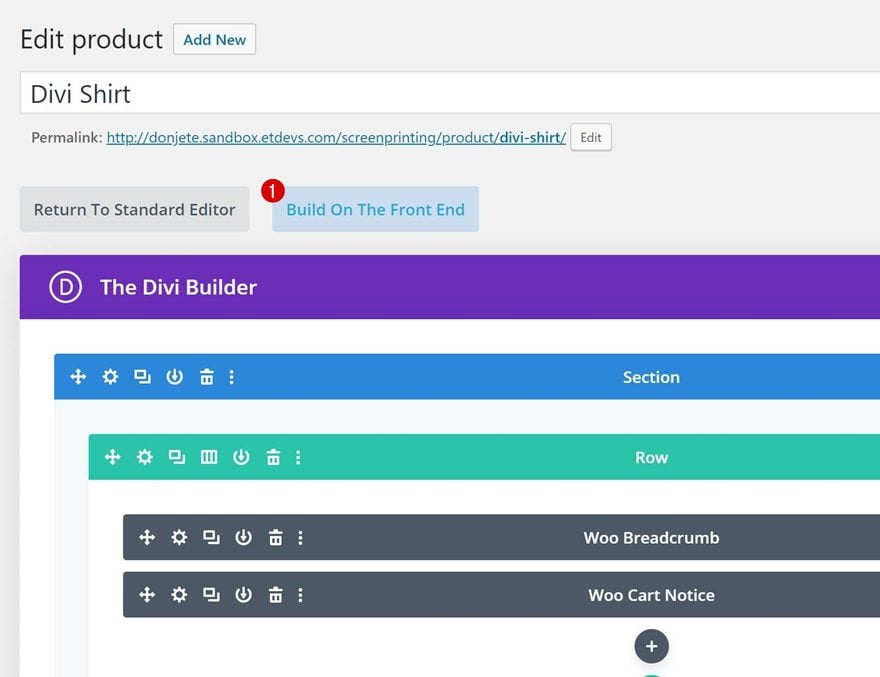
Once you’ve changes the page layout in the page settings, you can start building on the front end.
2. Customize Layout to Match Website/Layout Pack’s Style
Background Colors
Inside the Visual Builder, you can notice all the woo elements you need. We’re going to change some of these modules’ settings to match it with the Screen Printing Layout Pack. The changes we’re making are minimal and just help you apply a certain design style to your product page. If you’re working on a personal project, feel free to go as far with the customization as you want, but for this tutorial, we’ll try to keep it simple. We’ll start by modifying some background colors.
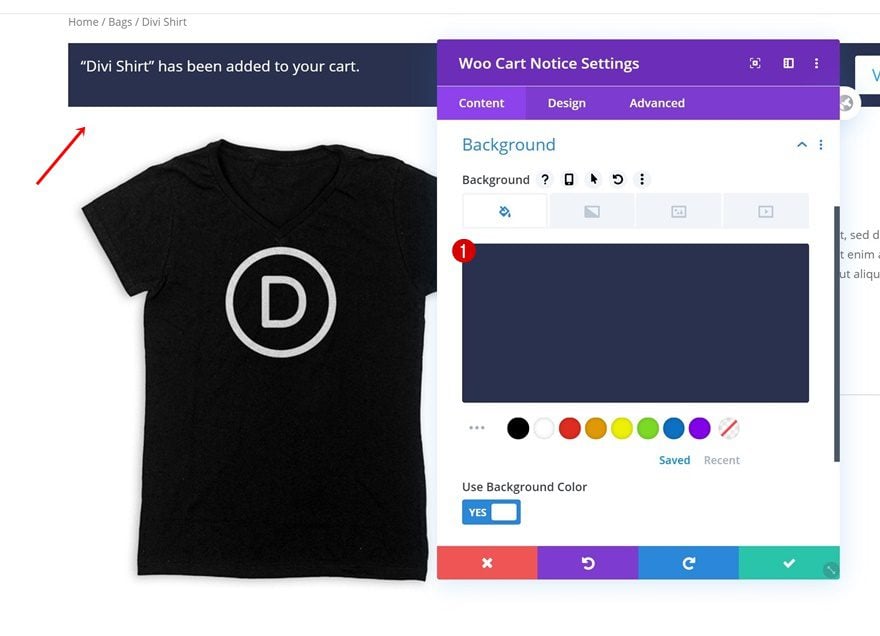
- Woo Cart Notice Module: Background Color
Open the Woo Cart Notice Module and change its background color.
- Background Color: #29314f
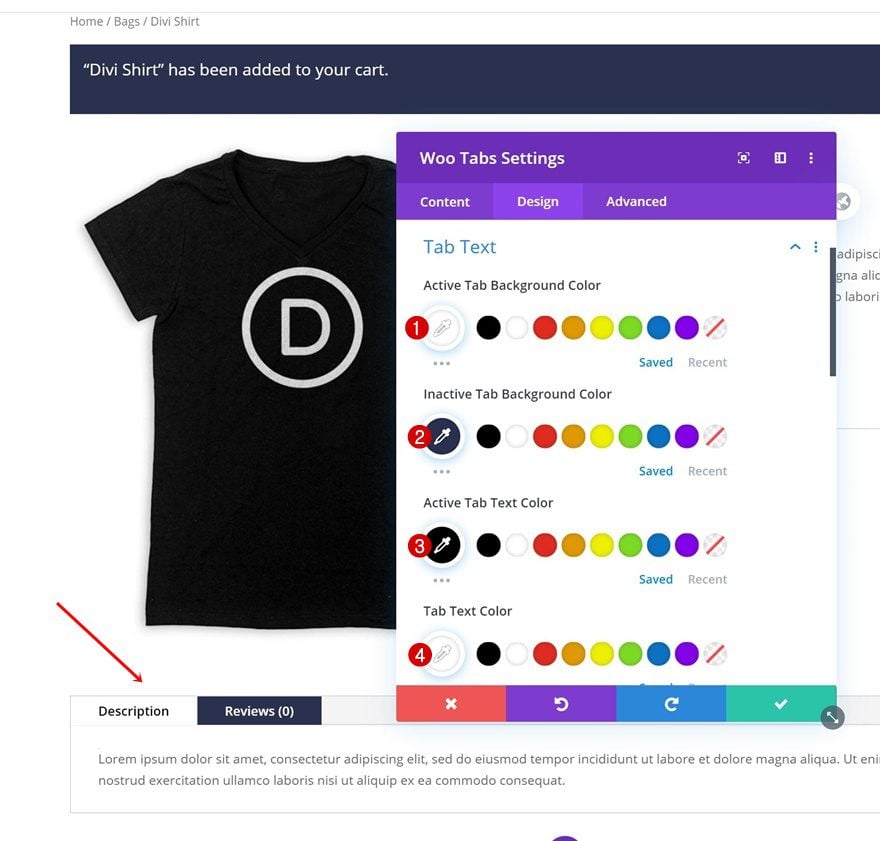
- Woo Tabs Module: Tabs Text/Background Colors
Continue by opening the Woo Tabs Module and change the tab text and background colors next.
- Active Tab Background Color: #ffffff
- Inactive Tab Background Color: #29314f
- Active Tab Text Color: #000000
- Tab Text Color: #ffffff
Body Text Settings
We also want to make some changes to the body text of the following modules:
- Woo Breadcrumb Module: Text Settings
- Woo Add To Cart Module: Text Settings
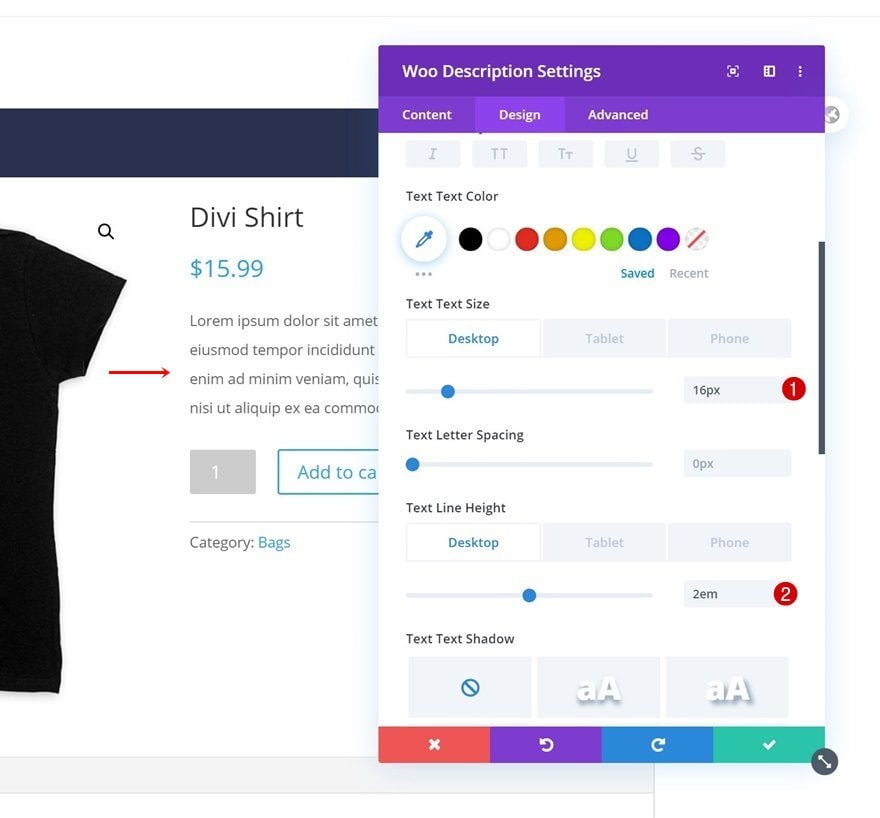
- Woo Description Module: Text Settings
- Woo Meta Module: Text Settings
- Woo Tabs Module: Text Settings
- Woo Tabs Module: Tabs Text Settings
Open each module listed above and change the text size and text line height as follows:
- Text Size: 16px (Desktop & Tablet), 14px (Phone)
- Text Line Height: 2em (Desktop & Tablet), 1.7em (Phone)
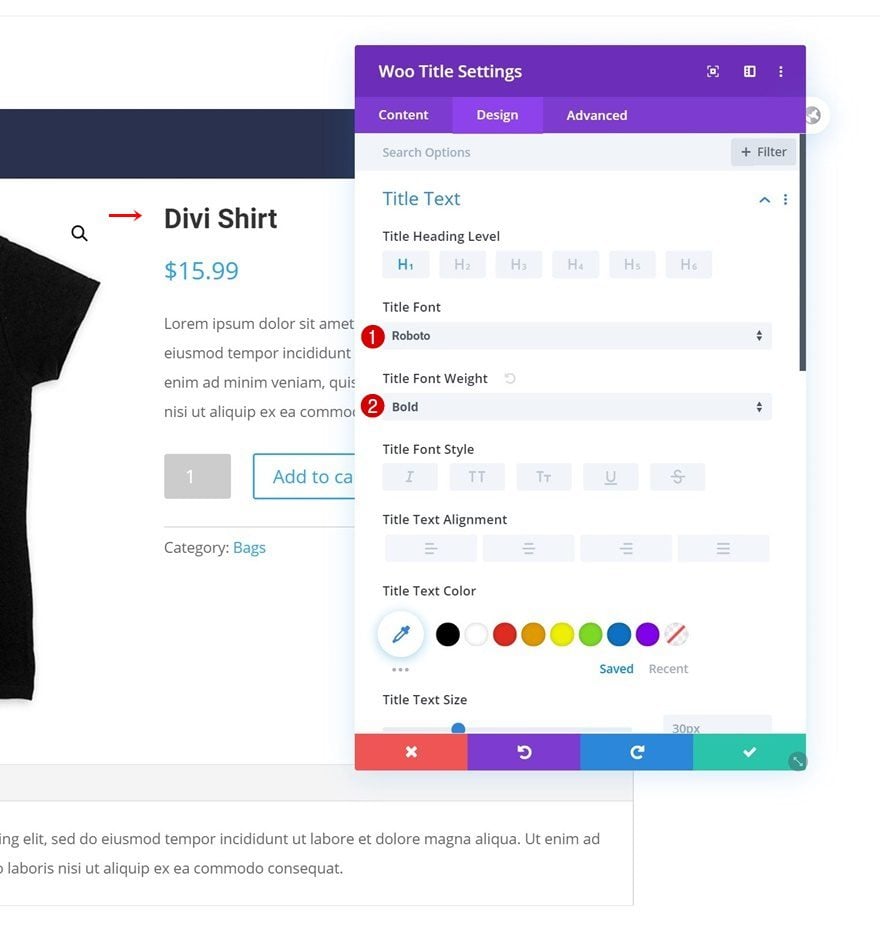
Title Text Settings
We’re also changing the style of our titles. We’ll apply the changes to each one of these modules:
- Woo Title Module: Title Text Settings
- Woo Related Products Module: Title Text Settings
- Woo Related Products Module: Product Title Text Settings
The only two things we’re changing are the title font and title font weight.
- Title Font: Roboto
- Title Font Weight: Bold
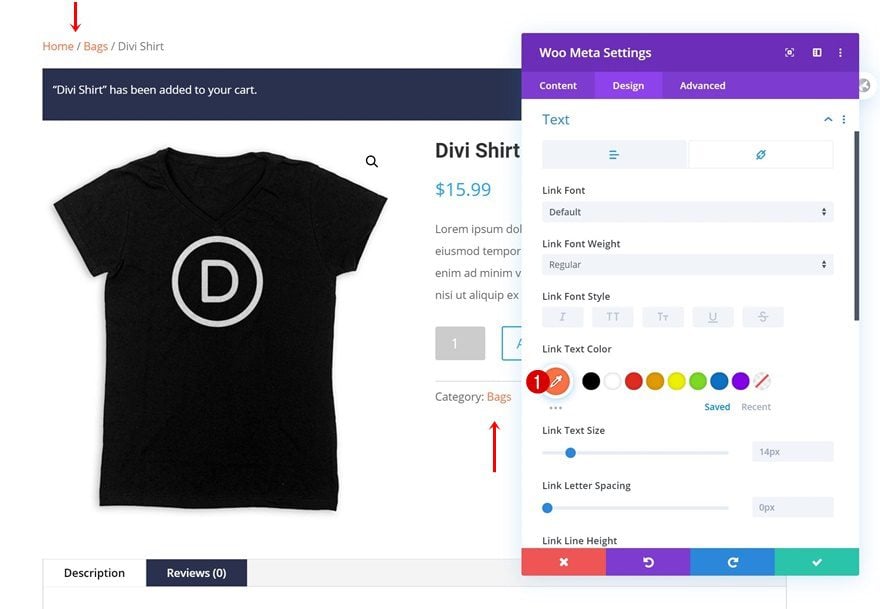
Link Colors
Moving on, we want to make sure the clickable items are highlighted. We’ll change the link text color of the following two modules:
- Woo Breadcrumb Module: Link Text Color
- Woo Meta Module: Link Text Color
This is the color code we’re using:
- Link Text Color: #ff7145
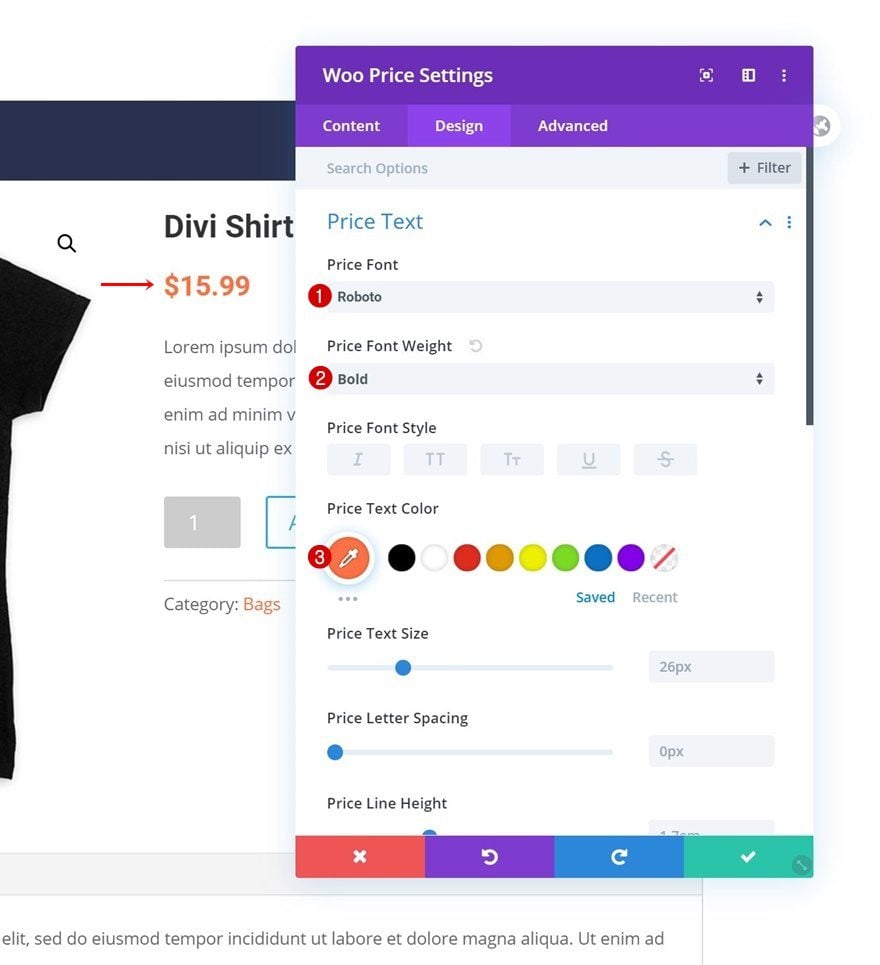
Price Text Settings
We want to style the price text as well, starting with the Woo Price Module.
- Woo Price Module: Price Text Settings
Change the price text settings as follows:
- Price Font: Roboto
- Price Font Weight: Bold
- Price Text Color: #ff7145
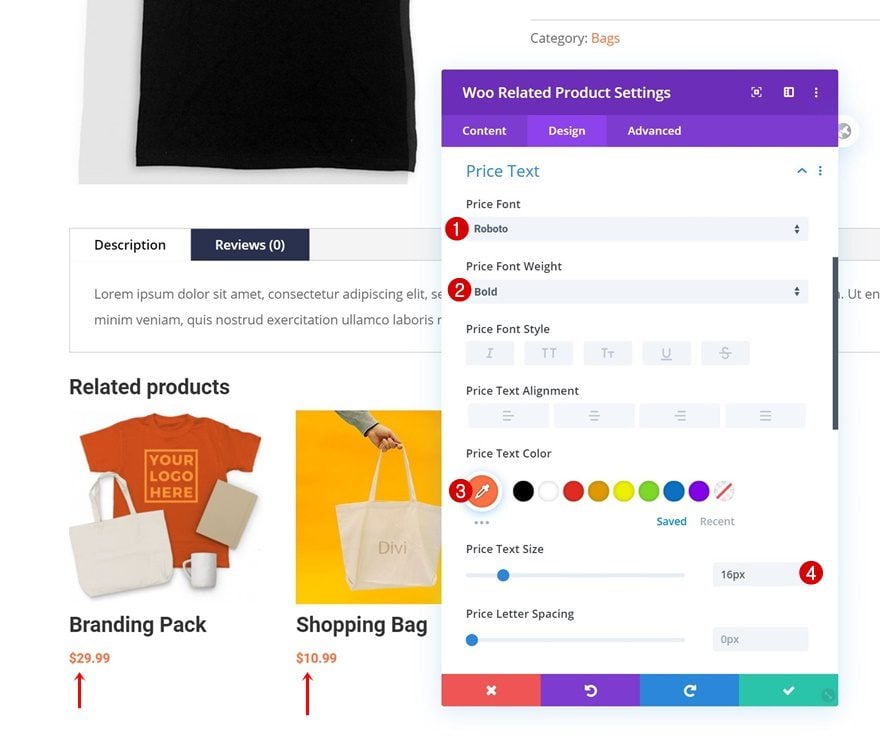
Open the Woo Related Product Module next.
- Woo Related Product Module: Price Text Settings
And make some changes to the price text settings:
- Price Font: Roboto
- Price Font Weight: Bold
- Price Text Color: #ff7145
- Price Text Size: 16px
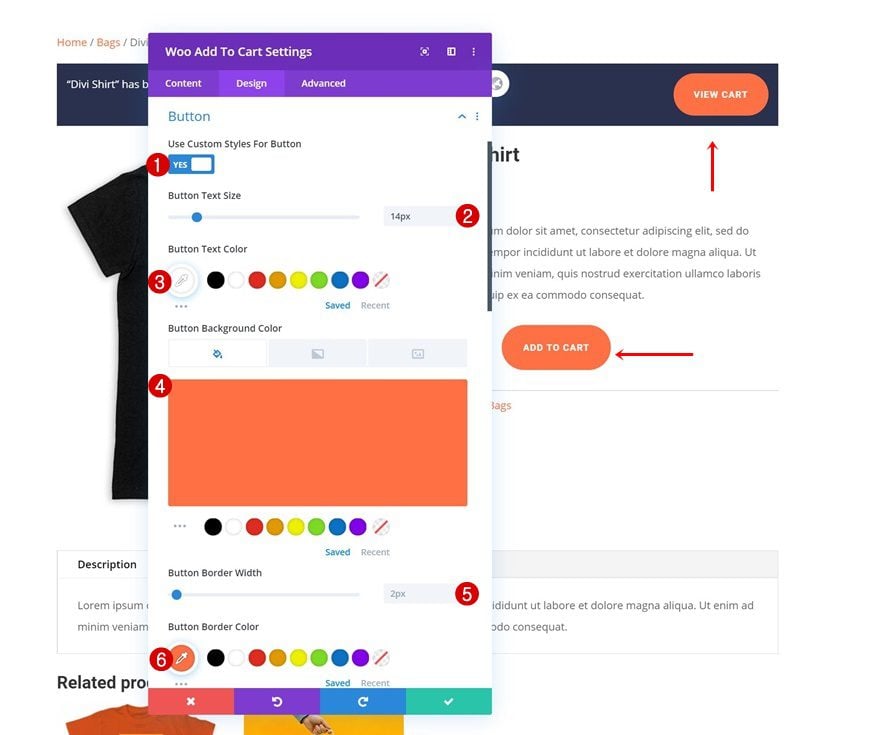
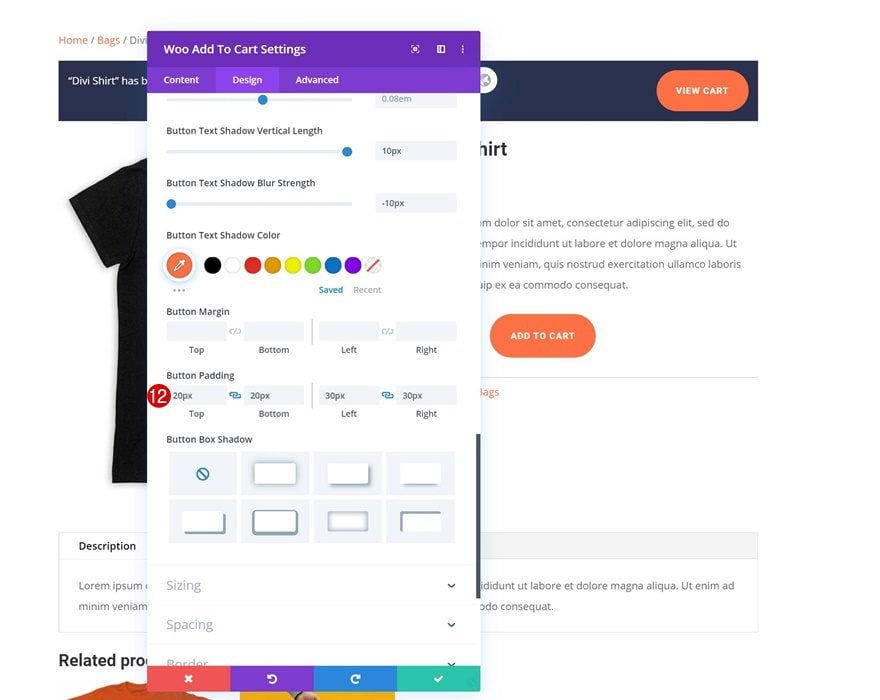
We have two buttons on our product page too, each one of them needs to be styled.
- Woo Cart Notice Module: Button Settings
- Woo Add To Cart Module: Button Settings
Change the modules’ button settings as follows:
- Use Custom Styles For Button: Yes
- Button Text Size: 14px
- Button Text Color: #ffffff
- Button Background Color: #ff7145
- Button Border Width: 2px
- Button Border Color: #ff7145
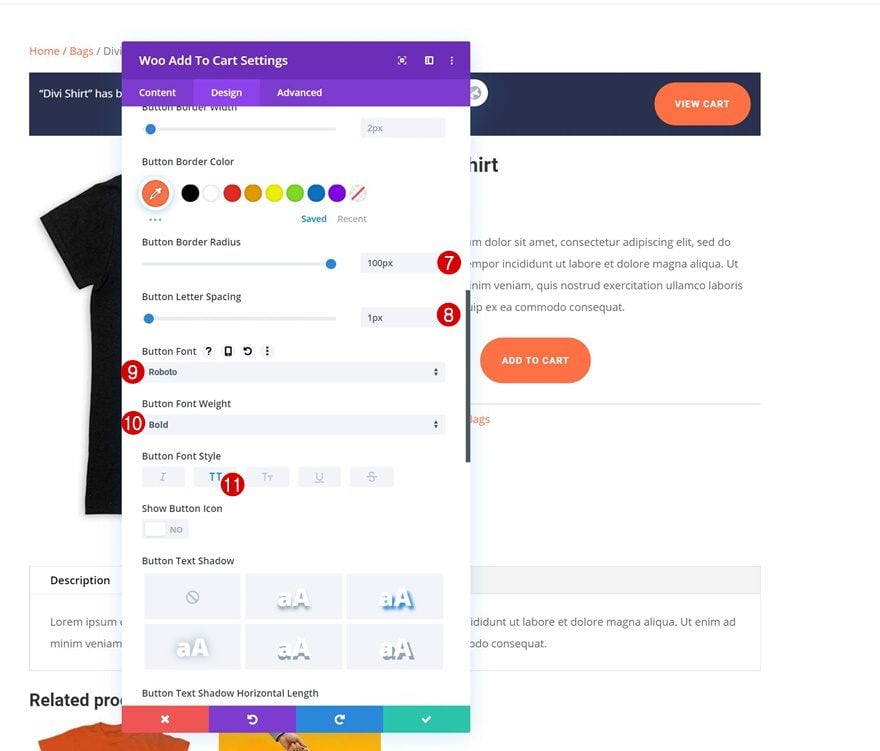
- Button Border Radius: 100px
- Button Letter Spacing: 1px
- Button Font: Roboto
- Button Font Weight: Bold
- Button Font Style: Uppercase
- Top Padding: 20px
- Bottom Padding: 20px
- Left Padding: 30px
- Right Padding: 30px
Additional Details
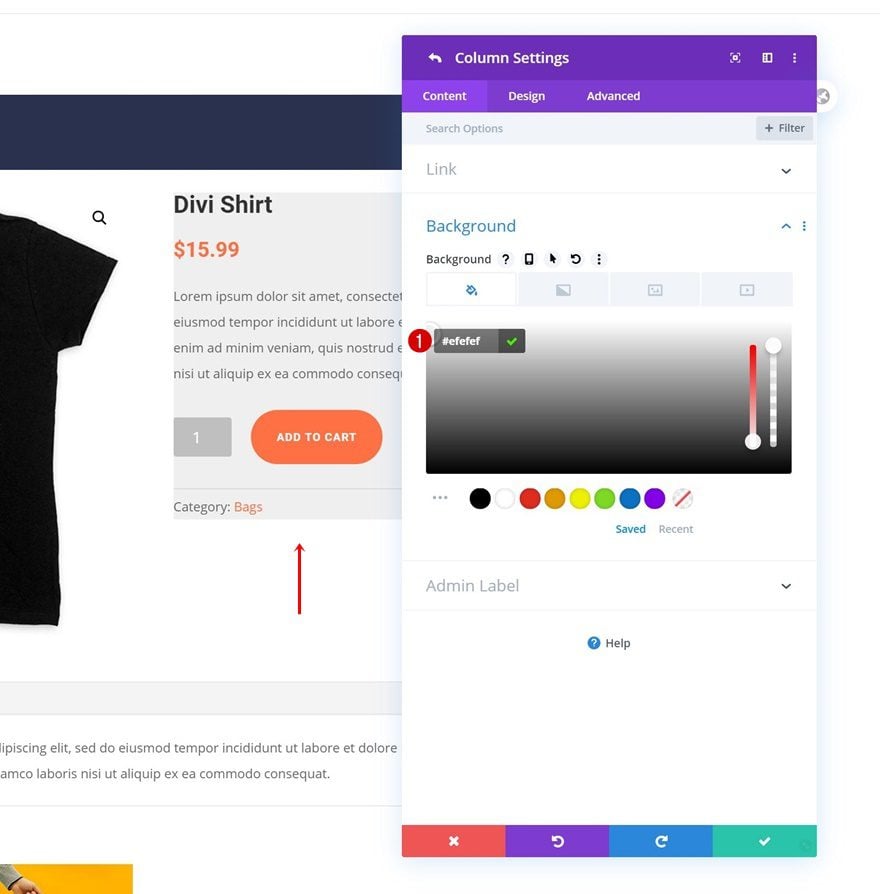
There are some additional changes we want to apply to the product page design, starting with the column 2 background of the second row on our page.
- Column 2: Background Color
Use the following color code:
- Background Color: #efefef
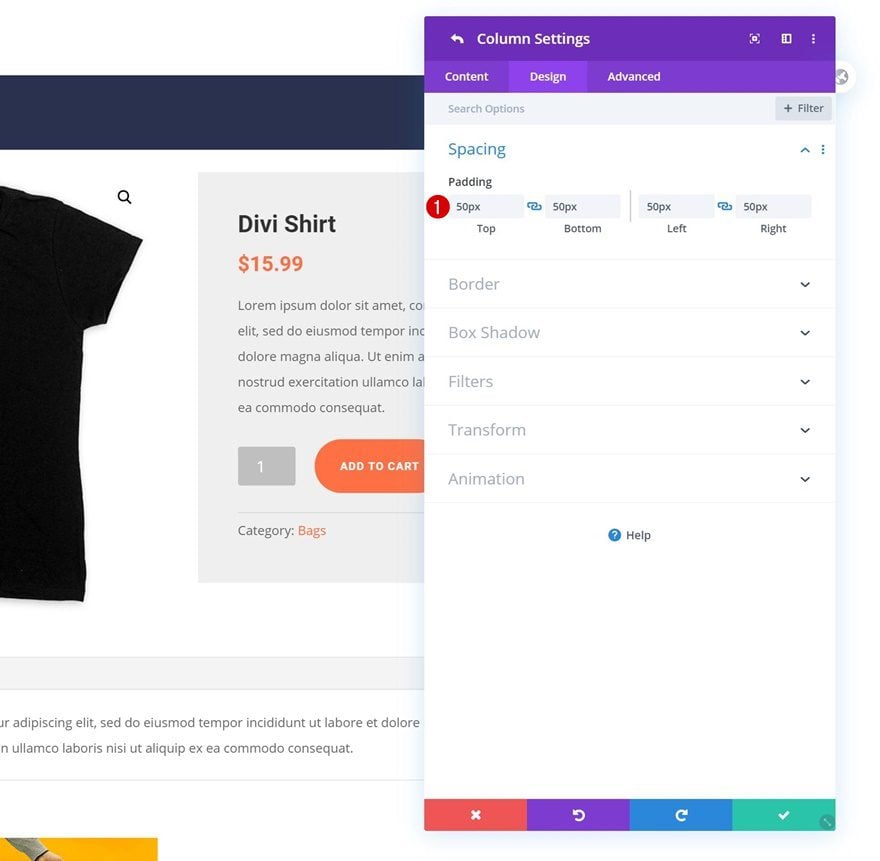
We’re modifying the column 2 spacing too.
- Column 2: Spacing
Use the following spacing values:
- Top Padding: 50px
- Bottom Padding: 50px
- Left Padding: 50px
- Right Padding: 50px
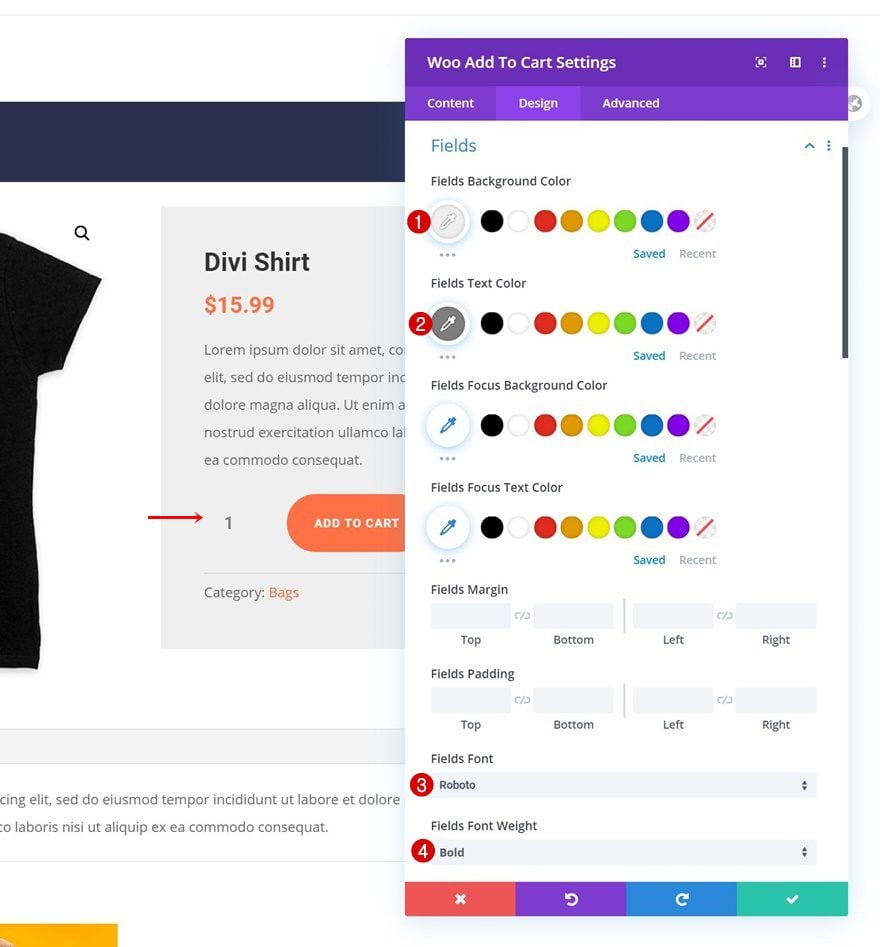
Last but not least, we’ll want to style the fields settings of our Woo Add To Cart Module.
- Woo Add To Cart Module: Fields Settings
Apply the following changes:
- Fields Background Color: #efefef
- Fields Text Color: #7f7f7f
- Fields Font: Roboto
- Fields Font Weight: Bold
3. Create New Template for Products & Import Product Page Layout in Body Area
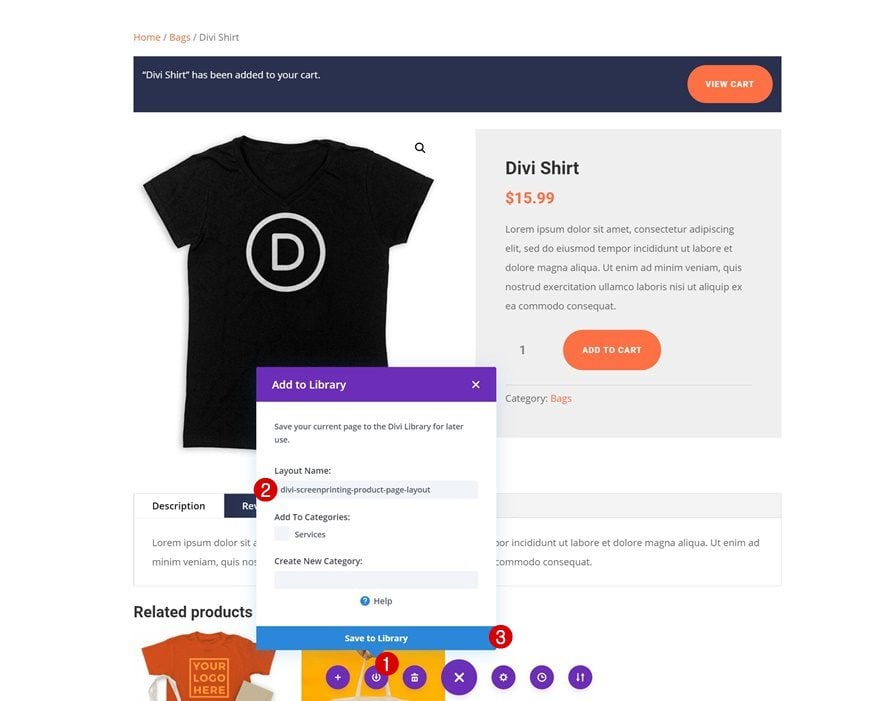
Save Product Page Layout to Divi Library
Once you’ve completed the product page design, you can save the entire layout to your Divi Library.
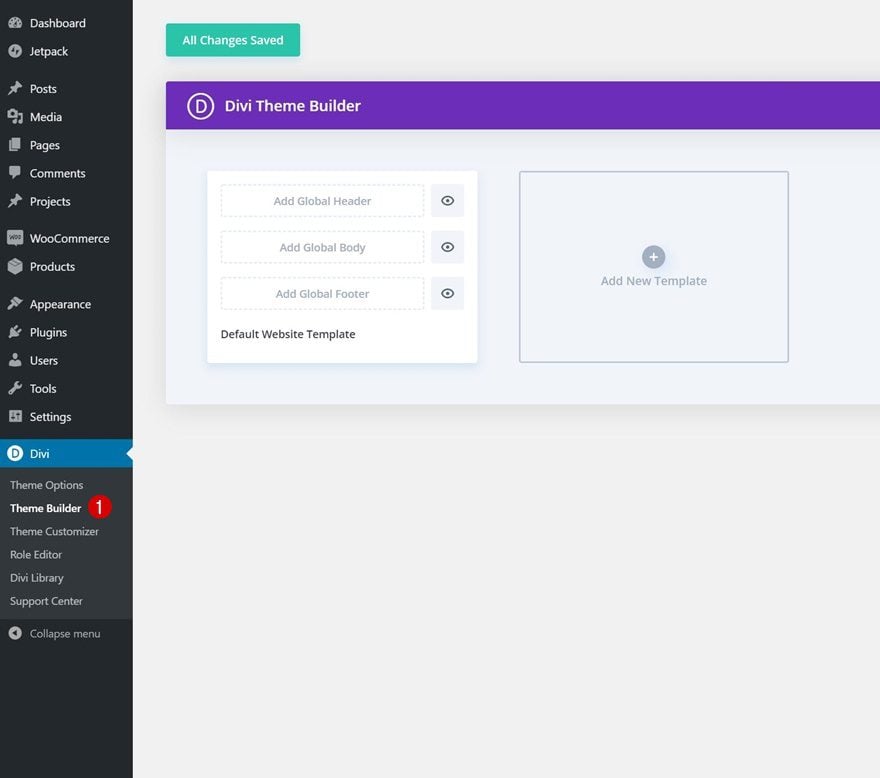
Go to Divi Theme Builder
Time to turn the layout into a product page template! To do that, navigate to the Theme Builder in your Divi settings.
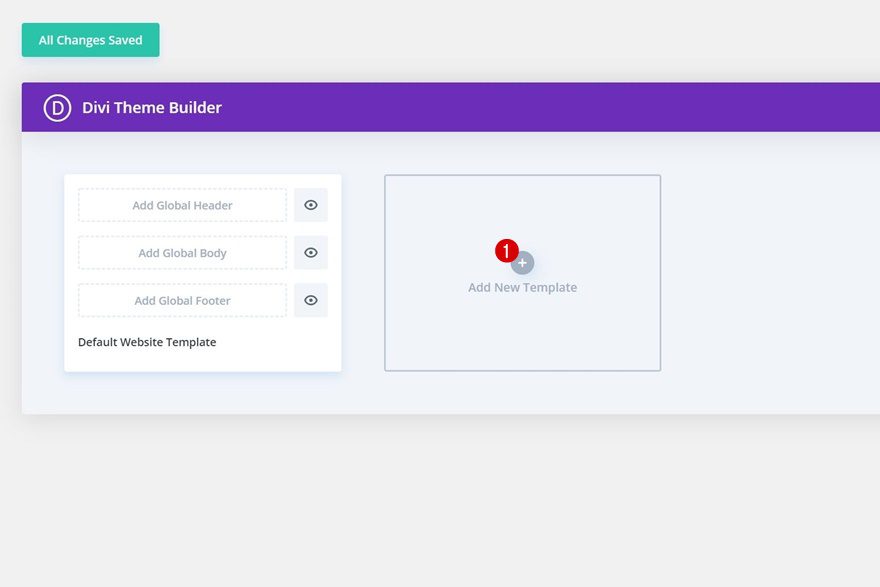
Add New Template
Continue by clicking on ‘Add New Template’.
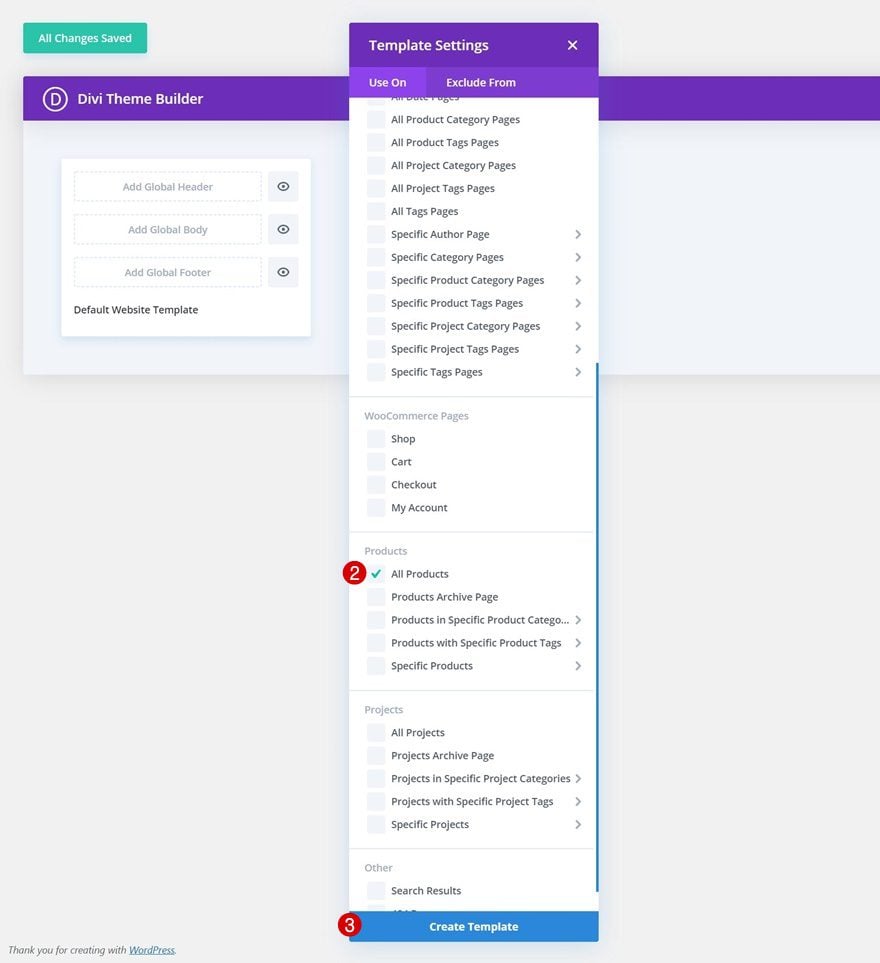
Select ‘All Products’ in the ‘Use On’ tab of your template settings to make the template apply to all your products at once.
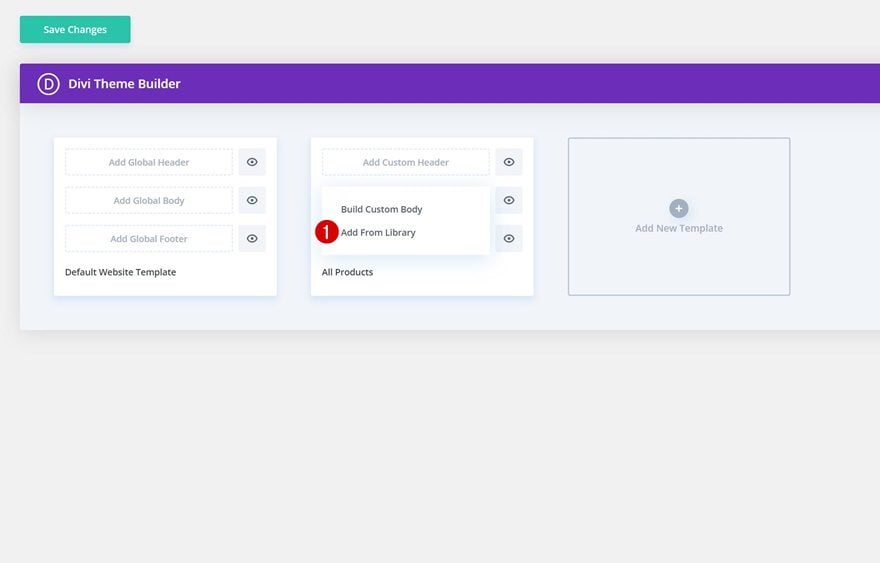
Add Custom Body From Library
Then, click on ‘Add Global Body’. Instead of building the custom body from scratch, we’ll select the layout we’ve just saved to our Divi Library.
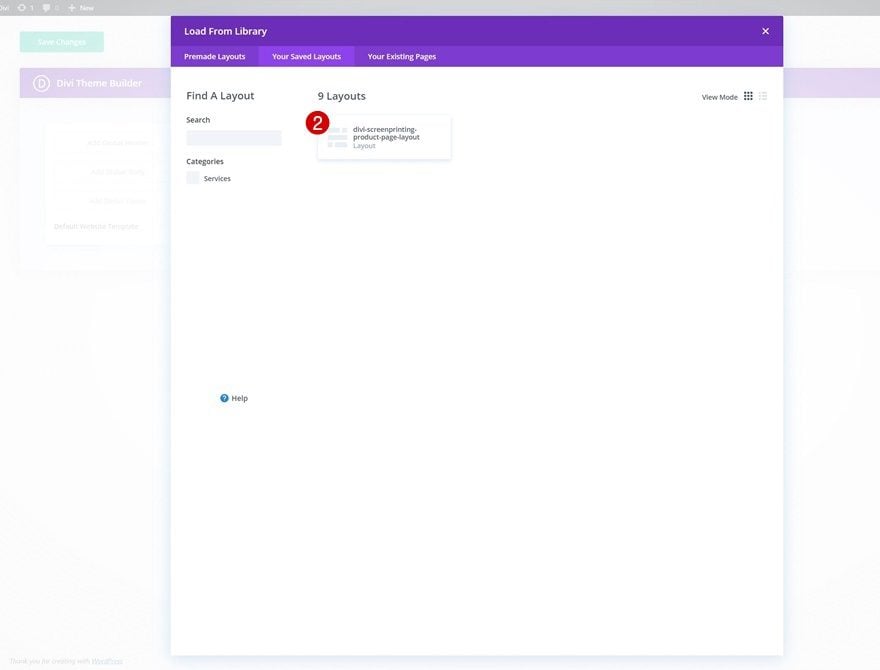
Go to the ‘Your Saved Layouts’ tab to select your saved layout.
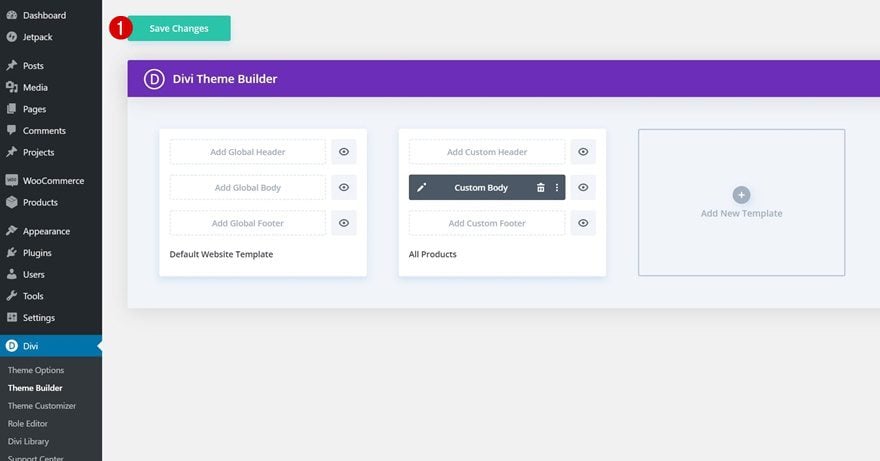
4. Save Theme Builder Options & View Template on Existing Products
Once the body of your template has been created, there’s only one thing left to do; save the changes. As soon as your new template has been saved, you can preview each one of your products and notice the same body template being applied to it!
Preview
Final Thoughts
In this post, we’ve shown you how to create a site-wide product page template. We’ve started by modifying an existing product page, using Divi’s woo modules. We made some minimal changes to the product page, to match it with the Screen Printing Layout Pack. We continued by saving the product page layout to our Divi Library. We, then, created a new template and uploaded the layout to the body of our product page template to make it apply to our entire website. We hope this tutorial helps you build beautiful eCommerce websites with Divi’s new Theme Builder! If you have any questions, make sure you leave a comment in the comment section below.
If you’re eager to learn more about Divi and get more Divi freebies, make sure you subscribe to our email newsletter and YouTube channel so you’ll always be one of the first people to know and get benefits from this free content.


Great tutorial! I am stuck at the step of adding the template in the Theme Builder. For some reason I have no templates there, even though it appears that I have them in my Divi Template Library. What did I miss?
Templates will not appear automatically in Theme Builder. You will need to create the Template.
After you import the layout to the Divi Library, you will need to create a new Template by going to Dashboard > Divi > Theme Builder:
https://prnt.sc/9yt5dlFK3GeJ
After that set the Template to All Products:
https://prnt.sc/fiC-Z-6zIZm-
Click on the Add Custom Body option in the Template and select Add from Library:
https://prnt.sc/iCqytEi53gZJ
Then select Your Saved Layouts and import the layout you added in the Library:
https://prnt.sc/8cBrhE-0XoyC
Once the above steps are done, make sure to save the changes 👍
When I use this product page template, it does not work when I import new product pages. The product pages do not automatically use the template until I manually update the page from the backend. Is there a work around to have the template automatically apply to the editor of the page to save time?
For those who are struggling with it saying “This file should not be imported in this context”, it’s because you have already gone into the Divi theme builder. On the ‘home’ page (where you see the global header, footer, and body options) look for the import and export icon in the far top right-hand corner. Import the page and it should work. Make sure to deselect override existing projects, etc.
I hope this helps.
When i try to import file. I got the message “This file should not be imported in this context”.
Since this is a template for Theme Builder, have you tried importing it in Divi > Theme Builder? Here’s a screenshot for referrence: https://prnt.sc/HRw3ZslrYC-d
I save my my first product as the product page template then when I went to add my second product it said that I had to add a post content module?!?!
Am I missing something?
In particular when I go to update the image. The image on the first product page appears as the image on all the others. Please note that I built my initial product page from scratch so I didn’t use the template that you suggested. Is there an easy fix here?
Thanks
– Gary
Why i cant import this layout into woocommerce page product???
These instructions are not very clear.
I have no option for “fullwidth” that is the first issue.
The second issue: you tell us to open an existing page… any page? Or should I open an existing product? I have no idea because you don’t make it clear enough!
Third issue: you make the assumption I notice all of the woo commerce things i need. I notice nothing! There isn’t anything at all specific that I can click or change in any way in the visual editor. What am I supposed to click? Brief and unclear instructions when trying to instruct people on how to do something new are not the way to go. Over-explain, use more images. Don’t make assumptions!
And since that is as far as I could get with unspecific enough instructions…
Exactly where am I supposed to upload that file?
Hello! Me too.. When i try to import file. I got the message “This file should not be imported in this context”.
When i try to import file. I got the message “This file should not be imported in this context”.
Any solution?
Same here, it’s not possible to import this file.
I have the same problem. Has anyone any ideas?
Now this is the Blog feature we have been waiting for! We will be trying this to our Product pages in our Divi WooCommerce website. Great Post Donjete 🙂
Definitely do, happy you like it! 🙂
I really love this divi theme a lot. Thanks for sharing
Hello, thanks for this great work!
Unfortunately I installed this package, but it doesn’t work with the theme headers and footers that I use “divi 4.0 third theme”.
Can you help me please?
Thank you!
Hi,great to see more themes and thank you for your frequent updates. Need more fully customize themes for divi 4. And also can we allow us to download not only global header and footer but entire theme download option with basic images and interface ? Appreciated. Webnoesys IT Solutions LLP Bangalore
It’s great. I’d be happy to write about customizing my shopping cart page and checkout page as well. Thanks.
Happy you like it!