
There are times when we want to use a different post template just for a certain blog post. There are many good reasons to do this, and fortunately, it’s easy to do with the Divi Theme Builder. In this article, we’ll see how to assign a different blog post template to specific posts with Divi.
Preview
Here’s a look at the blog post layouts we’ll use. The first one will work on All Posts. The next two will be assigned to specific posts.
All Posts Desktop
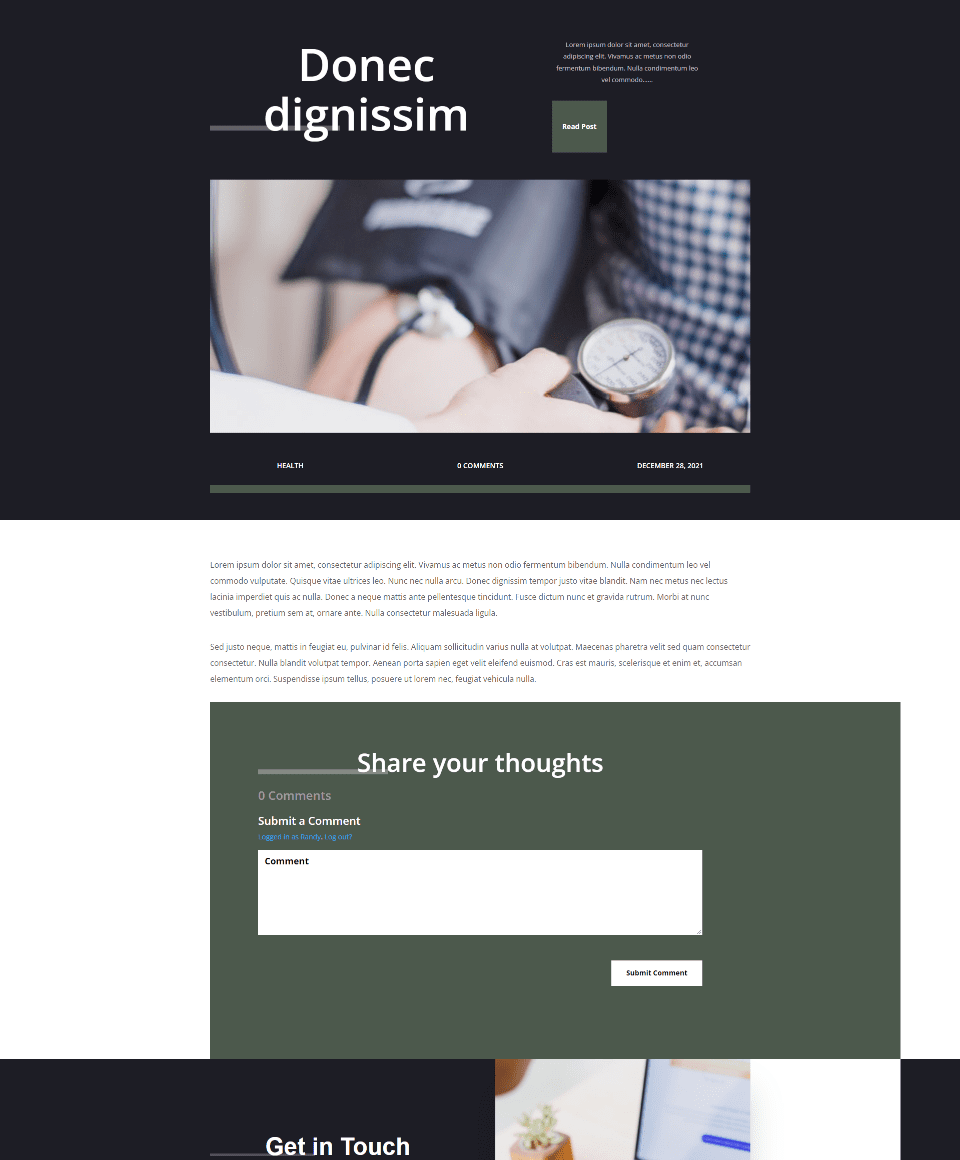
This is the post template that will be assigned to All Posts. Every post that’s not the two that I assigned will automatically display this default blog post template.
First Custom Blog Post Desktop
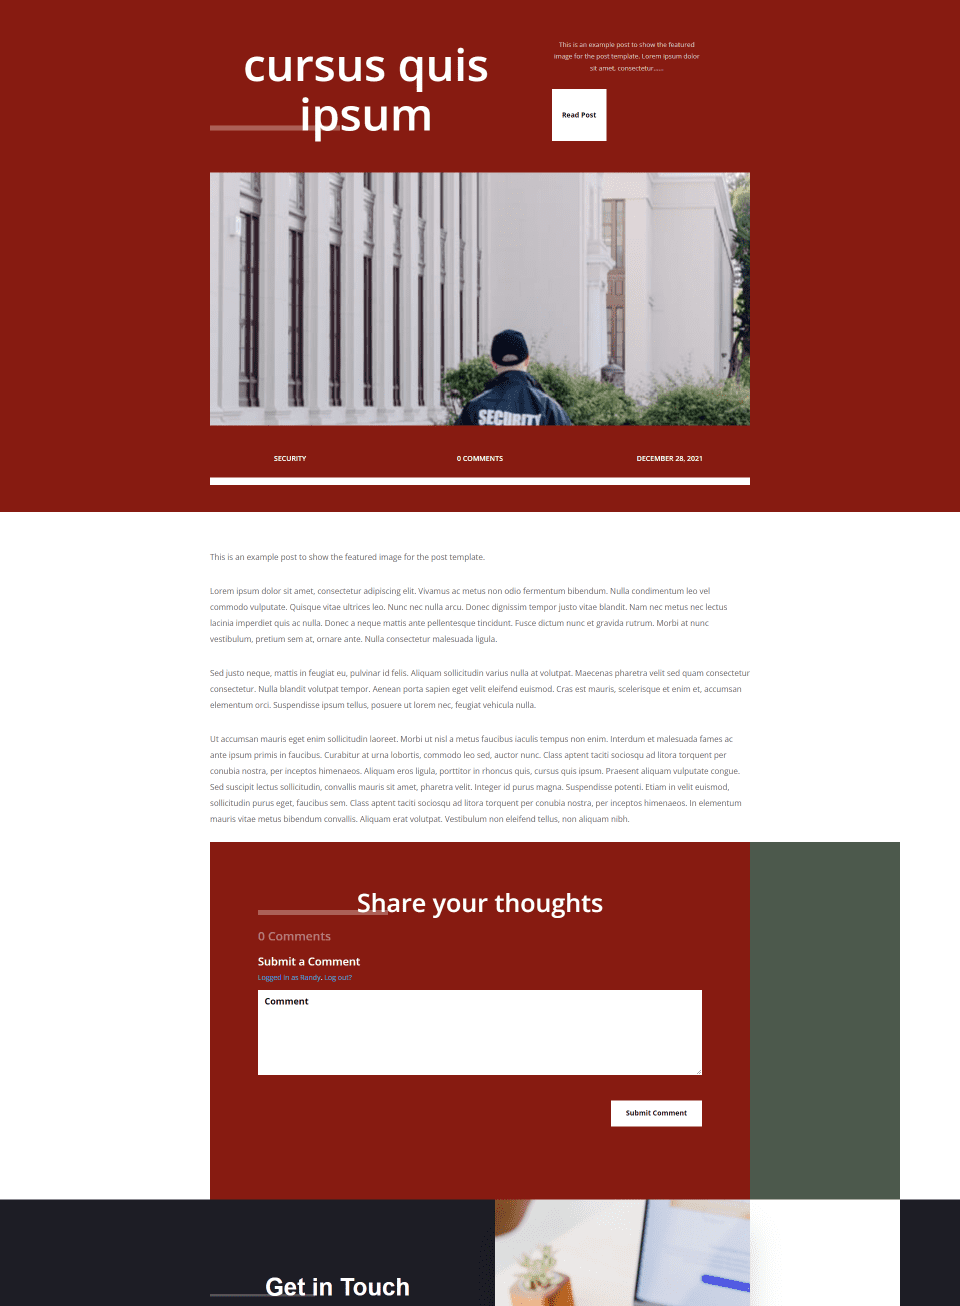
This template will be assigned to one post, so this is the only blog post that will display this template.
Second Custom Blog Post Desktop
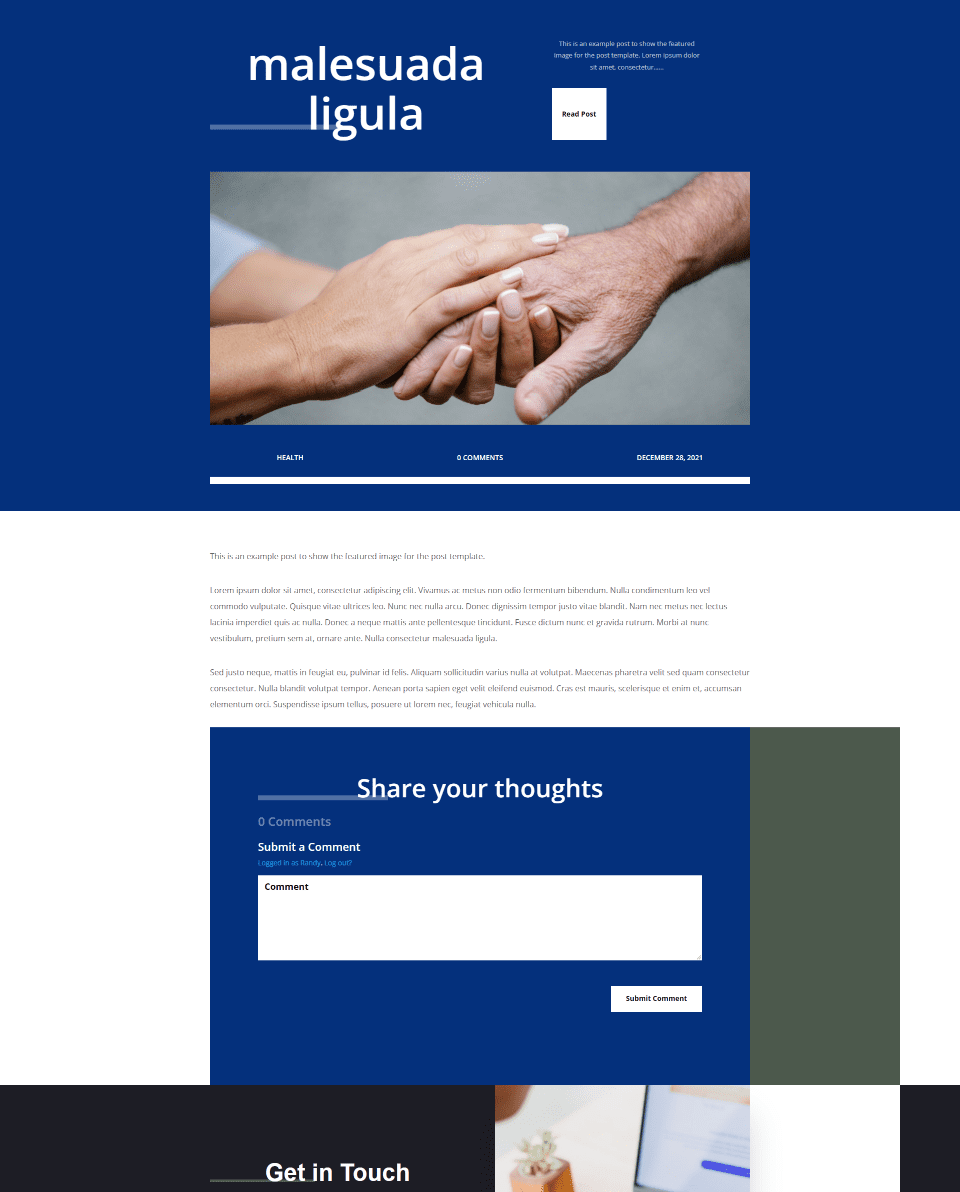
Just like the previous example, this template will be assigned to one post, so only this post will use this template.
Why Assign Different Blog Post Templates to Specific Posts
There are lots of advantages of having specific blog posts use a different template than the rest of your posts. The main reason is that they look different from all other posts on your website. Visitors know instinctively that the post is different from all the others.
This is useful for sales posts that highlight a product or a service. For example, if you have a sale coming up, an e-book, or a webinar that you’ll be launching soon, you can create a layout specifically to highlight these posts. Sale posts are especially good for this because you might not want to create a category for the sale and then assign layouts based on categories.
It’s also useful to show when a blog post is part of another post or series. For example, if you write posts in multiple parts, you could have part 1 to have one layout and part 2 to have a different layout. This way, users can get a visual queue of where they are within the series.
Subscribe To Our Youtube Channel
How to Assign Different Blog Post Templates to Specific Posts
Next, we’ll see how to use a template for all the blog posts except for those we want to assign specific layouts to. To do this, we’ll upload a blog post template that will be assigned to All Posts.
Then, we’ll create copies of that template so that all our post templates will have the same body, design settings, and layout structure. We’ll make tweaks to these layouts so they’re different from the All Posts layout.
Where to Get Blog Post Templates
First, you’ll need to download and unzip your blog post template. You can get lots of free blog post layouts in the Elegant Themes blog. Search the blog for “free blog post template”. There are also several premium blog post layouts in the Divi Marketplace. Search the marketplace for “blog post templates” to see what’s available.
For my examples, I’m using the free blog post template for Divi’s Corporate Layout Pack. I’ll make adjustments to have 3 versions of the template.
Uploading Blog Post Templates
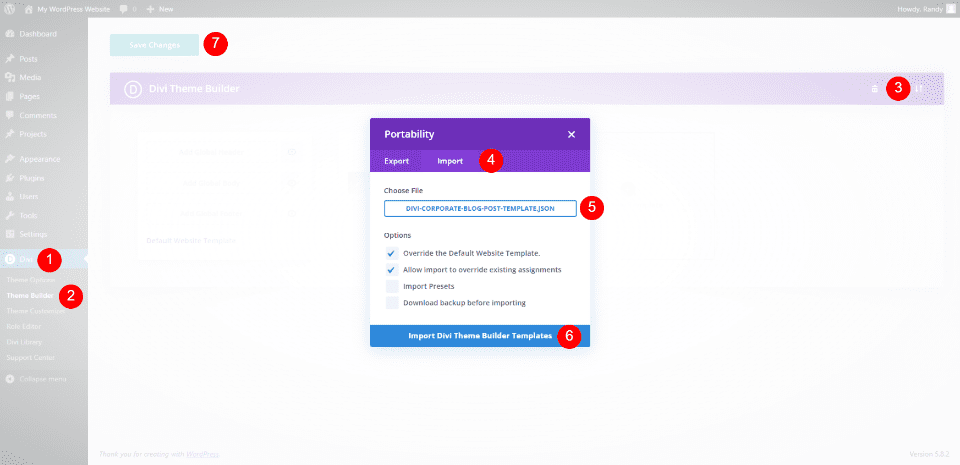
To upload your blog post template, go to Divi > Theme Builder in the WordPress dashboard. Click the Portability button in the upper right. Select the Import tab in the modal that opens. Click to choose your file, navigate to your unzipped JSON file on your computer, and select it. Click Import Divi Theme Builder Templates and wait for the upload to complete. Finally, click Save Changes.
Assigning Blog Post Templates to Specific Posts
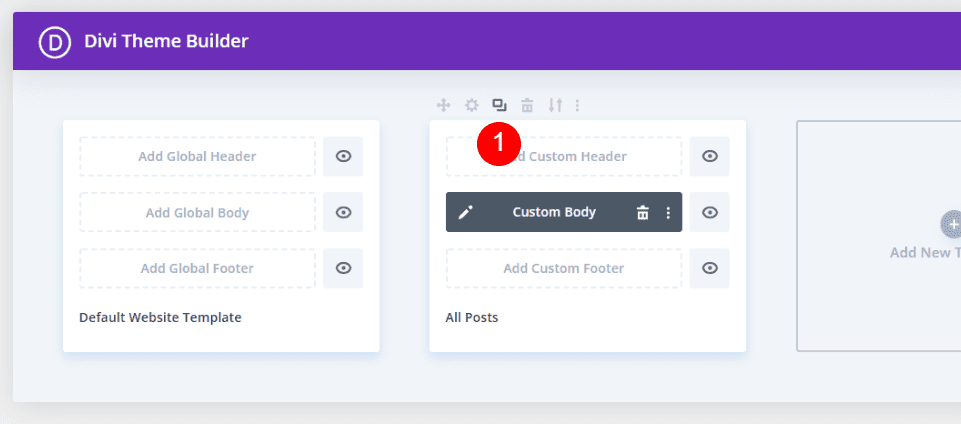
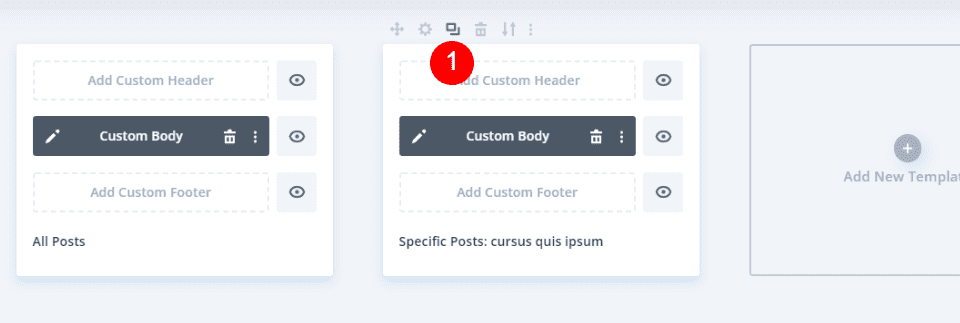
The template is automatically assigned to All Posts. Every blog post that’s not assigned to a different template, or is not excluded from using this template, will display the template used in All Posts. We’ll leave the template at this default setting and create copies to customize and assign. Hover over the template and select the Clone icon.
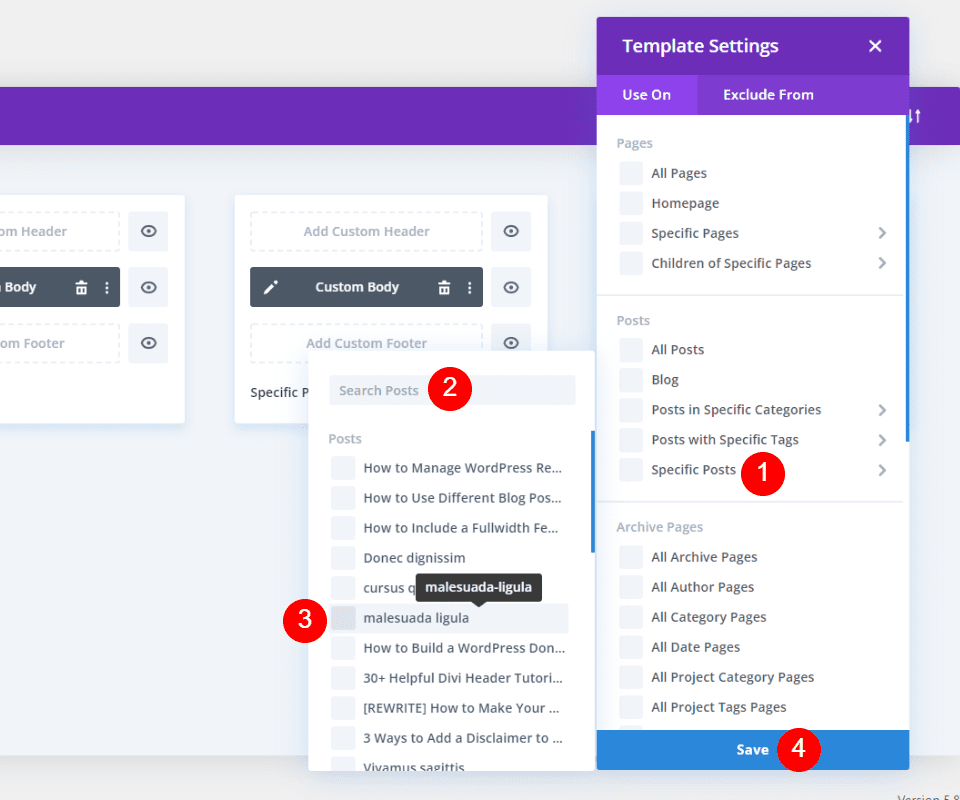
A modal will open with the template settings for your new template. Under the Posts section, hover over Specific Posts. This opens the list of blog posts on your website. Here, you can search for a specific post or scroll to find it. Click on the post you want to assign this template to. You can assign to as many posts as you want. I’m assigning it to one post.
We’ll create another copy of this one, but we’ll customize it first.
Customize the Cloned Blog Post Template
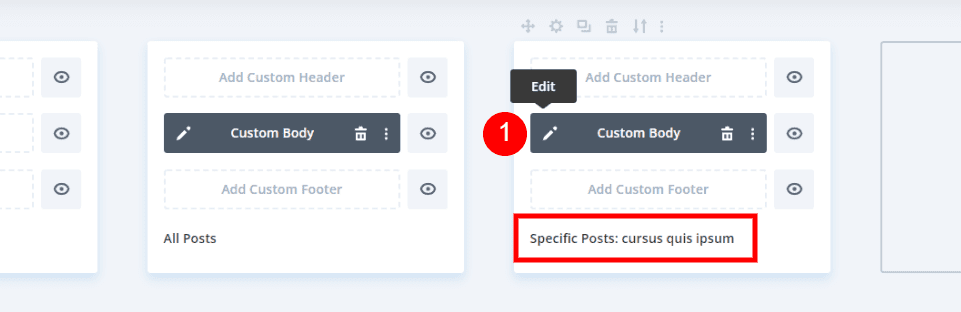
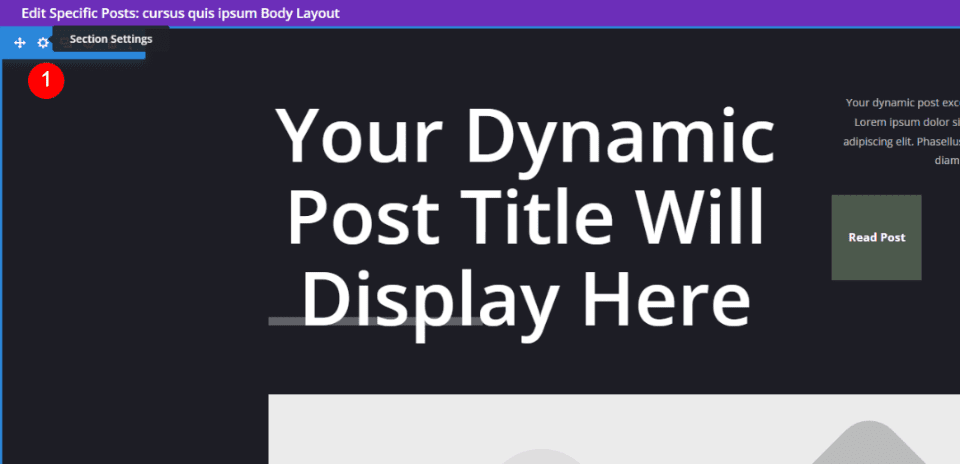
The template now shows that it’s assigned to the blog post I selected. Next, click the edit icon to customize this template.
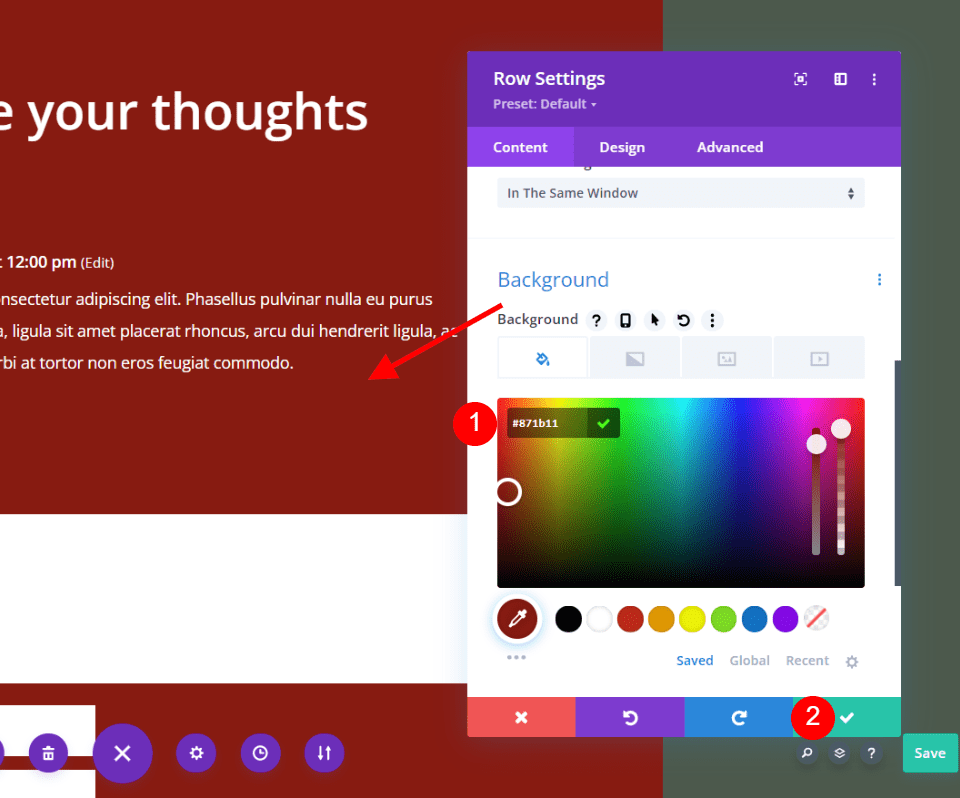
Open the Section settings for the first section.
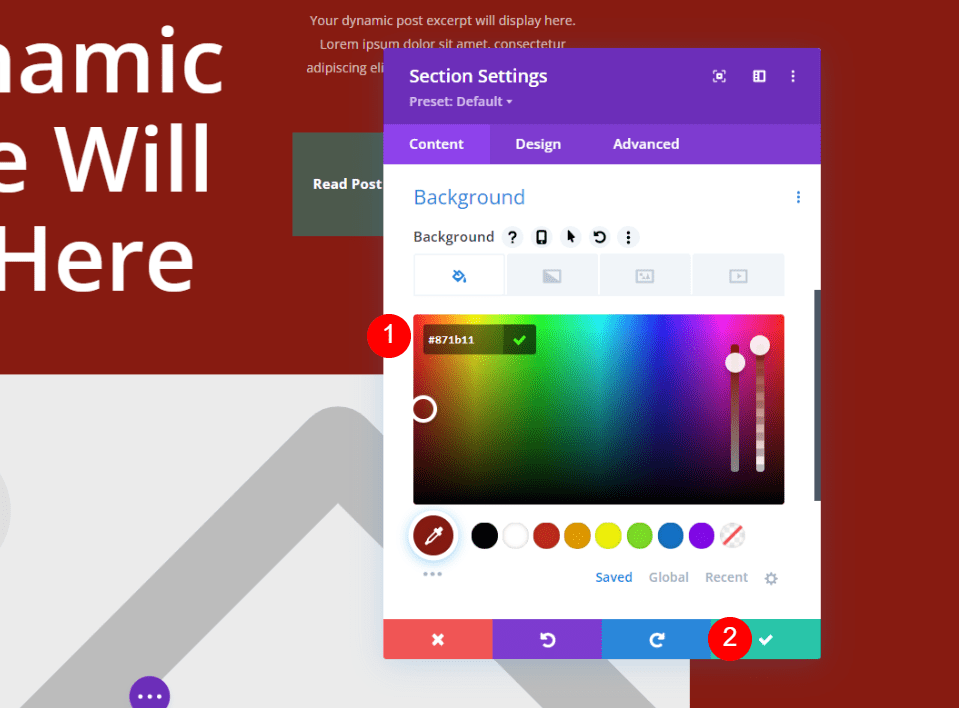
Scroll to the Background settings and change it to a dark red, #871b11. Close the settings.
- Background: #871b11
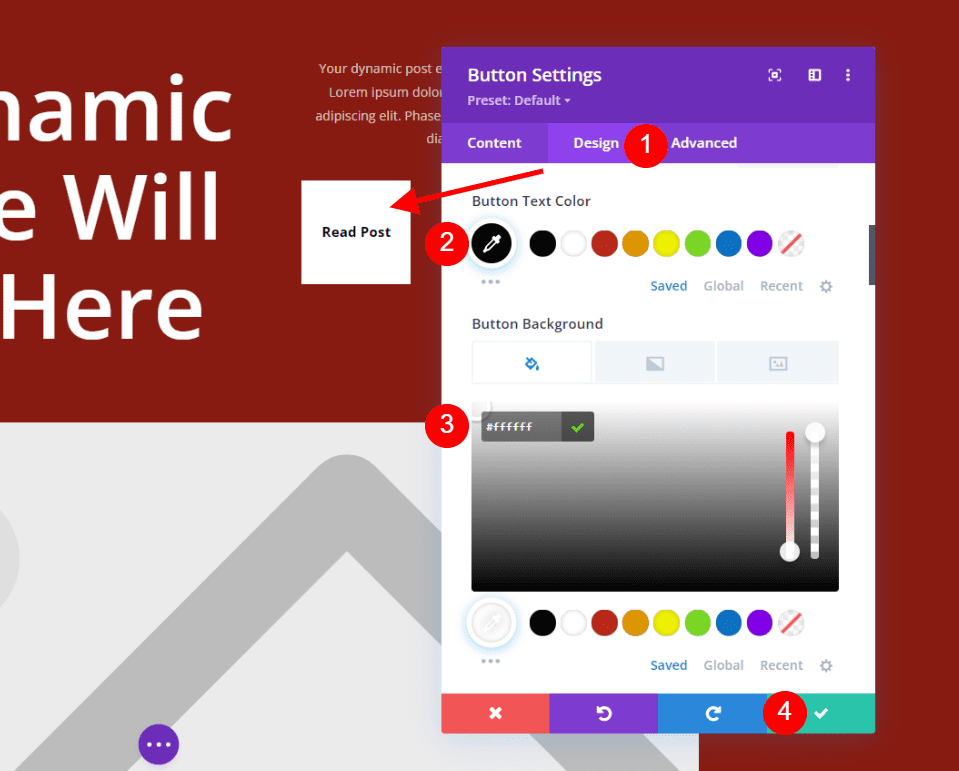
Open the Read Post button settings and select the Design tab. Change the button text color to black and the button background to white. Close the settings.
- Button Text Color: #000000
- Button Background: #ffffff
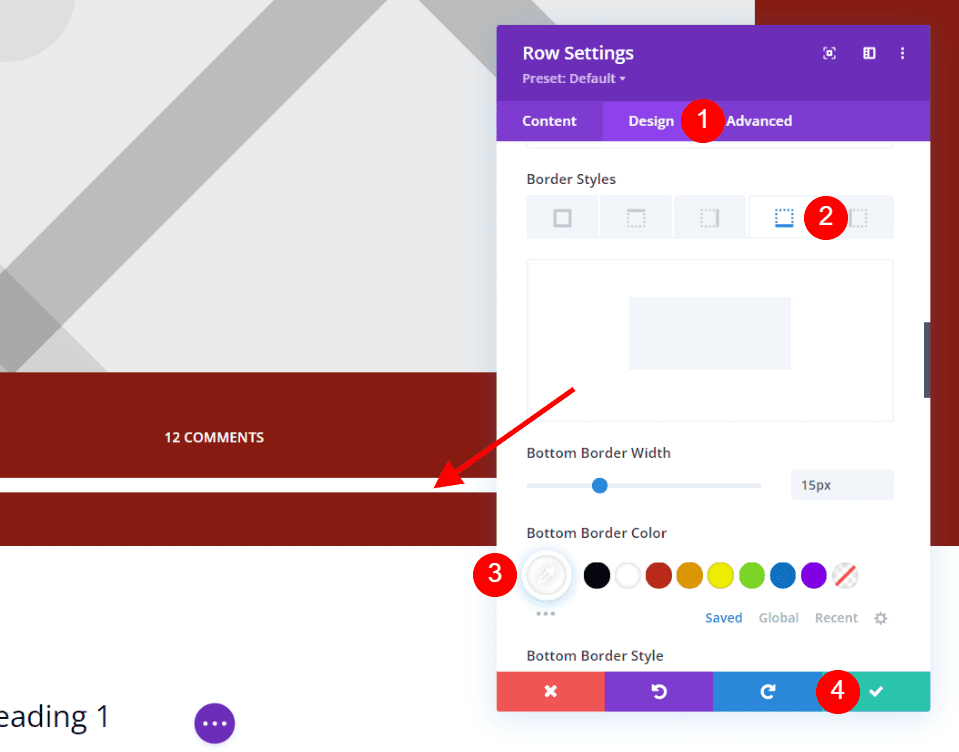
Open the settings for the Row that contains the post meta information. Select the Design tab and scroll to Border Styles. Select the bottom border and change the color to white. Close the settings.
- Bottom Border Color: #ffffff
Scroll down to the Row that contains the Comments module and open its settings. Change the background to the same dark red as the first section’s background. Notice the portion of the background that remains green. I will keep this as it is because it ties the blog post to the original layout. Close the settings and save your layout.
- Background: #871b11
Customize the Second Cloned Blog Post Template
Next, we’ll duplicate our customized post template. Hover over the template and click on the clone icon.
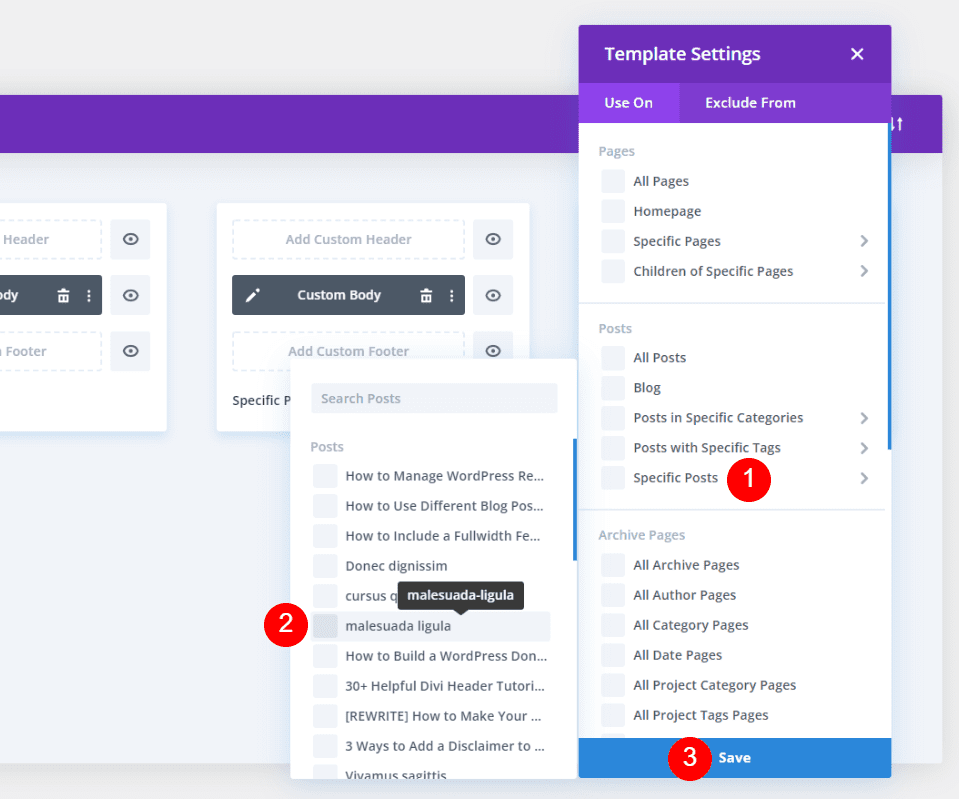
The settings modal will open. Under Posts, hover over Specific Posts. Search for your post or look for it in the list and select it. Save your settings. As with the first cloned template, you can assign to as many posts as you want. As before, I’m assigning it to one post.
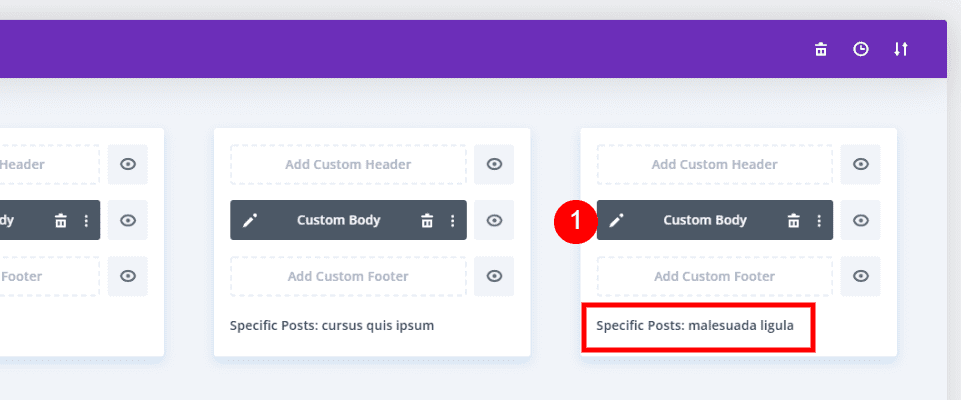
The second cloned blog post template will show the post name that it’s assigned to. Next, select the edit icon to make your changes.
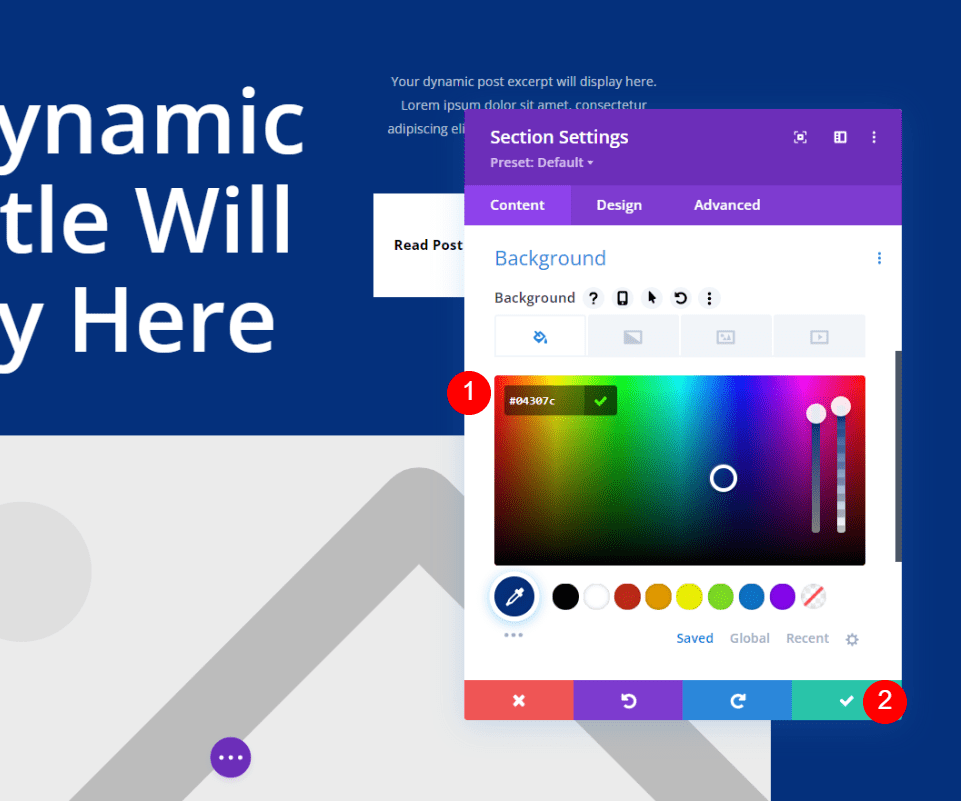
Open the settings for the first section and change the color to a dark blue, #04307c. Close the settings.
- Background: #04307c
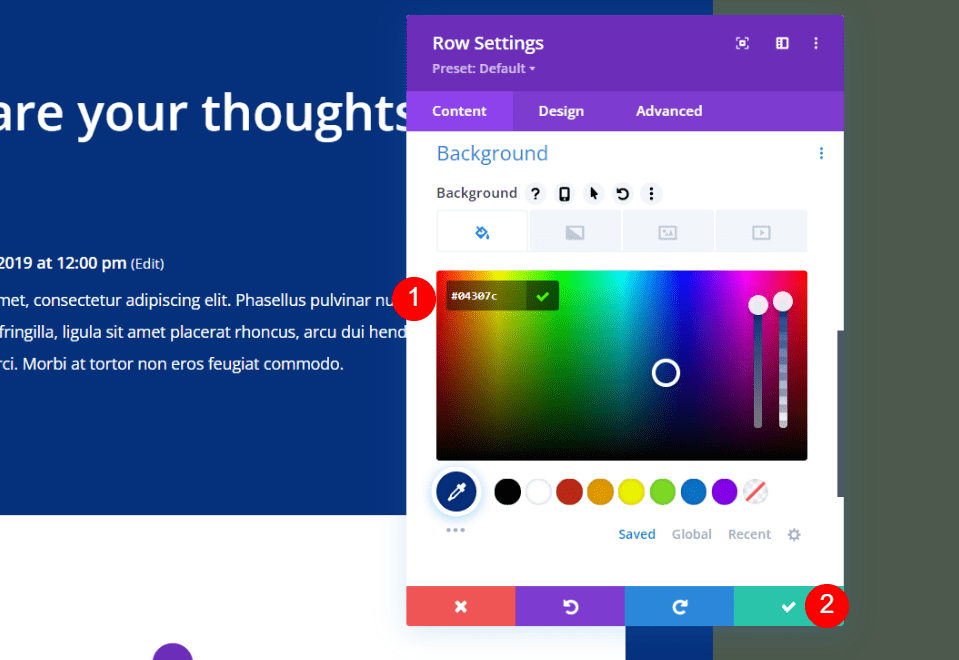
Next, scroll down to the Comments module and open the Row settings. Change the background color to the same dark blue, #04307c. Close the settings and save your template. As we did in the previous template, we’ve left the green color as it is so the template will have some elements from the original layout.
- Background: #04307c
Results
Here’s a look at the results.
All Posts Desktop
Every post that’s not the two that I assigned will automatically display this default blog post template.
First Custom Blog Post Desktop
This is the only post that will display this template.
Second Custom Blog Post Desktop
Just like the previous example, only this post will use this template.
Ending Thoughts
That’s our look at how to assign a different blog post template to specific blog posts with Divi. The examples I used only changed the colors of the backgrounds, but you can use templates with completely different layouts if you want. I recommend using similar design elements to keep the layouts similar. This way, users don’t think they’ve gone to a different website. Fortunately, using different layouts for specific blog posts is easy to do with Divi.
We want to hear from you. Do you use different blog post templates for specific blog posts? Let us know about it in the comments.


Leave A Reply