
Having a slide-in call to action on your site is one of the least obtrusive ways to get your visitors attention. Most of the time they will simply ignore CTA or close it to continue browsing the page, but sometimes you will win them over. A slide-in call to action will work great for promoting just about anything on a landing page.
In this tutorial, we are going to design a closeable slide-in call to action that can be added to any corner of a page using the Divi Theme Builder. Once done, you will have the ability to promote your products and special offers anywhere on the page without having to use a plugin.
Let’s get started!
- 1 Sneak Peek
- 2 Download the Slide-In Call to Action Divi Page Template for FREE
- 3 Download For Free
- 4 What You Need to Get Started
-
5
Creating a Closable Slide-In Call-to-Action for every corner of your page template in Divi
- 5.1 Creating a New Template
- 5.2 Creating the Post Content Section
- 5.3 Creating the Top Left Slide-In Call-to-Action
- 5.4 Creating the Top Right Slide-In Call-to-Action
- 5.5 Creating the Bottom Left Slide-In Call-to-Action
- 5.6 Creating the Bottom Right Slide-In Call-to-Action
- 5.7 Adding the Custom jQuery and CSS Code Snippets using a Code Module
- 6 Final Thoughts
Sneak Peek
Here is a quick look at the four slide-in CTAs we will be adding to all four corners of the page template. Of course, you will not need to have all four deployed at once. Notice how each one is closable by clicking on the “x” icon and then you can choose to toggle the CTA back open by clicking the “plus” icon.

Download the Slide-In Call to Action Divi Page Template for FREE
To lay your hands on the Page Template from this tutorial, you will first need to download it using the button below. To gain access to the download you will need to subscribe to our newsletter by using the form below. As a new subscriber, you will receive even more Divi goodness and a free Divi Layout pack every Monday! If you’re already on the list, simply enter your email address below and click download. You will not be “resubscribed” or receive extra emails.

To import the layout to your page, simply extract the zip file and add one of the json files into the Divi Theme Builder using the Theme Builder Portability option.
Let’s get to the tutorial shall we?
What You Need to Get Started
To get started, you will need to install and activate the Divi Theme. Make sure you have the latest version of Divi.
You will also need at least one page created with the Divi Builder for testing purposes in order to assign the new template to that page to show the result.
After that, you are ready to go.
Creating a Closable Slide-In Call-to-Action for every corner of your page template in Divi
Creating a New Template
From the WordPress Dashboard, navigate to Divi > Theme Builder. Then click the “Add New Template” box to create a new template.
Assign the template to the page(s) you want the promo bar to be displayed.
On the new template, click the “Add Custom Body” area then select “Build Custom Body”.
Then select the option “Build From Scratch”.
Creating the Post Content Section
The post content section is a necessary part of any page template in order to display the actual content of the page or post built in Divi or WordPress. We will add this to our template before creating our first slide-in call-to-action.
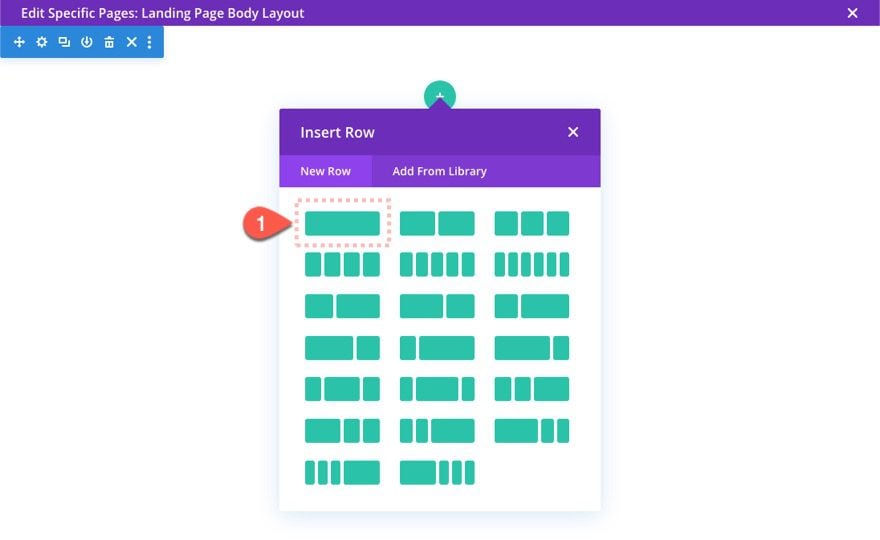
Add One-Column Row
To start, add a one-column row the regular section.
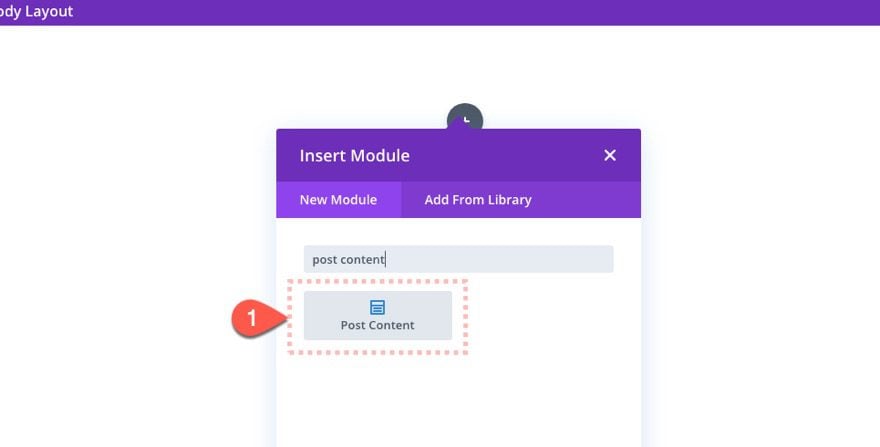
Add Post Content Module
Then add a post content module to the row.
Row Settings
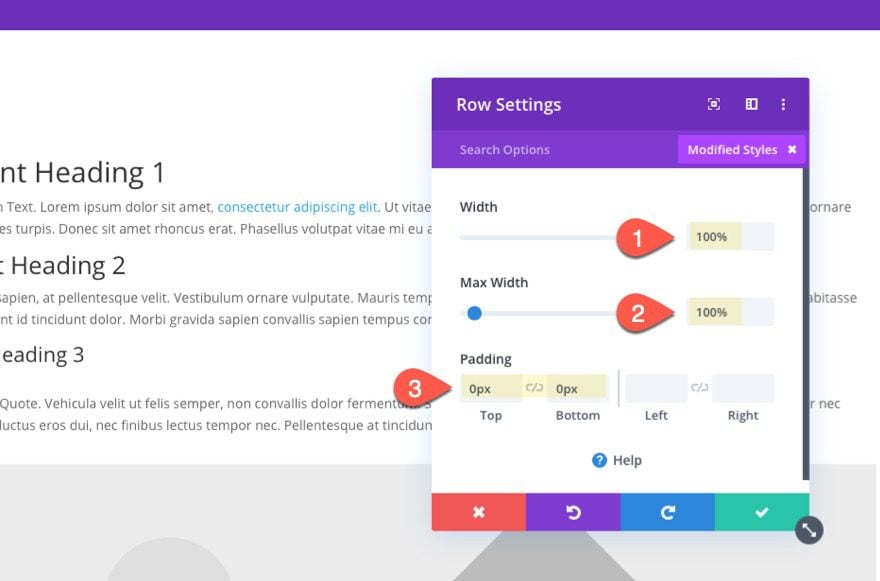
After that, update the row settings as follows:
- Width: 100%
- Max Width: 100%
- Padding: 0px top, 0px bottom
Creating the Top Left Slide-In Call-to-Action
Now that our post content module is in place, we are ready to start adding our first slide-in call to action to the top left corner of the page template.
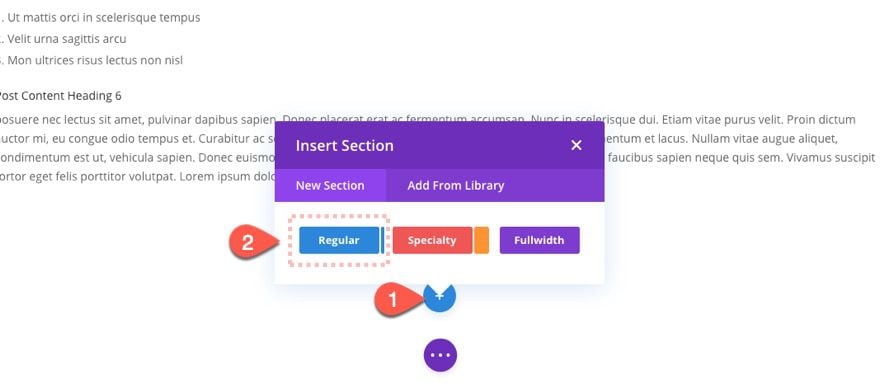
Add Section
Each new call to action will be created with an entire new section. This will allow you to add any layout or module needed to design the call to action.
Add a new regular section to the template layout.
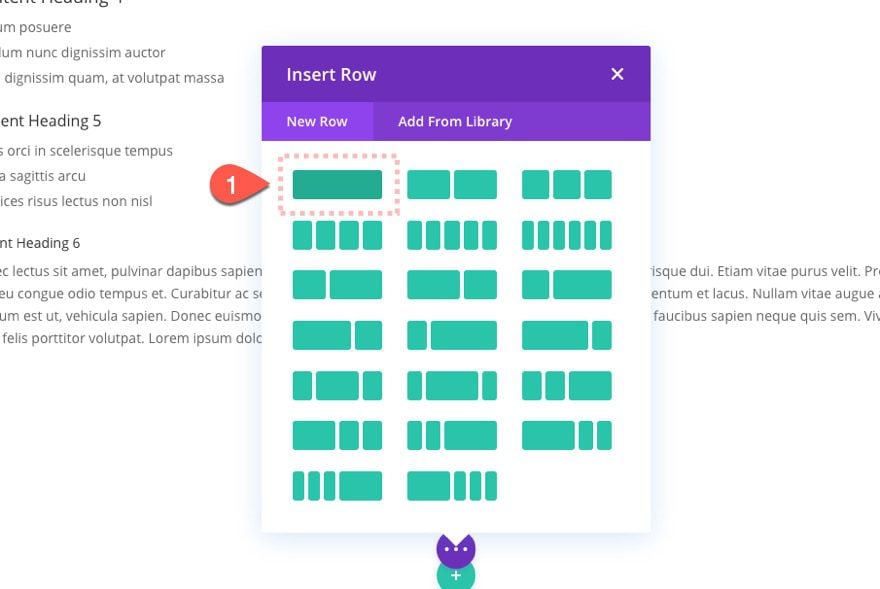
Add One-Column Row
Then give the section a one column row.
Section Settings
Drag (or move) the section above the post content section and update the section settings as follows:
- Background Gradient Left Color:
- Background Gradient Right Color:
- Show Gradient Above Image: YES
- Background Image: [insert image]
- Width: 320px
- Margin: 320px left
- Padding: 0px top, 0px bottom
- Animation Style: Slide
- Animation Direction: Right
- Animation Delay: 2000ms
Then jump over the the advanced tab and add the following CSS Class and Z index:
- CSS Class: slide-in-cta
- Z Index: 999
And add the following custom CSS snippet the Main Element:
position: fixed;
top: 80px;
left: -320px;
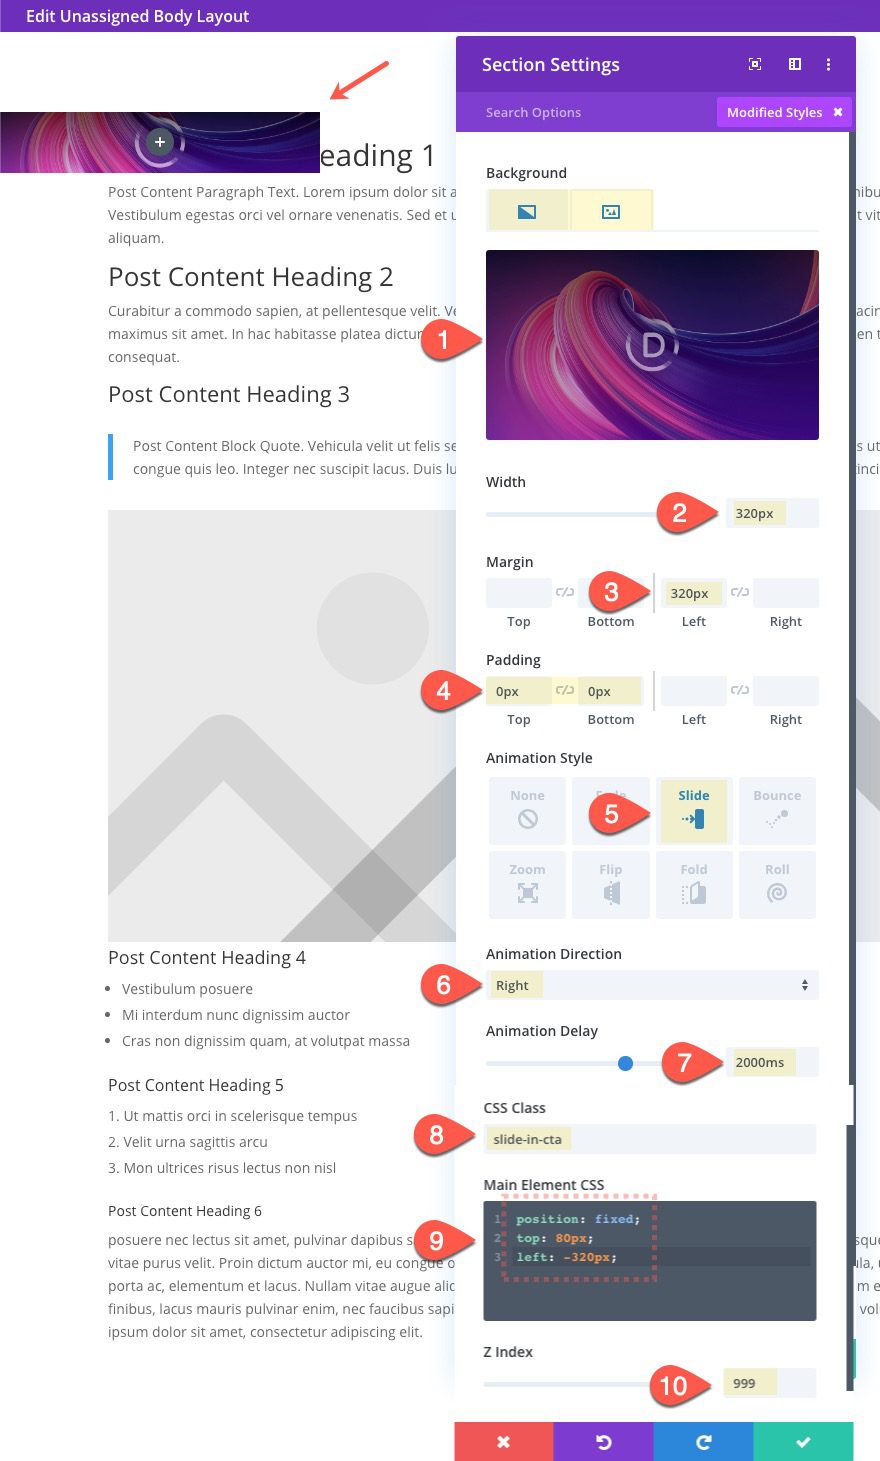
The CSS Class is needed so that we can target the section with code later on. The custom CSS will position the section at the top left of the page template in a fixed (or sticky) position. The “left: -320px” position should move the entire section (which is 320px wide) outside of the browser window. But we have the 320px left margin to bring it back into view. The reason this is built this way is so that we can toggle the margin value on and off when clicking the “x” icon. This will cause the CTA to slide in and out of view.
Row Settings
Now let’s update the row settings as follows:
- Use Custom Gutter Width: YES
- Gutter Width: 1
- Width: 100%
- Padding: 0px top, 0px bottom

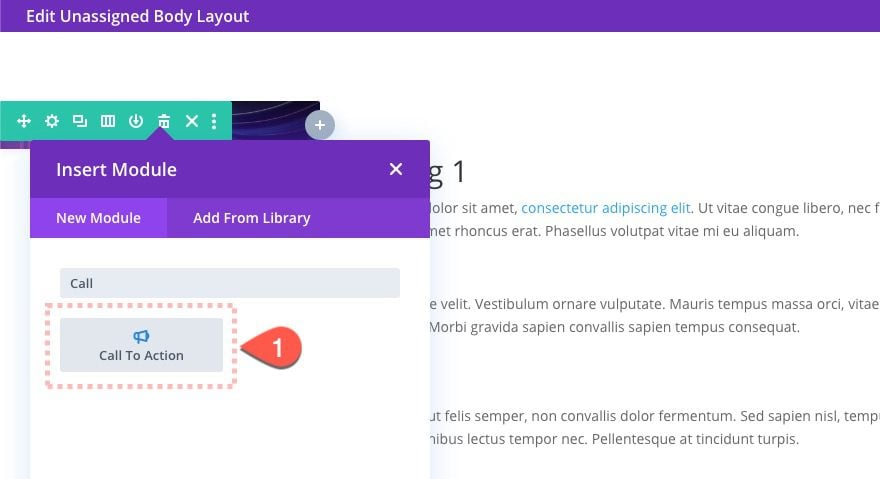
Add Call to Action Module
Inside the row, add a Call to Action Module.
Call to Action Settings
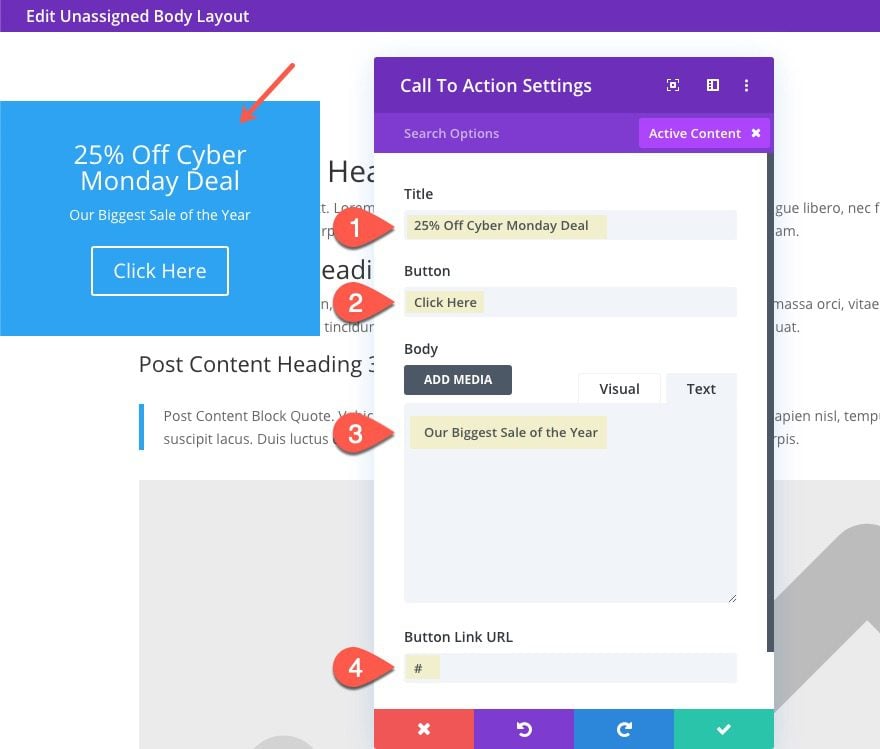
Then update the call to action settings.
Content
- Title: [enter text of choice]
- Button: [enter text of choice]
- Body: [enter text of choice]
- Button Link URL: [enter actual url or #]
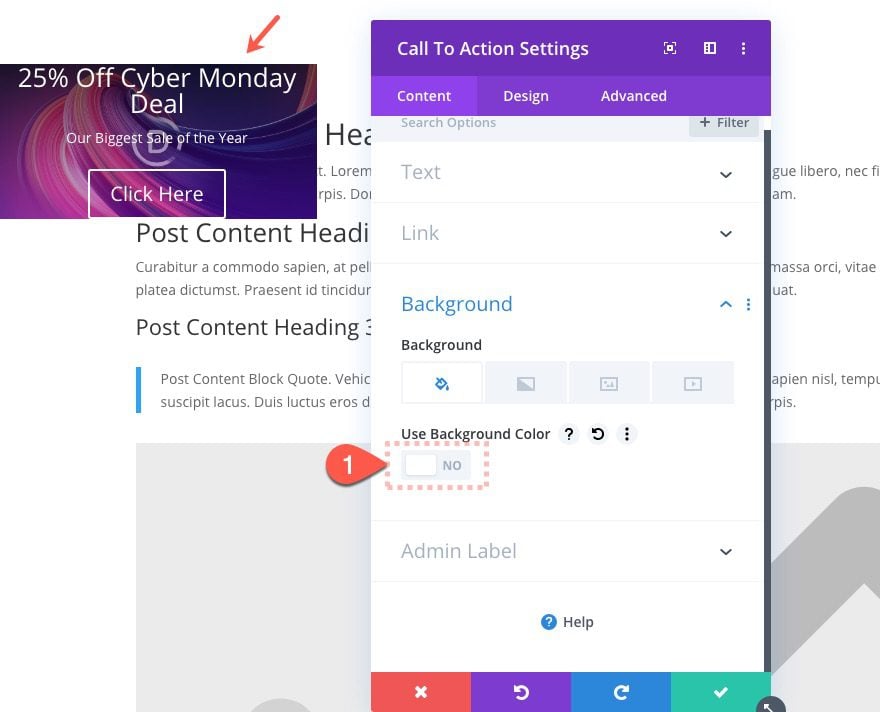
Next, remove the default background color to reveal the background of the section we added earlier.
Design Settings (Text, button, and padding)
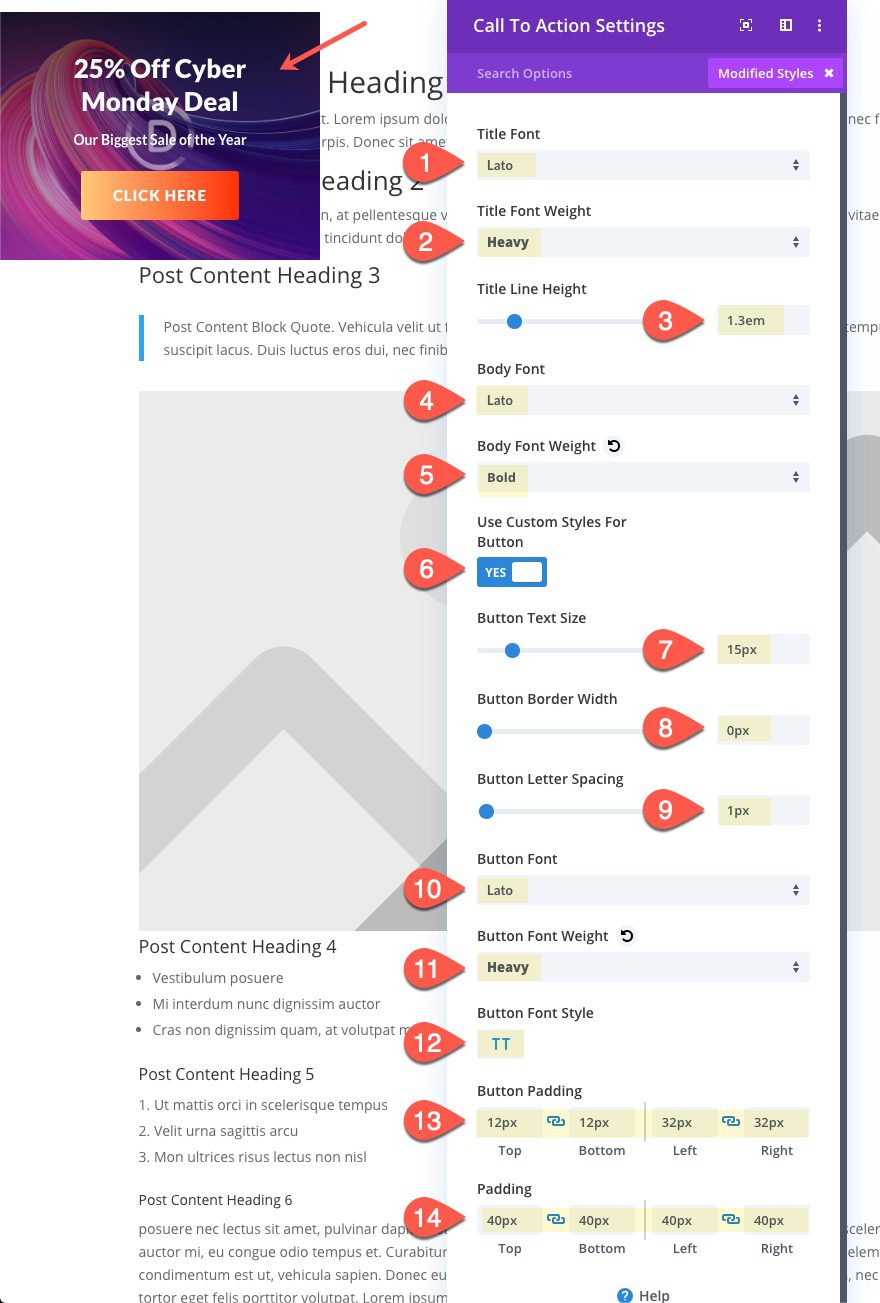
Under the design tab, update the following:
- Title Font: Lato
- Title Font Weight: Heavy
- Title Line Height: 1.3em
- Body Font: Lato
- Body Font Weight: Bold
- Use Custom Styles for Button: YES
- Button Text Size: 15px
- Button Border Width: 0px
- Button Letter Spacing: 1px
- Button Font: Lato
- Button Font Weight: Heavy
- Button Font Style: TT
- Button Padding: 12px top, 12px bottom, 32px left, 32px right
- padding: 40px top, 40px bottom, 40px left, 40px right
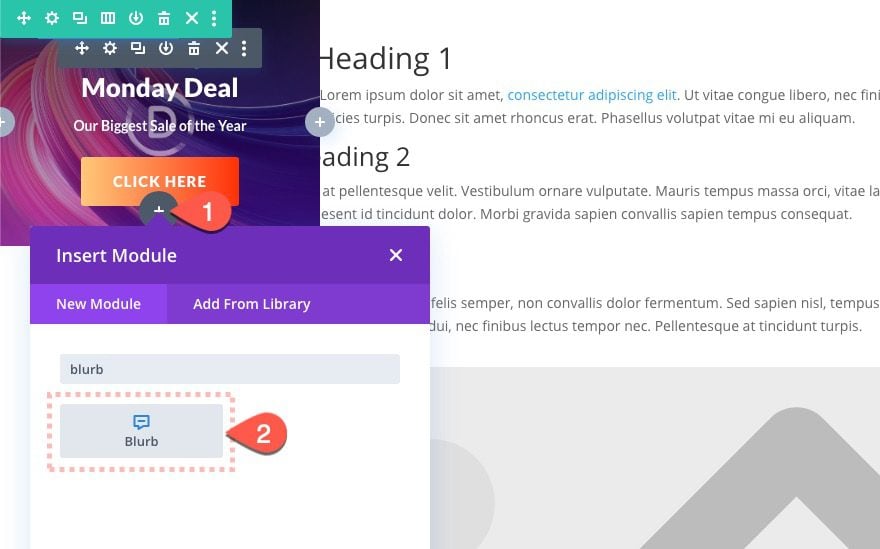
Add Open and Close Icon with a Blurb Module
After the call to action is finished, we need to create the icon button used to open and close the slide-in call to action. To create this, add a blurb module below the call to action module.
Blurb Settings
Update the following design settings.
Content
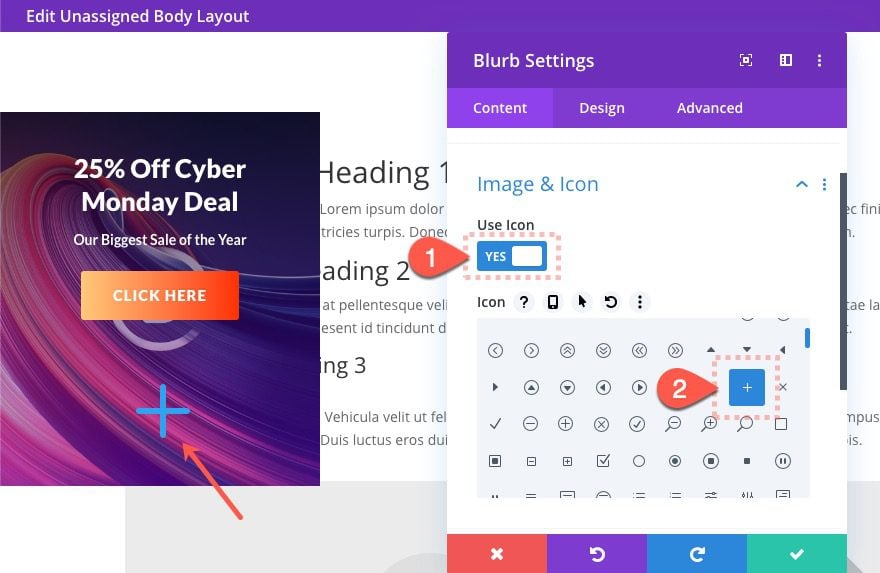
- delete default title and body text
- Use Icon: YES
- Icon: plus (see screenshot)
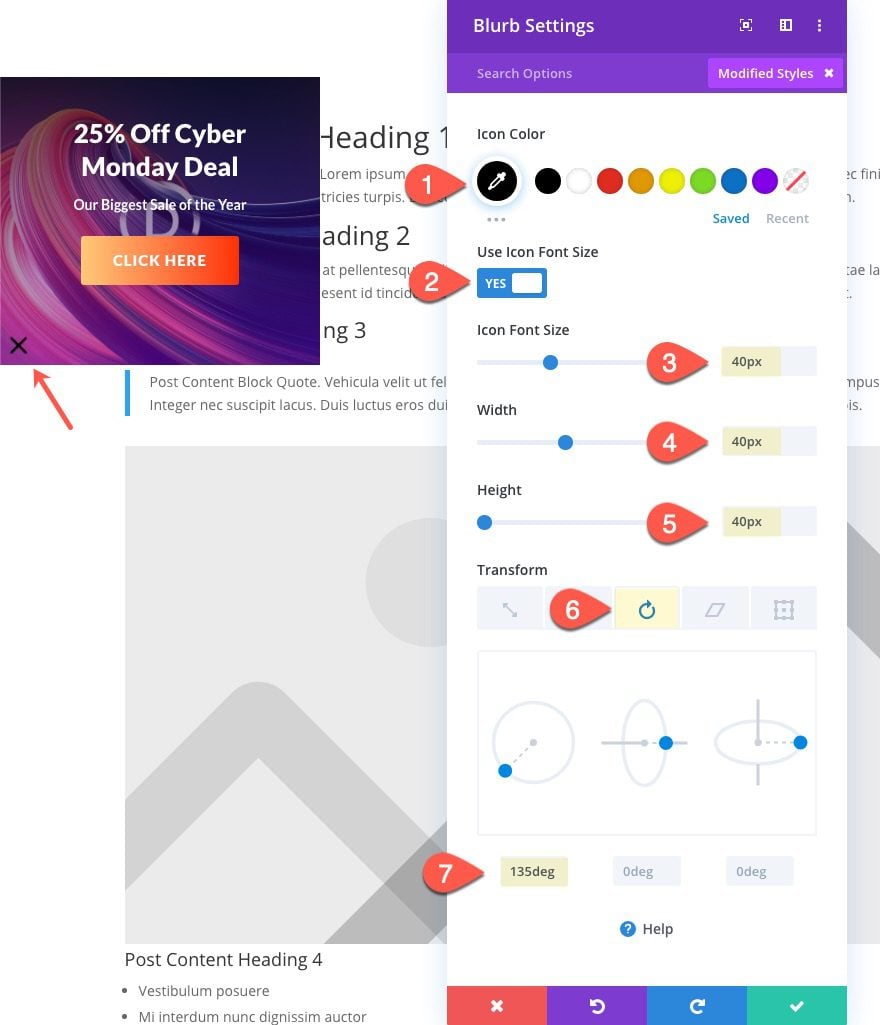
Design
- Icon Color: #000000
- Use Icon Font Size: YES
- Icon Font Size: 40px
- Width: 40px
- Height: 40px
- Rounded Corners: 50%
- Transform Rotate Z axis: 135deg
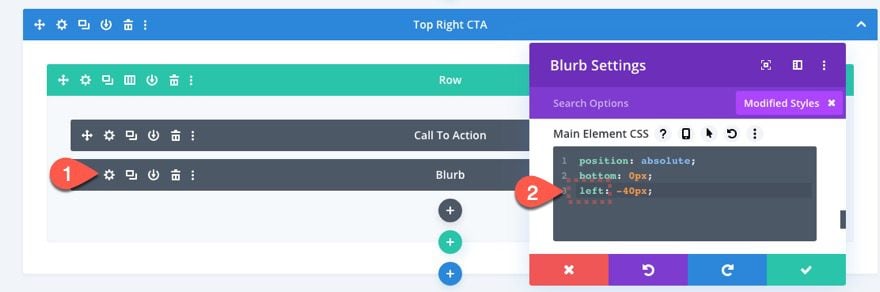
Advanced Settings
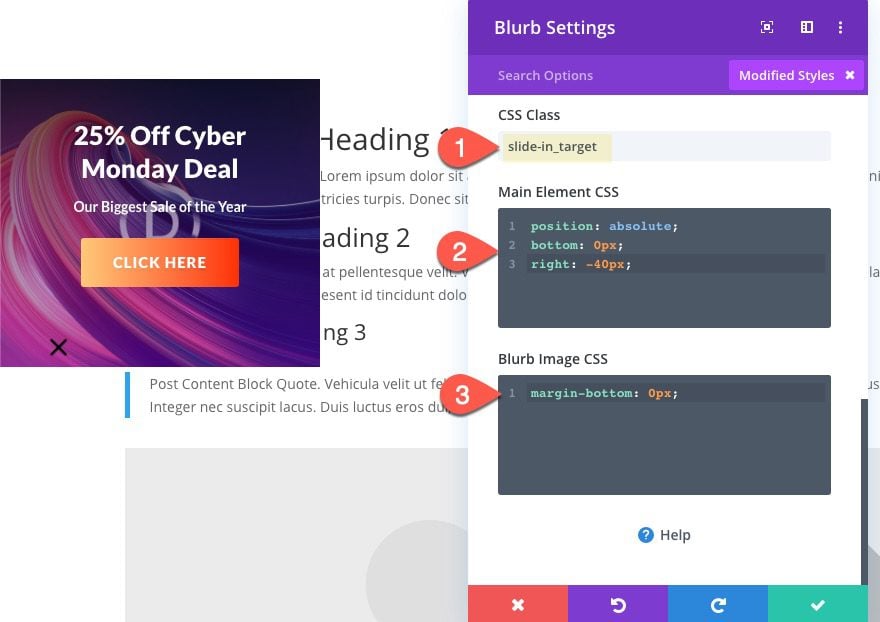
Under the advanced tab, add the following CSS class:
- CSS Class: slide-in_target
Then add this custom CSS to the main element.
position: absolute;
bottom: 0px;
right: -40px;
Add the following custom CSS to the Blurb Image.
margin-bottom: 0px;
Result
Here is the result so far.

Bear in mind that we still need to add some code to add the close and open functionality when clicking the “x” icon. We will add the code after we create a call to action in each of the four corners of the template.
Creating the Top Right Slide-In Call-to-Action
With the first slide-in call to action created, we can speed up the process of creating the rest of the CTAs by duplicating the section already built. Next, we will create a slide-in call to action for the top right corner.
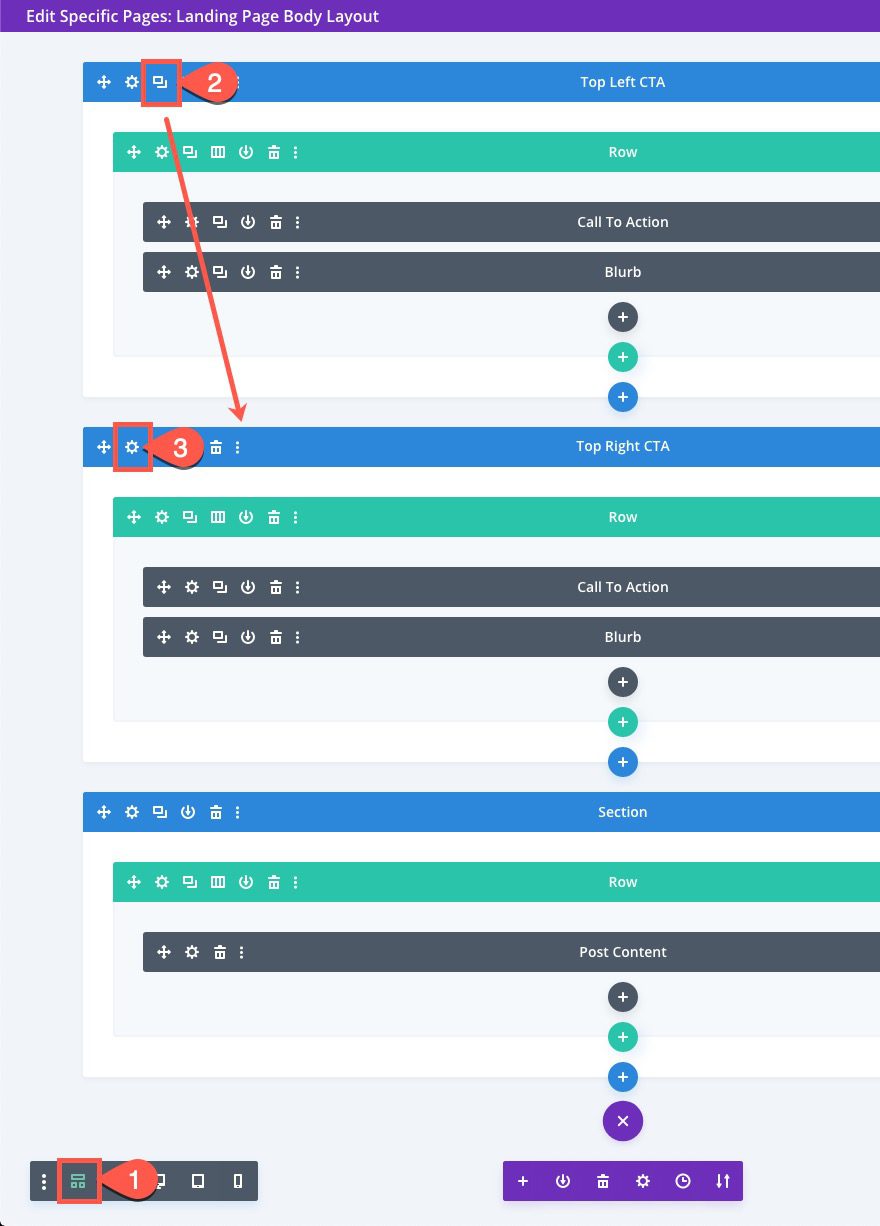
Duplicate Section
Deploy the wireframe view mode and then duplicate the top left CTA section.
Update Section Settings
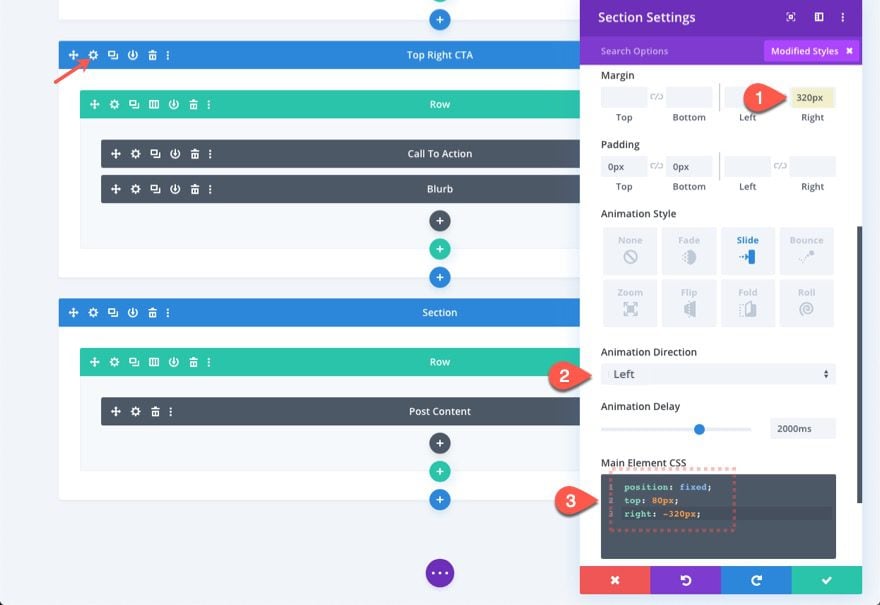
Then update the new section settings as follows:
- margin: 320px right
- animation direction: left
Then update the custom CSS in the Main Element by replacing “left” with “right”. Here is the full snippet:
position: fixed;
top: 80px;
right: -320px;
Update Blurb Module Settings
Then open the blurb module settings and update the custom CSS snippet in the main element by replacing “right” with “left”. Here is the full snippet:
position: absolute;
bottom: 0px;
left: -40px;
Result
Now you will see a slide-in call to action at the top right of the page template.

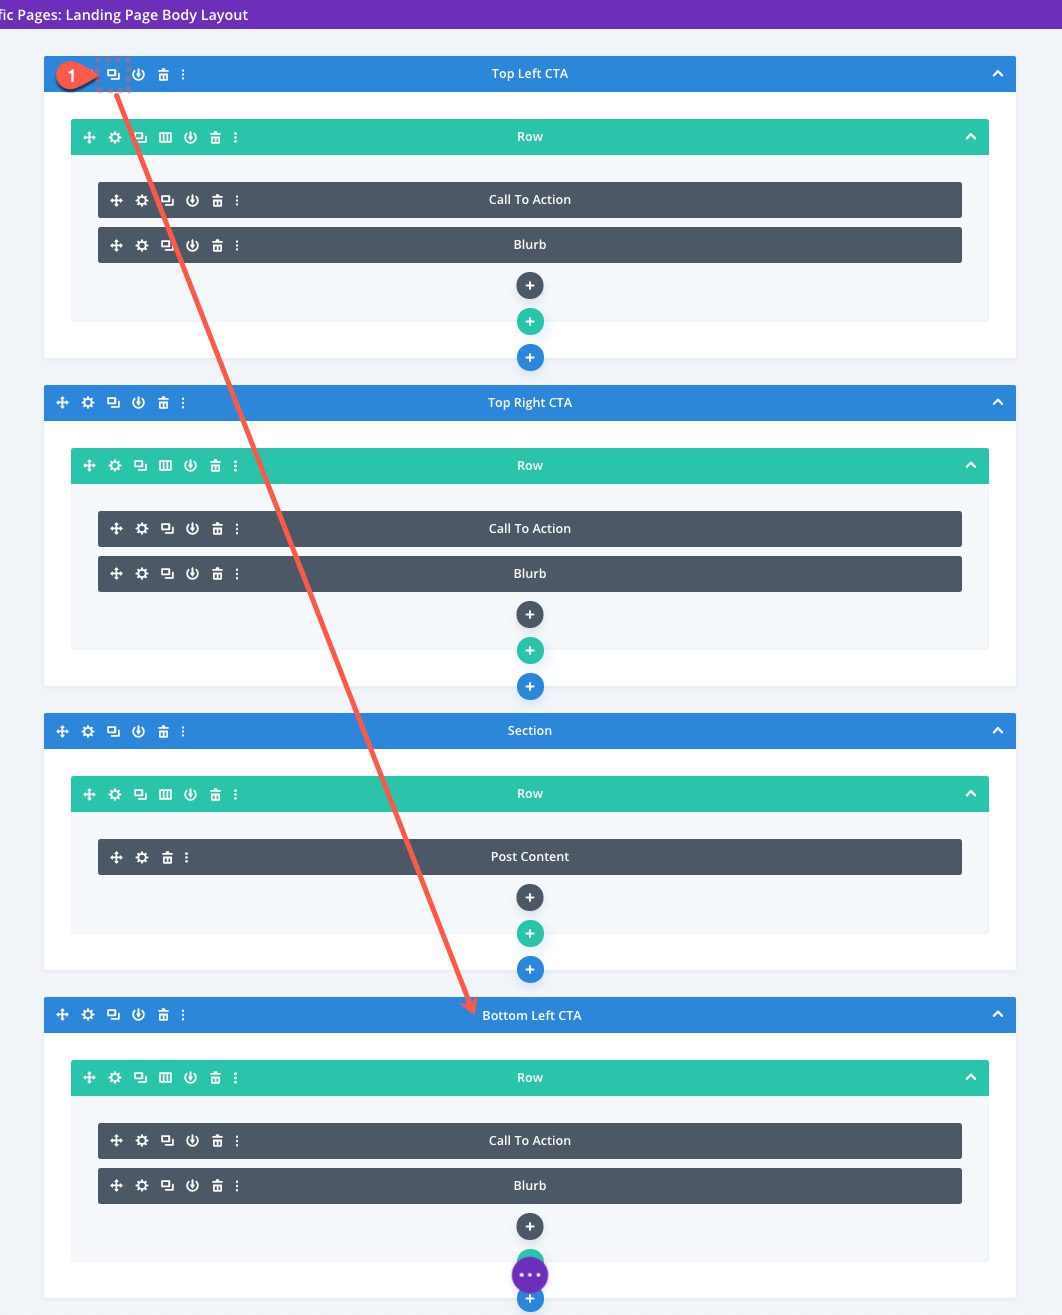
Creating the Bottom Left Slide-In Call-to-Action
Duplicate Section
To create a slide-in call to action in the bottom left corner of the page template, duplicate the top left CTA section at the top of the page layout. Label the duplicate section “Bottom Left CTA” then move it below the post content section.
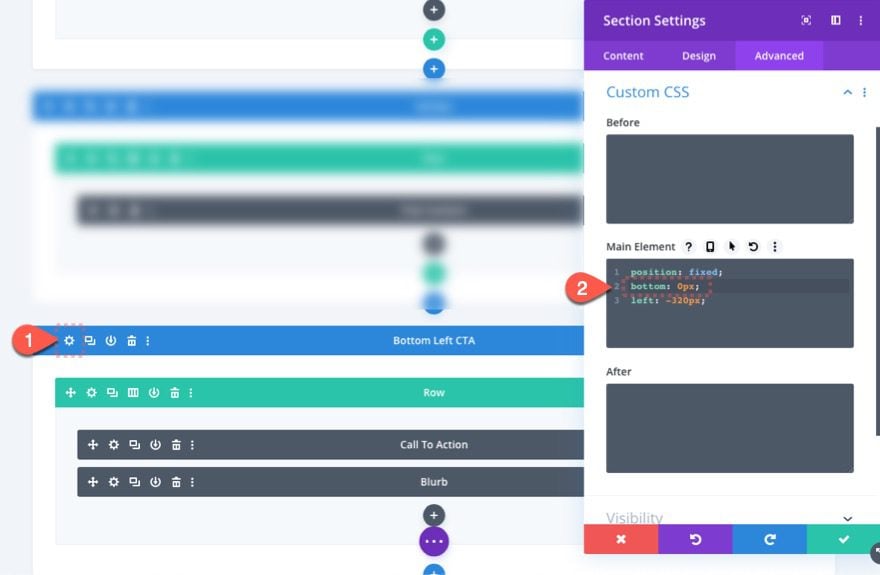
Update Section Settings
Then open the section settings update the main element CSS by replacing “top: 80px” with “bottom: 0px”. Here is the final snippet:
position: fixed;
bottom: 0px;
left: -320px;
Update Blurb Module Settings
Then update the Blurb Module’s main element CSS by replacing “bottom: 0px” with “top: 0px”. Here is the final snippet:
position: absolute;
top: 0px;
right: -40px;

Result
Now check out the bottom left slide-in call to action on the live page.

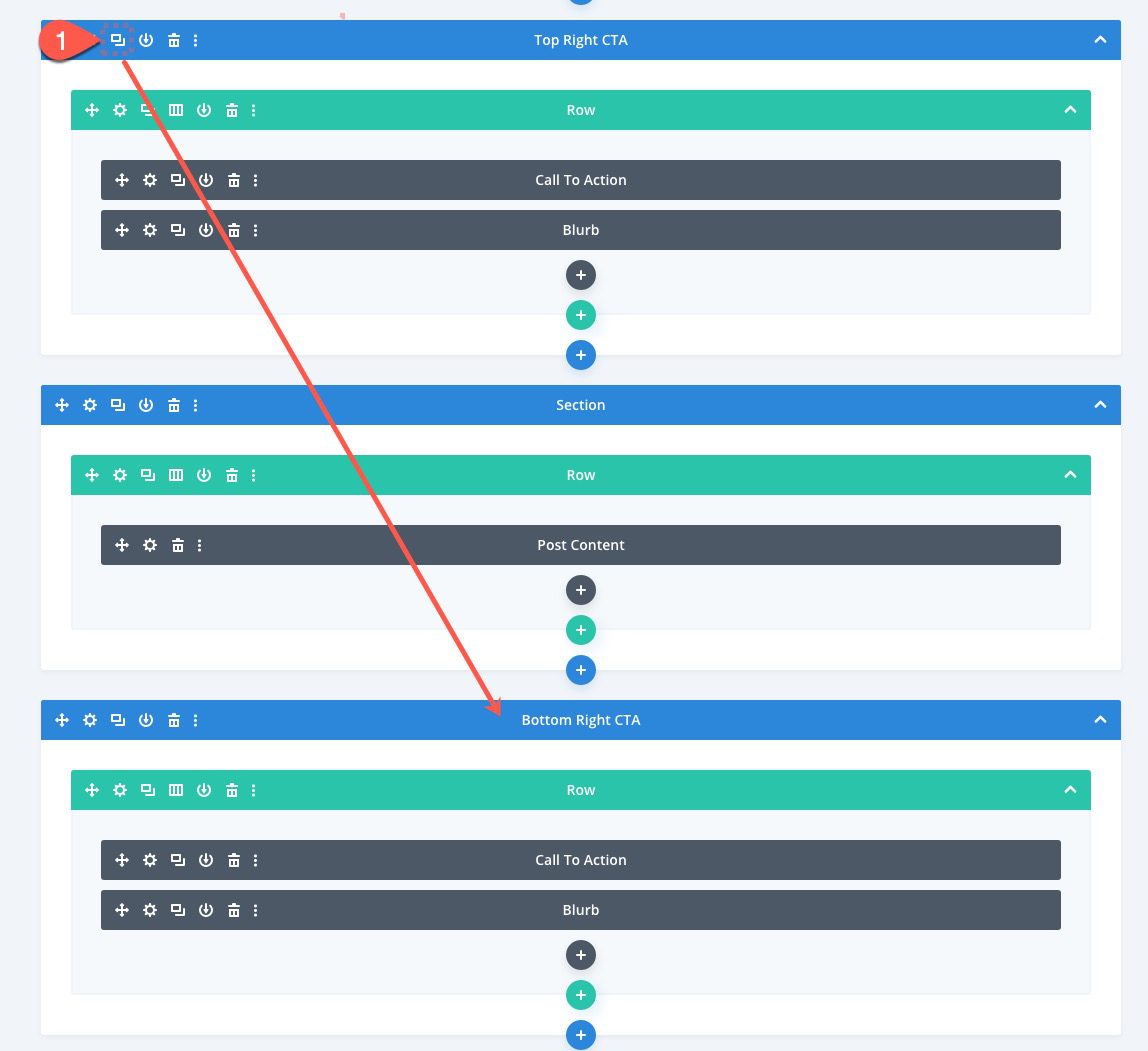
Creating the Bottom Right Slide-In Call-to-Action
Duplicate Section
To create the bottom right slide-in call to action, duplicate the top right CTA section and move the duplicate section below the post content section.
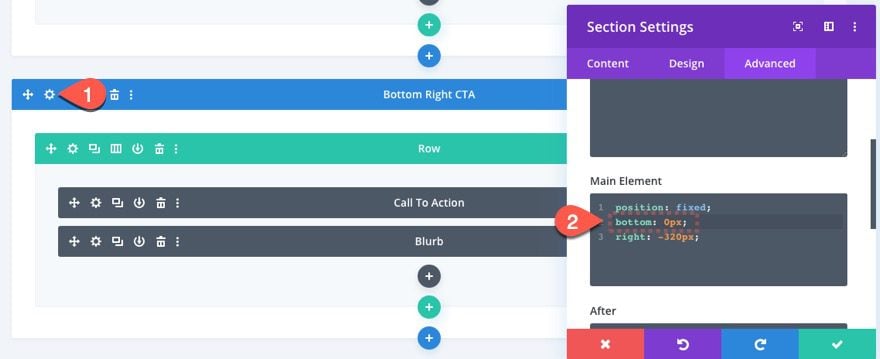
Update Section Settings
Open the section settings and update the main element CSS by replacing “top: 80px;” with “bottom: 0px;”. Here is the final snippet:
position: absolute;
bottom: 0px;
right: -320px;
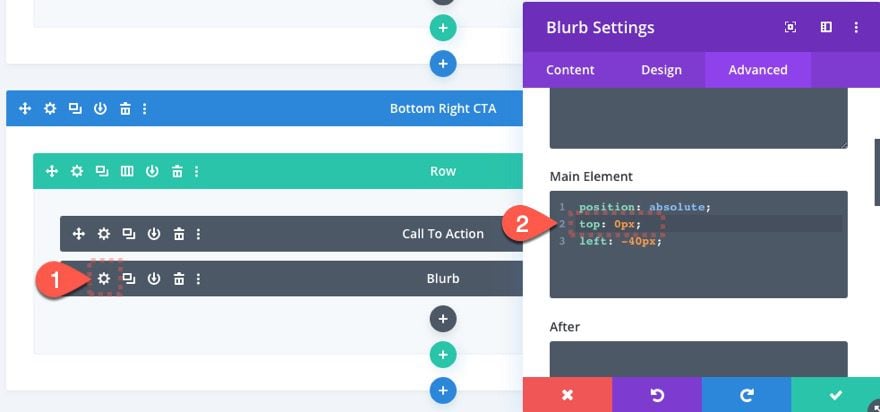
Update Blurb Module Settings
Then open the blurb module settings and update the main element CSS by replacing “bottom: 0px;” with “top: 0px;”. Here is the final snippet:
position: absolute;
top: 0px;
right: -40px;
Result
Now check out the bottom right slide-in call to action on the live page.

Adding the Custom jQuery and CSS Code Snippets using a Code Module
For the final step, we need to add some custom jQuery and CSS so that we can get the open and close functionality to each of the slide-in CTAs.
Add Code Module
Add a code module to one of the sections in the layout.
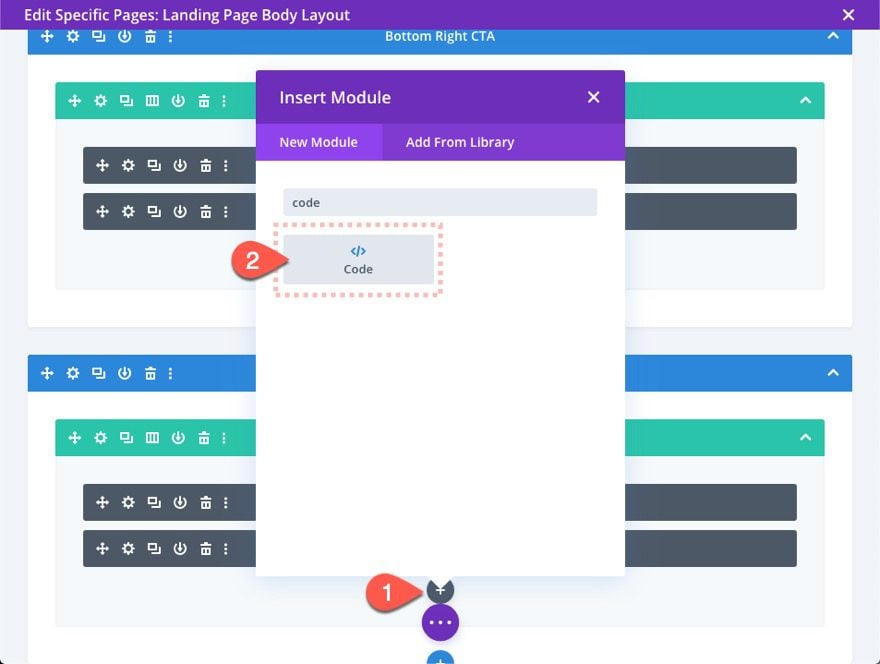
Paste Code
Then open the code settings and paste the following code into the code box.
<style>
  .slide-in-cta, .slide-in_target, .slide-in-toggle-active {
    transition: all 400ms ease-in-out;
  }
  .slide-in-toggle-active {
    margin: 0px 0px 0px 0px !important;
  }
   .slide-in-toggle-active .slide-in_target  {
    transform: none !important;
    background: rgba(0,0,0,0.2);
  }
  .slide-in_target {
    cursor: pointer;
  }
</style>
<script>
(function($) {
  $(document).ready(function(){
    $('.slide-in_target').click(function(){
      $(event.target).closest('.slide-in-cta').toggleClass('slide-in-toggle-active');
    });
  });
})( jQuery );
</script>

Final Thoughts
With Divi, creating a slide-in call to action is not hard at all. And since you can use the theme builder to add a call to action to a page template, you will have more control over what pages will display those CTAs. Feel free to increase the animation delay for the CTA section so that the user will see the CTA slide-in animation a little later (or sooner) after page load. You could also use Divi leads and enable split testing to improve conversions of those CTA’s and find out which corner will have the best conversion.
I look forward to hearing from you in the comments.
Cheers!


Nice tutorial but isn’t this what Bloom is for?
Rob,
You can definitely use bloom for add a slide-in email optin, especially if you are wanting more features like tracking and split testing. However, this tutorial will give you the ability to build a custom slide-in box with add any content or design you want without a plugin.
Any change in code required if only one slide-in CTA is required? 4 are too frustrating for visitors. Thank you.
That’s exactly what I looking for. Thank you so much for the step by step explanation Jason
Awesome! Glad it helped.
this information is very useful. thanks for sharing
Thanks Jason. One of the best possibilities of Divi is the library so for me the best option is to download the layout.
All is best themes, and if you are good in customization its also best.
T I tried to follow your instructions and got lost on the third section of instructions. Is there an easier way?
If you choose one of the four positions for slide-in, keeping the Javascript as it is, it’ll make it much less complex.