
There are many instances where one may want to add Divi buttons side by side. For headers on landing pages, it’s good to provide an eye-catching call-to-action. Dual buttons are a popular way to do this. As with all things Divi, there is more than one way to reach the desired outcome. There are a few ways that you can have your buttons in Divi next to each other. You can use columns, add some CSS, or skip out on using the native Divi Button Module altogether.
Let’s walk through four methods (and a bonus fifth tip!) to help you get your buttons in Divi to play nice with each other. Using Divi’s FREE Portfolio Layout Pack, we’ll explore the different ways to achieve this.
Install the Divi Portfolio Landing Page Layout
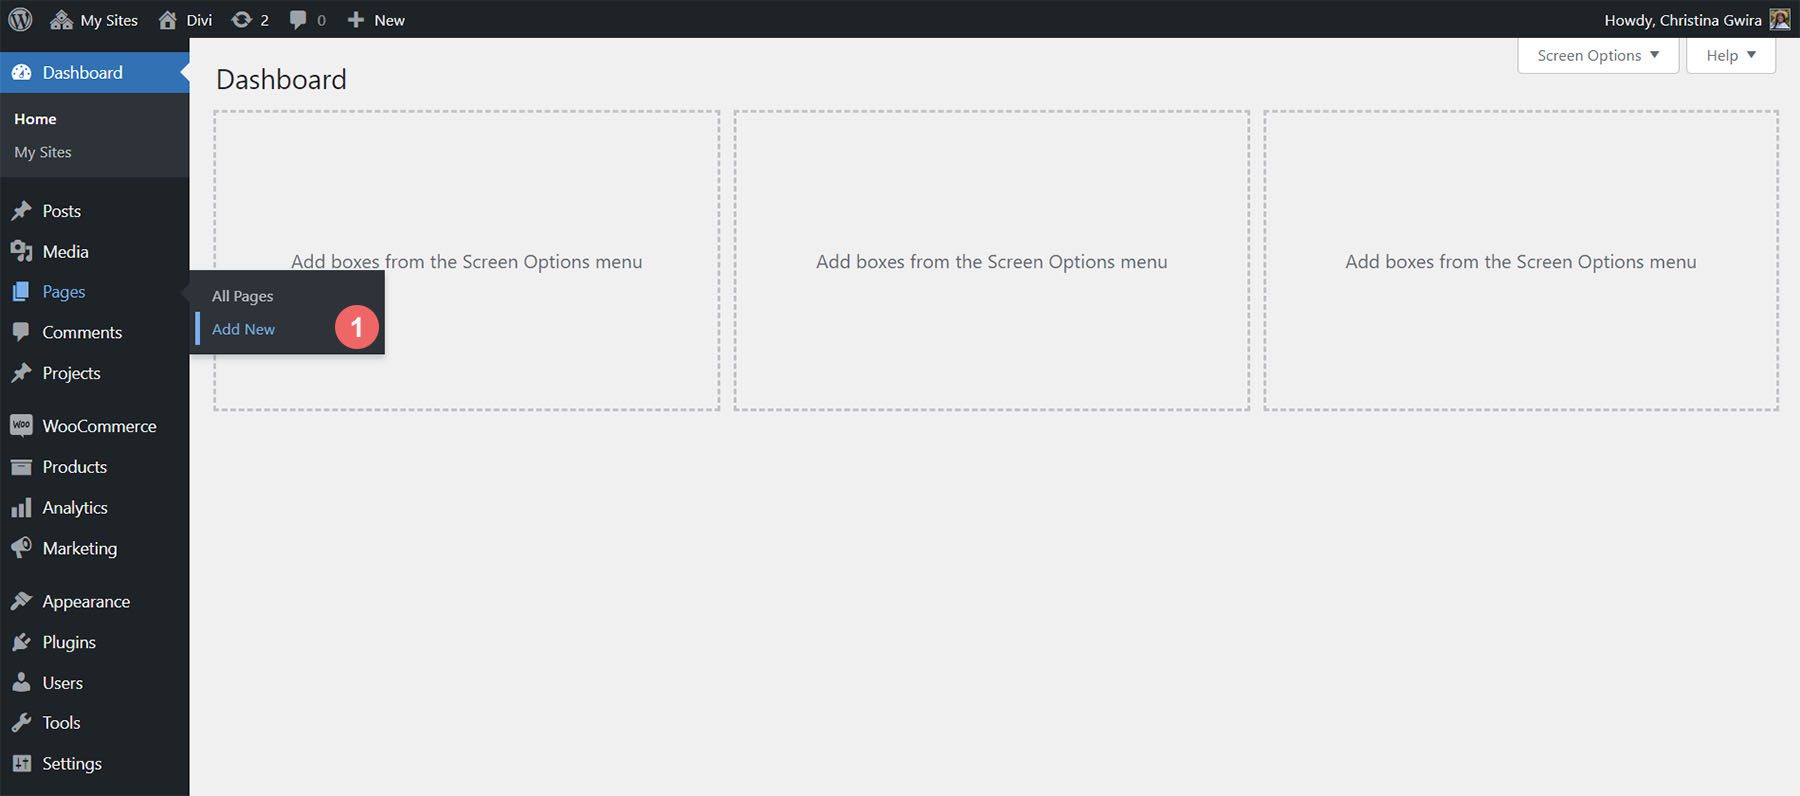
To start, we’ll install the page layout. We first need to create a new page in WordPress. From the WordPress dashboard, hover over the Pages menu item from the left-hand menu. Next, we click Add New.
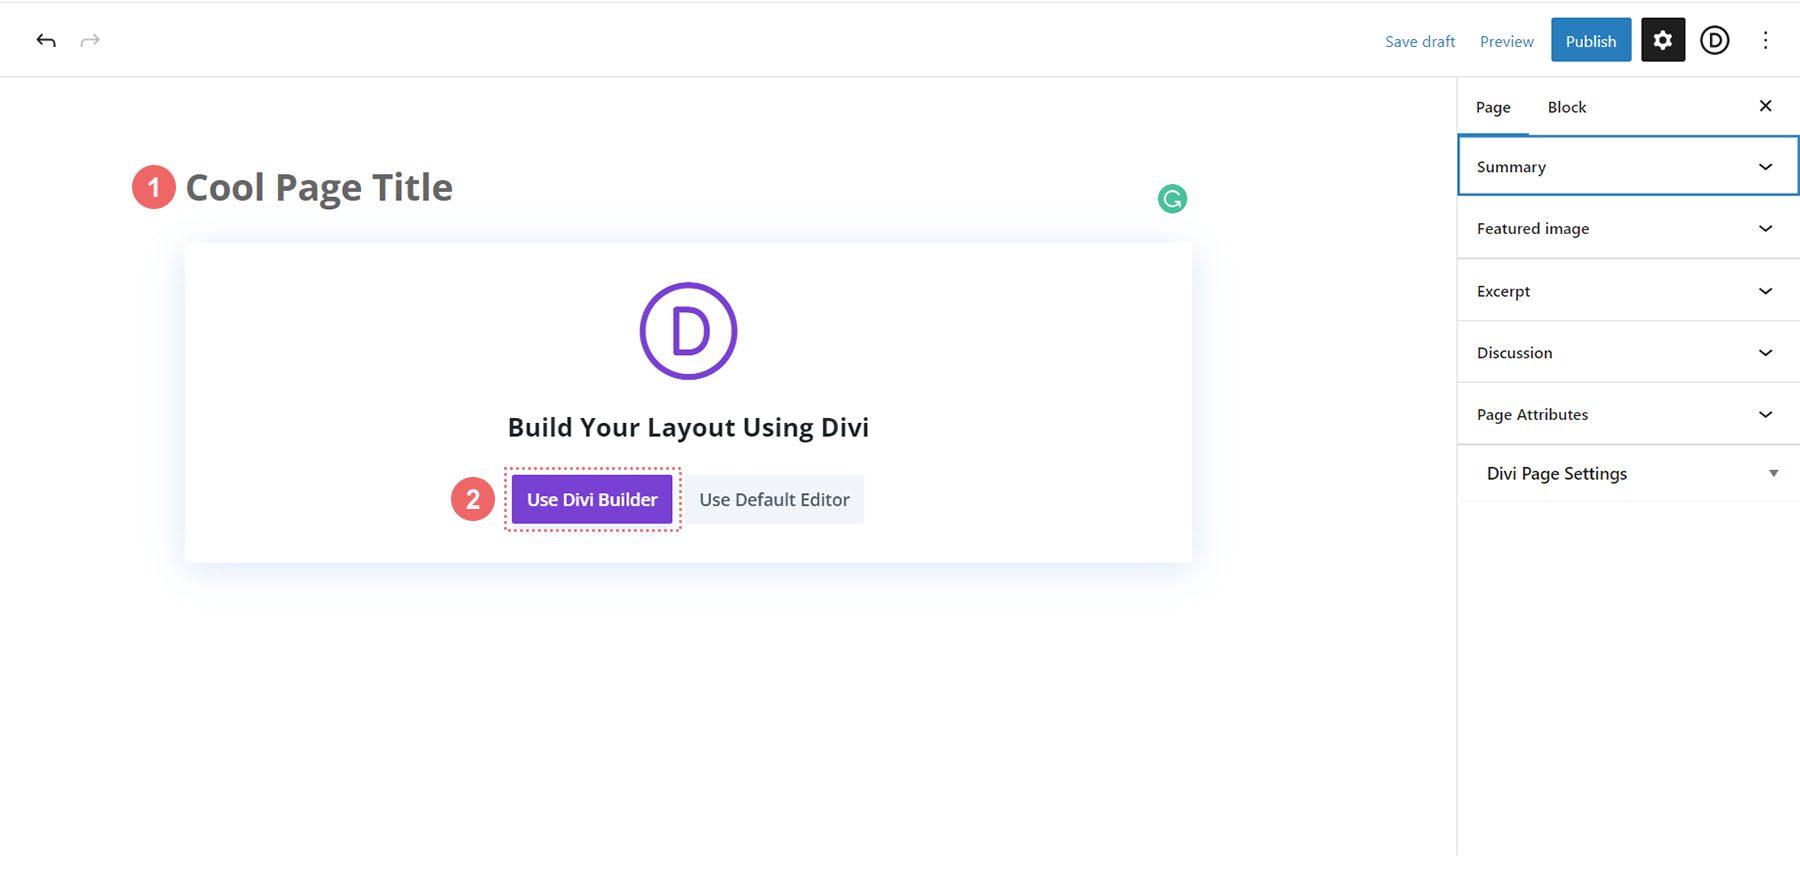
Once inside the default WordPress editor Gutenberg, set a title for your new page. Next, click on the purple Use Divi Builder button.
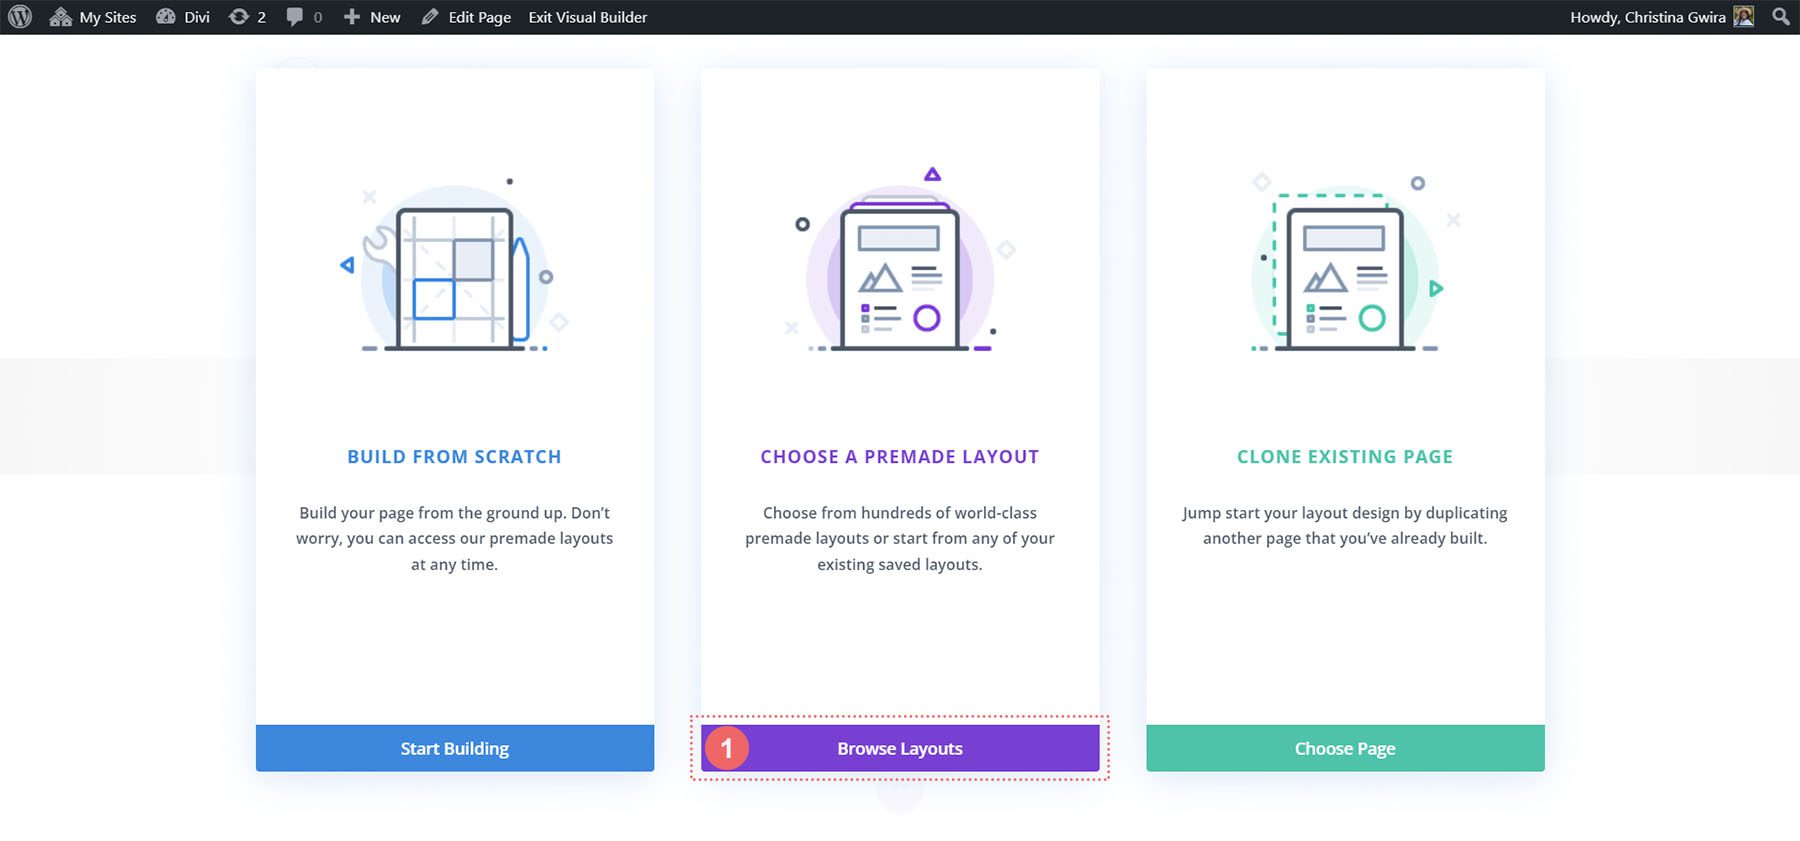
You will then be presented with three options. We will click on the purple middle button, Browse Layouts.
This will open up Divi’s vast layout library, which comes packed with pre-designed pages for you to choose from. We’ll be selecting the Portfolio Layout Pack.
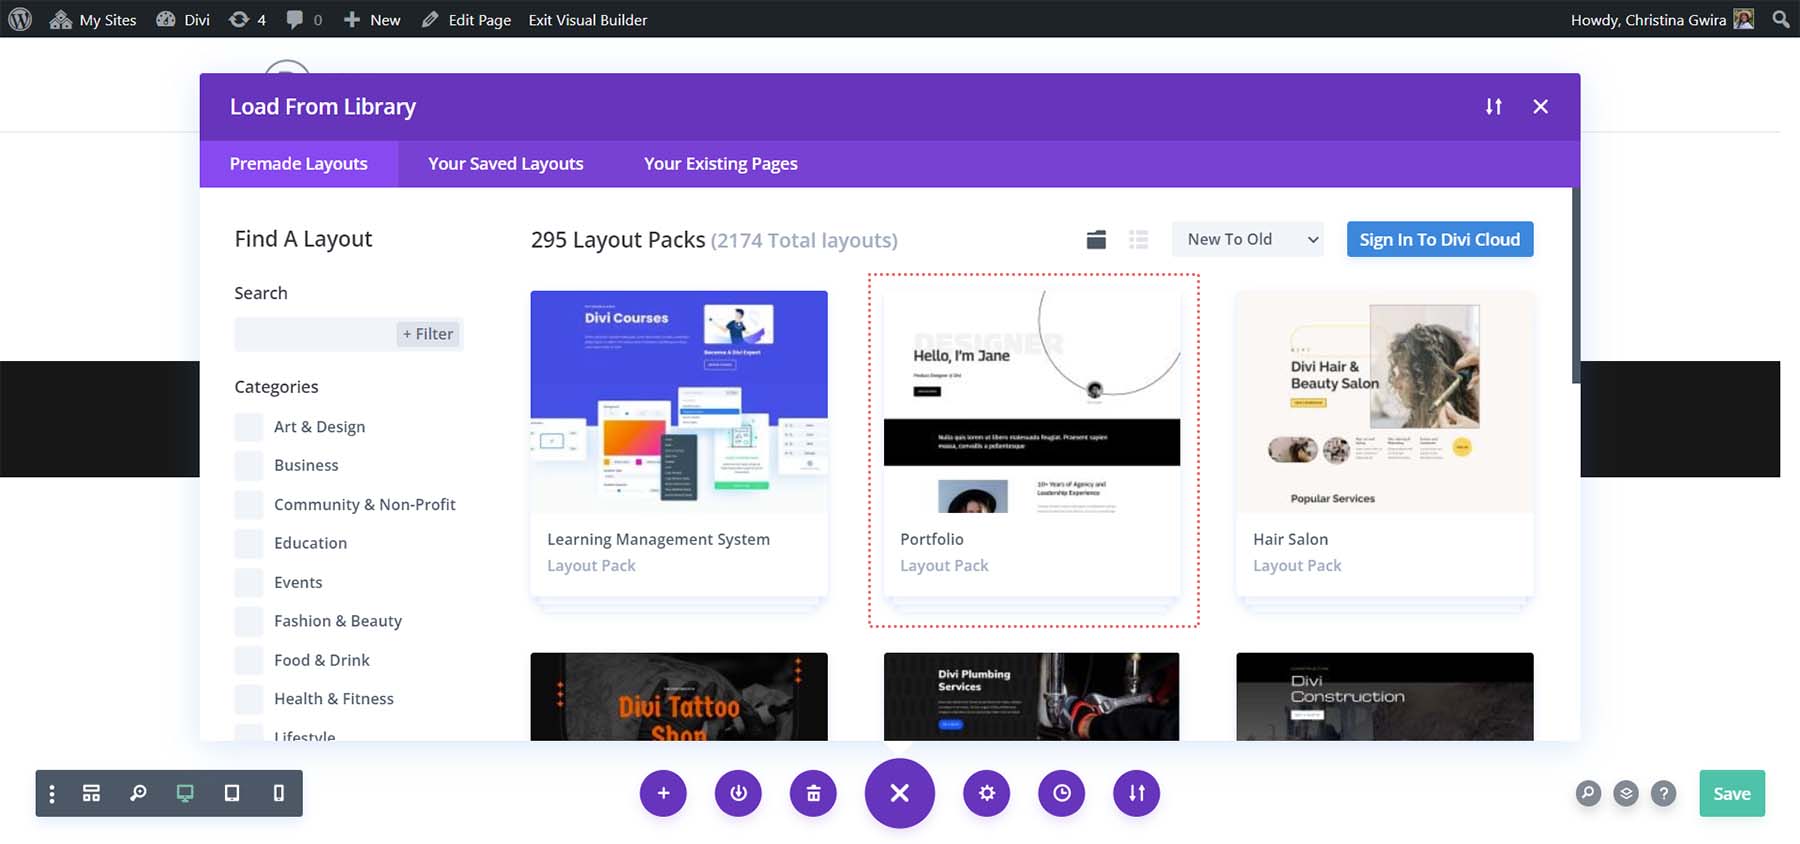
From the Portfolio Layout Pack, select the About Page Layout.
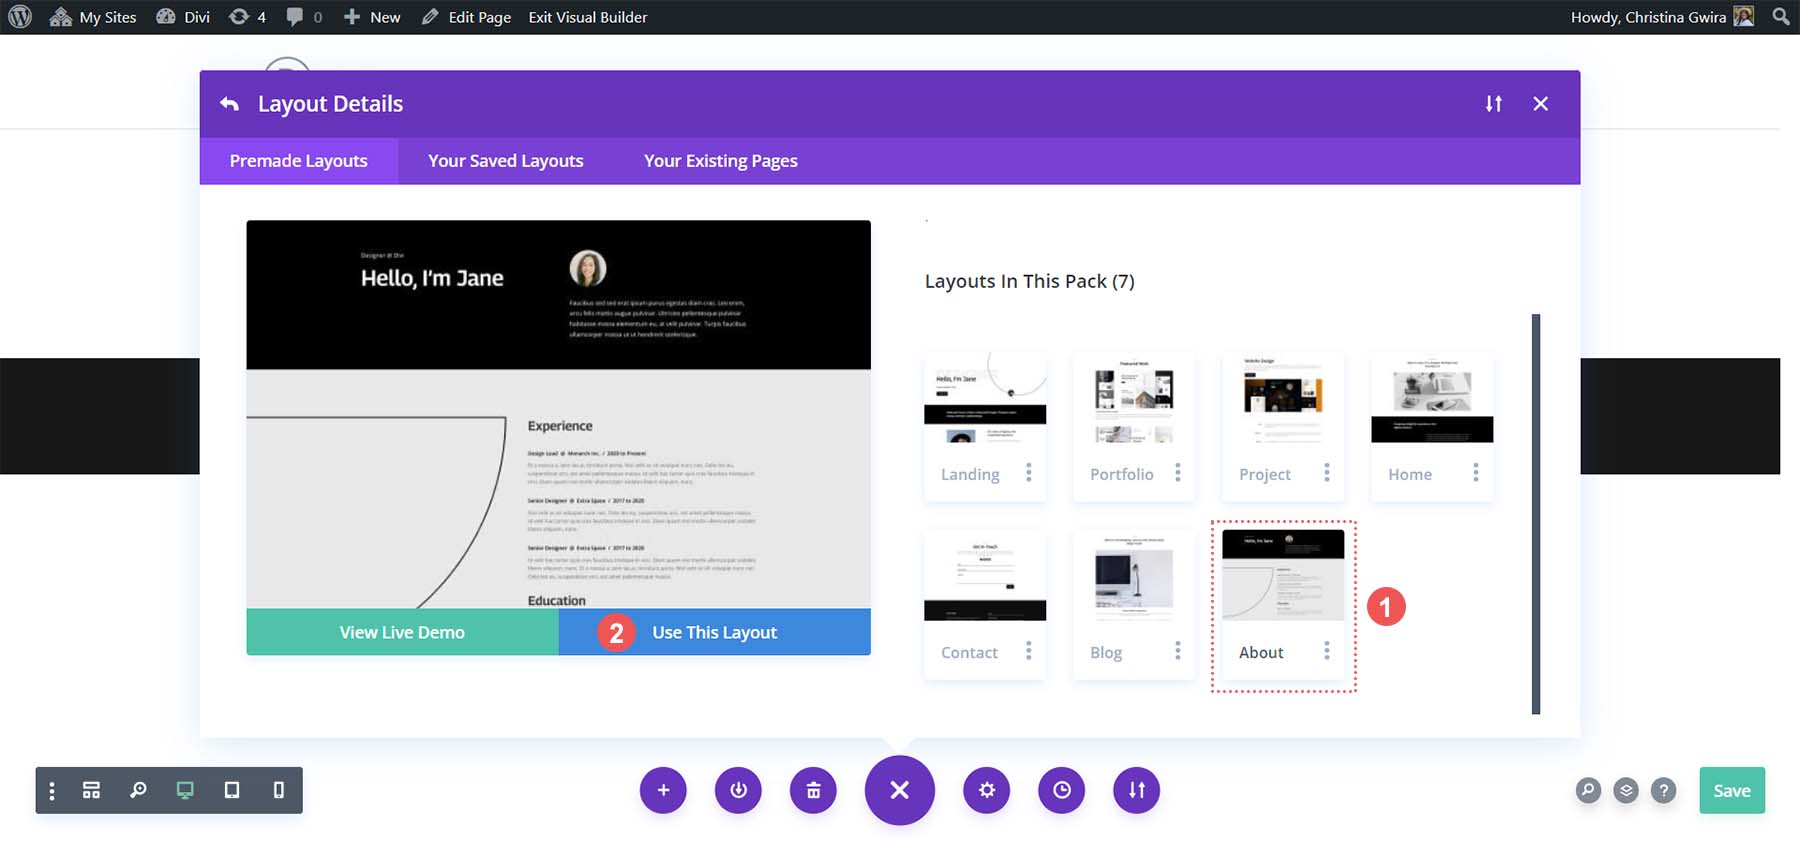
Then, click on the blue Use This Layout button. Wait for the layout to install on your new page. Finally, click the green Publish button to make your page and new layout live.
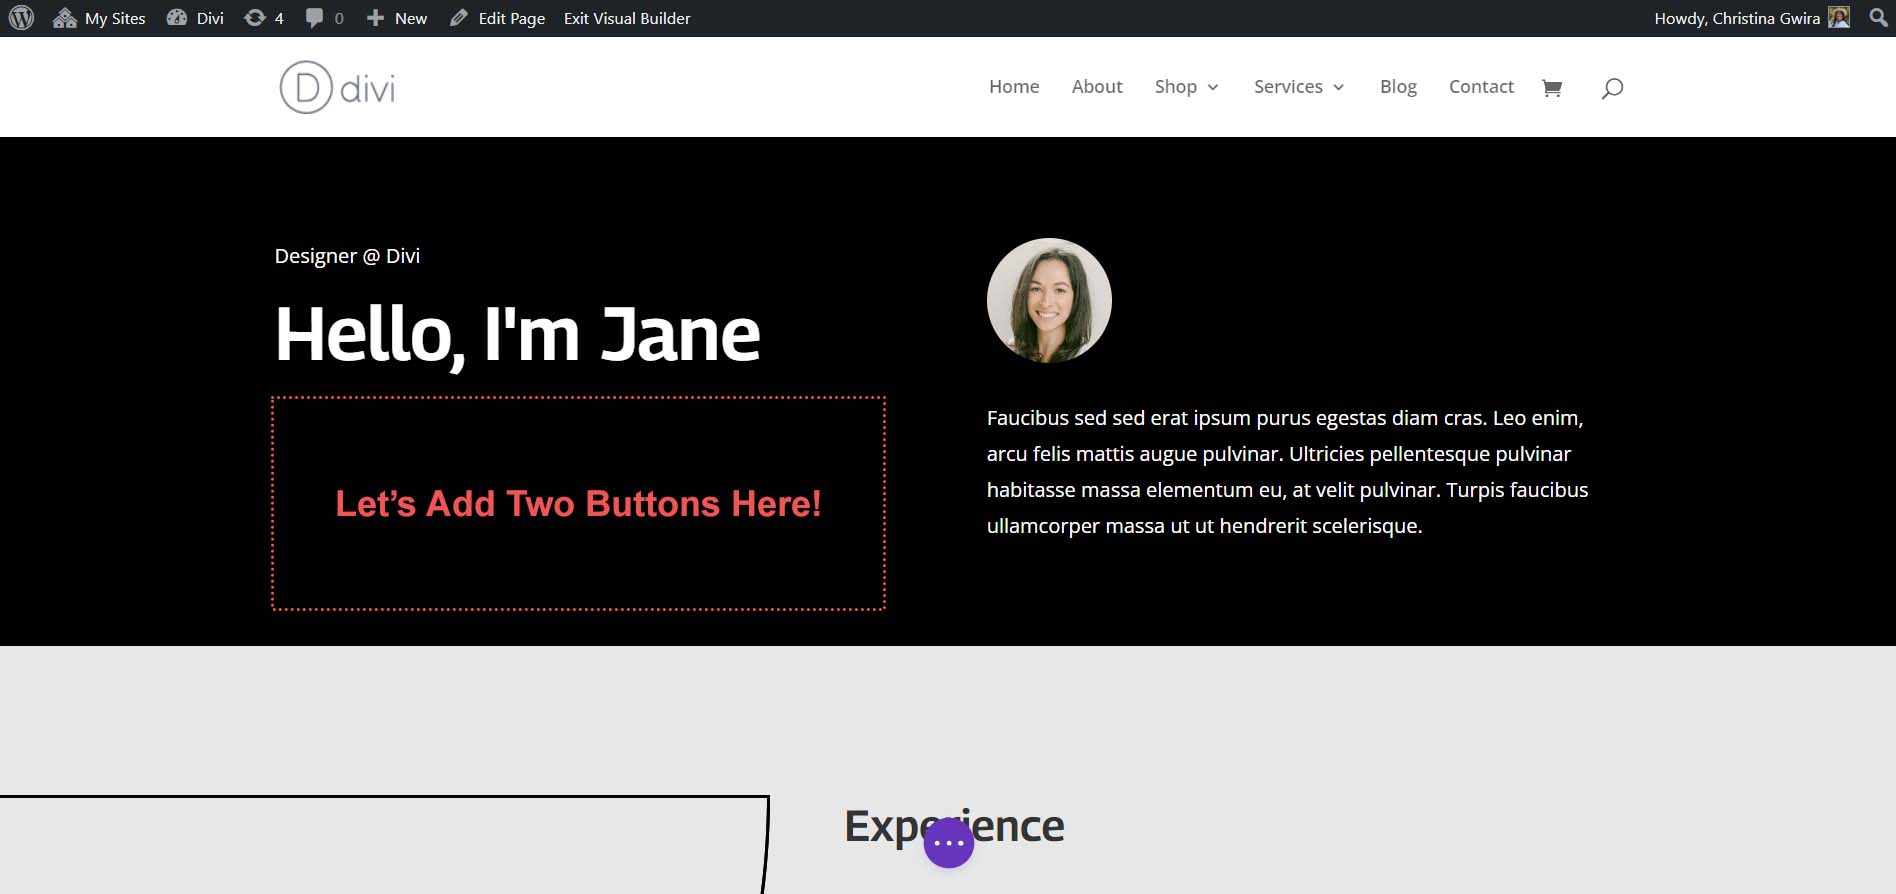
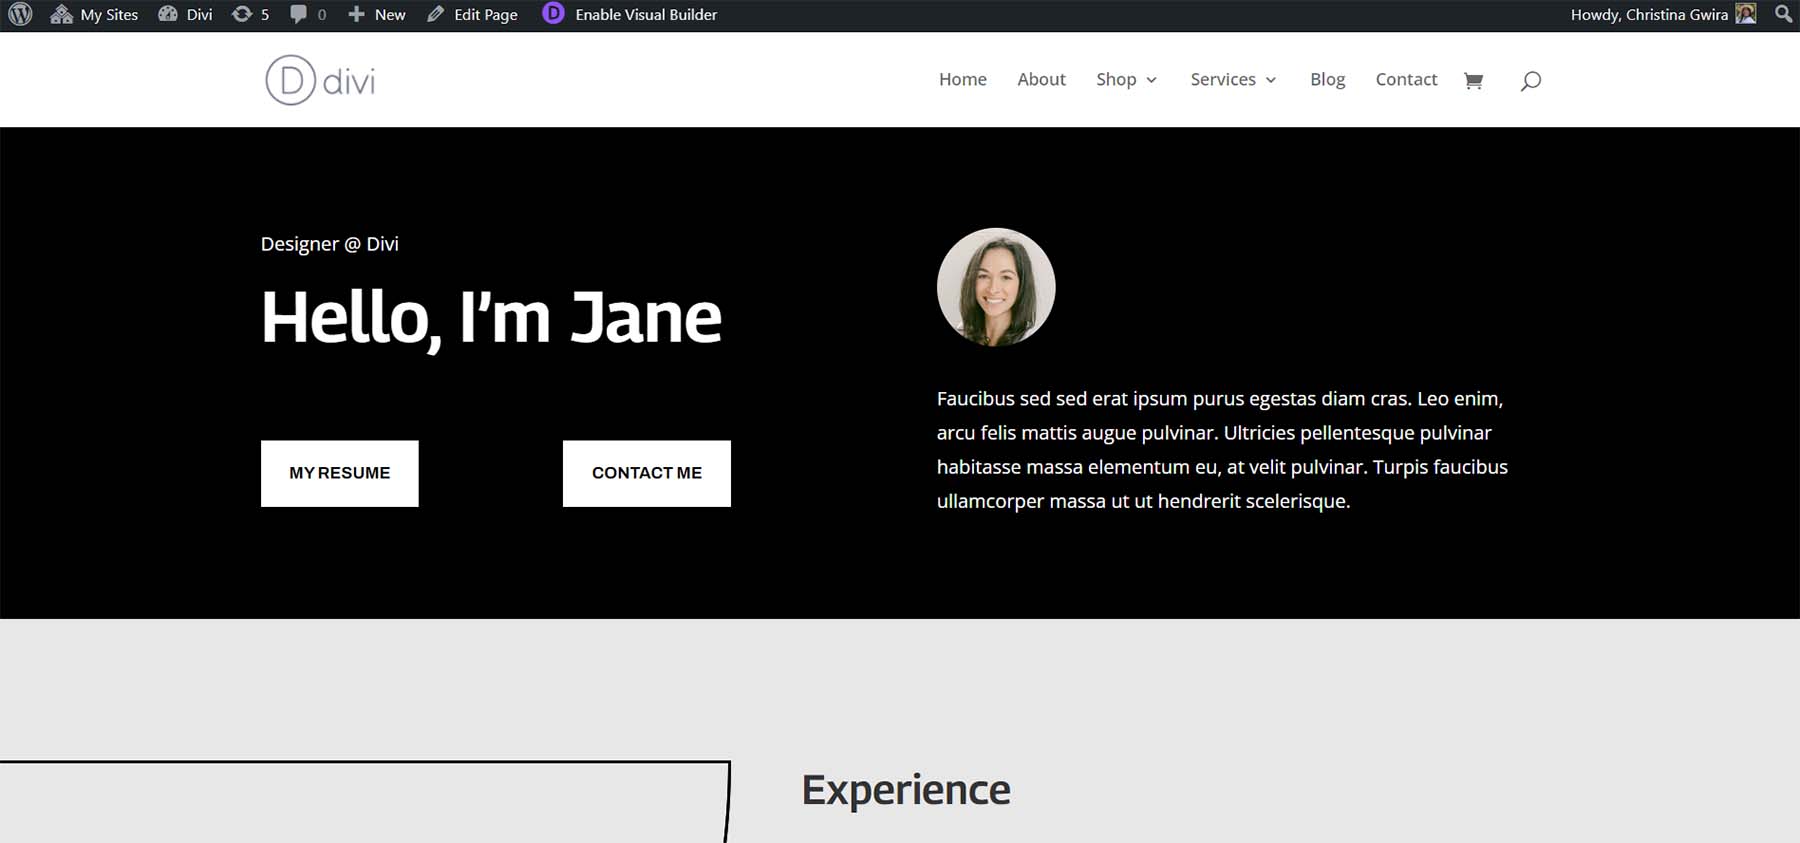
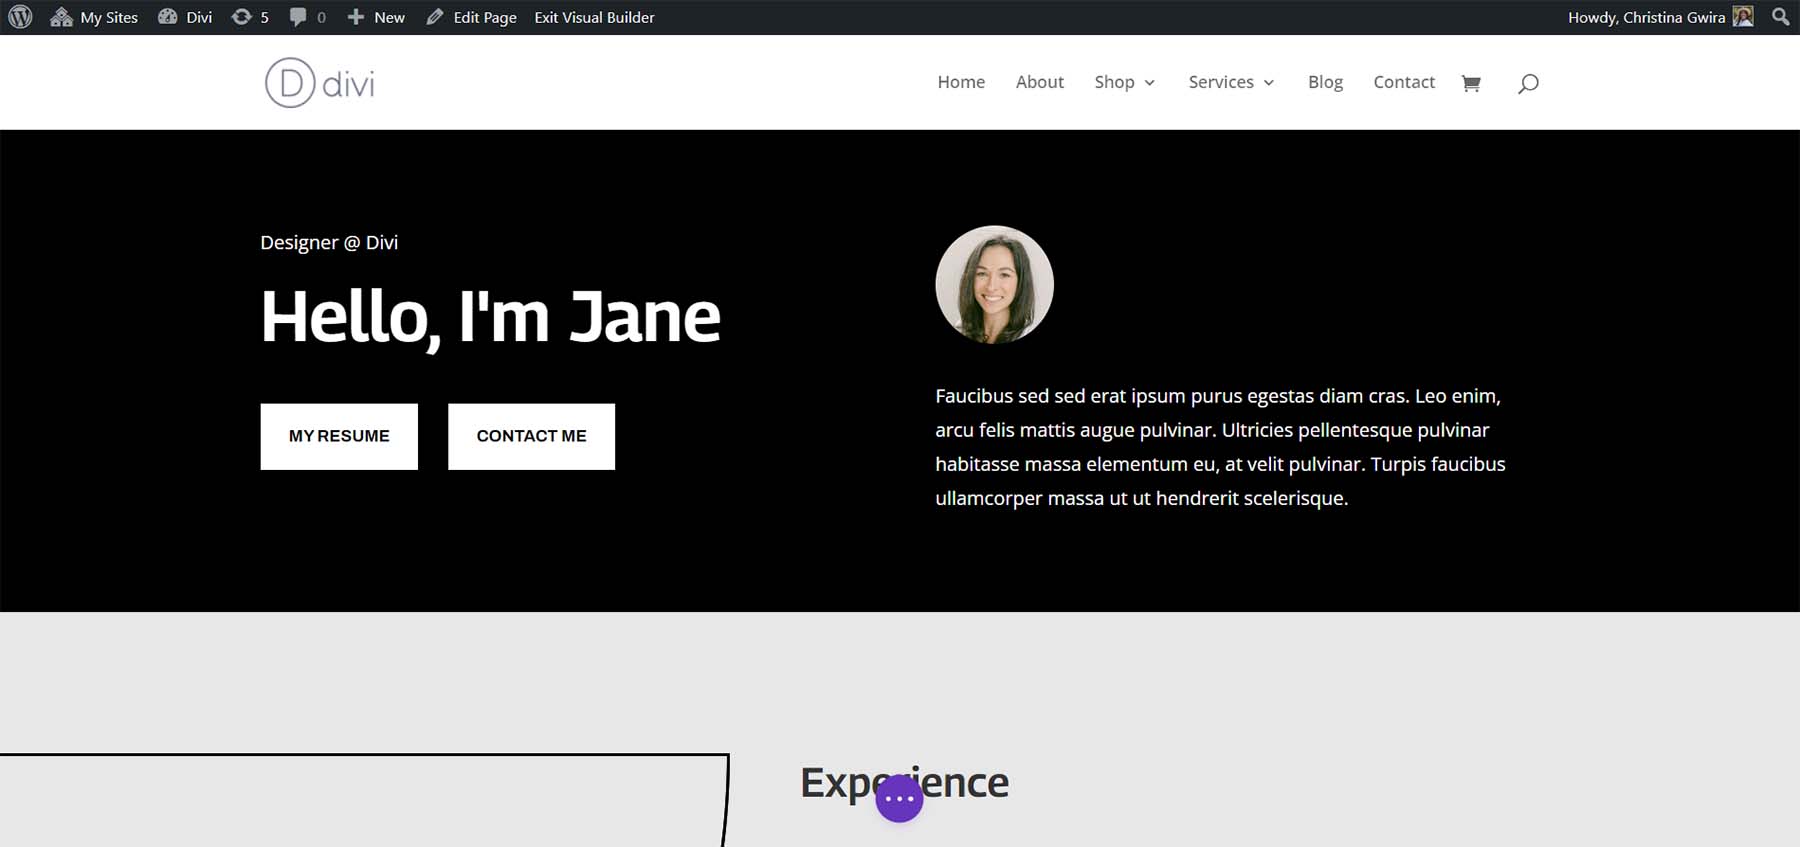
We’ll work with the layout’s black Header section for most of our tutorial. Let’s dig in!
You can add Divi Buttons side by side in a variety of ways. Our first way will be by using the default Divi column structure.
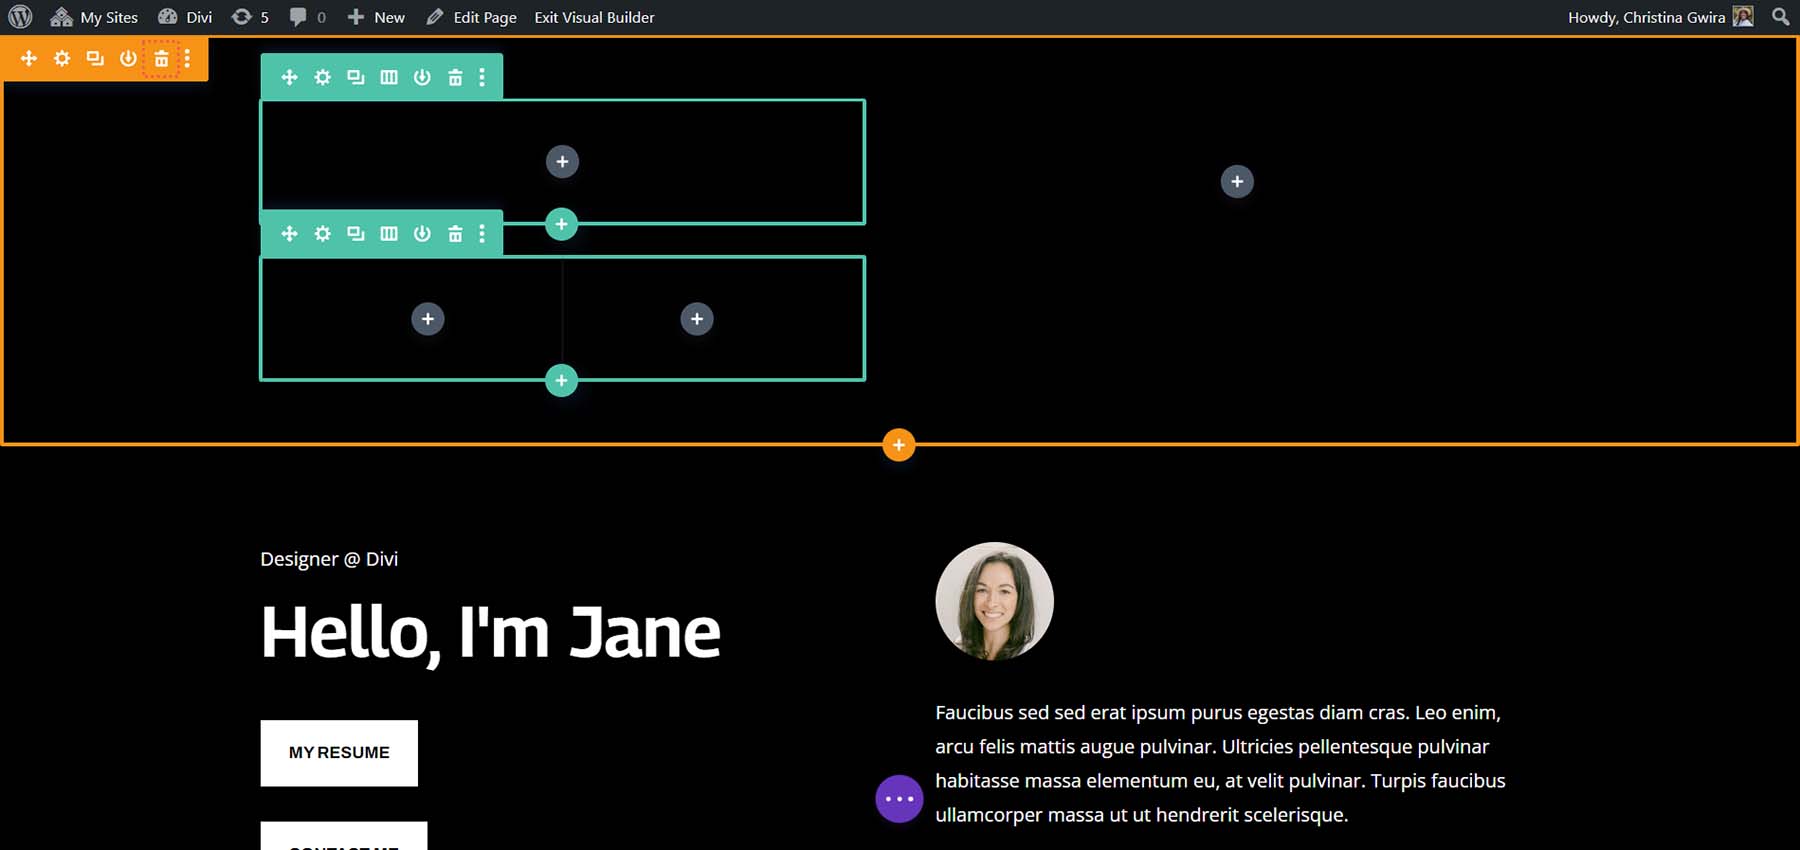
From our page layout, we can see that our header section has two columns. We will re-design this section with a specialty section to allow us to add two Button Modules side by side in the first column.
Adding New Speciality Section
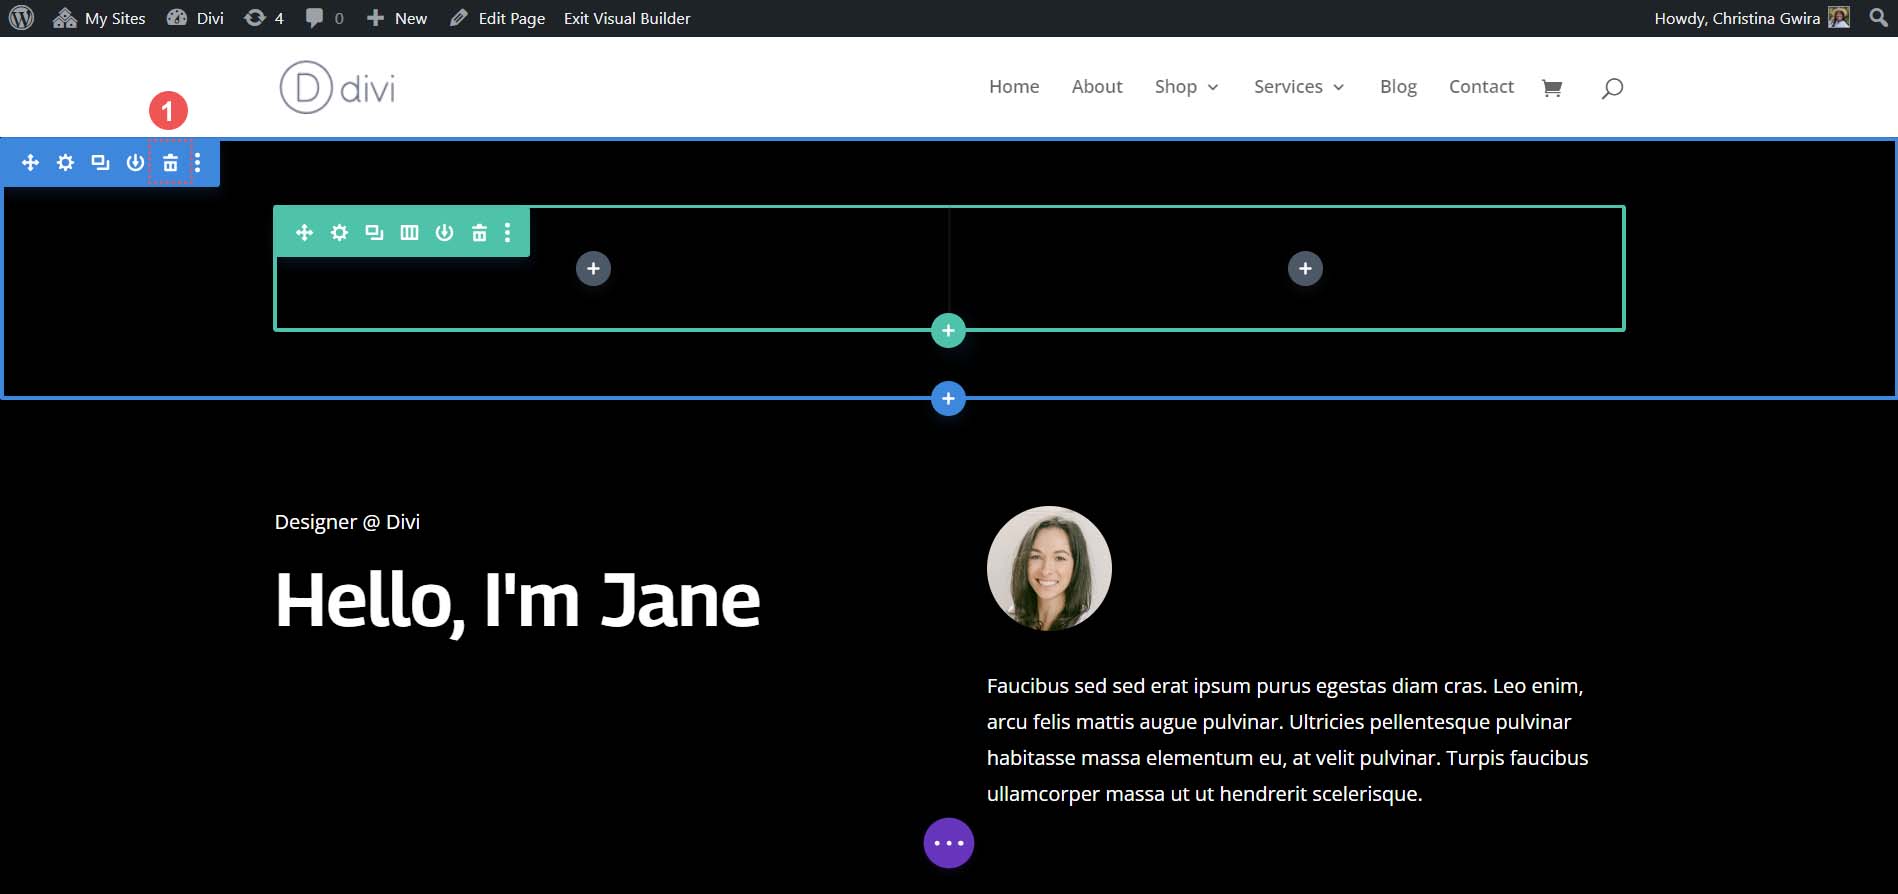
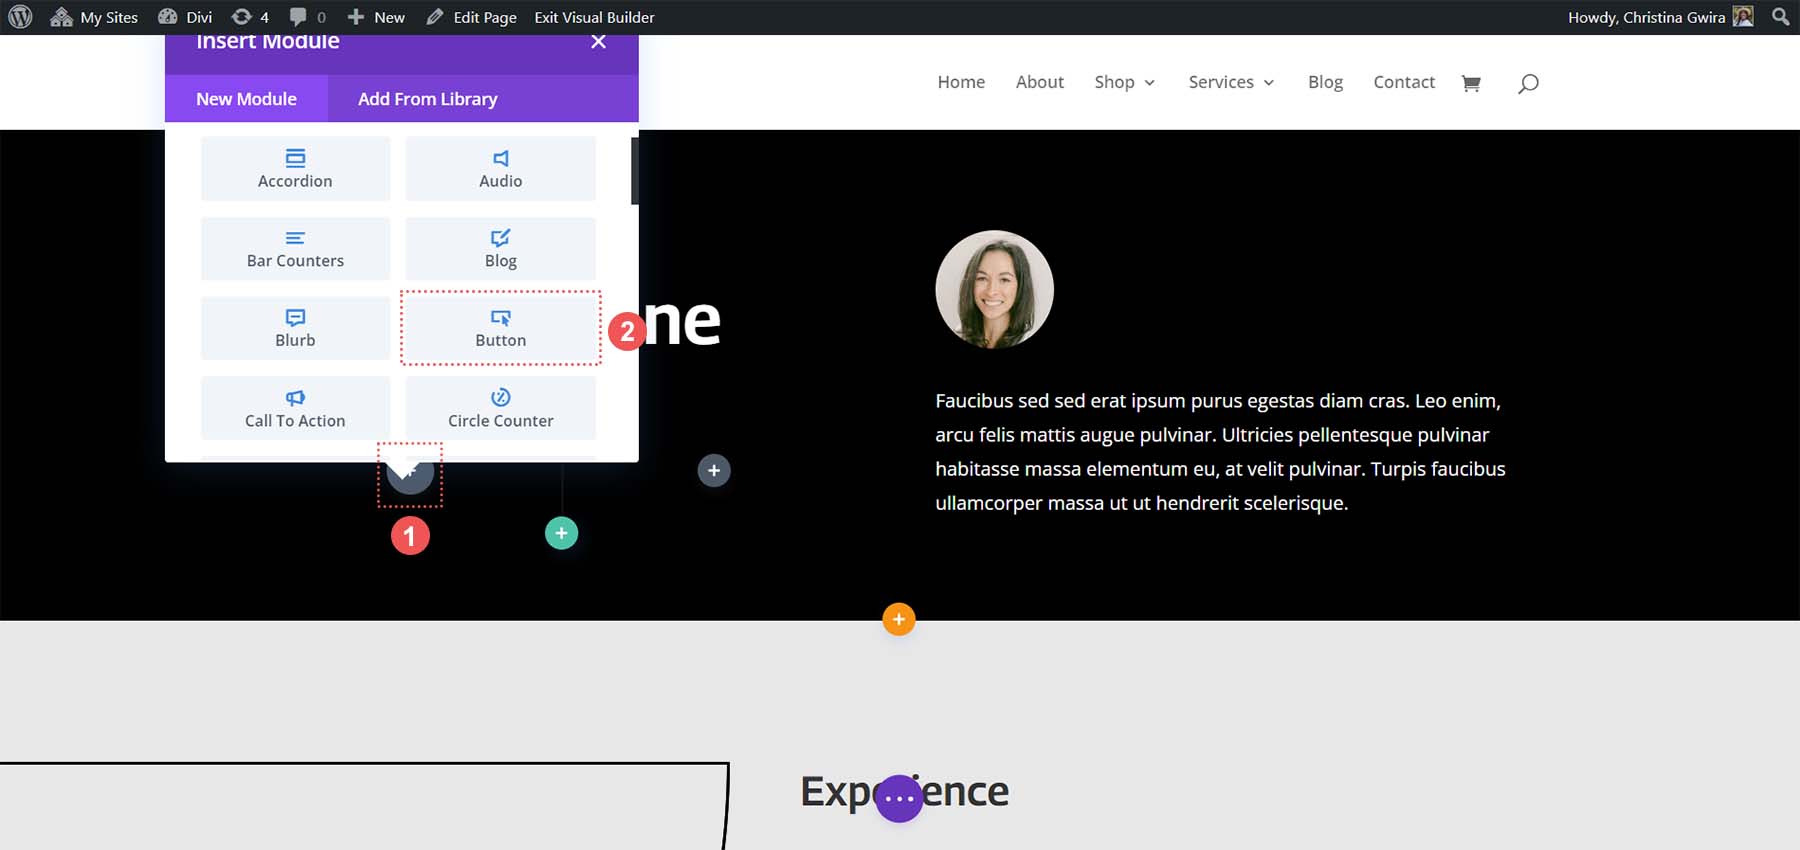
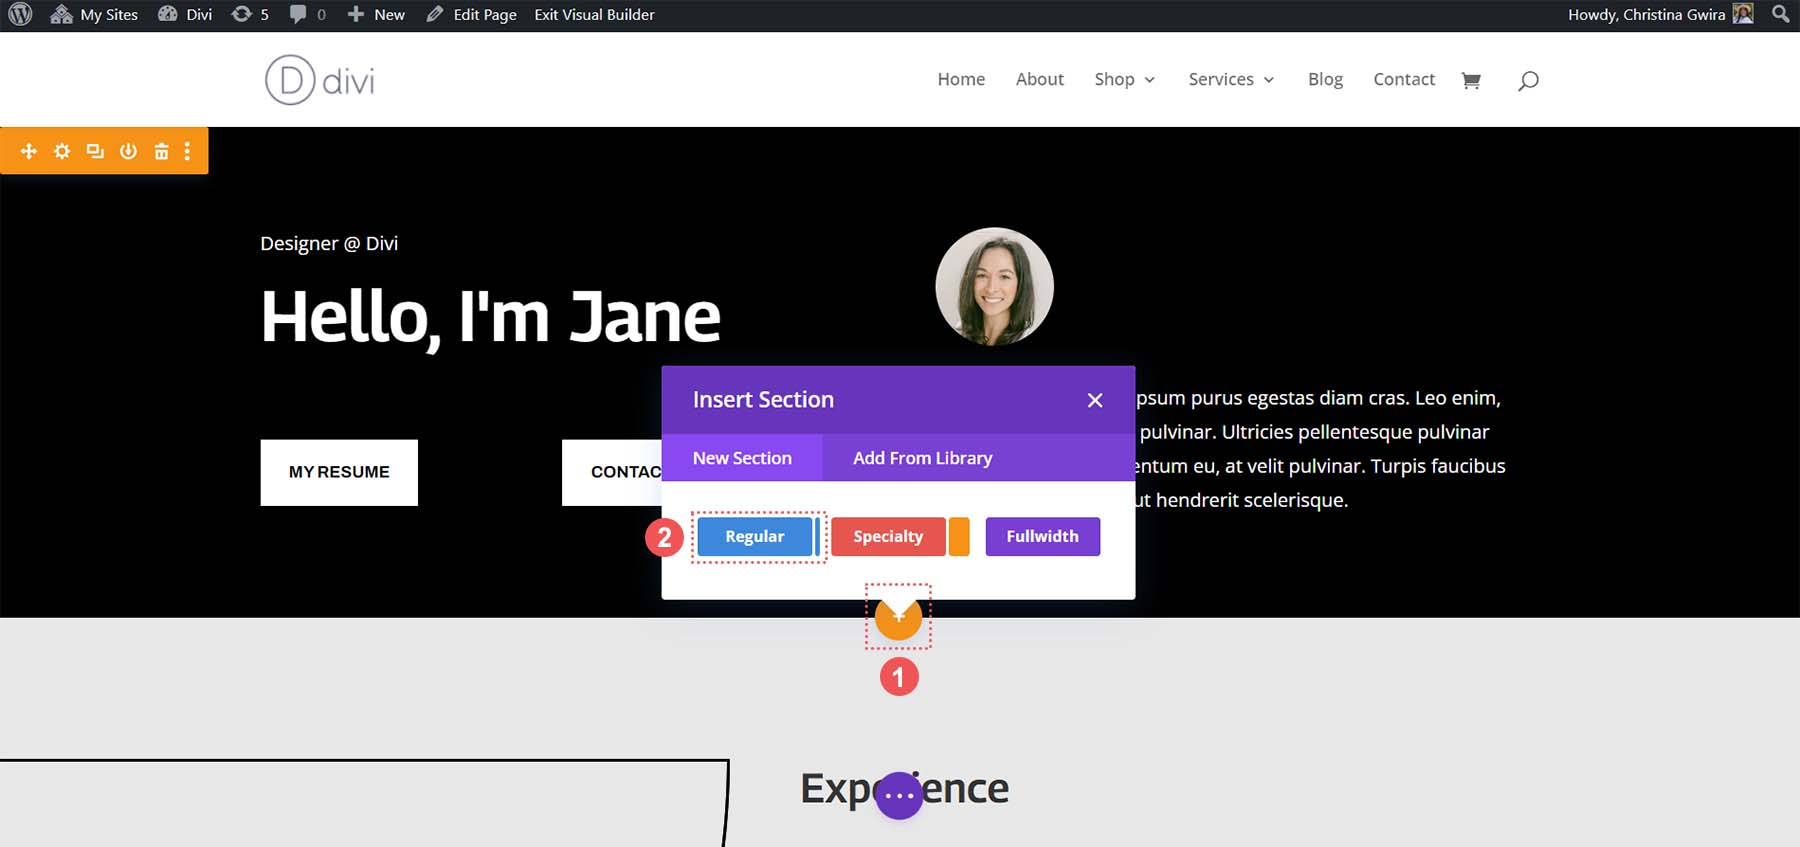
First, we click on the blue plus icon. This will allow us to add another section. We will add a Speciality Section, so click on the red and orange Speciality Section icon.
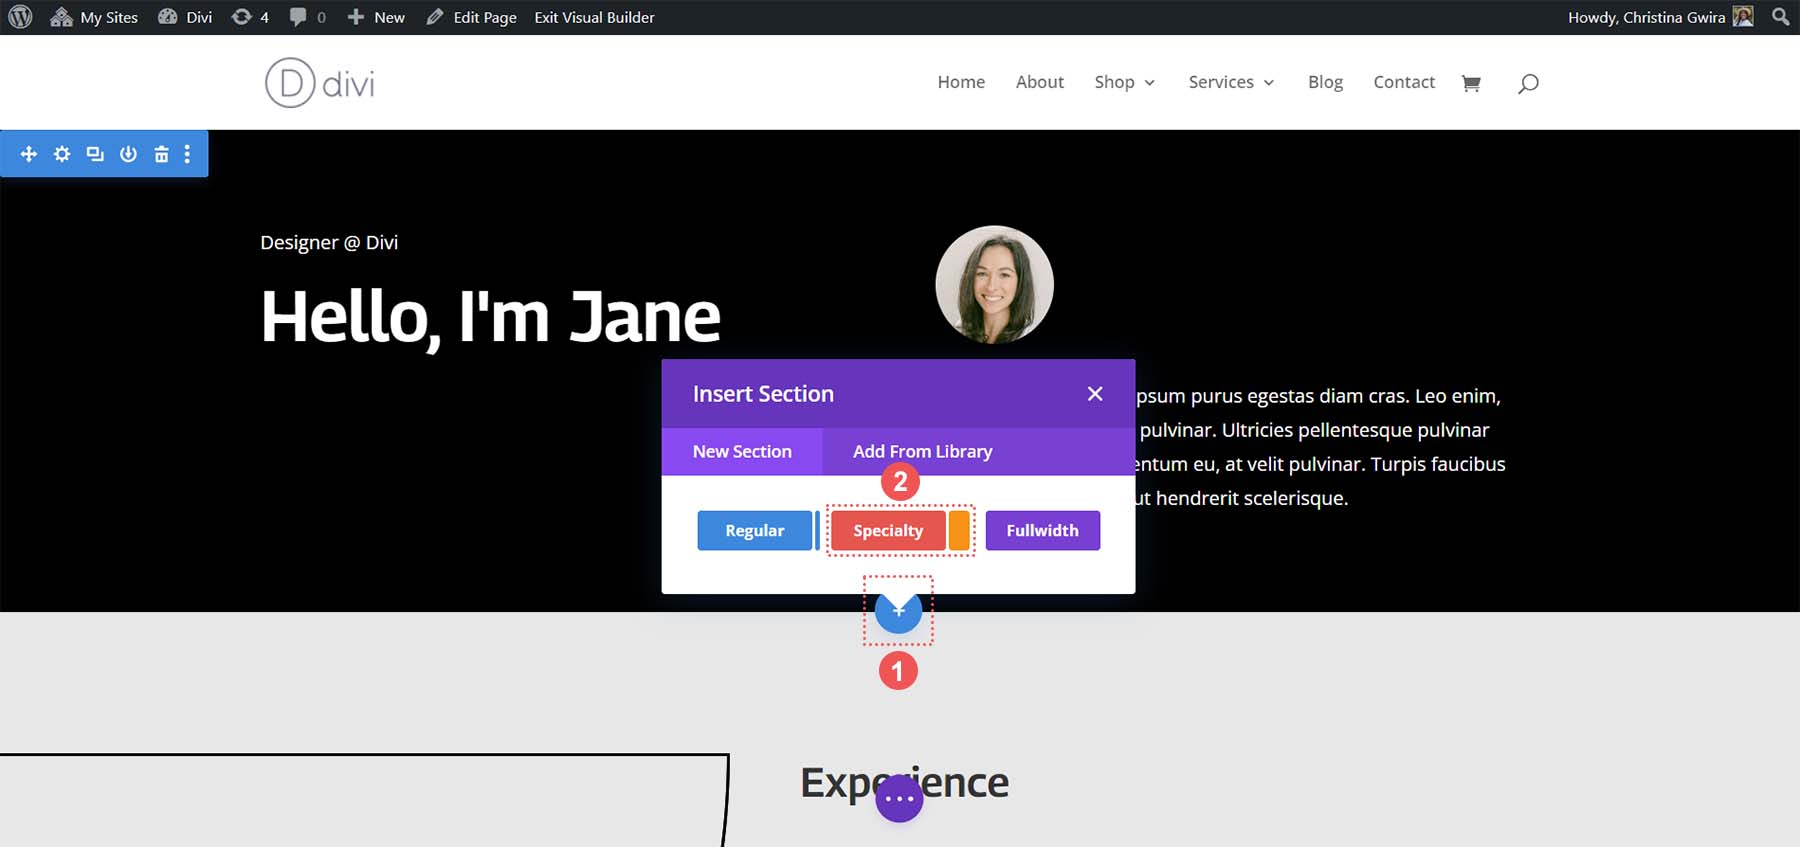
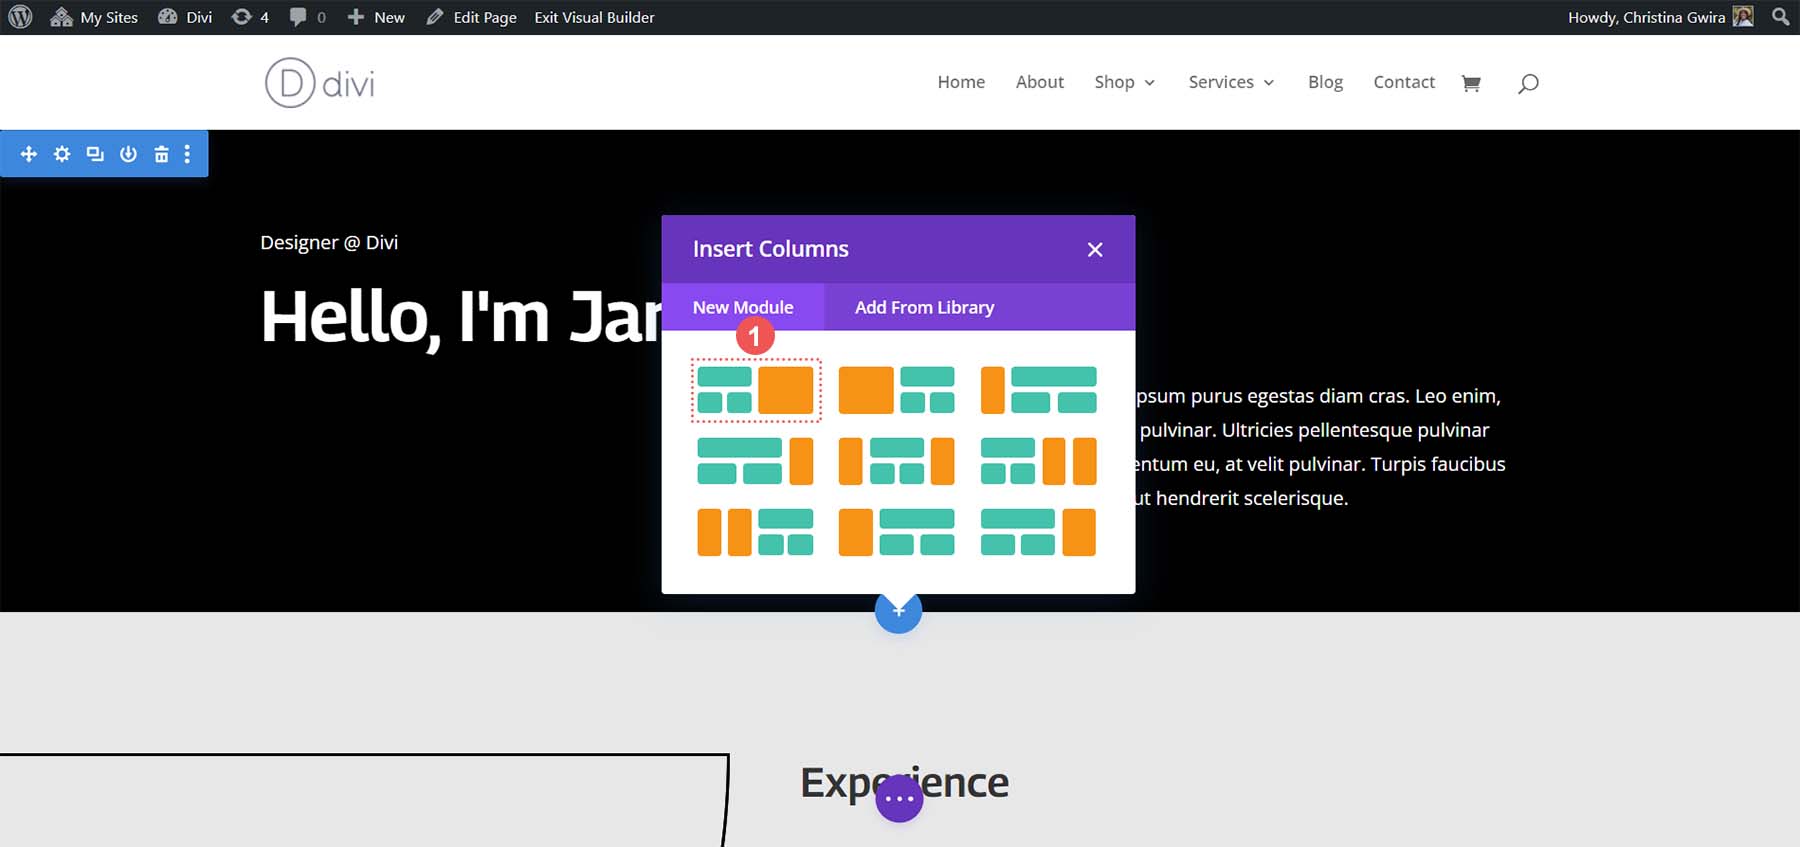
After clicking this icon, you will be presented with a selection of sections. Notice that, unlike regular sections, specialty sections allow you to combine different column structures within a column. This is what we’ll be using to place two Button Modules side by side. Select the first row and column combination.
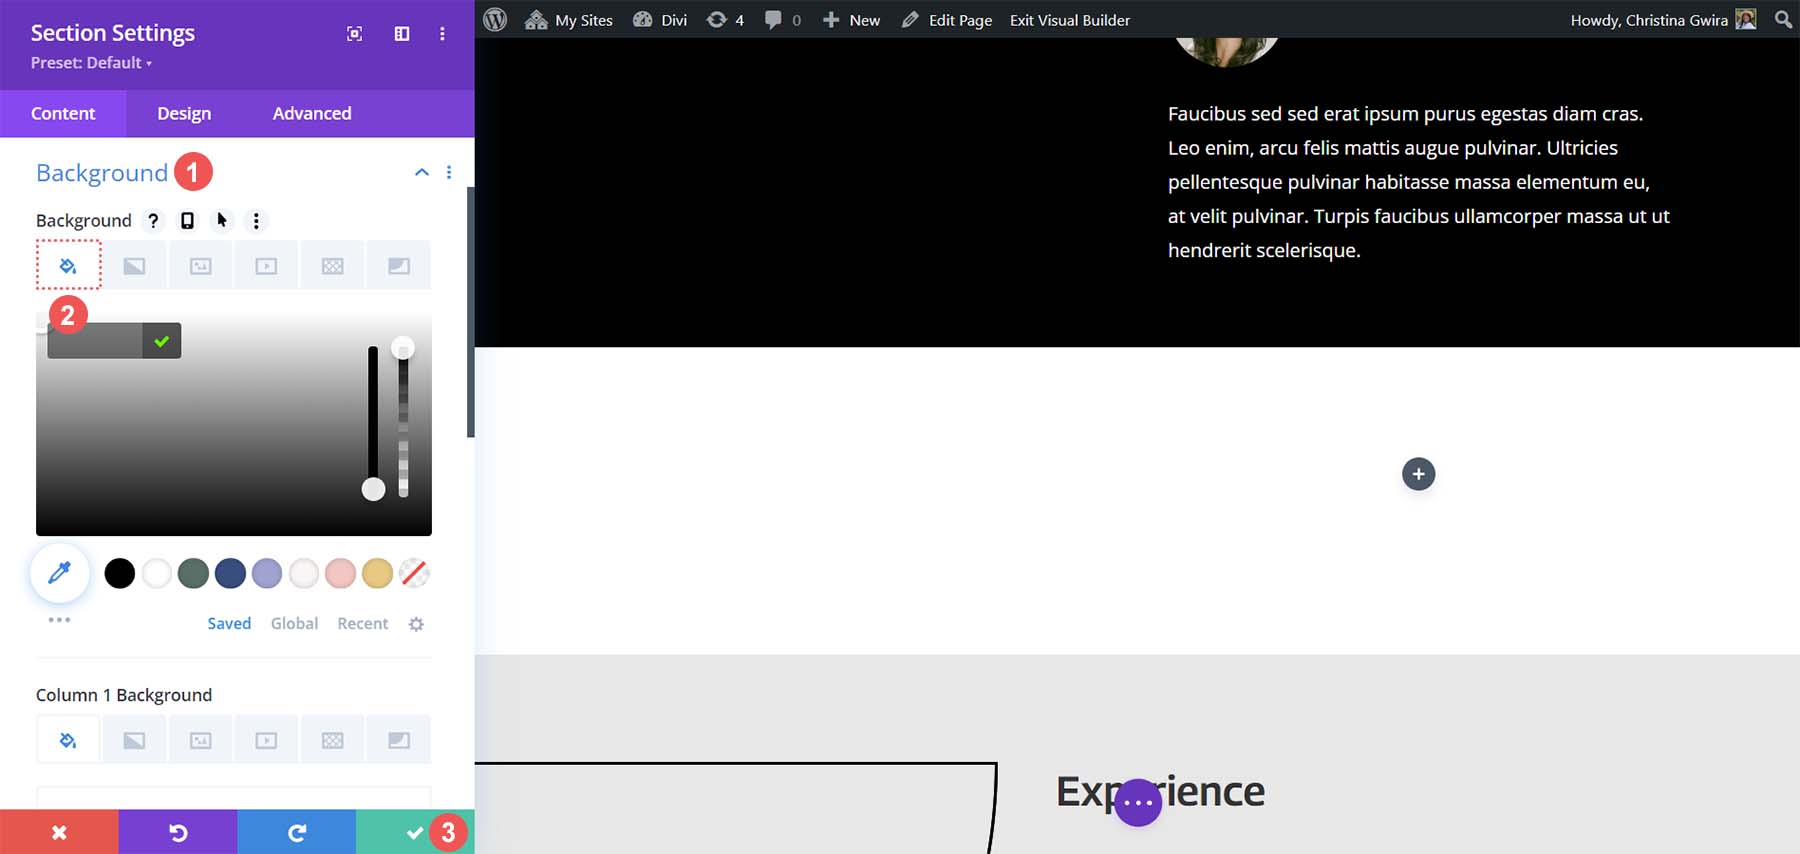
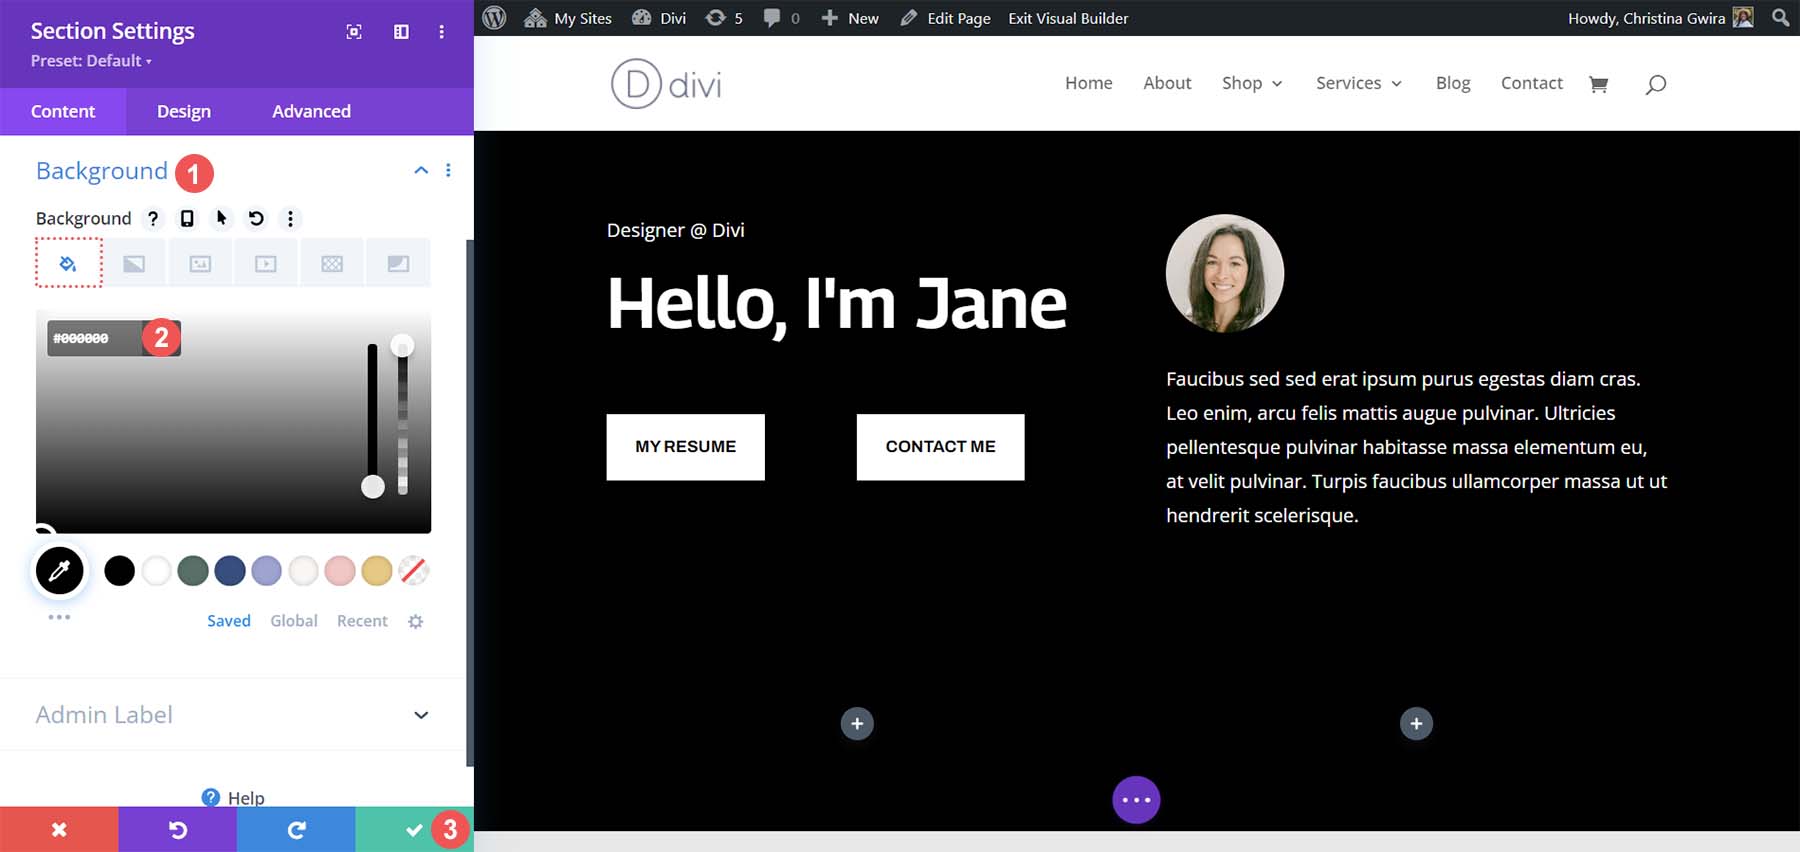
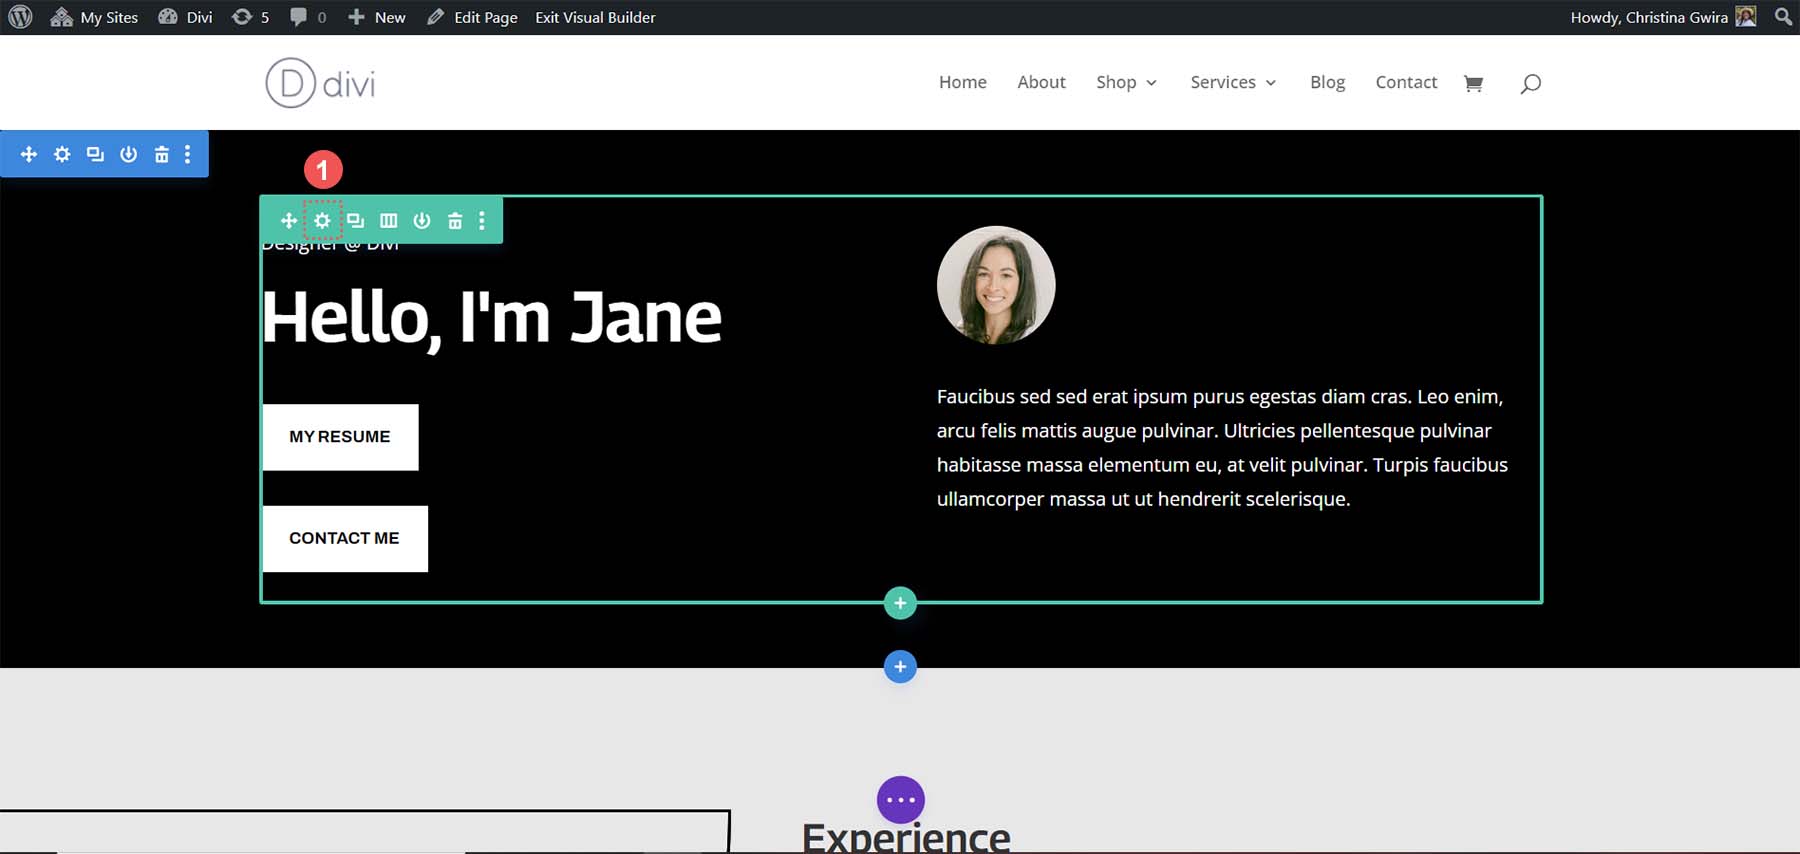
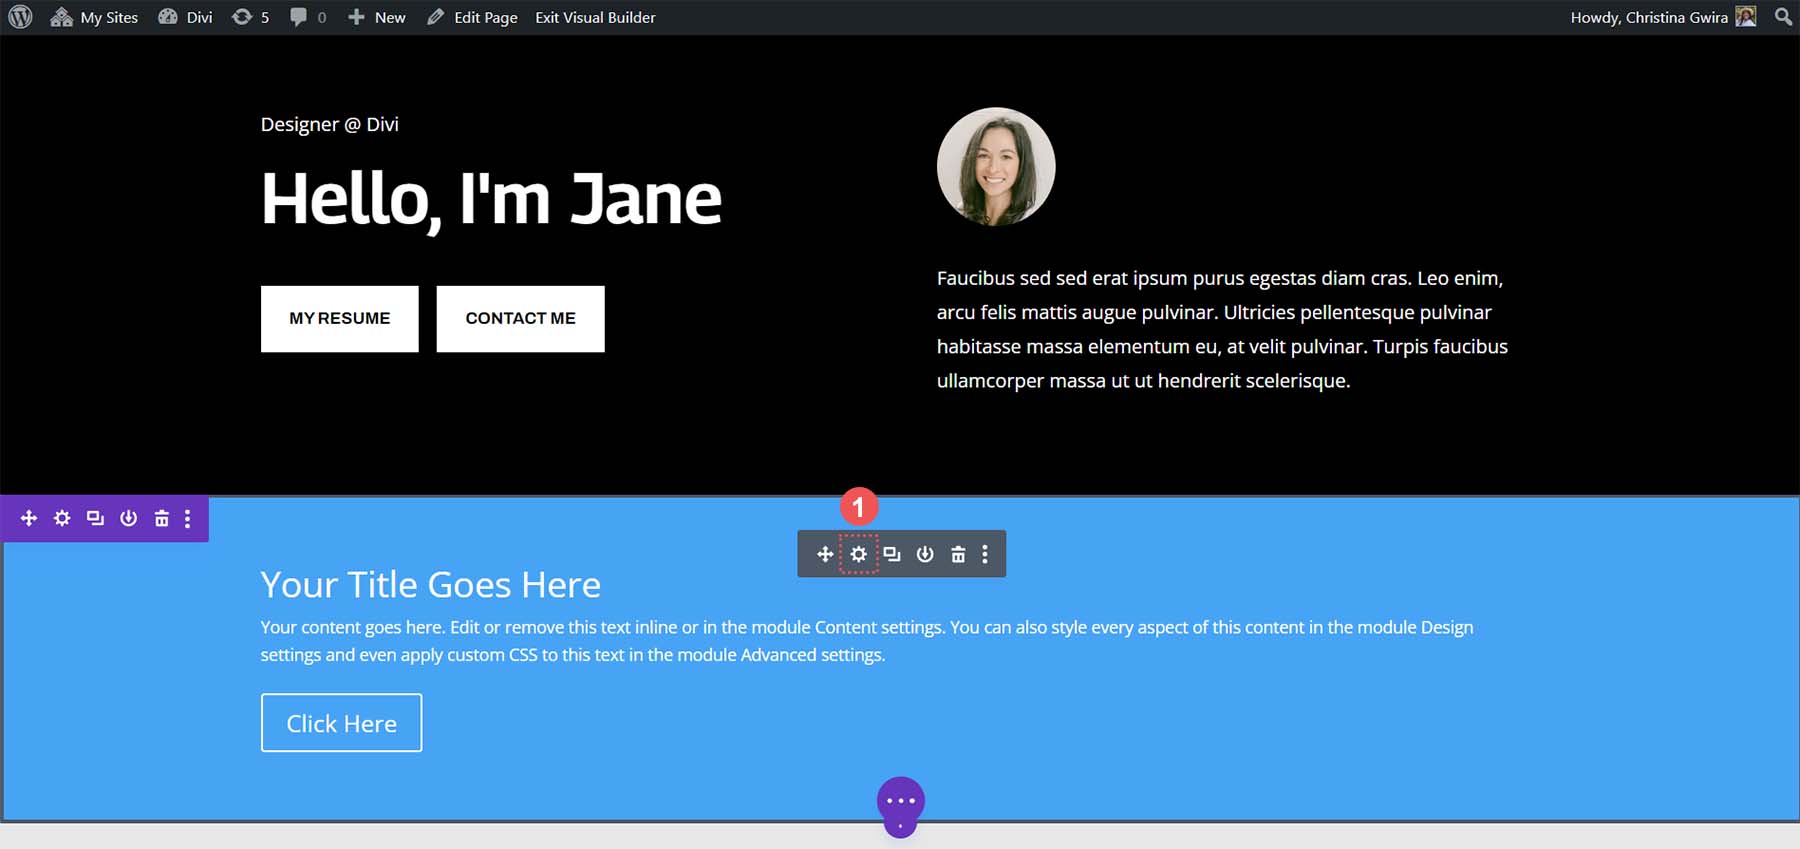
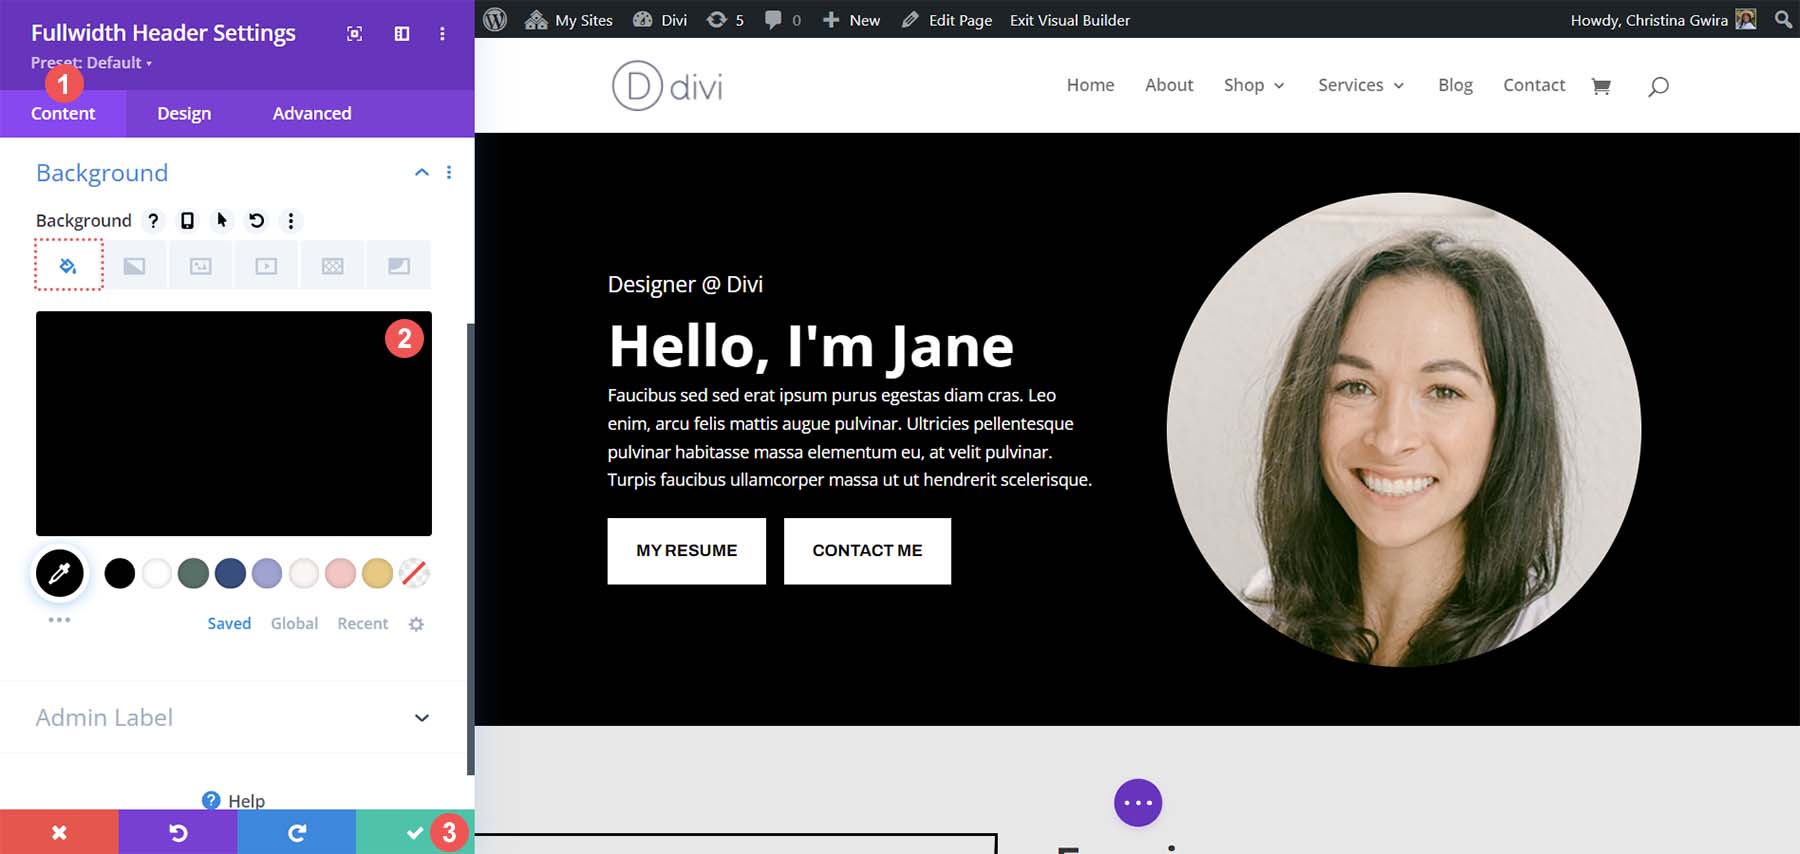
This will allow us to add our page header across the full width of the column. However, it’ll also allow us to place two Button Modules side by side underneath. As we are recreating the default header within this layout pack, we will apply a black background color to the section. Hover over the orange section and select the gear icon to open the settings for the section.

Scroll down to the Background tab. Select the color picker and make the background of section #000000. Click the green checkmark at the bottom of the settings box to save your styling choice.
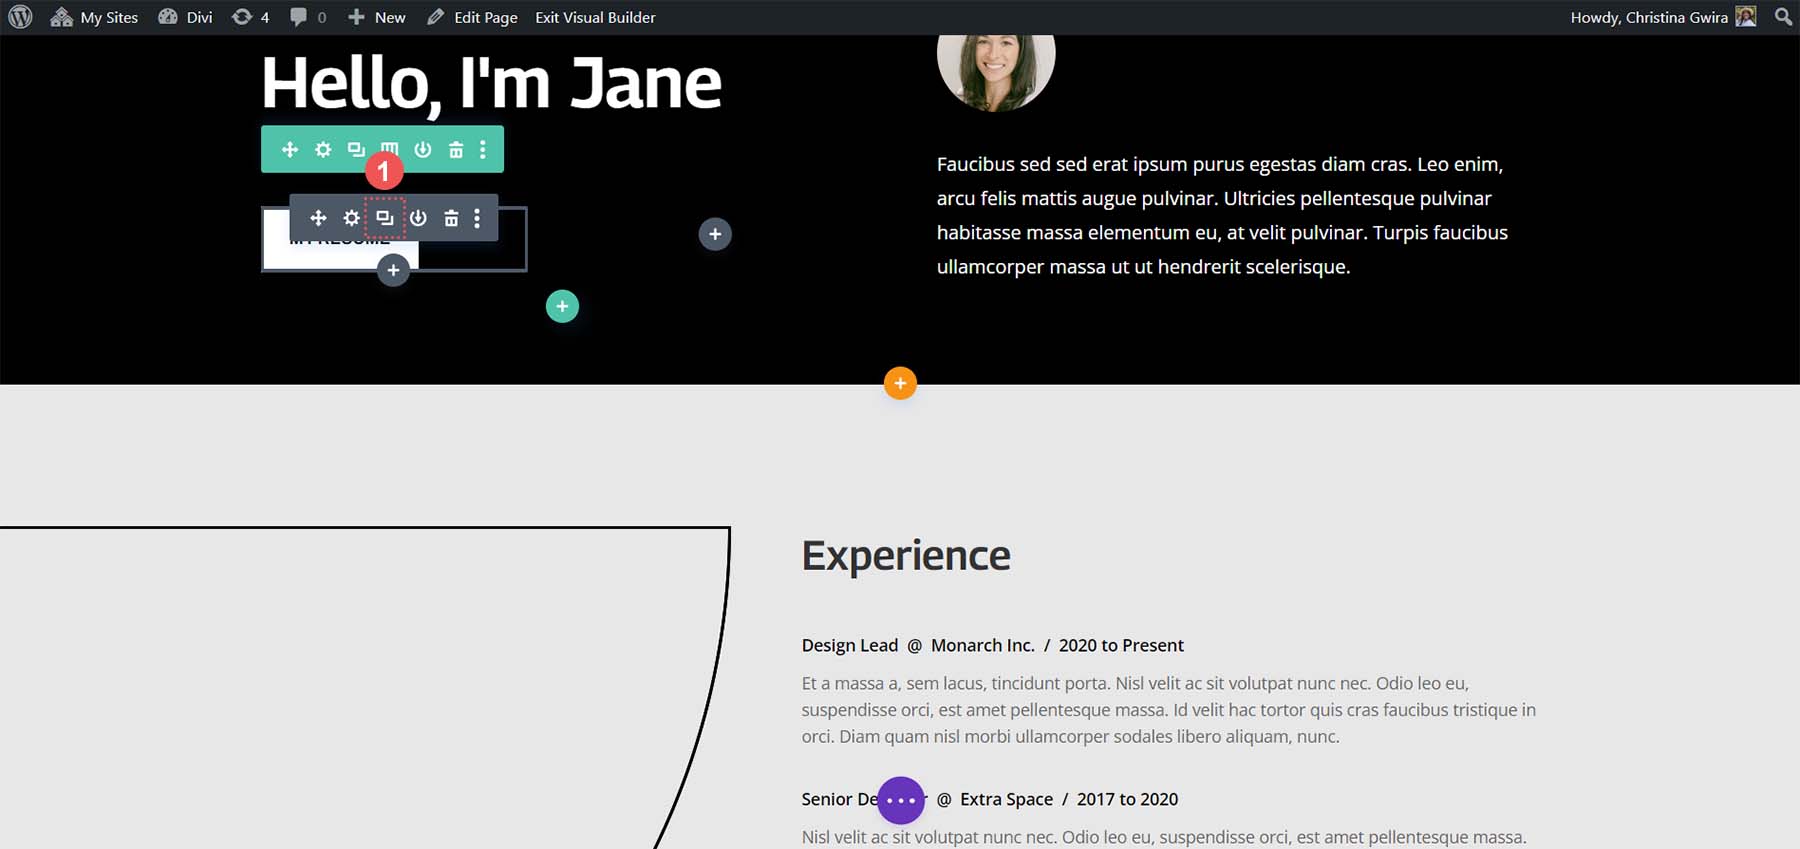
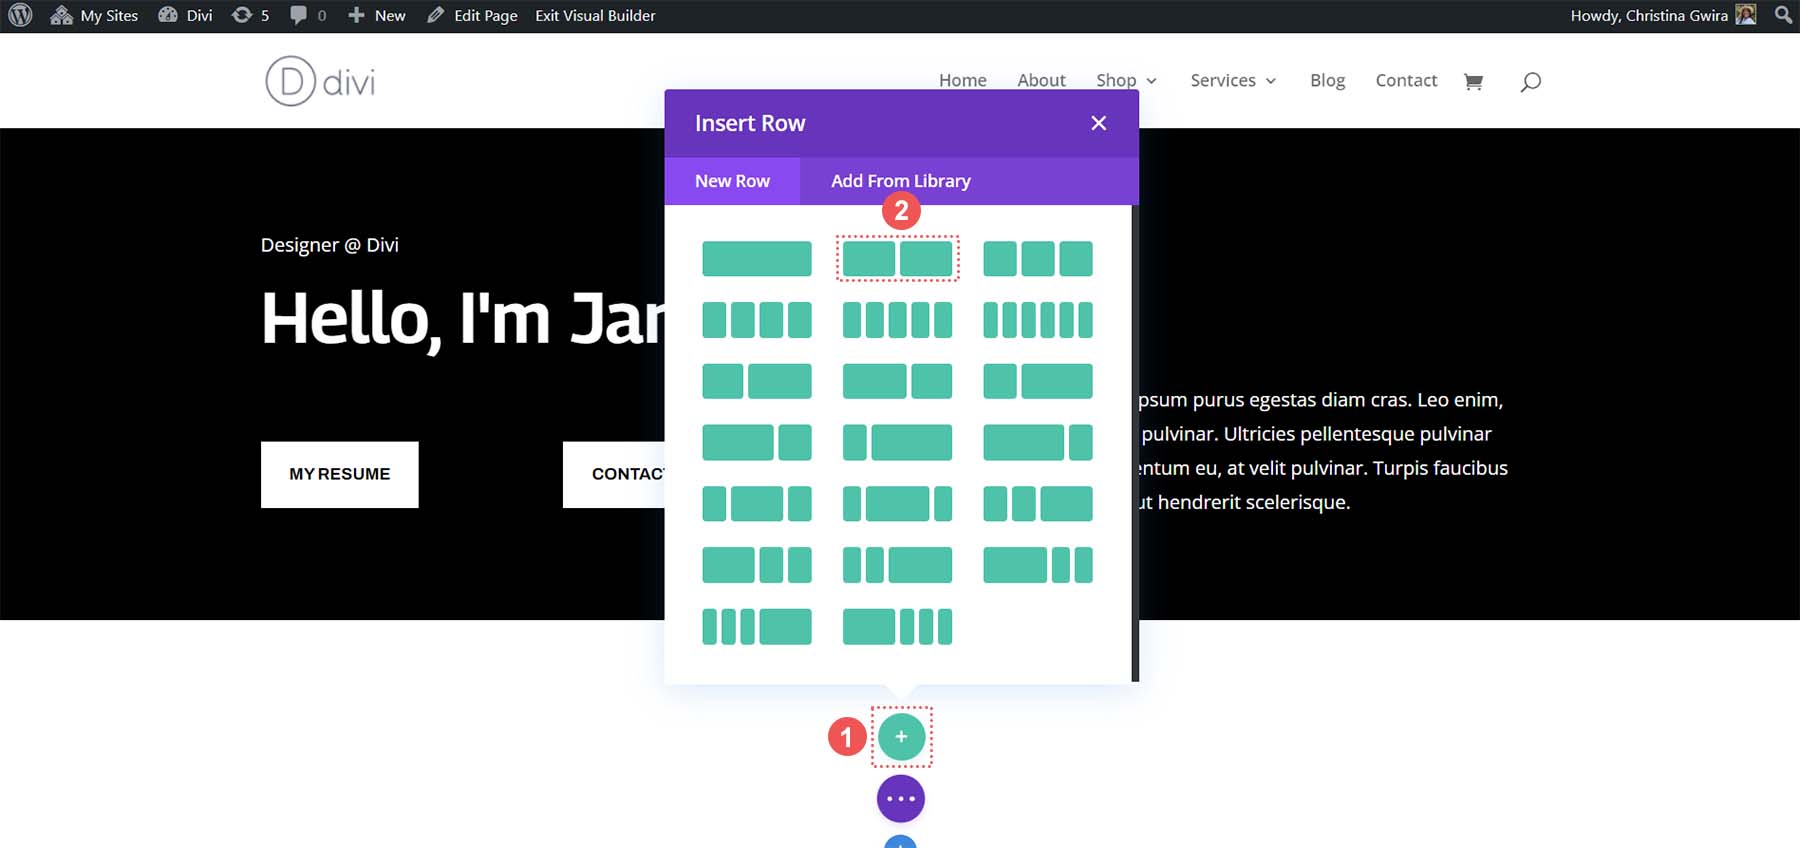
With our section created and styled, we will click the green plus icon in the first column. Next, we’re going to select a one-column layout.
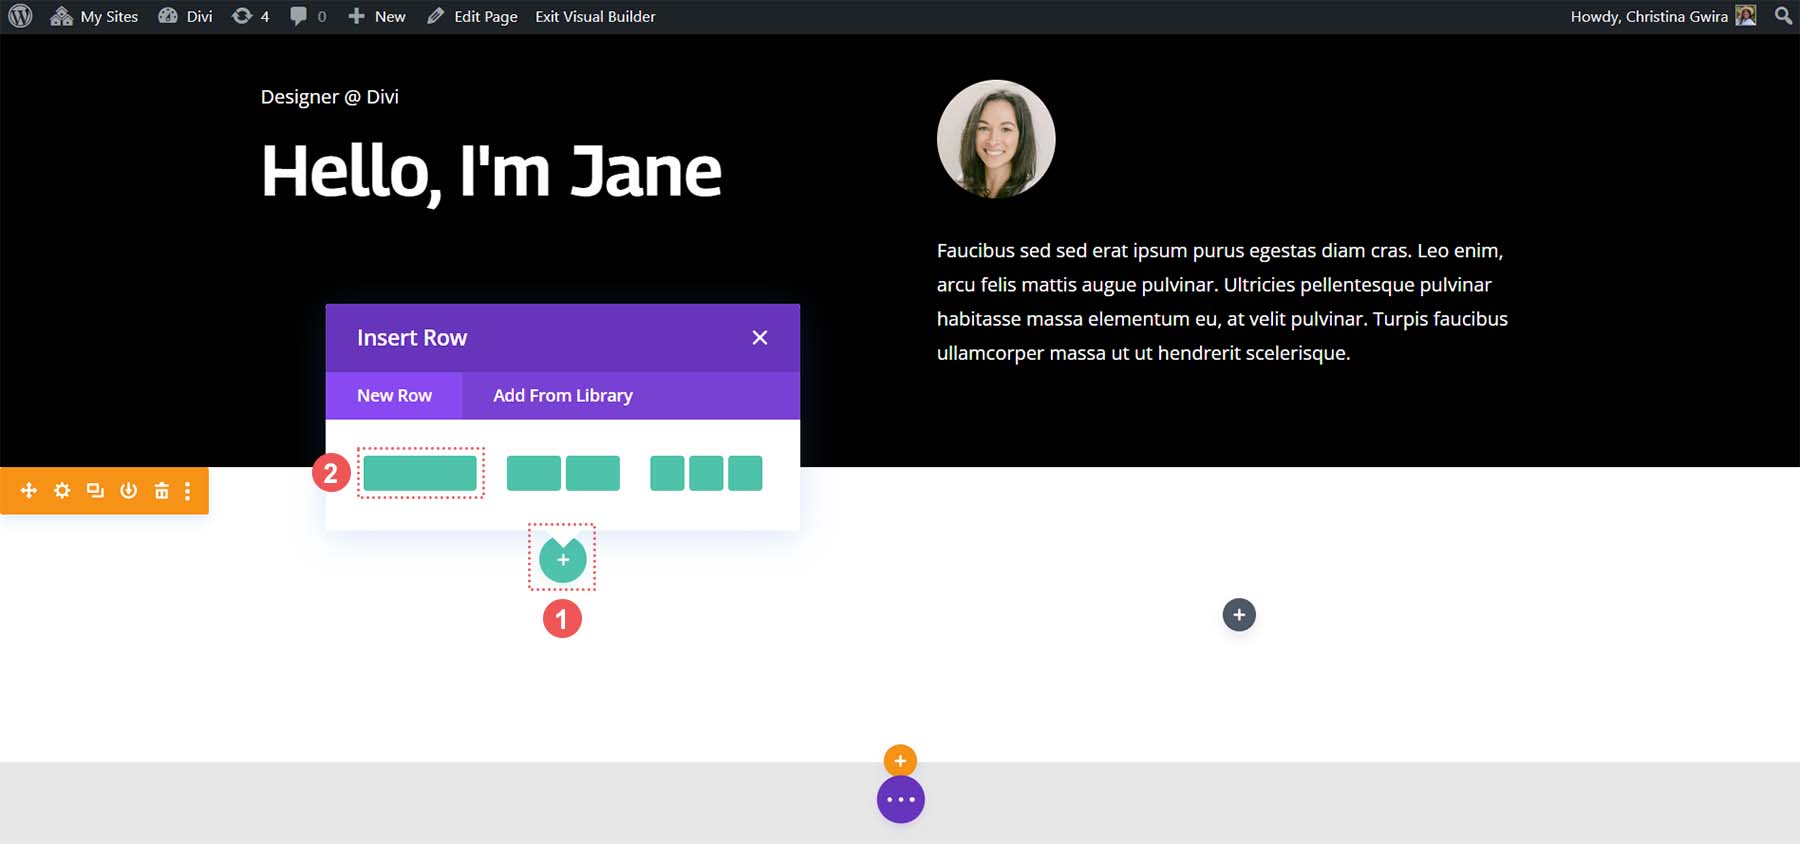
With our first row in place, we will drag the contents of the first column of the initial header section into this row.
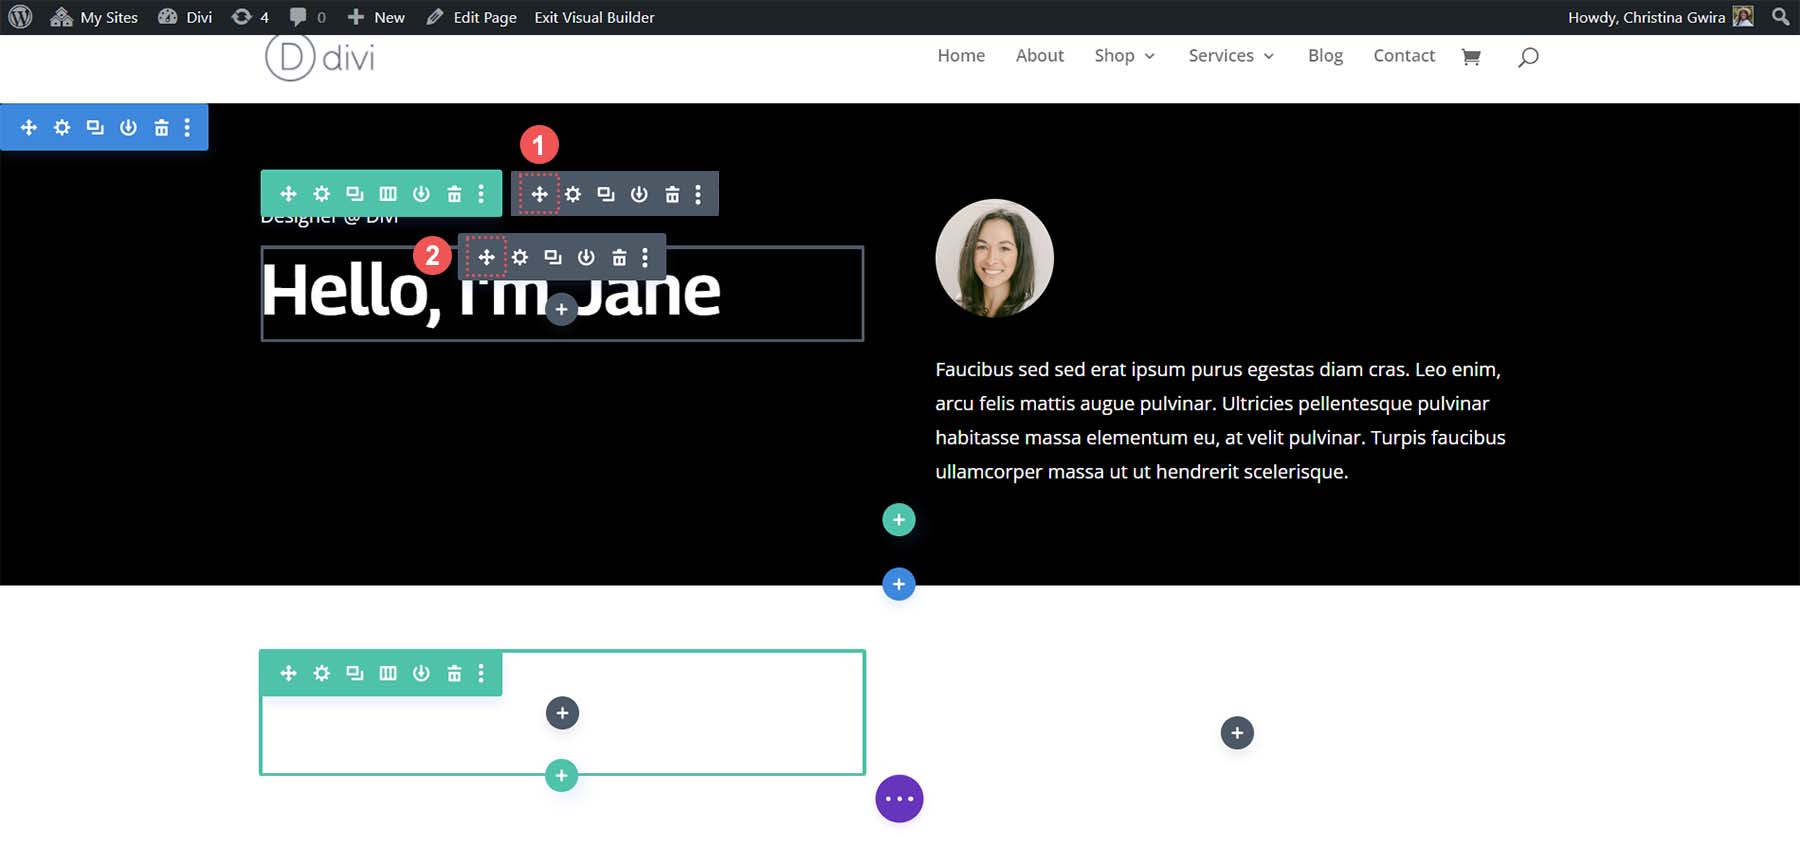
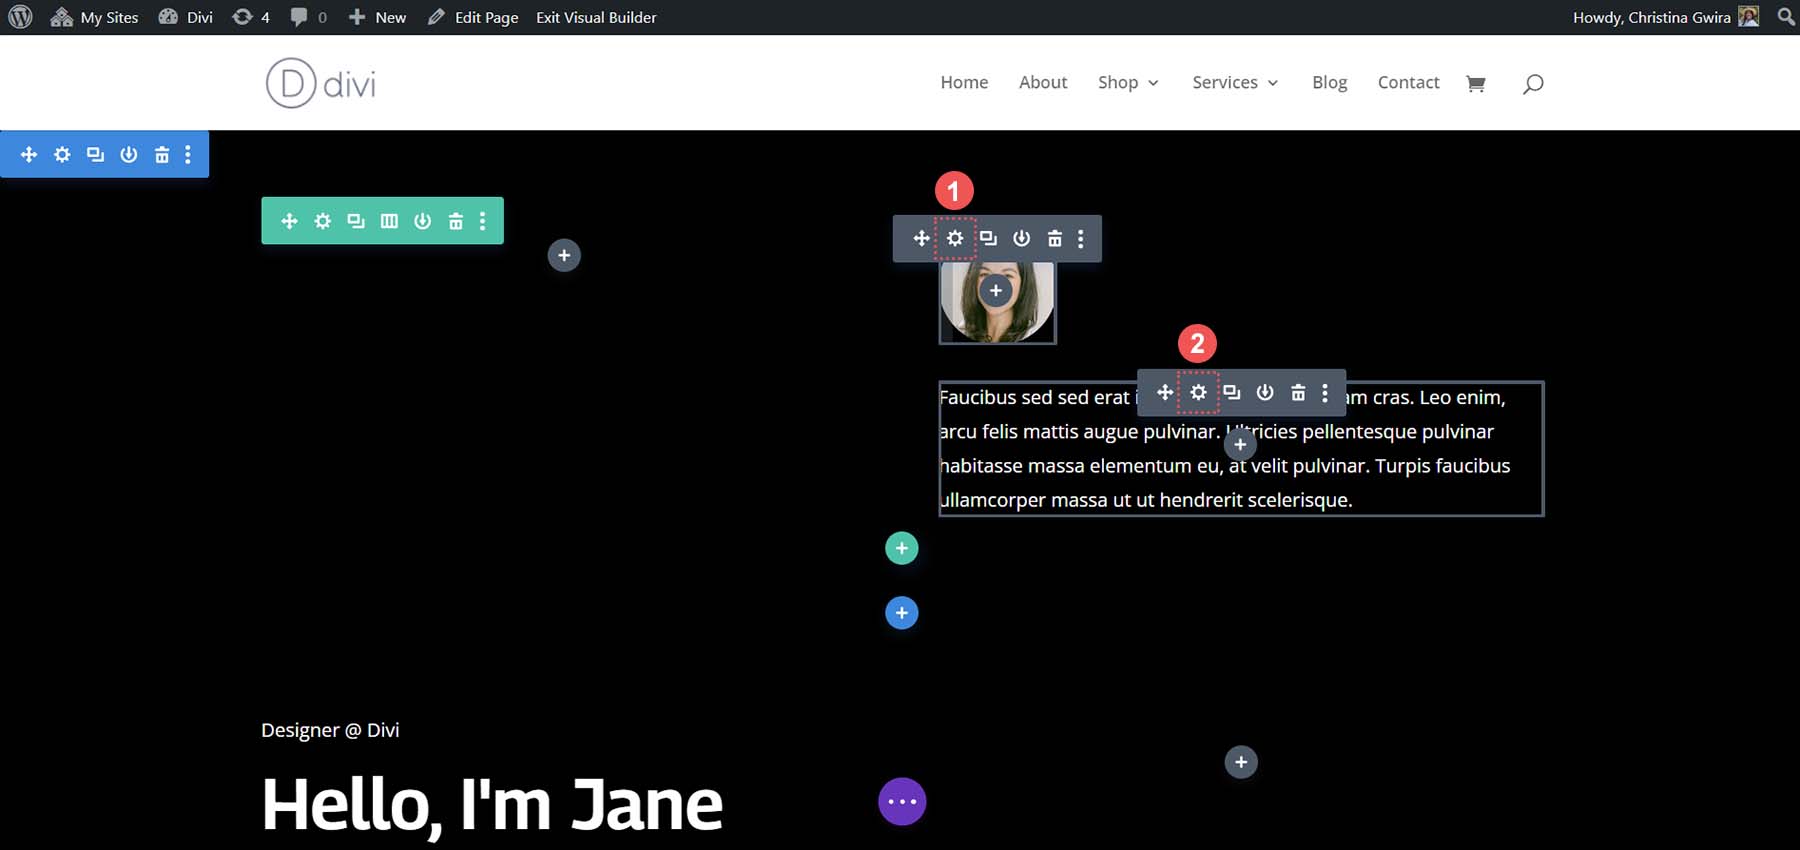
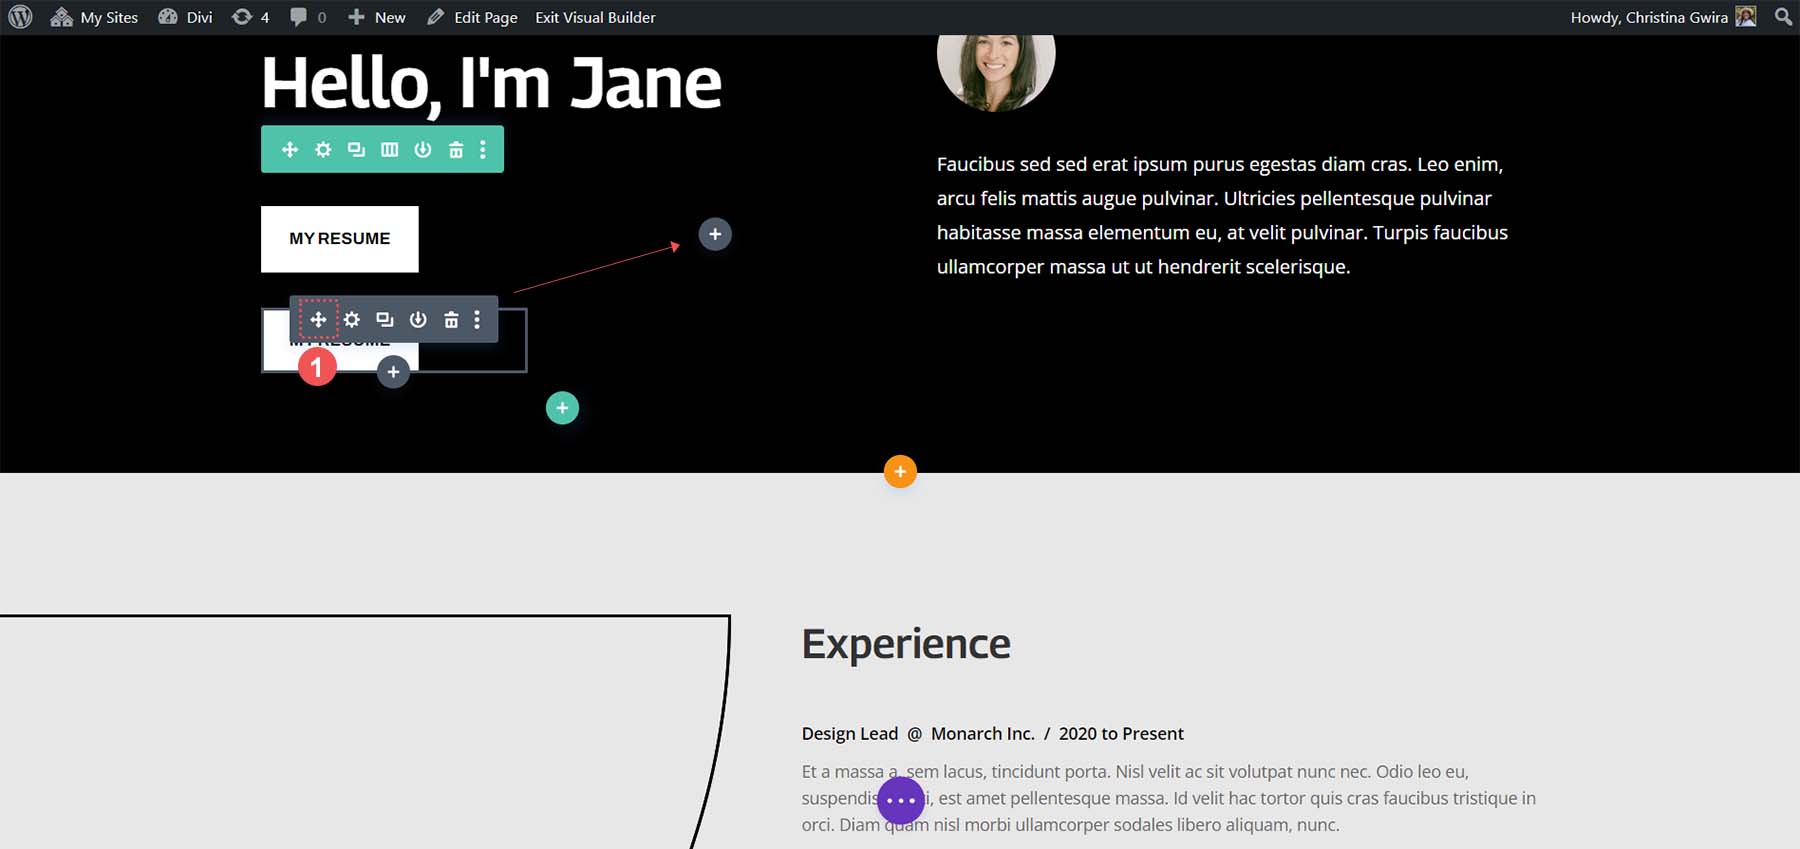
We will do the same to the contents of the second column. We click on the move arrow icon and drag the Image Module and the Text Module into the second column of the new specialty section we just created.
After we’ve moved the modules we need from the original section, we can delete them. Hover over the section menu and click on the trash can icon. This will delete the section with its row.
Add Button Modules
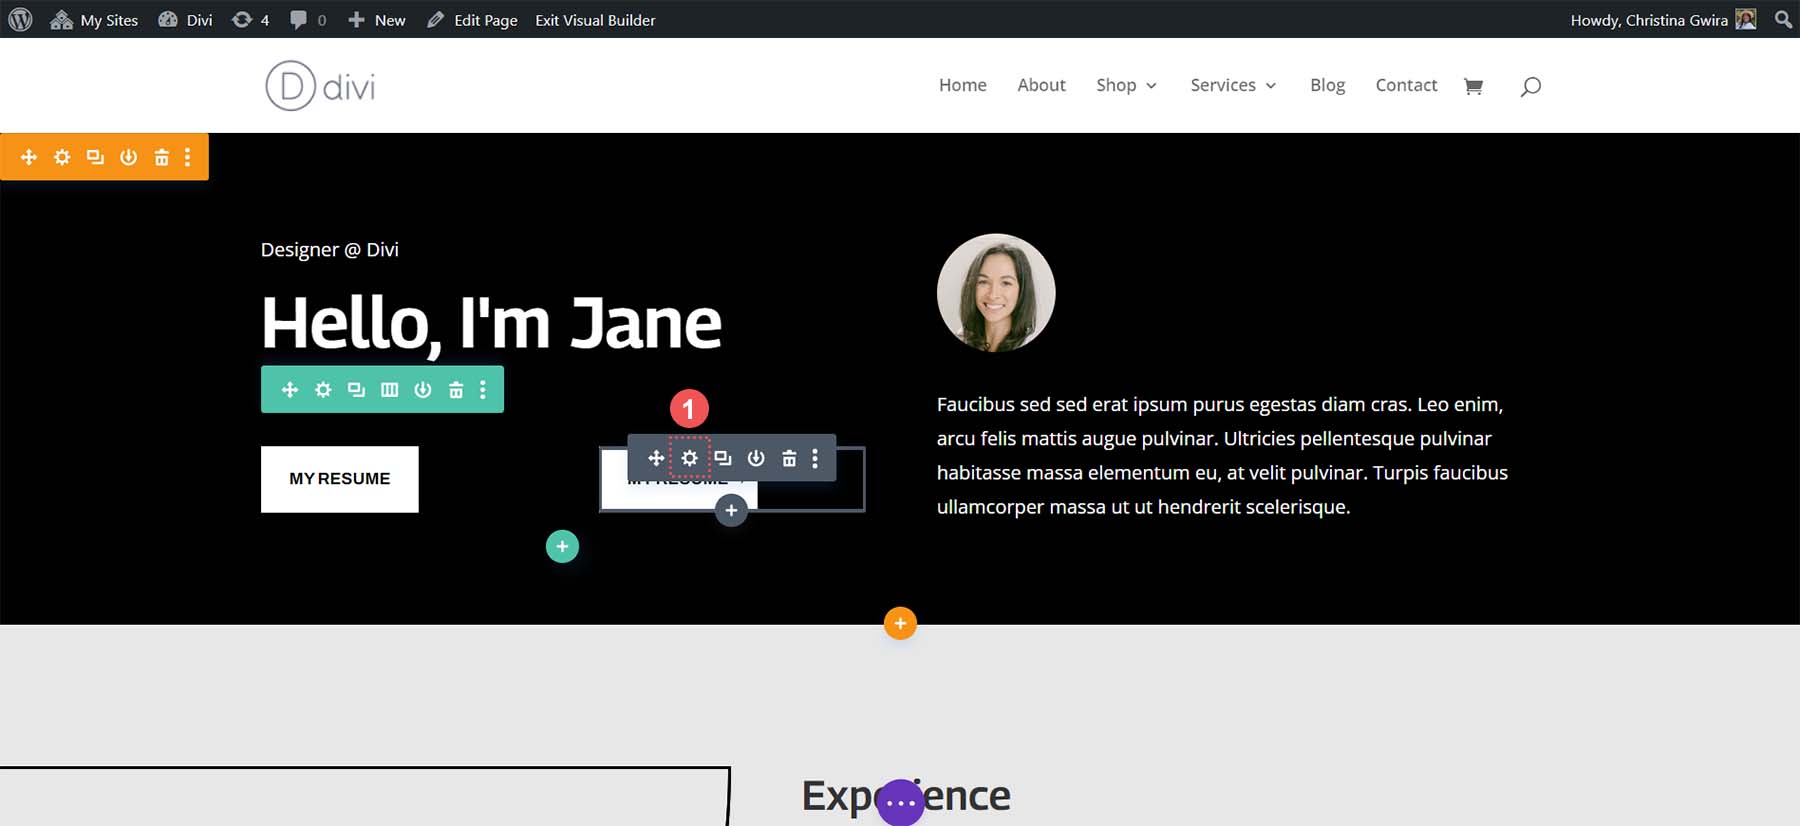
In the first column of our specialty section, we will click on the green plus icon to add a second row to this column. We’re going to select the two-column layout icon.

Next, we will add a Button Module to each of the columns of this new row. To do this, click the grey plus icon, then select the Button Module icon to add a button to the first column.
Styling the Button Module
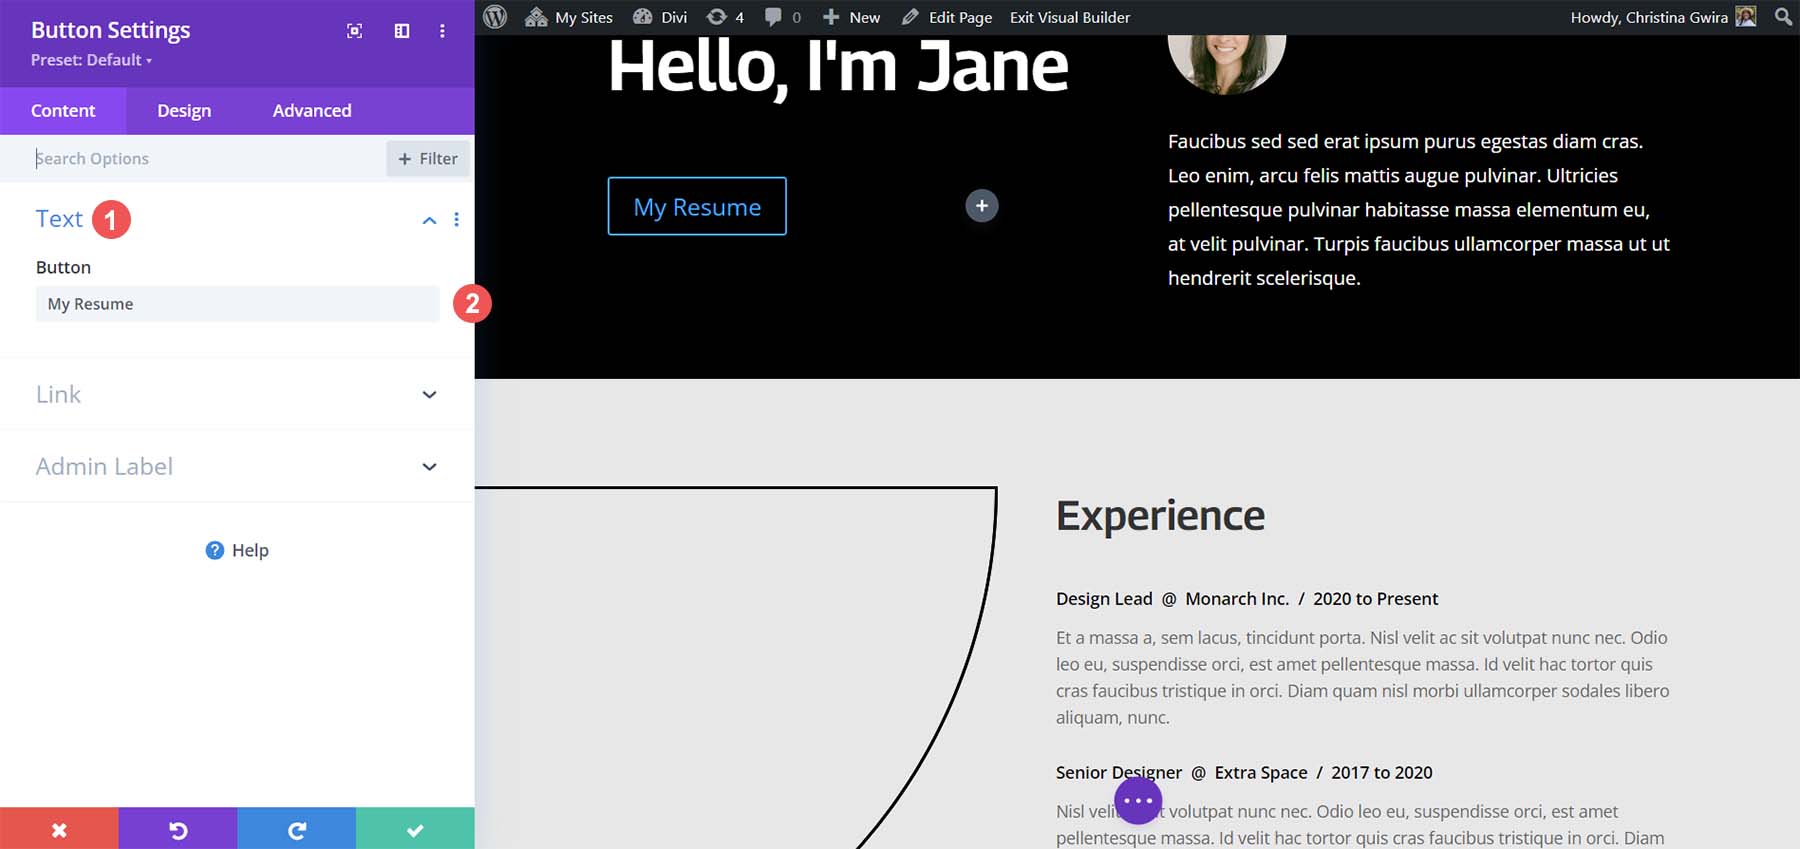
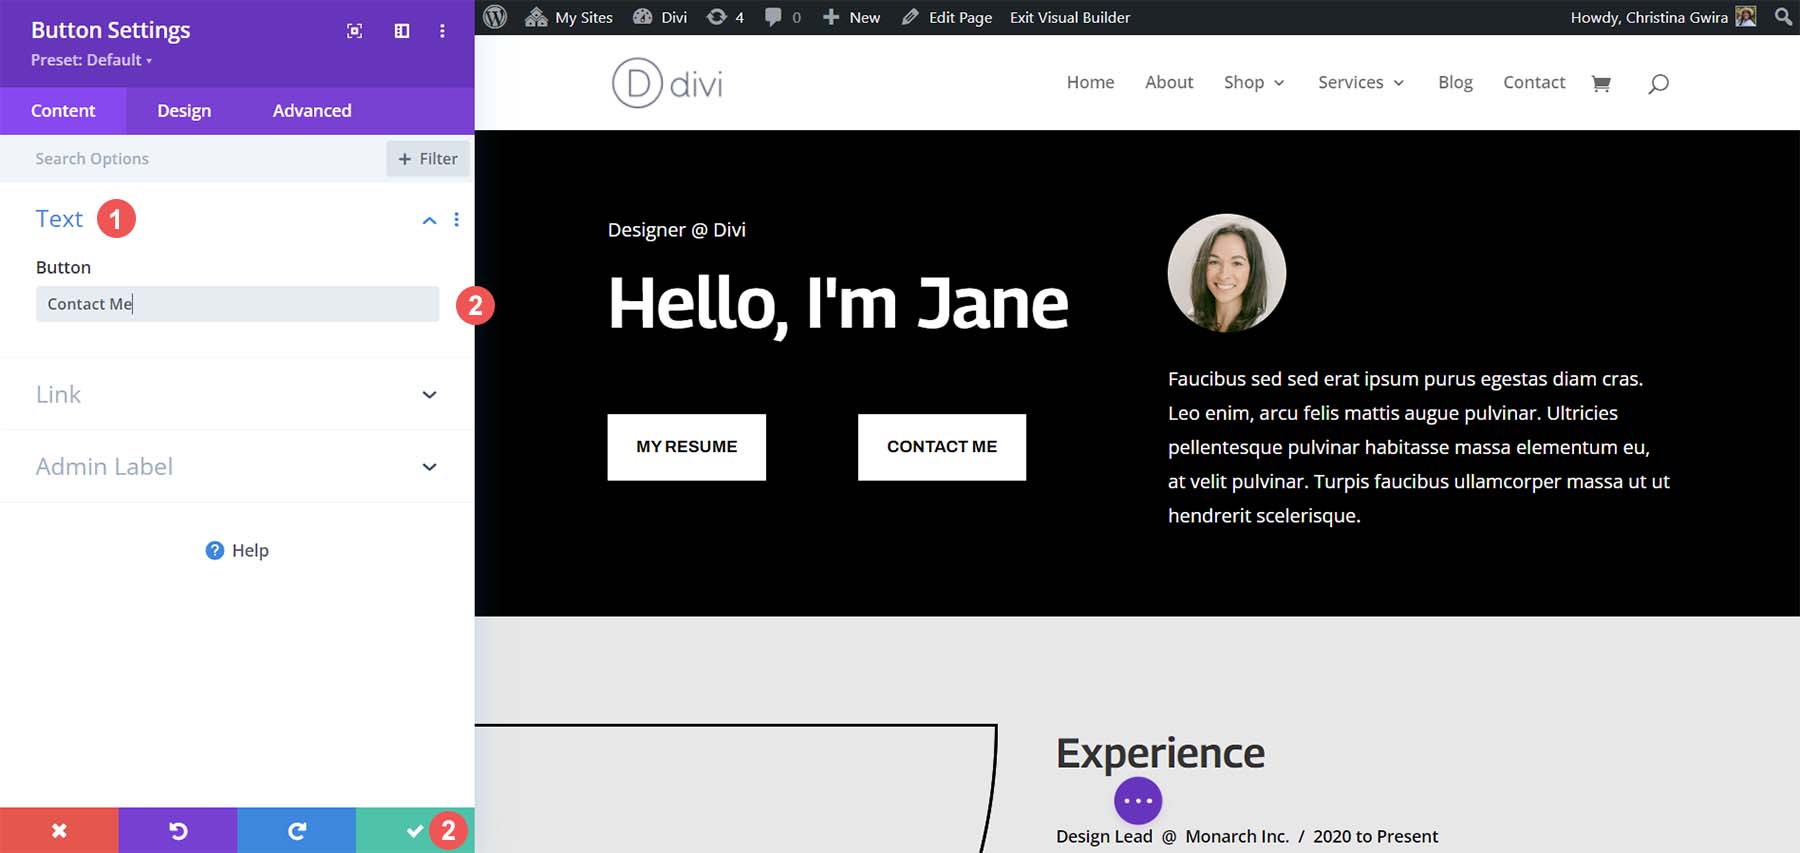
Within the Content tab, update the button’s Text to reflect your needs. In our case, we changed the text to say, My Resume.
Next, click on the Design tab, then click on the Button tab. Use the following settings to style the button.
Button Design Settings:
- Use Custom Styles for Button: Yes
- Button Text Size: 14px
- Button Text Color: #000000
- Button Background: #ffffff
- Button Border Width: 0px
- Button Font: Archivo
- Button Font Style: All Caps
- Show Button Icon: Yes
- Button Icon: Default
- Button Icon Placement: Right
Now, we’re going to add some padding to our Button Module. Then, we click on the Spacing tab. Give the button the following padding settings.
Spacing Design Settings:
- Top and Bottom Padding: 16px
- Left and Right Padding: 24px
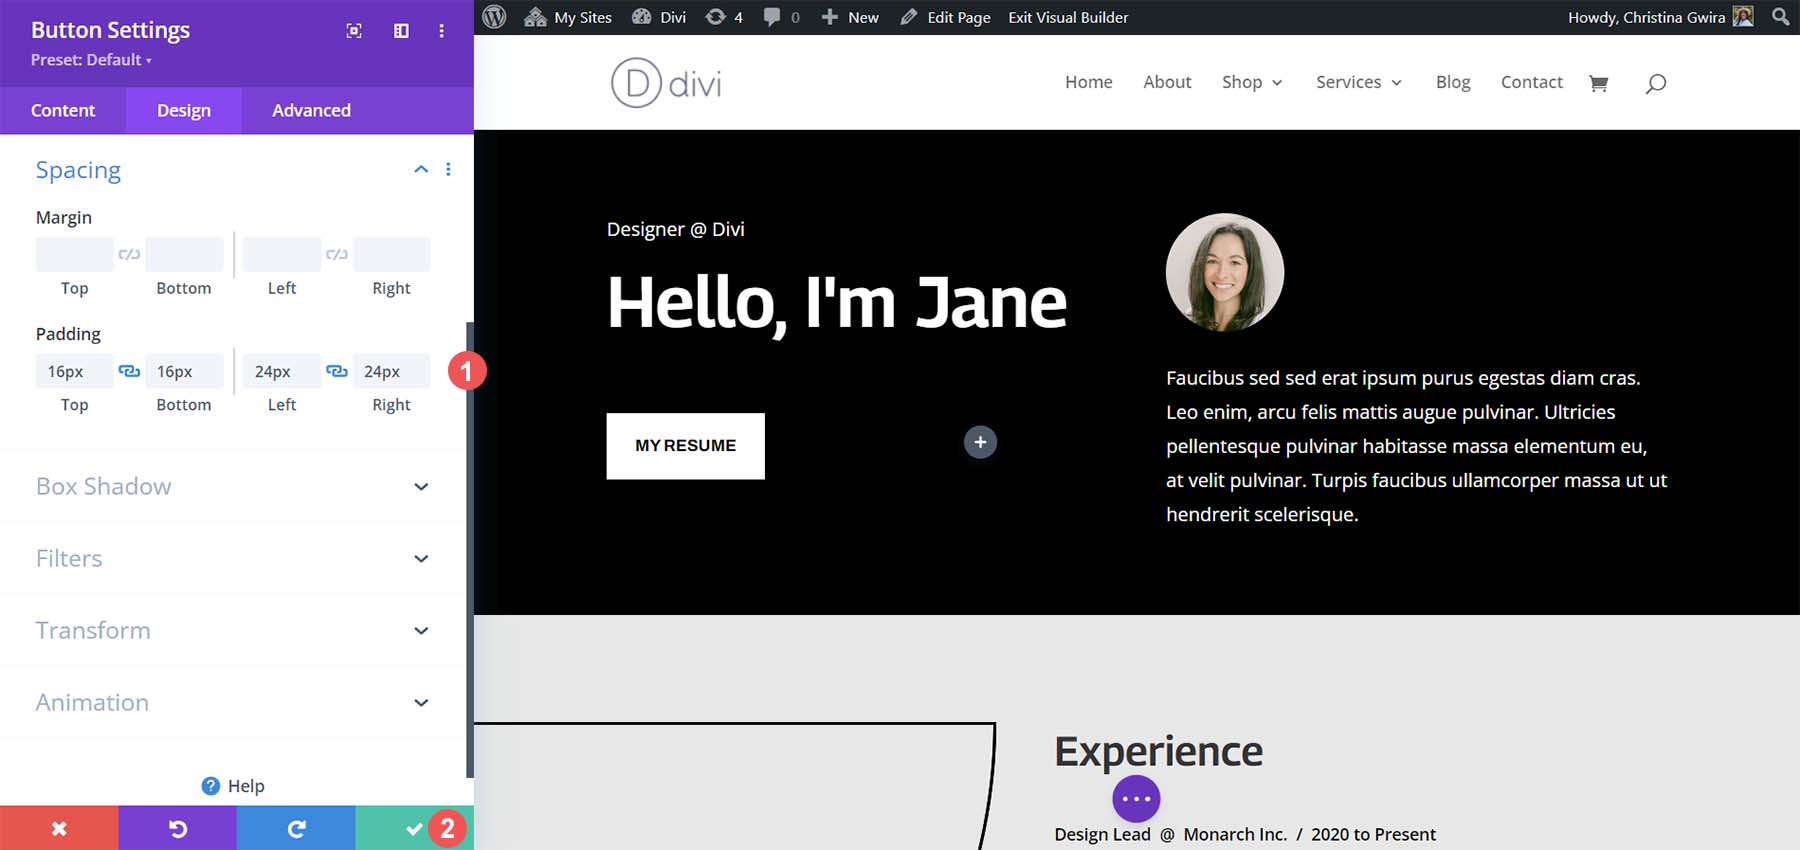
Click on the green check mark to save your styling options.
Create a Second Button Module
It’s time to create and place our second button next to our first button. Firstly, hover over the first button and click the copy icon. This will duplicate the module.
Then, drag the duplicated module to the second column.
Now that our second Button Module is in the column let’s click on the gear icon. This will open the settings for this button.
In the Content tab, edit the button’s text to fit your needs.
Once in the Button Module’s settings, update the button’s text. Finally, click the green check mark to save your edits to the second button.
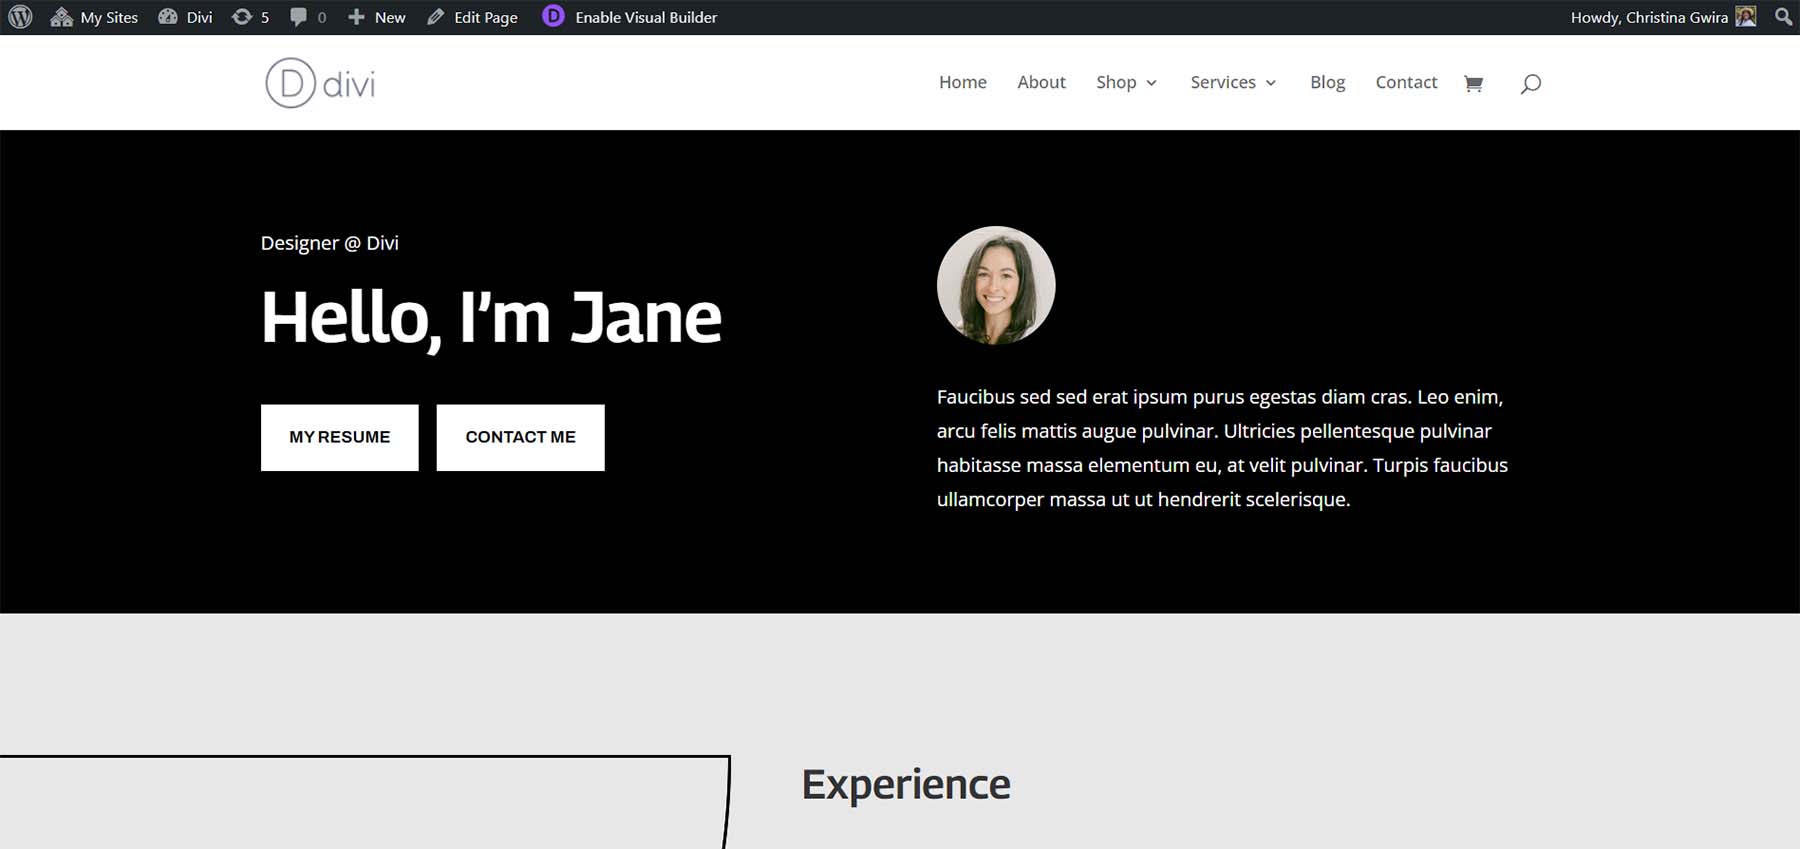
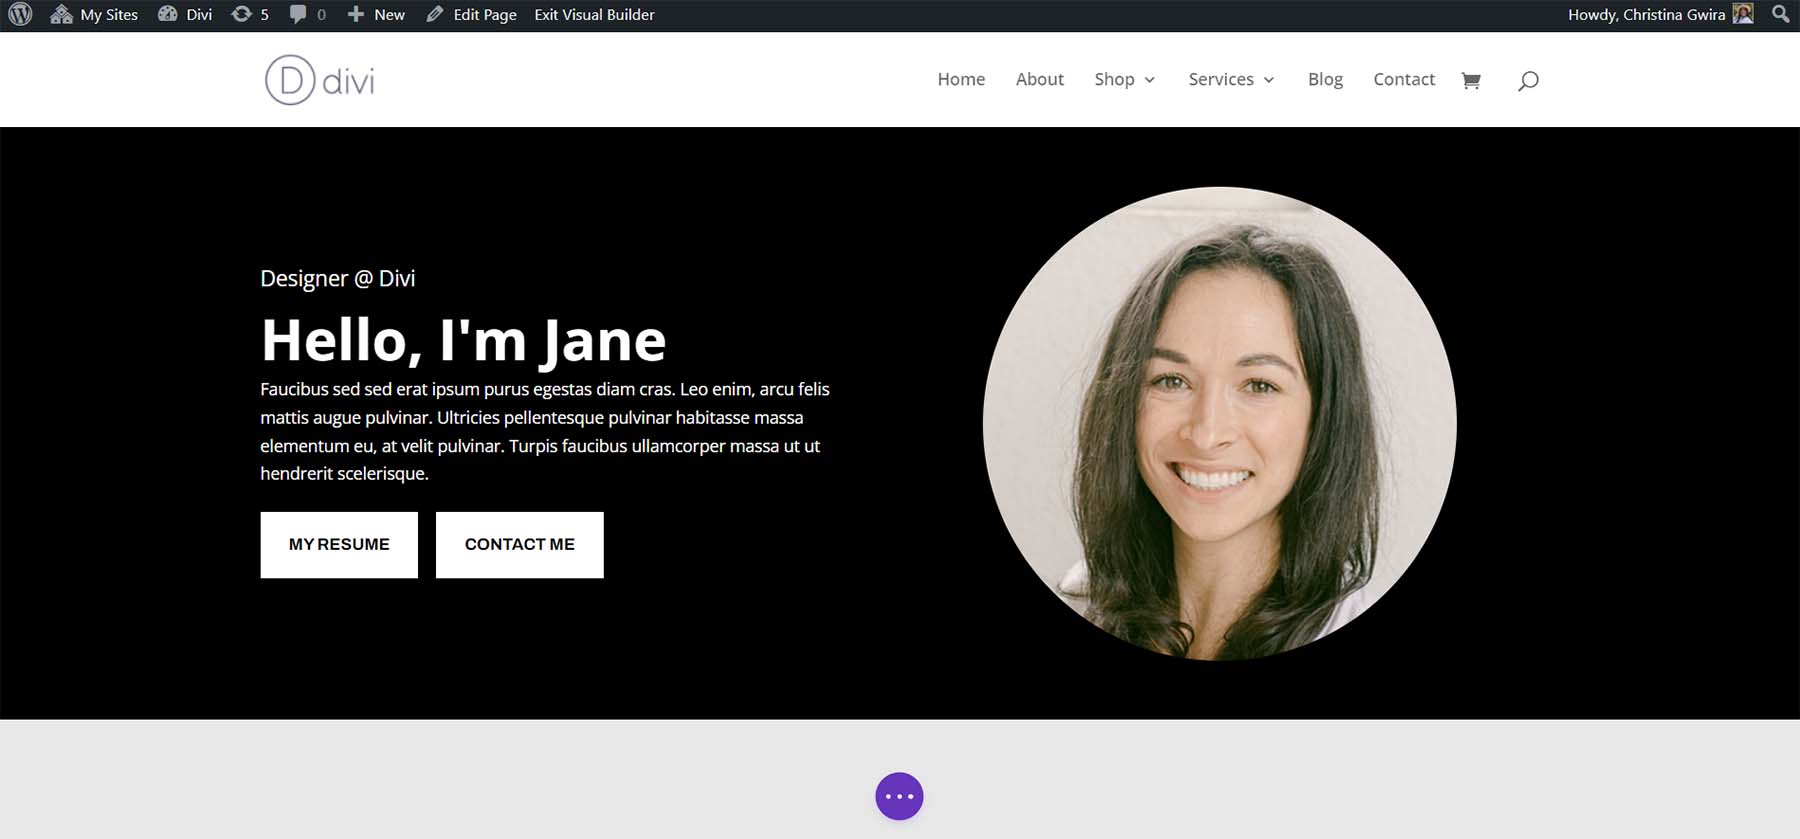
In the end, you will have two Button Modules, side by side.
Another way to add Divi buttons side by side is by using CSS. With only a single line of CSS, we can achieve side-by-side dual buttons in Divi. First, let’s prep our section.
Prepping Our Section
Similar to our previous method, we’ll need to adjust our section. In this case, we’ll use a regular Divi section instead of a specialty section. To begin, we click the orange plus icon and select the blue regular section icon.
Now that our new section has been created, we’ll add rows and columns. We will select the two columns, 50% + 50% layout icon.
Seeing that our section has been created, let’s give it a black background, similar to the previous section. Click on the gear icon within the blue section menu. Then, click on the Background tab. Select the Background Color icon and set the background color to #000000.
Click on the green check mark to save our section styling. Next, move all the modules from the specialty section to this new section. Finally, we will click the trash can icon in our previous section and delete the specialty section.
Note that the Button Modules are not side by side yet. They are resting on top of each other. Let’s change that with some CSS.
Adding CSS to Make Our Divi Buttons Sit Next to Each Other
To begin, we click on the gear icon for the row.

Click on the Advanced tab and then the CSS ID and CSS Classes tab. Set a CSS class for the row. In our case, we will give it a class name of side-by-side-1.
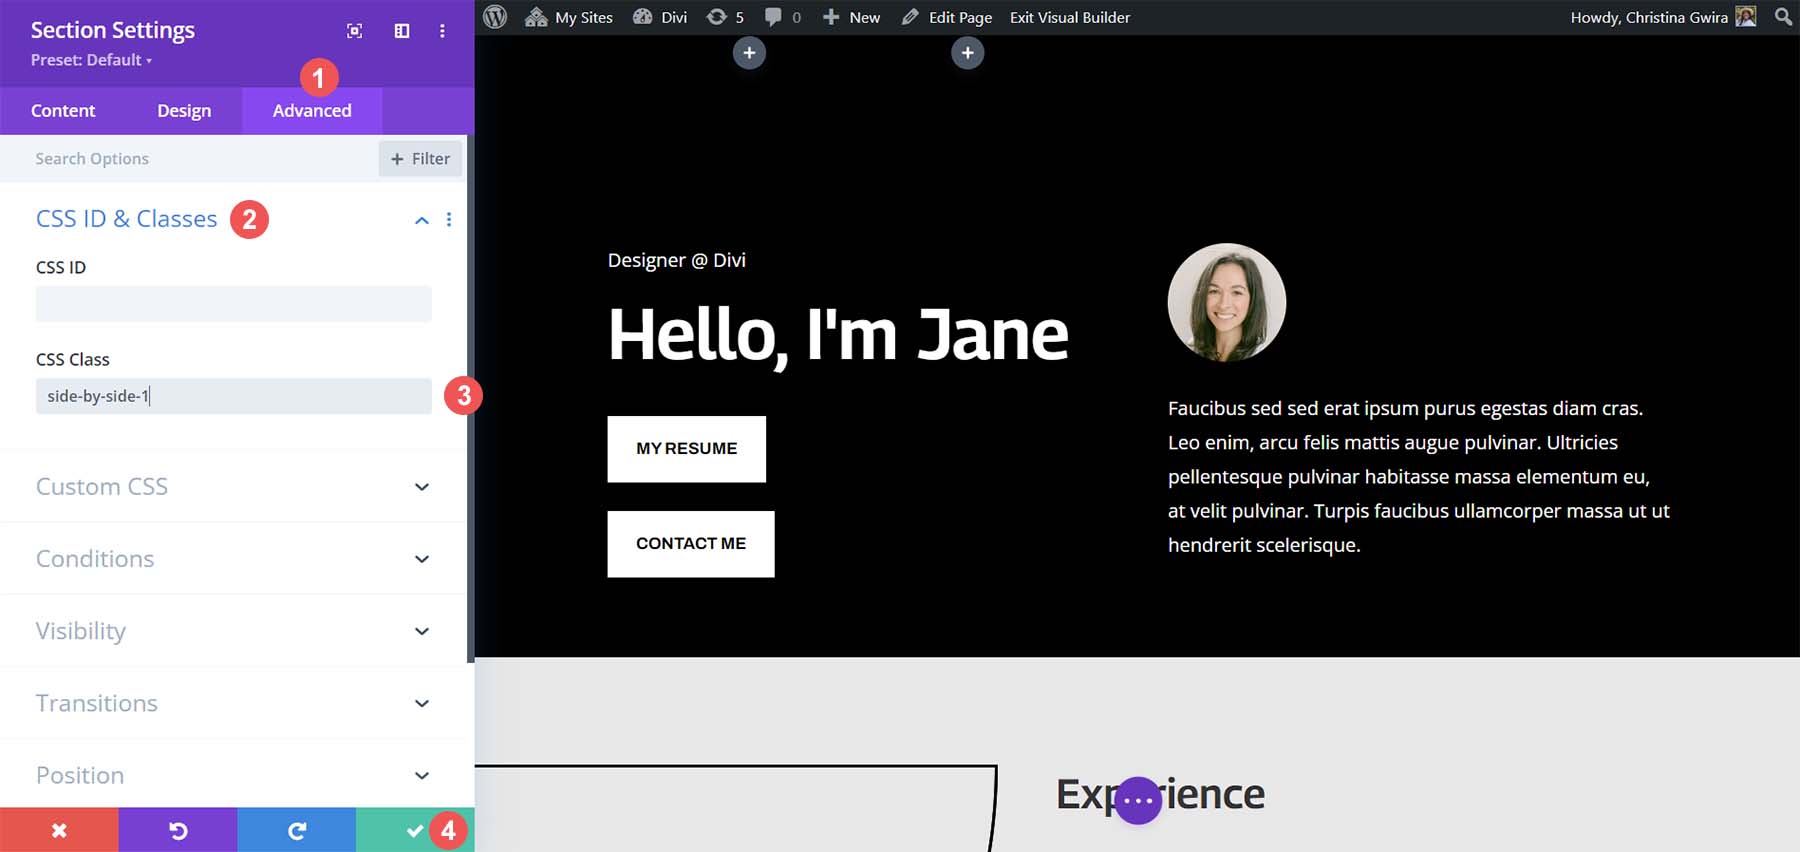
Afterward, click on the green checkmark icon to save the additions to the row. Now, we click the purple circle button in the middle of the screen.
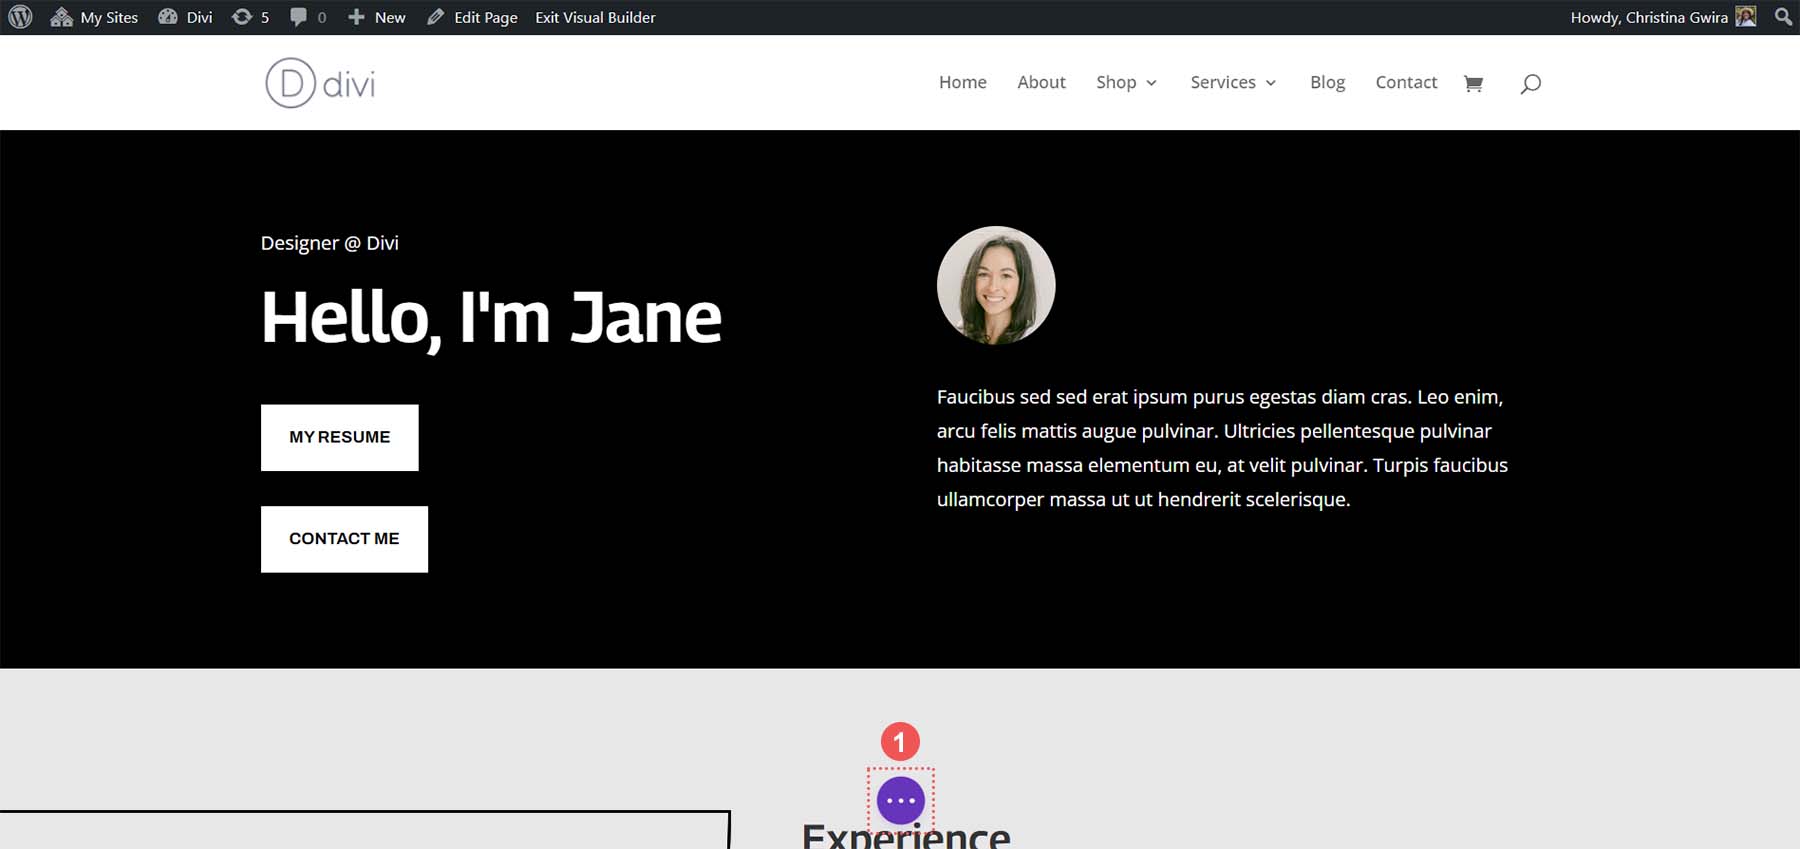
Next, click on the purple gear icon. This will open the Page Settings.
Within the Page Settings, click on the Custom CSS tab. Once there, add the following line of CSS:
/* Side by Side Buttons v1 */
.side-by-side-1 .et_pb_button_module_wrapper {
display: inline-block;
margin-right: 25px;
}
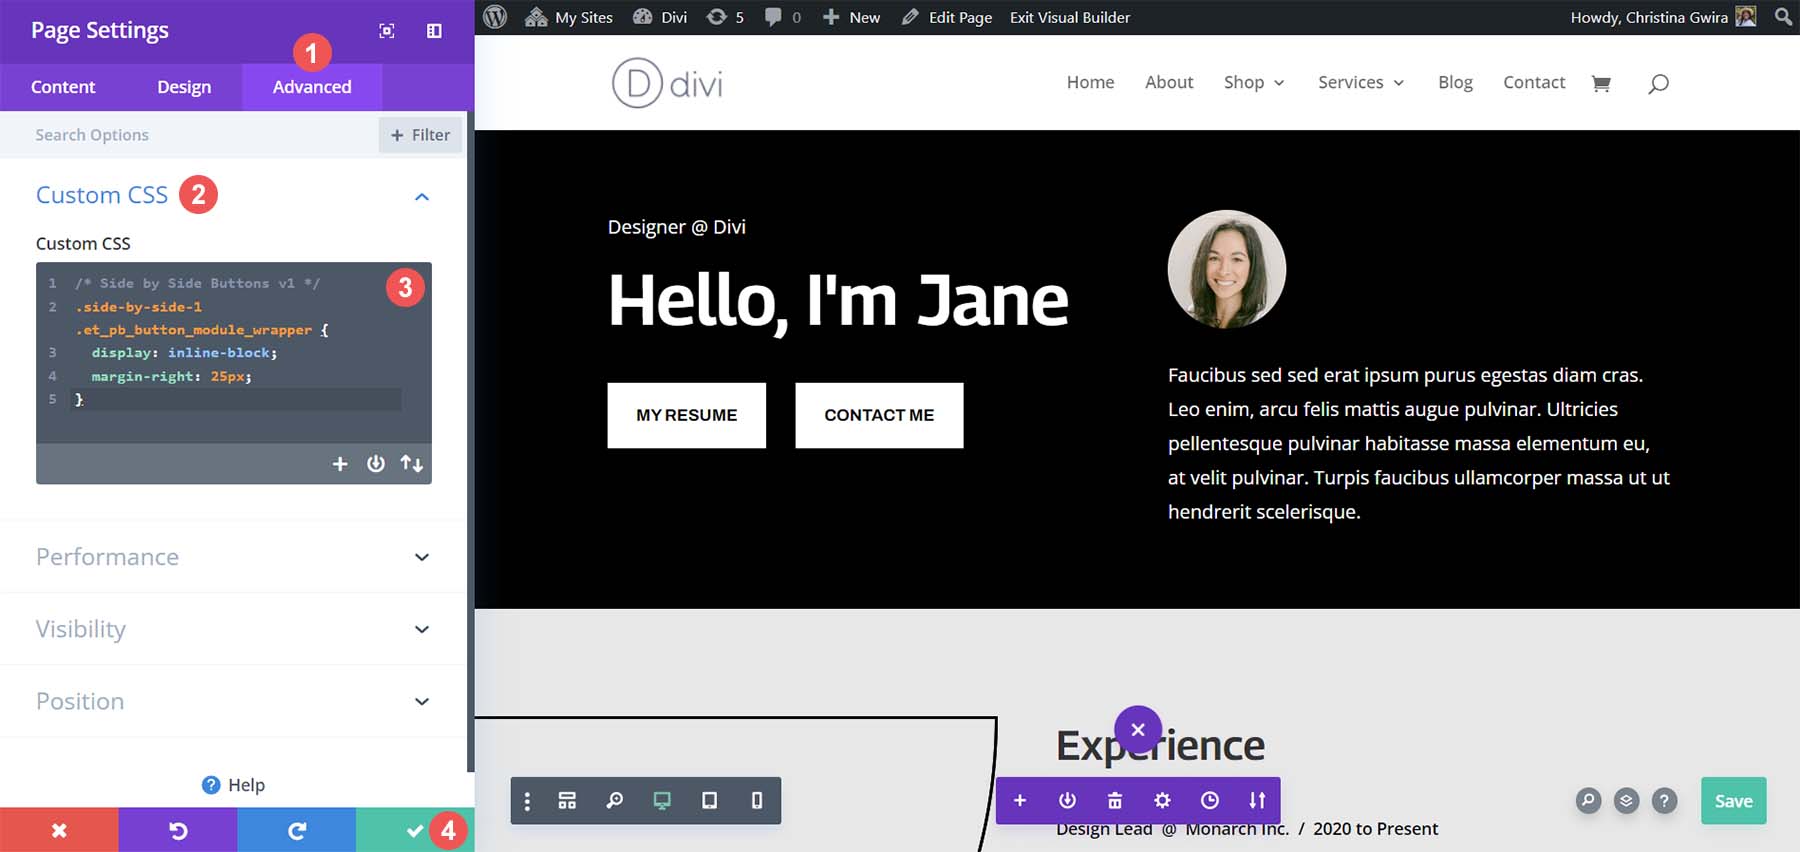
The value for the right margin can be adjusted to increase or decrease the space between both buttons. Once you are satisfied, click the green check mark to save your work!
If you’d like, you can also use Flexbox to place your Button Modules next to each other. To begin, let’s assign a different CSS class to our column. To start, click on the gear icon within our row.
Within the row’s modal box, click on the gear icon for the first column.
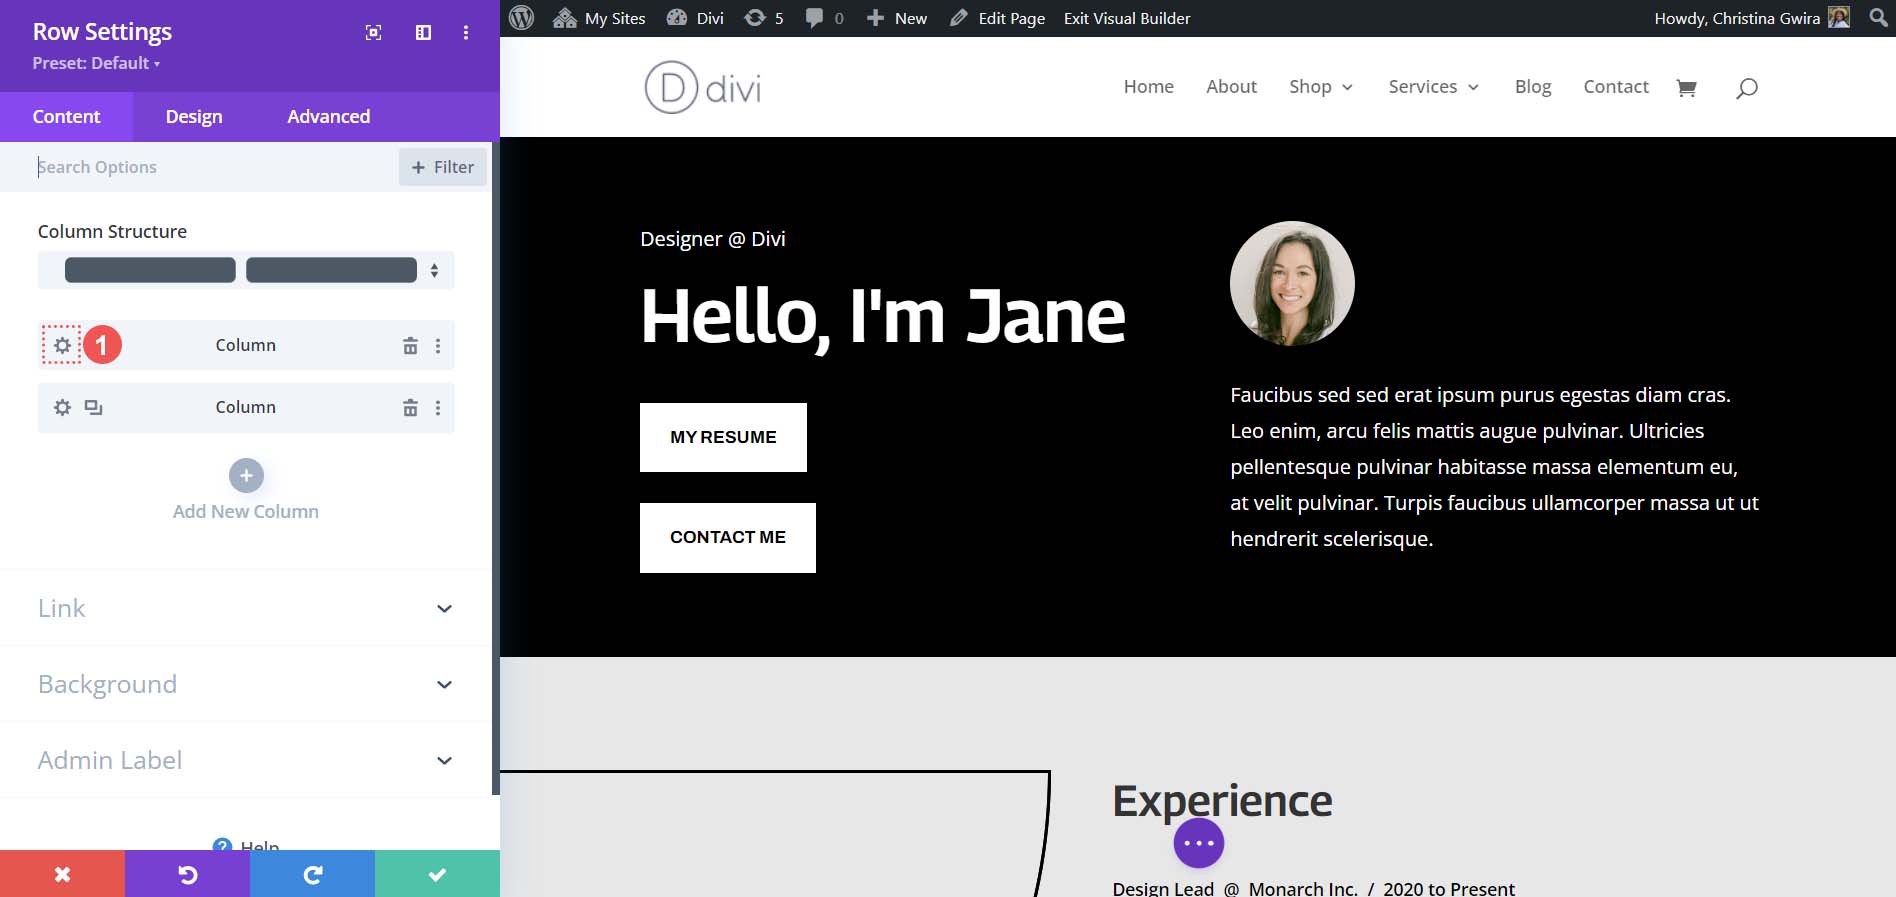
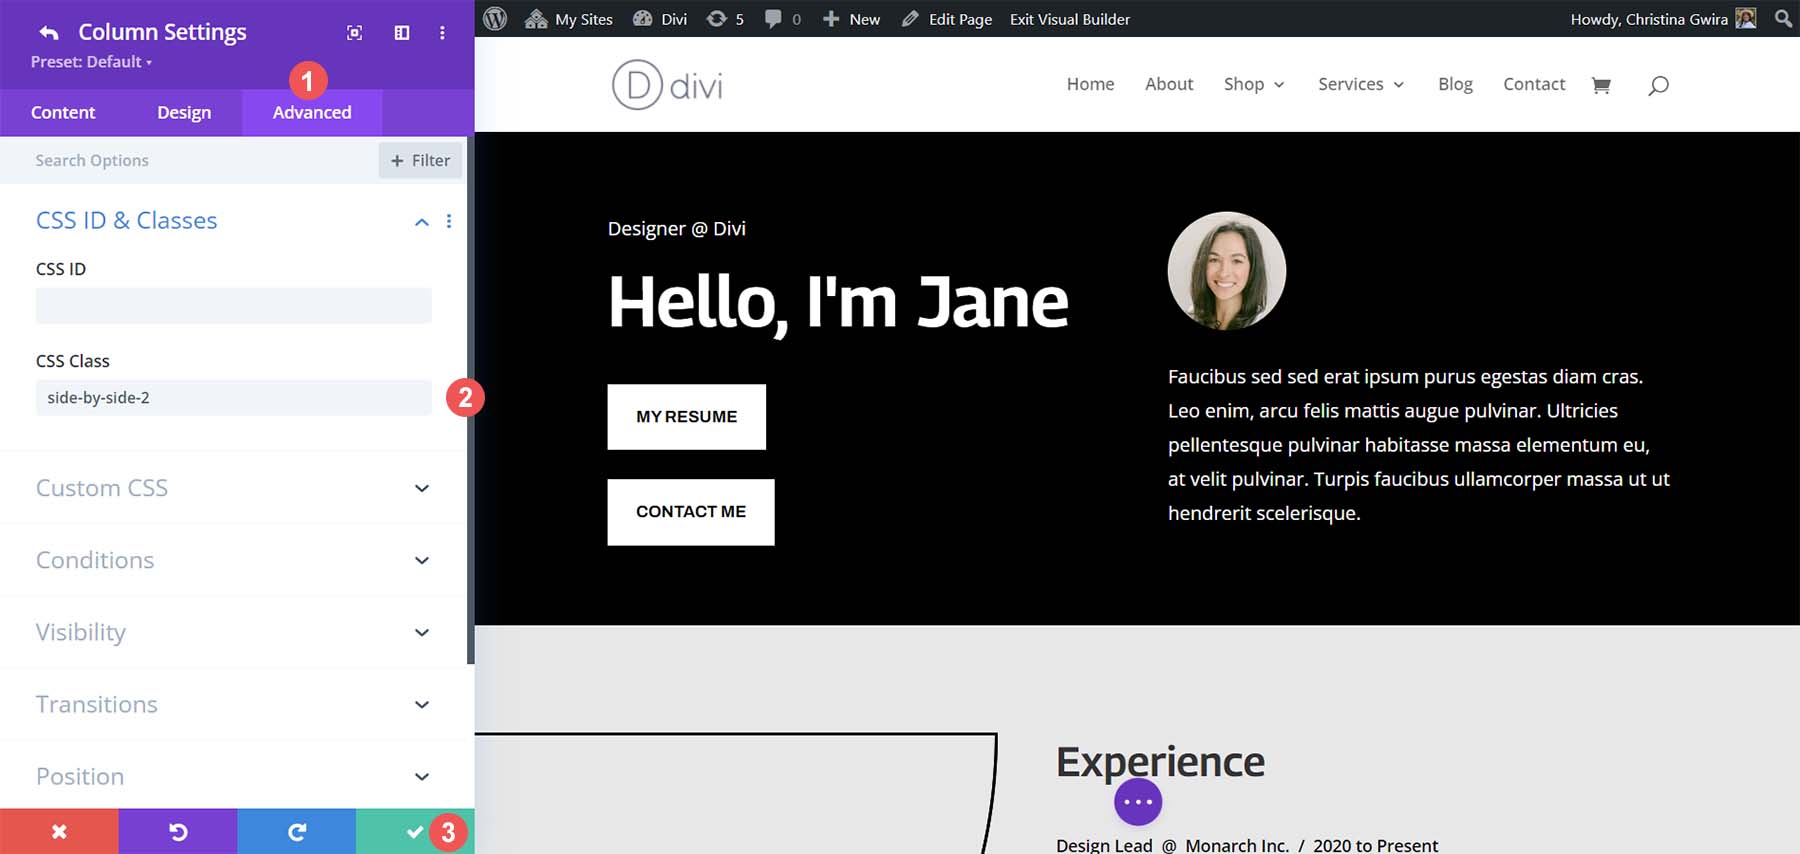
While in the column settings, click on the Advanced tab. Then, add a CSS class of .side-by-side-2 to the column. Click on the green checkmark icon to save your changes.
Next, we’ll navigate back to the page settings screen. Click on the purple circle button with three dots in the center of the screen.
Then, click the purple gear icon.

In our Page Settings, click on the Advanced tab and use the following CSS snippet:
/* Side by Side Buttons v2 */
.side-by-side-2 {
display: flex;
flex-wrap: wrap;
gap: 15px;
}
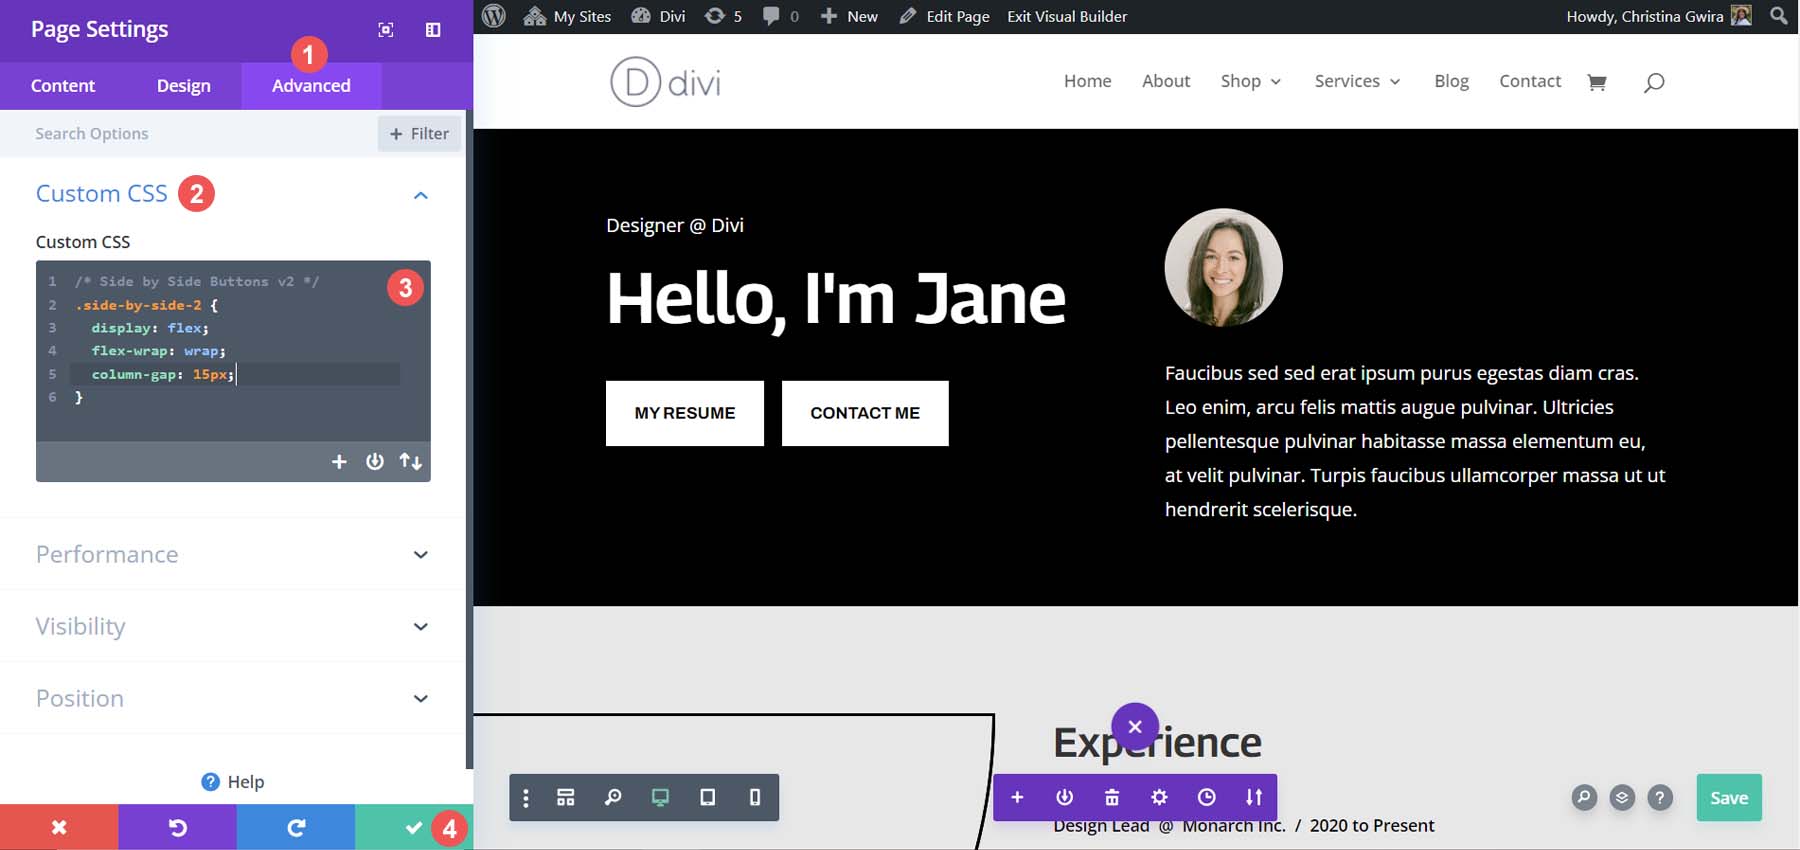
The property column-gap can be adjusted to add more spacing between the various modules within the column. Here’s the final look!
Non-Traditional Option: Use the Full-Width Header Module.
It is possible to have two buttons in Divi side by side without using two separate Button Modules. The Divi Fullwidth Header Module has the option to add two buttons within it. Let’s see how we could mimic the sections we’ve created above with one single module.
Add Full-Width Section and Module
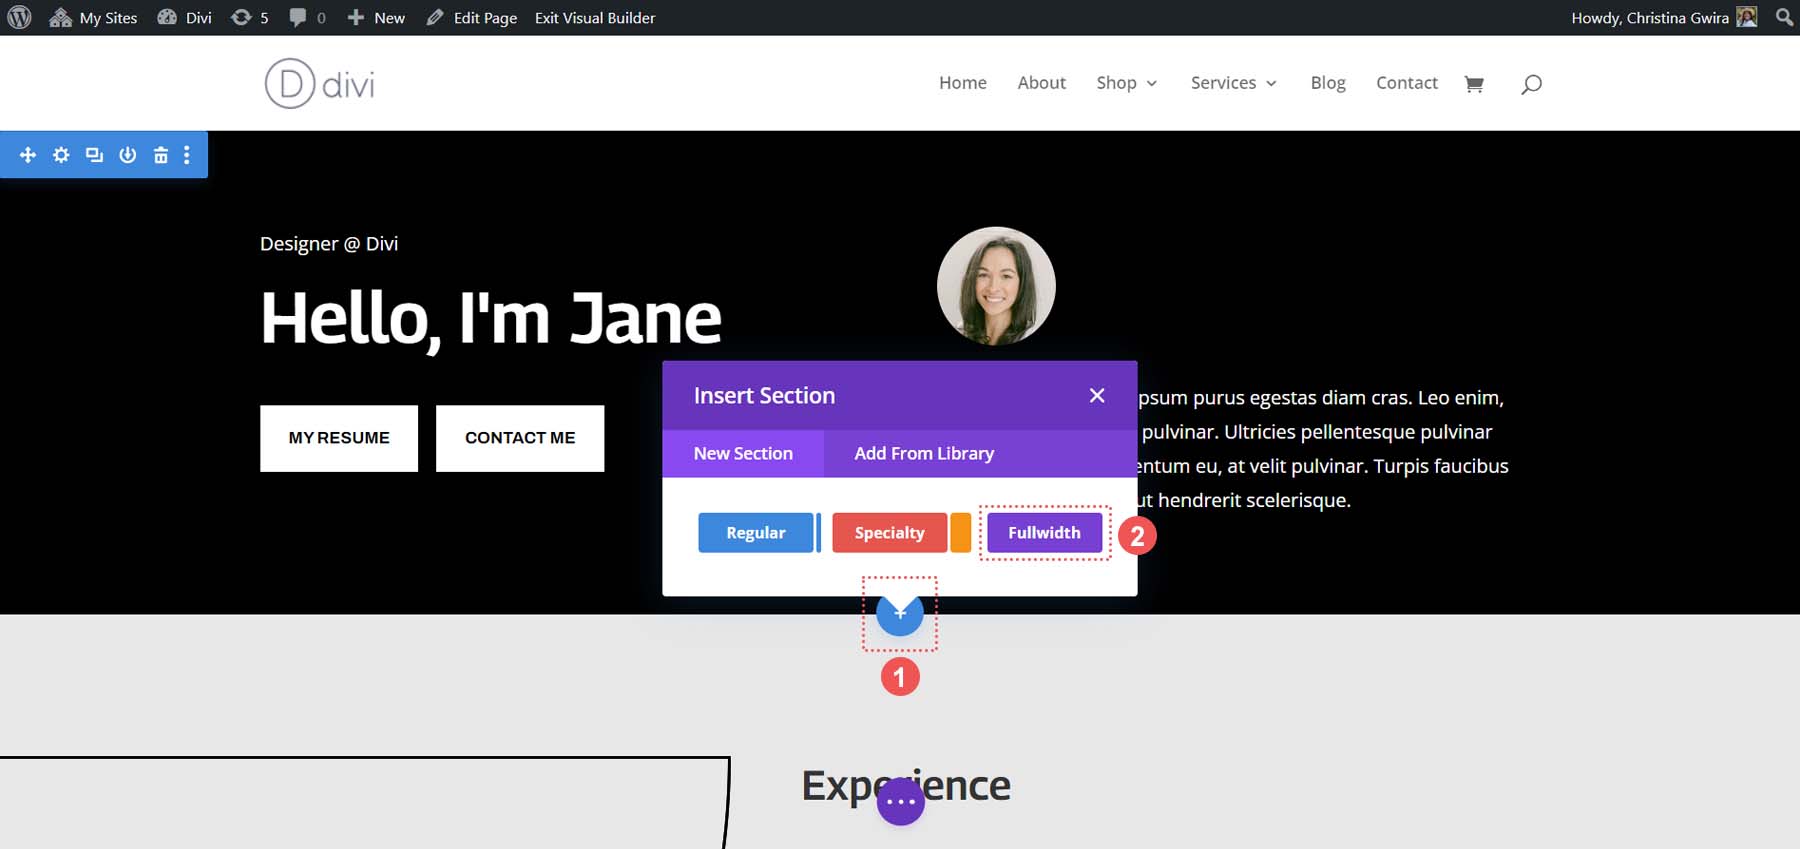
Firstly, we’ll need to add a Full Width section to our page. Click on the blue plus icon. Then, select the purple Fullwidth section icon.
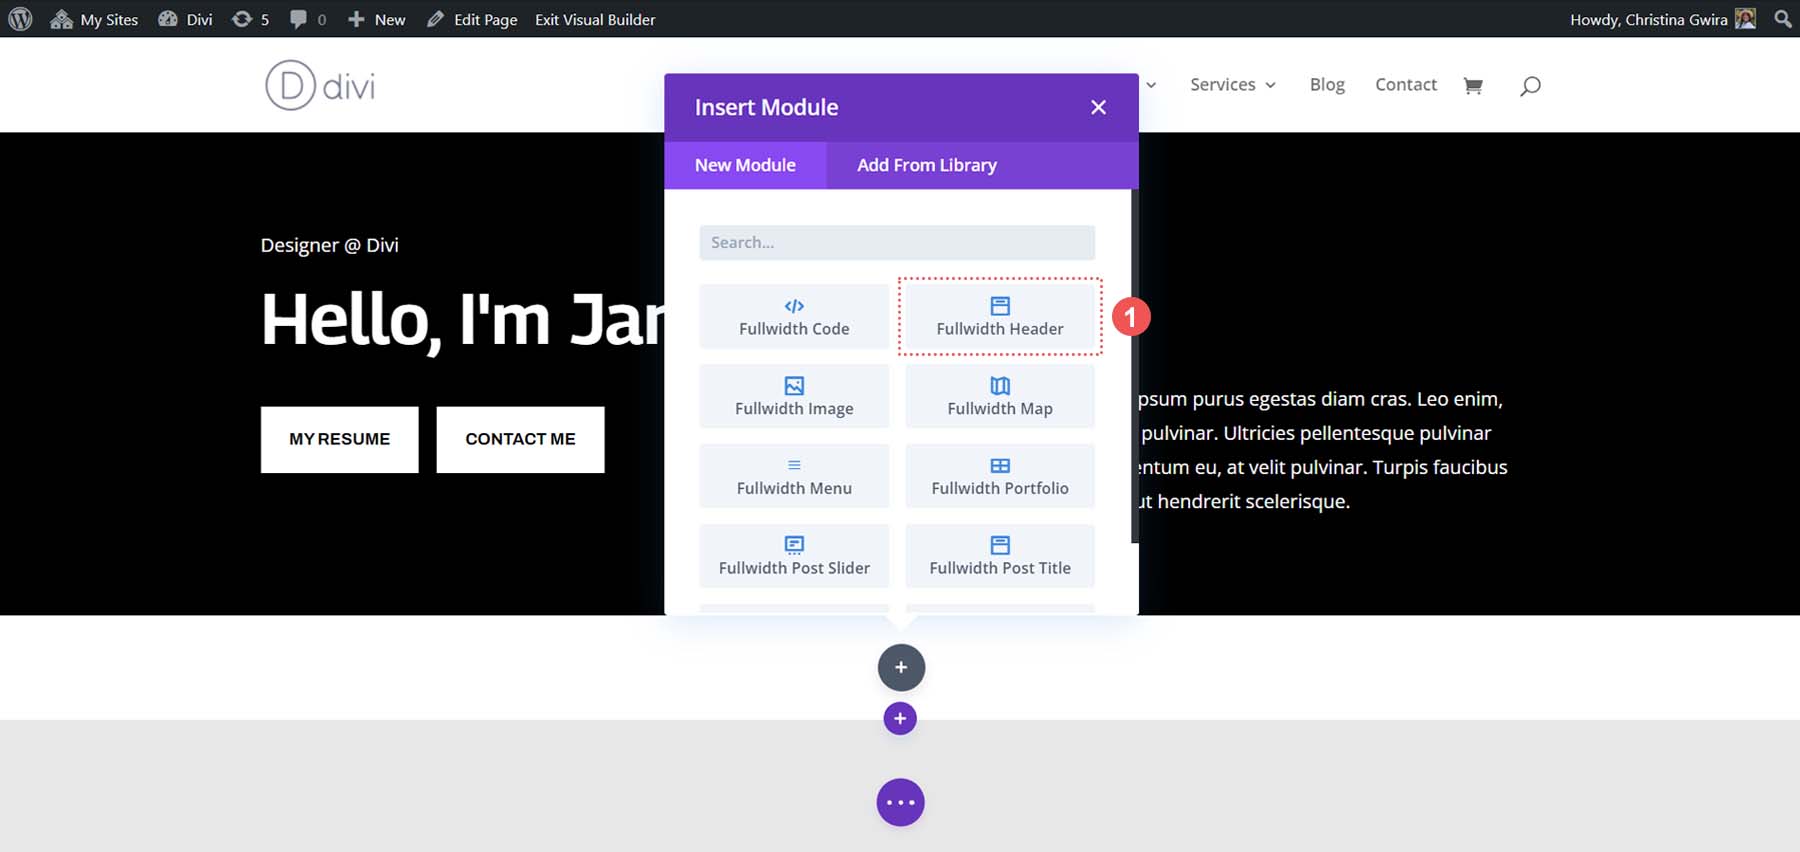
From the full-width modules available, click on the Fullwidth Header icon.
After adding our Fullwidth Header, let’s click on its gear icon to start styling and adding content to the module.
Adding Content to Module
In the Content tab of the module, we can use the content from the modules above to fill out the fields within the Fullwidth Header Module.
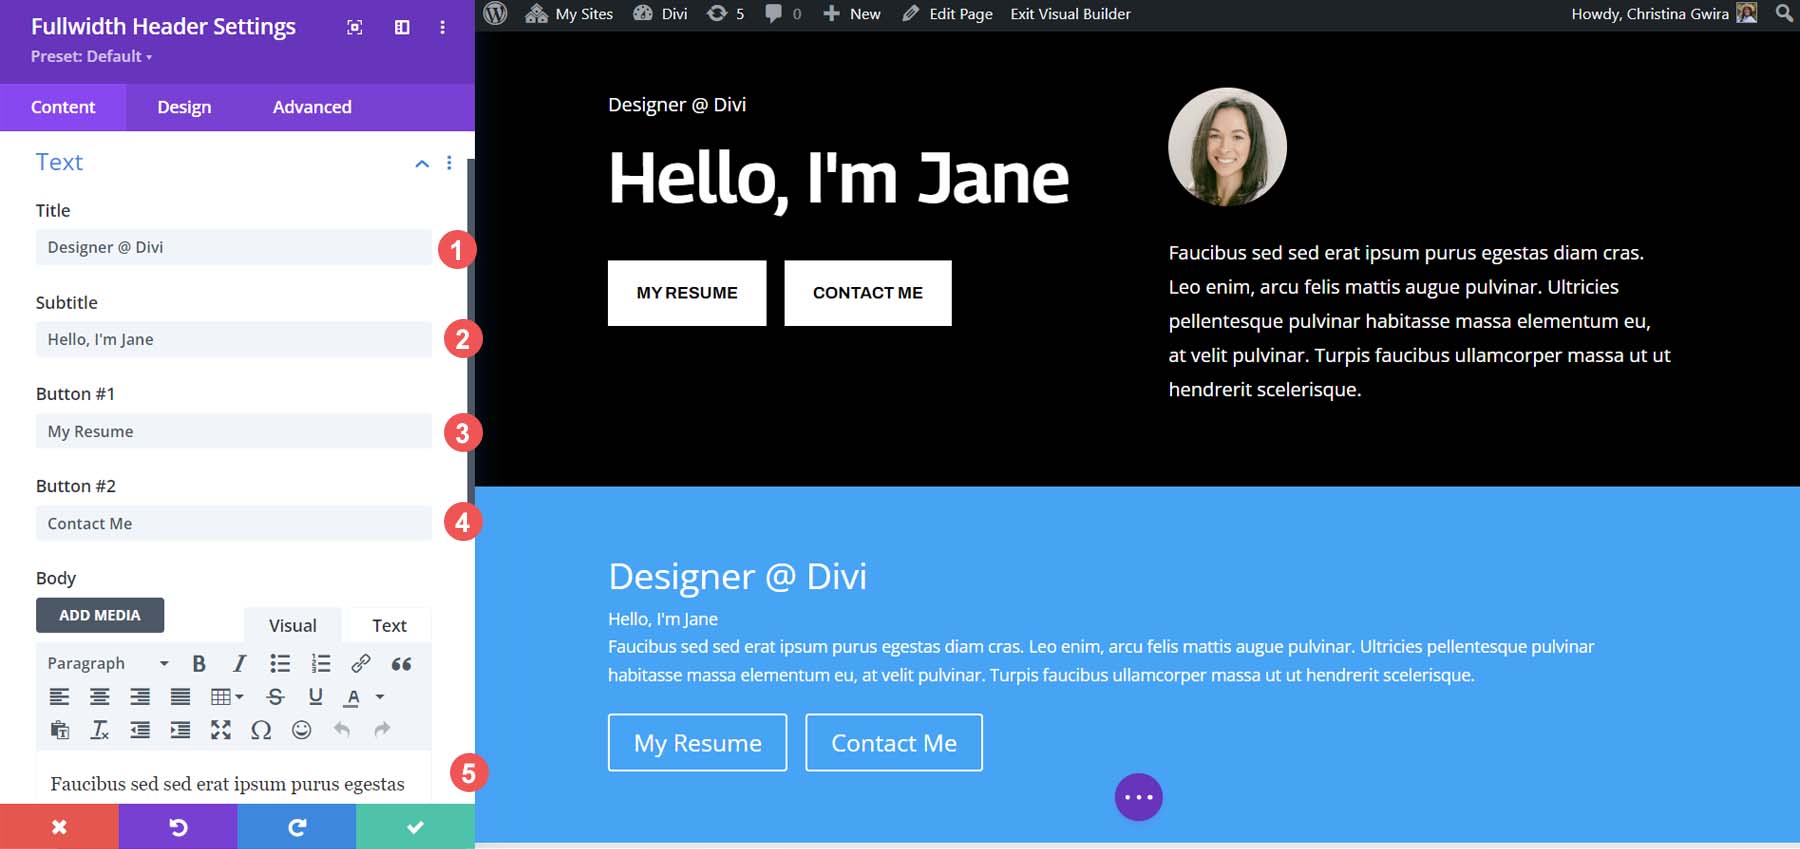
The positioning of modules and elements will be different; however, all the pieces – the text, title, subtitle, image, and body text are present. What used more than 5 modules can be accomplished with one, and still have the Divi buttons side by side.
Styling the Fullwidth Header Module
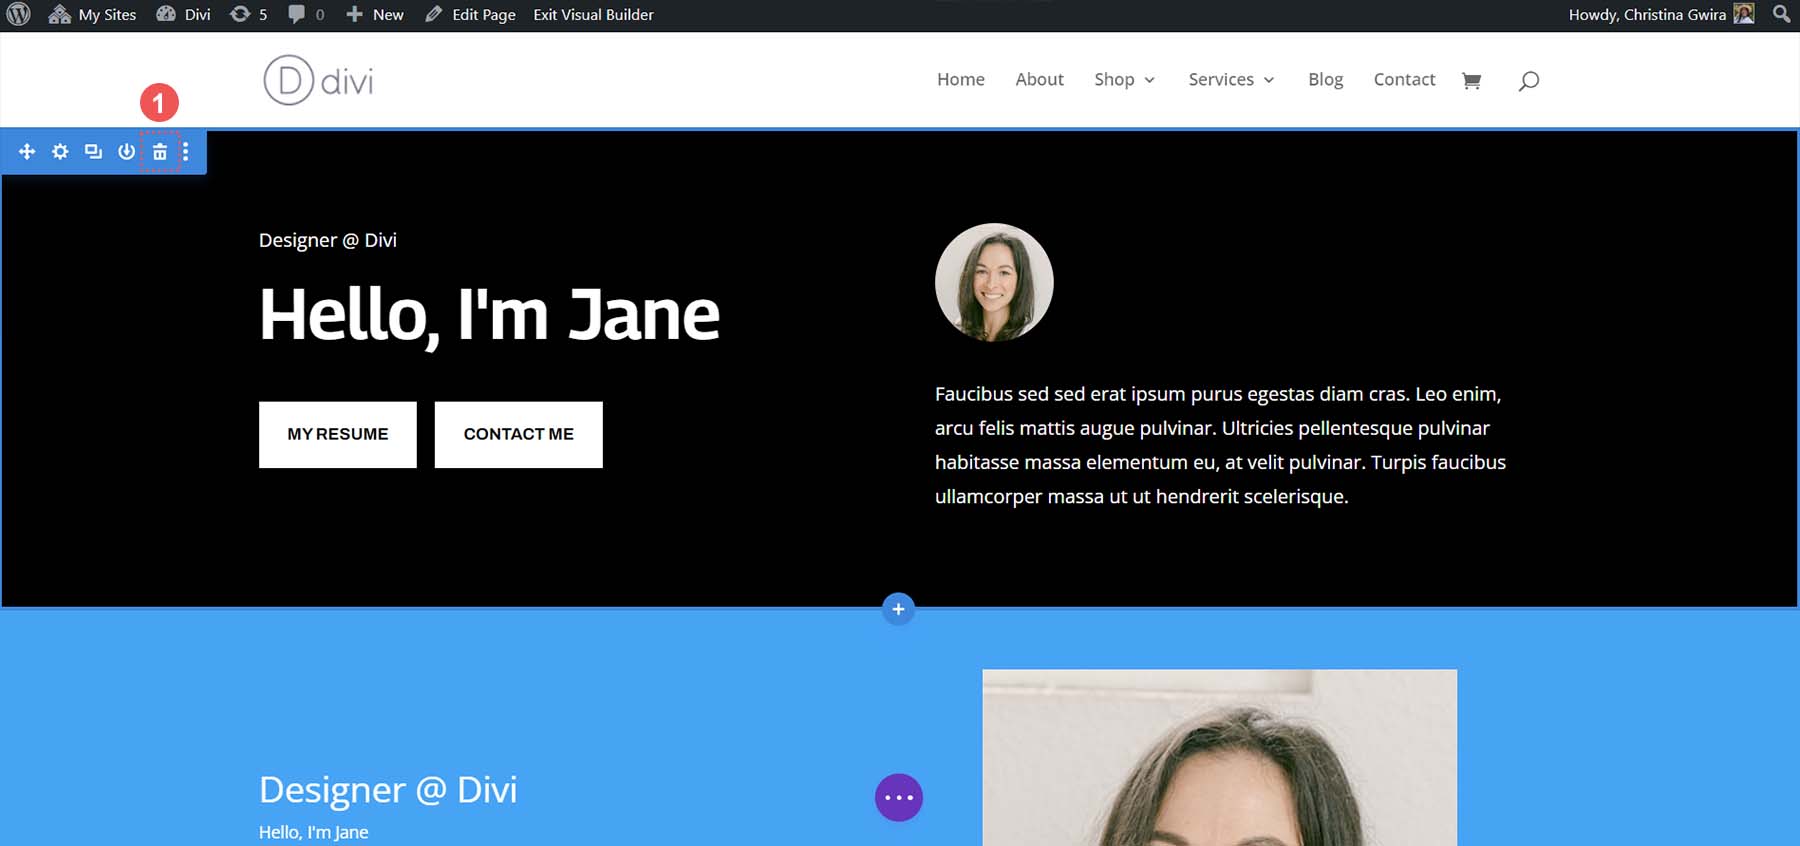
Now that the content from the modules has been inputted into the Fullwidth Header module, we can go ahead and delete the previous section. Click on the trashcan icon from the blue section menu.
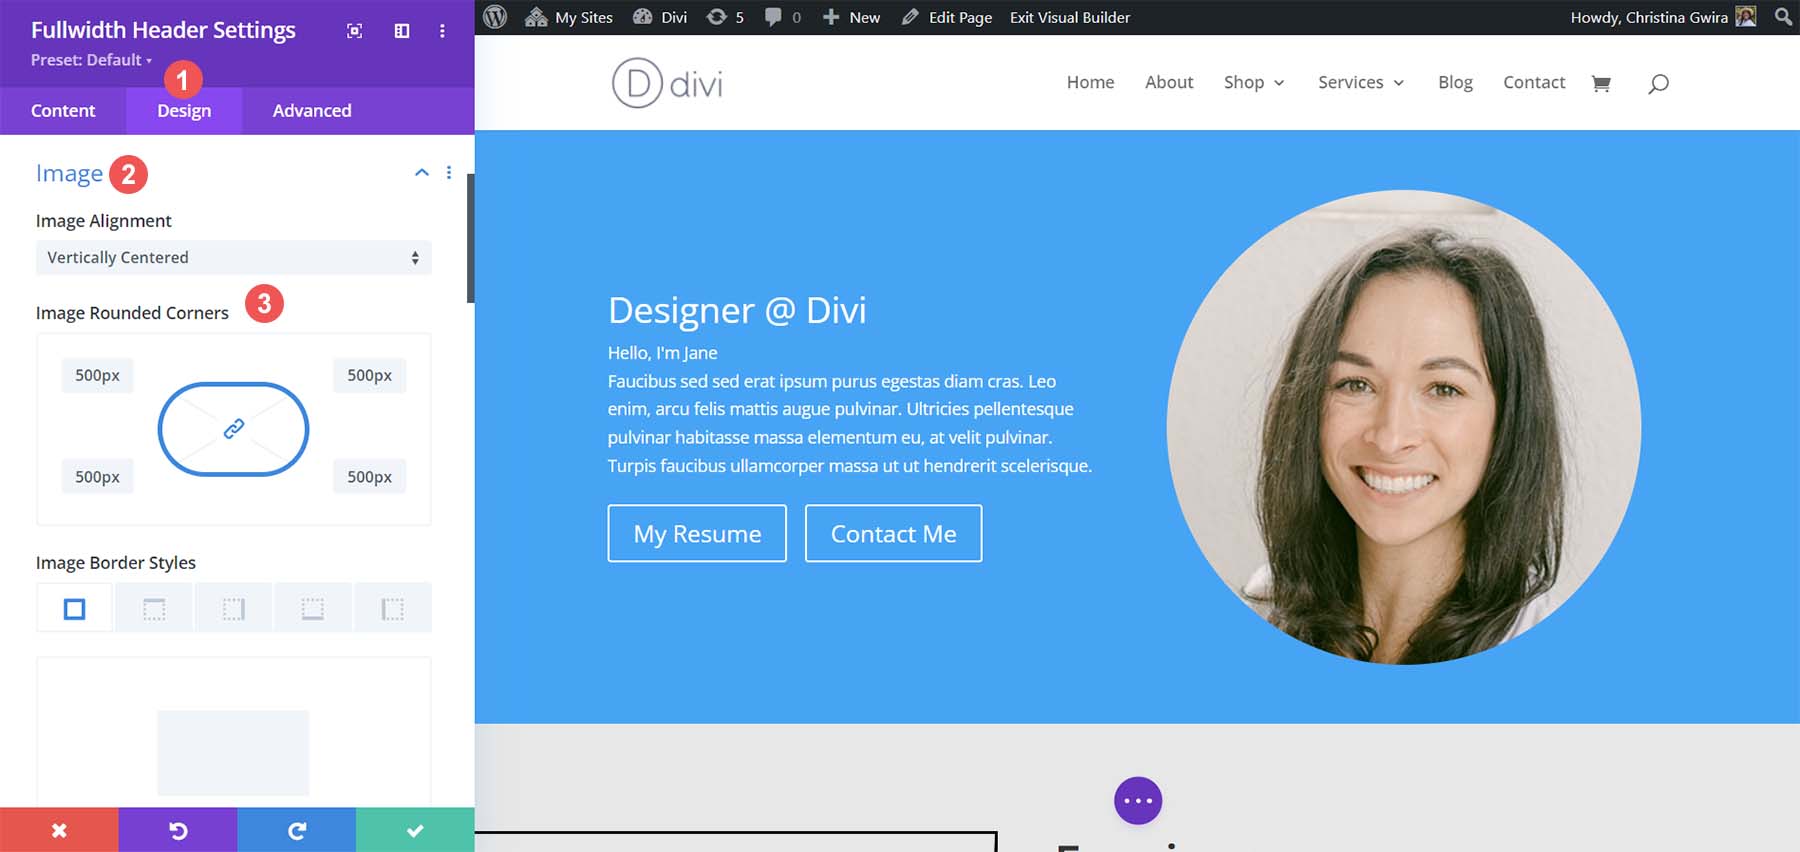
Let’s begin to style our Fullwidth Header module to match our layout pack. On the Design tab, click the Image tab. Then, set the rounded corners to 500px for all corners.
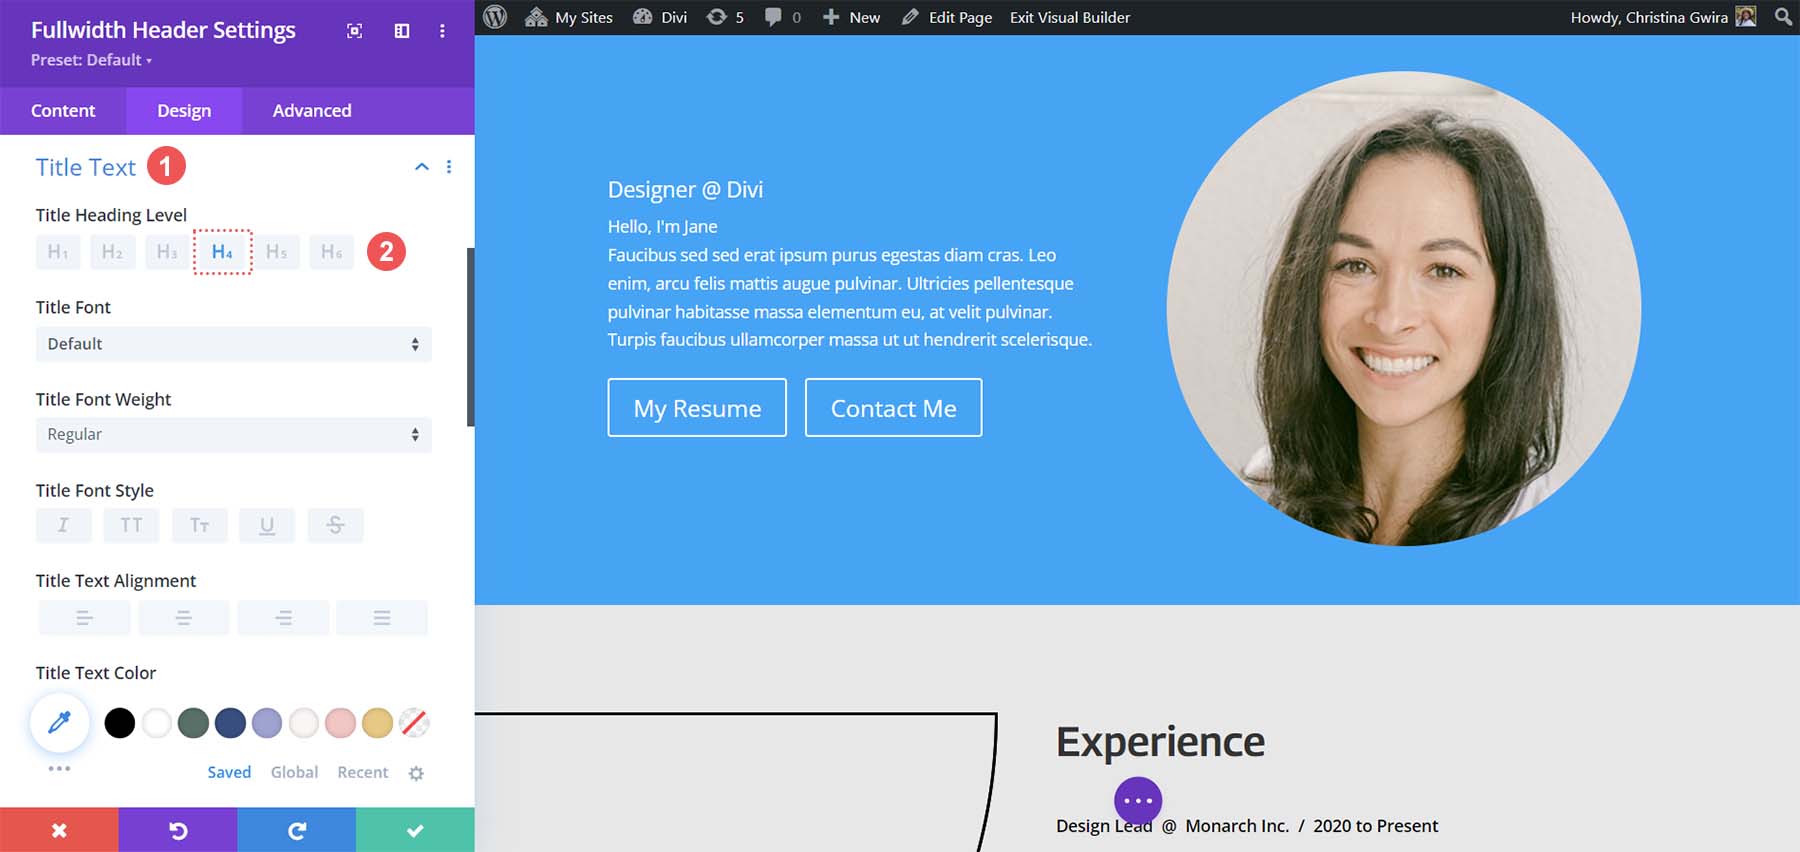
Next, click on the Title Text tab. Set the heading level of the title to h4. Leave all other settings to their default.
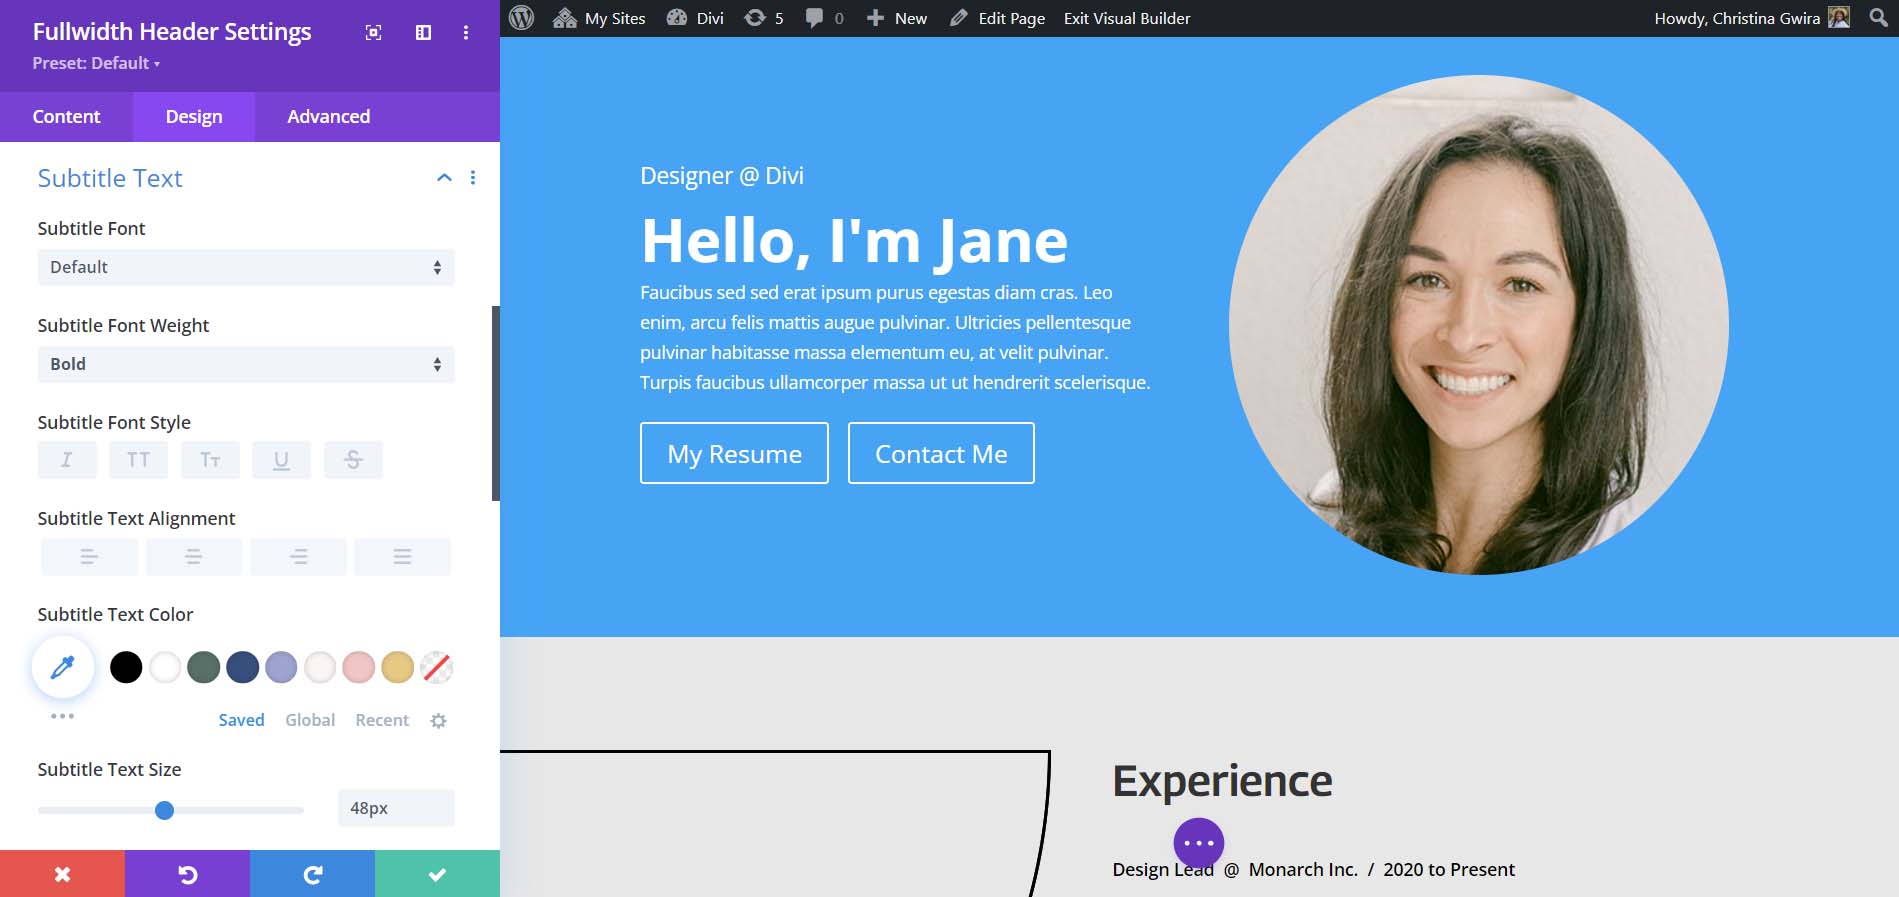
Next, move to the Subtitle Text. Click on the Subtitle text tab, and use the following settings to style it.
Subtitle Text Design Settings:
- Subtitle Font Weight: Bold
- Subtitle Text Size: 48px
- Subtitle Line Height: 1.3em
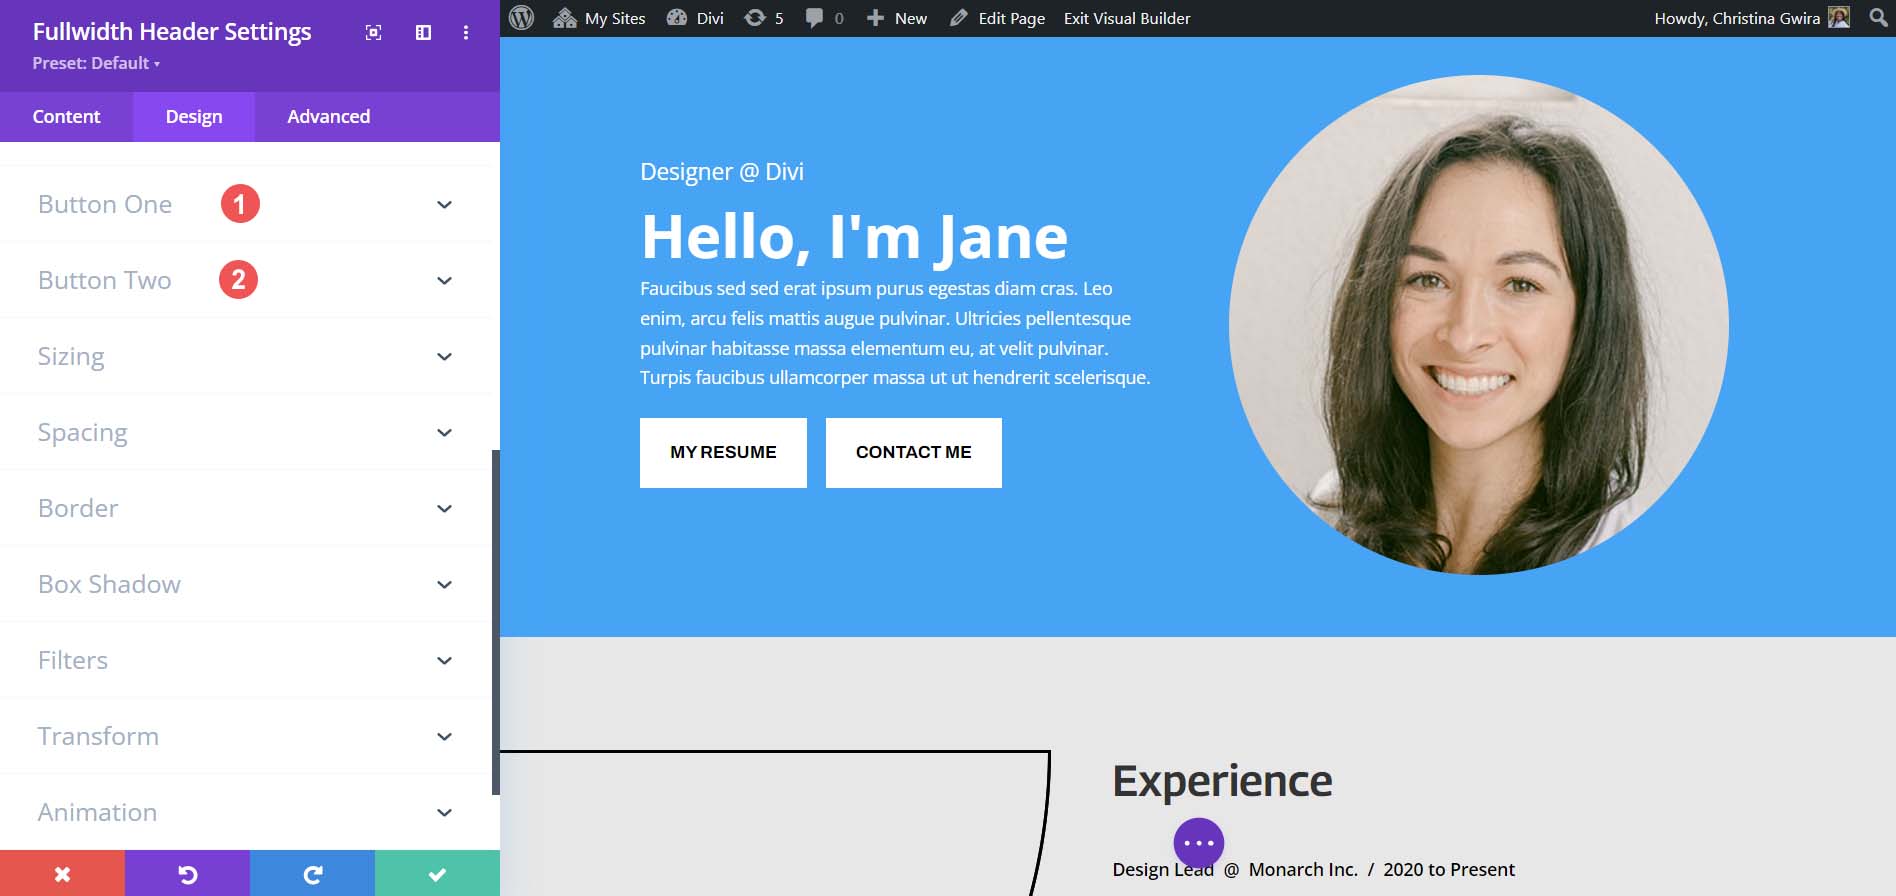
For the Button tab, we’ll use the same settings for Button One and Button Two used for the individual Button Modules. You can find those settings below.
Button Design Settings:
- Use Custom Styles for Button: Yes
- Button Text Size: 14px
- Button Text Color: #000000
- Button Background: #ffffff
- Button Border Width: 0px
- Button Font: Archivo
- Button Font Style: All Caps
- Show Button Icon: Yes
- Button Icon: Default
- Button Icon Placement: Right
- Button Padding:
- Top and Bottom: 16px
- Left and Right: 24px
To finish off our styling of this module, we travel back to the Content tab. Here, we set the Background Color of the module to #000000.
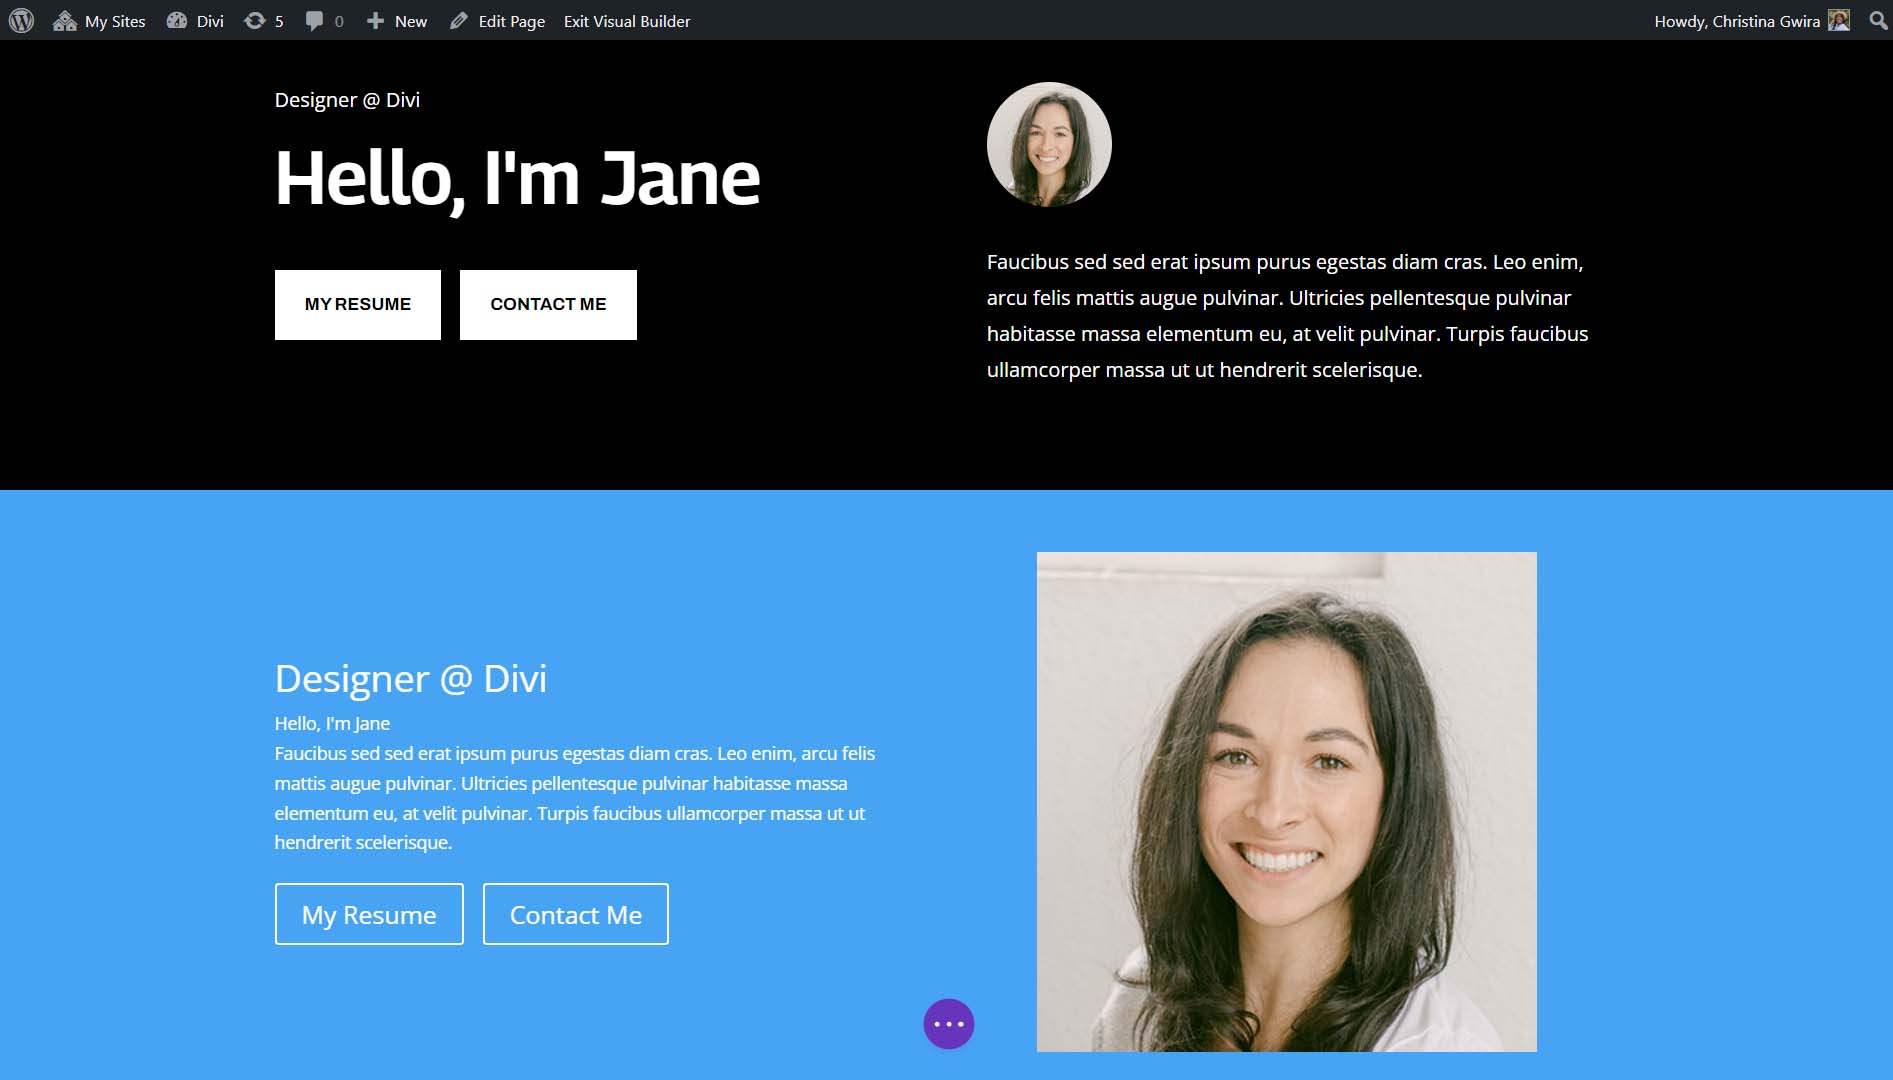
While the Fullwidth Header module doesn’t look exactly like the header from the layout, it comes pretty close. We can see how simple it is to use a single module to get two Divi buttons next to each other.
Bonus Option: Use a Third-Party Plugin
You can look to the Divi Marketplace to also help you place Divi buttons next to each other. Plugins like Divi Plus, Divi Flash, and Divi Supreme Pro all have modules that allow you to place 2 or more buttons next to each other. You may consider searching in the Divi Marketplace to see if a third-party plugin may be able to help you create more attractive buttons for your next project.
Wrapping it All Together
Divi allows you to customize its native modules using its built-in tools or CSS. Whether you use a regular section or one of the specialty sections, you can add buttons next to each other. CSS allows you to get technical with your design without sacrificing ease of use. If you’d rather not deal with multiple modules, you can find that the Fullwidth Header module can help you be able to place buttons next to each other. Finally, you can also peruse the Divi Marketplace to find plugins that have dual or multiple buttons or call-to-action modules that will allow you to have your buttons next to each other.


Leave A Reply