Using Divi Presets
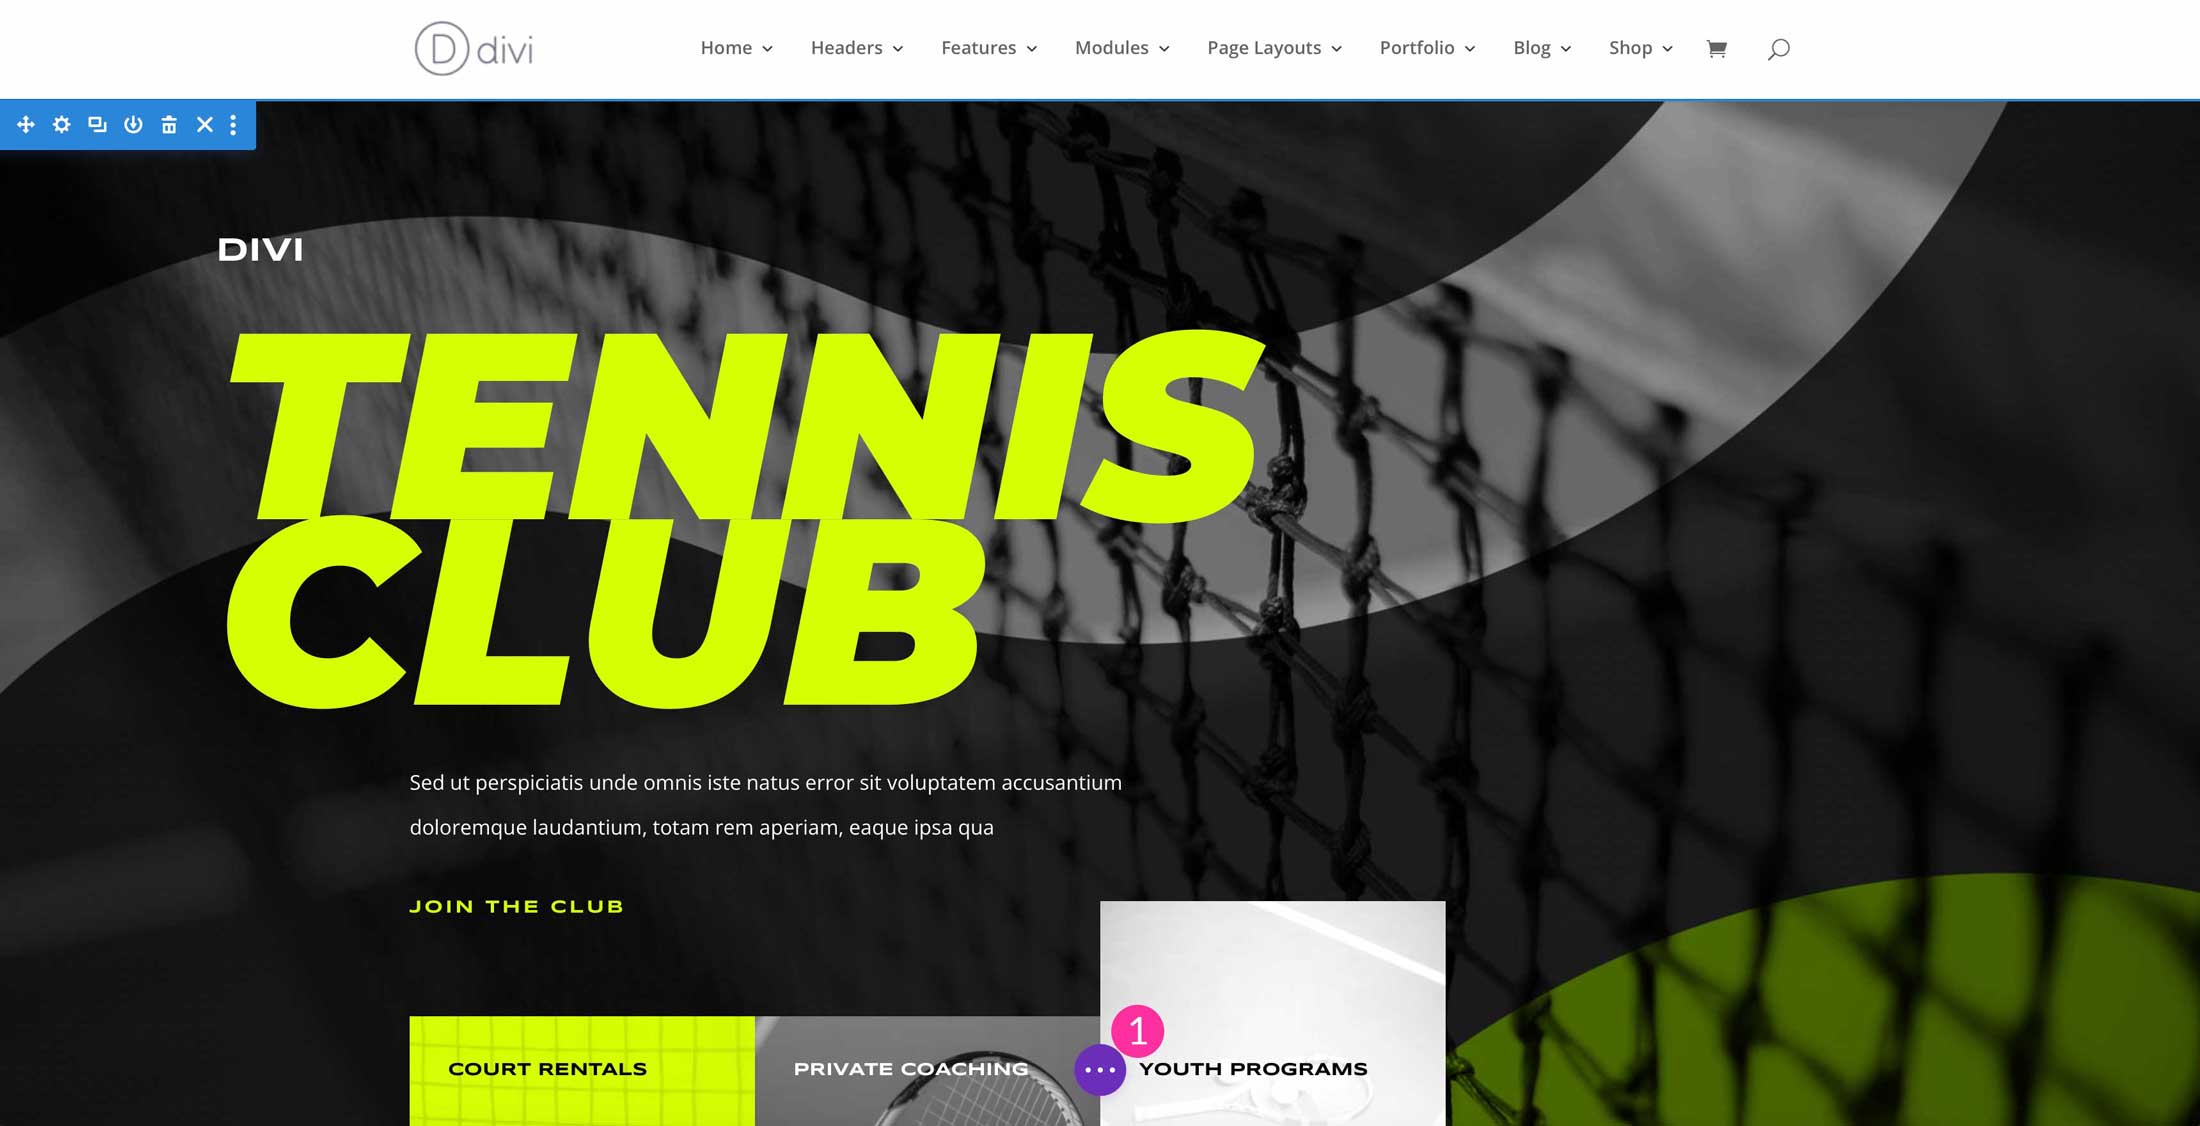
Divi presets dramatically speed up your design process by allowing you to take any element’s design settings and apply them across your site by saving the design settings as a preset.
Divi is highly customizable, allowing you to make modules and other Divi elements look any way you want. For example, you can take any Divi blurb module and add a background color, adjust the title’s text size, font, and color, add animation, or assign an image or icon. Divi presets enhance the design experience by allowing you to take that blurb’s design settings and apply them to any blurb on your site by saving the design settings as a preset. When you use Divi presets, you can create a global design setting for your blurb, or any other Divi module, and save those settings for future use across your website.
How Divi Presets Work: Brief Overview
Using Divi presets is a huge time saver when creating or altering websites. For example, if you are building a new website and want to use a Divi layout pack, you can create presets from those elements to use on additional pages you create.
Divi presets can be applied to any element including modules, sections, rows, or columns. For instance, if you create a nice hero section with a background color and pattern applied, you can save the section as a preset for use on other sections throughout your website.
However, there is one thing you should keep in mind where presets are concerned. If you use a preset on a text module, you can’t apply that same preset to a toggle. Basically, presets are specific to the element, so you can’t use one preset from one module type on another.
The Divi Presets Interface
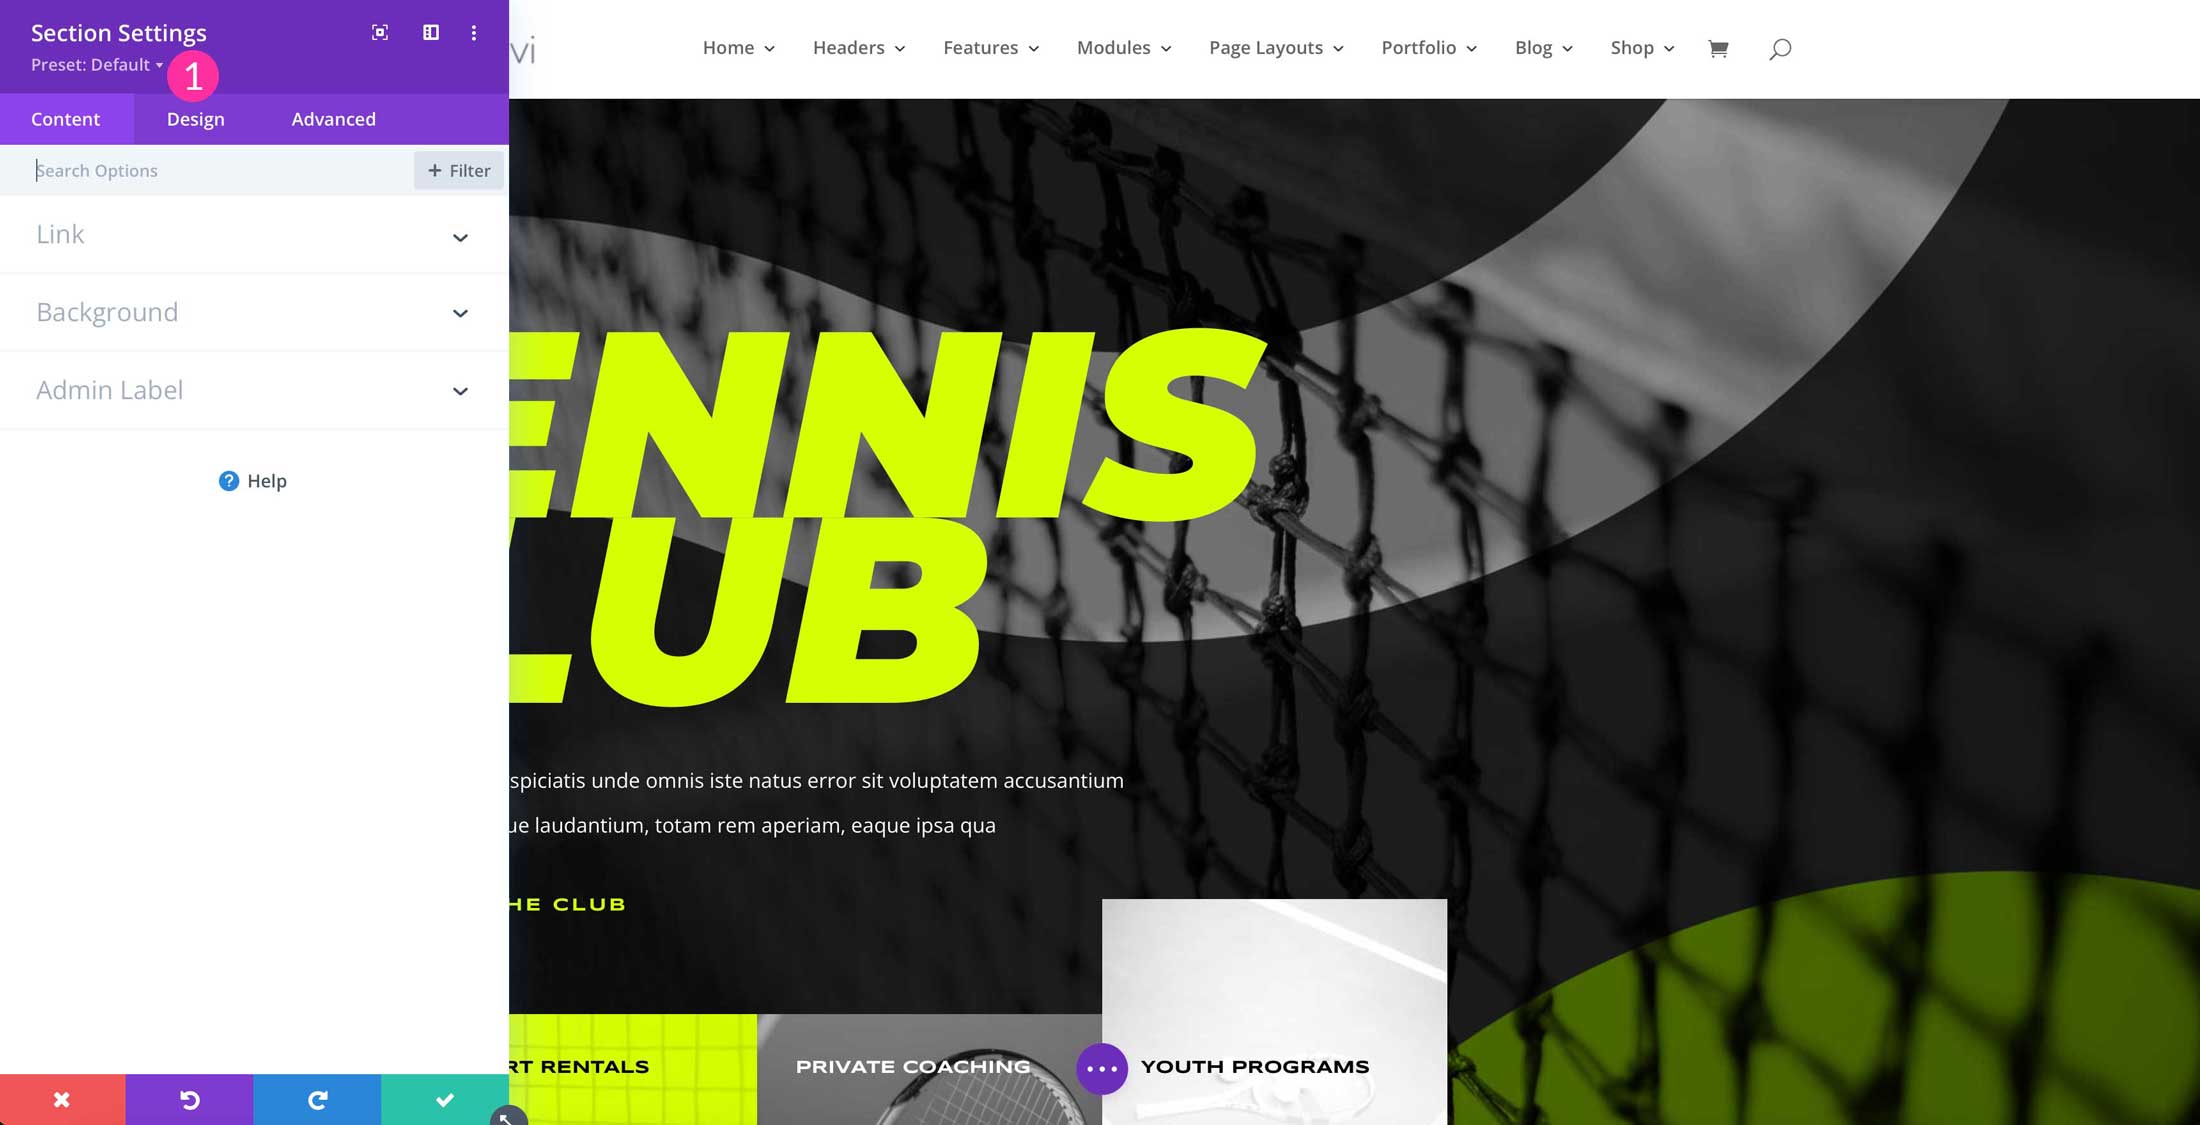
In order to better understand how presets work, take a look at the settings below.
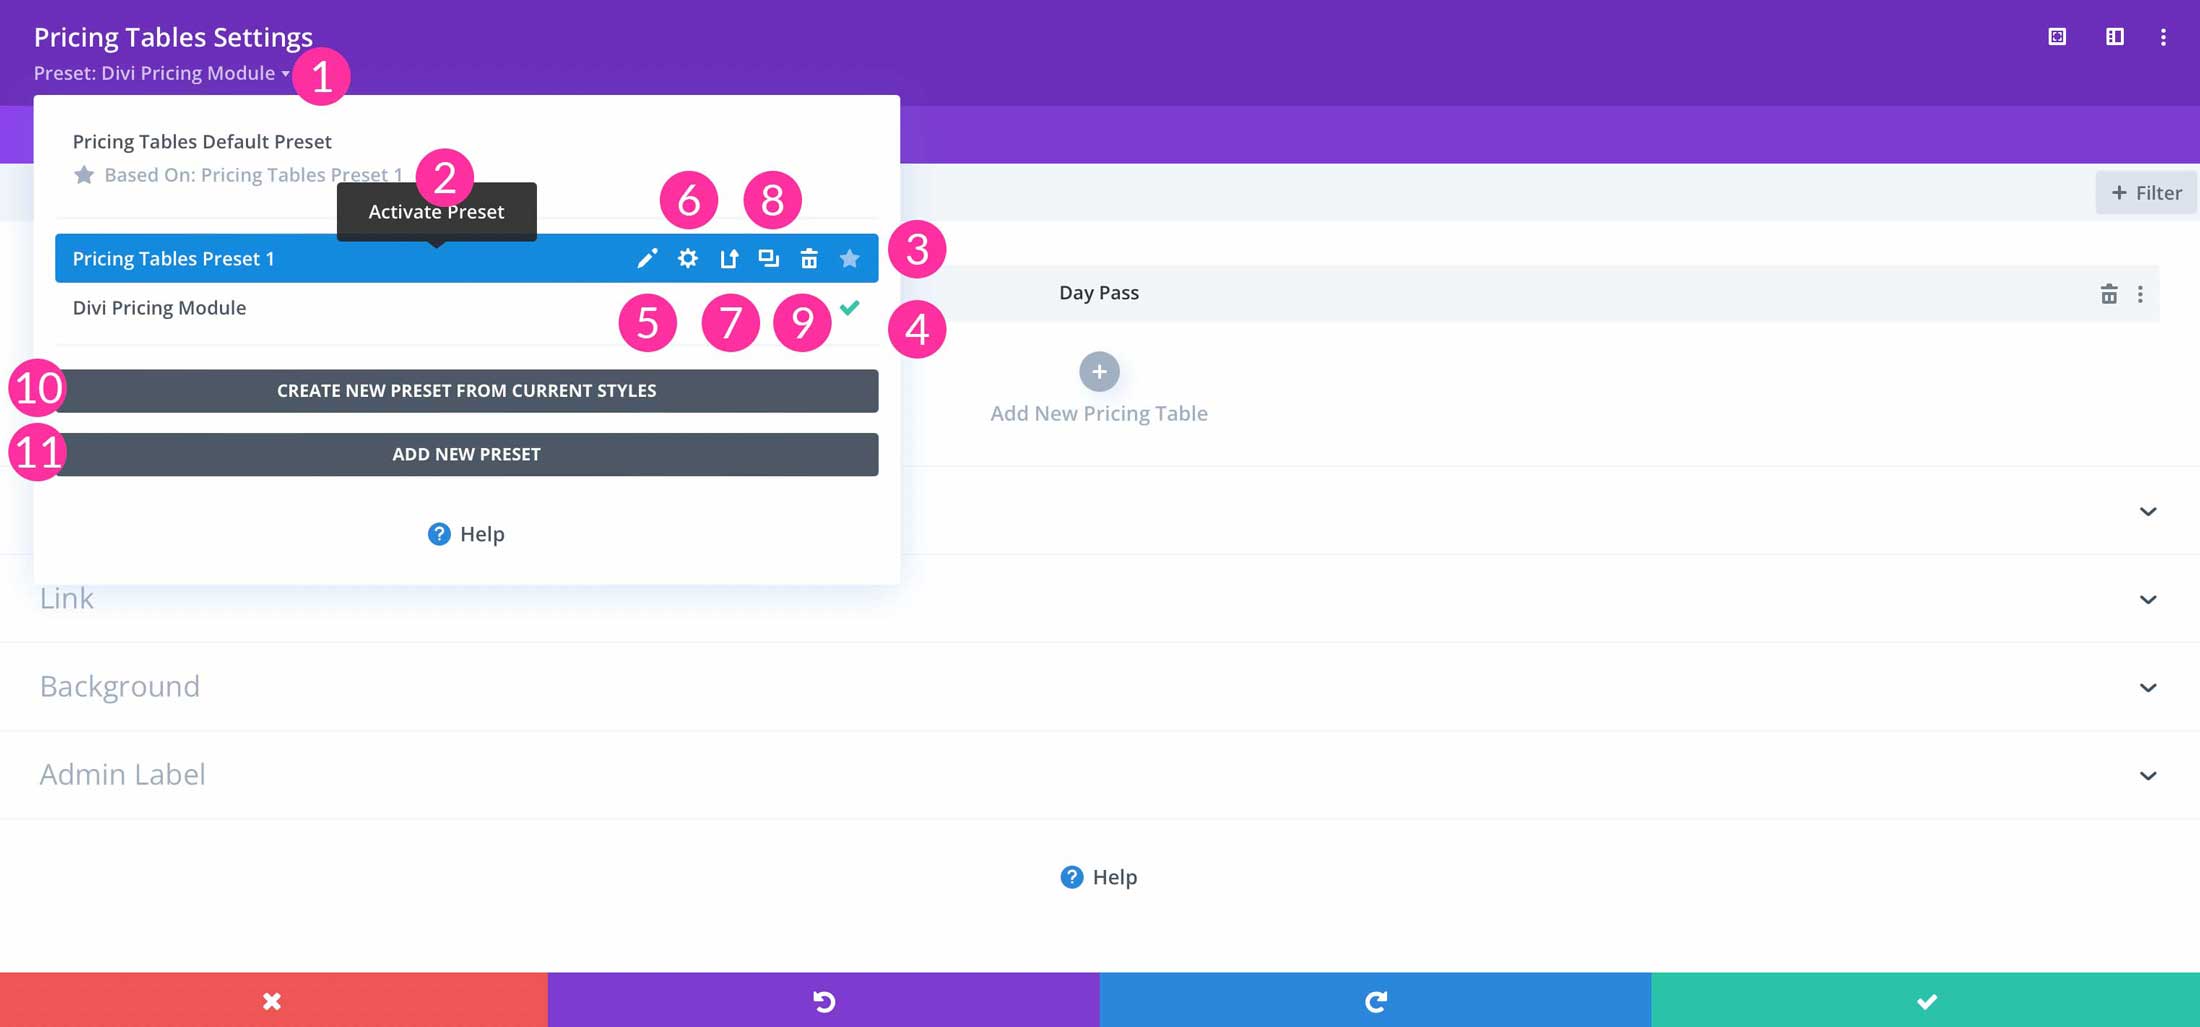
- Preset Dropdown Menu – Here you can see your module’s active preset. Click the dropdown menu to manage your presets library.
- Default Preset – This is your default preset. Select it to activate the default module appearance.
- Assigned Default Preset – This star signifies which preset is currently assigned as your default preset. All basic modules will use this preset as their default appearance. Click this star icon within any preset to make it the default preset.
- Selected Preset – The green check mark signifies which preset is currently assigned to the module you are editing. The module’s base styles are controlled by the selected preset.
- Edit A Preset – Click this pencil icon to edit the design of a preset. When you edit a preset’s design, all modules using that preset will take on the new appearance.
- Manage Preset Settings – Here you can change the preset’s name to better organize it within your preset library.
- Update Preset With Current Styles – This will update the preset to match the current design of the module you are editing.
- Duplicate Preset – You can duplicate any of your existing presets. This is a great way to create different variations without having to start from scratch.
- Delete Preset – Deleting a preset will remove it from your library. All modules using that preset will switch to the default preset.
- Create New Preset From Current Styles – This will create a new preset to match the design of the module you are currently editing. If you have pre-designed elements that you would like to reuse throughout your website, you can quickly turn them into presets.
- Add New Preset – This will add a new blank preset. You can then customize the preset using the module’s available design settings.
When to Create Divi Presets
To make the most of Divi’s presets, you should apply them at the beginning of the design process. That way, you can set everything up from the start, saving yourself quite a bit of time. As you add pages, presets that you’ve created can be applied to new modules. You won’t have to worry about writing down hex codes, padding and margin settings, font sizes, font families, or any other design element. Simply apply a preset and move on to the next element you wish to build.
Adding a New Preset
Adding a new Divi preset is simple. Start with creating an element. Click the add new preset button, then design your element and save it by clicking the green check box. Alternatively, you can design your module, then save the preset. Click the presets at the top of the elements’s settings. Next, click the dropdown arrow under presets and click create new preset from present styles.
Updating Default Styles with Presets
Once a preset has been created, you can update existing modules on your page by applying a saved preset. For example, if you create a preset for a button, you can easily add or change exising buttons to your page, then apply the saved preset. All of your design styles will be updated instantly with your saved preset’s styles.
Naming Your Preset
Once you click the create new preset from present styles button, you’ll be prompted to name your preset. Alternatively, you can click the add new preset button, if you want to save your preset, then style it.
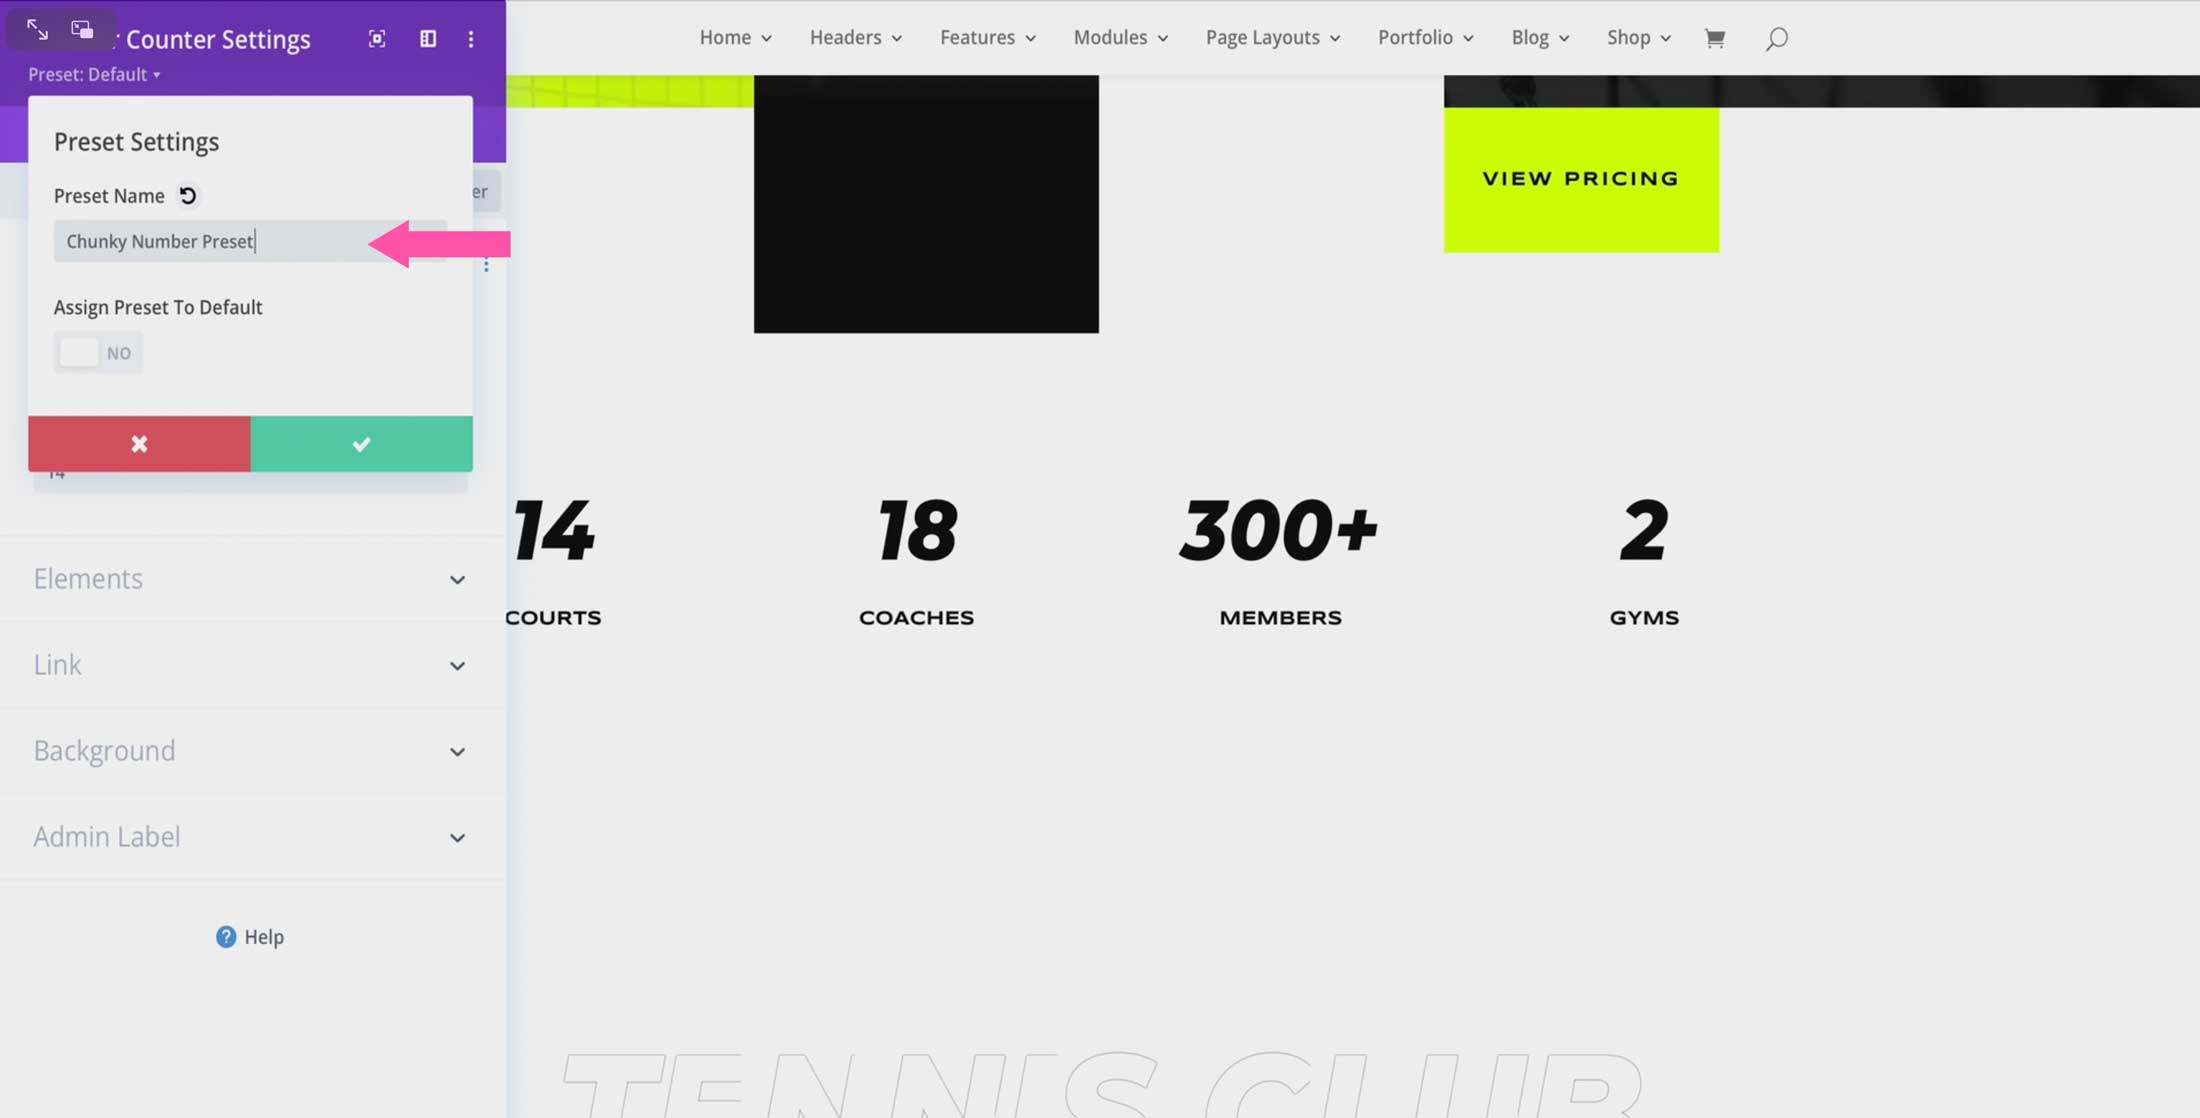
It’s important to name your presets something that you recognize. Otherwise, you’ll have a hard time deciphering which preset to use when creating new elements. For headlines, use names like main headline or secondary headline. Body text should be named something appropriate as well. If you use multiple styles for the same element, each should be named accordingly, so that you don’t confuse presets that are created for the same module style.
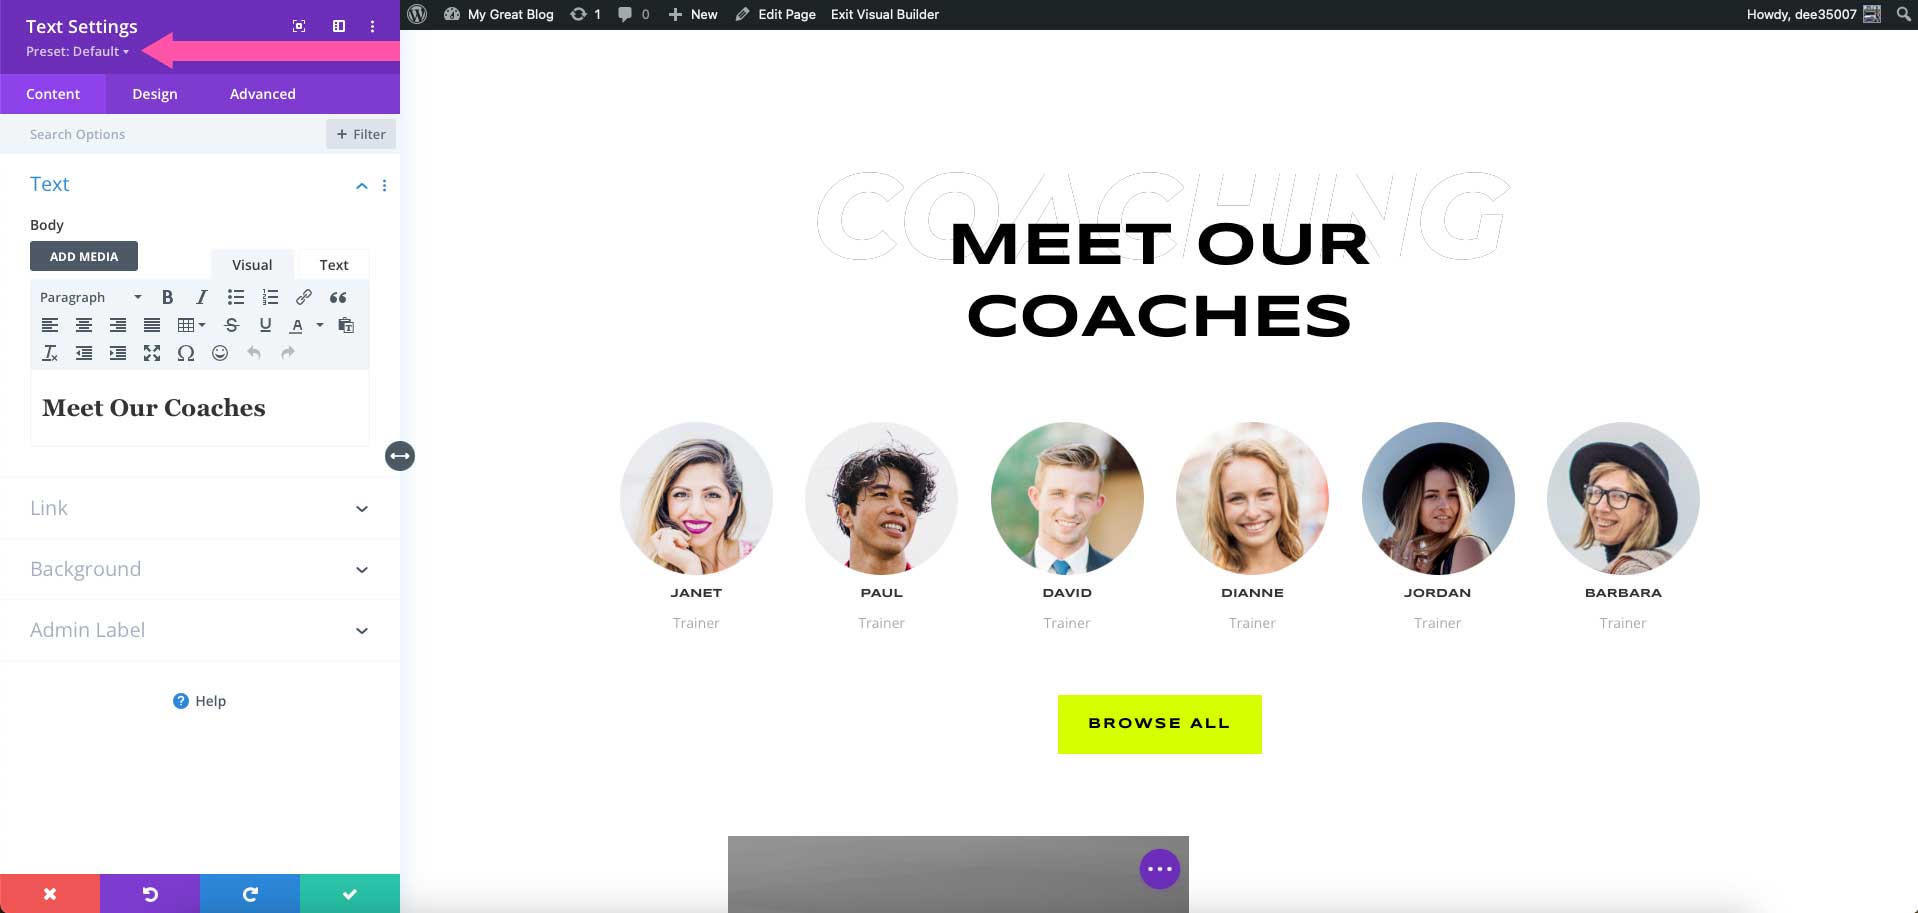
Styling a Preset
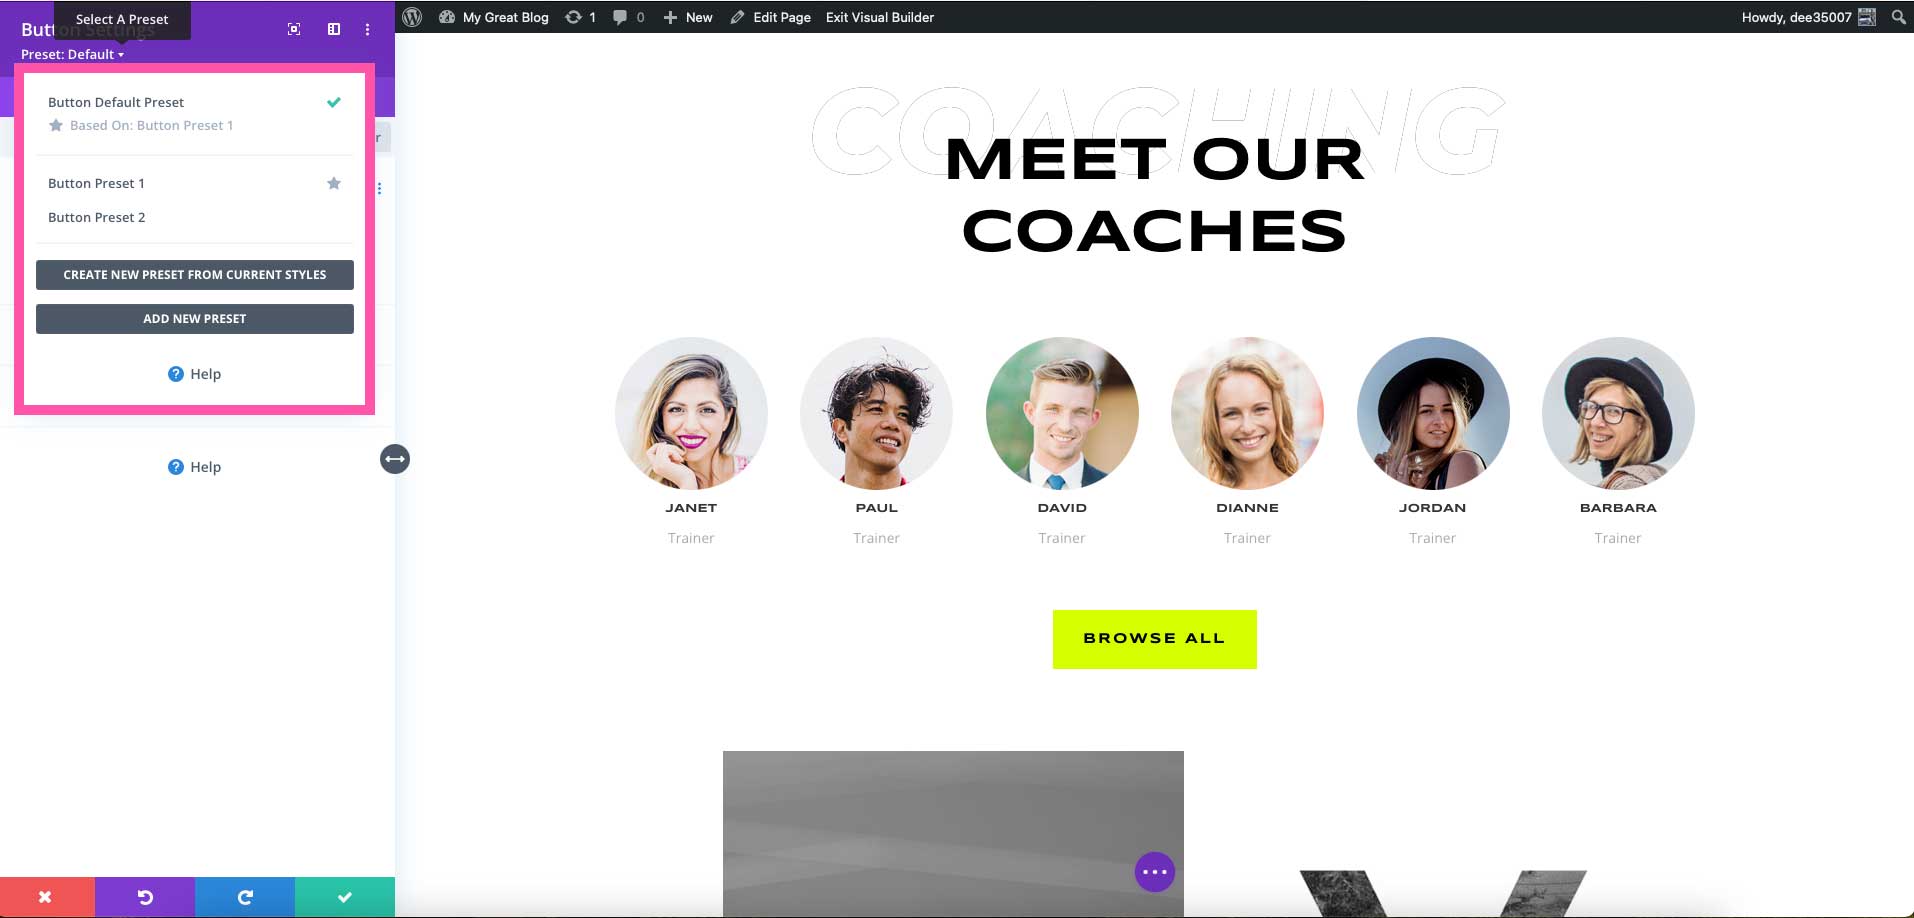
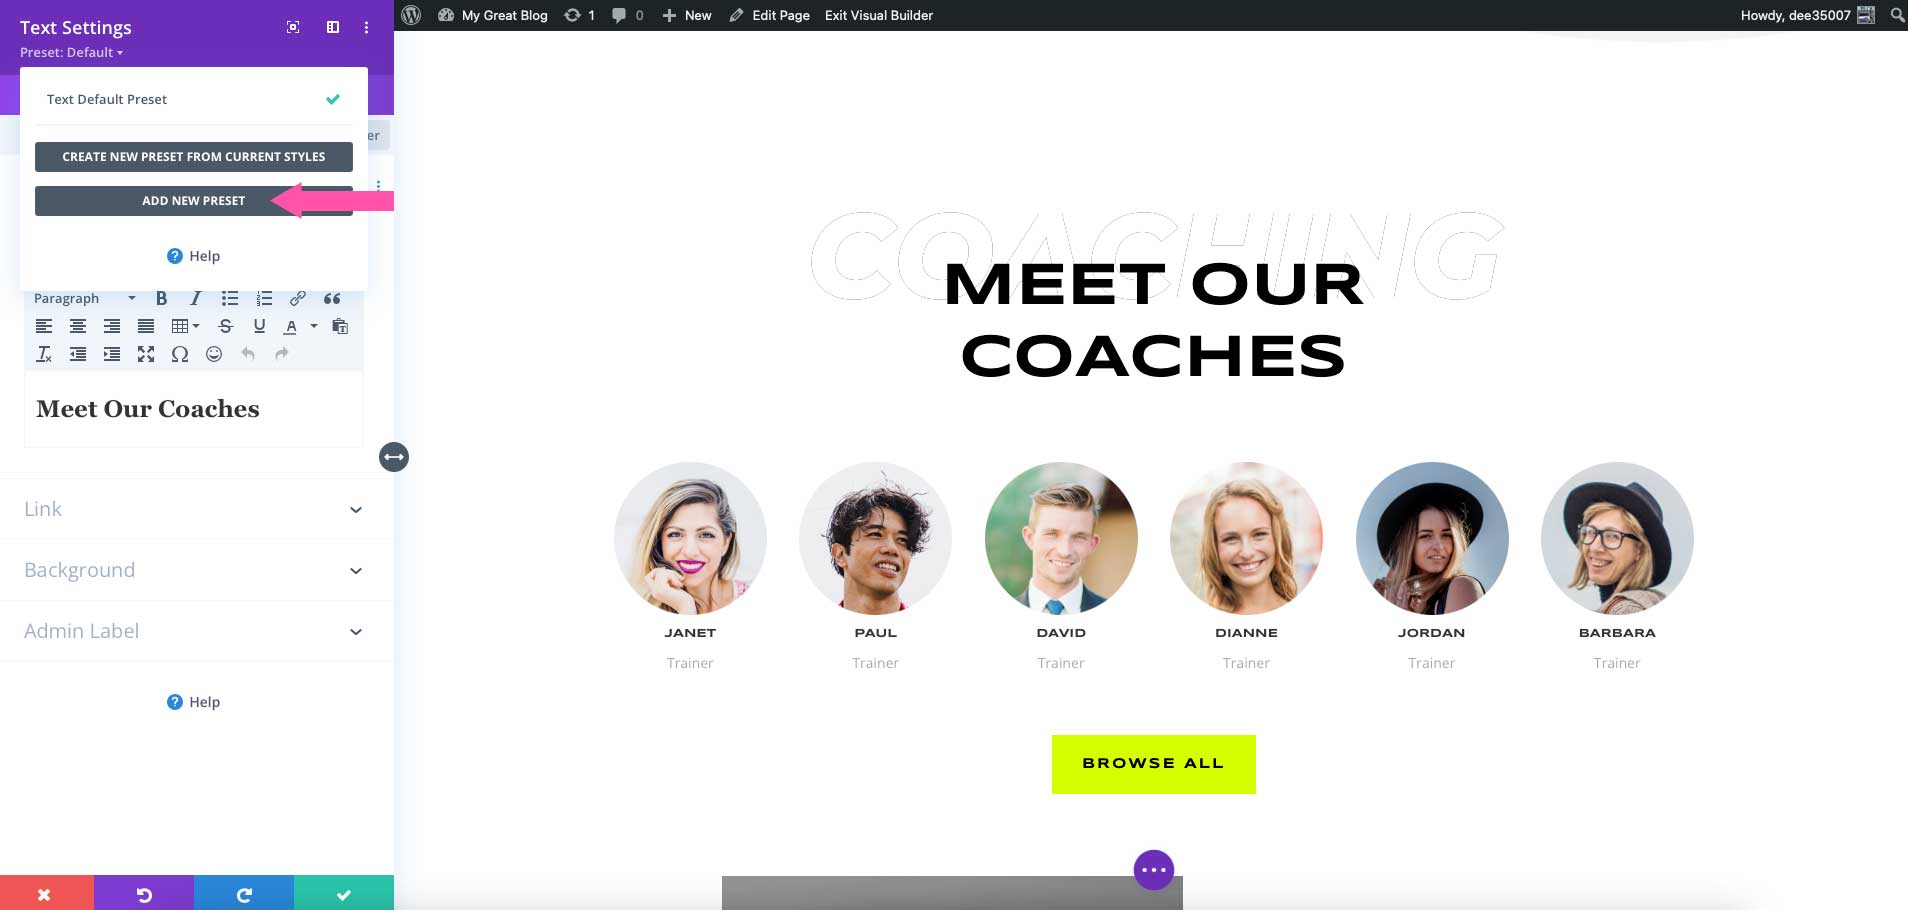
When you want to style a preset, you’ll need to create a new preset, then style your element. Start by opening a module, then clicking the dropdown arrow next to presets.
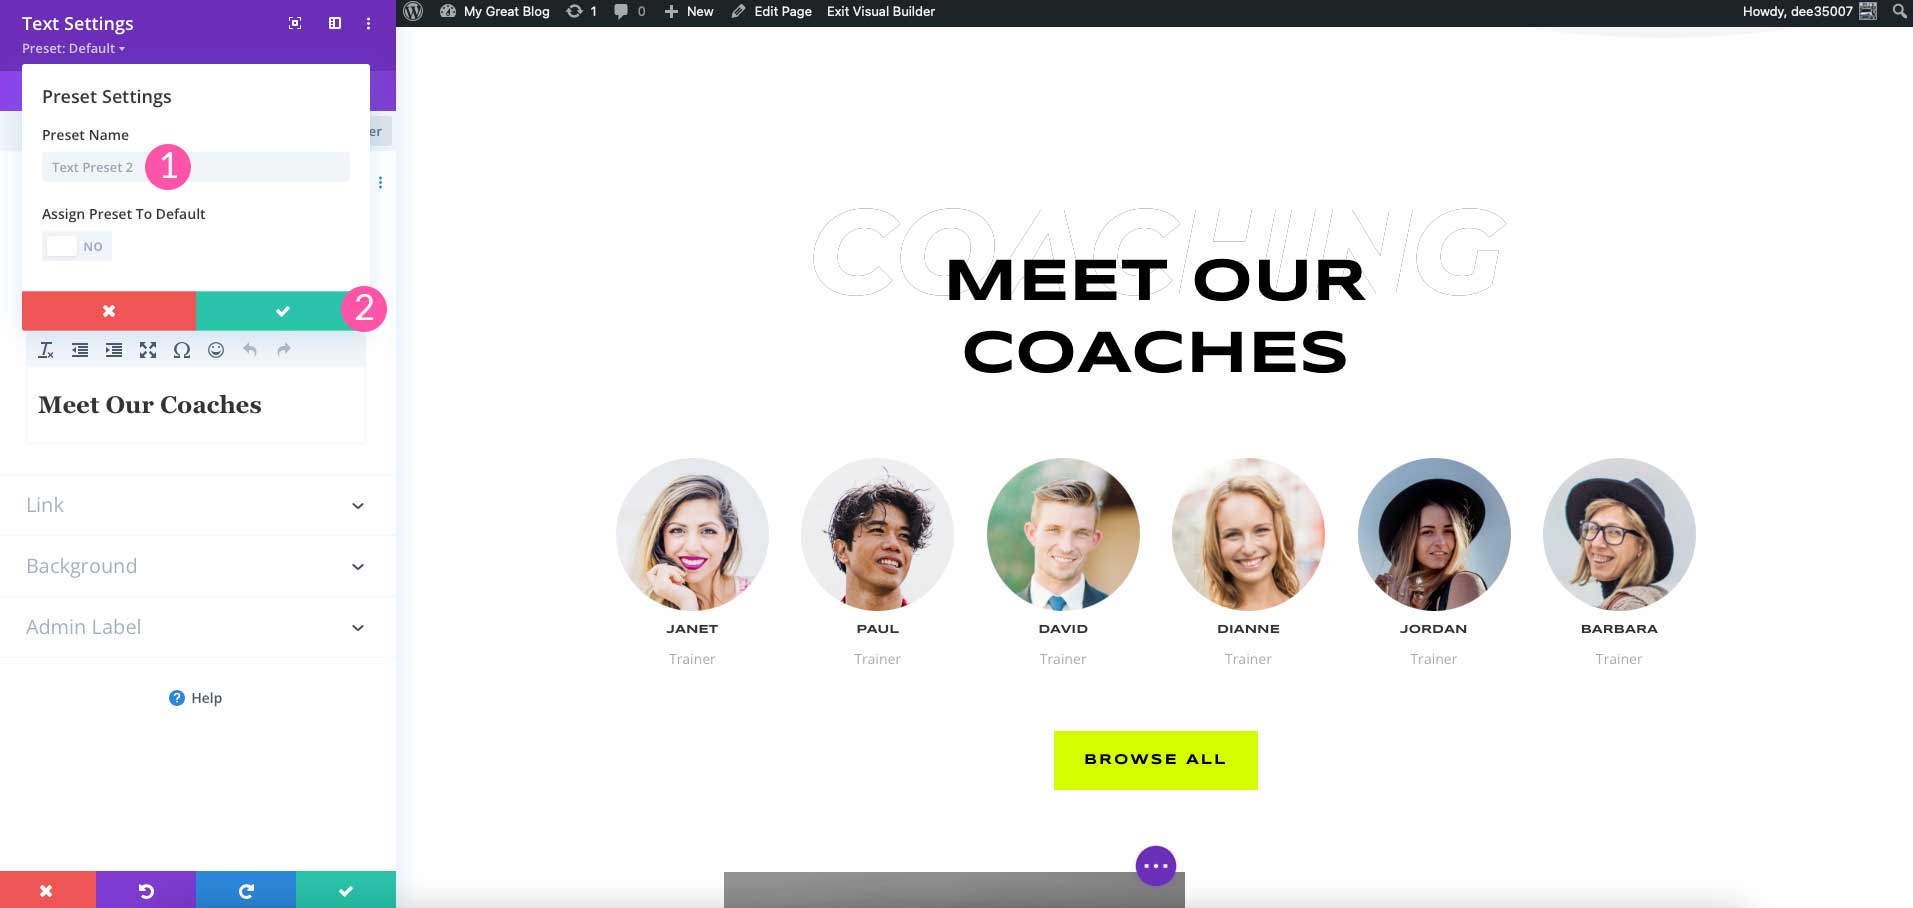
Click the add new preset button.

Next, name your preset, then click the green check button to save it.
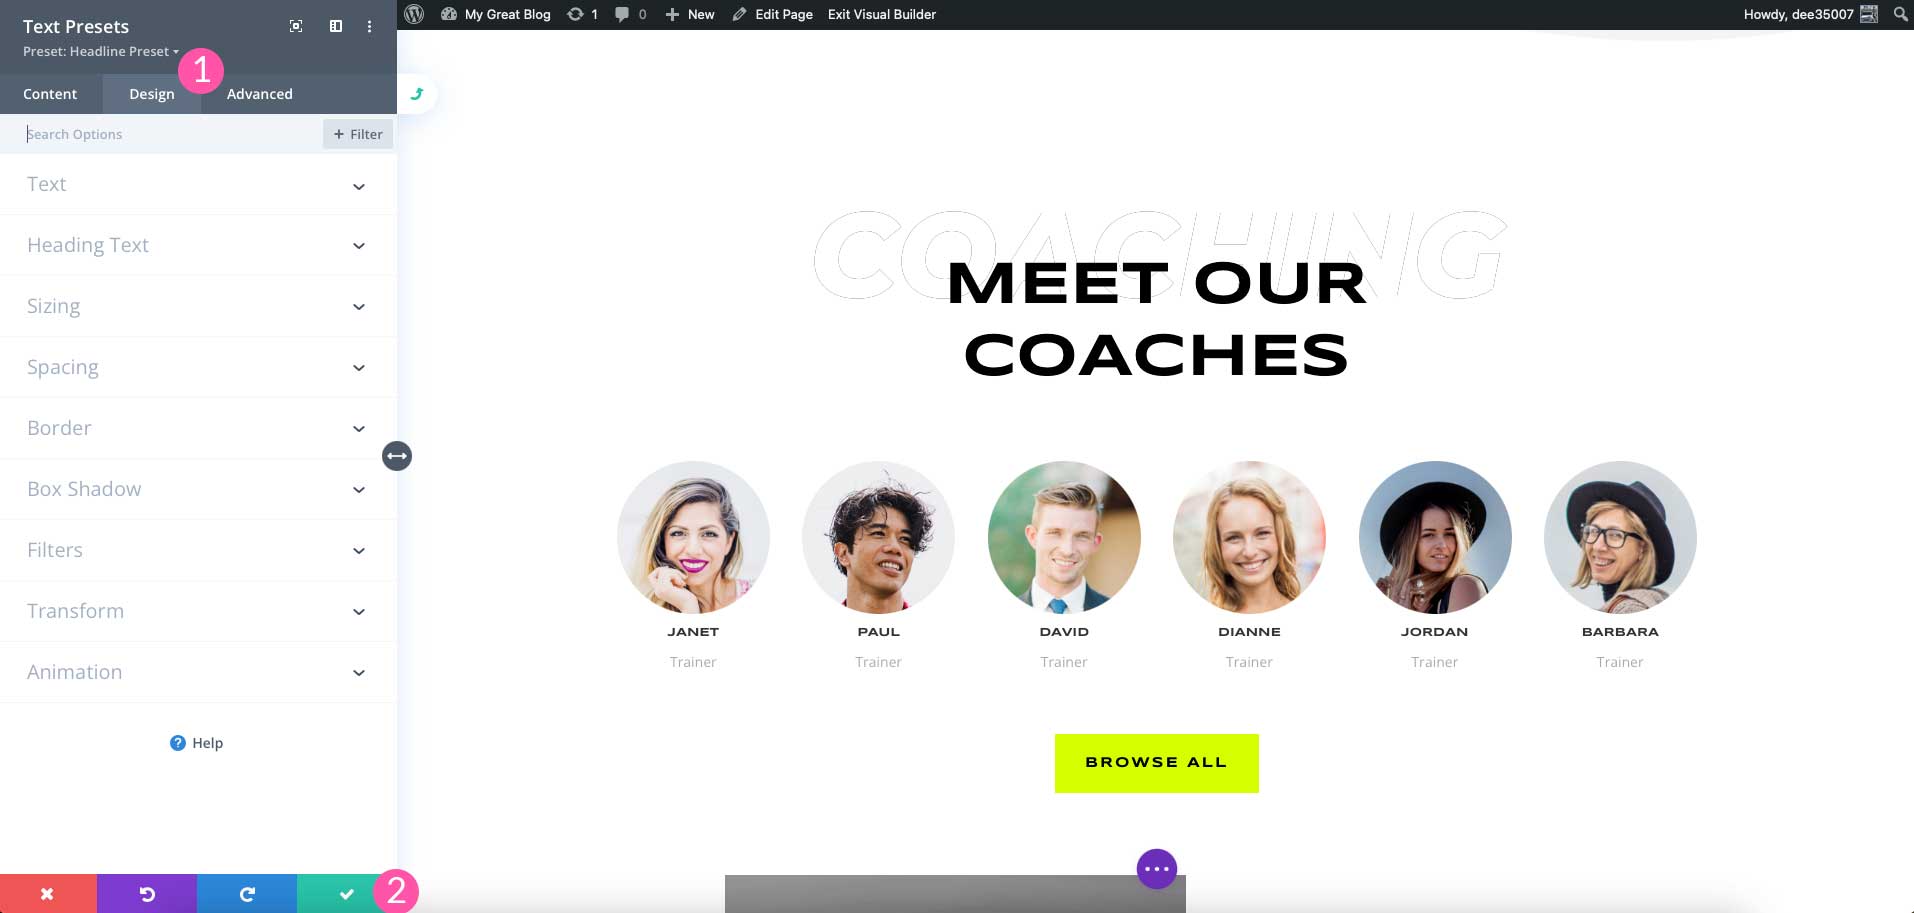
Then proceed to style your element as you wish. Next, click the green check box to save your element. A modal will appear asking if you’re sure you want to proceed with saving. Click yes. Finally, save your module by clicking the green check box.
Applying Divi Presets to New Modules
Divi makes it easy to apply presets to new modules. This is especially benefical when creating new pages that you wish to apply the same styles to. To apply an existing preset to a new module, simply click the presets dropdown arrow, then select the preset you’d like to apply. Remember, presets are module specific. Ensure that you’re applying the same module preset when creating new modules. For example, text modules must have a text preset, blurbs must have blurb presets, and so on.
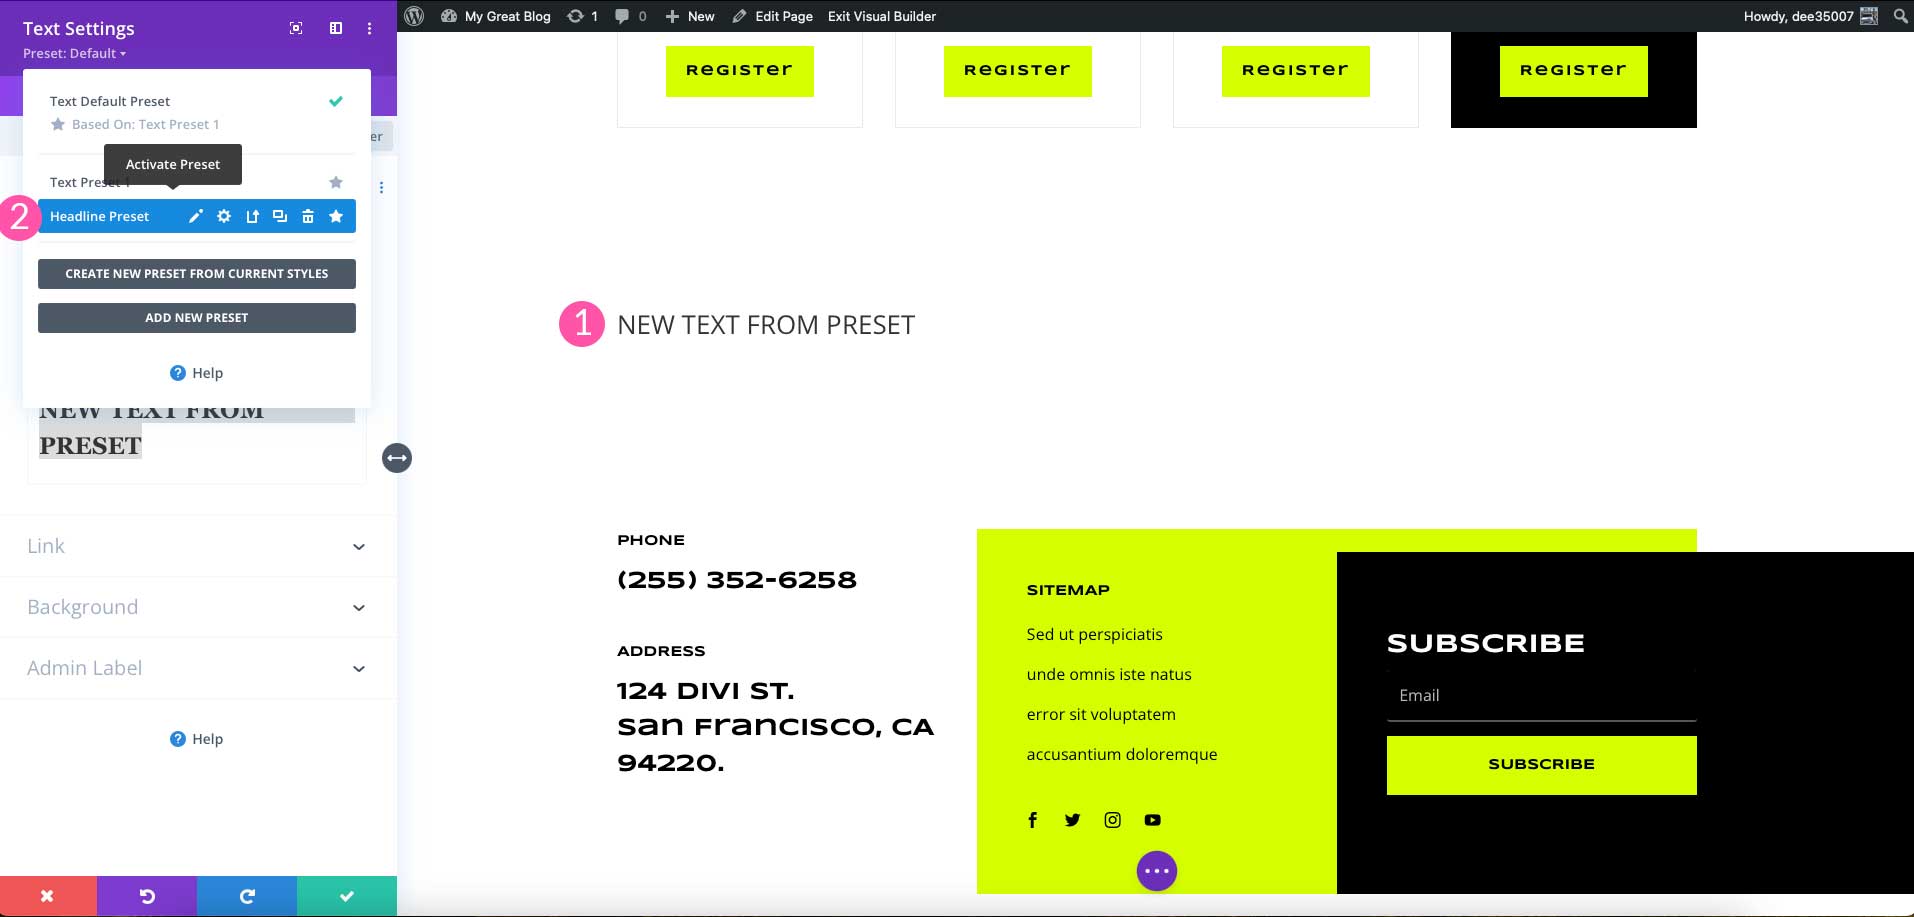
Creating a New Divi Preset From a Current Style
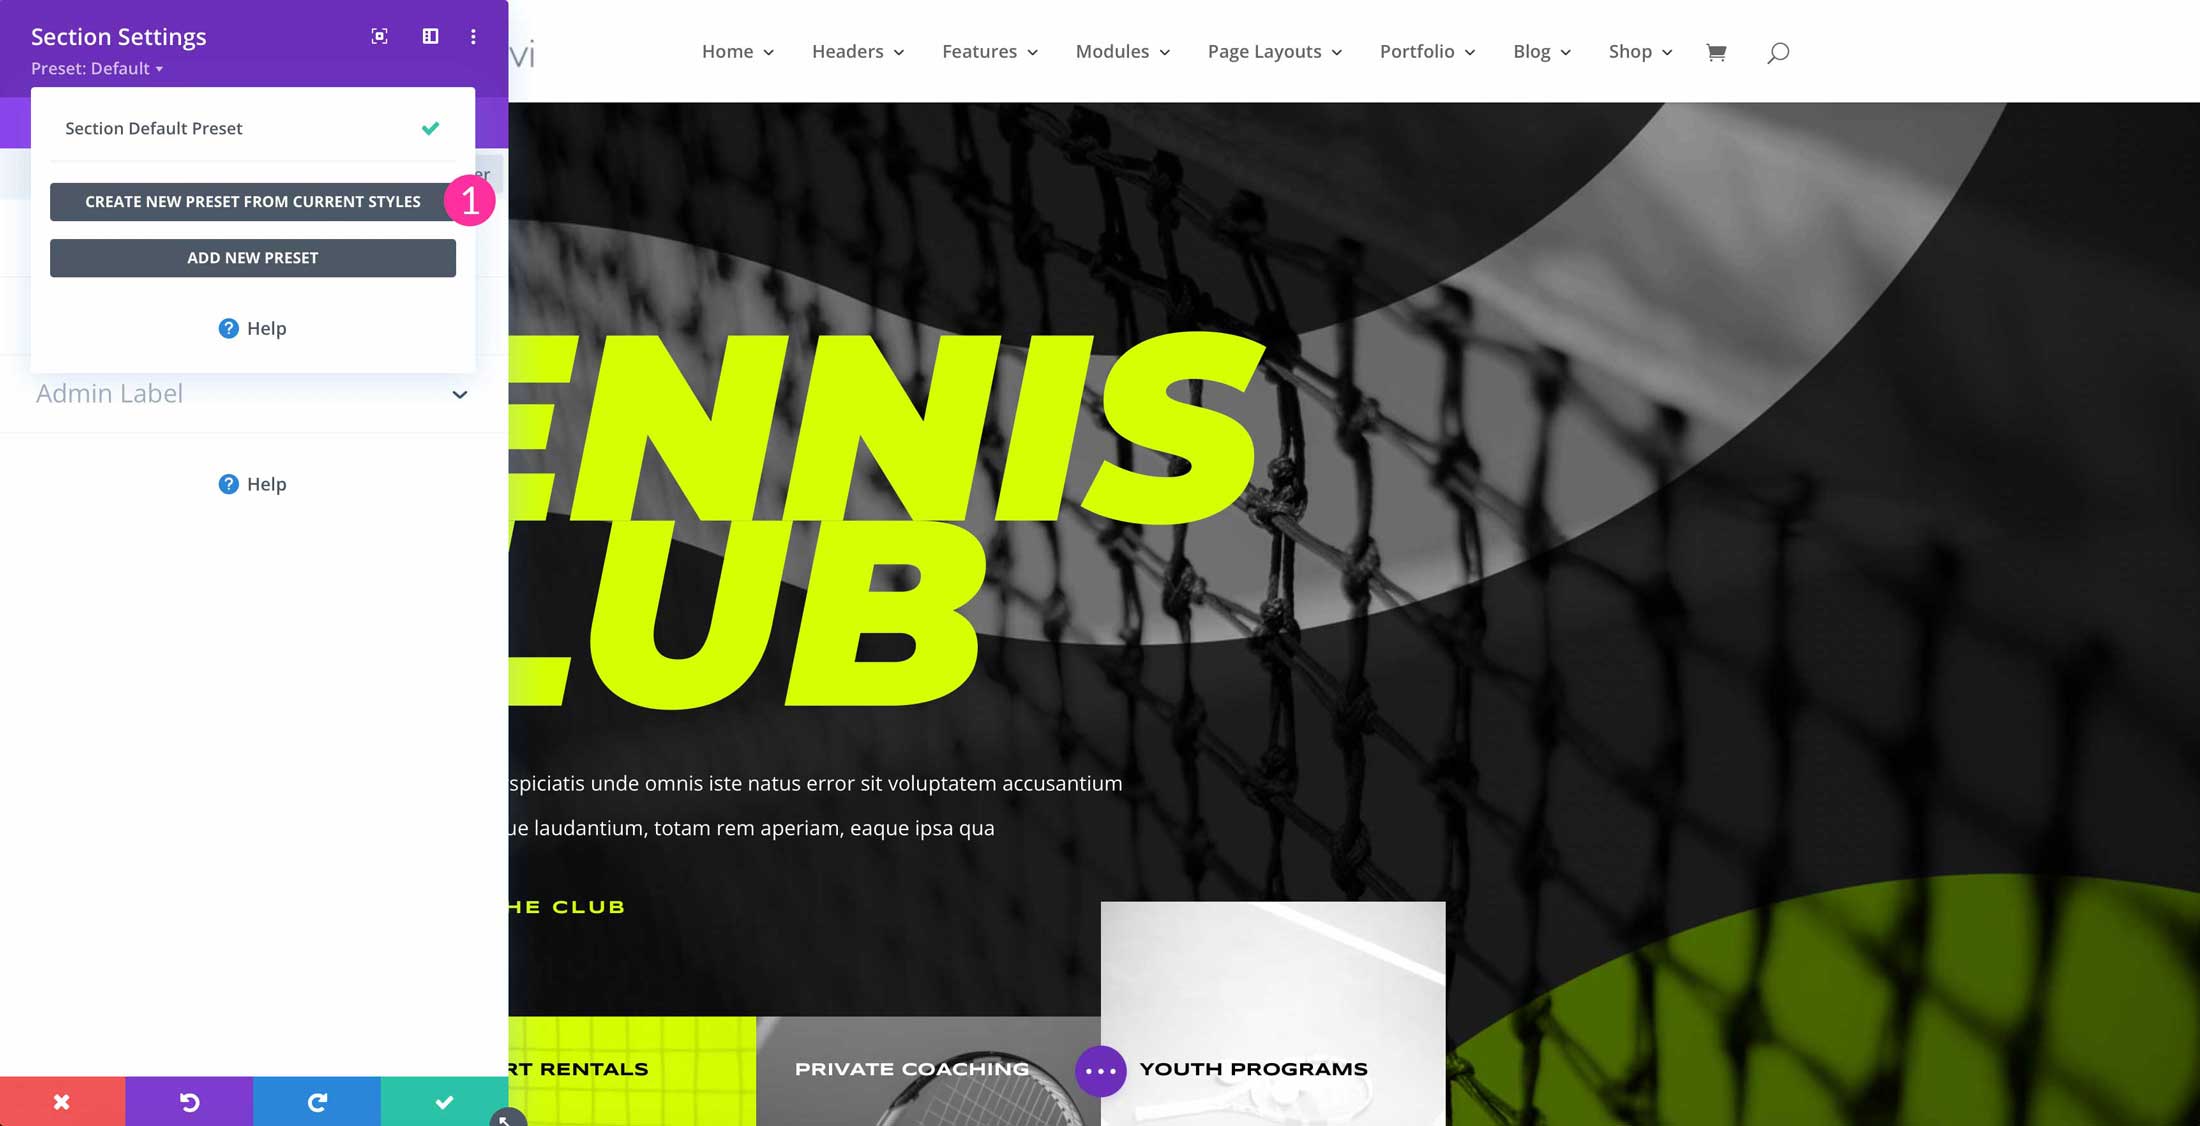
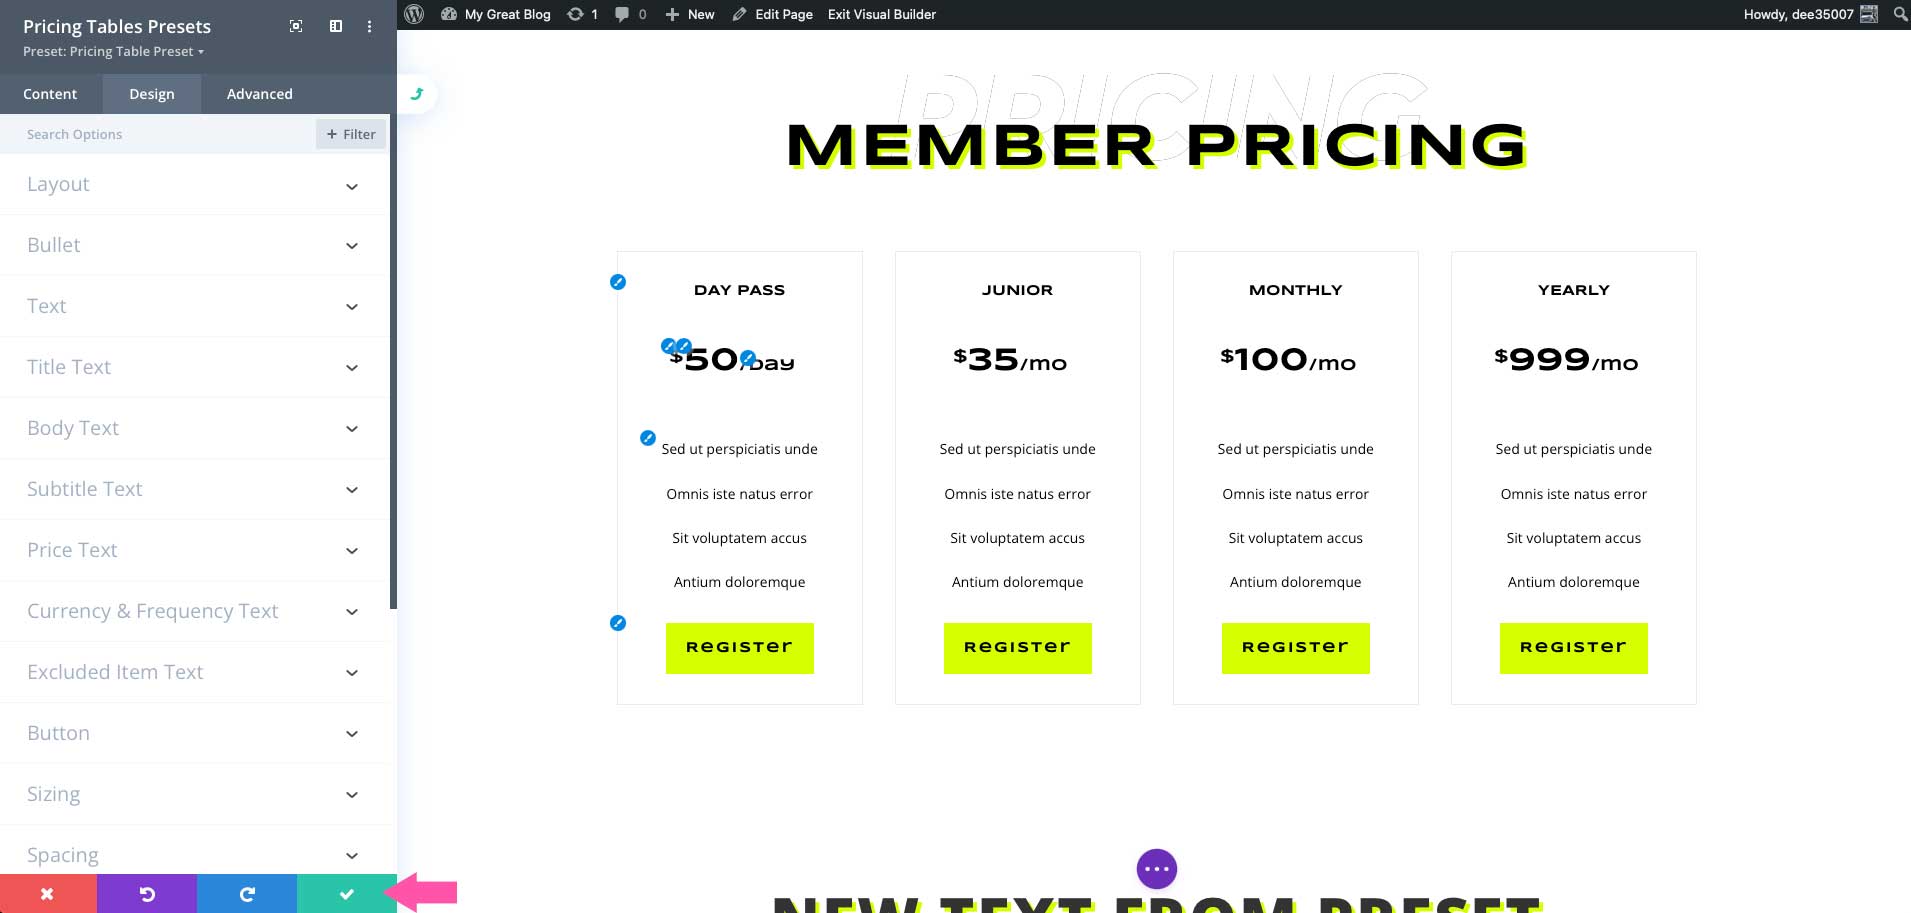
As previously mentioned, you can create a new preset from a currently styled element. We’ll use Divi’s pricing module as an example. A styled element can be saved as a preset by clicking the presets dropdown menu, then selecting the create new preset from current styles button. Name your new preset, then save it.
To apply the styles in another pricing module, simply click to edit the new pricing module, then select the presets dropdown menu. Next, click the pricing module preset to activate it. Save the module by clicking the green check box. Your new pricing module is styled instantly, reflecting your saved preset’s styles.
Editing Divi Preset Styles
Editing existing preset styles is a breeze. If you’d like to edit an existing preset, simply click on any element that currently has a preset applied. Next, click the dropdown arrow next to presets. Hover over the currently applied preset, then click the pencil icon.
The module’s settings background will turn gray to incidate that changes are being made. Make the design changes you’d like to implement, then click the green check box to save it. You’ll notice that any module with that preset applied will adjust to reflect the changes you made.
It’s important to note that if you edit a preset, those changes will be reflected wherever that preset is being used.
Overriding Divi Preset Styles
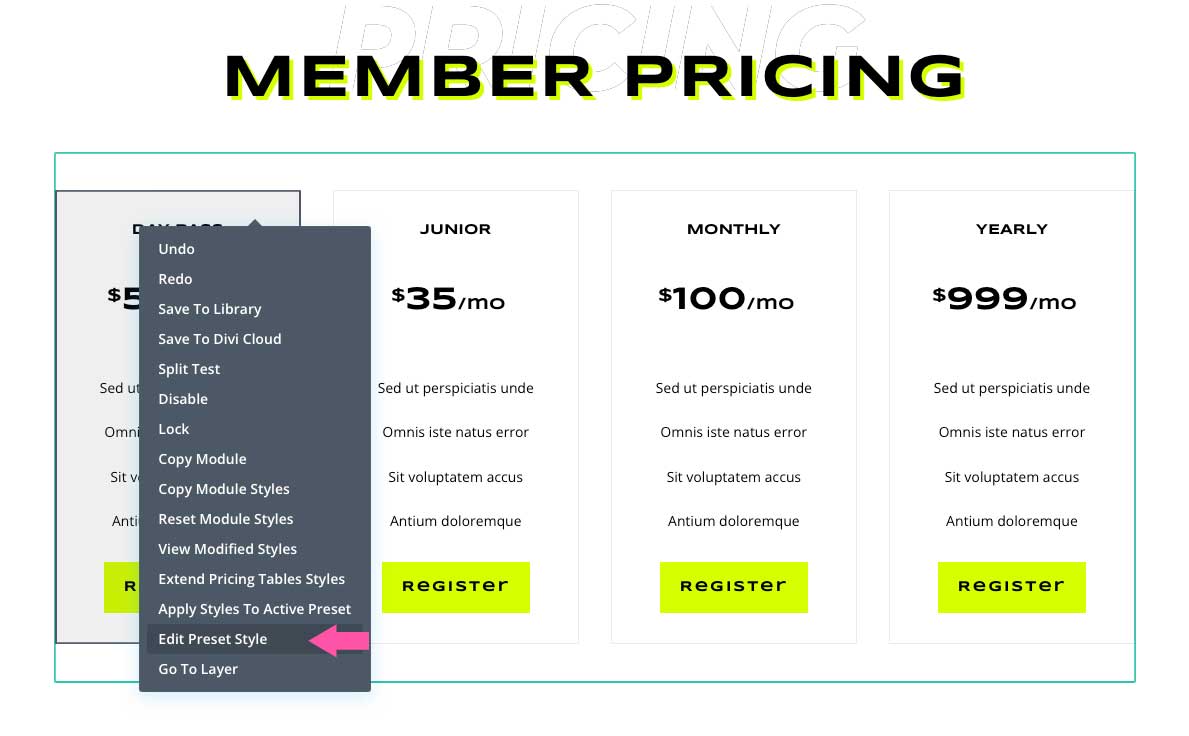
If you need to override a preset’s style, you can use Divi’s right click options to do it. Hover over the module or element that you’d like to edit, then right click to reveal the menu. Click Edit Preset Style. The module’s options will appear allowing you to make design changes to that singular module. Once your changes are made, simply save it by clicking the green check box.
Importing and Exporting Layout With and Without Your Divi Presets
When you want to import a layout that you’ve previously saved, you can do so with or without presets. Both can be useful when wanting to incorporate your layouts into other Divi websites. When you export a layout, your presets are automatically saved and included in the export.
Exporting a Page Layout with Divi Presets
When exporting a Divi layout, presets will be saved with your layout. To start the process, ensure that you have the Visual Builder enabled. Next, click on the purple ellipsis menu at the bottom center of your screen.
With the page menu visible, click the import/export icon.
![]()
Finally, name your layout, then click the Export Divi Builder Layout button. Your layout will be saved as a json file that can be imported into another page of your site, as well as another Divi website.

Importing a Page Layout with Divi Presets
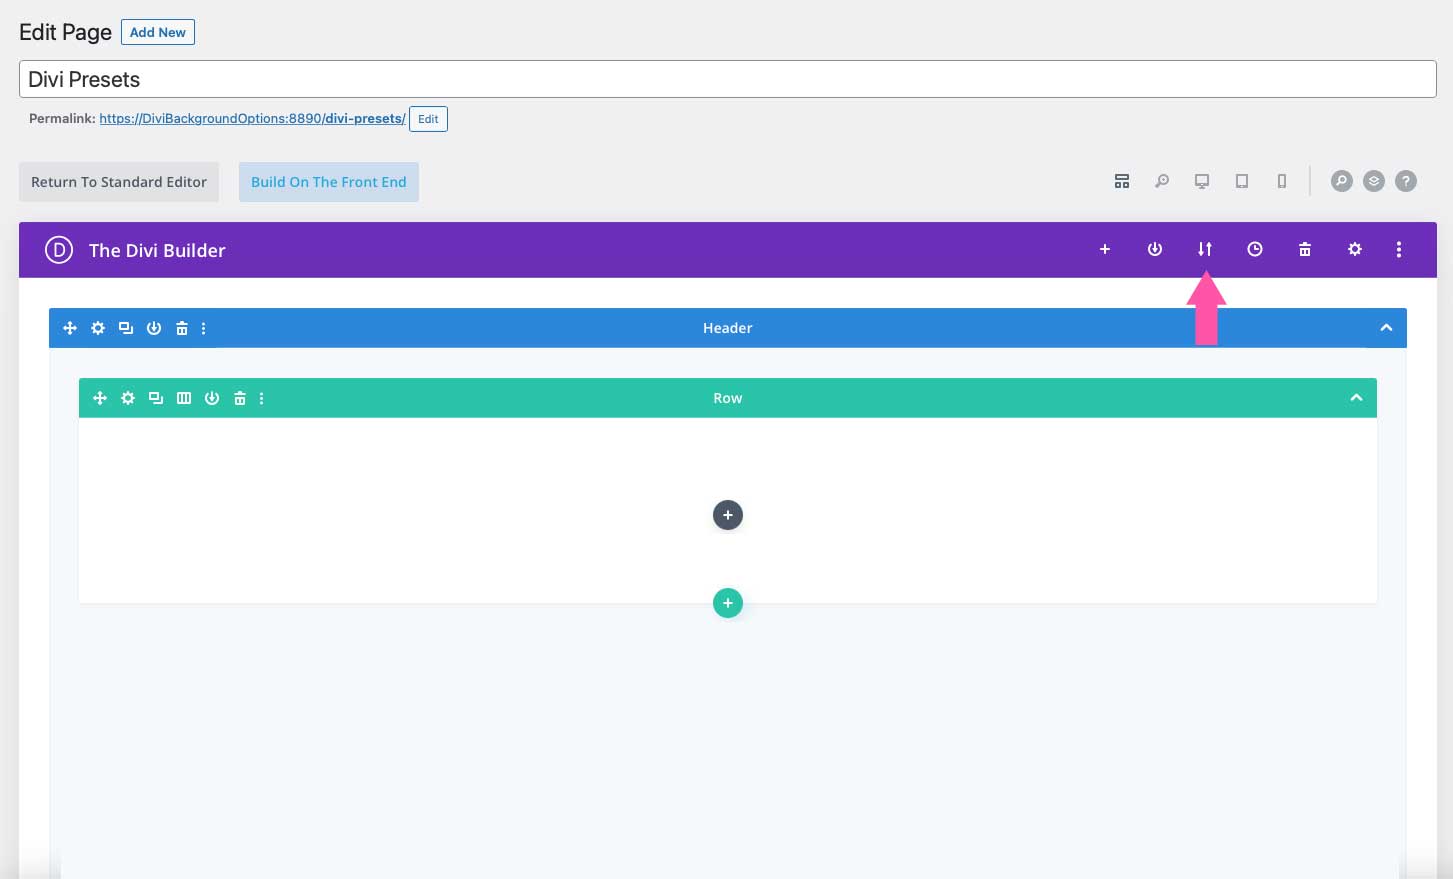
When importing a Divi page layout, you can choose whether or not you’d like to include presets. There are several ways that you can do this. The first way is in the Divi Page Builder back end. With a new page created, click the import/export icon at the top right of the Divi Page Builder settings.
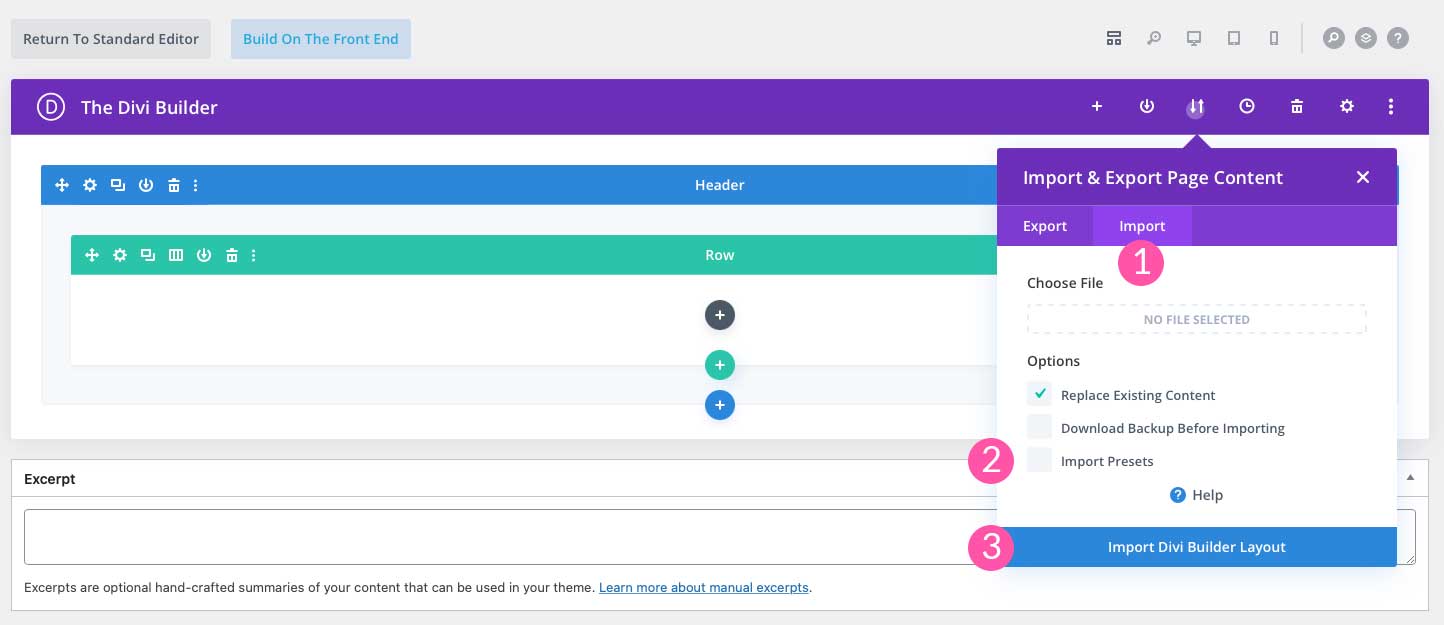
Next, click the import tab. Then, choose whether or not to include presets by ticking the include presets checkbox. Finally, click the Import Divi Builder Layout button. Your page will refresh and reveal that the new layout has been imported.
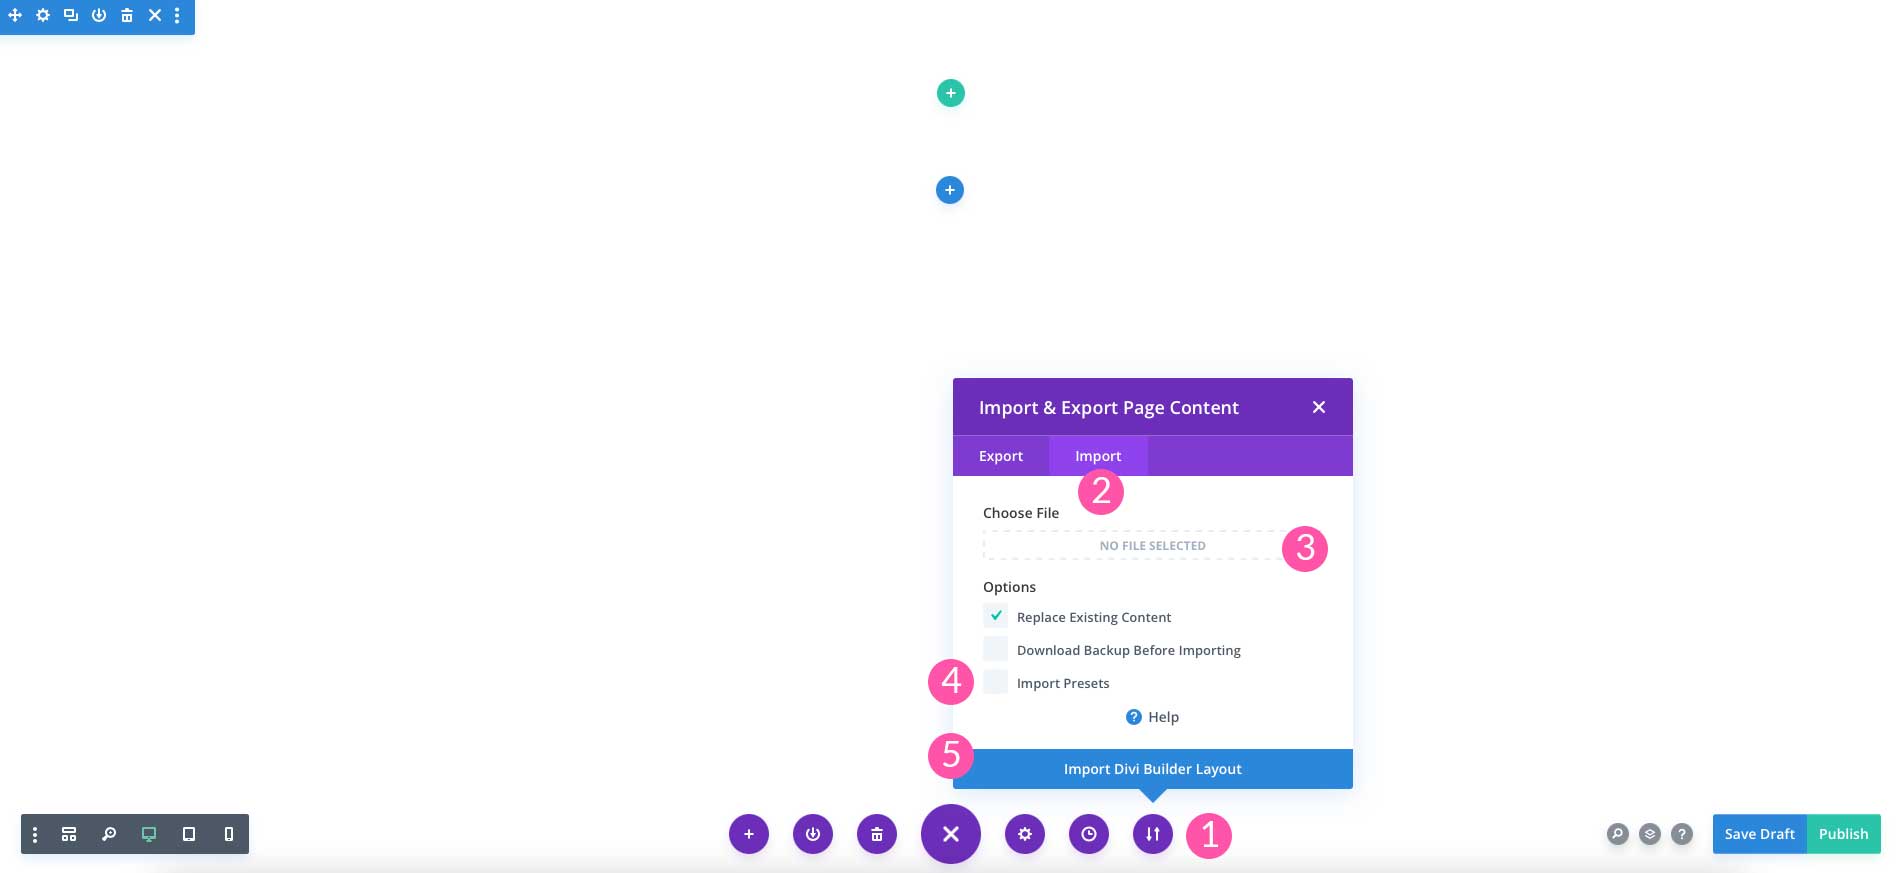
Another way is to import your layout is by using the Visual Builder. You can either drag your json file into a new page, or click the import/export button in the page menu at the bottom of the screen. Choose whether to include presets, then click the Import Divi Builder Layout button.
Now when you edit a module or element where a preset is applied, you will all available presets, including the ones that were imported.
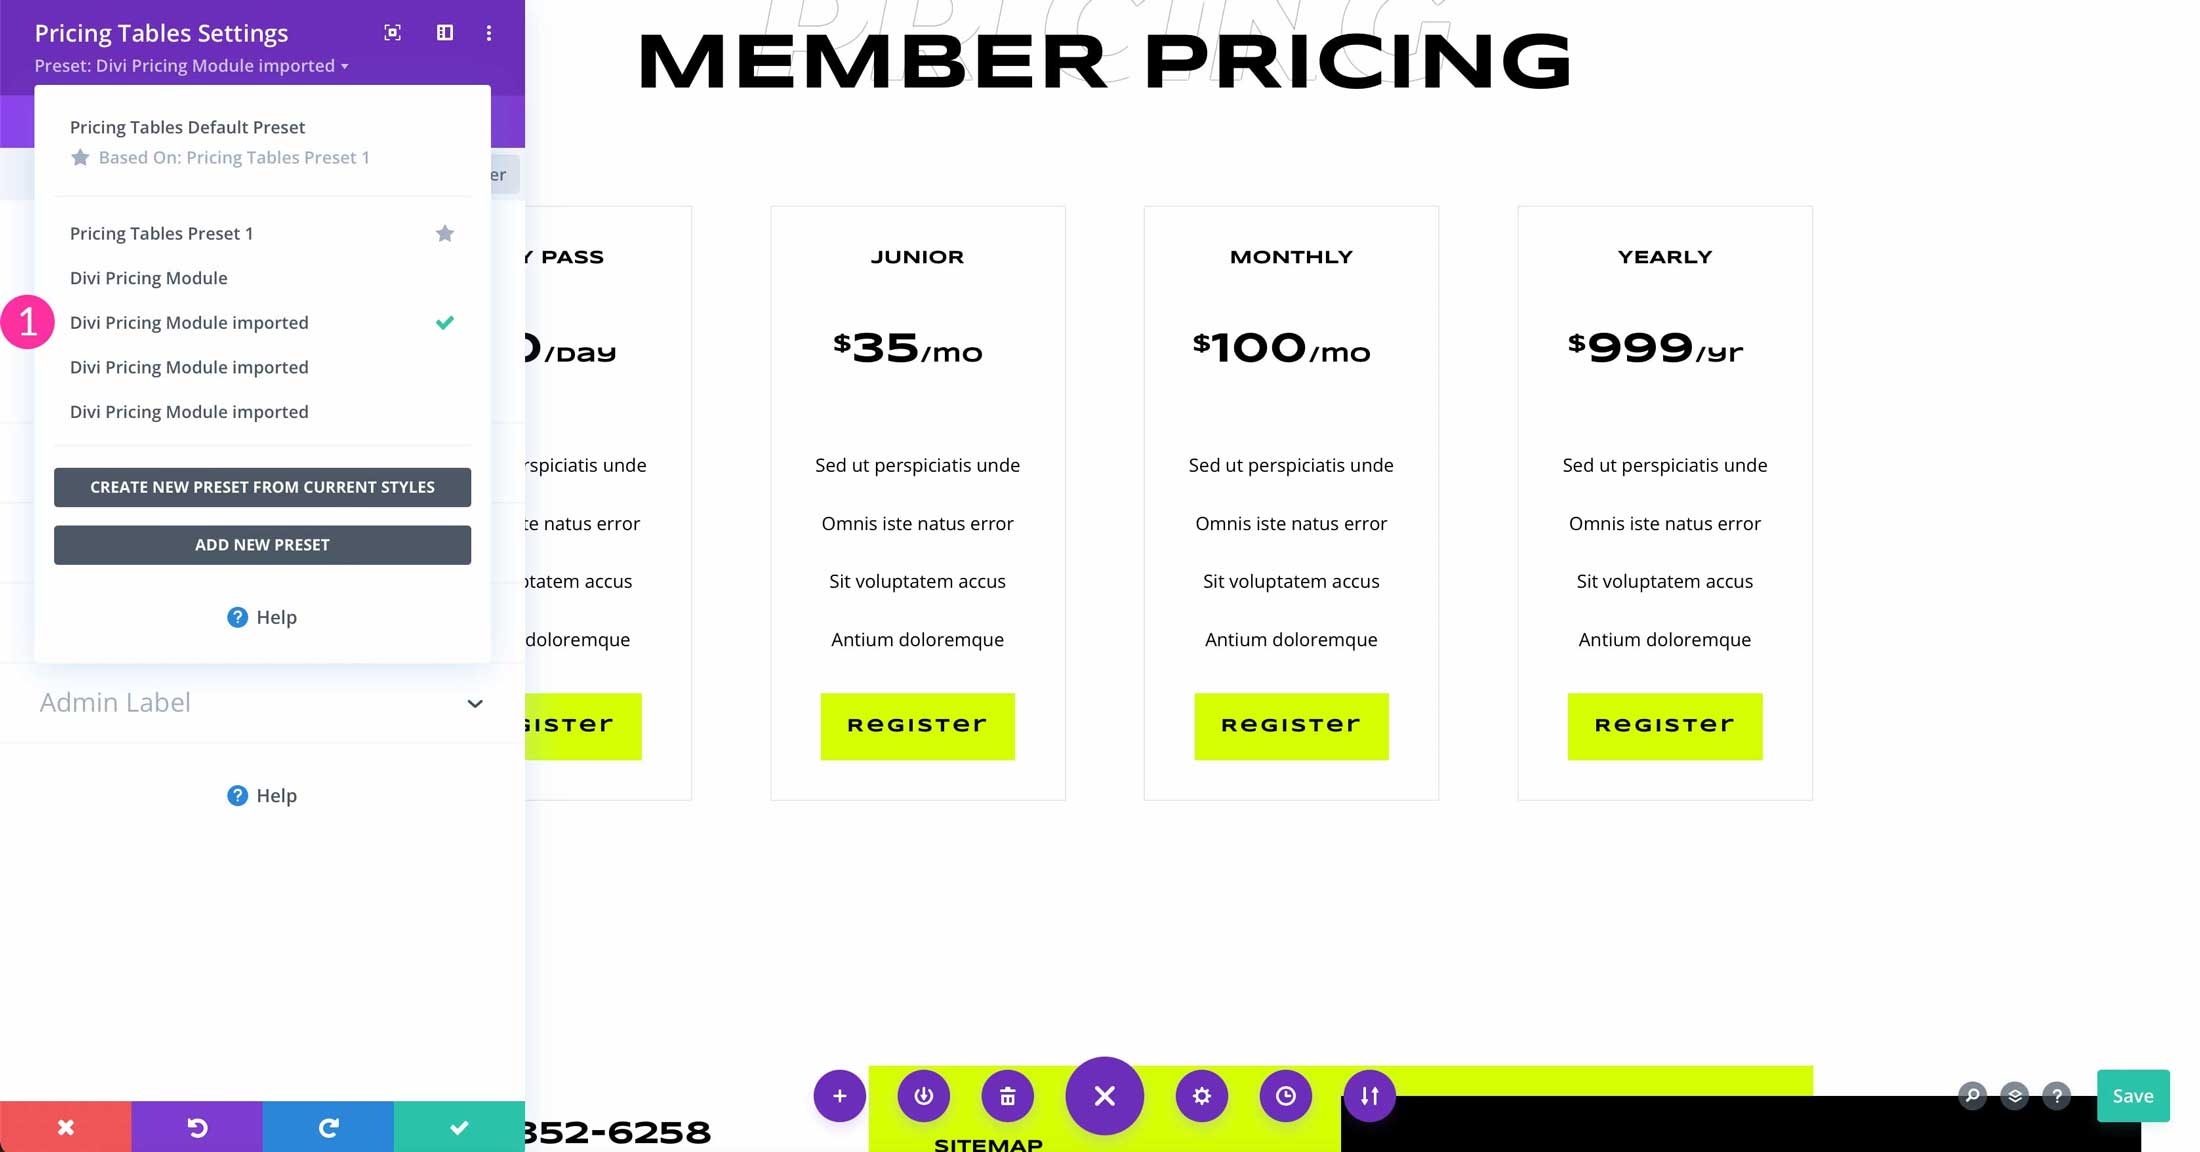
Tips & Best Practices for Using Divi Presets
When working with presets, there are a few things you should consider. Implementing these tips will help you build a beautiful Divi website faster, and improve your knowledge of Divi presets.
Create a Divi Preset Style Guide
Divi presets enable you to work faster and more effeciently when building your website. Creating a preset style guide is a great way to jumpstart your design. Check out our free preset style guide to help you get started.
Use Section and Row Presets
It’s a great idea to use section and row presets to create a consistent layout when building your site. This is a good replacement for the theme customizer settings layout options, which are pretty limited. You can use your new custom presets for sections and rows to jumpstart the layout and then override them when needed.
Continue Learning
Now that you have a good grasp about how Divi presets work, check out some of our helpful posts and freebies to kick your creativity up a notch.