Using Divi Background Options
Divi’s background options are a powerful suite of design features that includes background color options, gradient options, image options, video options, pattern options, and mask options.
The Divi background options go far beyond the ability to add a simple background color. They’re an advanced suite of tools that bring your backgrounds to life. Including color options, gradient options, image options, video options, pattern options, and mask options.
In this document, we’ll show you how to use it all. Let’s get started!
How to Access the Divi Background Options
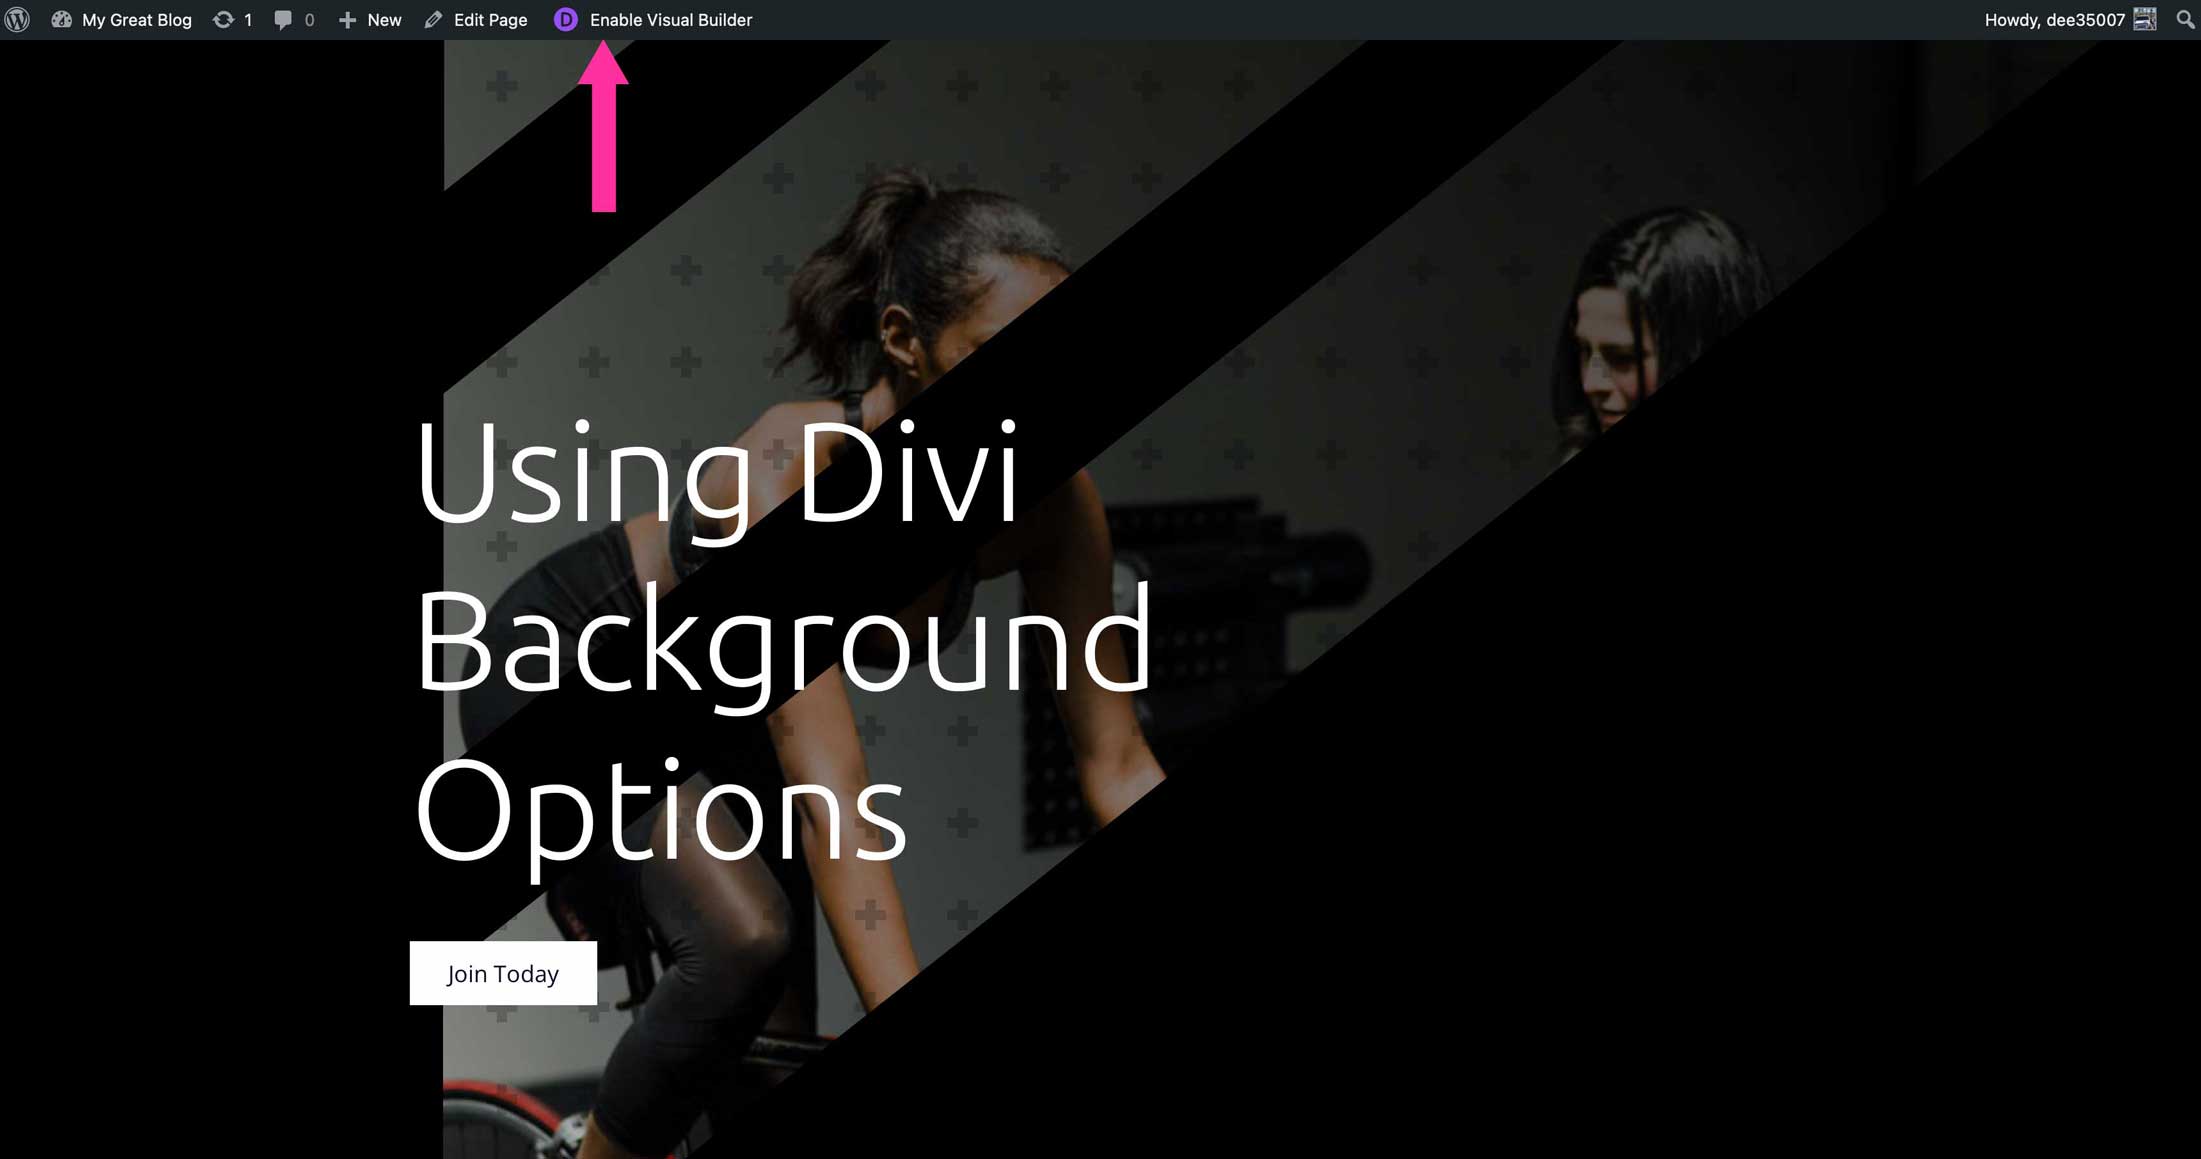
Divi’s background options can be accessed by clicking to edit any module, column, row, or section. First, navigate to the front of your website and click enable Visual Builder.
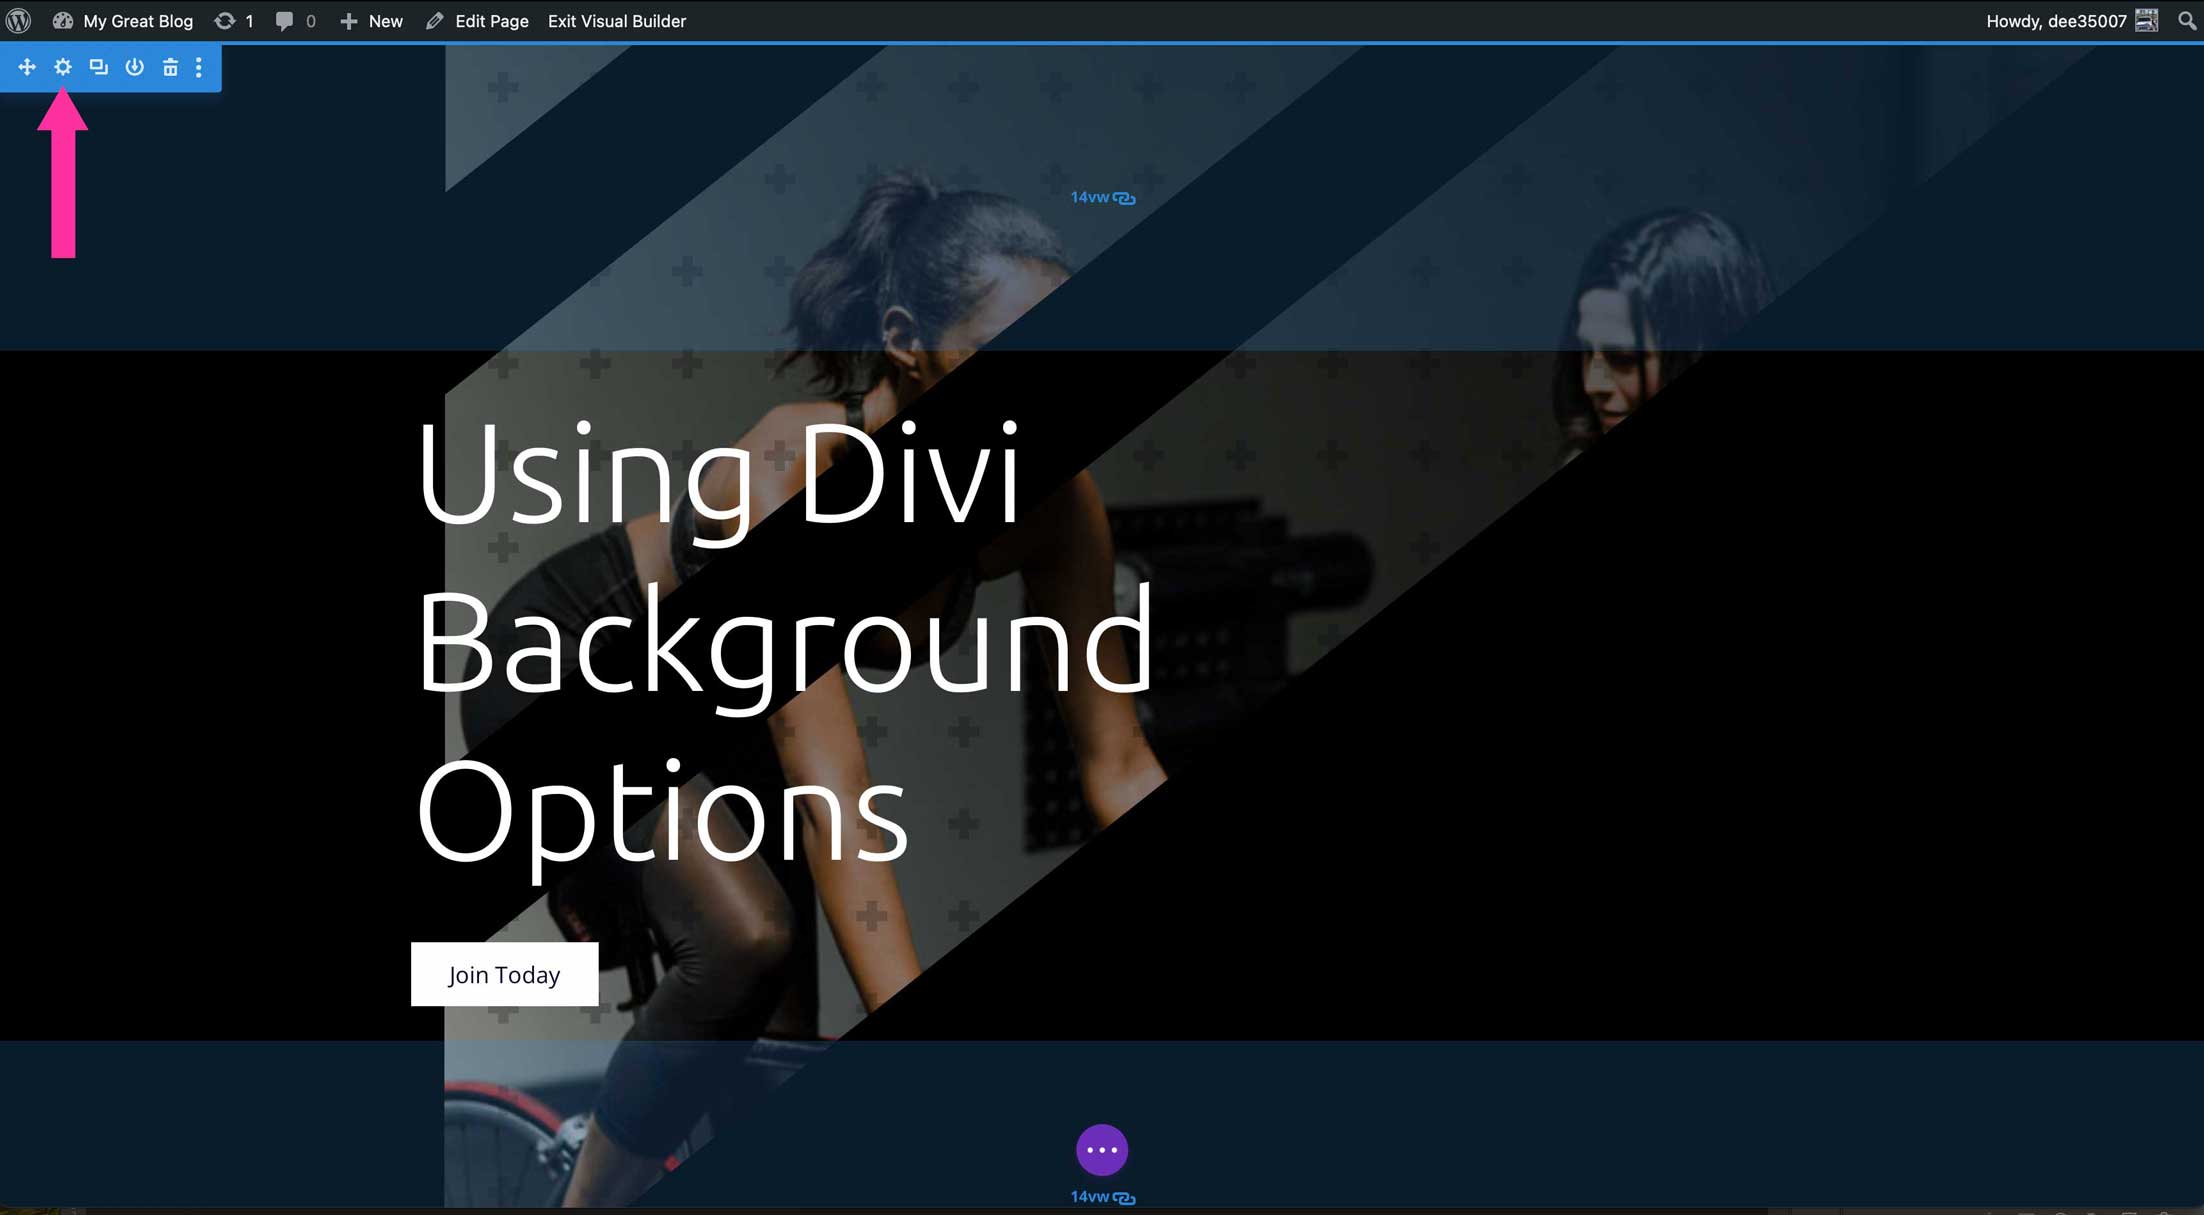
Next, hover over the top left corner of the page until the blue bar appears. Click the gear icon to access the section settings.
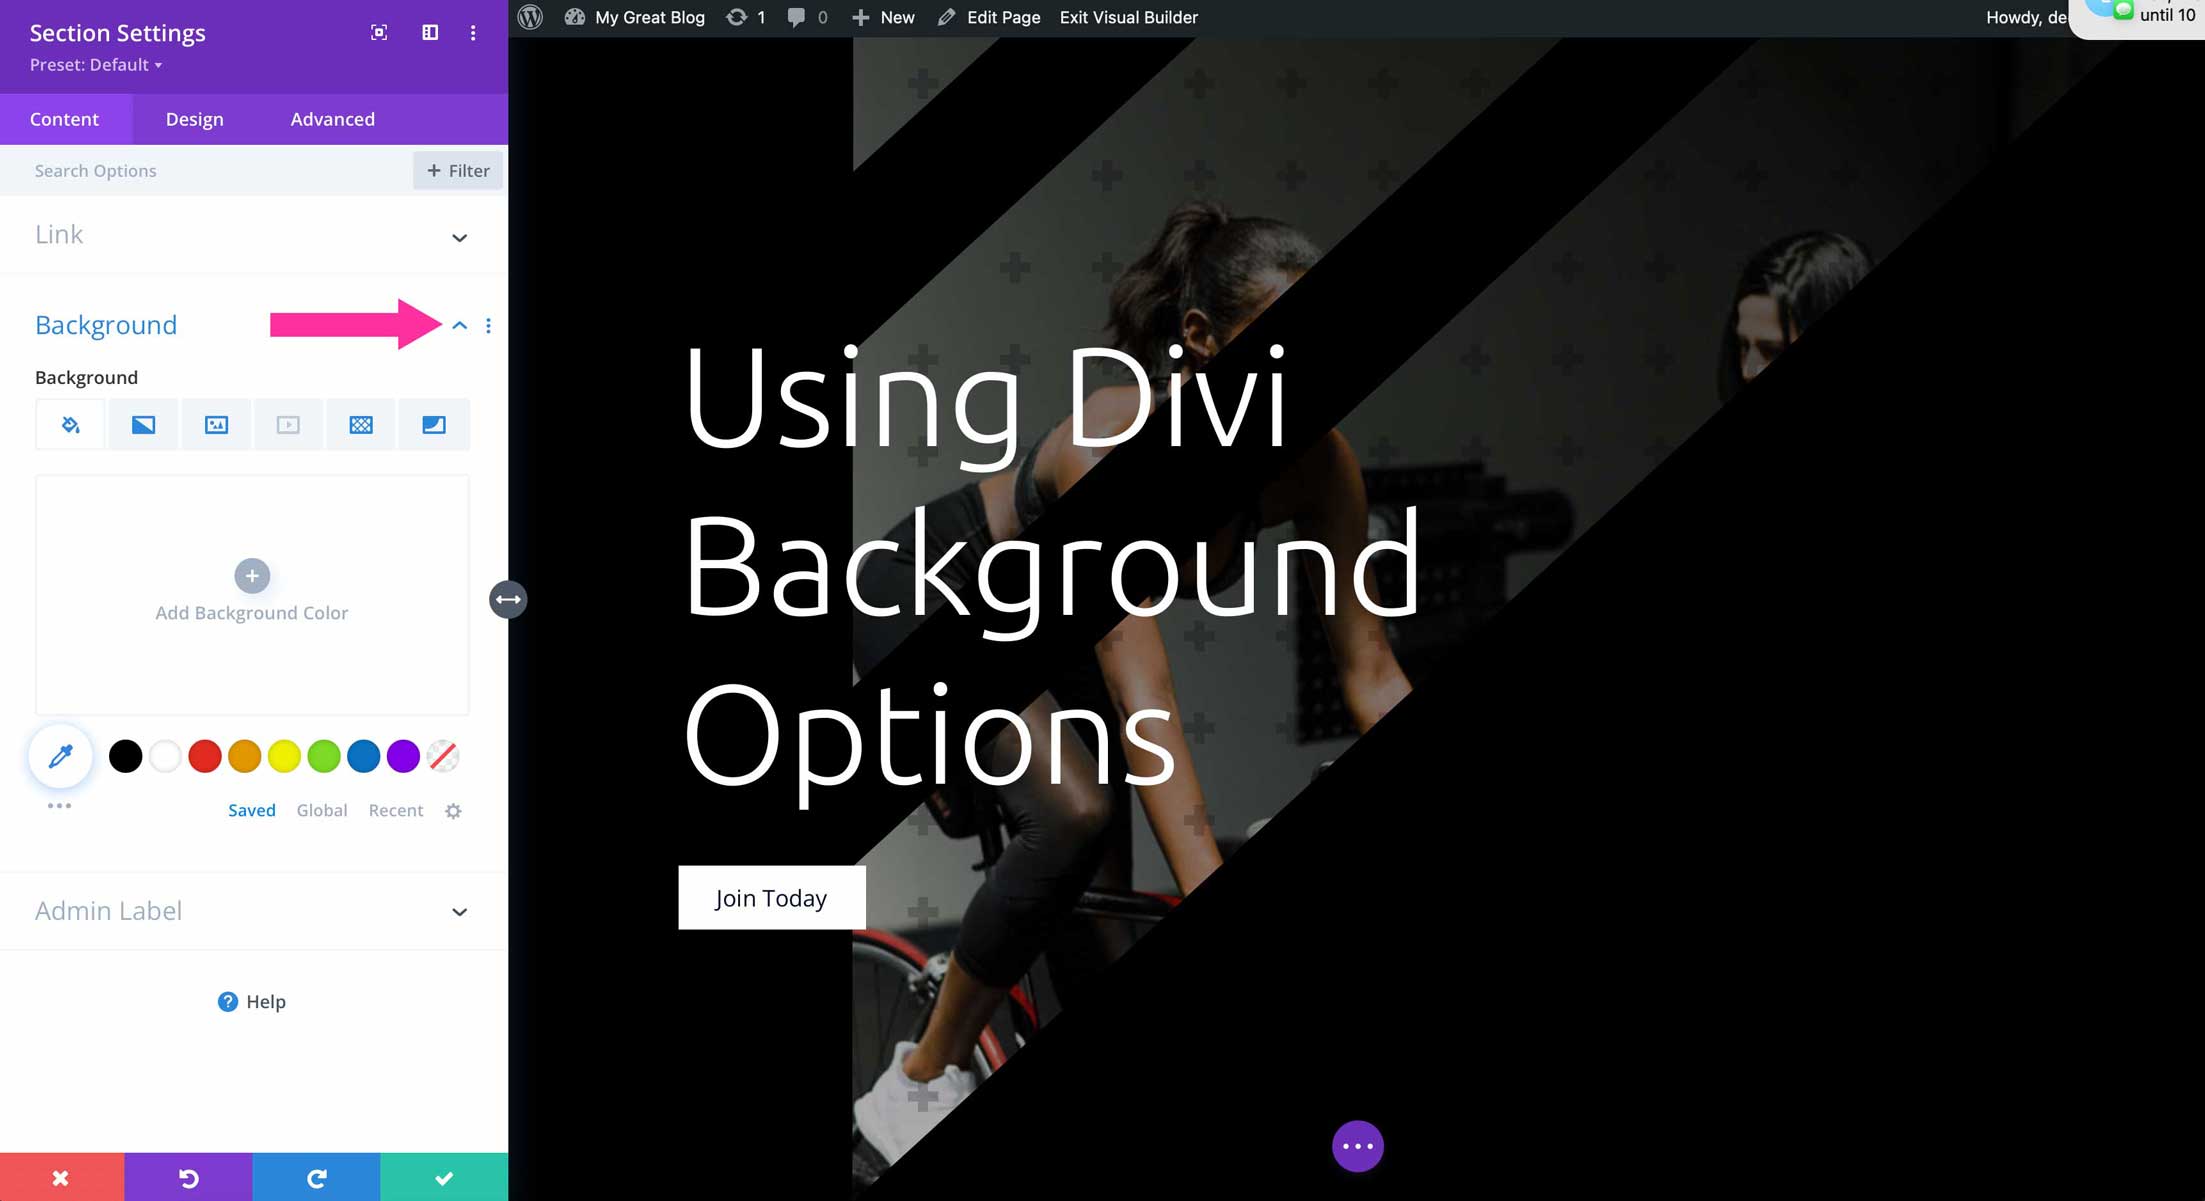
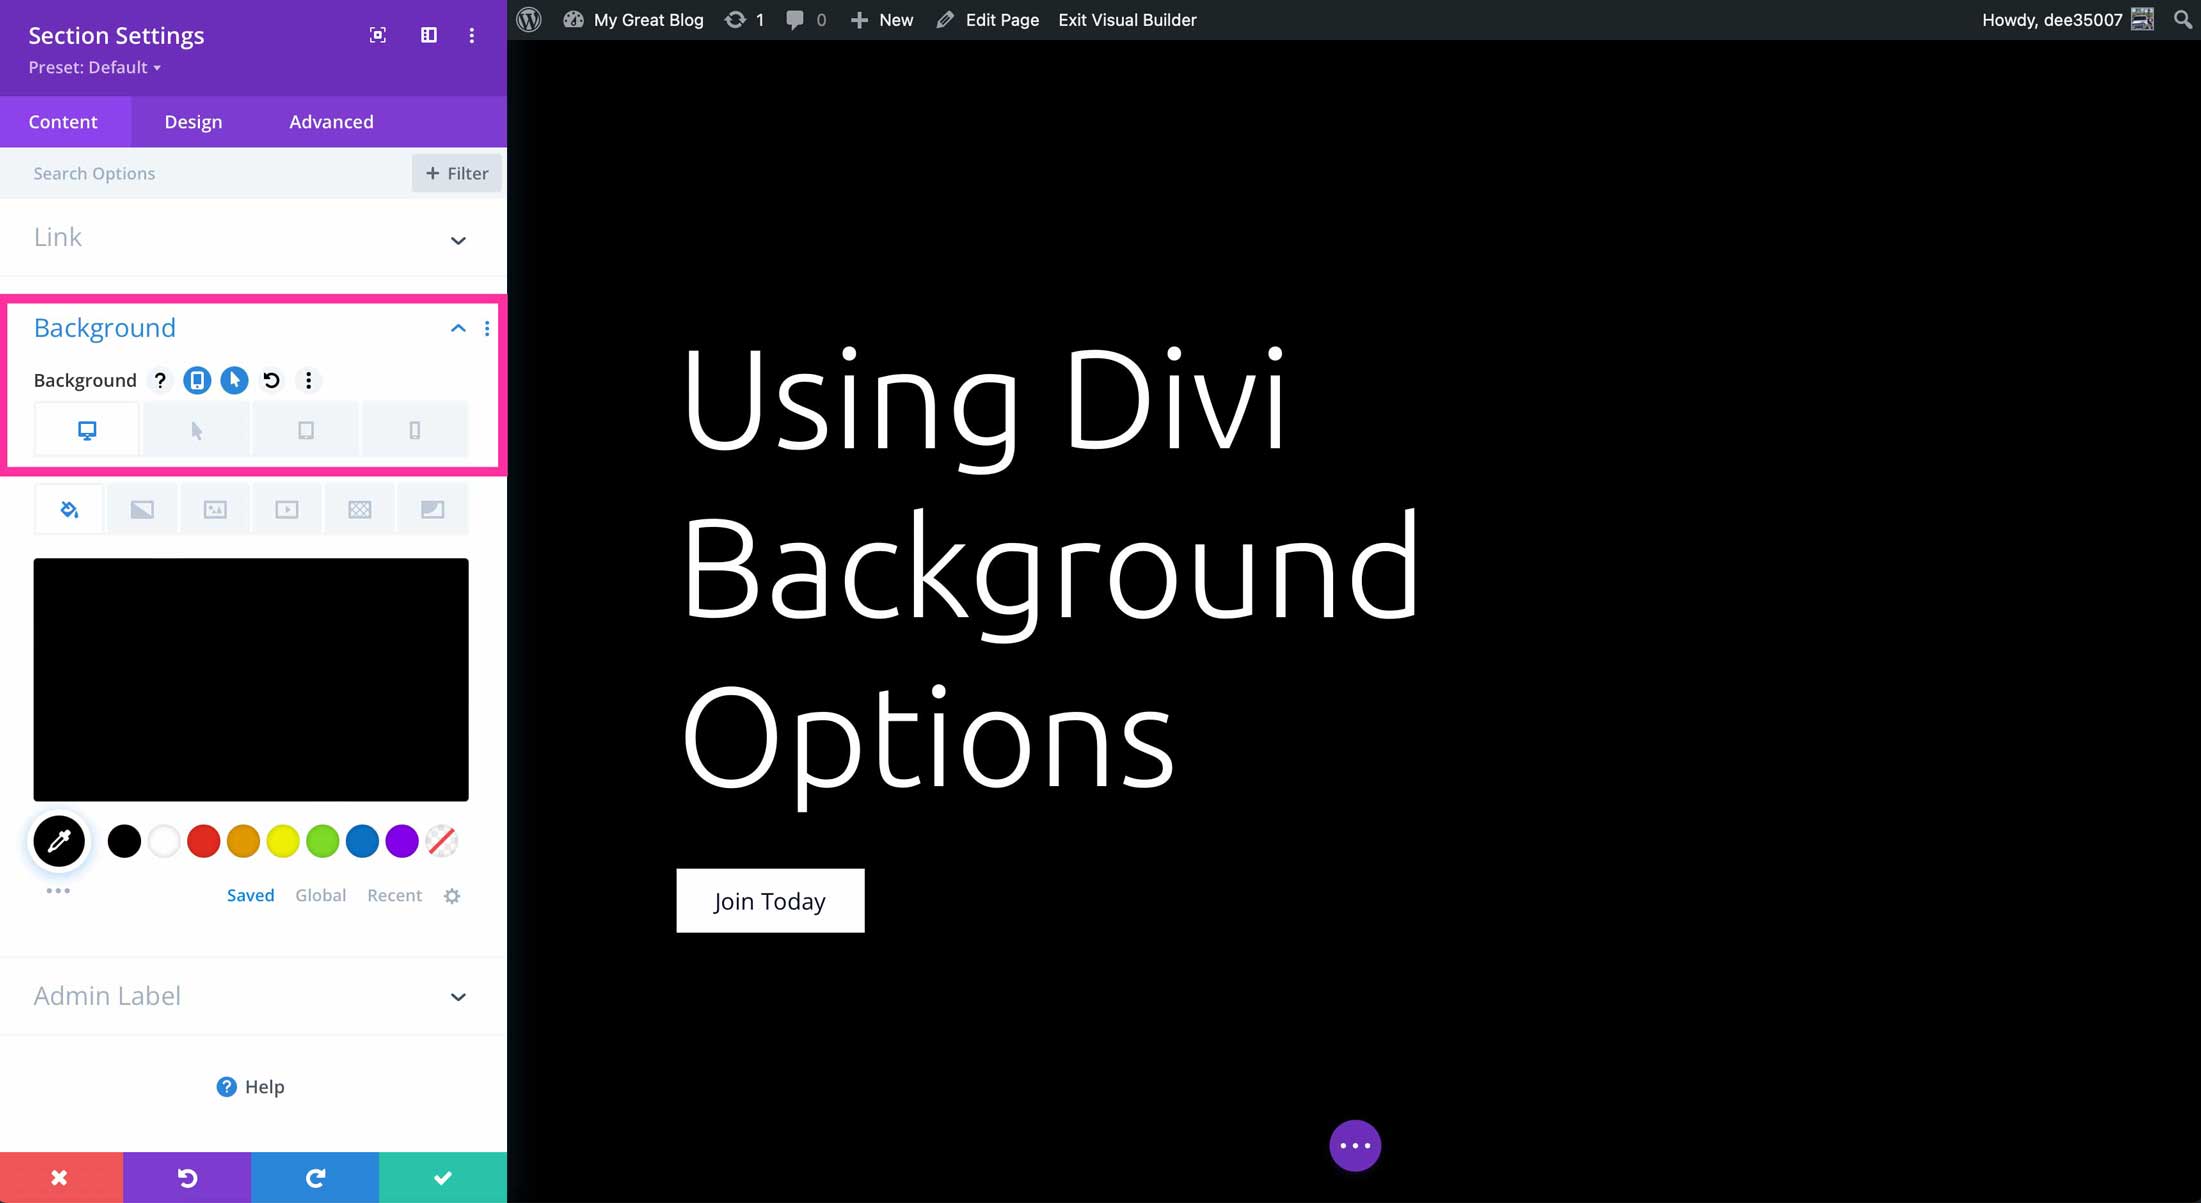
Next, click the Background settings by toggling the arrow in the settings menu.
Overview of Divi Background Options
Here you’ll have access to all of Divi’s background options. Settings include background color, background gradient, background image, background video, background pattern, and background mask. Additionally, you have access to Divi’s magic color system. Colors can be edited, saved as global, or modified to choose harmonious colors for your designs.
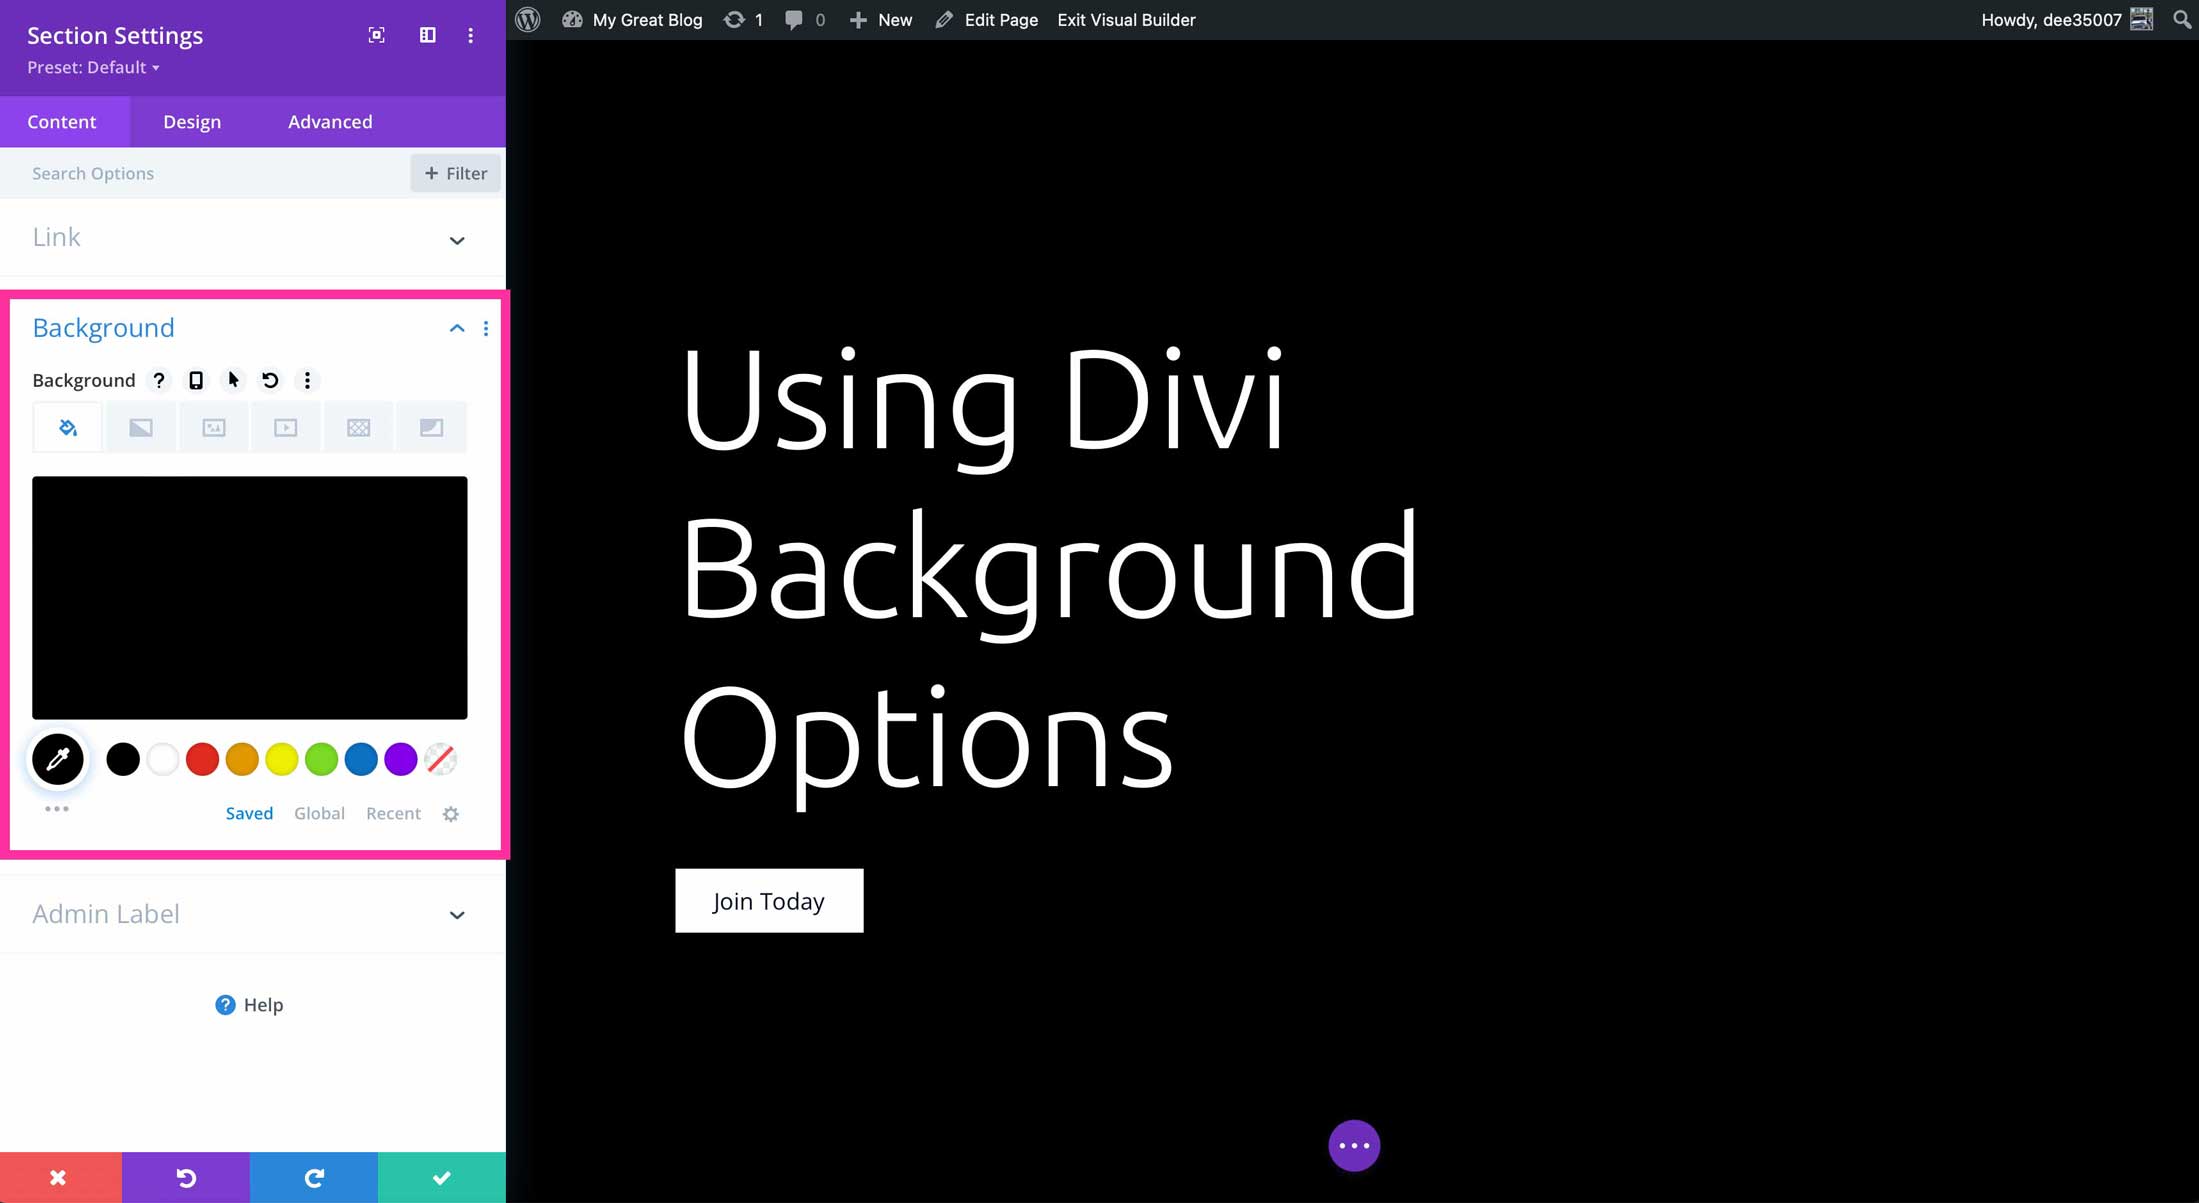
You’ll also find hover options, which will allow you to change settings based on the user’s mouseover actions. Finally, there are responsive settings for the background. These allow you to change settings based on screen size.
Let’s disucss each of Divi’s background options so you’ll be able to use them with confidence.
Divi Background Tabs
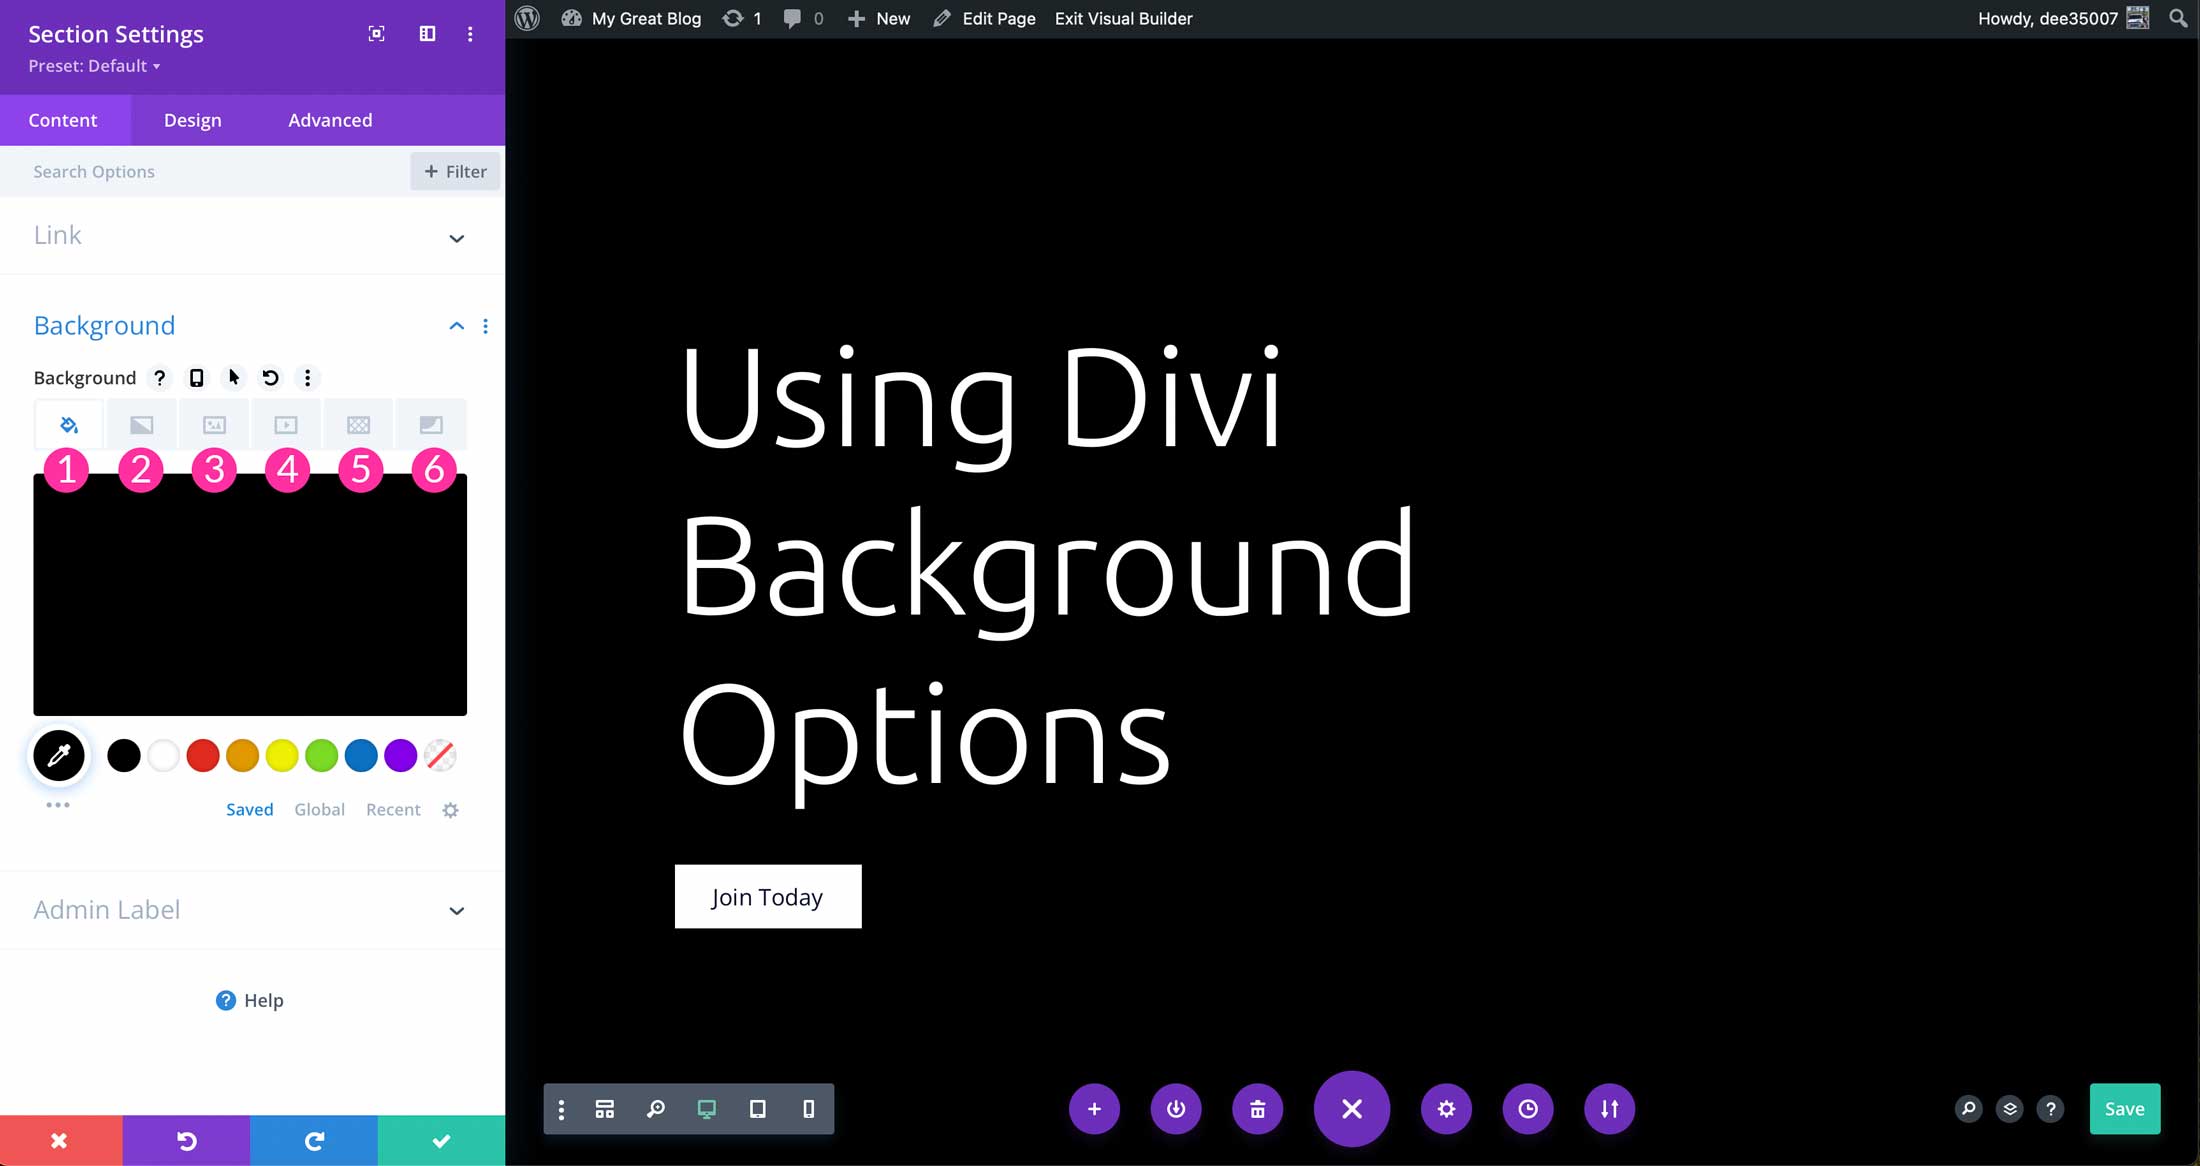
There are six separate background tabs within the Divi background options. Each has a robust set of options to help you create gorgeous, one-of-a-kind designs for your webpages. Let’s briefly walk through each tab to explain how they’re used.
1. Background Color Tab
The first tab allows you to set the color of your background using Divi’s advanced color system – a dynamic color system that allows you to create and edit colors that can be used throughout your website. In addition, colors can be saved globally so that changes are simple and applied across your website. There’s no need to click into every module, row, or section where colors are applied to edit them. Additionally, using Divi’s unique find & replace system, colors can be replaced by right-clicking on any background color.
To learn more about Divi’s dynamic color system, check out our documentation.
2. Background Gradient Tab
The background gradient tab enables you to create gradient effects for your backgrounds using the magic color system. Additionally, you can add additional color stops to create unique gradients with four different gradient types. There are additional options for gradient direction, repeat, and gradient units. You can also apply a gradient over a background image.
3. Background Image Tab
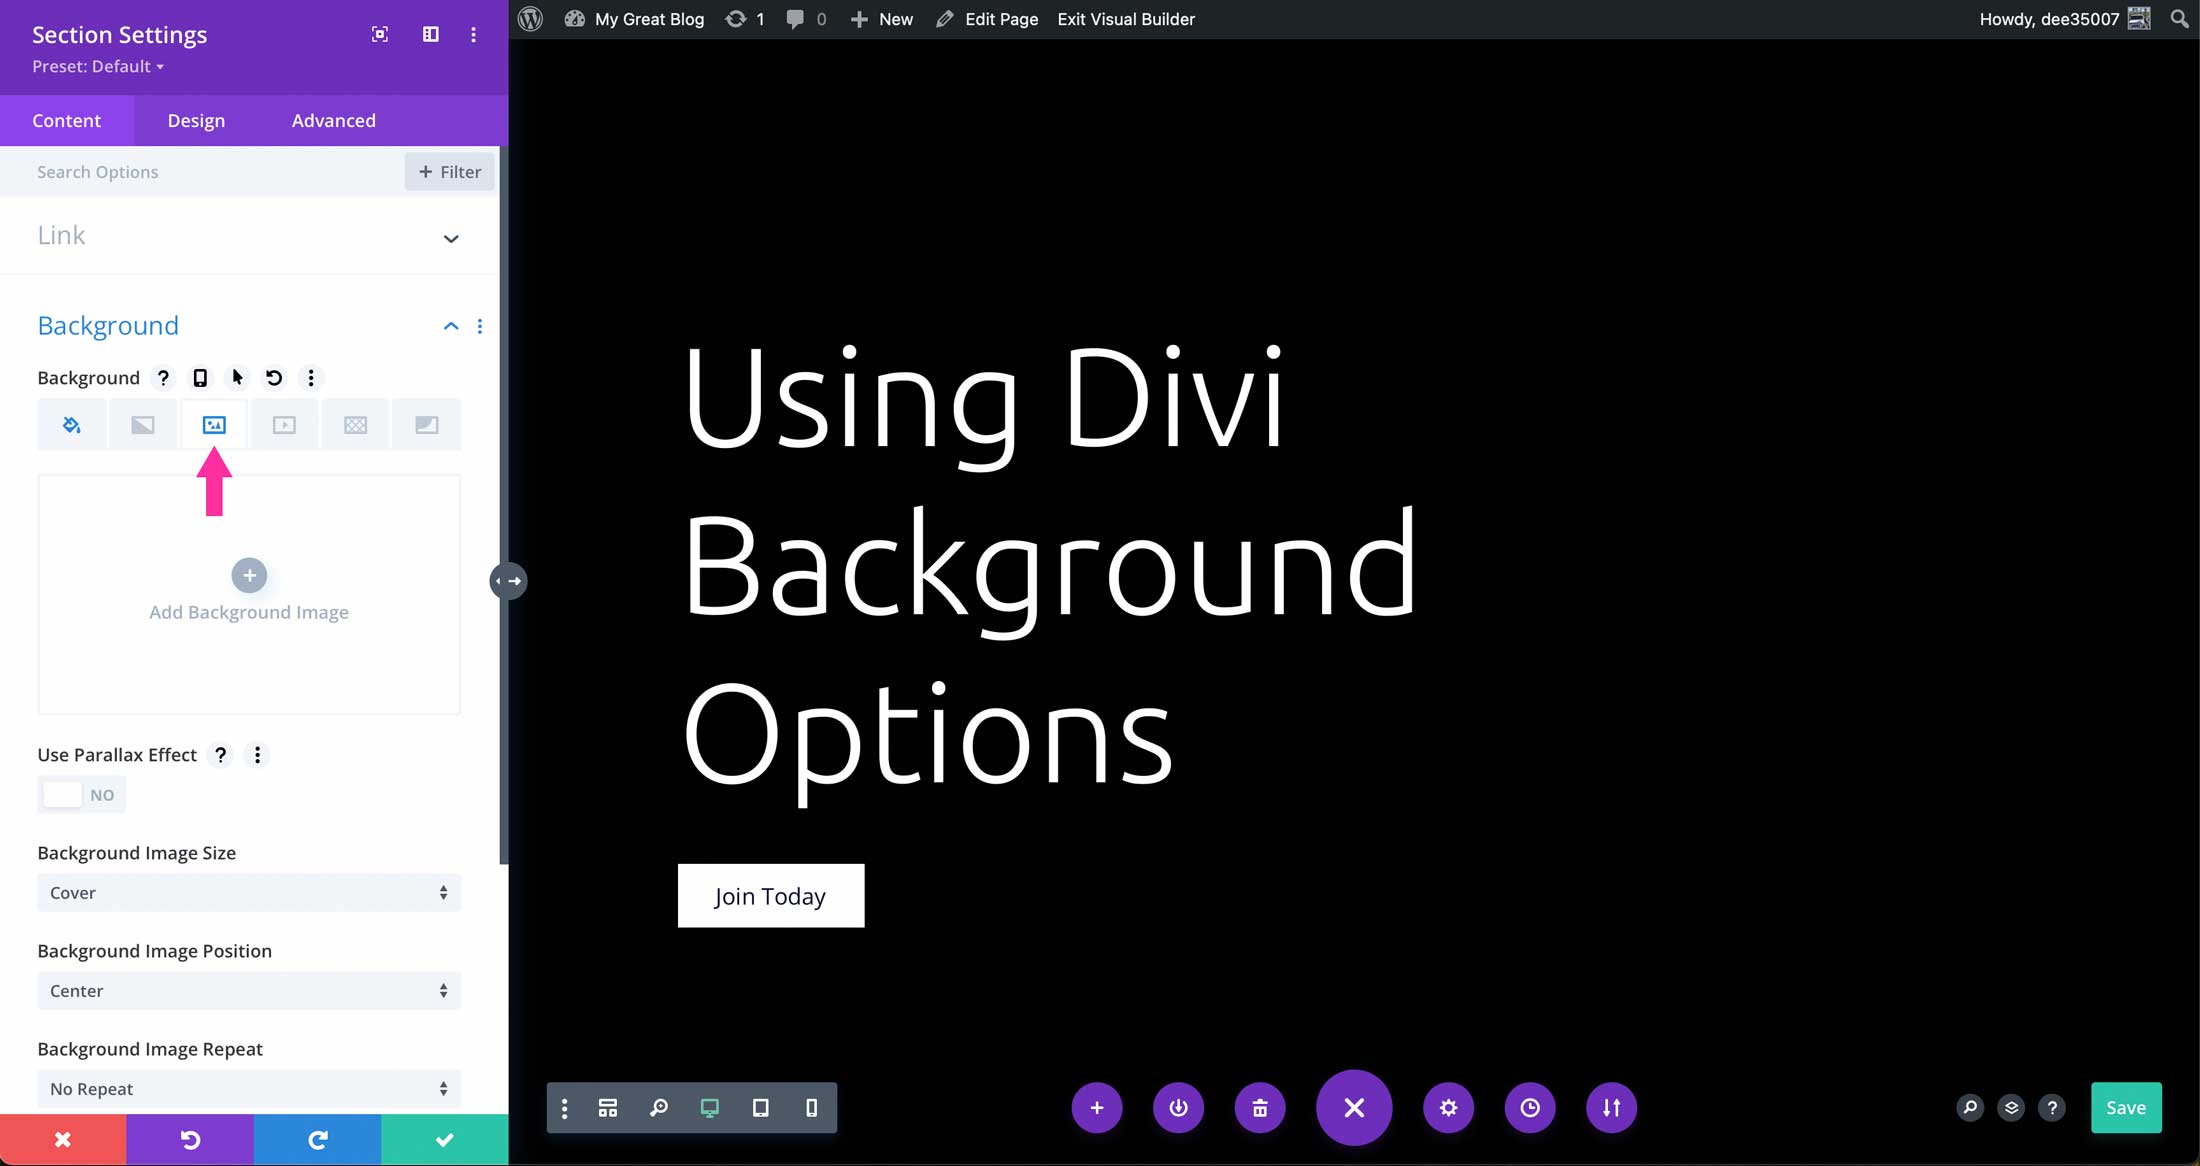
This tab gives you the ability to add background images to sections, rows, and modules. You can apply parallax effects, and change background size, position, and repeat. Additionally, you can choose from 16 different blend modes to create unique effects when combined with colors, gradients, patterns, and masks.
4. Background Video Tab

Using the background video tab, you can add video elements to your backgrounds. Divi supports mp4, webm, and linking YouTube videos with a URL. You can adjust the background video’s width and height, as well as how your video functions on the page. You can pause when not in view, or pause while another video is playing.
5. Background Pattern Tab
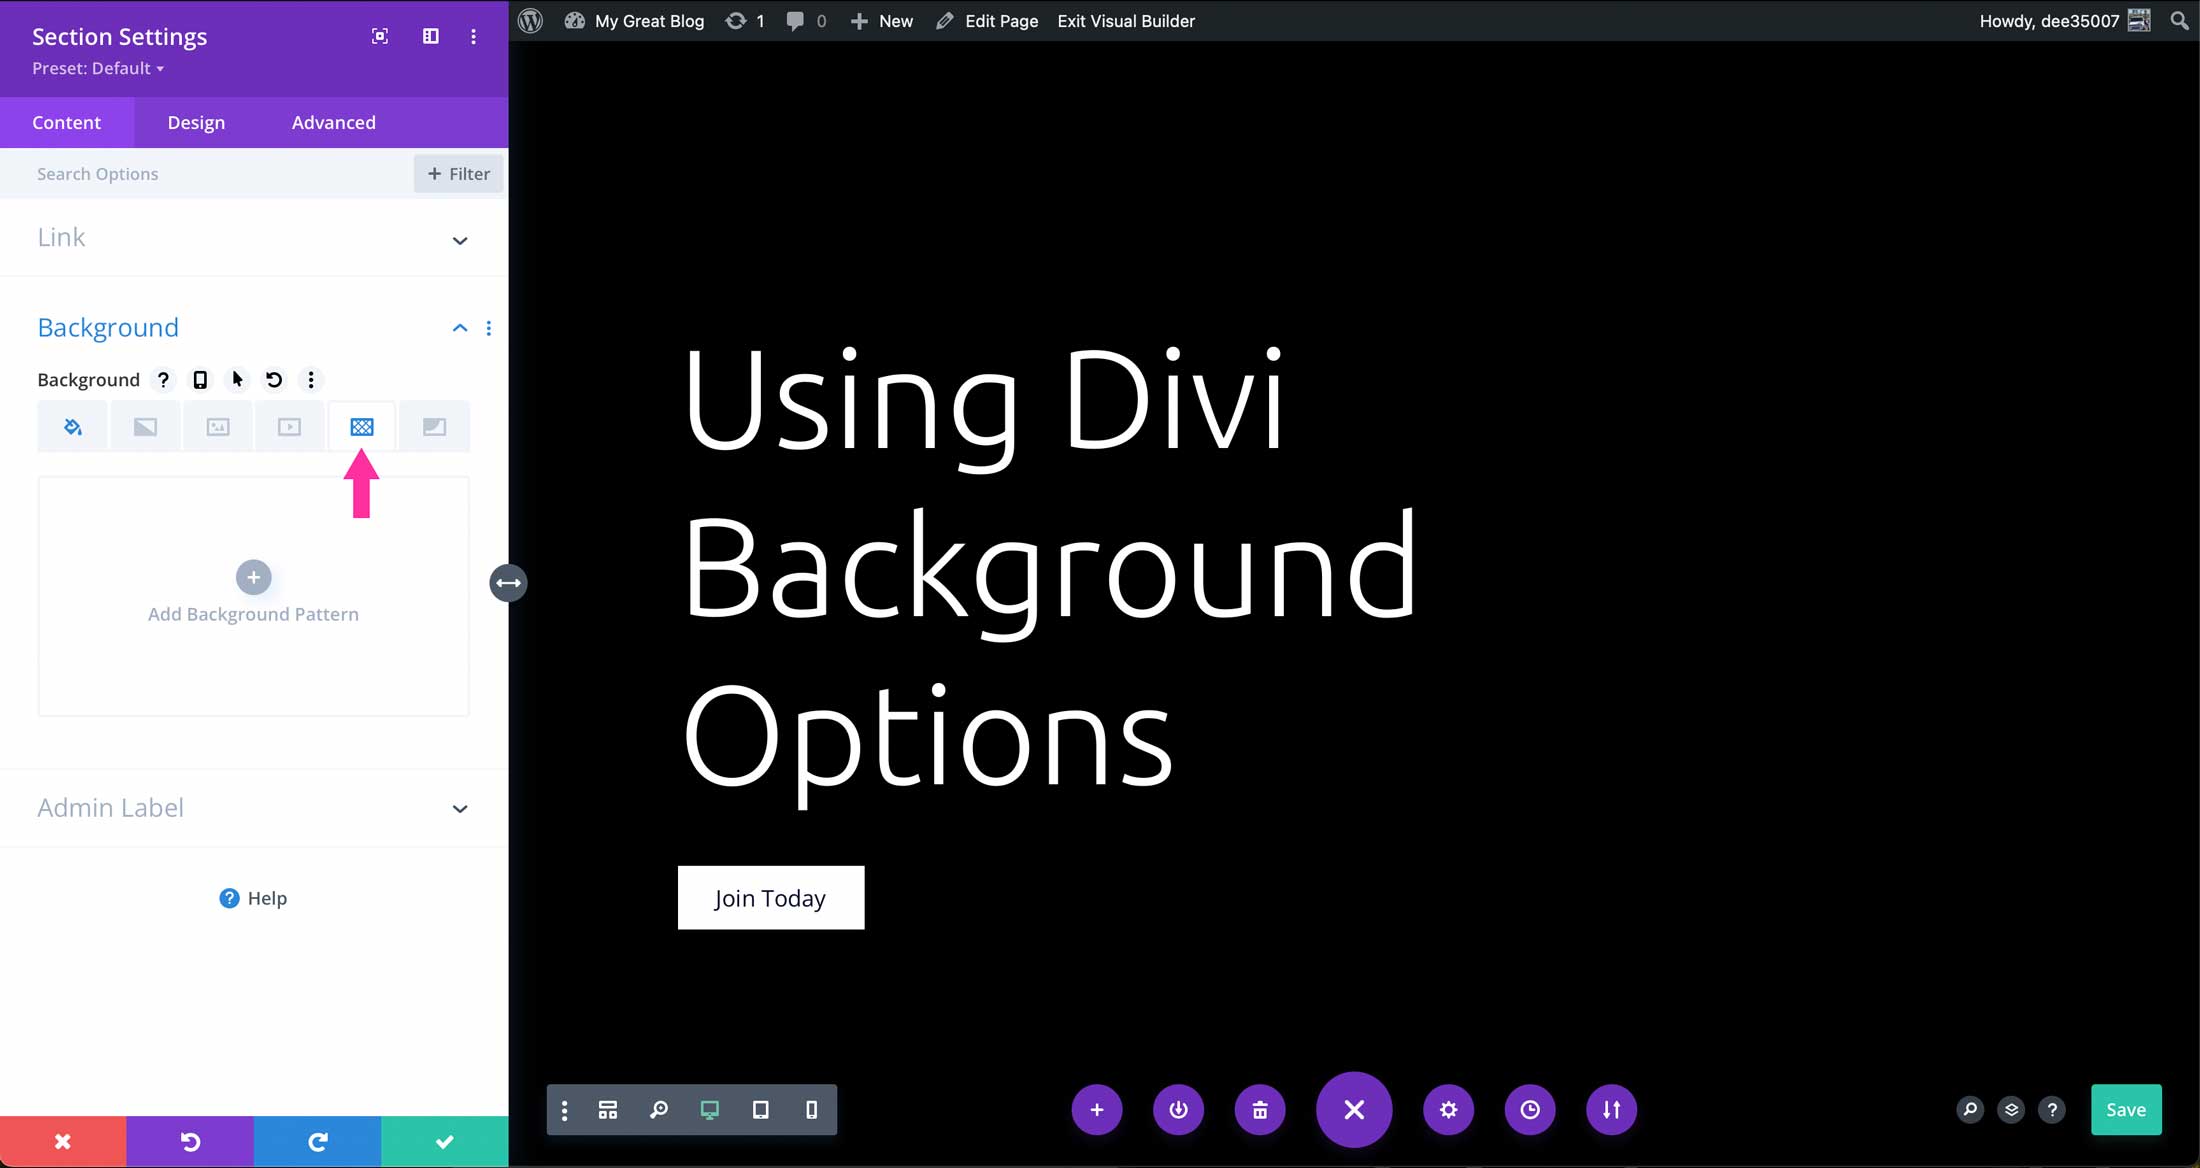
Background patterns add a unique look to your background with 24 different options to choose from. Settings include choosing the pattern color, horizontal, vertical, and flip options, as well as size and repeat origin. Additionally, you can choose the horizontal and vertical offset, as well as whether to repeat it. Finally, there are 16 blend modes to adjust the appearance of the mask in relation to other background tab settings.
6. Background Mask Tab
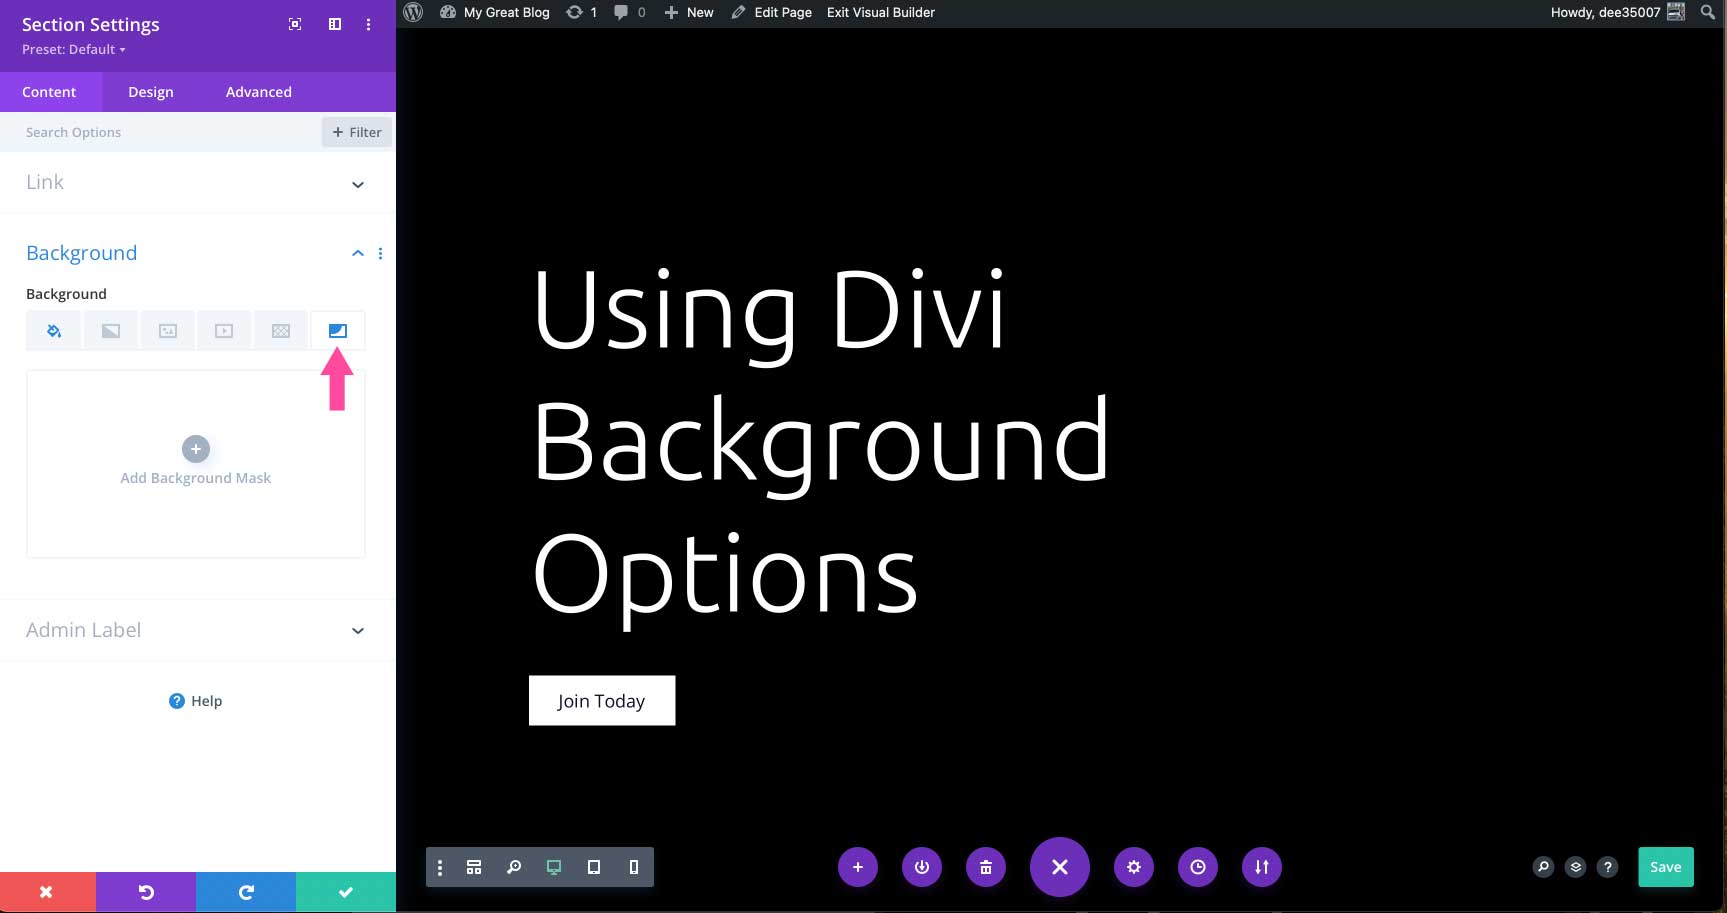
Background masks give you options to add shapes to your backgrounds. There are 23 different shapes availble with color, transform, and aspect ratio controls. You can also choose the size and blend mode options for masks.
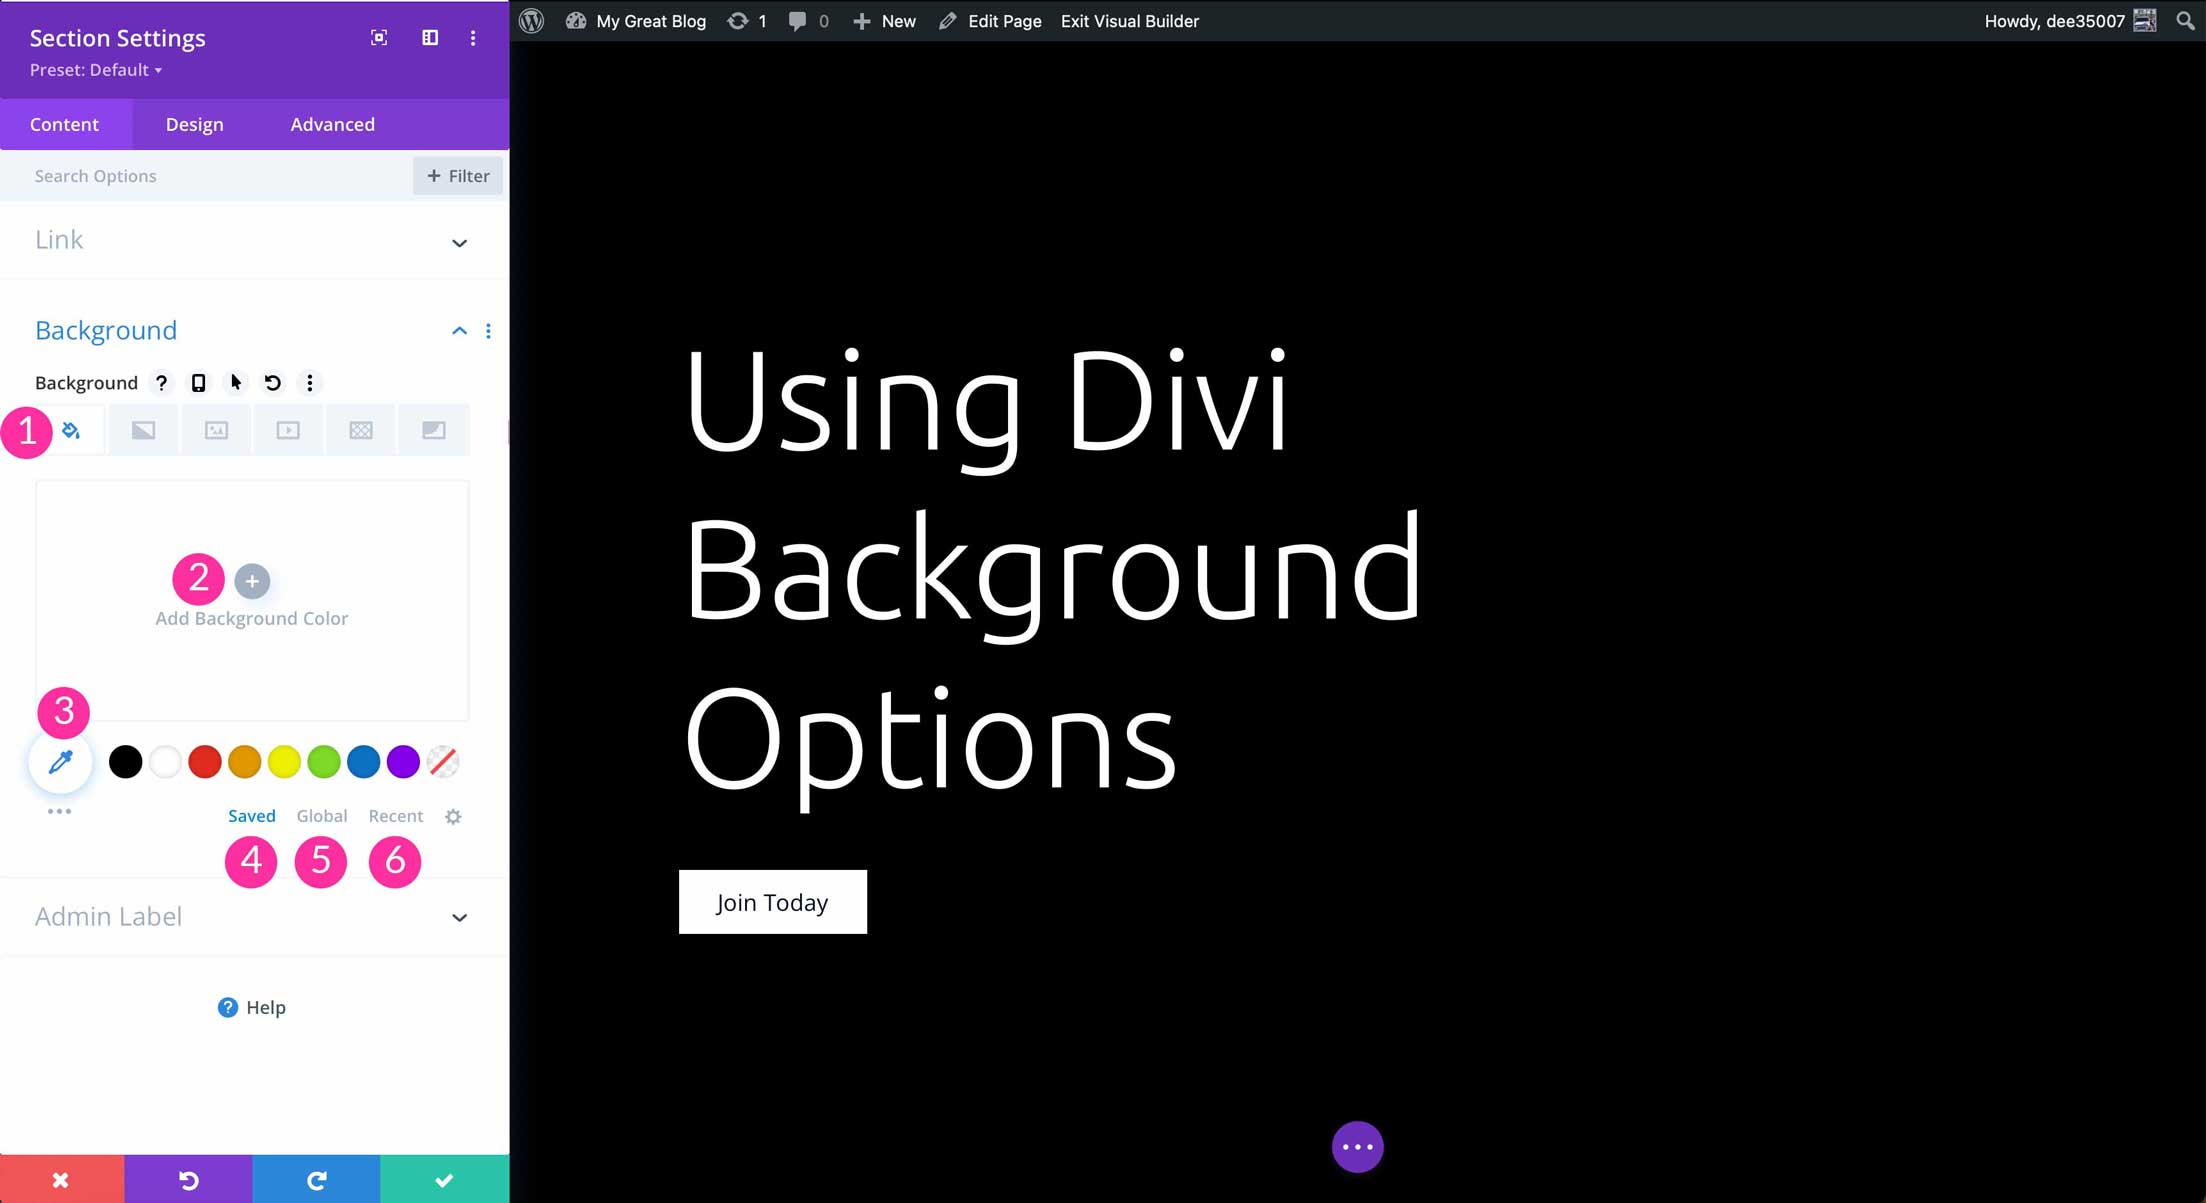
How To Add Color in Divi Background Options
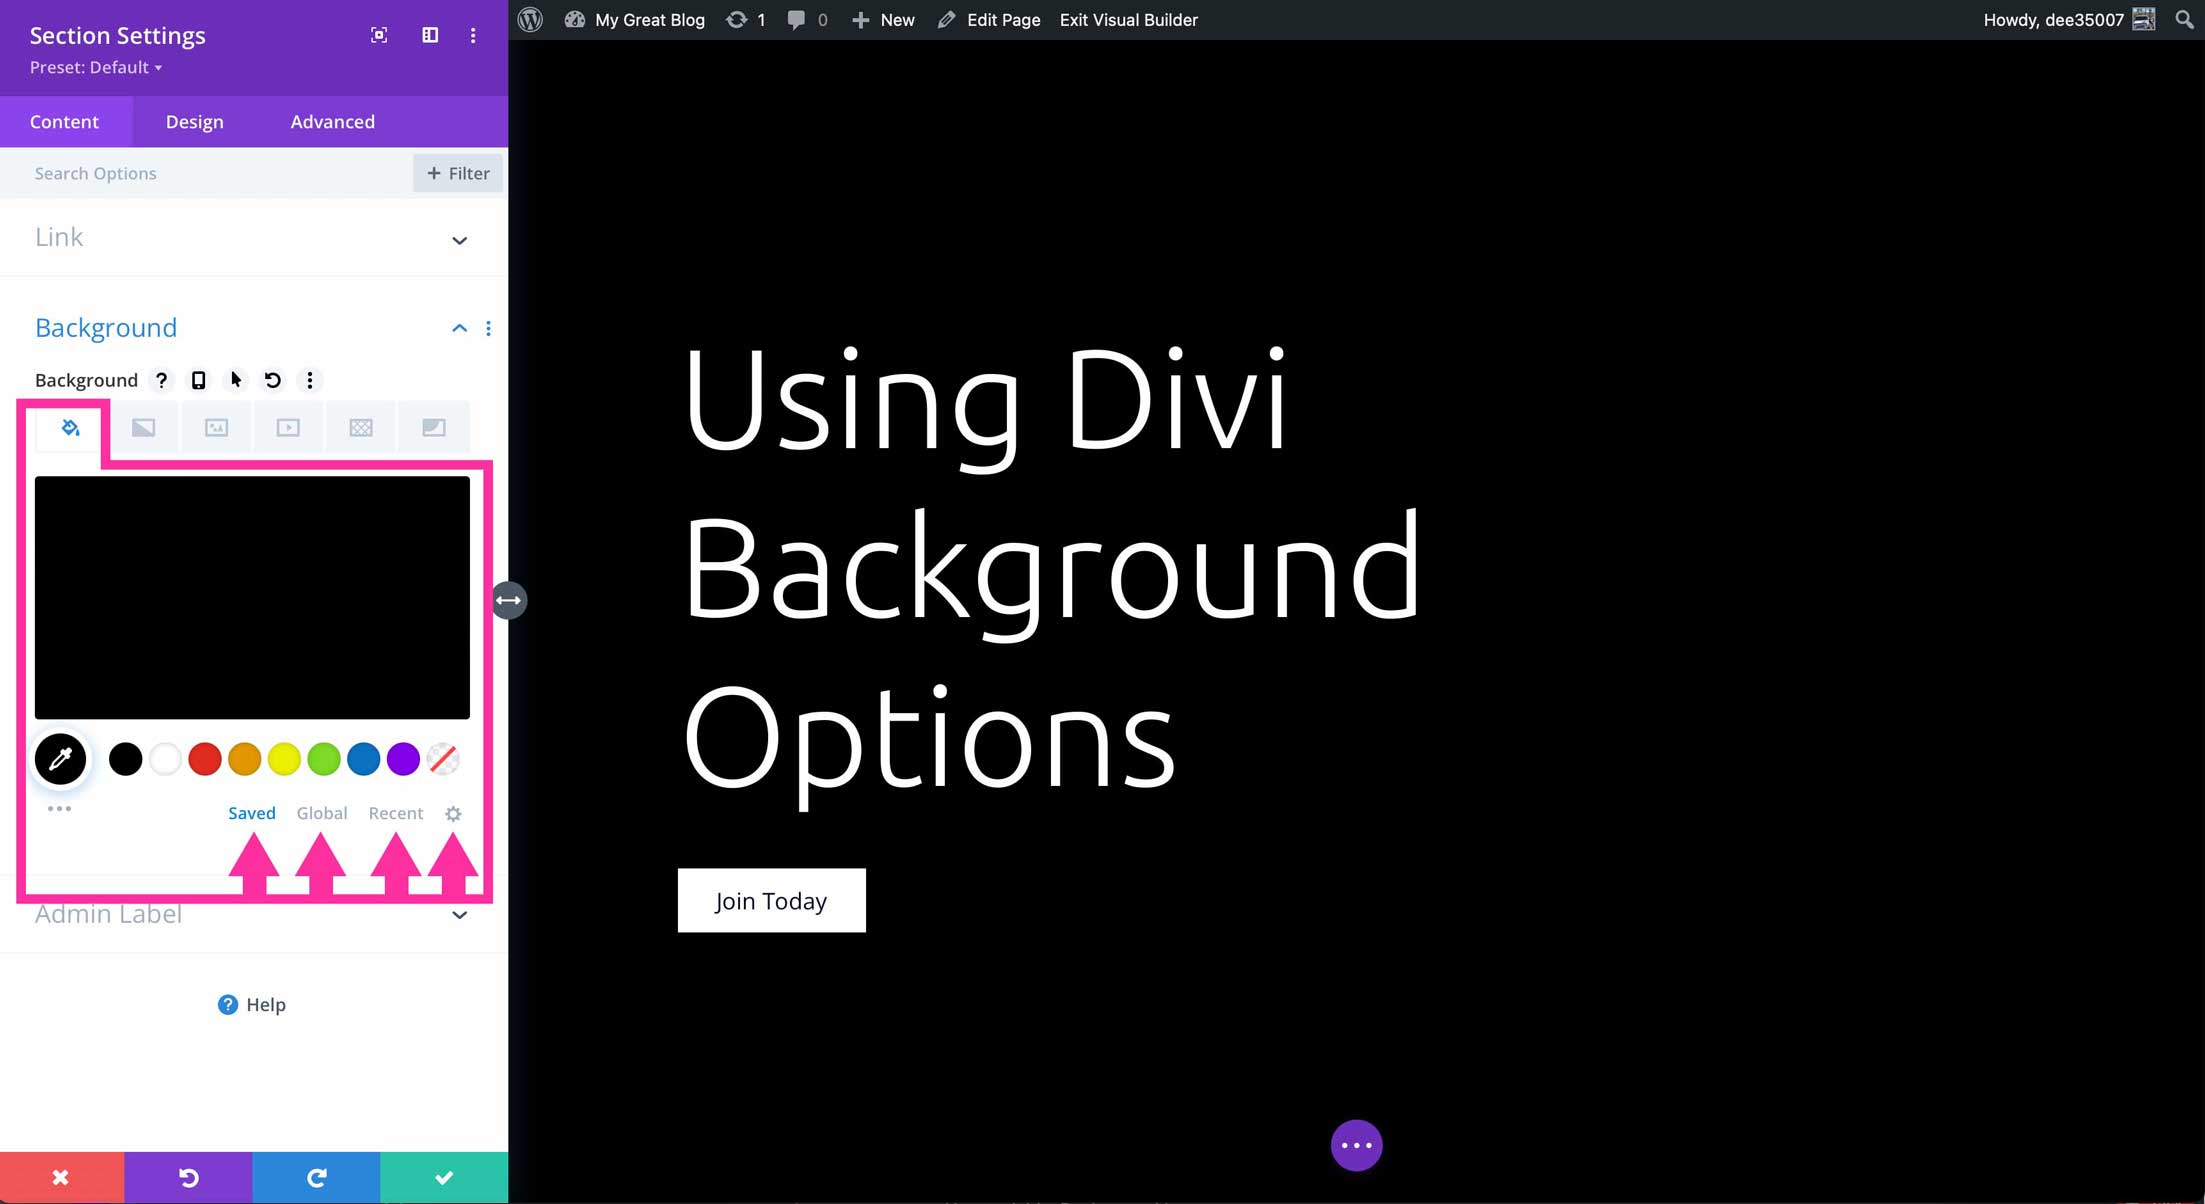
To add a background color, click the paint bucket icon in the first background settings tab. Next, click the + Add Background Color button to add the color of your choosing. Once the Divi color picker is active, you can browse colors by clicking into the color picker area, or inserting a hex color code directly. Colors can be also be added from saved, global, or recent colors.
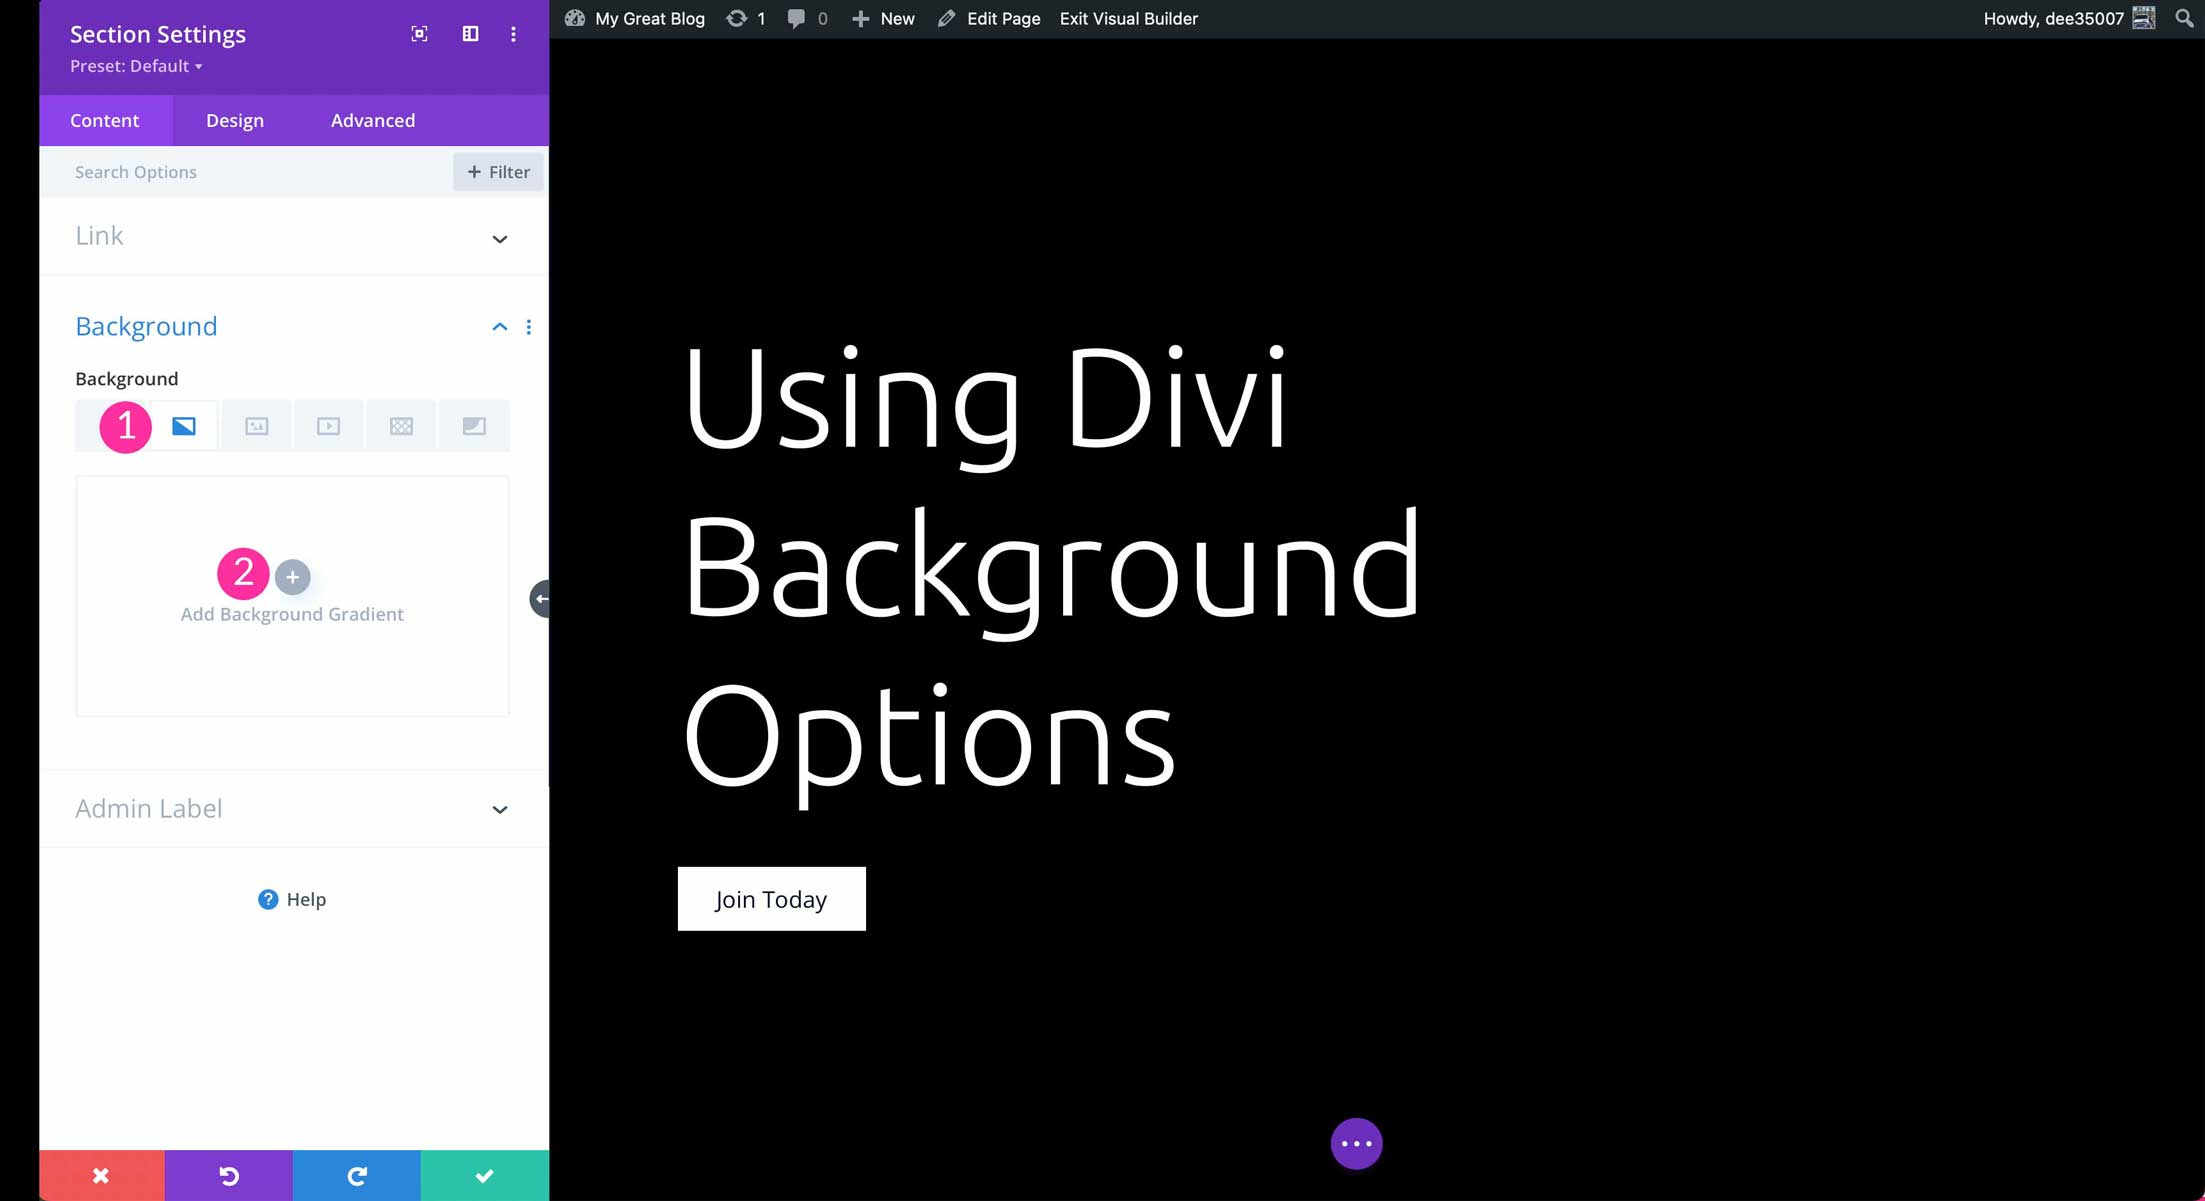
How To Add a Gradient in Divi Background Options
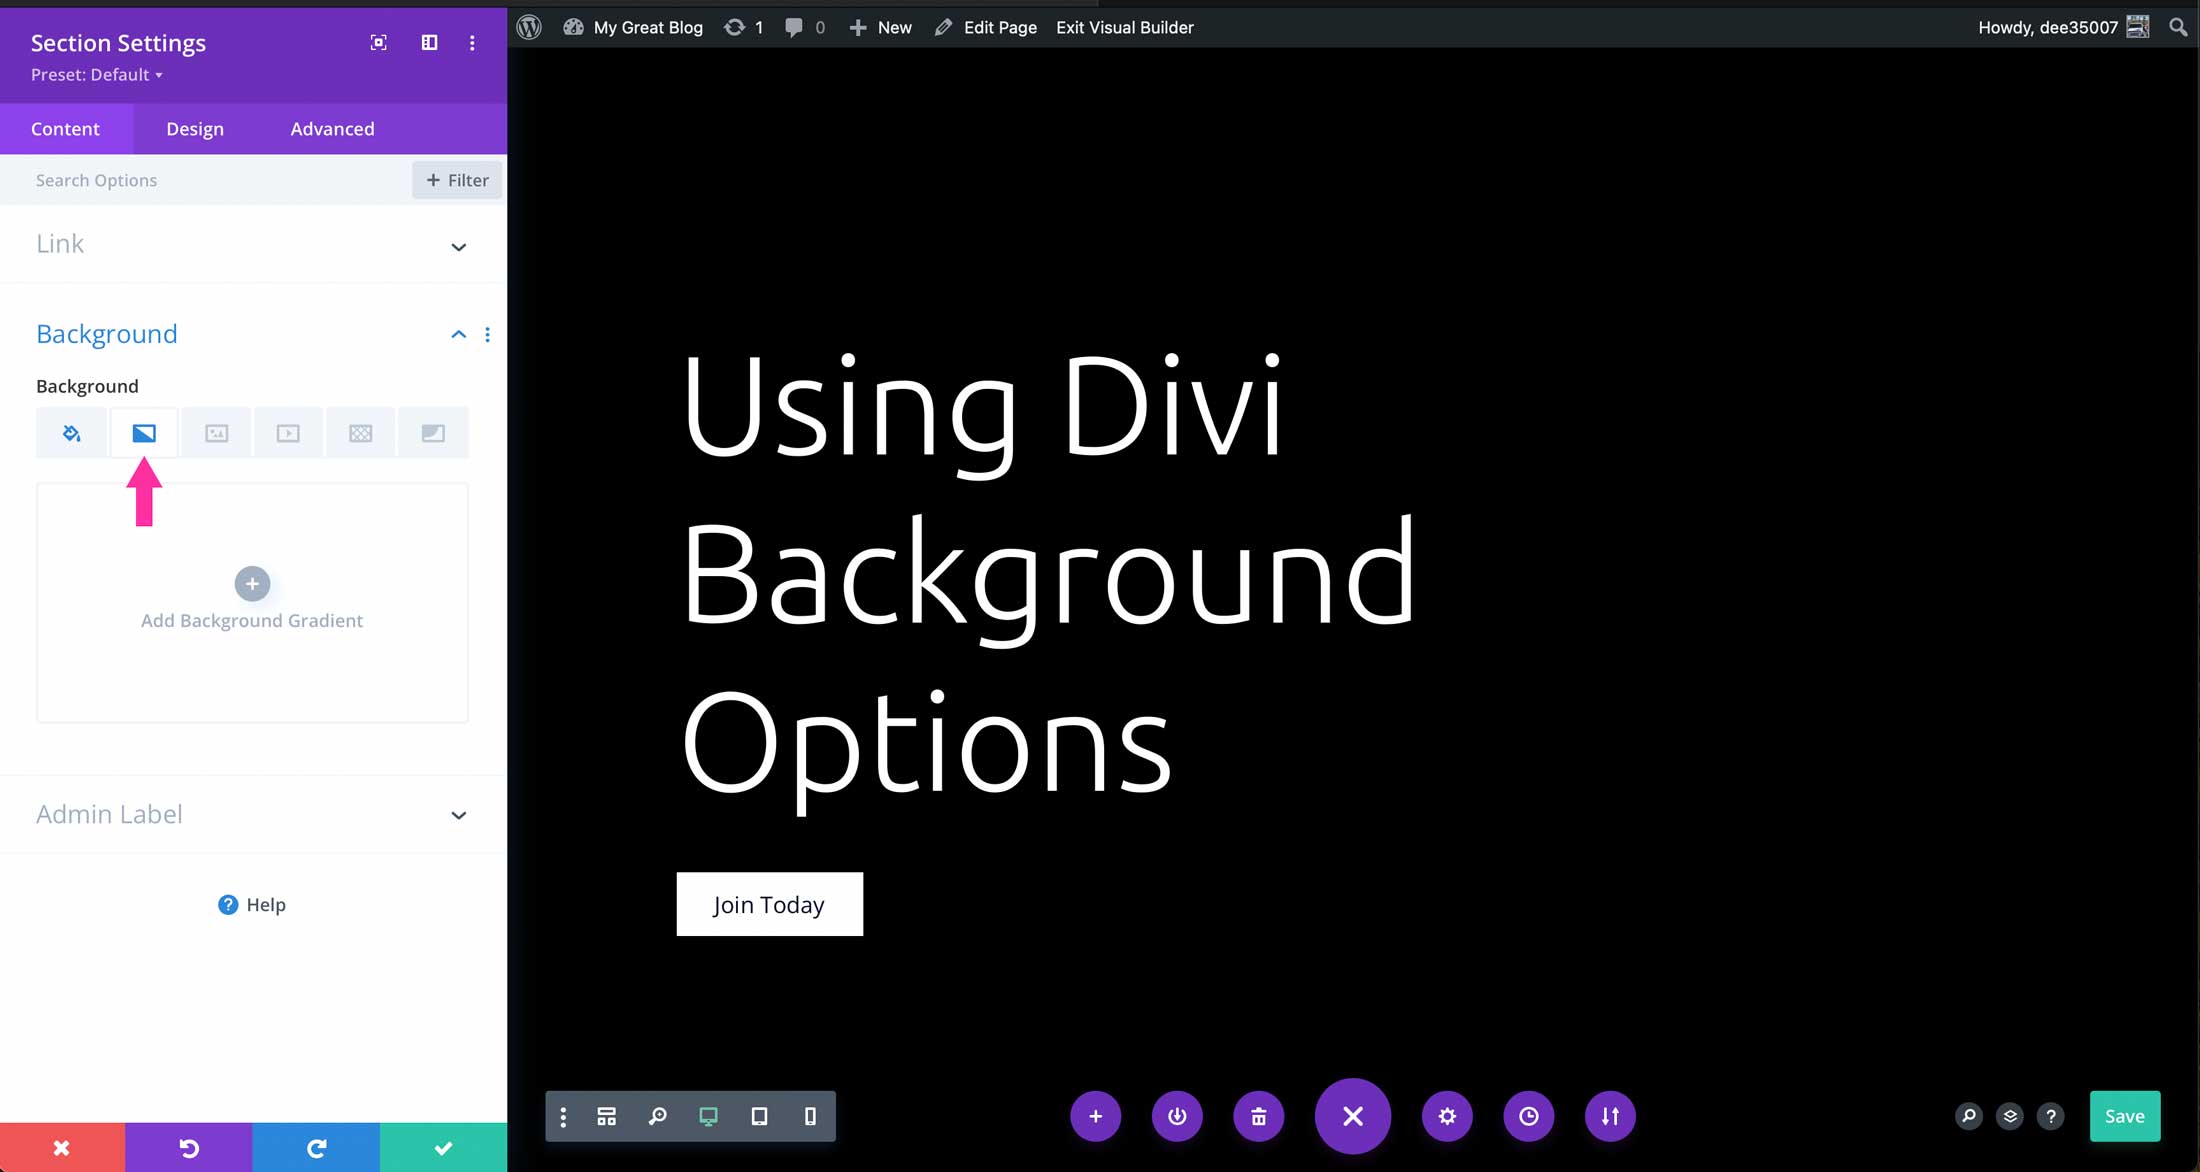
Gradients can be added into Divi background options by clicking the gradient tab, then + Add Background Gradient.
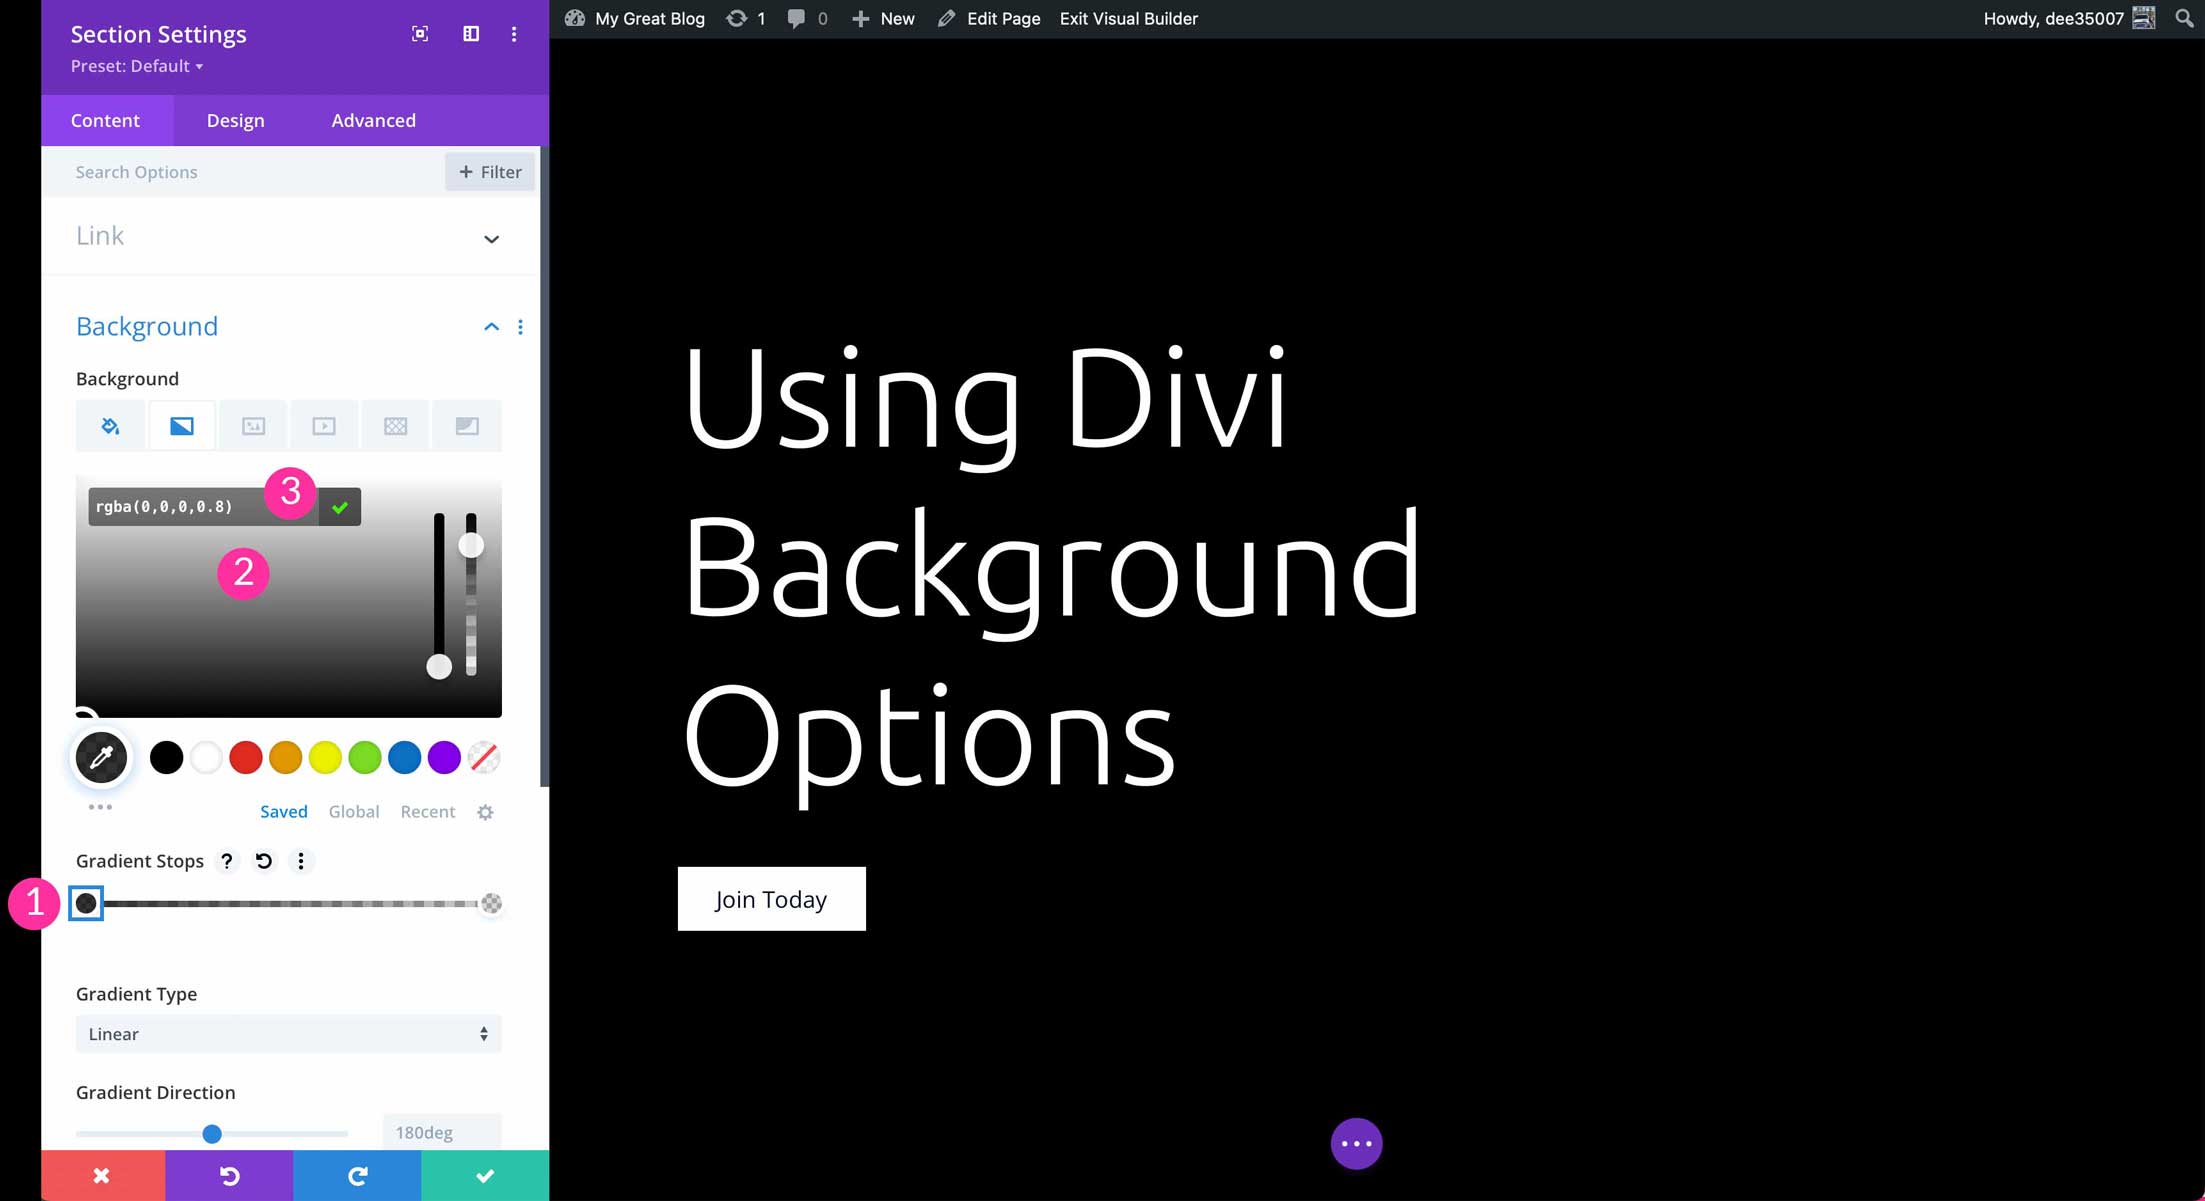
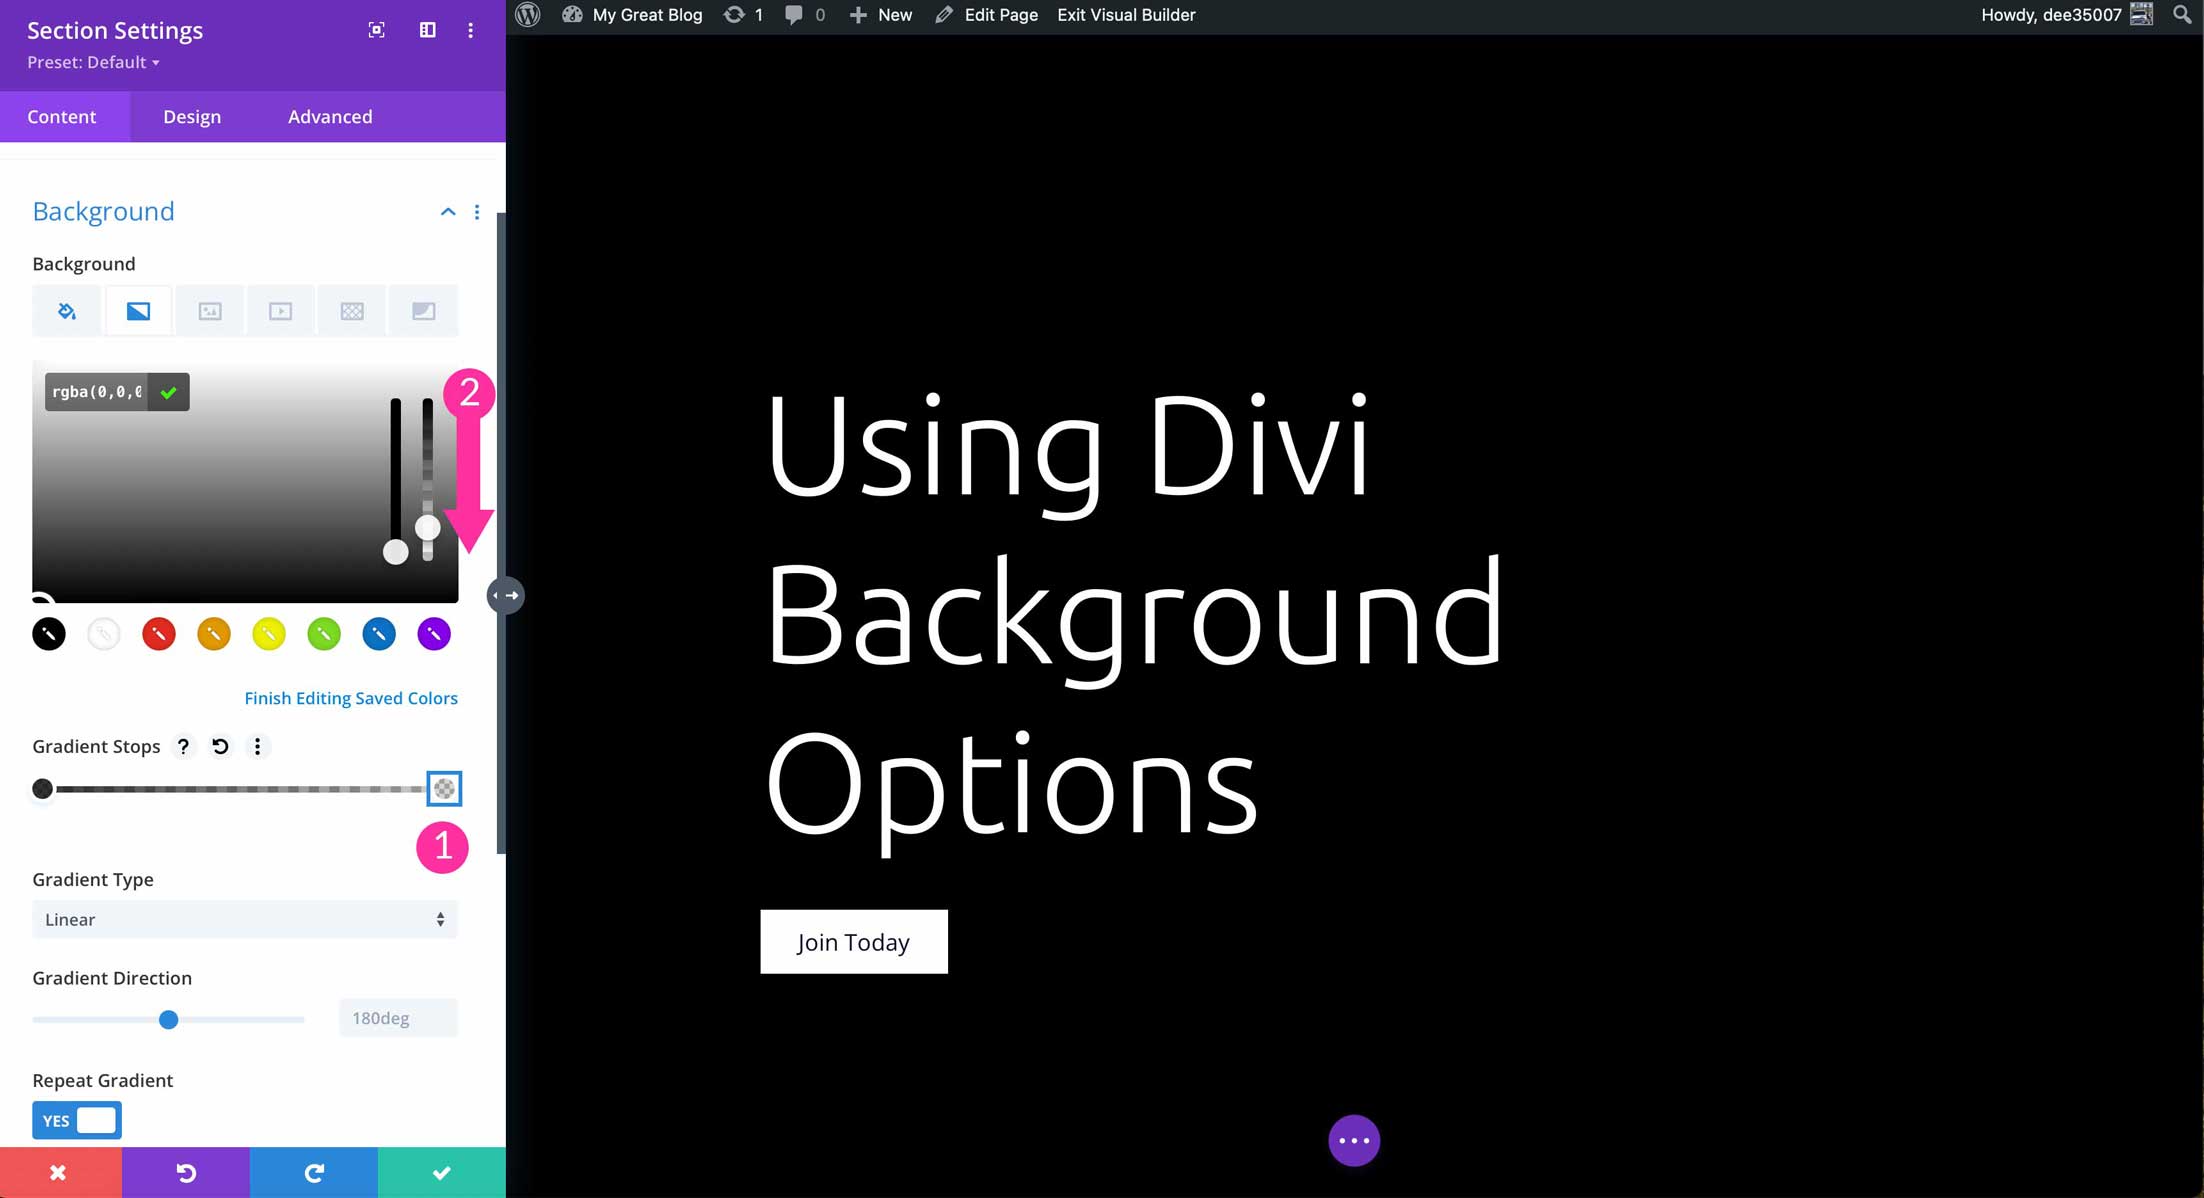
To edit your gradient, click into the Divi gradient bar on each color stop. Input a specific hex code or use Divi’s magic color system to generate, or load a recent, global, or saved color.
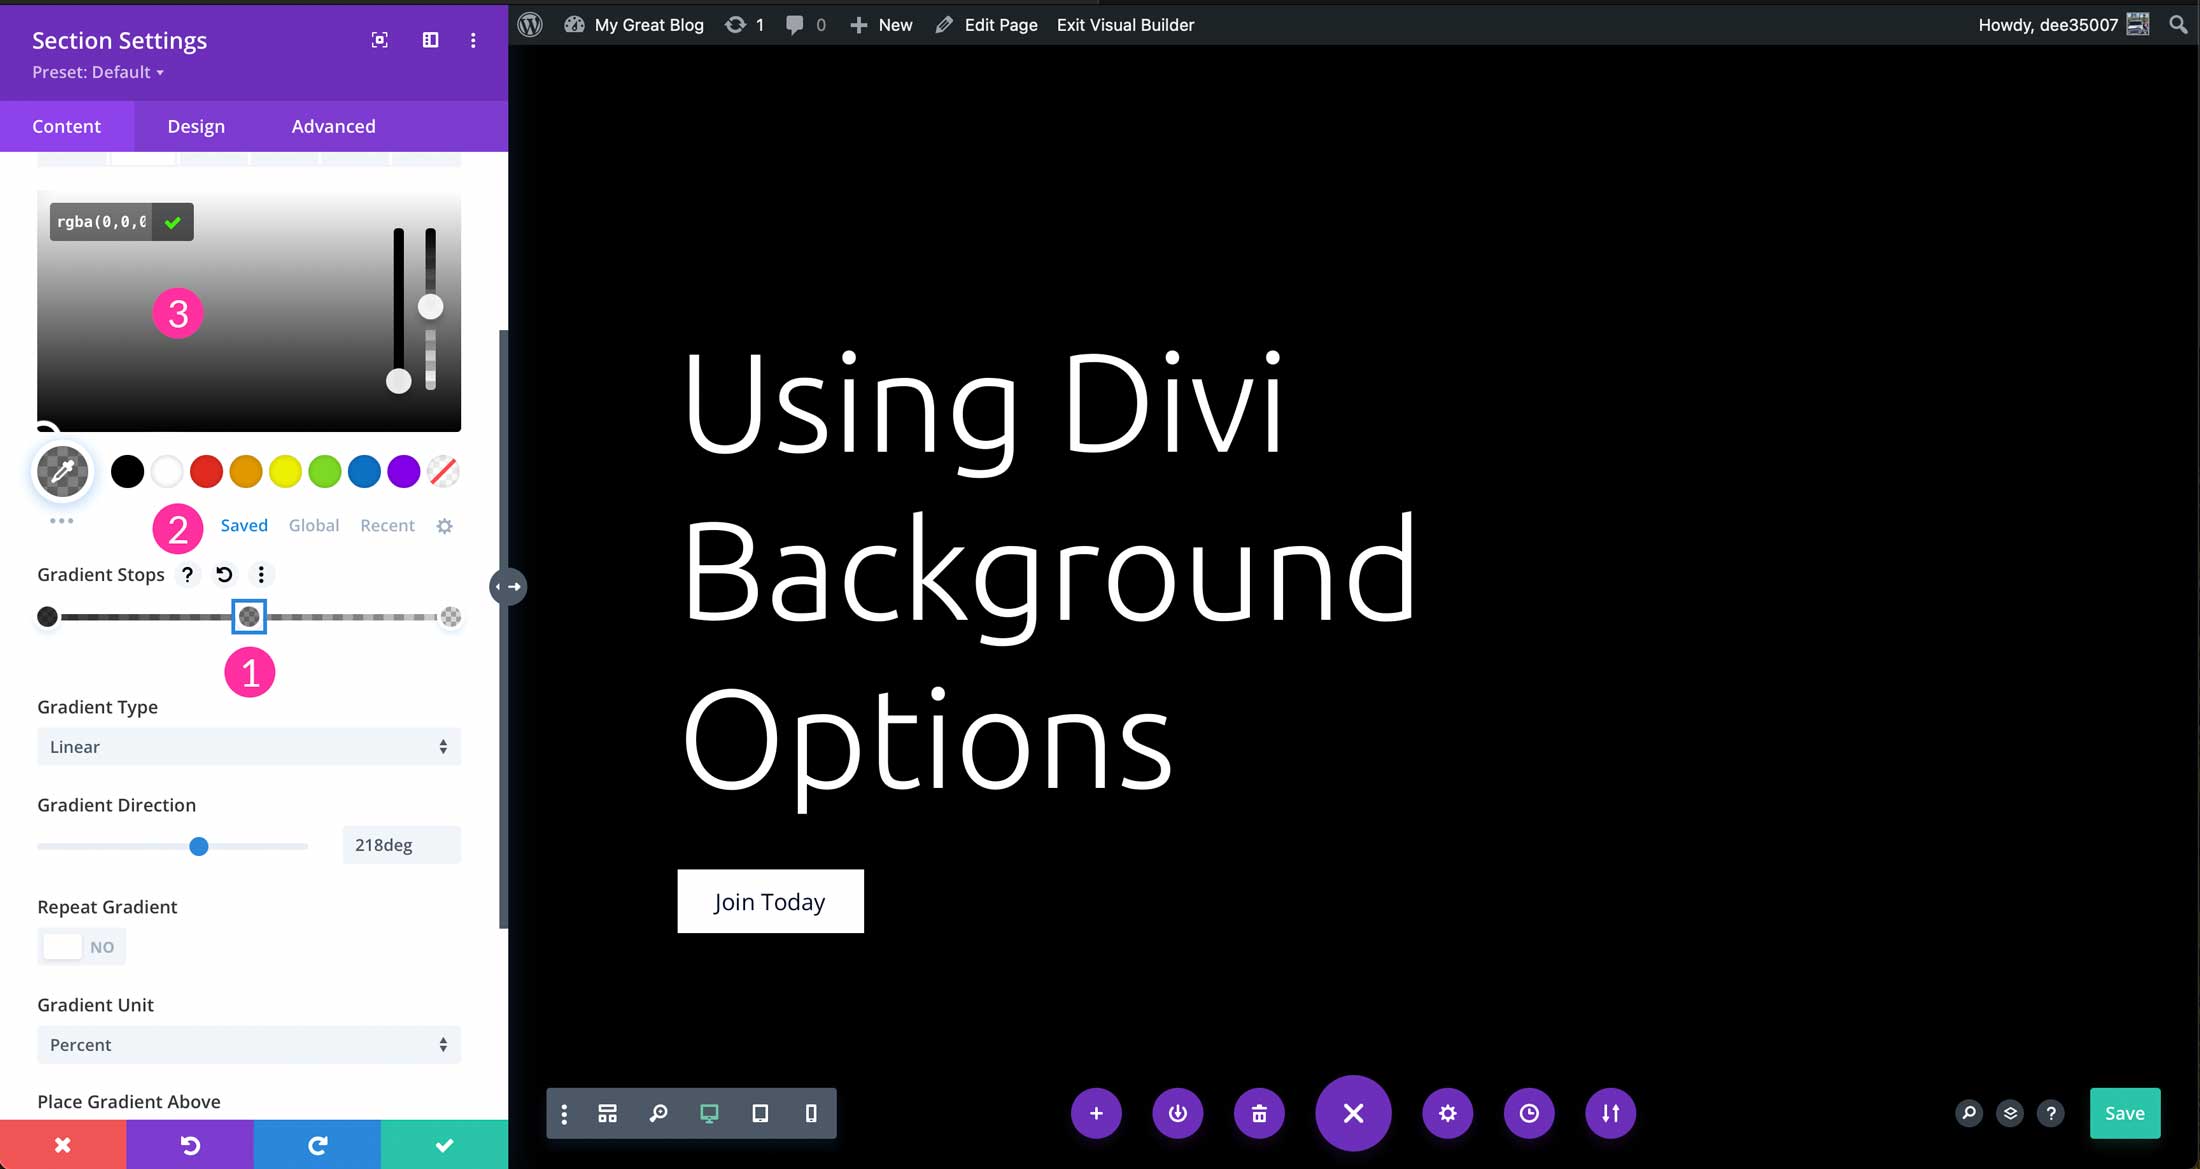
How to Add a Color Stop
You can add as many color stops as you would like. Click into the gradient slider to add a stop.
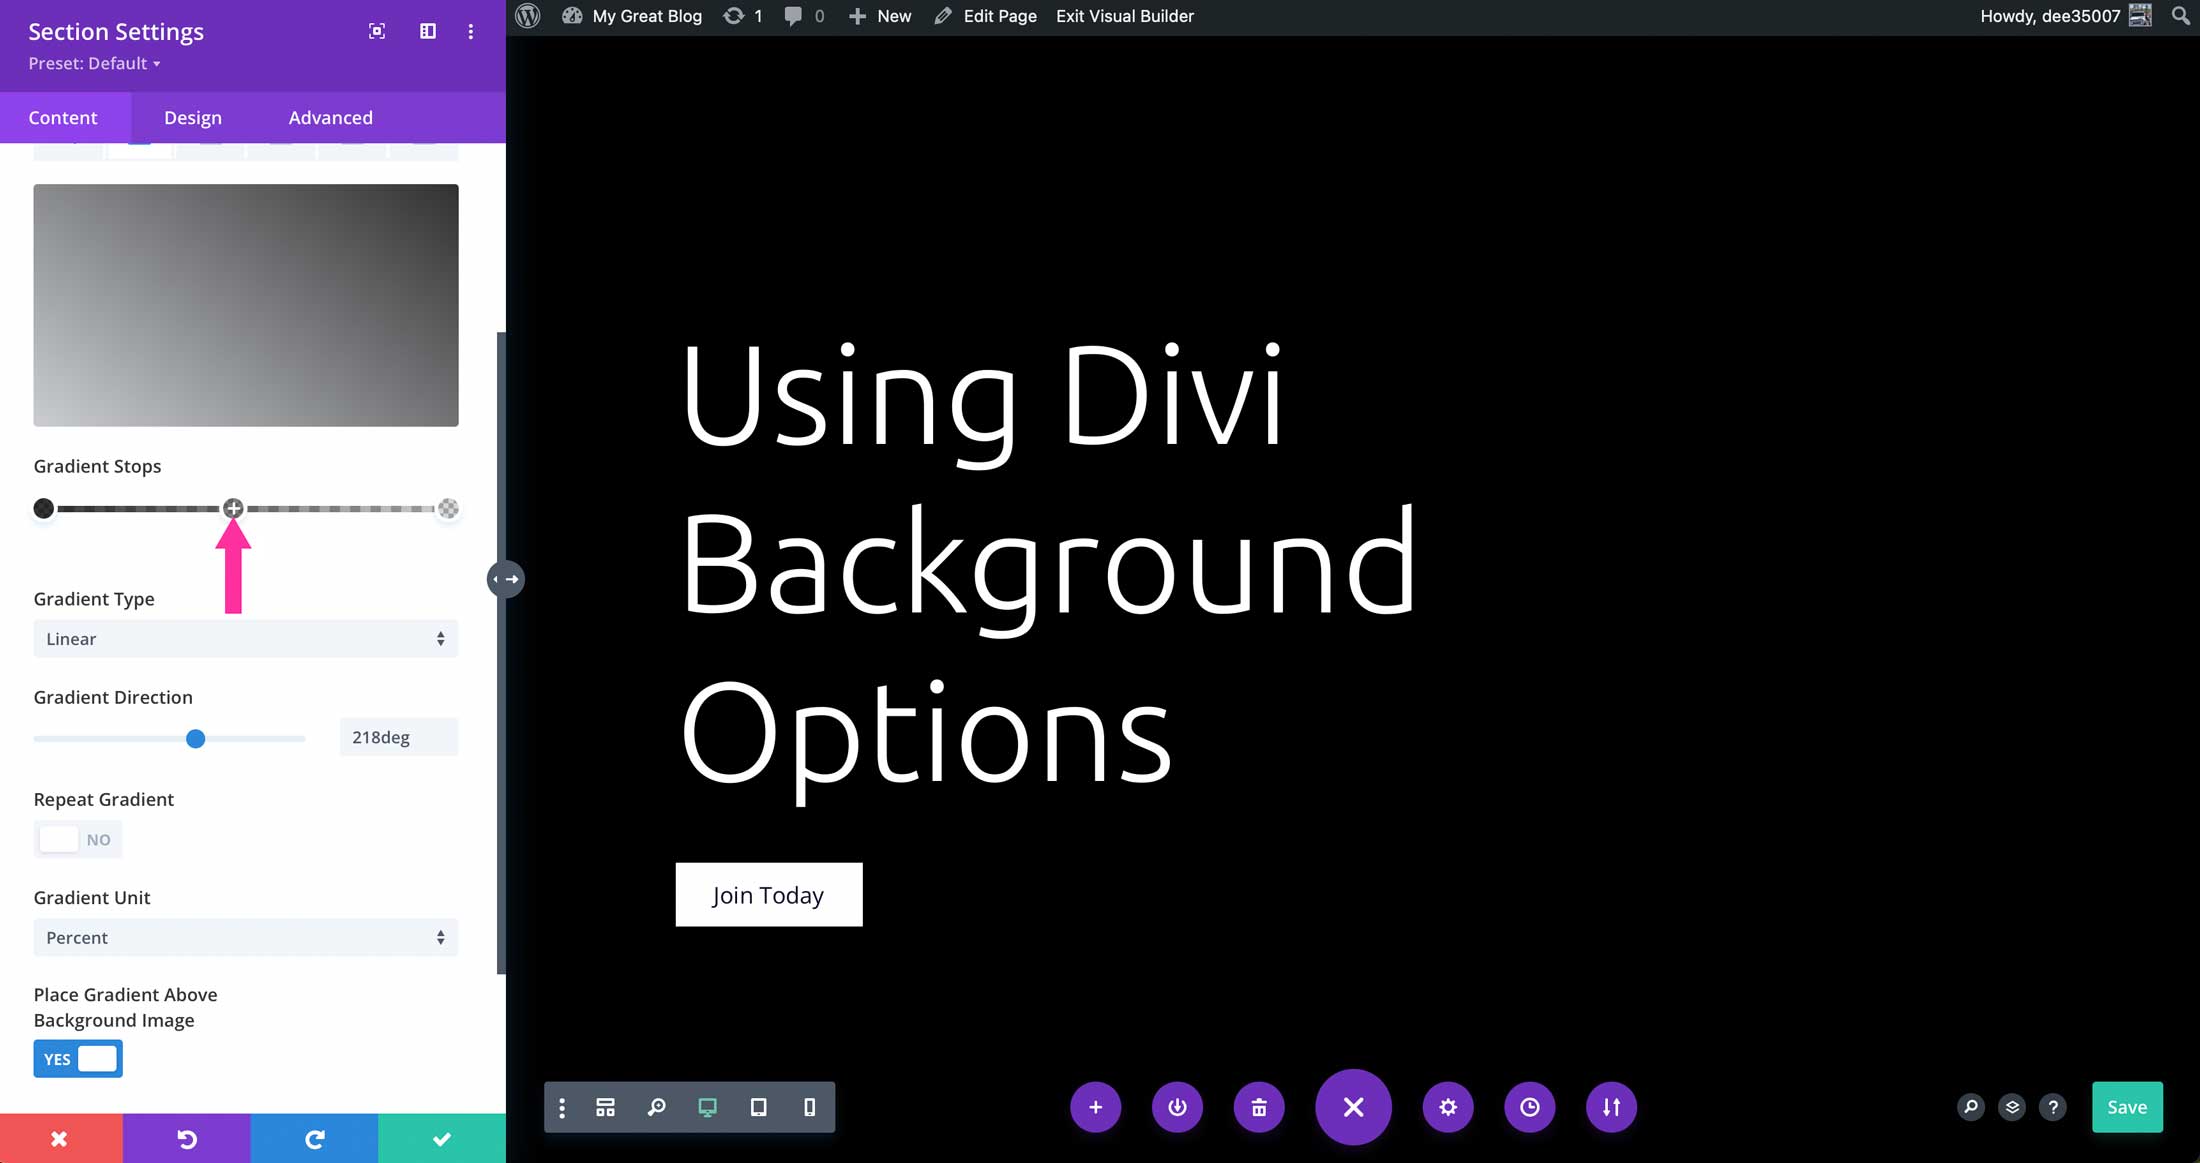
Next, double click the stop to change the color. You can choose a color from saved, global, or recent colors. Additionally, you can click within the color picker to choose a custom one.
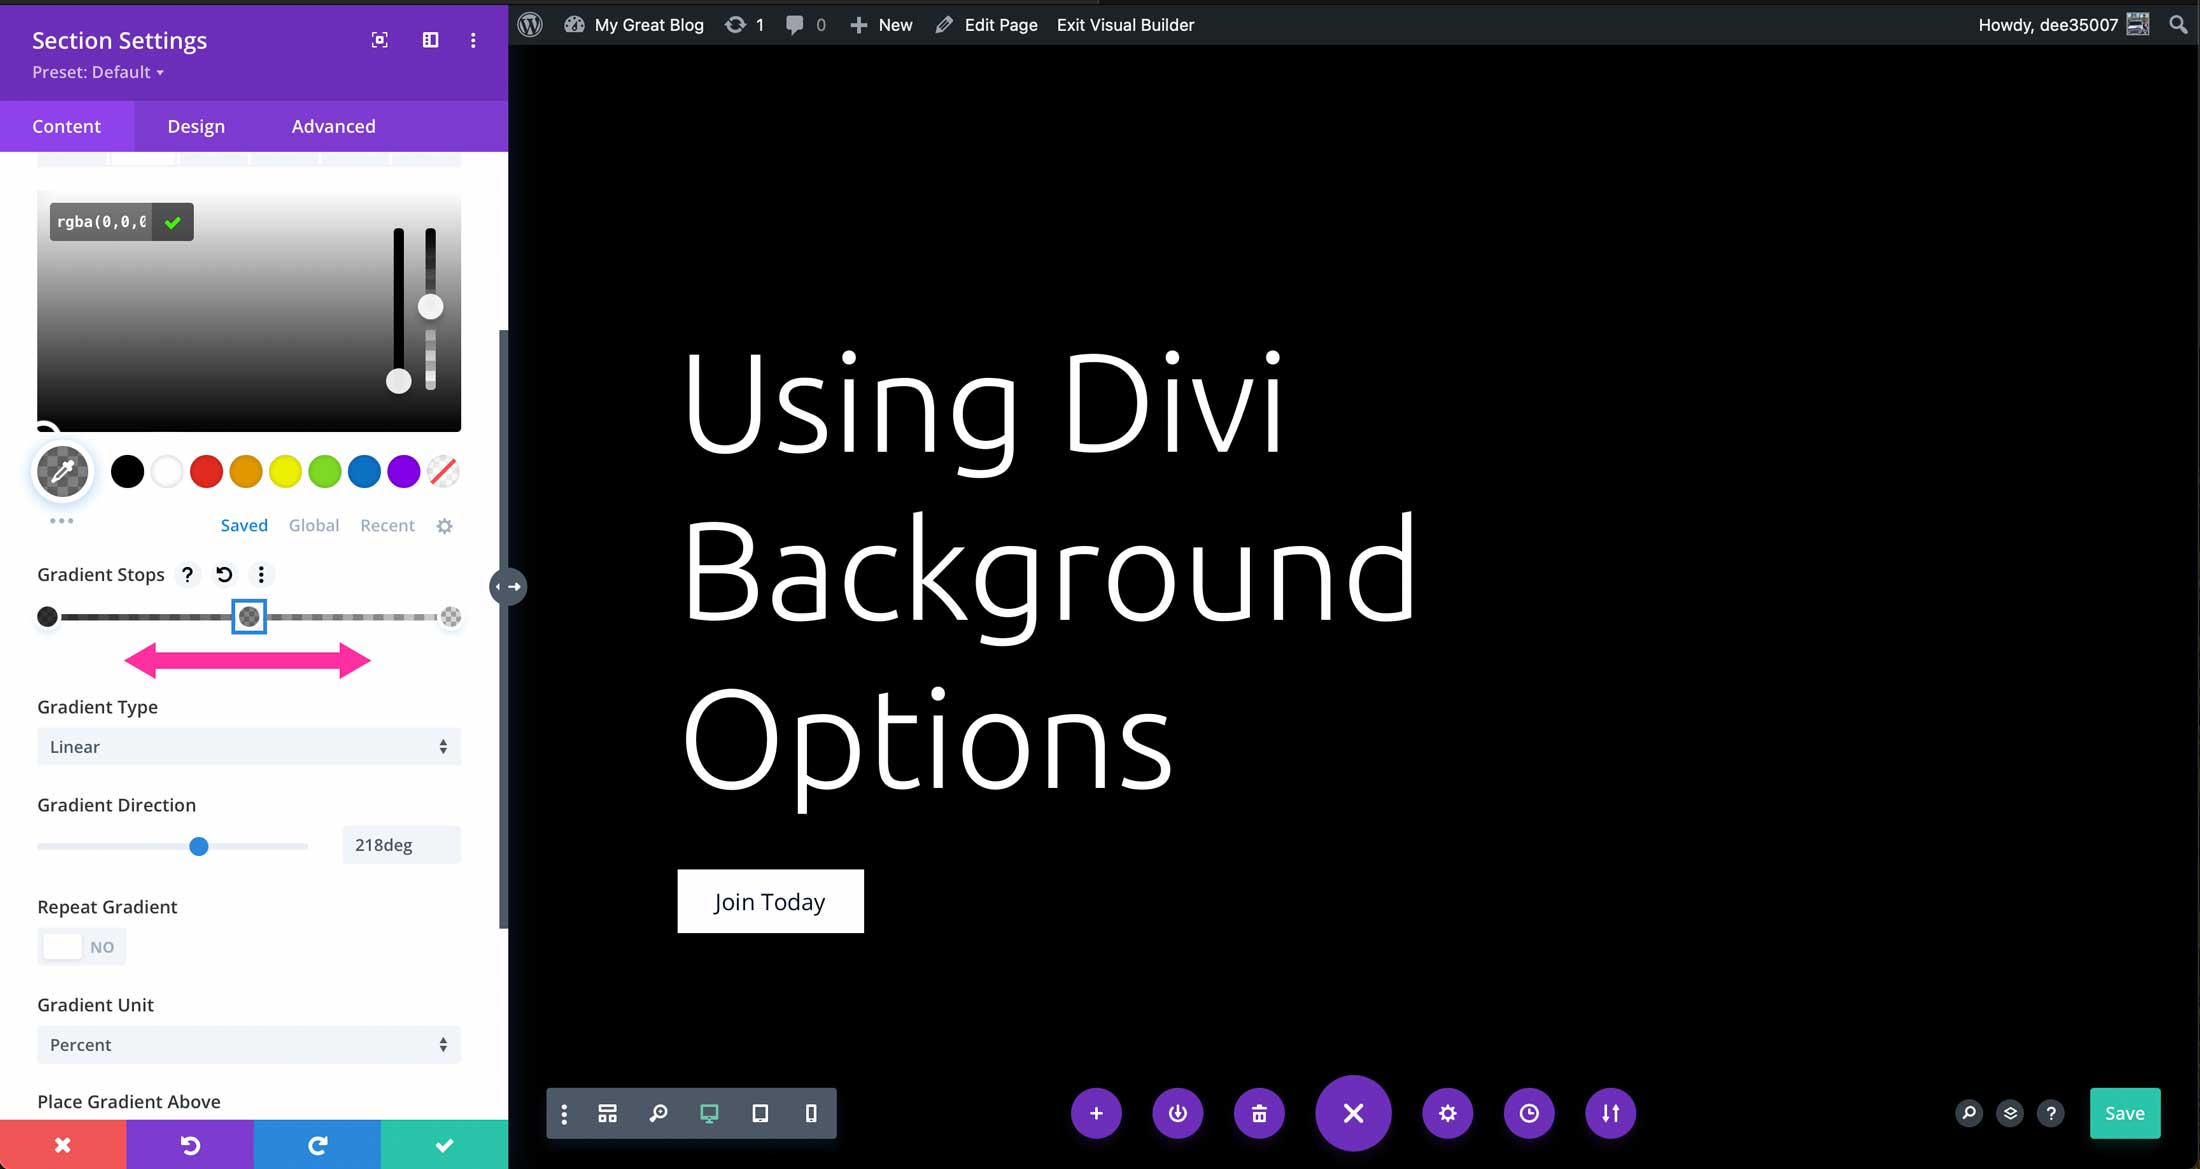
To change the position of the stop, click and drag it to the location you wish. The closer the stops are together, the tighter the color blend.
Divi Gradient types
There are four gradient types in Divi background options. Linear, circular, elliptical, and conical. Each type gives a different efect for gradients. Experiment with gradient types to achieve the desired look. Let’s explore the different gradient types so you have a better understanding of how they work.
Linear Gradient
Divi adds the linear gradient by default when you click the +Add Background Gradient button. You can choose the direction for your gradient, with 180 degrees being the default position. Modifying the gradient type’s direction alters the look. To adjust a gradient, click into the gradient slider or manually adjust it in the field.
Circular Gradient
Circular gradients add a rounded effect to a gradient. Similiar to linear, you can apply different positions to change the appearance.
Elliptical Gradient
The elliptical gradient is similar to the cicular one, but it creates an oblong appearance.
Conical Gradient
The last gradient type available in the Divi background options is conical. It’s a bit different than the others. It is the only gradient type that doesn’t allow for gradient units to be changed.
Divi Gradient Direction
As demonstrated in the previous section, gradient direction assists in changing the look of a gradient. In our example, a linear gradient with overlapping color stops at a 147 degree angle gives the appearance of a sharp angled line between colors.
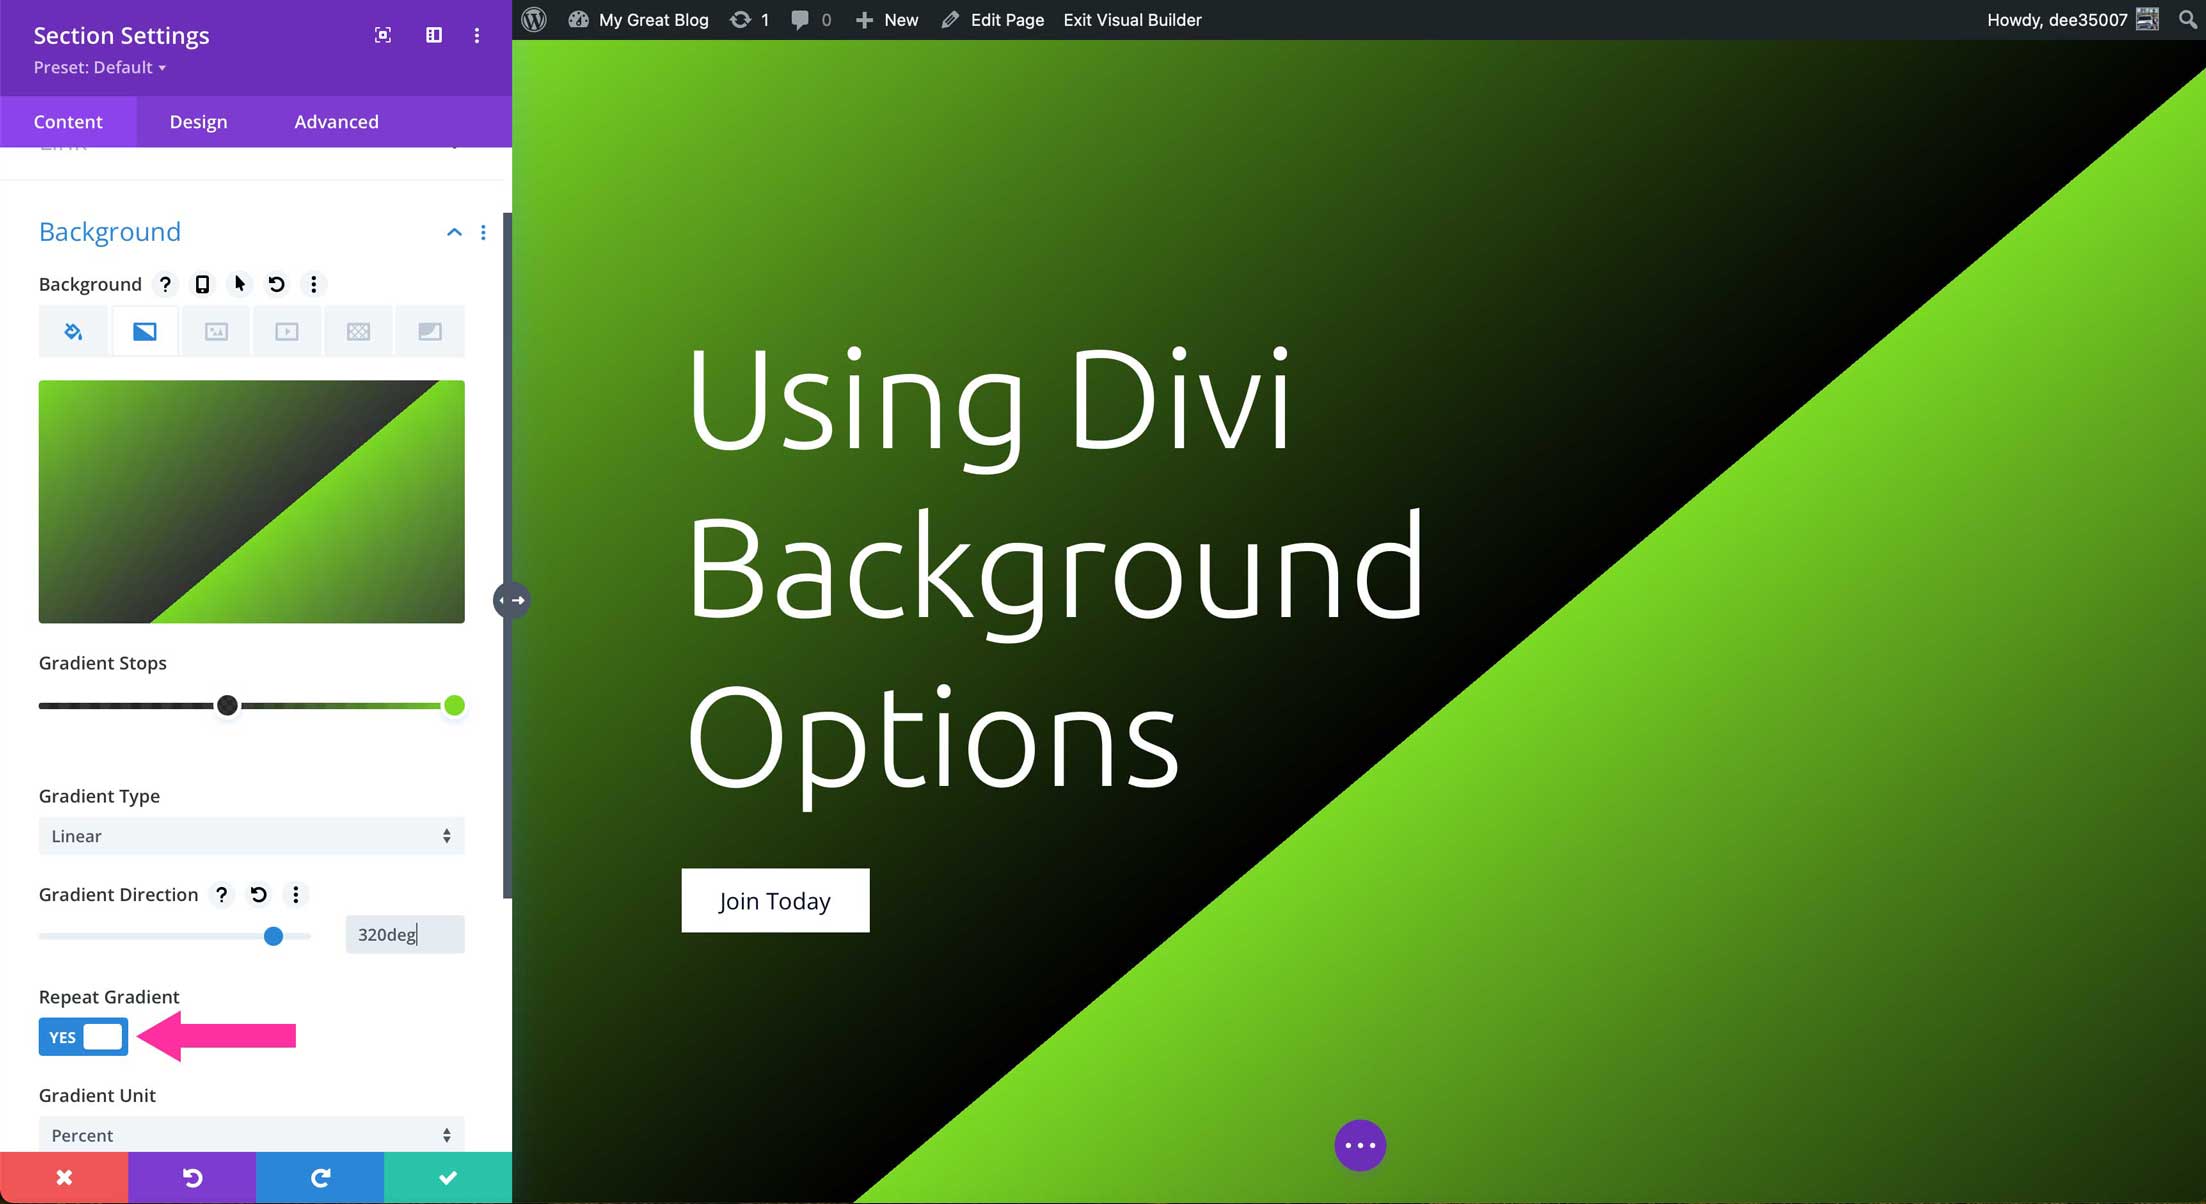
Divi Repeat Gradient
The gradient repeat option is used to create patterns in your gradient based on the color stops used. Stops are the measurements that determine where the colors appear and end within the gradient. The first color stop signifies where the gradient begins. Similarly, the last color stop tells Divi where to end the gradient. When using additional color stops, they are used to blend the gradient together.
Gradient repeat can be used to create visually captivating images within your background designs. They can be combined with two or more color stops, and depending on the gradient unit used, will enable completely unique looks. The example below uses three color stops set to 0, 2, and 4 percent. Remember, the placement of the color stop determines how tight the gradient is. When the repeat gradient toggle is enabled to yes, Divi will repeat the gradient as many times as necessary to fill the available space.
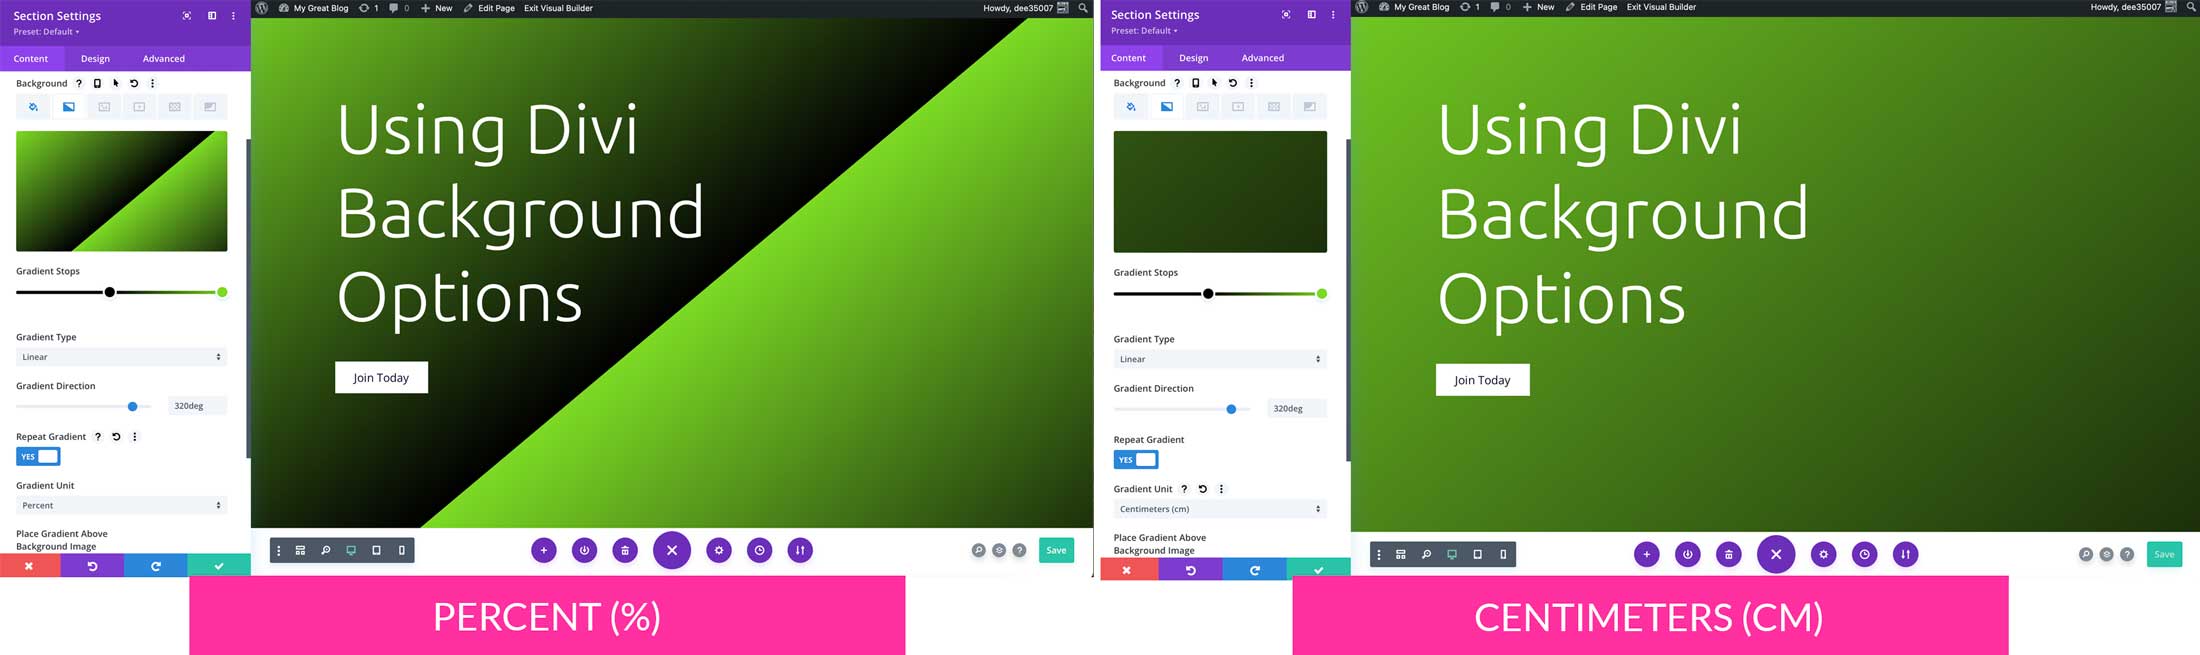
Divi Gradient Units
Gradient units determine the measurement applied to the color stops in gradients. Designs are altered based on the unit of measurement. For example, when using percent as your gradient unit, a gradient with color stops set to 44 and 100 will have 56% distance between the two colors. On the other hand, using centimeters would apply a 56cm distance between color stops, which is a sizable difference.
Applying a Gradient Over a Background Image
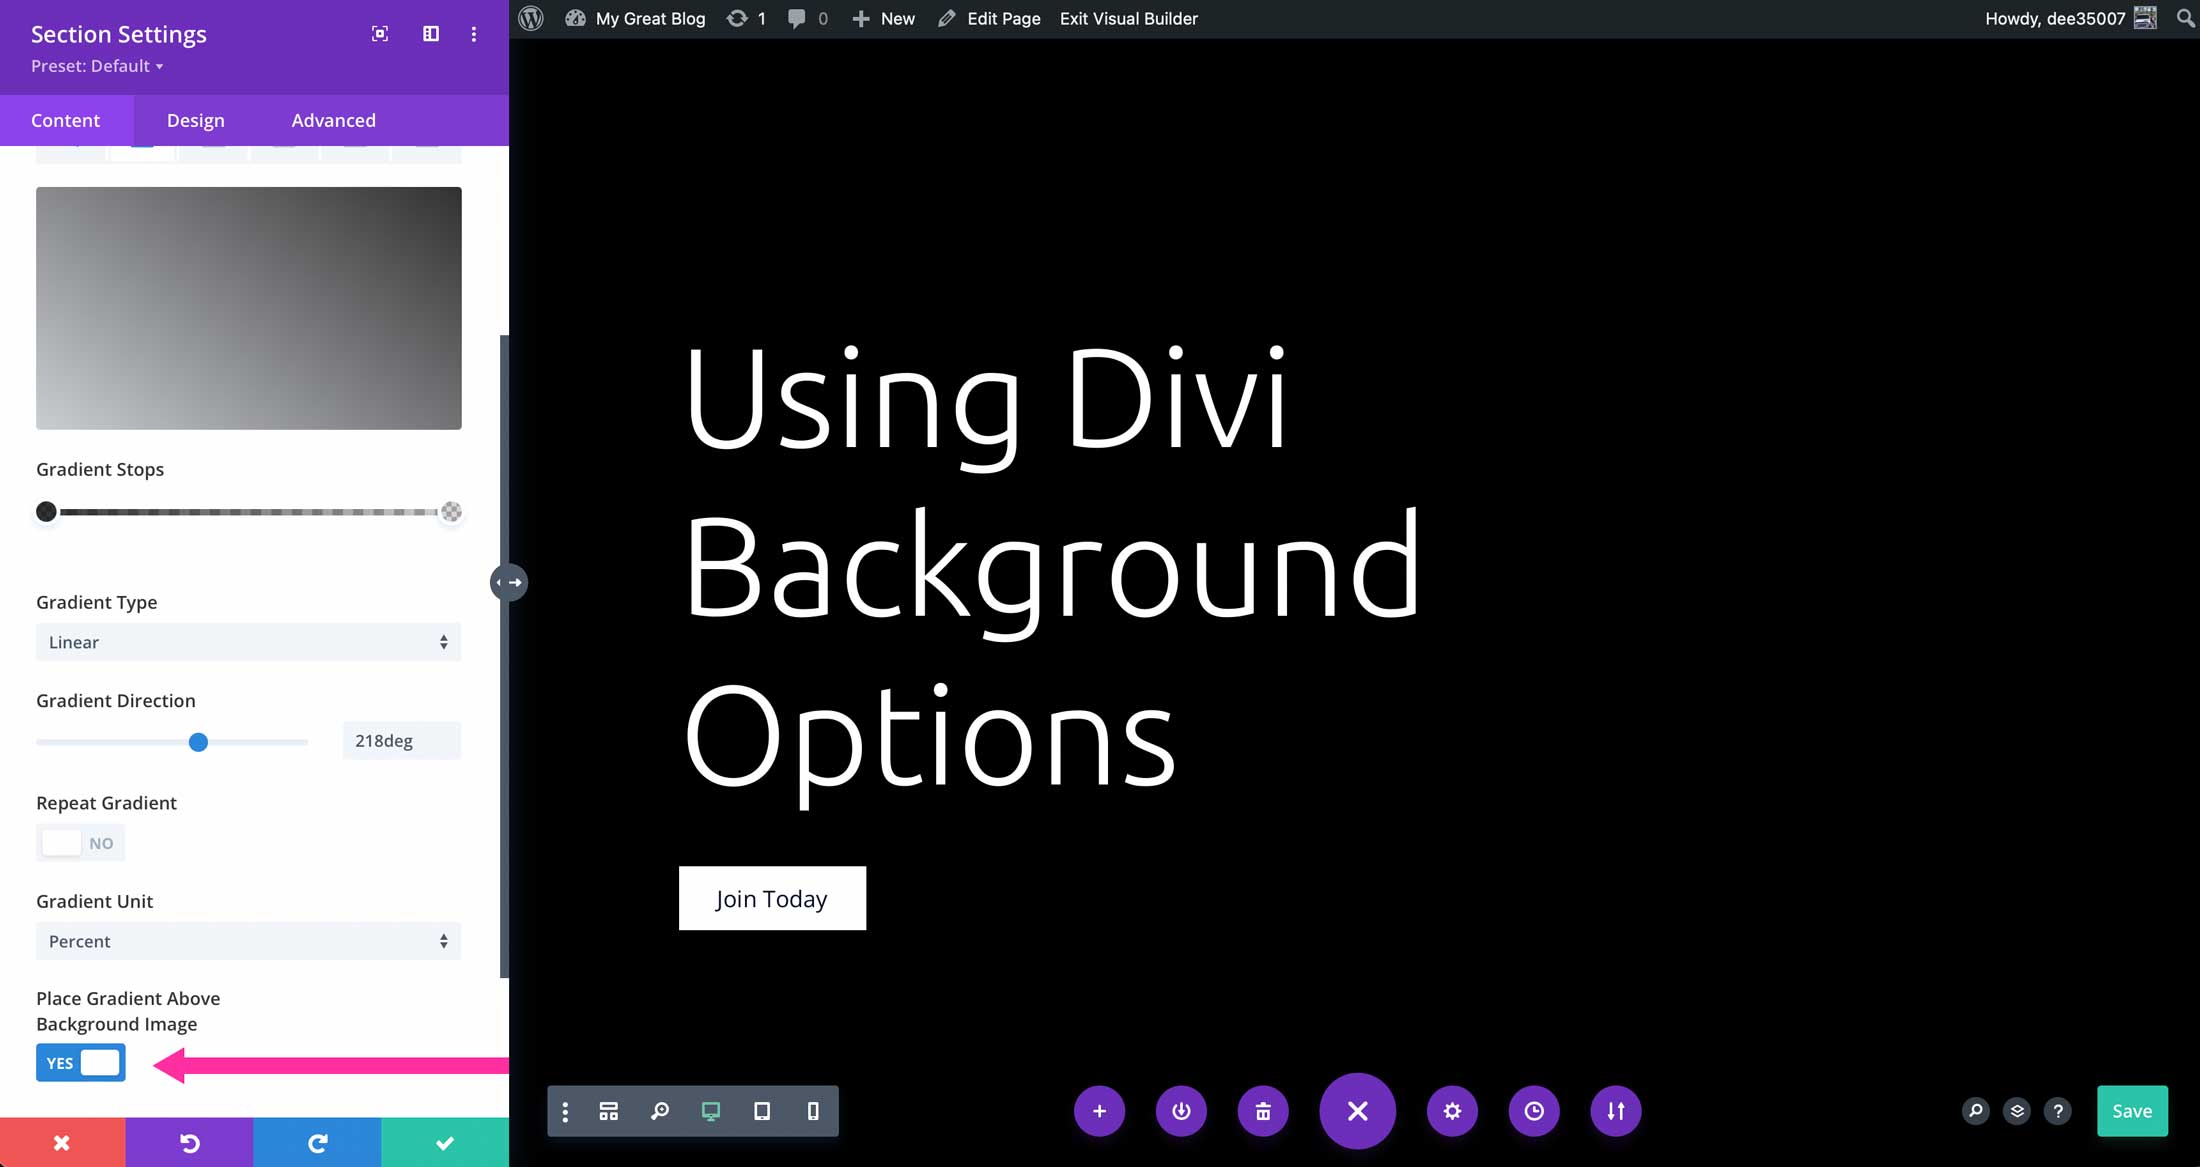
The last option for gradients is to choose whether to overlay your gradient above a background image. When toggled to yes, your gradient will appear over an image, should you choose to add one. It’s important to note that if you want your image to be visible, you must adjust the transparency of the color stops. Start by enabling the place gradient above background image to yes. Next, click into the gradient slider on any color stop, then adjust the transparency to reveal the background image beneath it.
Keep in mind that applying a background gradient over a background image should occur after the background image is added. We’ll cover adding background images in the next section. In order to enable the gradient over a background image, enable the place gradient over background image toggle.
To learn more about the Divi Gradient Builder, check out our documentation.
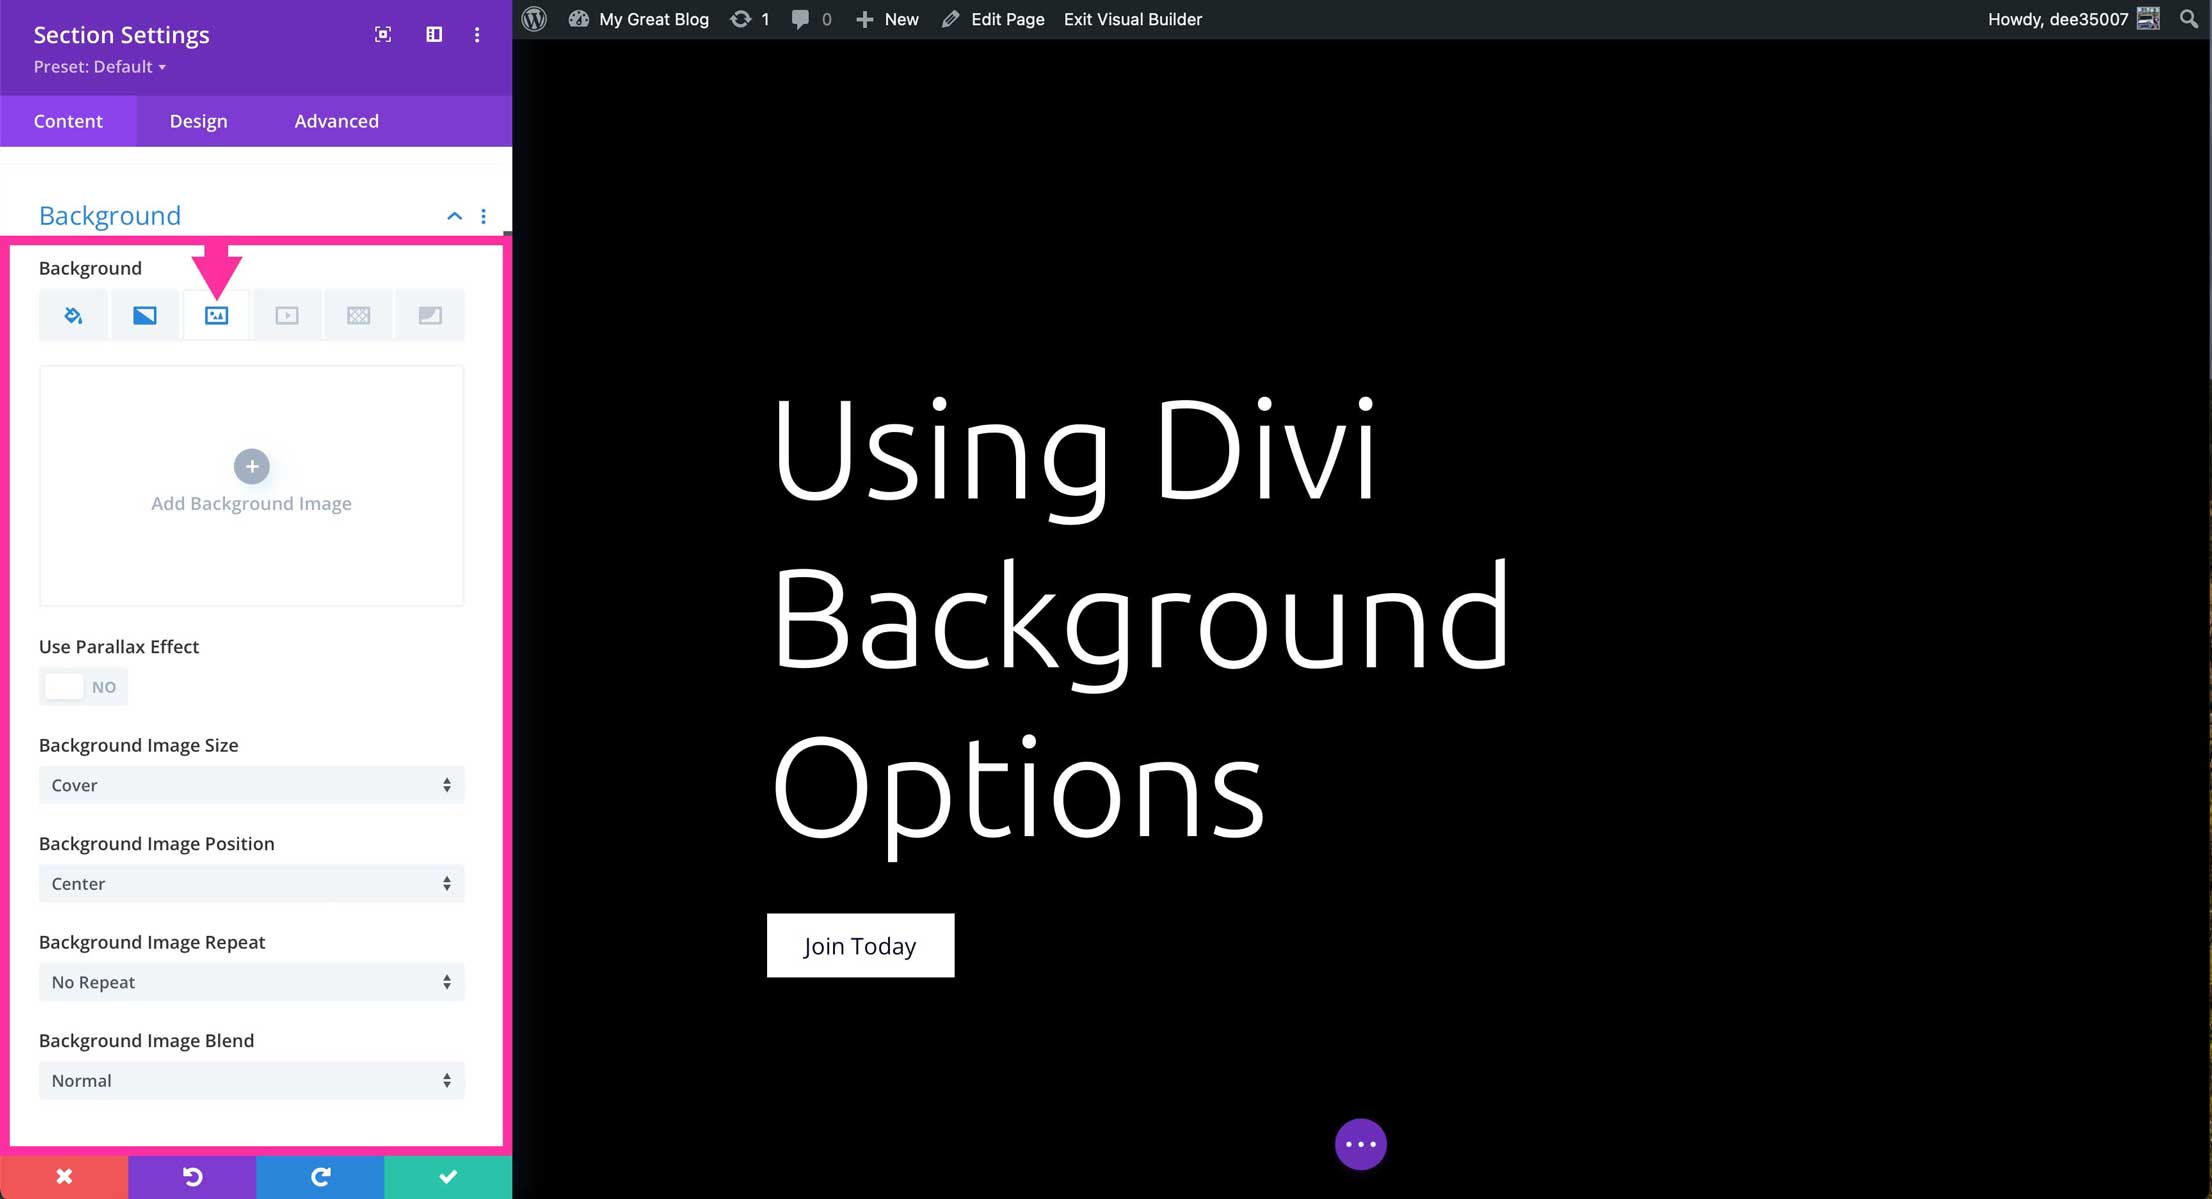
How To Add An Image in Divi Background Options
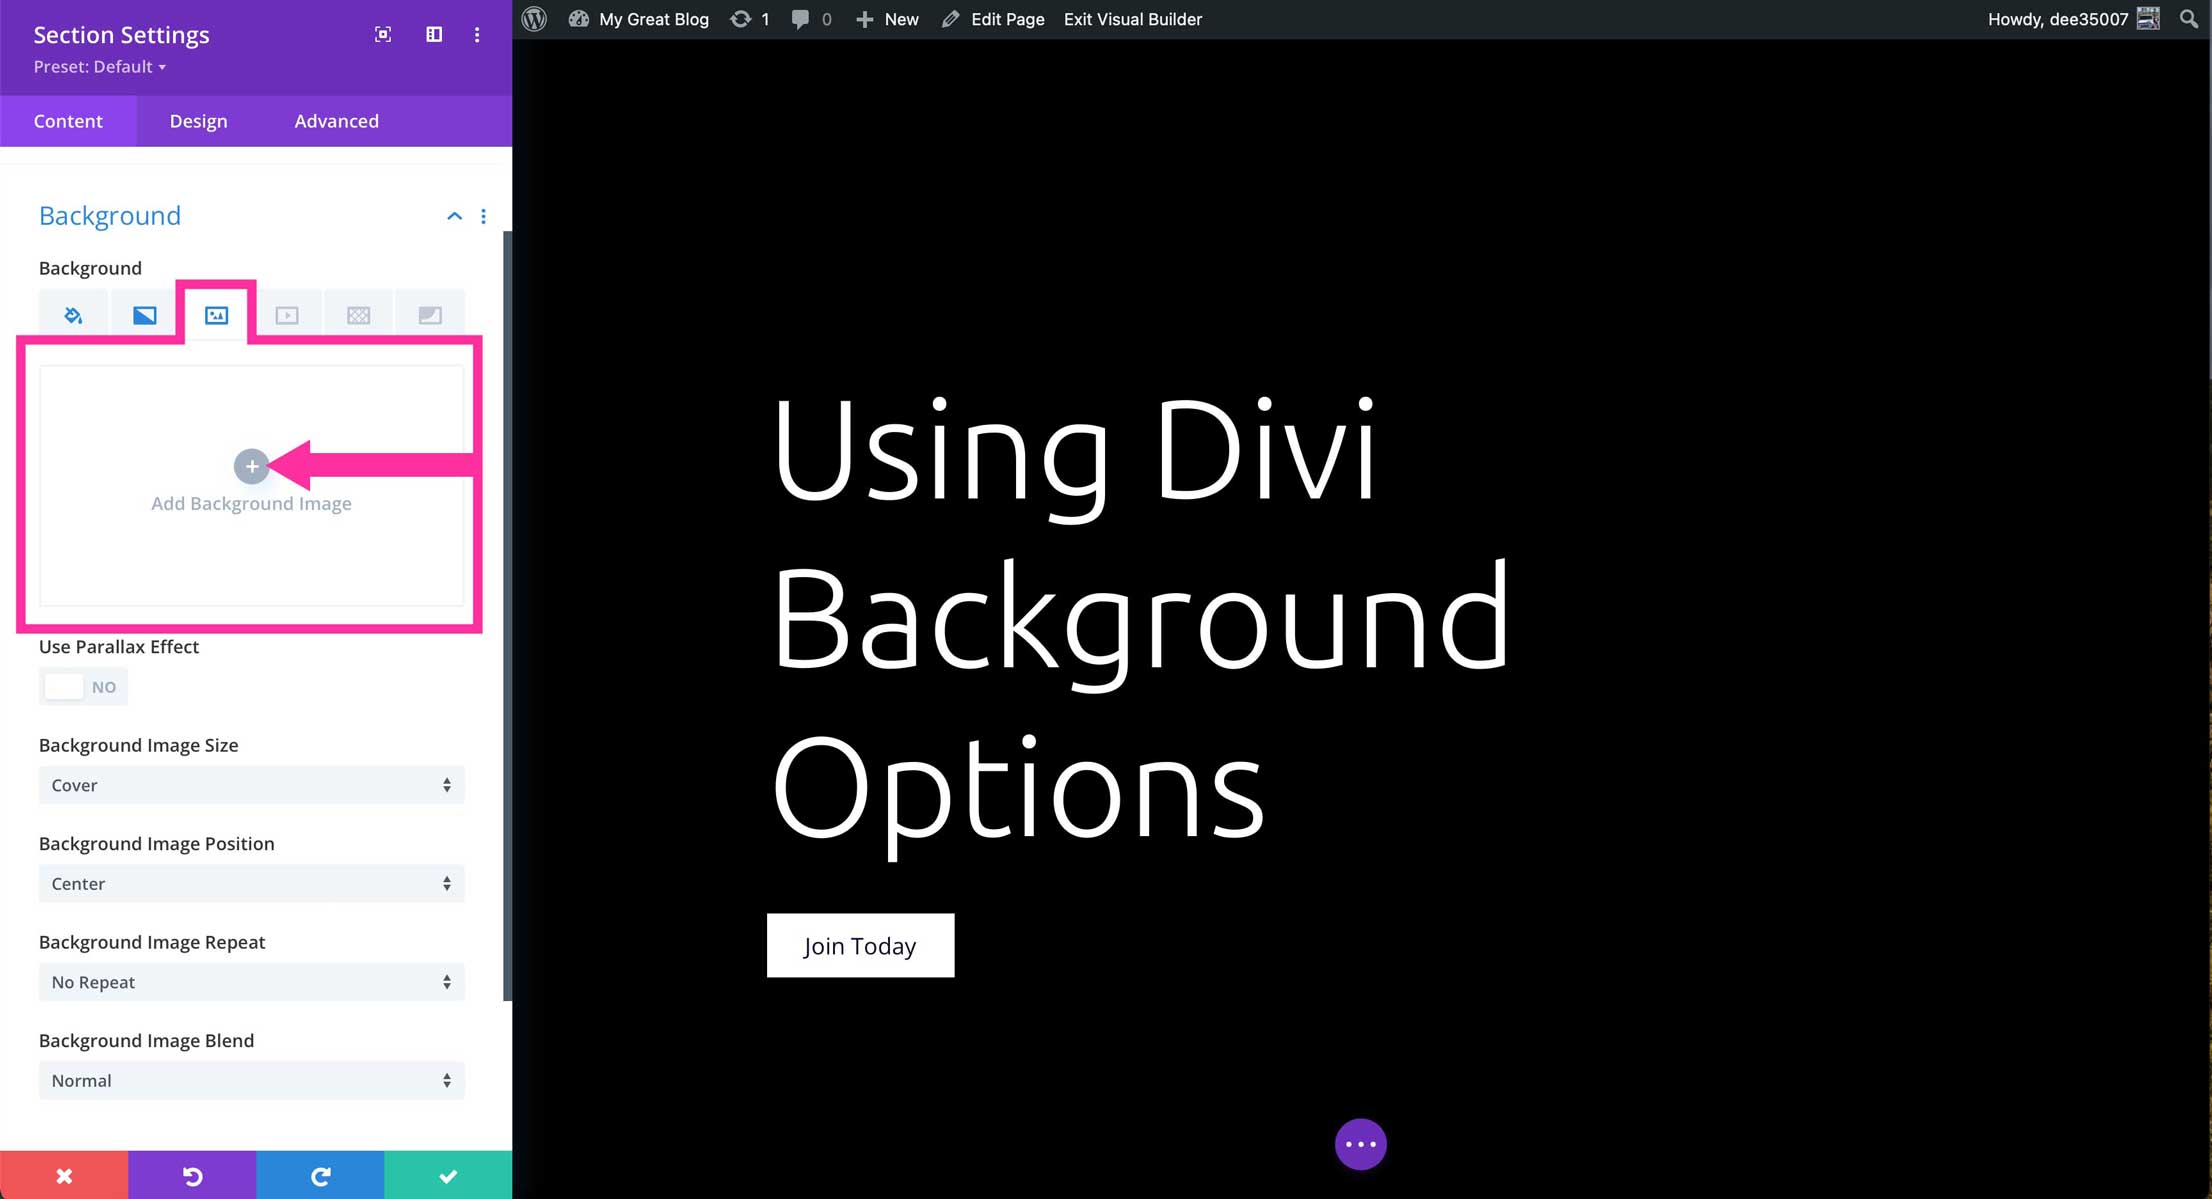
Another great feature of the Divi background options is the ability to add an image to your background. The background image settings are located on the third tab in background options. To add a background image, click the +Add Background Image button. You can choose one already in the media library, or upload a new one.
There are a number of effects that can be applied to your images to add even more interest to them. Let’s go over them one by one.
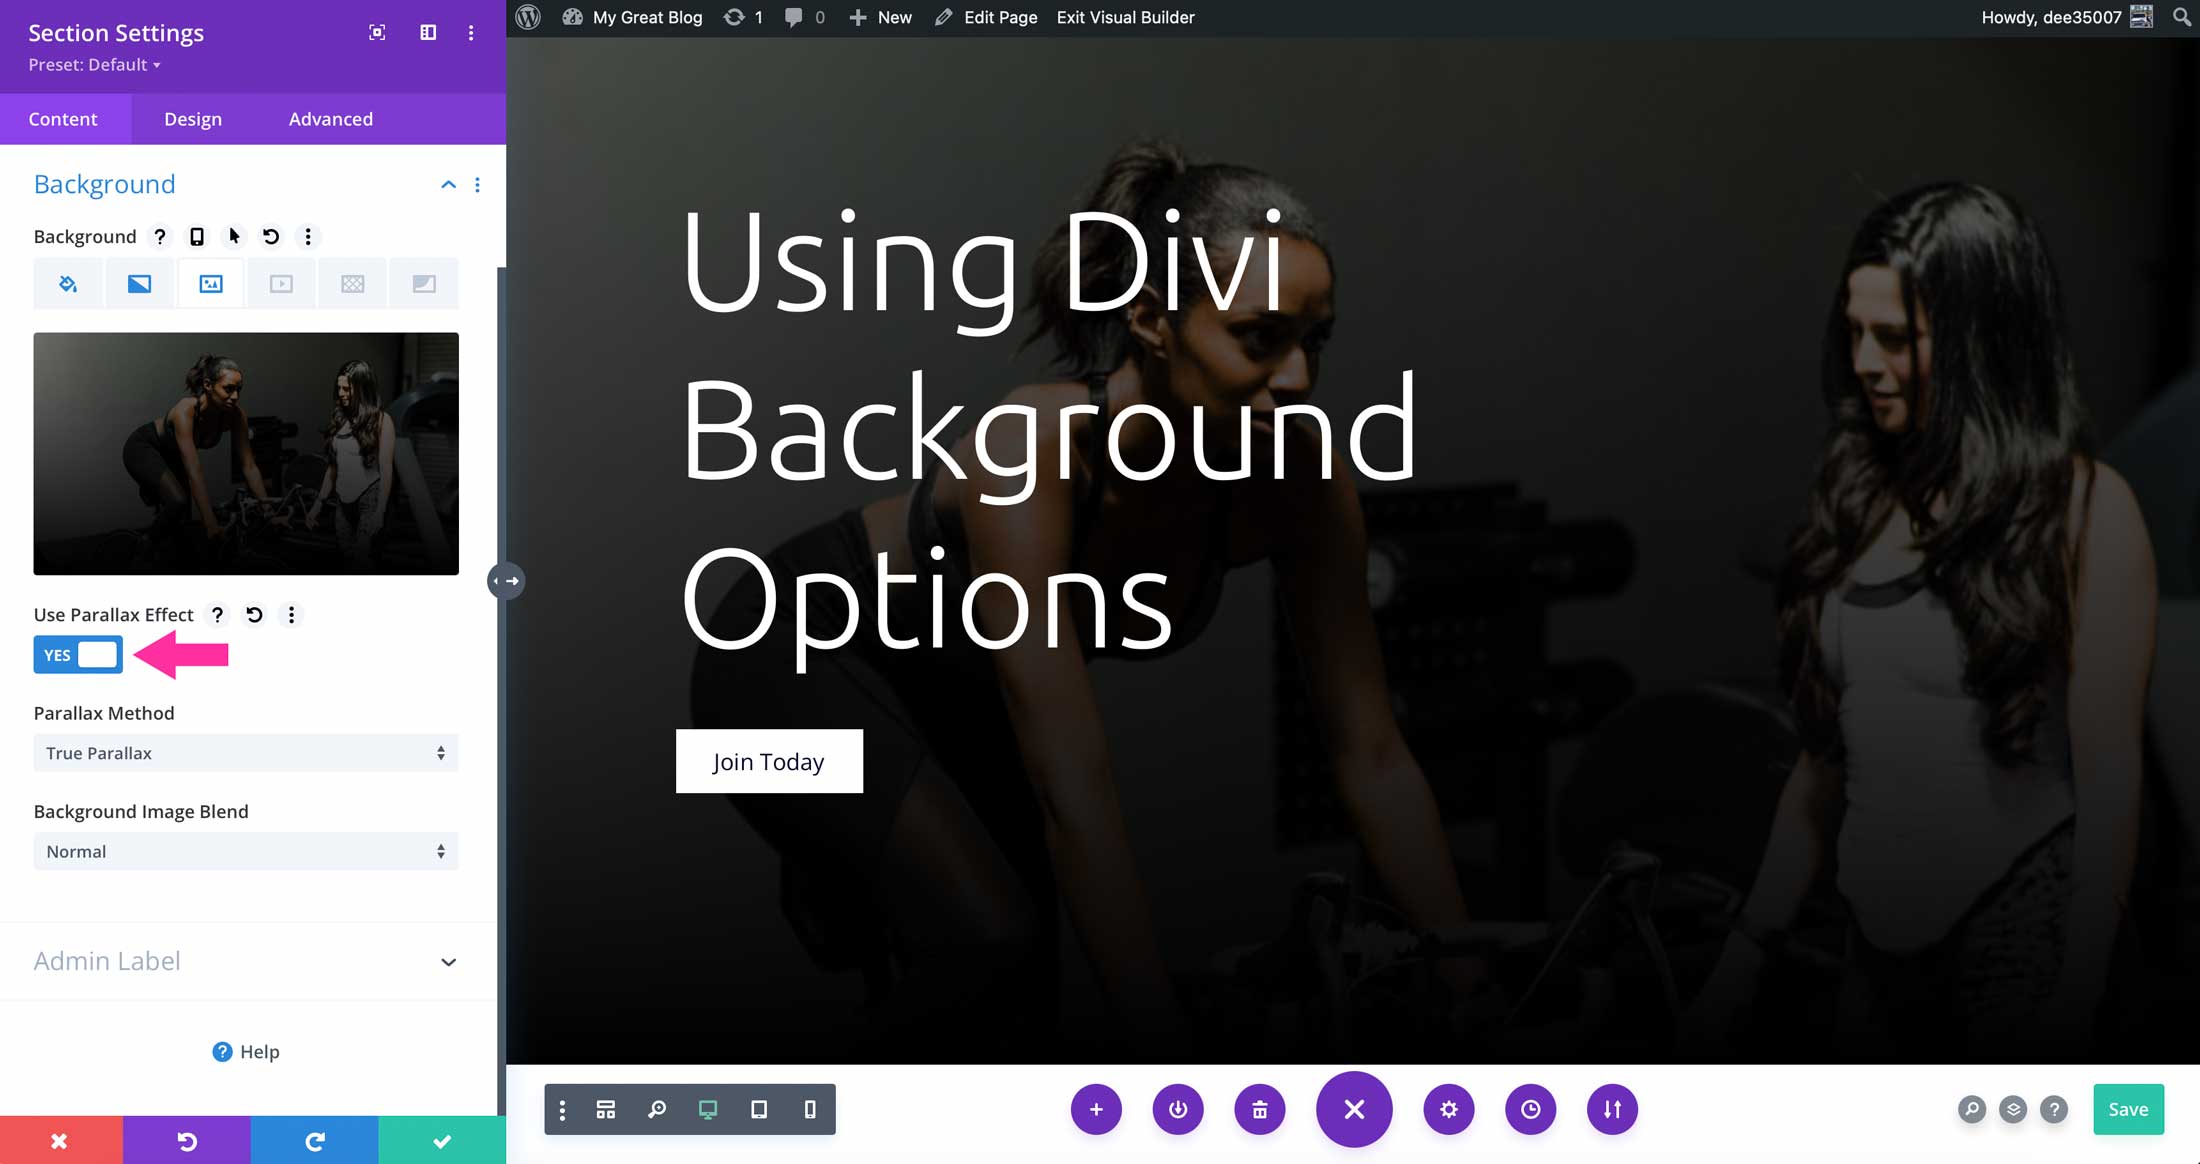
Parallax Effect (true or CSS)
The parallax effect gives the perception of life-like distance and motion utlizing two-dimension type animation. Basically, scrolling speeds of different elements in the background create the illusion of movement, which in actuality, the element remains fixed. To enable the parallex effect in Divi’s background options, toggle use parallax effect to yes.
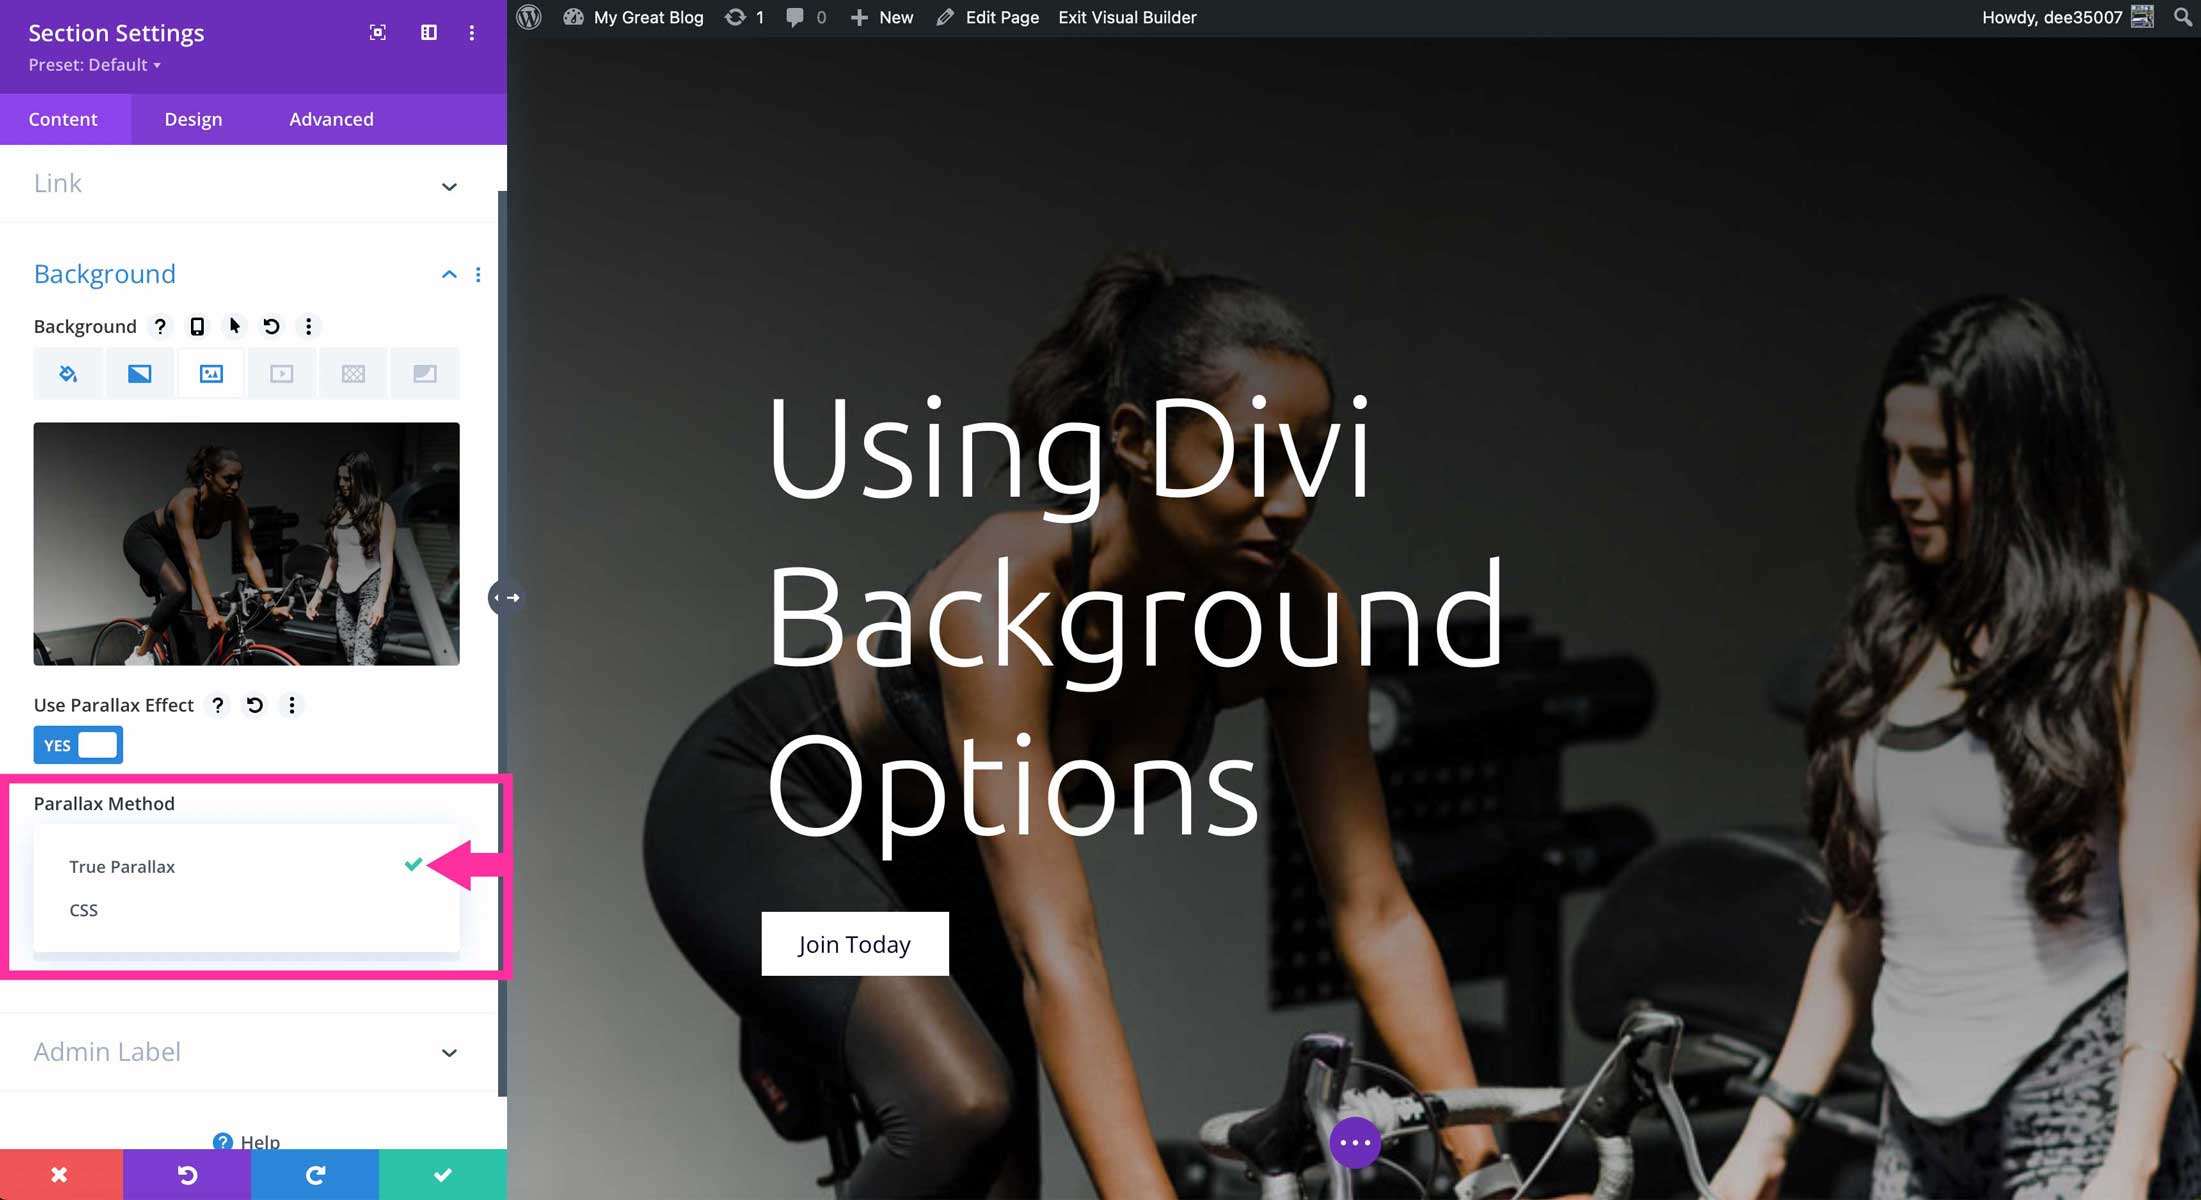
If enabled, choose between true parallax, or CSS. True parallax uses a combination of CSS and JavaScript to create a slower, more life-like representation than other elements on the page. When using the CSS method, only CSS is used to create the effect. The background is held in place while the other elements on the page scroll normally.
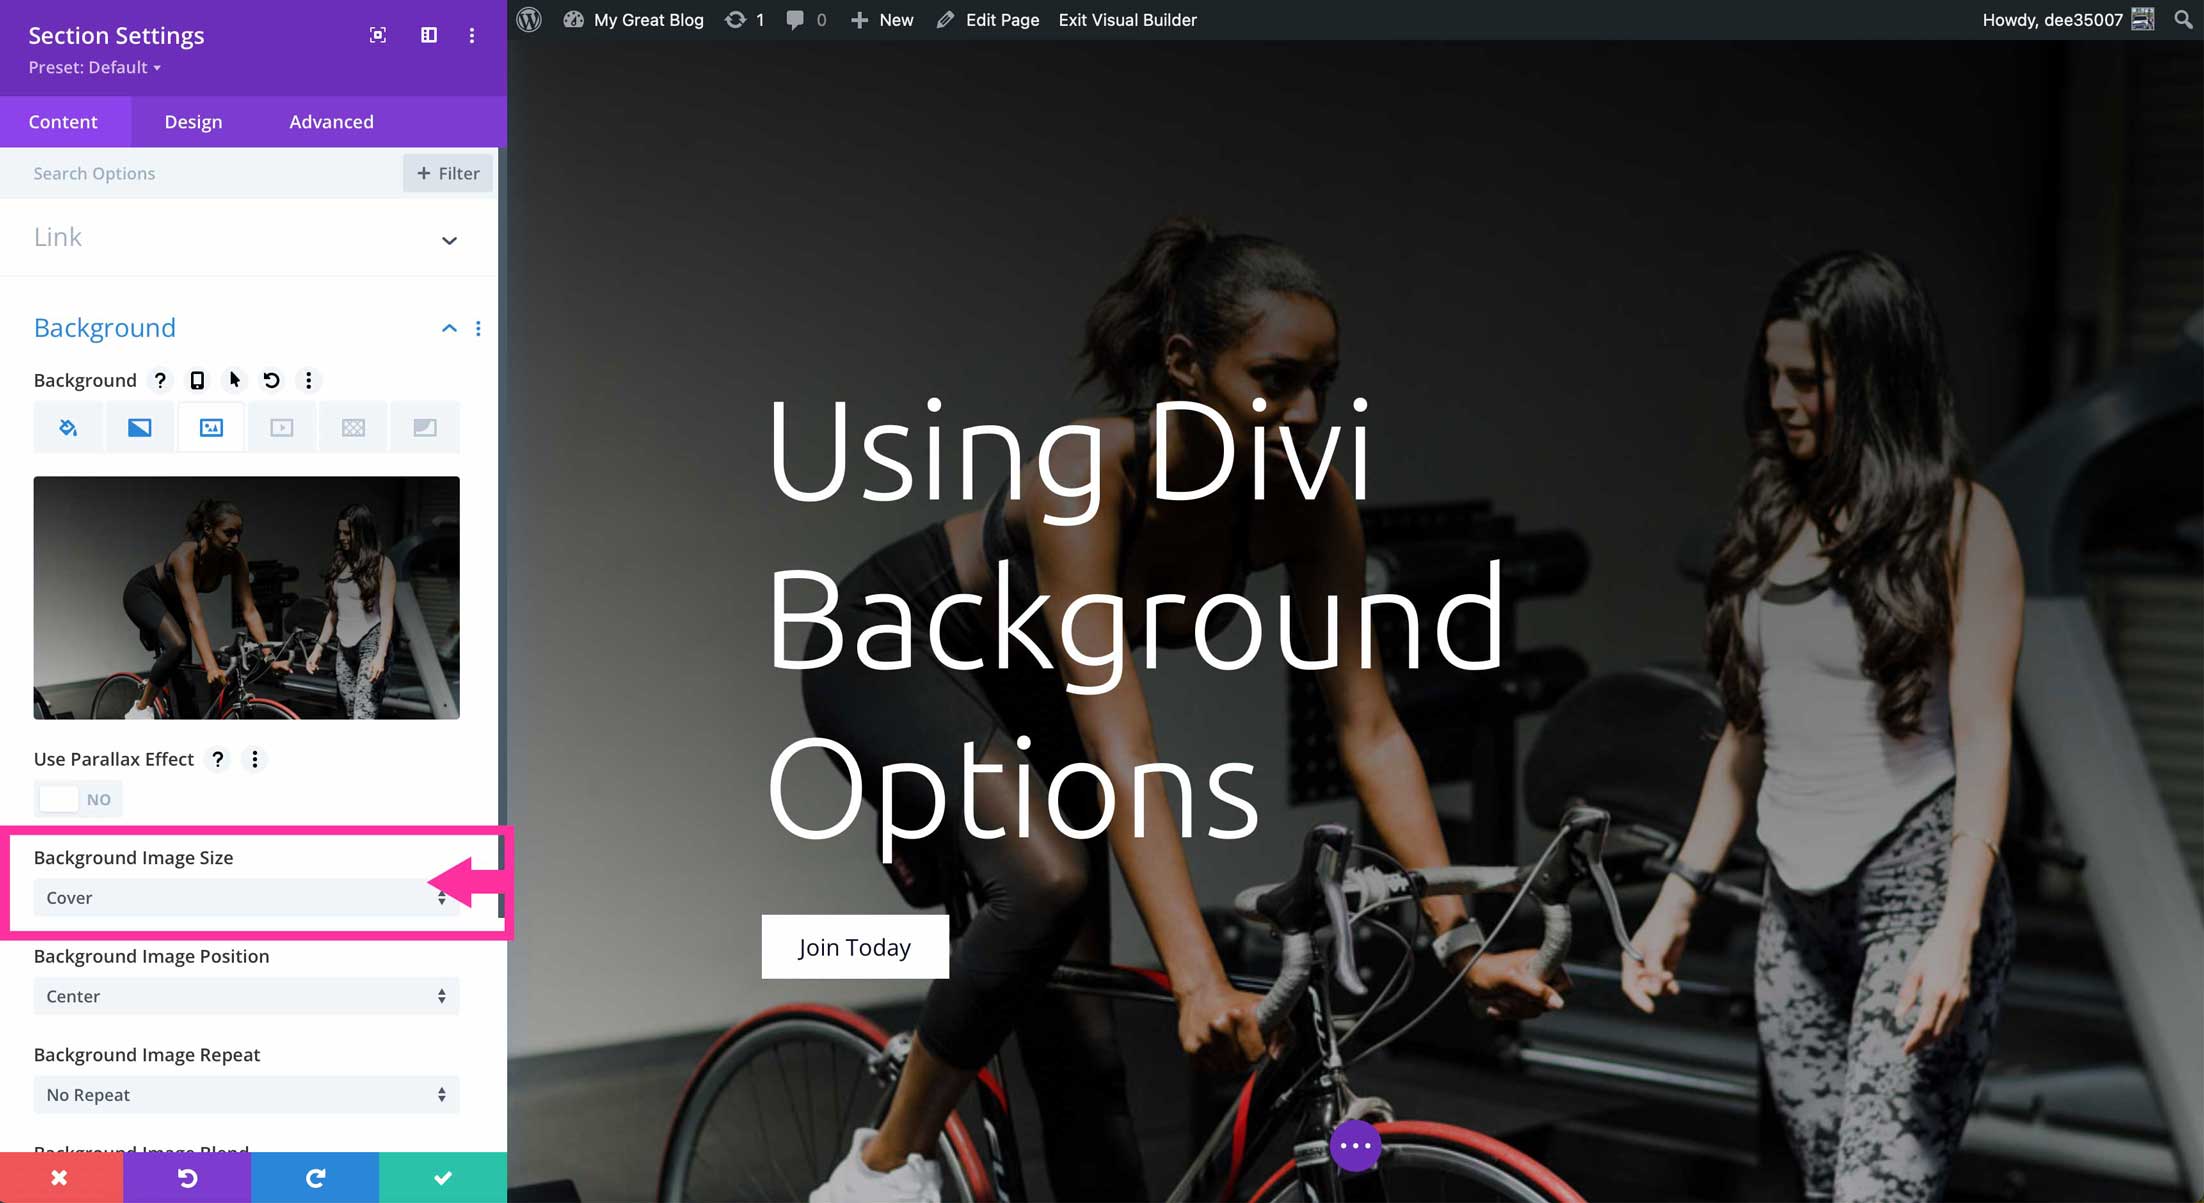
Divi Background Image Size
You can control the look of your image further by specifying the size. Actual size will fill the screen to the actual pixels of the image. Fit will place the image within the constraints of the available space. Cover will enlarge the background image to cover the entire space. Stretch to fill will stetch the image, regardless of size, to cover the space top to bottom.
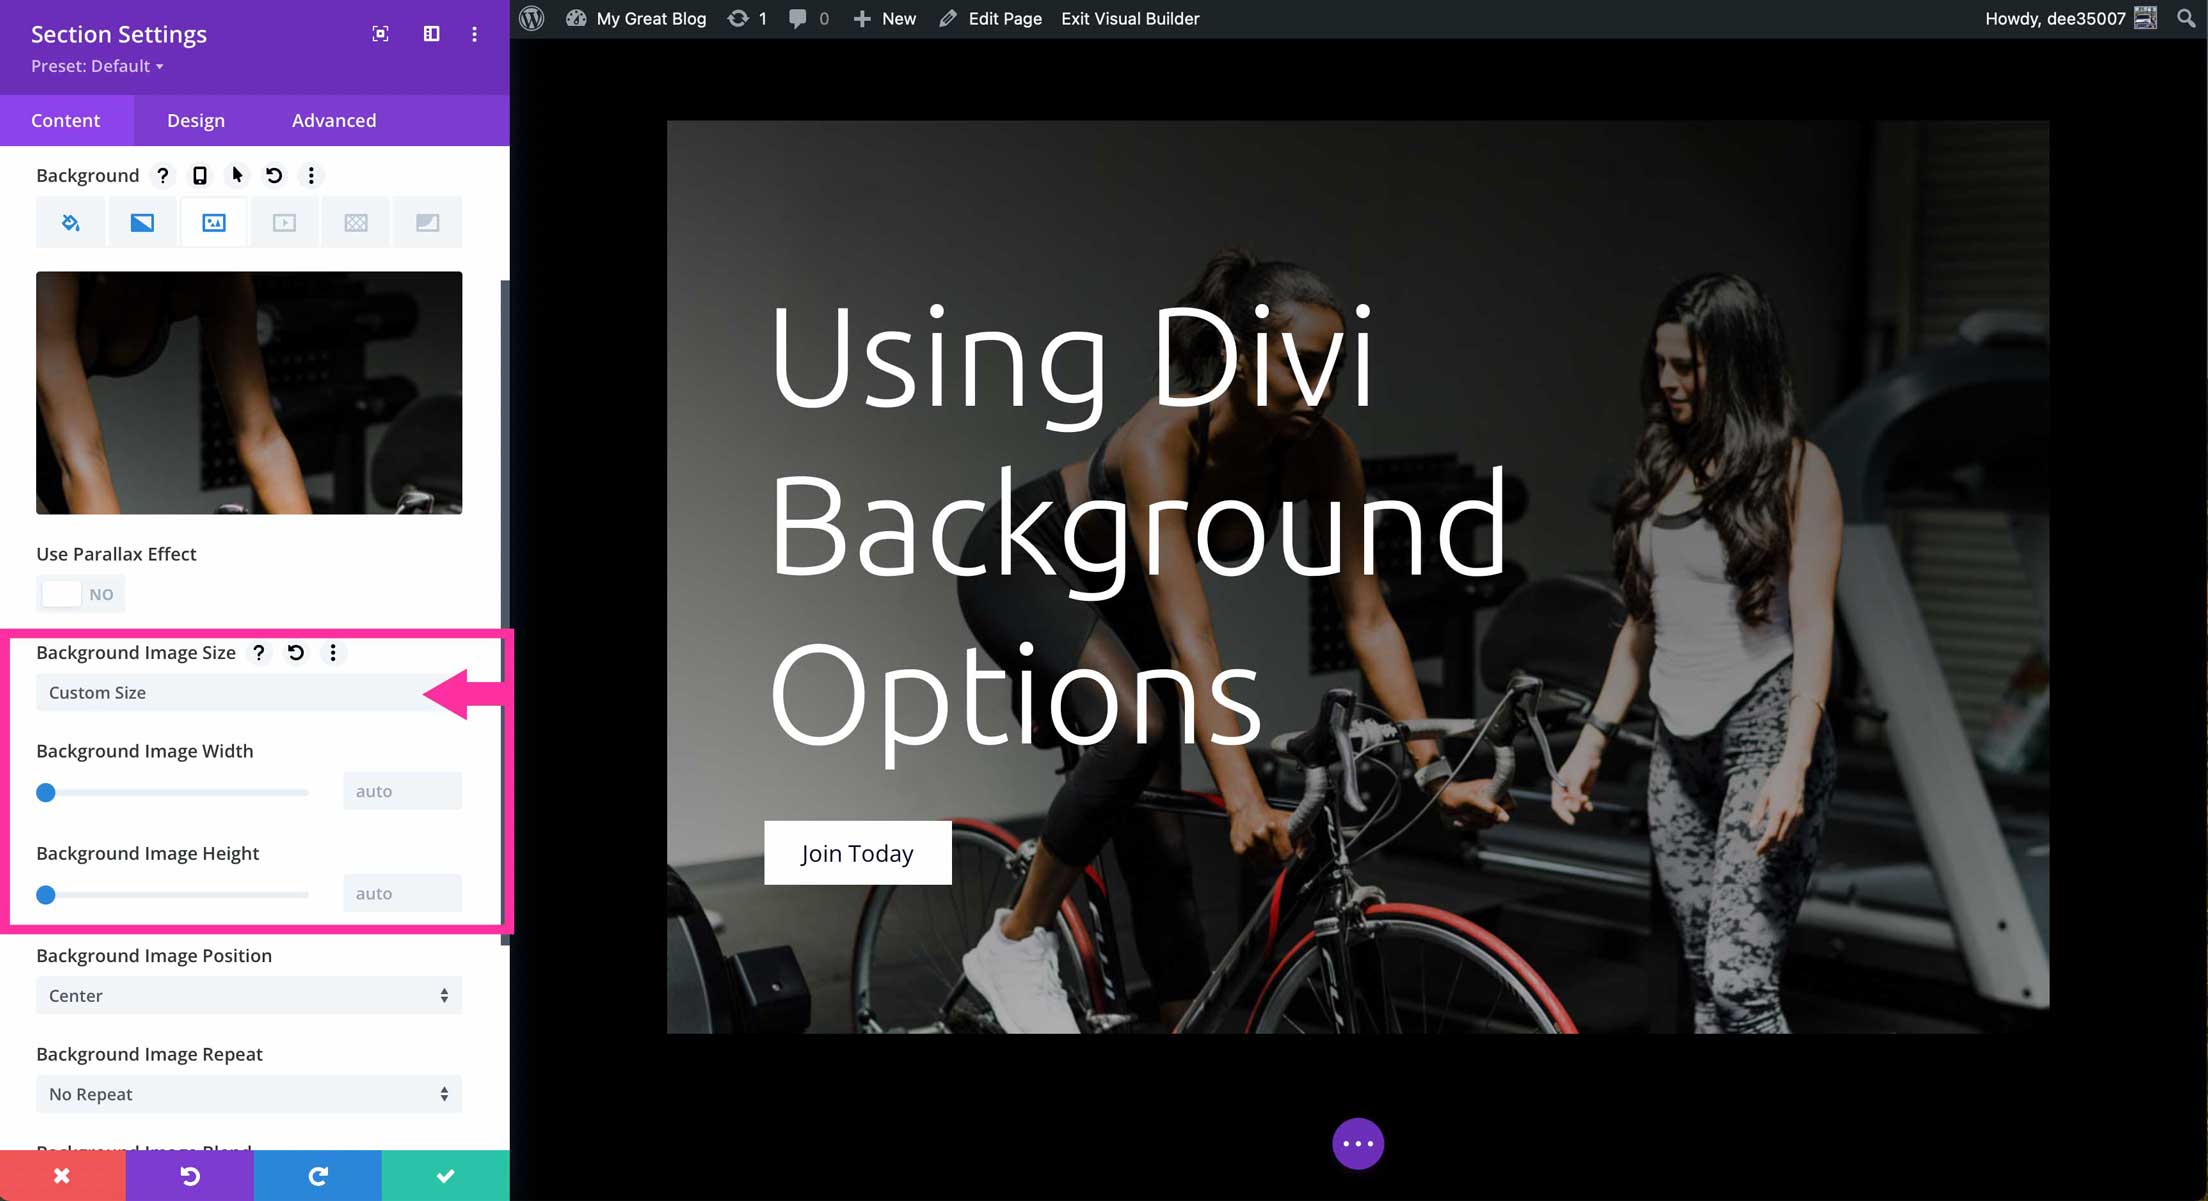
Finally, you can create a custom size for your image. There you can specify the image width and height.
Divi Background Image Position
The next section allows you to control the position of your image. Choices are top left, top center, top right, center left, center, center right, bottom left, bottom center, and bottom right.

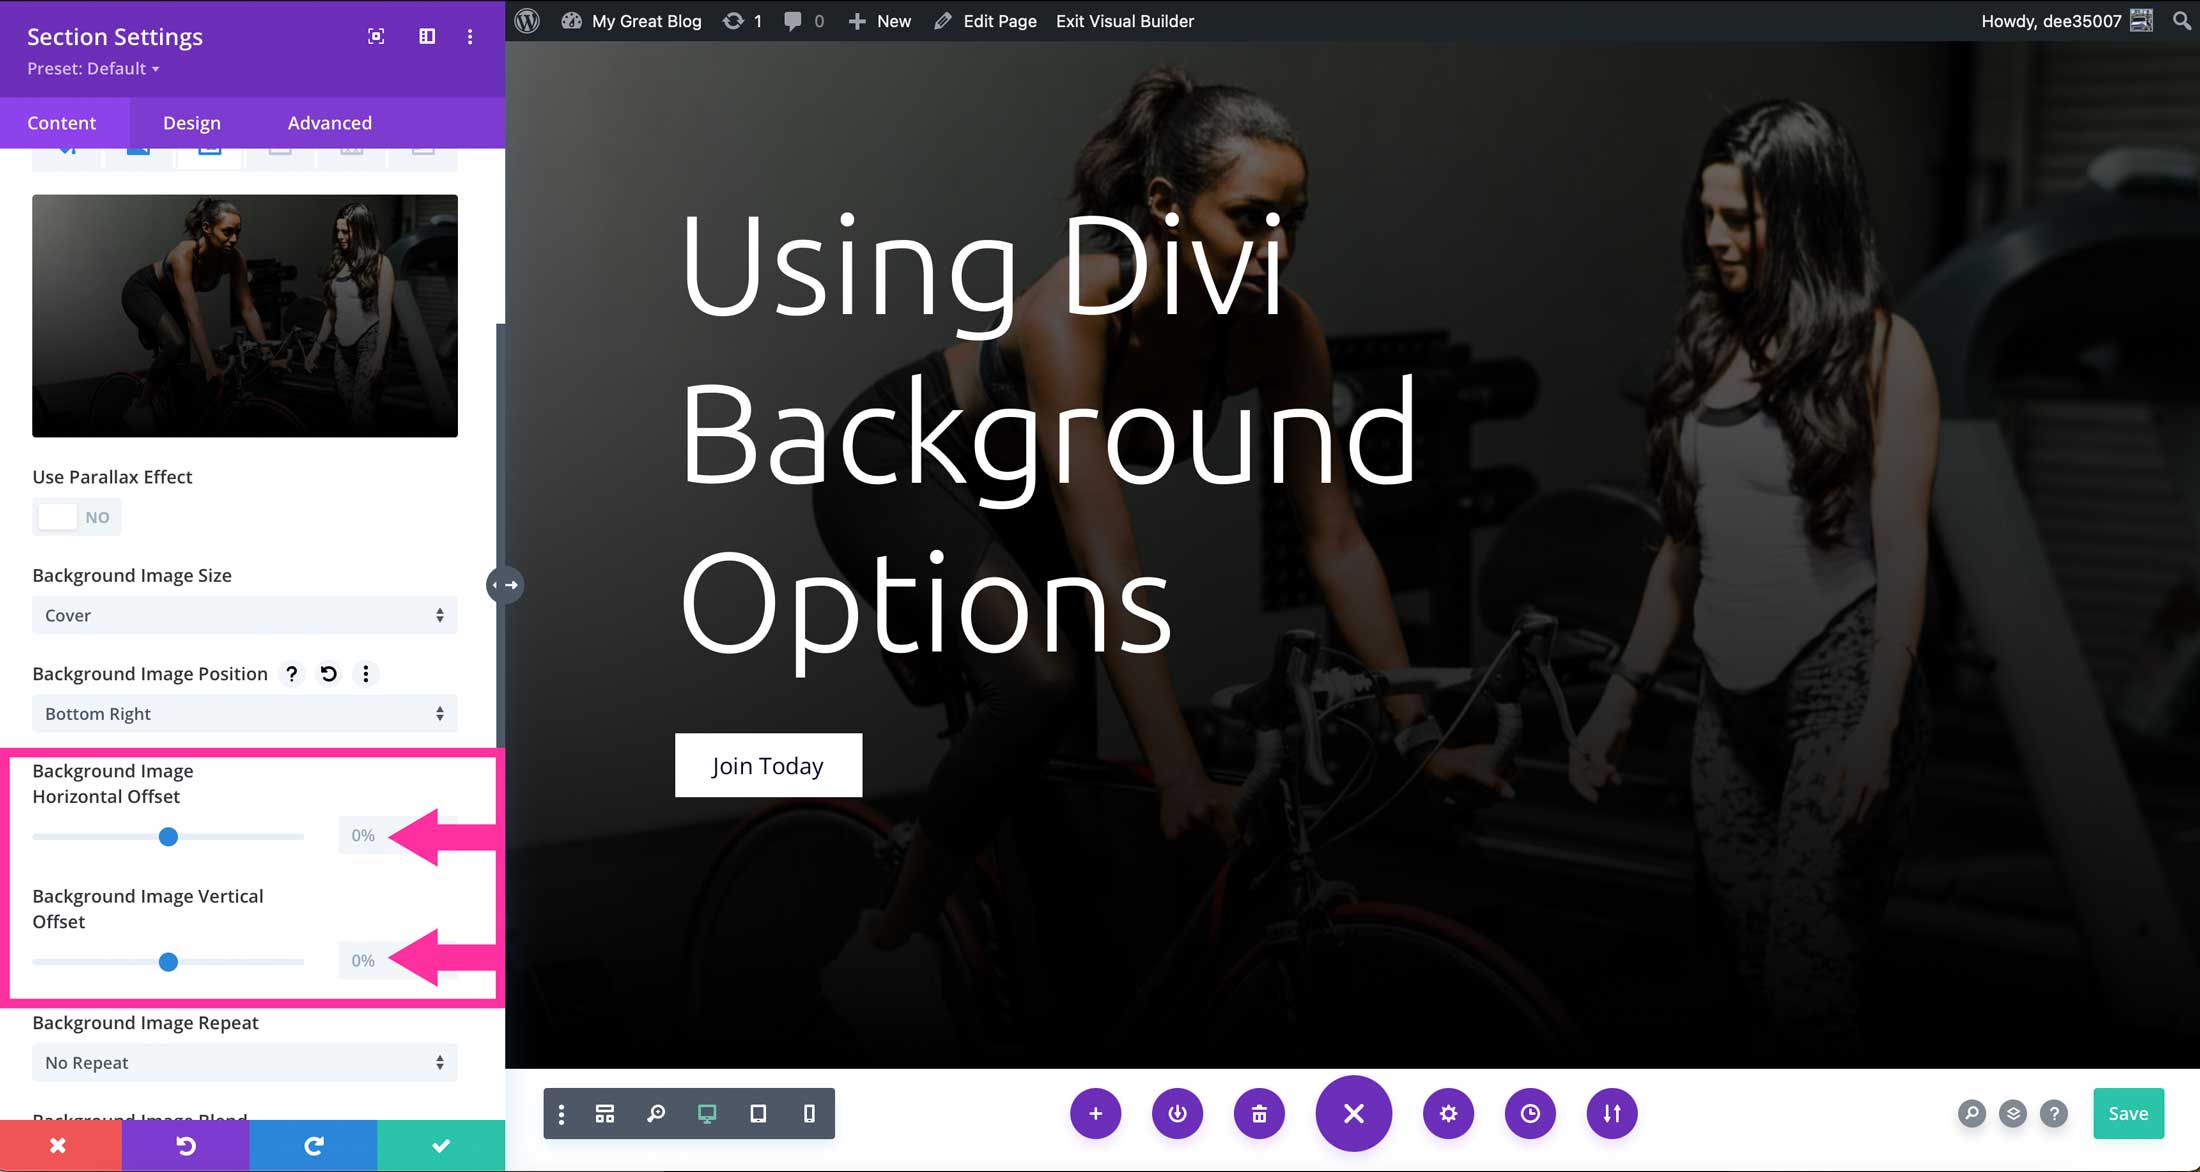
Divi Background Image Horizontal & Vertical Offset
Depending on the image position you choose, you will have the option to set the horizontal and vertical offset. For example, if you set your background size to actual, then align it to bottom right, the background image horizontal offset will appear. To adjust the placement of the offset, click into the offset slider to adjust the image’s horizontal or vertical offset position.
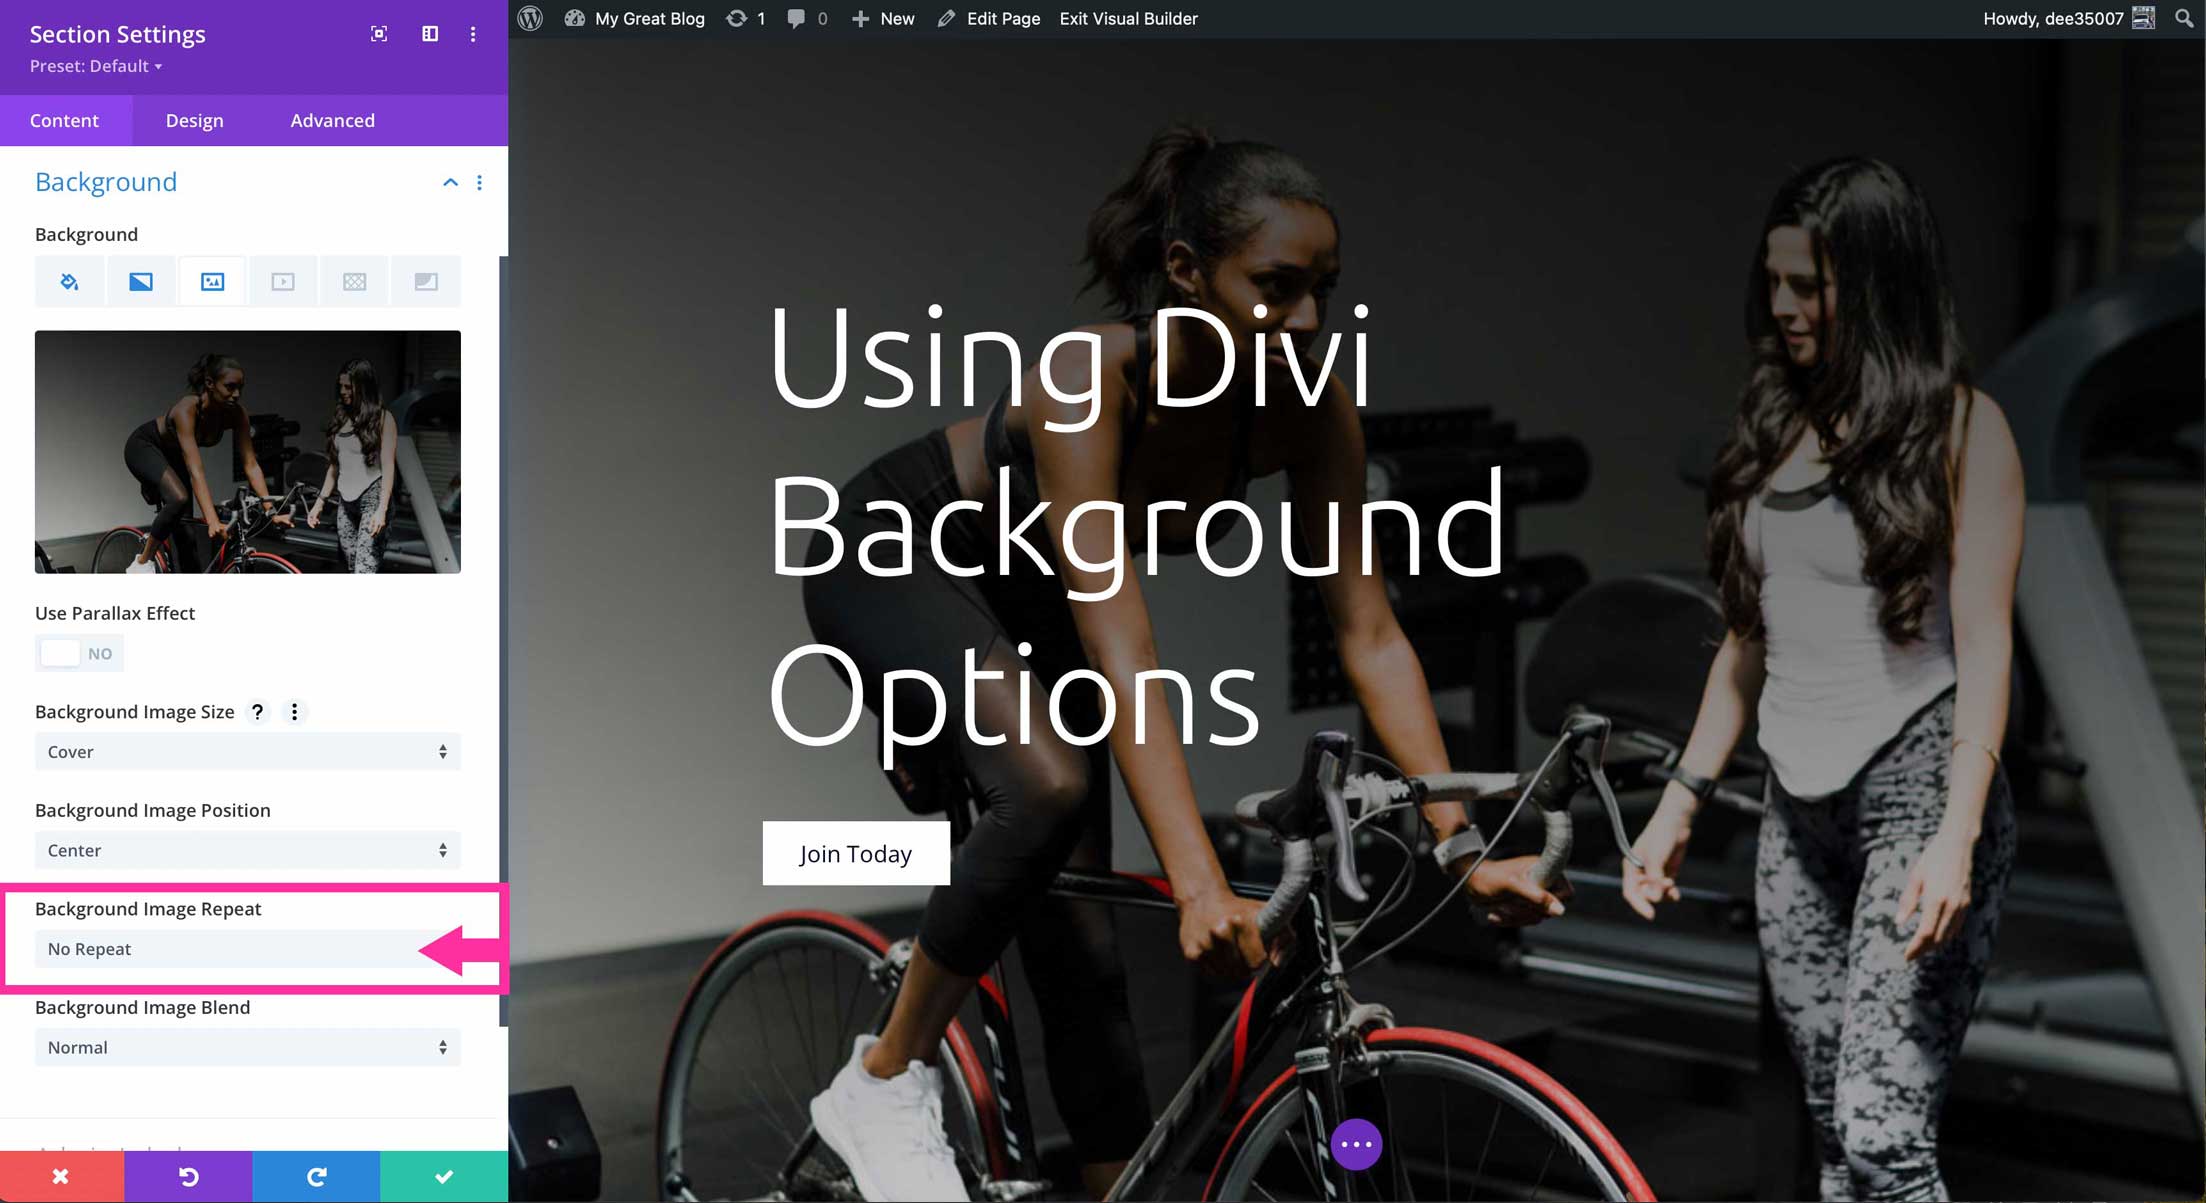
Divi Background Image Repeat
This option will repeat the background image if enabled. You can choose between repeat, repeat X (horizontal), repeat Y (vertical), repeat with space between, repeat and stretch, or no repeat.
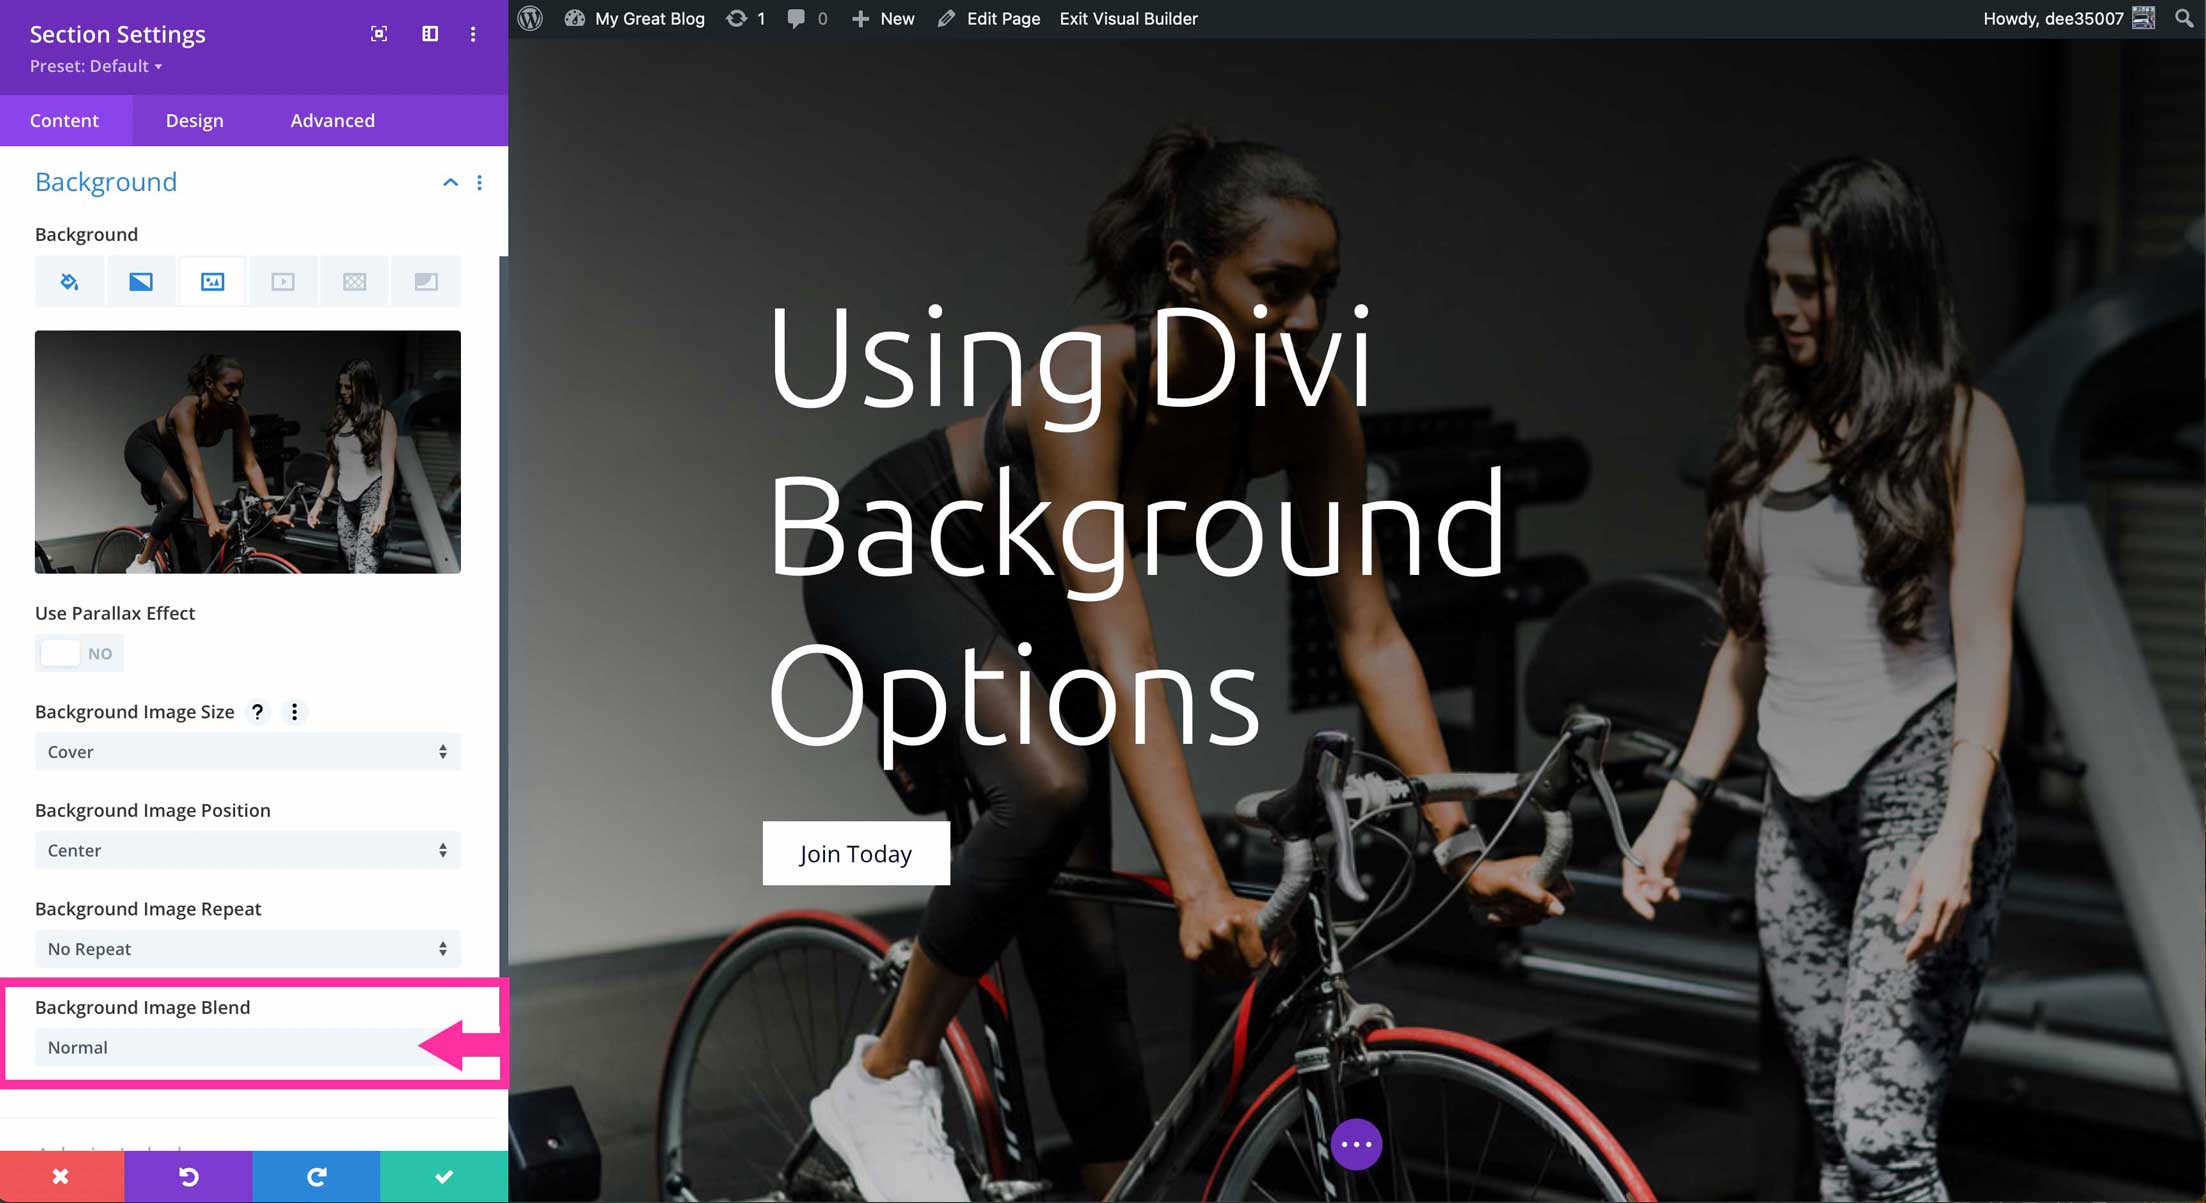
Divi Background Image Blend
Blend modes allow for different effects to be incorporated into your images. For example, choosing screen will lighten the appearance of your image and allow it to blend into the background gradient. Overall, there are 16 blend modes to choose from.
How To Add a Video in Divi Background Options
Within the Divi background options, users can add two types of video. MP4 and Webm formats. Not all browsers can handle the MP4 format, so it’s good practice to add both when using video within Divi. Click the + Add Background Video button to add a video.
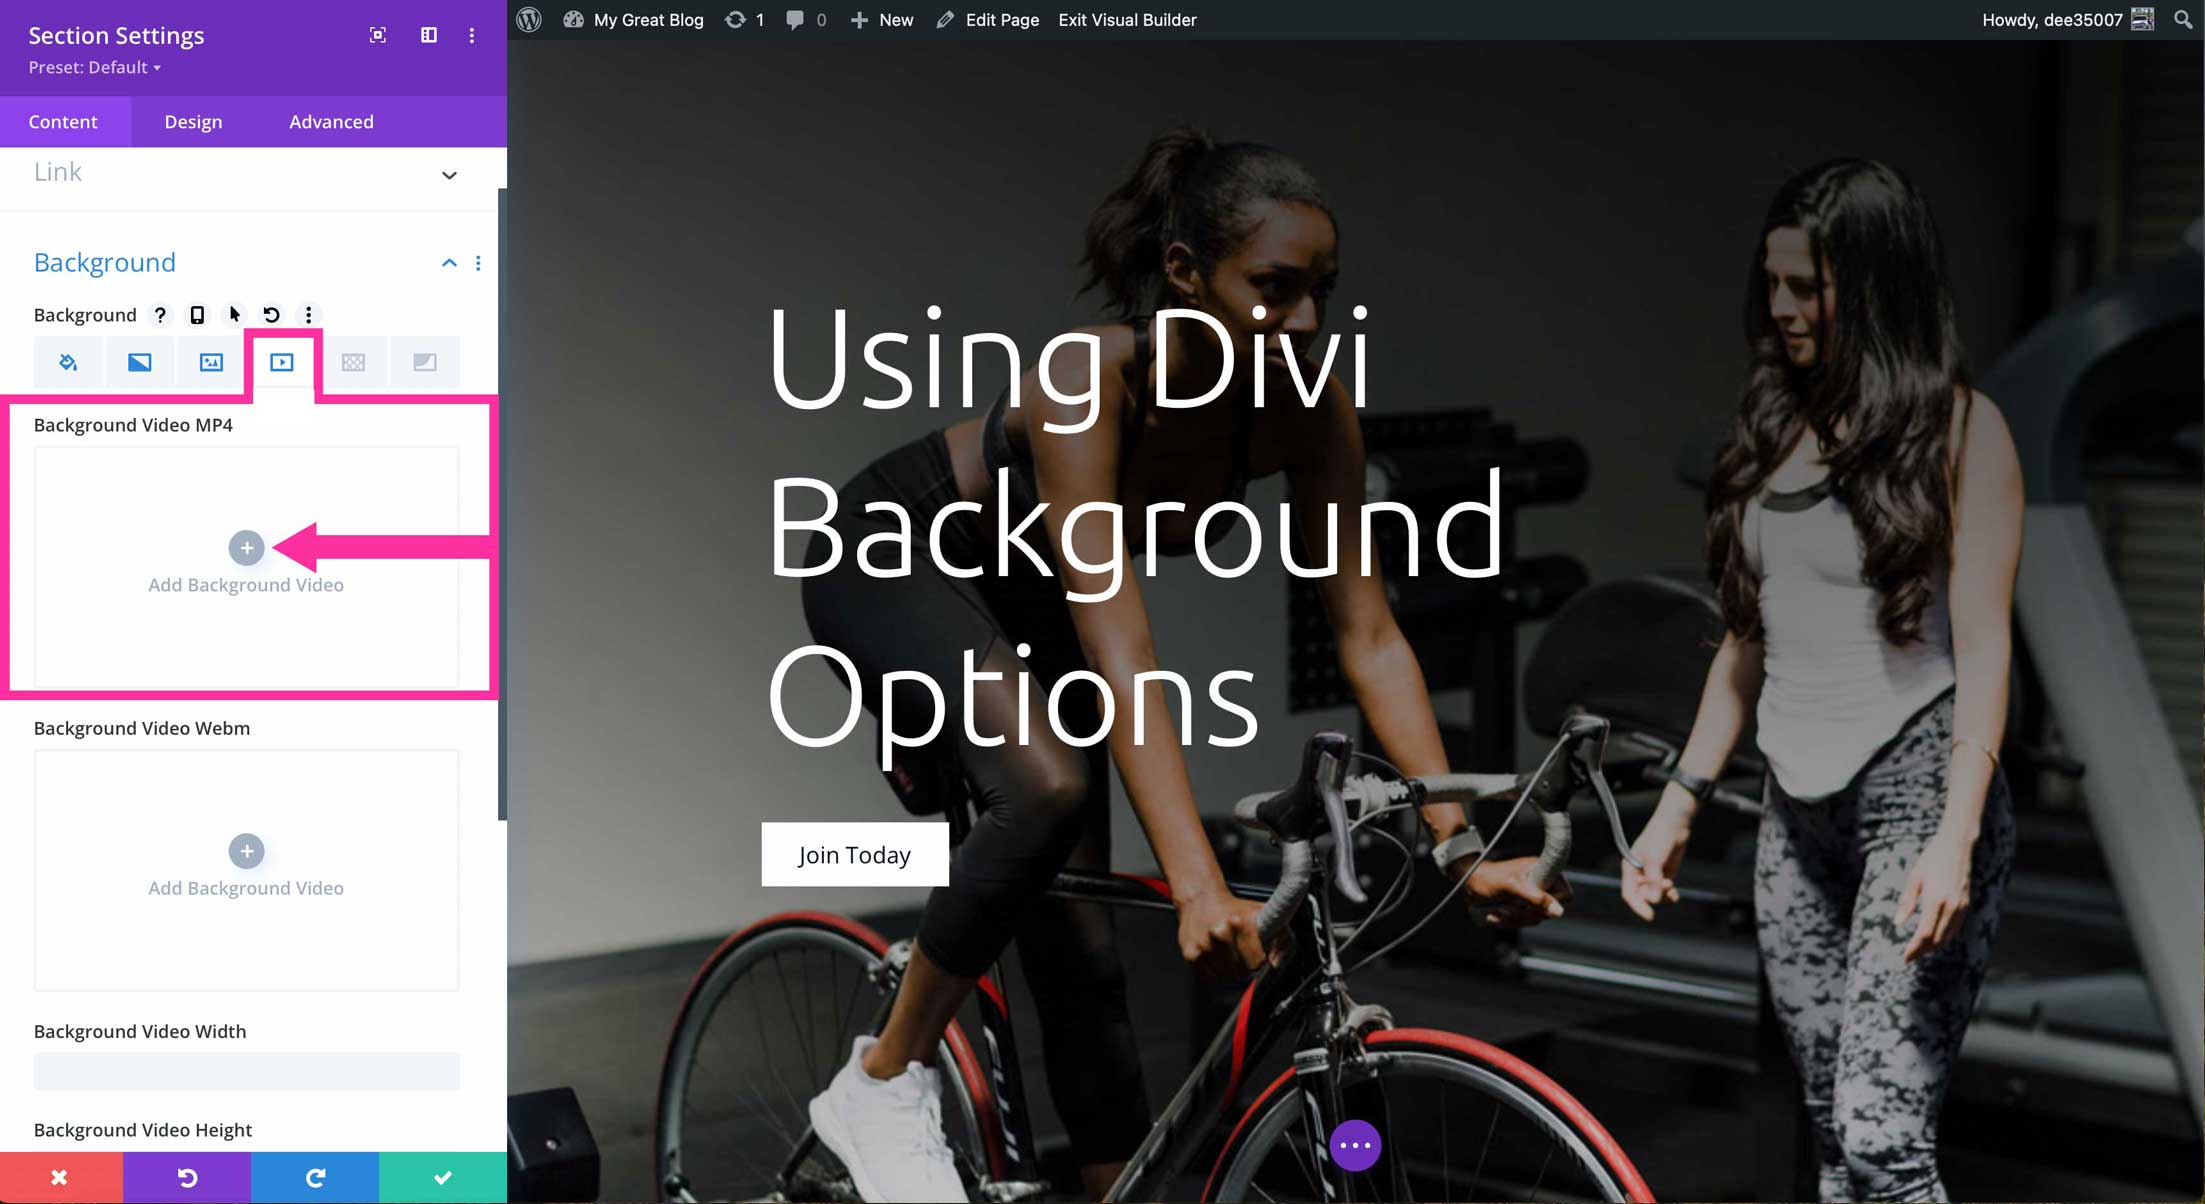
You can either upload a video file, choose one that has already been added to your media library, or insert one by inputting a URL. YouTube formats are supported if you choose to upload a video from a URL.
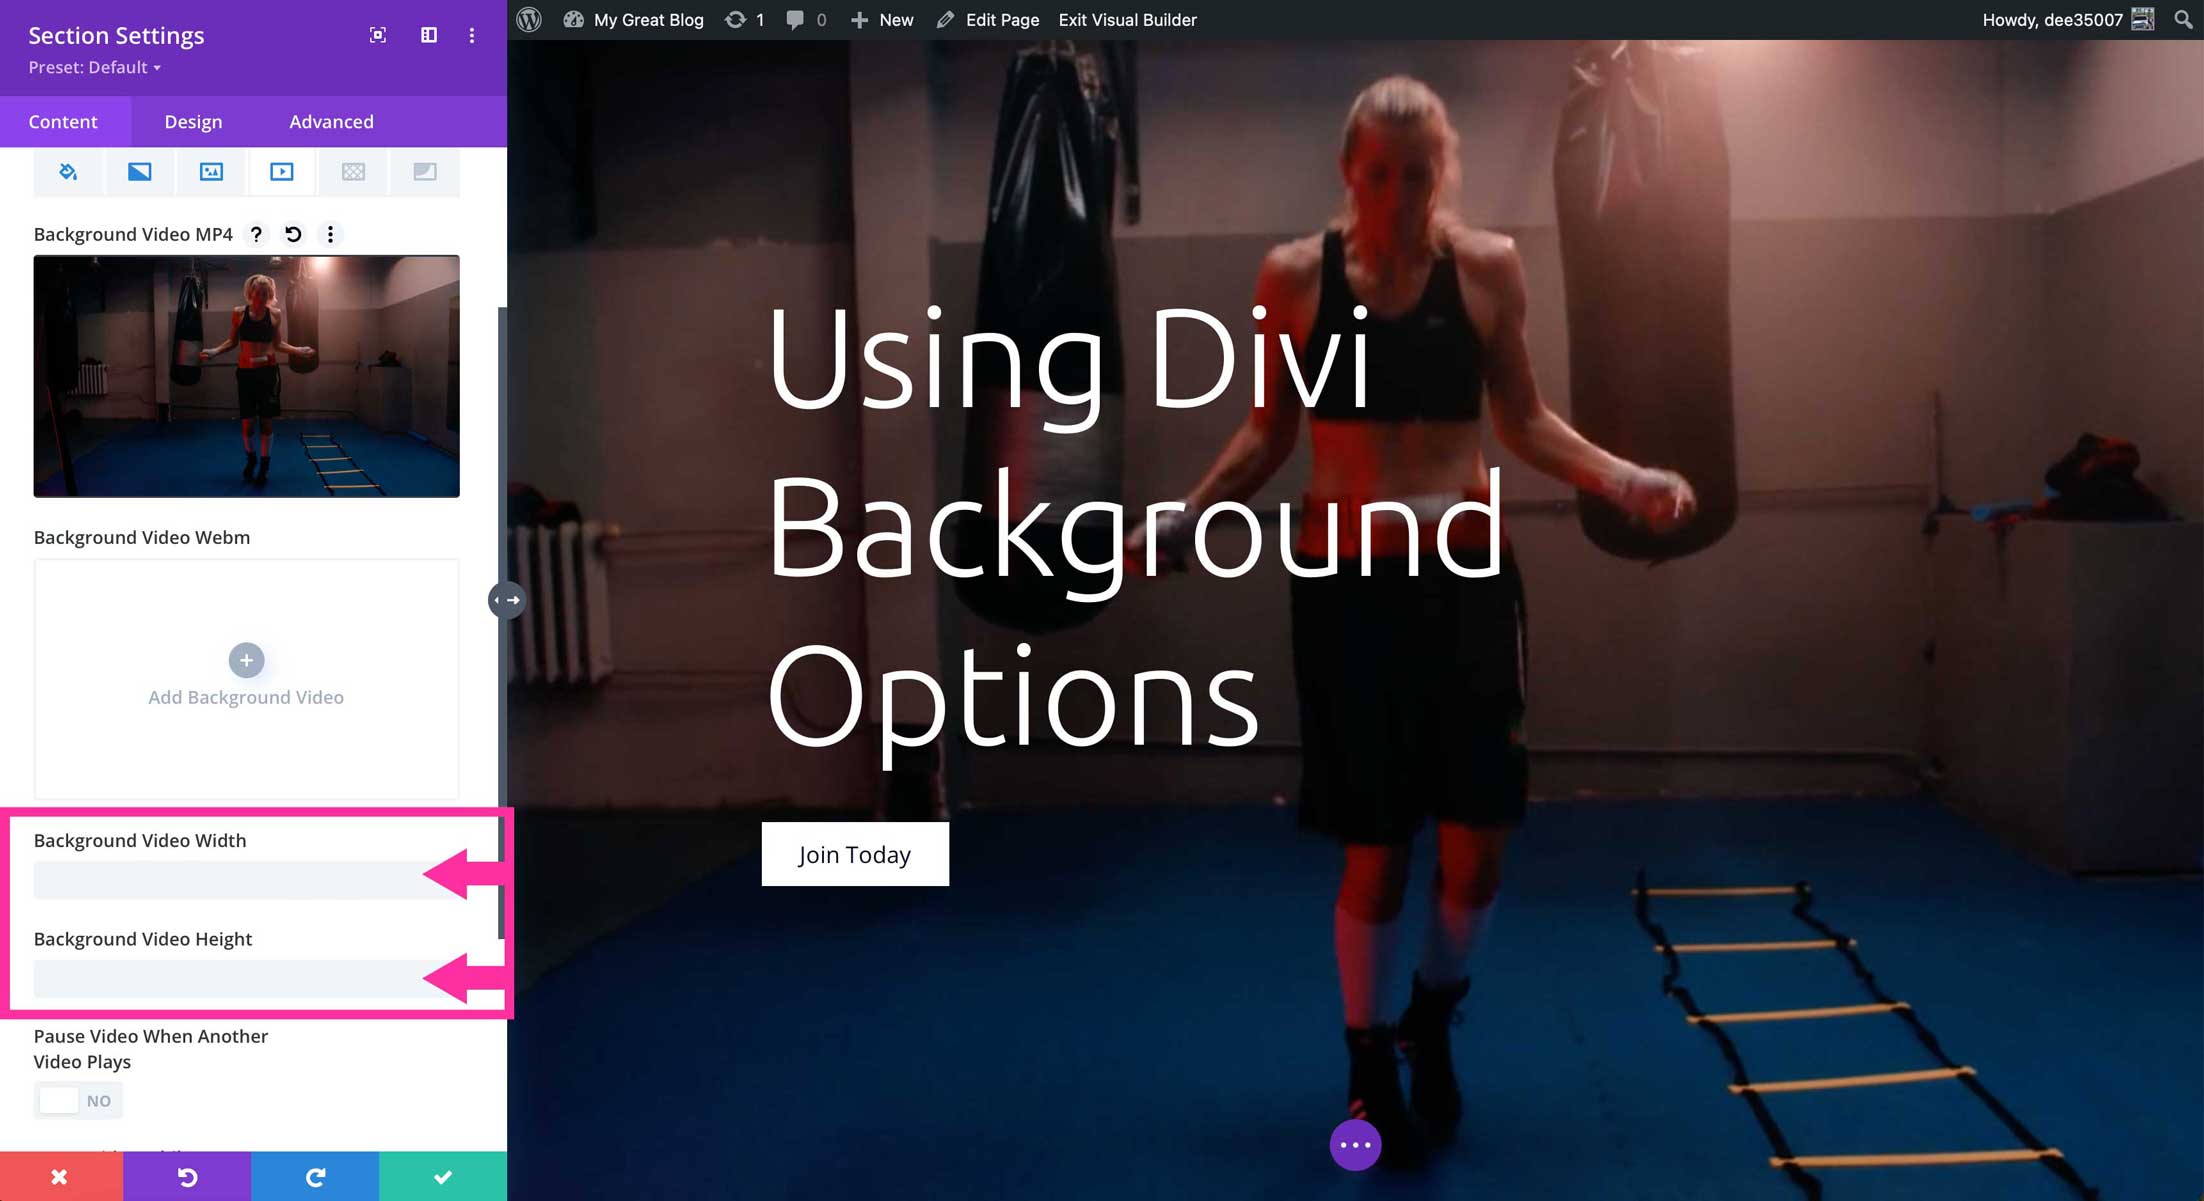
Background Video Width & Height
This is where you specify the height and width for your video.
Pause Video When Another Video Plays
If multiple videos exist on your webpage, you can choose to pause the video while another plays. To enable this feature, be sure to toggle this option to yes.

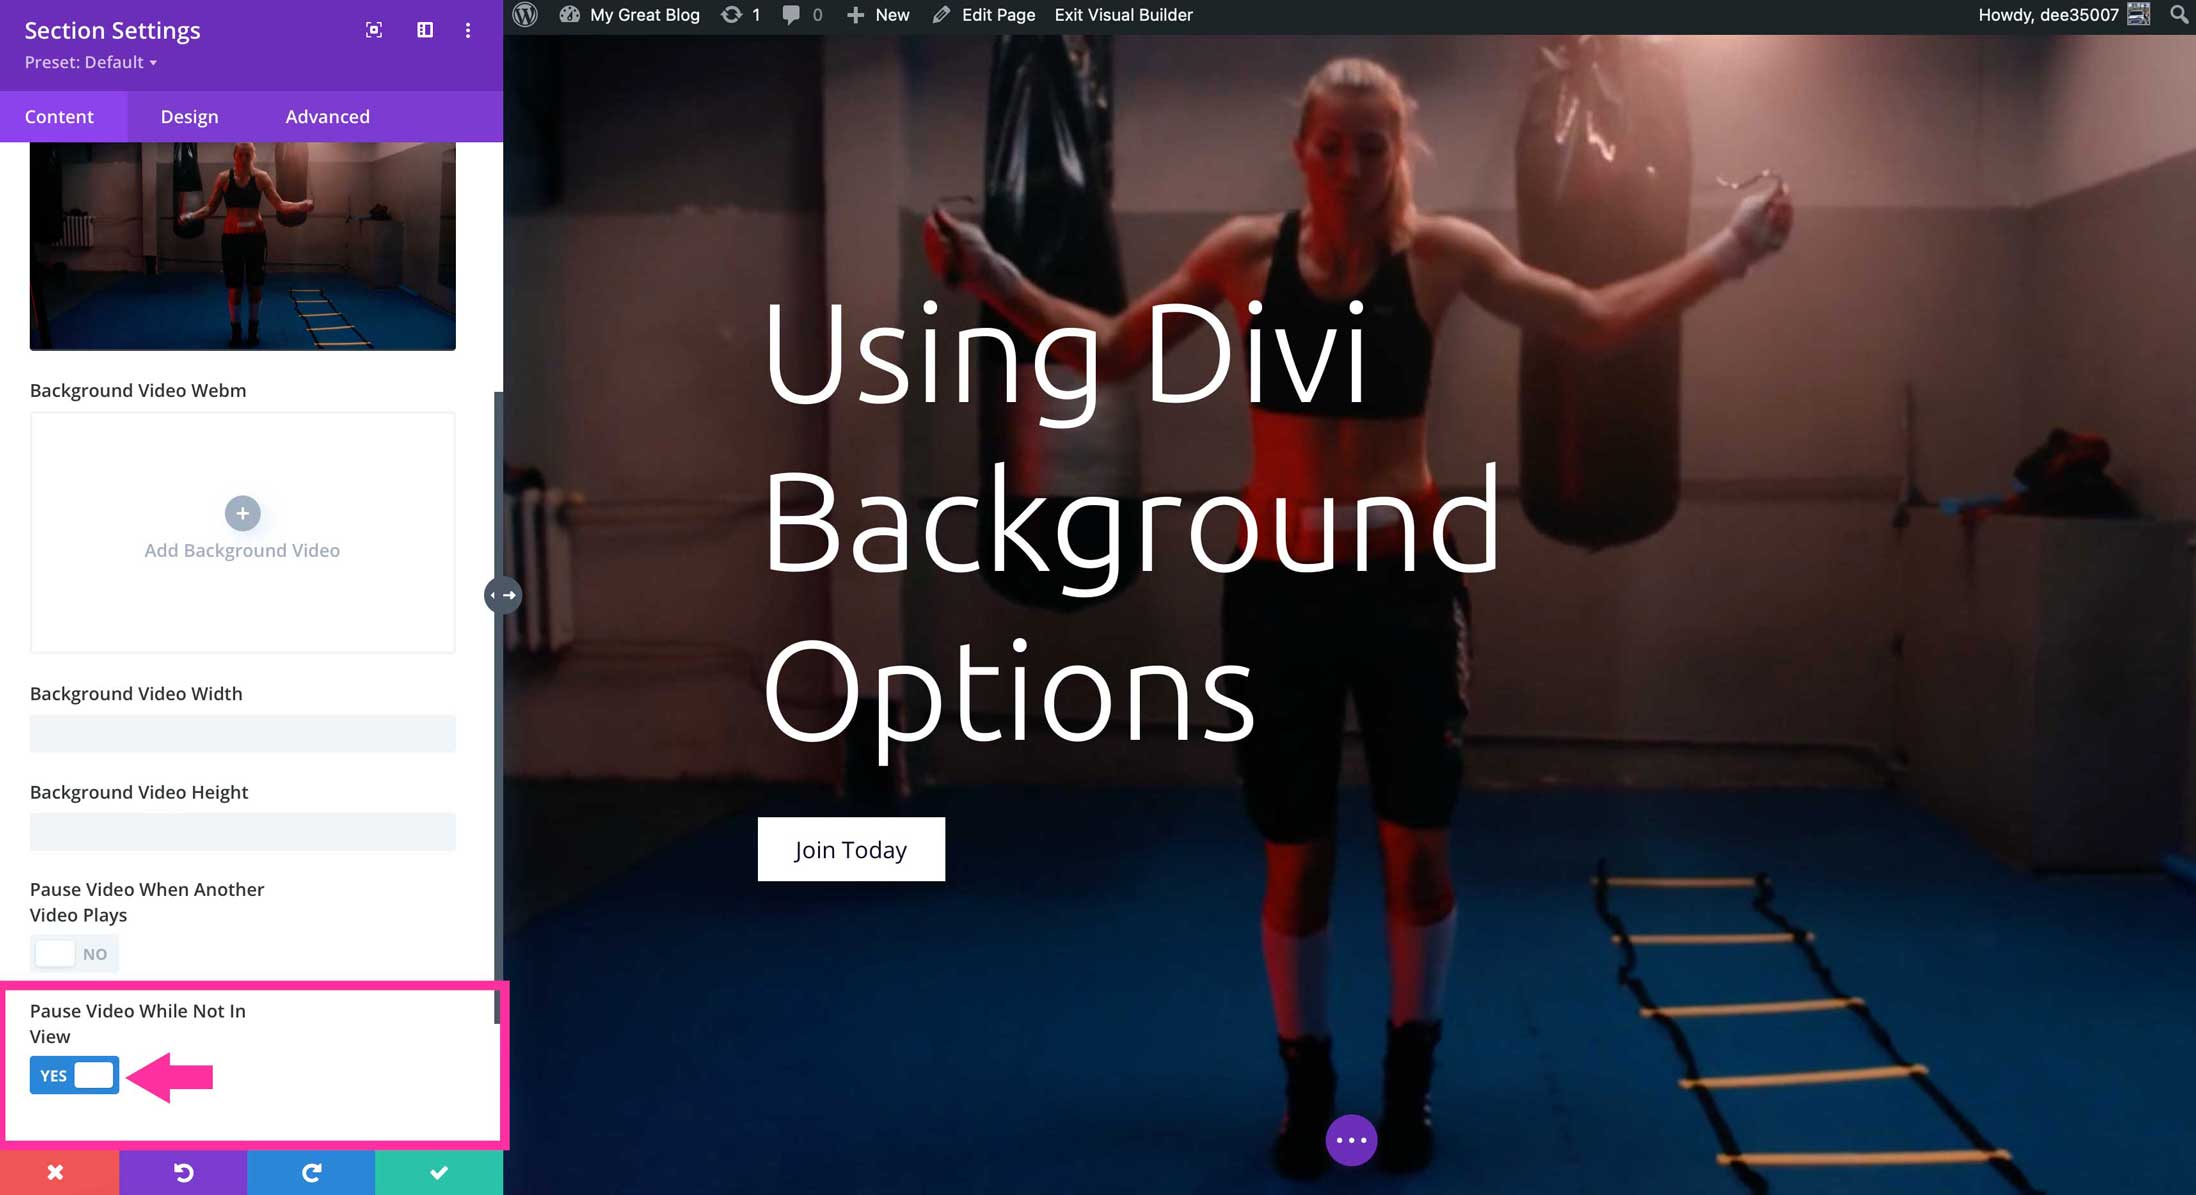
Pause Video While Not in View
Enable this option if you wish to pause the video while your site’s visitors are viewing other content. This is especially useful if the video contains pertinent information you don’t want users to miss.
How to Add a Pattern in Divi Background Options
Divi background patterns can be combined with colors, gradients, images, videos, and masks. When enabled, patterns will sit on top of other elements to provide depth and visual appeal.
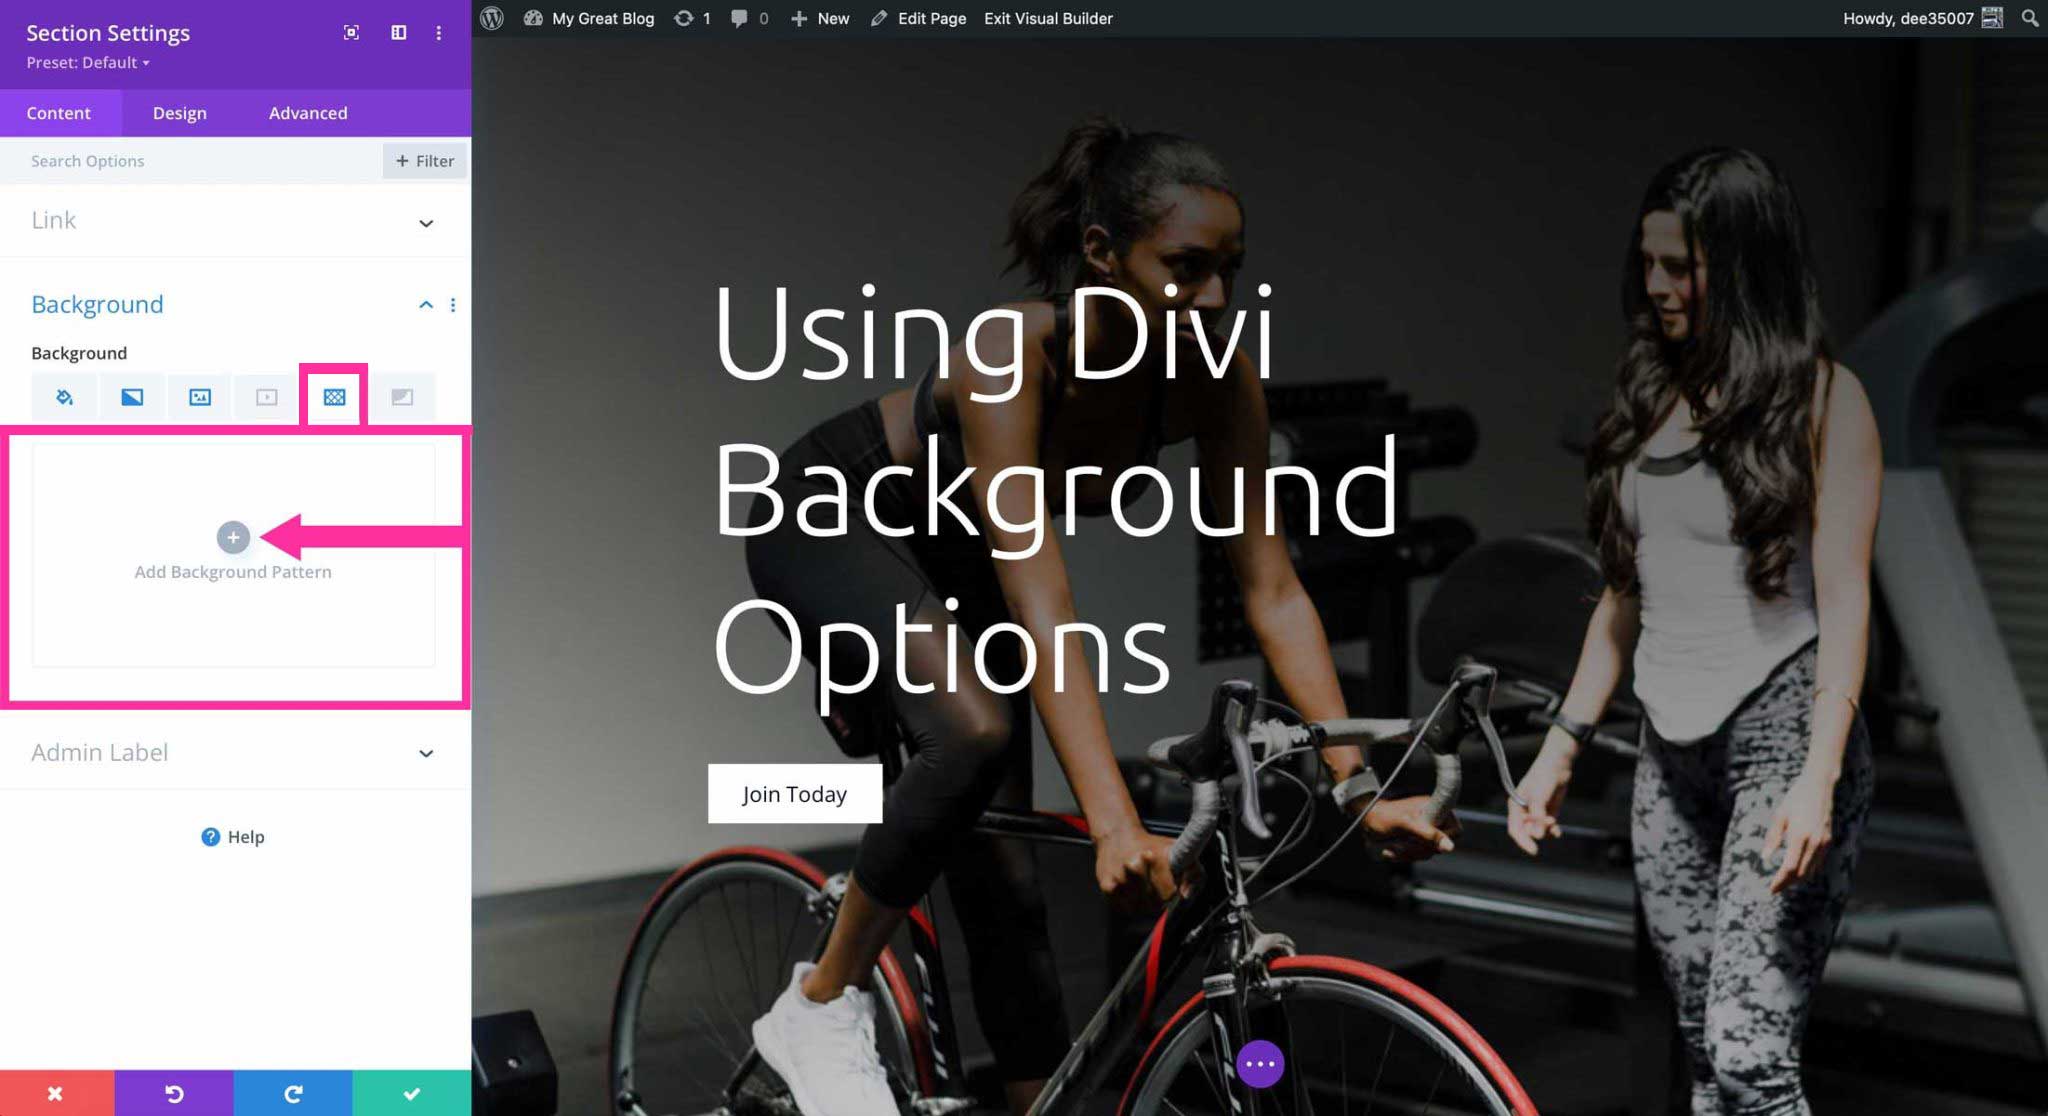
To add a new pattern, click the background pattern tab, then + Add Background Pattern.
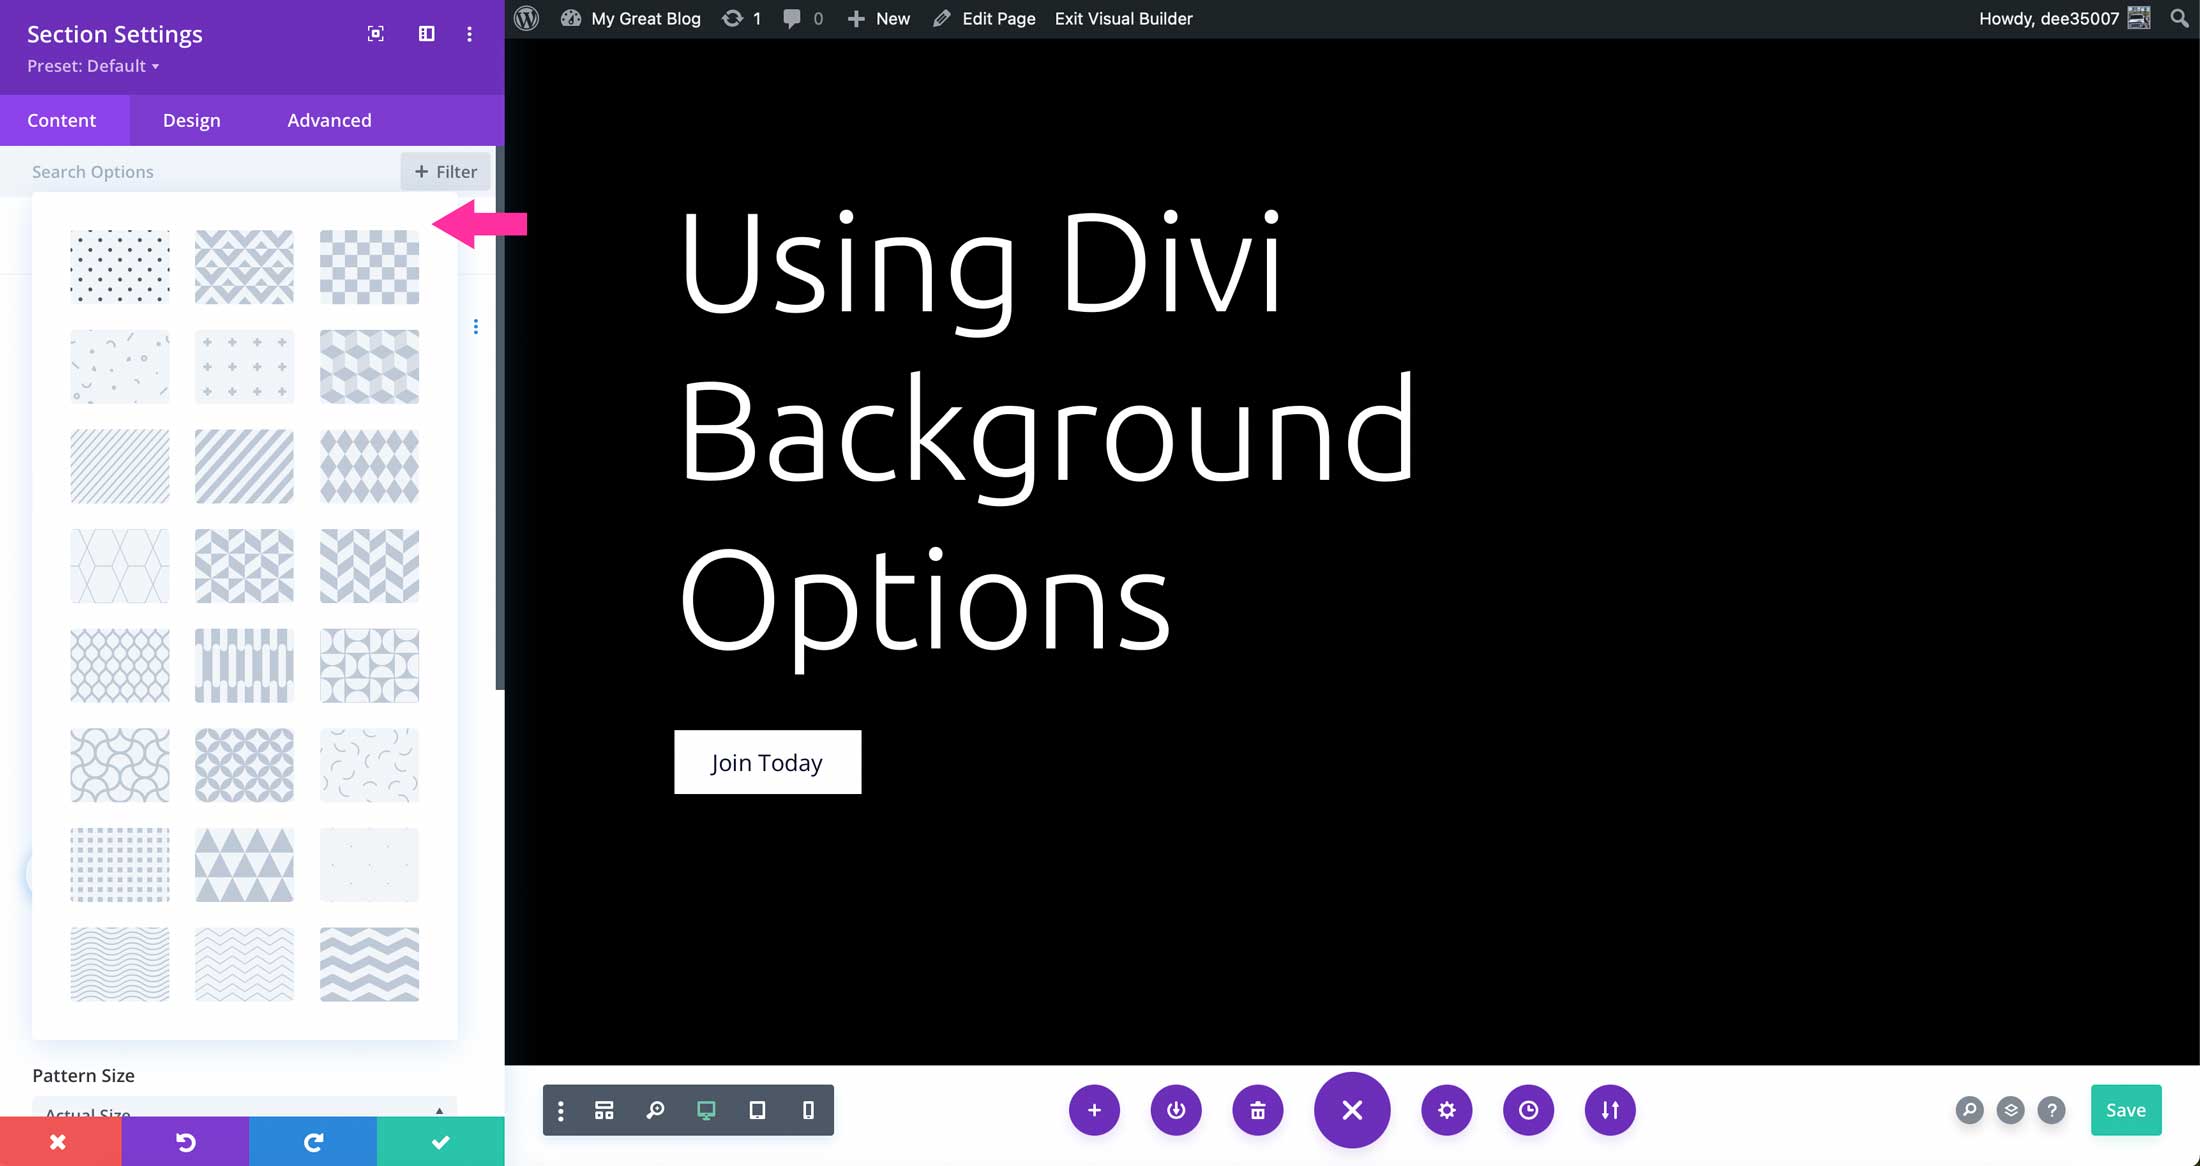
Divi comes with 24 pattern options to enhance your background design. Patterns can be flipped, rotated, and inverted to create unlimited looks.
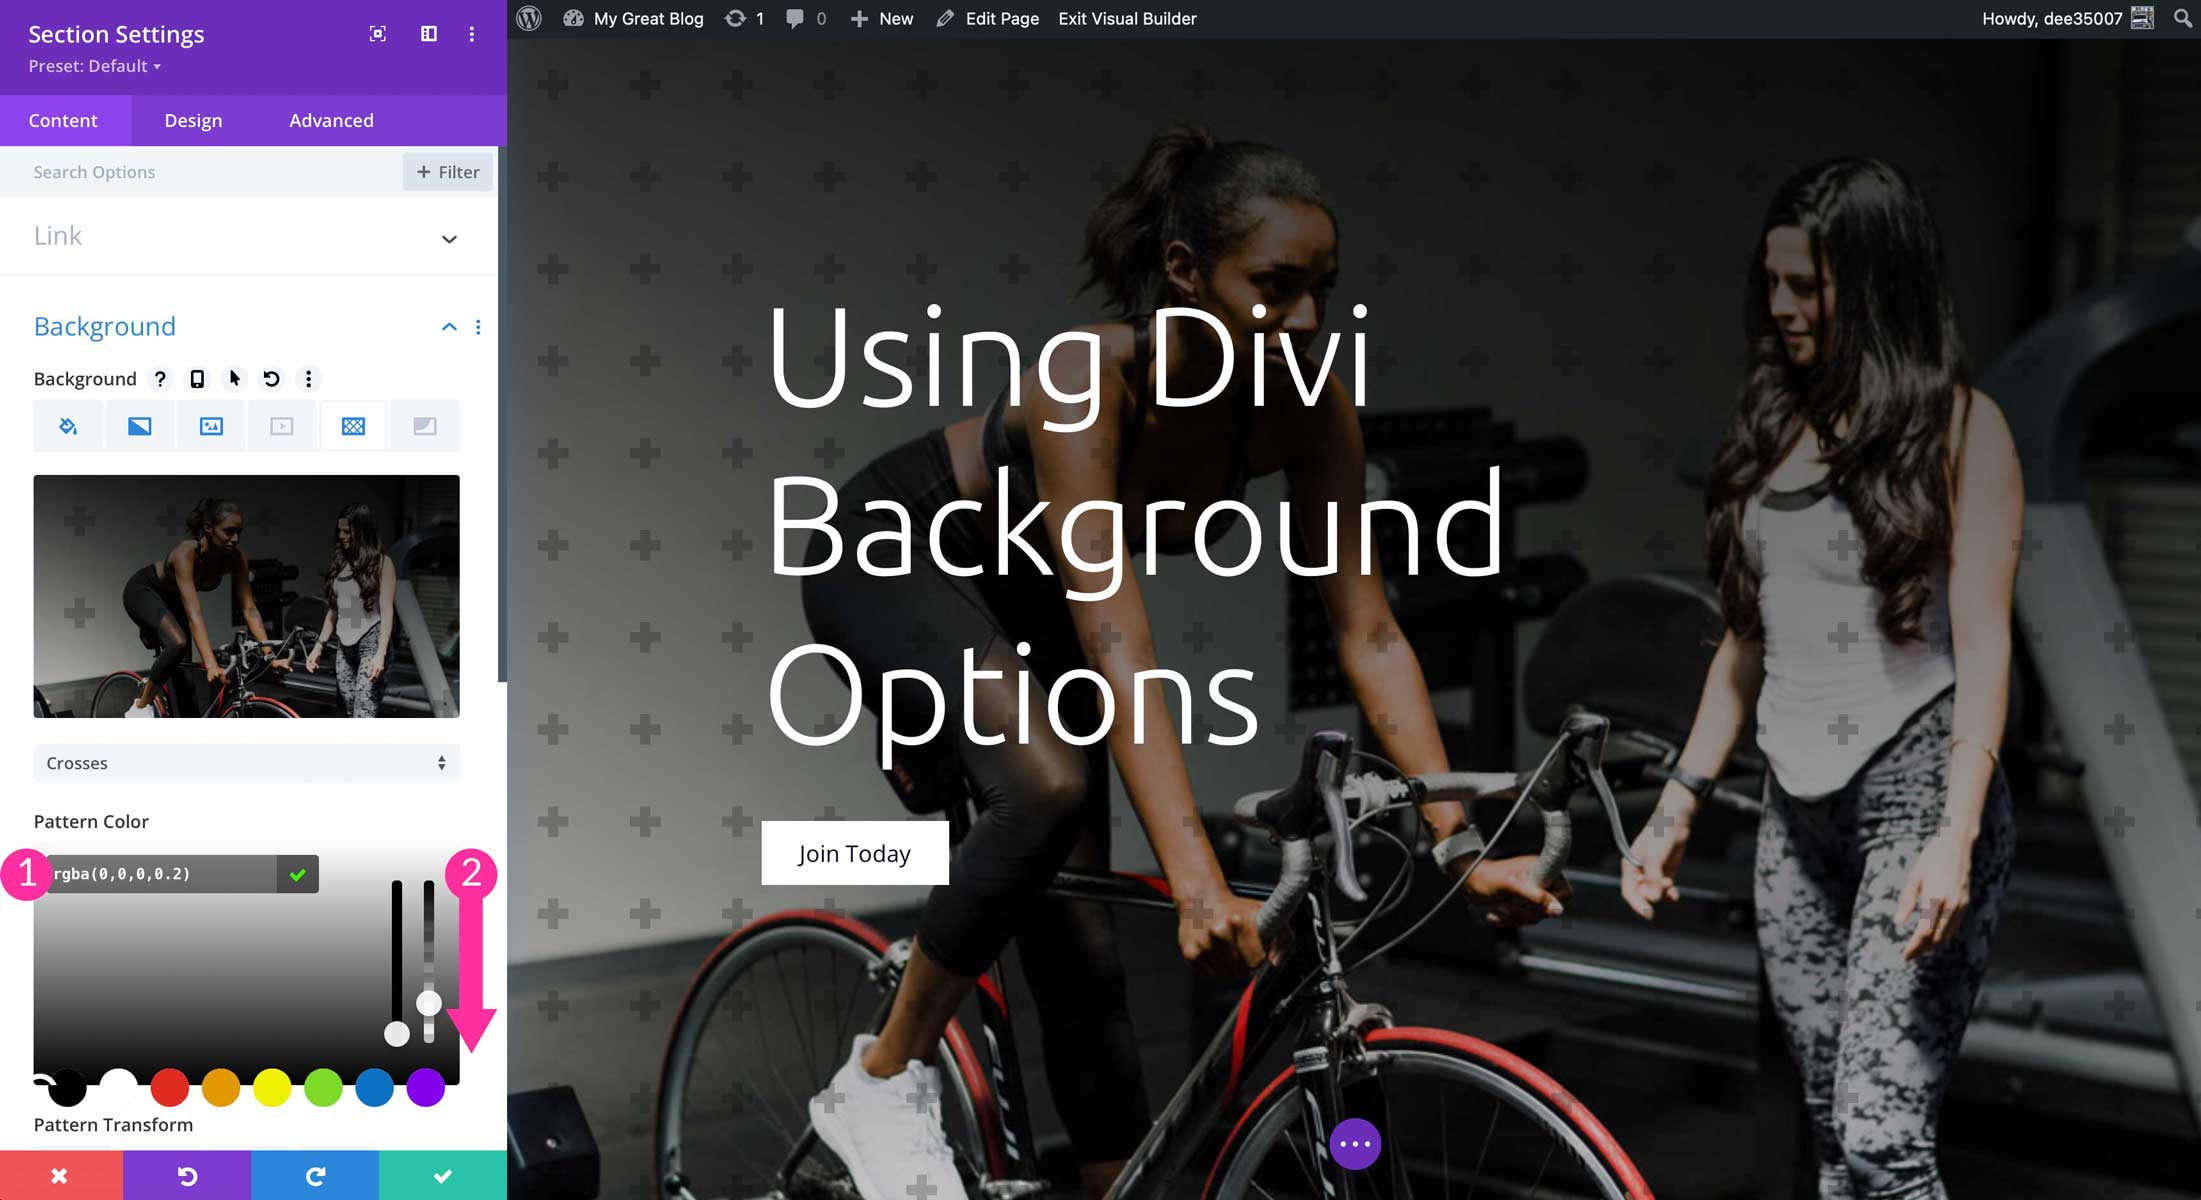
Pattern Color & Color Opacity
As with other Divi background options, users can edit the color associated with patterns. In addition, the opacity can be adjusted. Users can use Divi’s magic color system to edit or create swatches from recent, saved, or global colors. Refer to our documentation on the Divi color management system to learn more.
Pattern Transform
Once you set a pattern, you can use pattern transform to alter how it appears. You can flip it horizontally or vertically, rotate it, or invert it for an even more unique look.

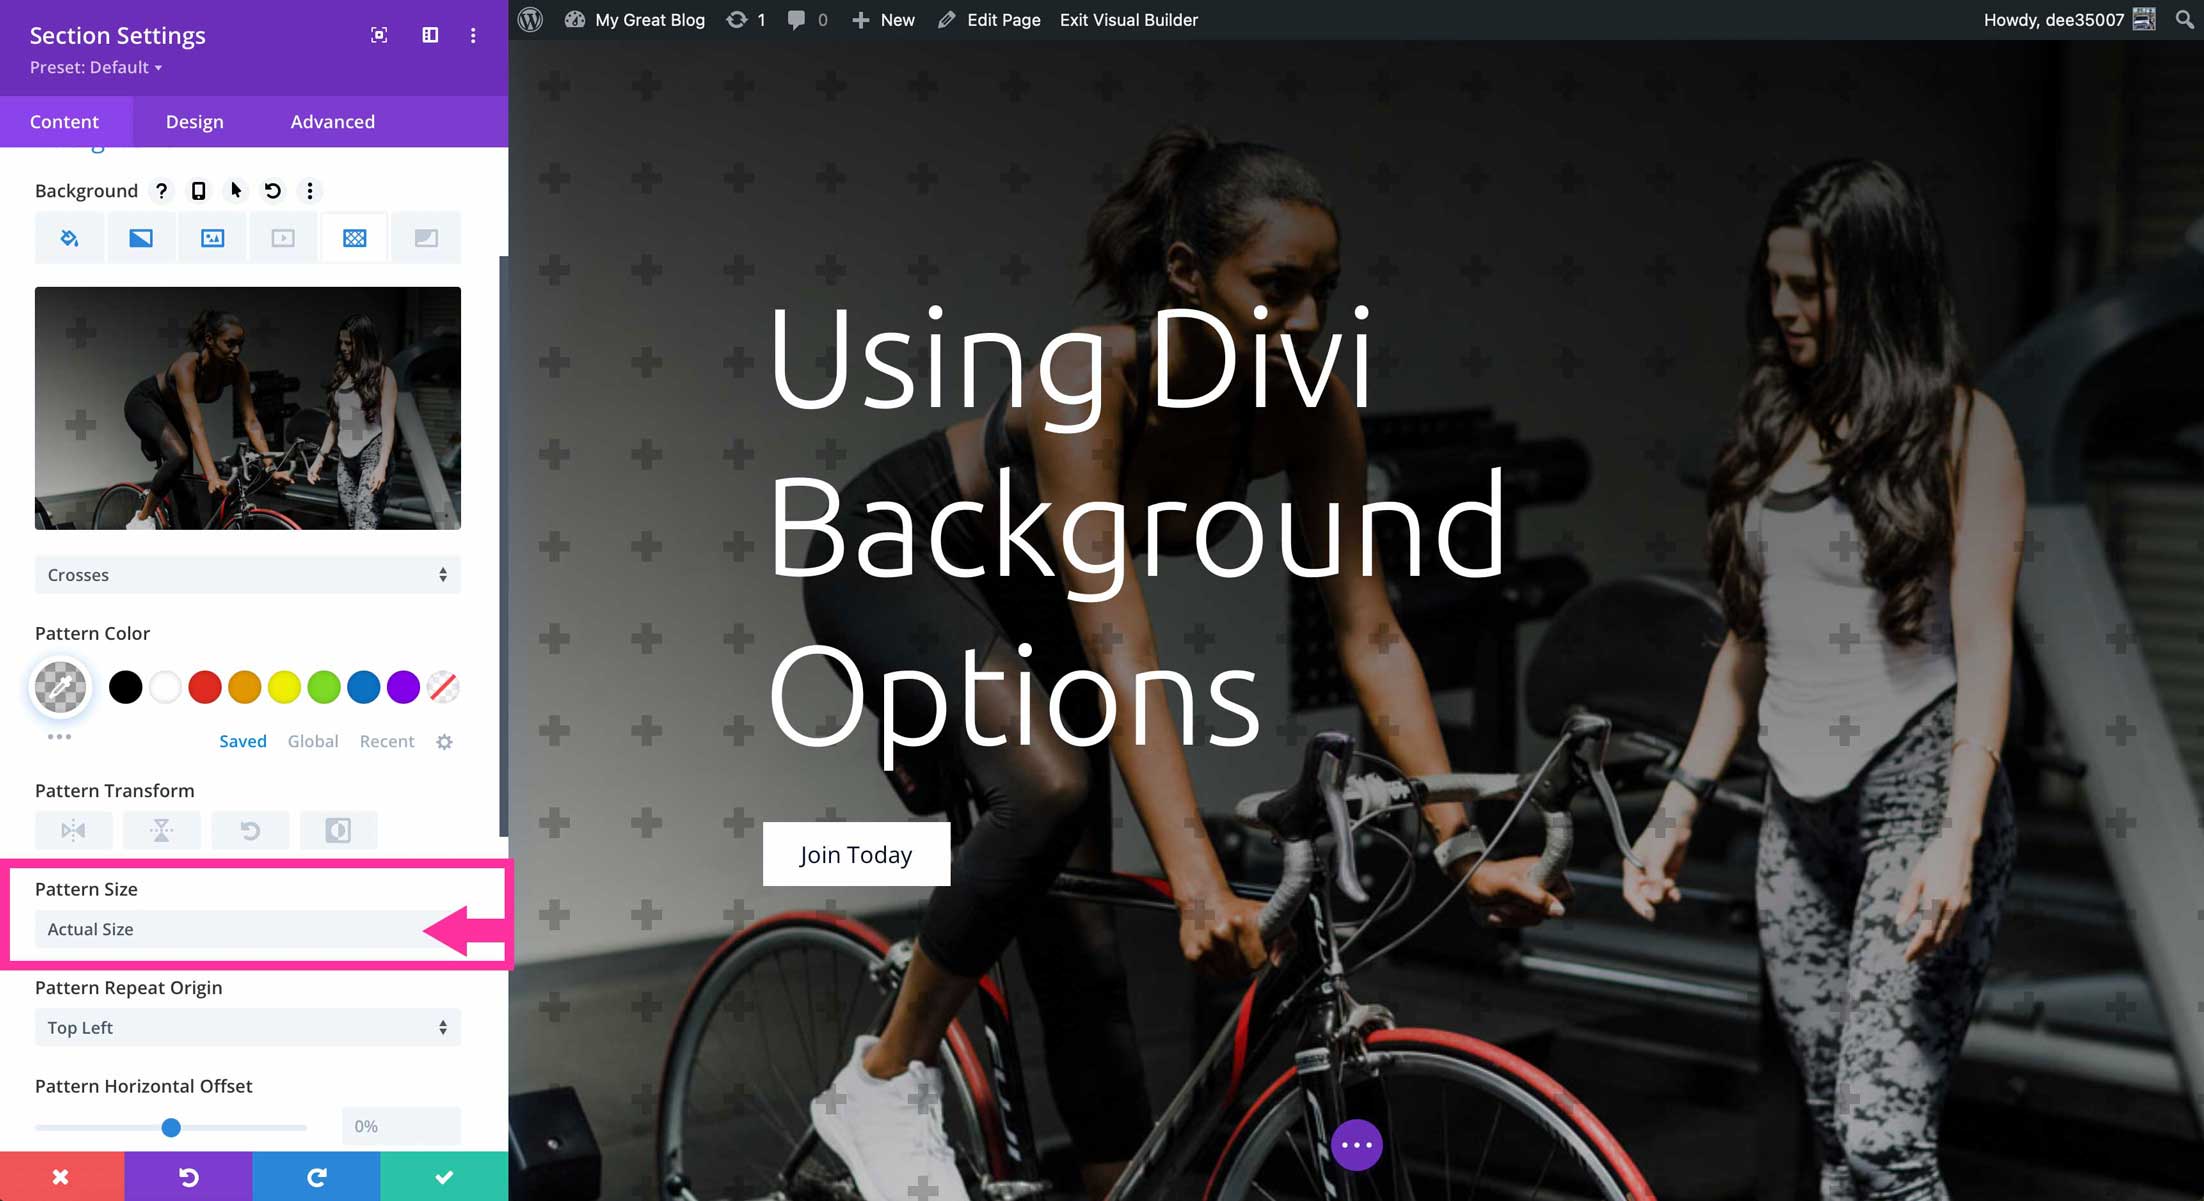
Pattern Size
The size of your pattern can be changed in a number of ways. Actual, cover, stretch to fill, fit, and custom size give users options on how the pattern is displayed. With custom size, you can adjust both the horizontal and vertical elements by clicking into their respective sliders.
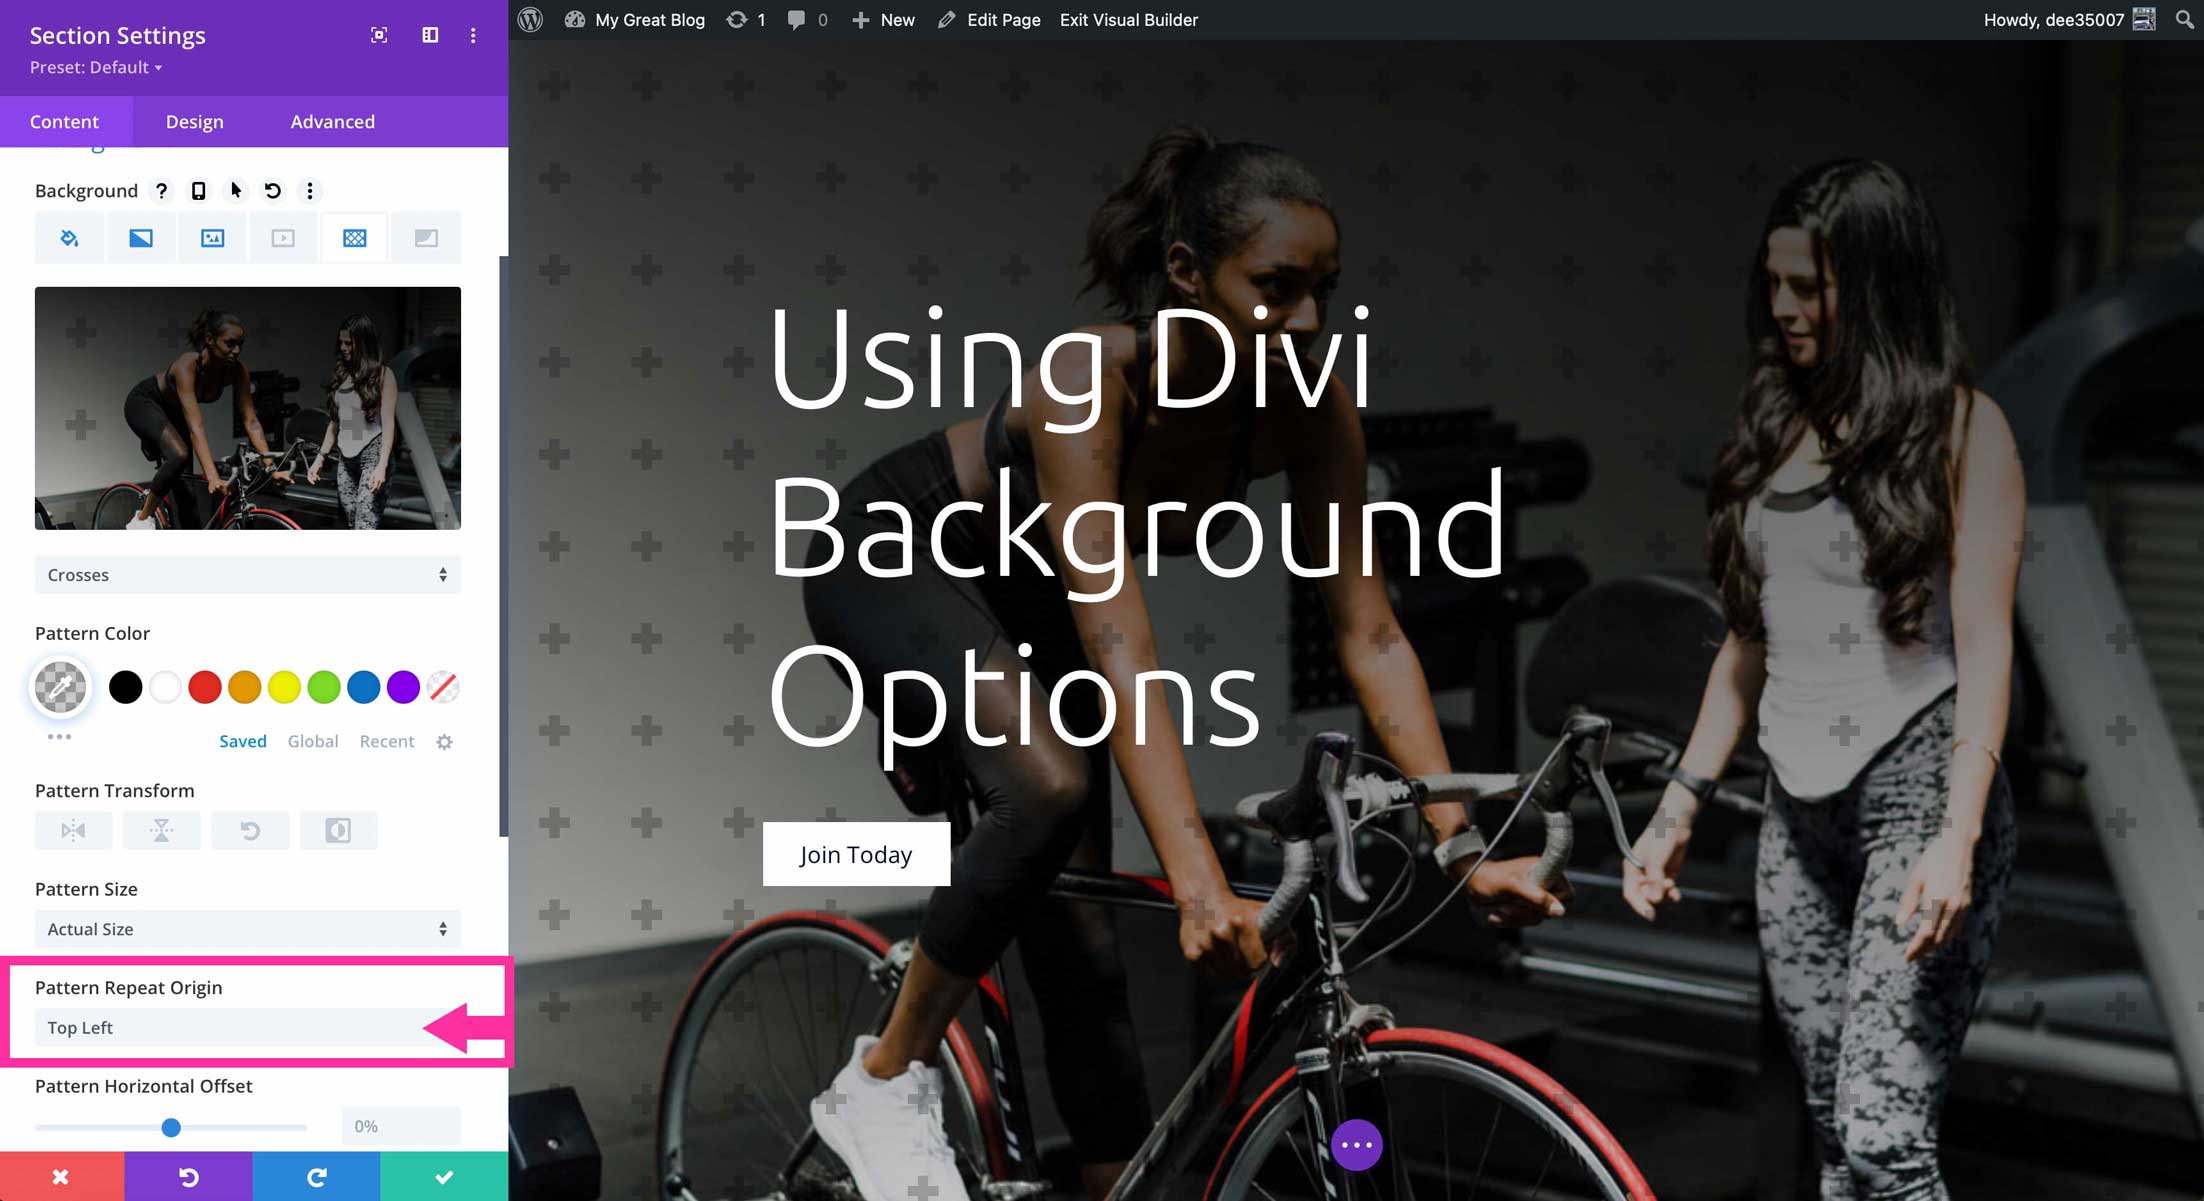
Pattern Repeat Origin
This option controls which position to repeat the pattern. Becuase patterns are seamless and repeatable, you’ll want to set the position of your pattern. Similar to background gradient and background image, users can choose a center, left, right, or bottom position.
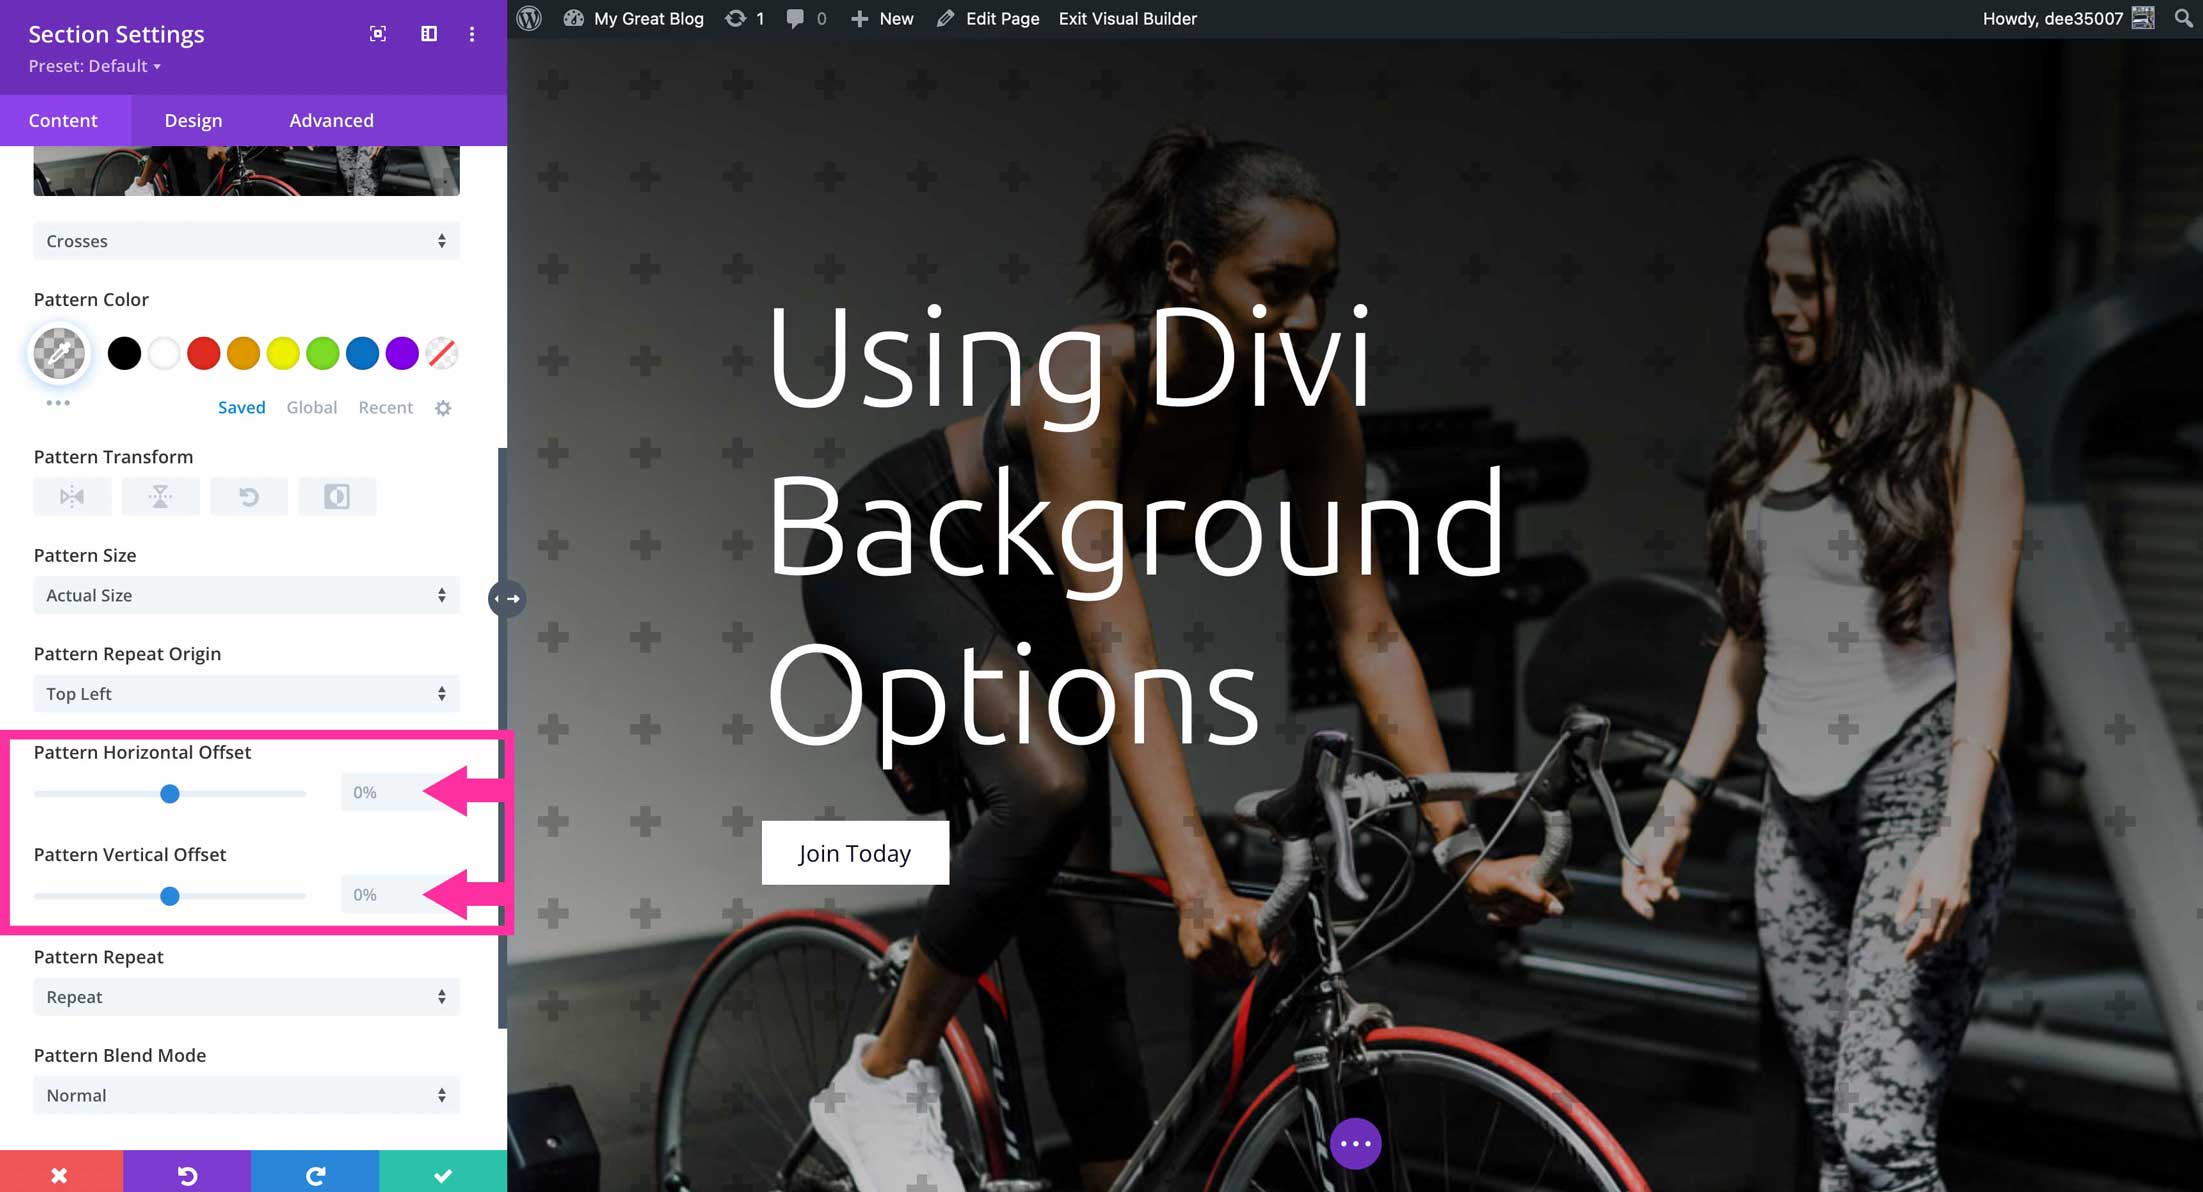
Pattern Horizontal & Vertical Offset
This allows you to choose the point your pattern begins; with horizontal and vertical options. Simply click into each slider to adjust the vertical or horizontal offset position.
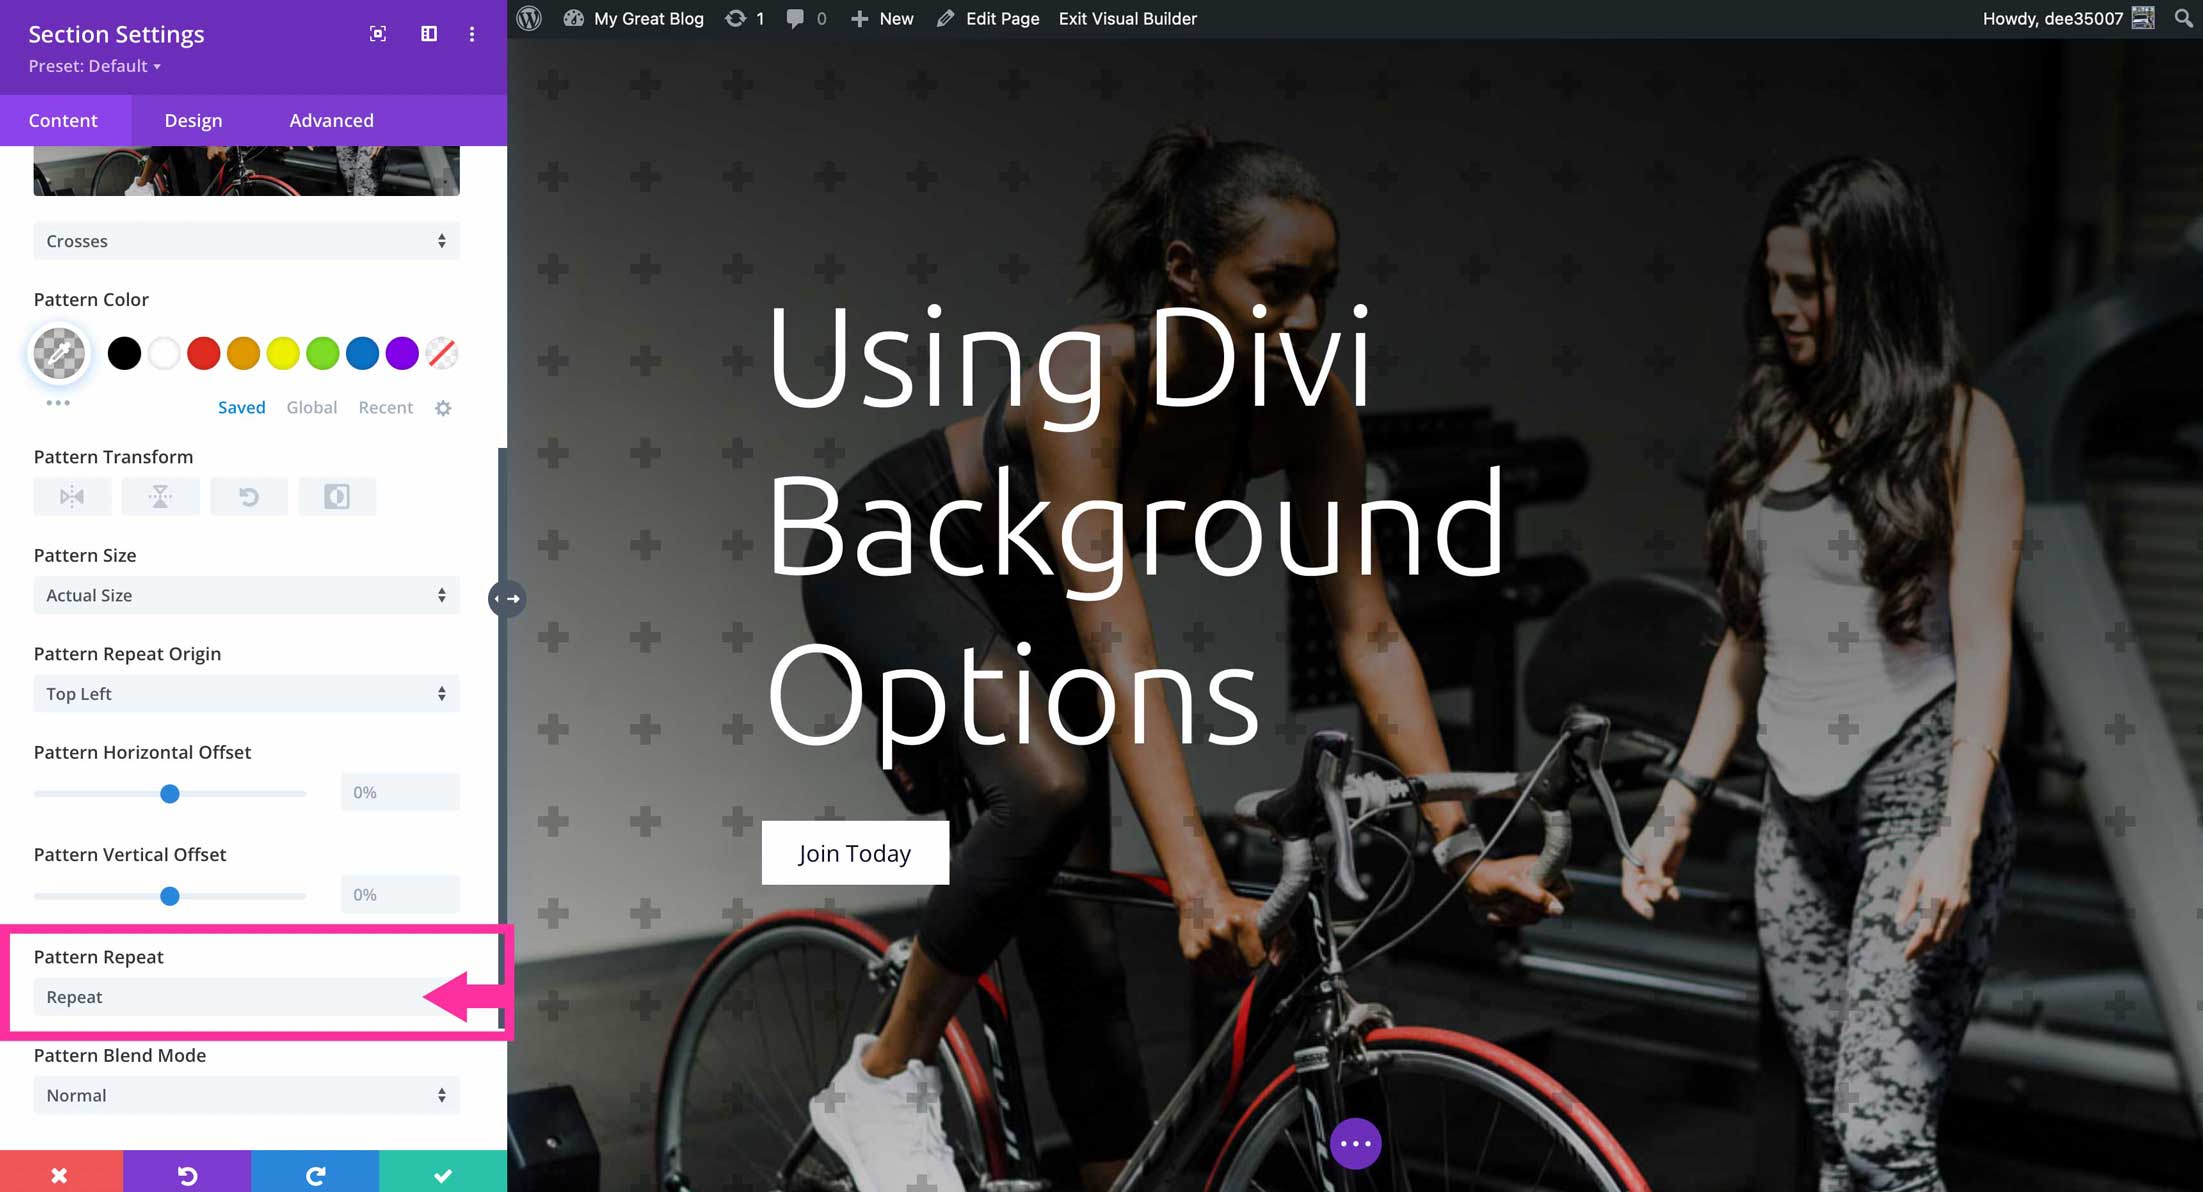
Pattern Repeat
You can choose the type of repeat applied to your pattern. Choices are repeat, repeat X (horizontal), repeat Y (vertical), repeat with space between, and repeat and stretch.
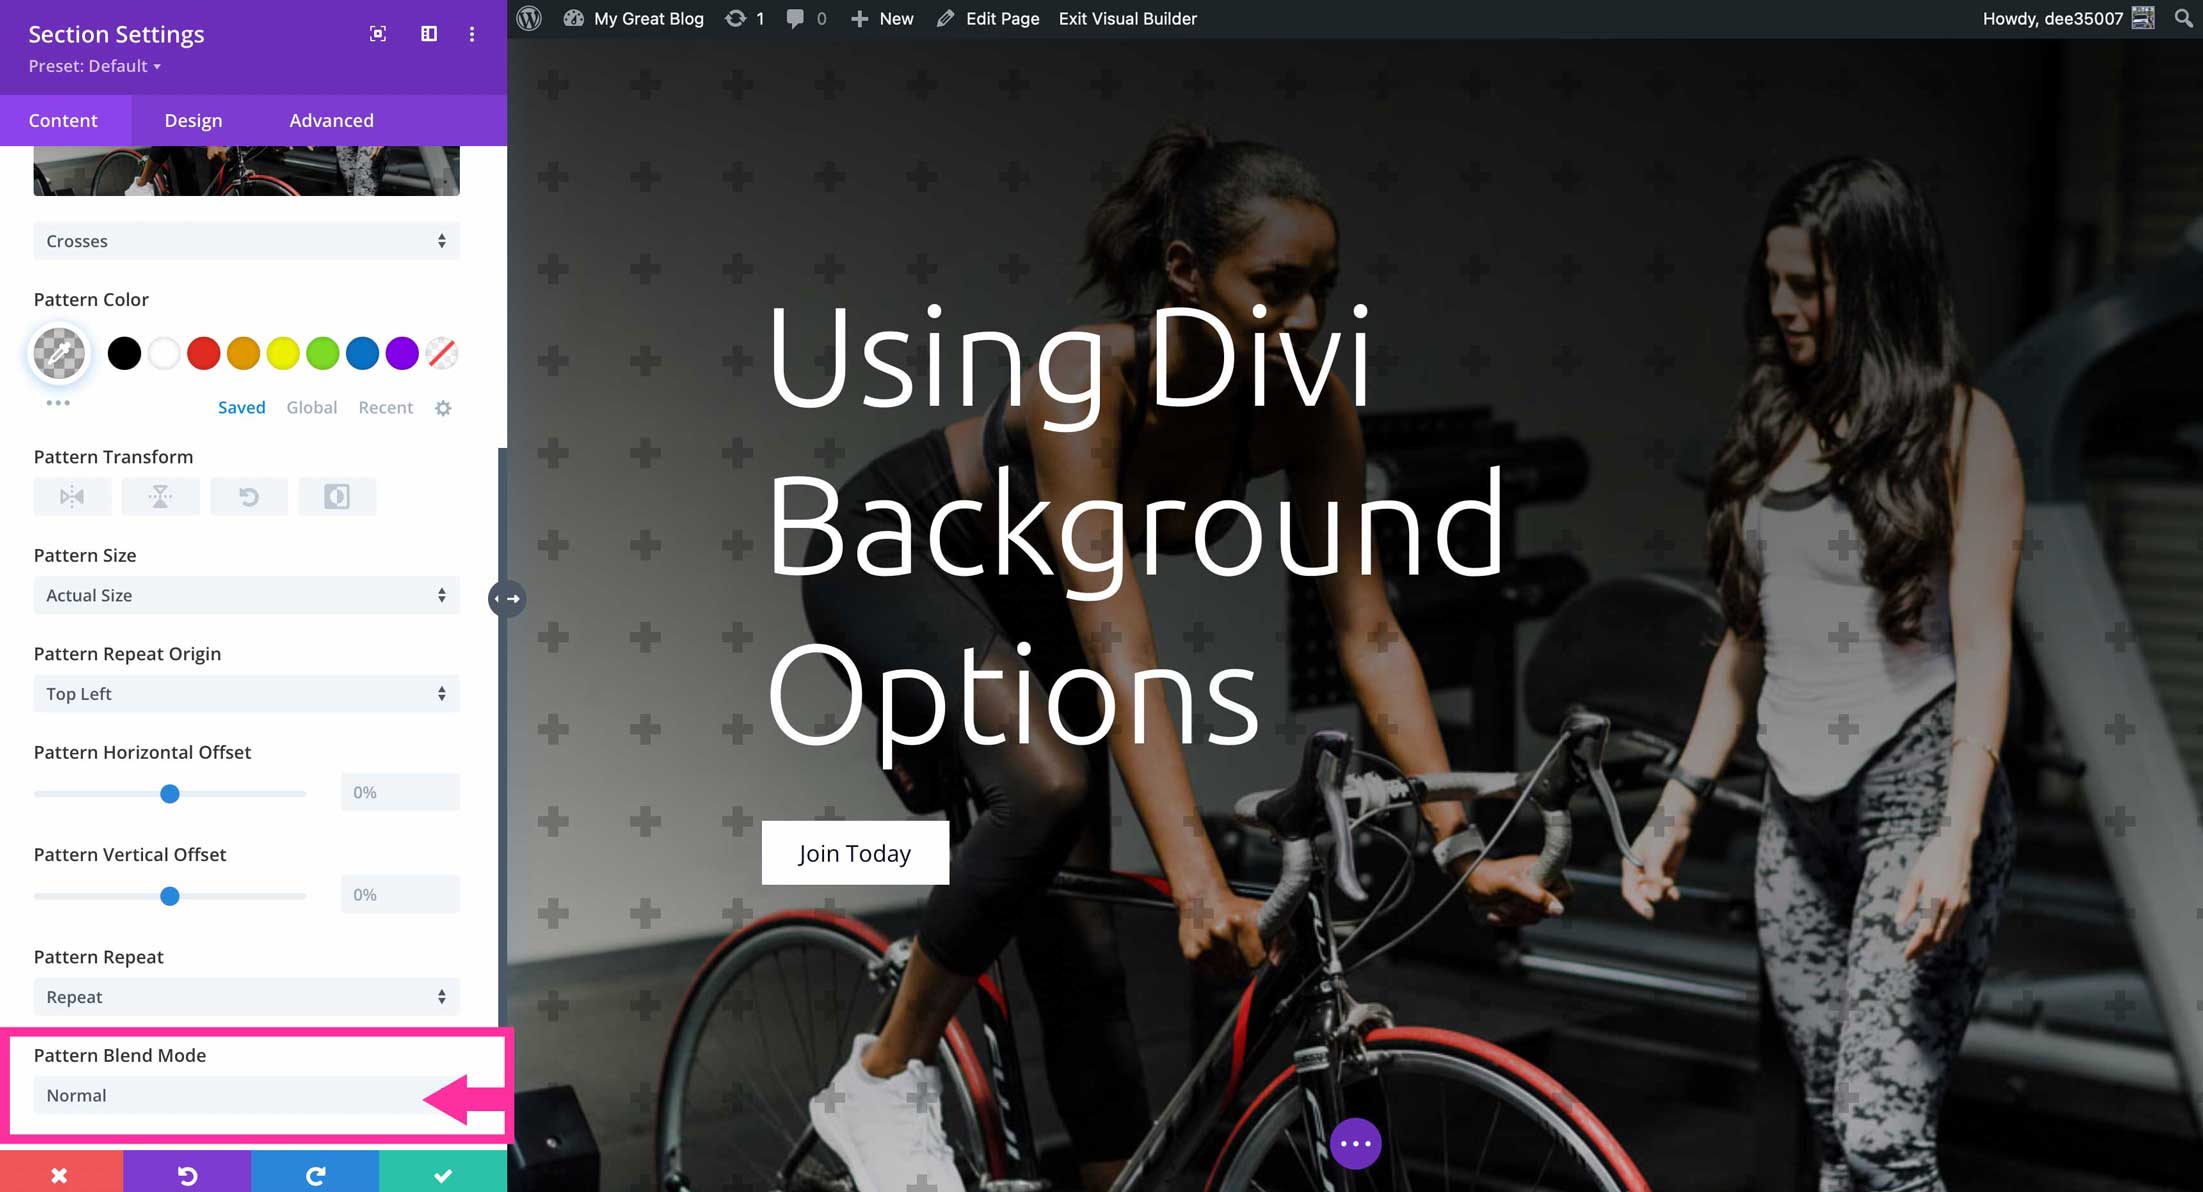
Pattern Blend Mode
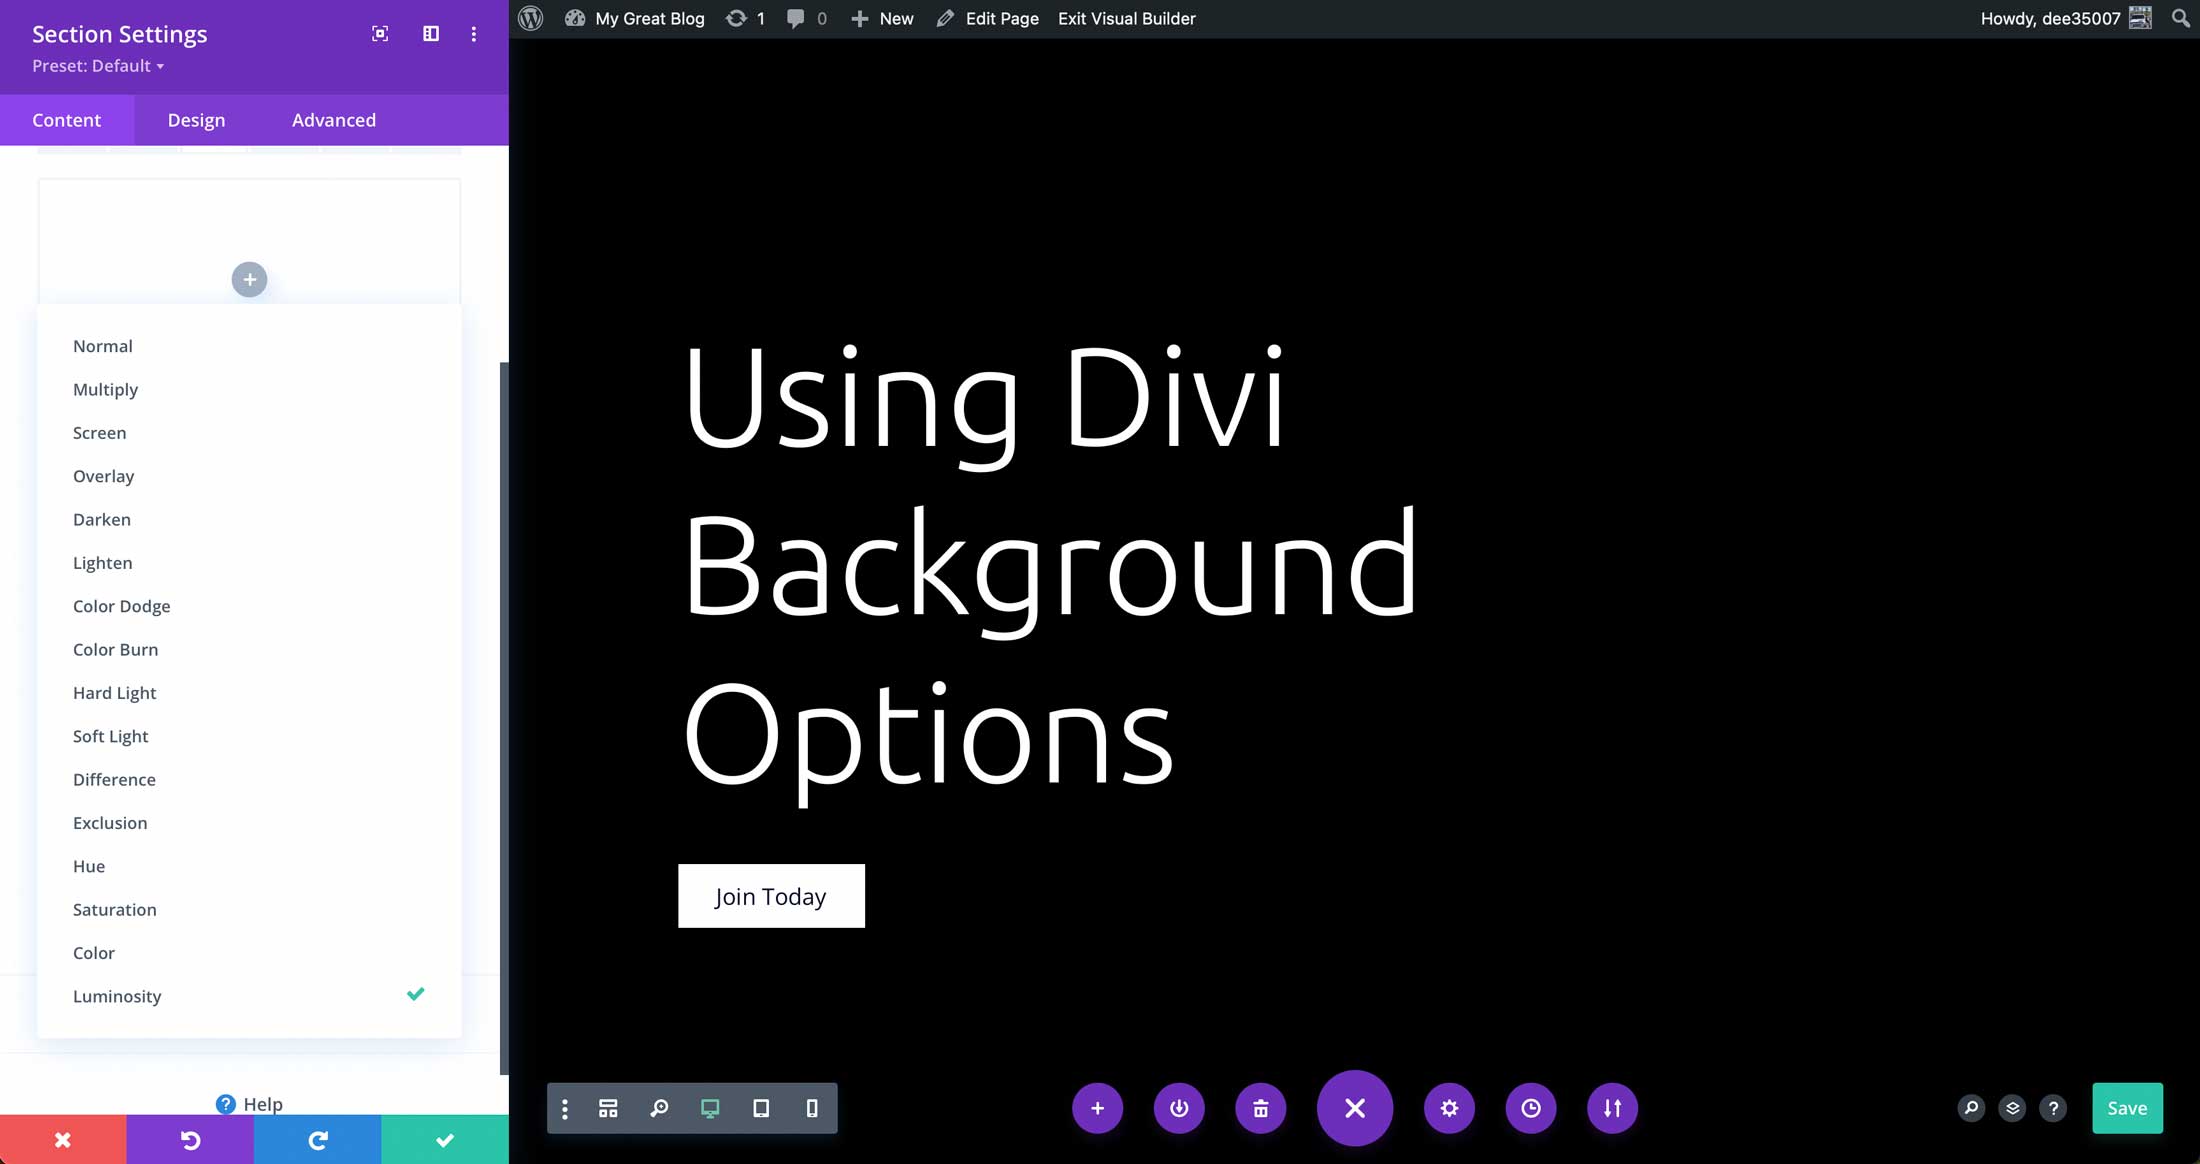
Divi’s pattern blend mode gives you 16 options for blending your pattern into your background color, gradient, image, or video. Each has a different effect, so we encourage familiarizing yourself with the options in order to choose the best look for your design.
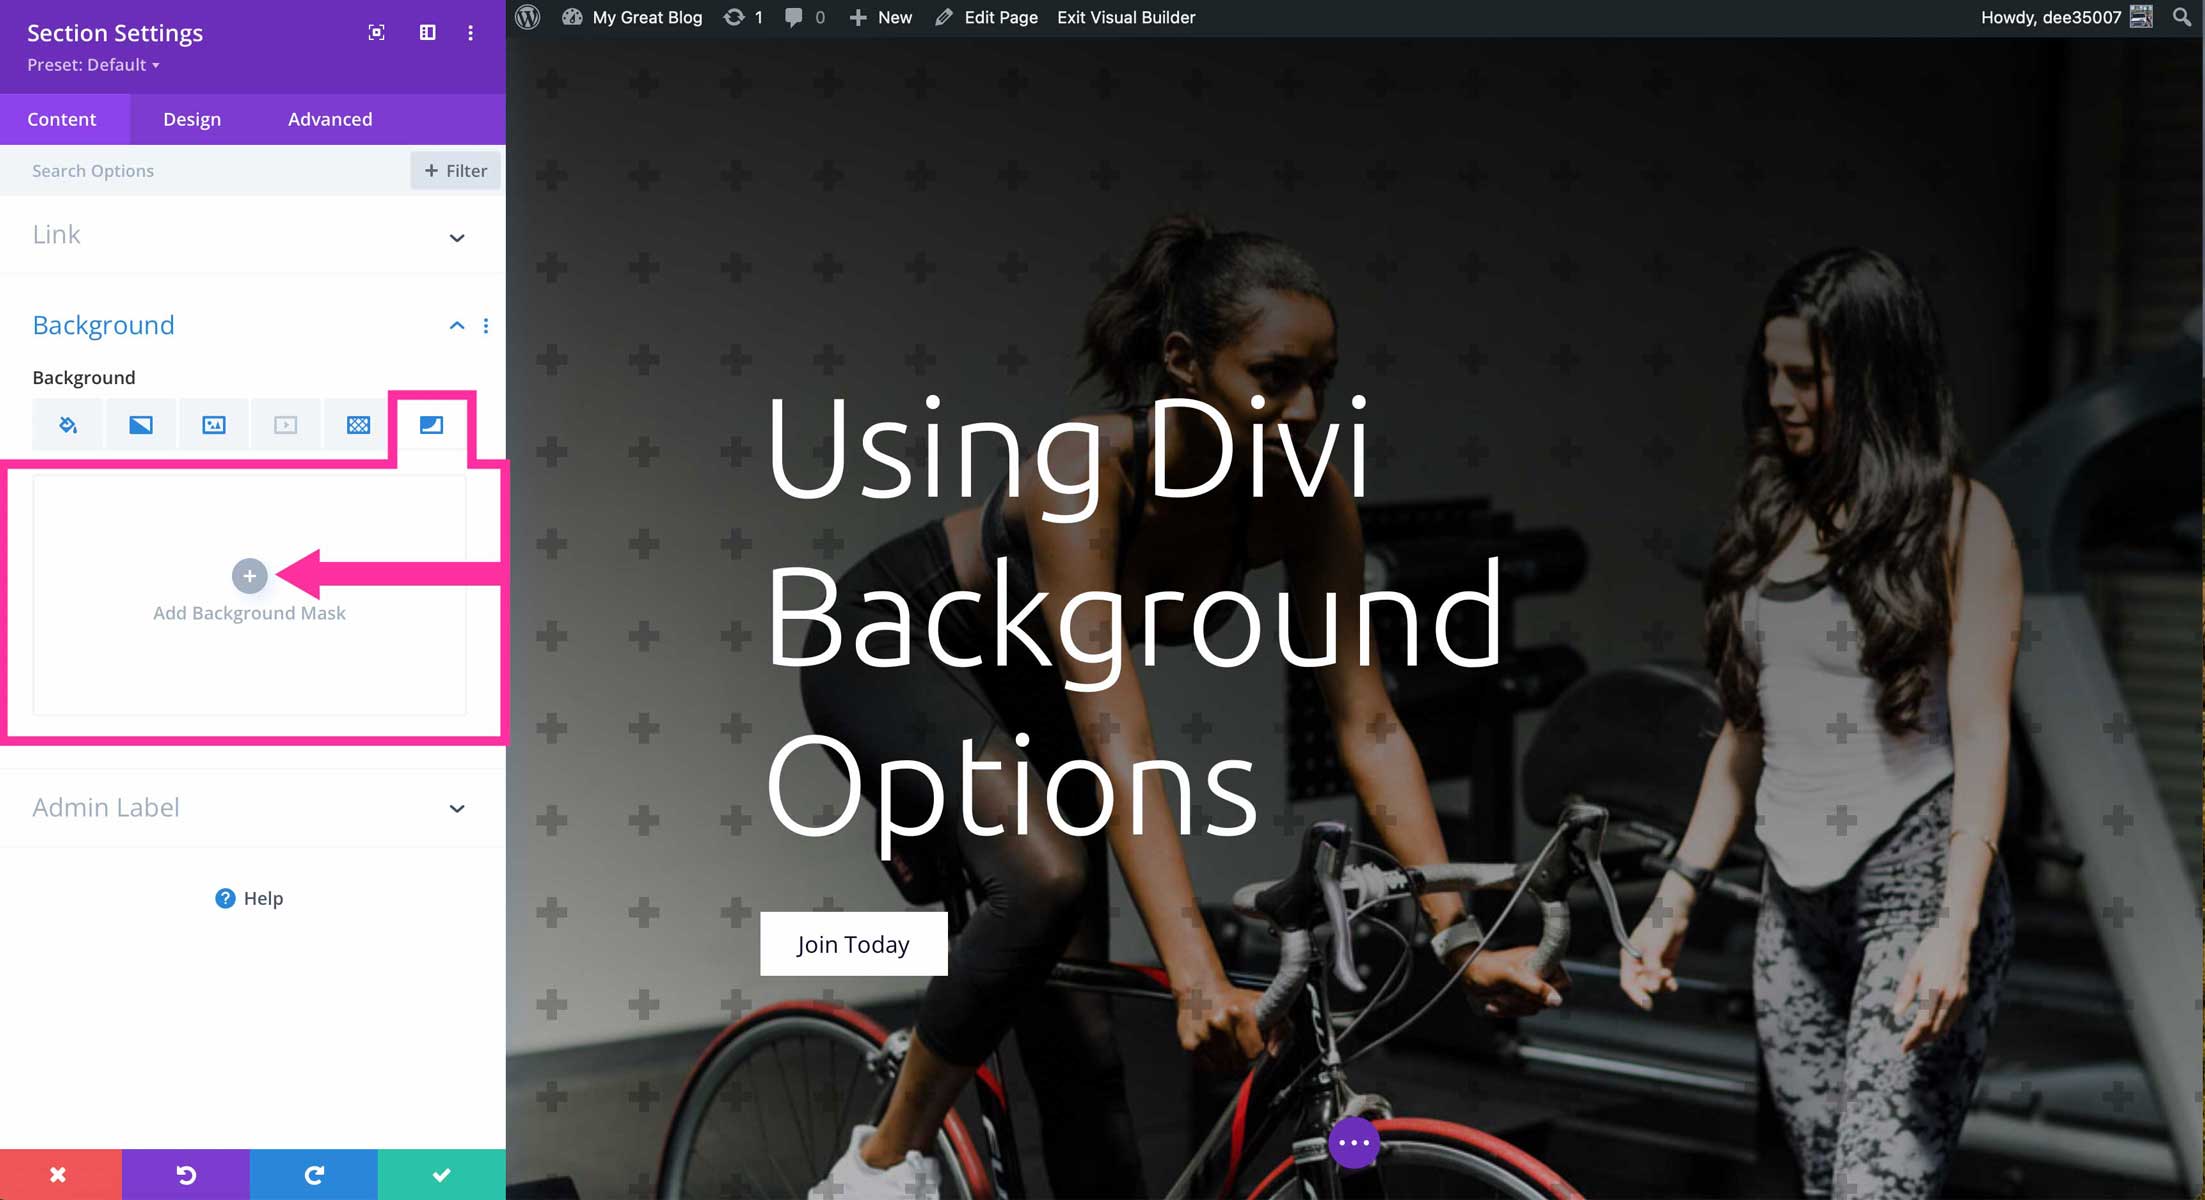
How to Add a Mask in Divi Background Options
Background masks use positive and negative space to create shapes for use in your designs. They are placed on top of gradients, images, videos, and patterns to create striking backgrounds. Combined with other elements, you can create unique background designs where no two backgrounds are the same. There are 23 mask options to choose from. To add a background mask, select the background mask tab, then click the +Add Background Mask button.
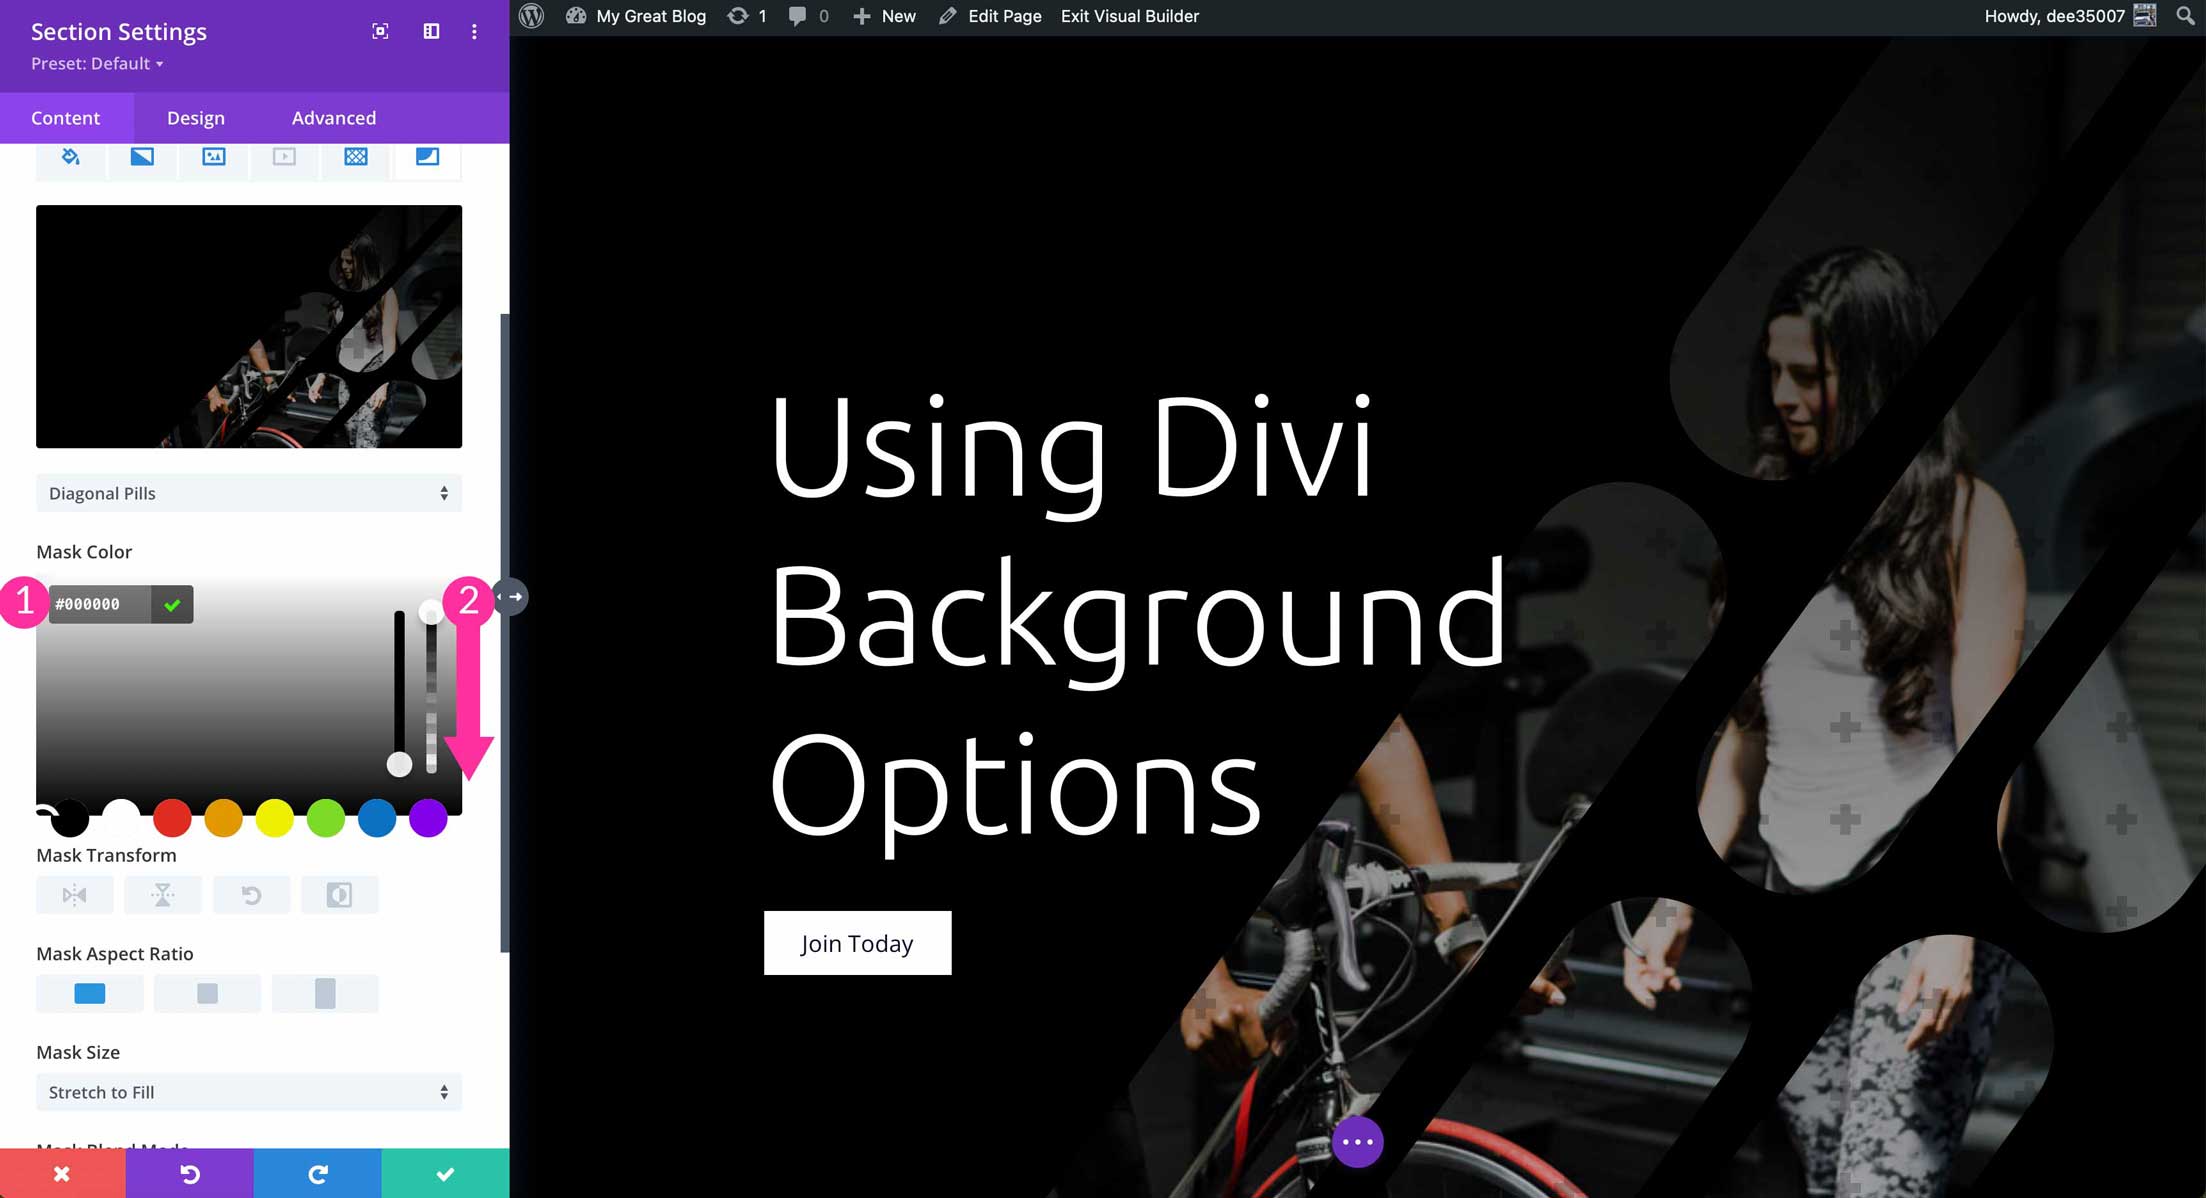
In addition to adding background masks you can also choose a mask color, transform the mask by flipping it horizontally or vertically, rotate it, or invert it. Finally, the mask aspect ratio has several orientations to choose from: landscape, portrait, or square.
Mask color
The mask color can be a static color of your choosing. Additionally, you can choose to use a recent, saved or global color. Another option is to use Divi’s dynamic color system to choose a color for your mask. Finally, opacity can be adjusted on your color to reveal other elements being used in background options.
Mask Transform
The mask transform setting allows for you to flip your mask horizontally or vertically, as well as rotate or invert it.

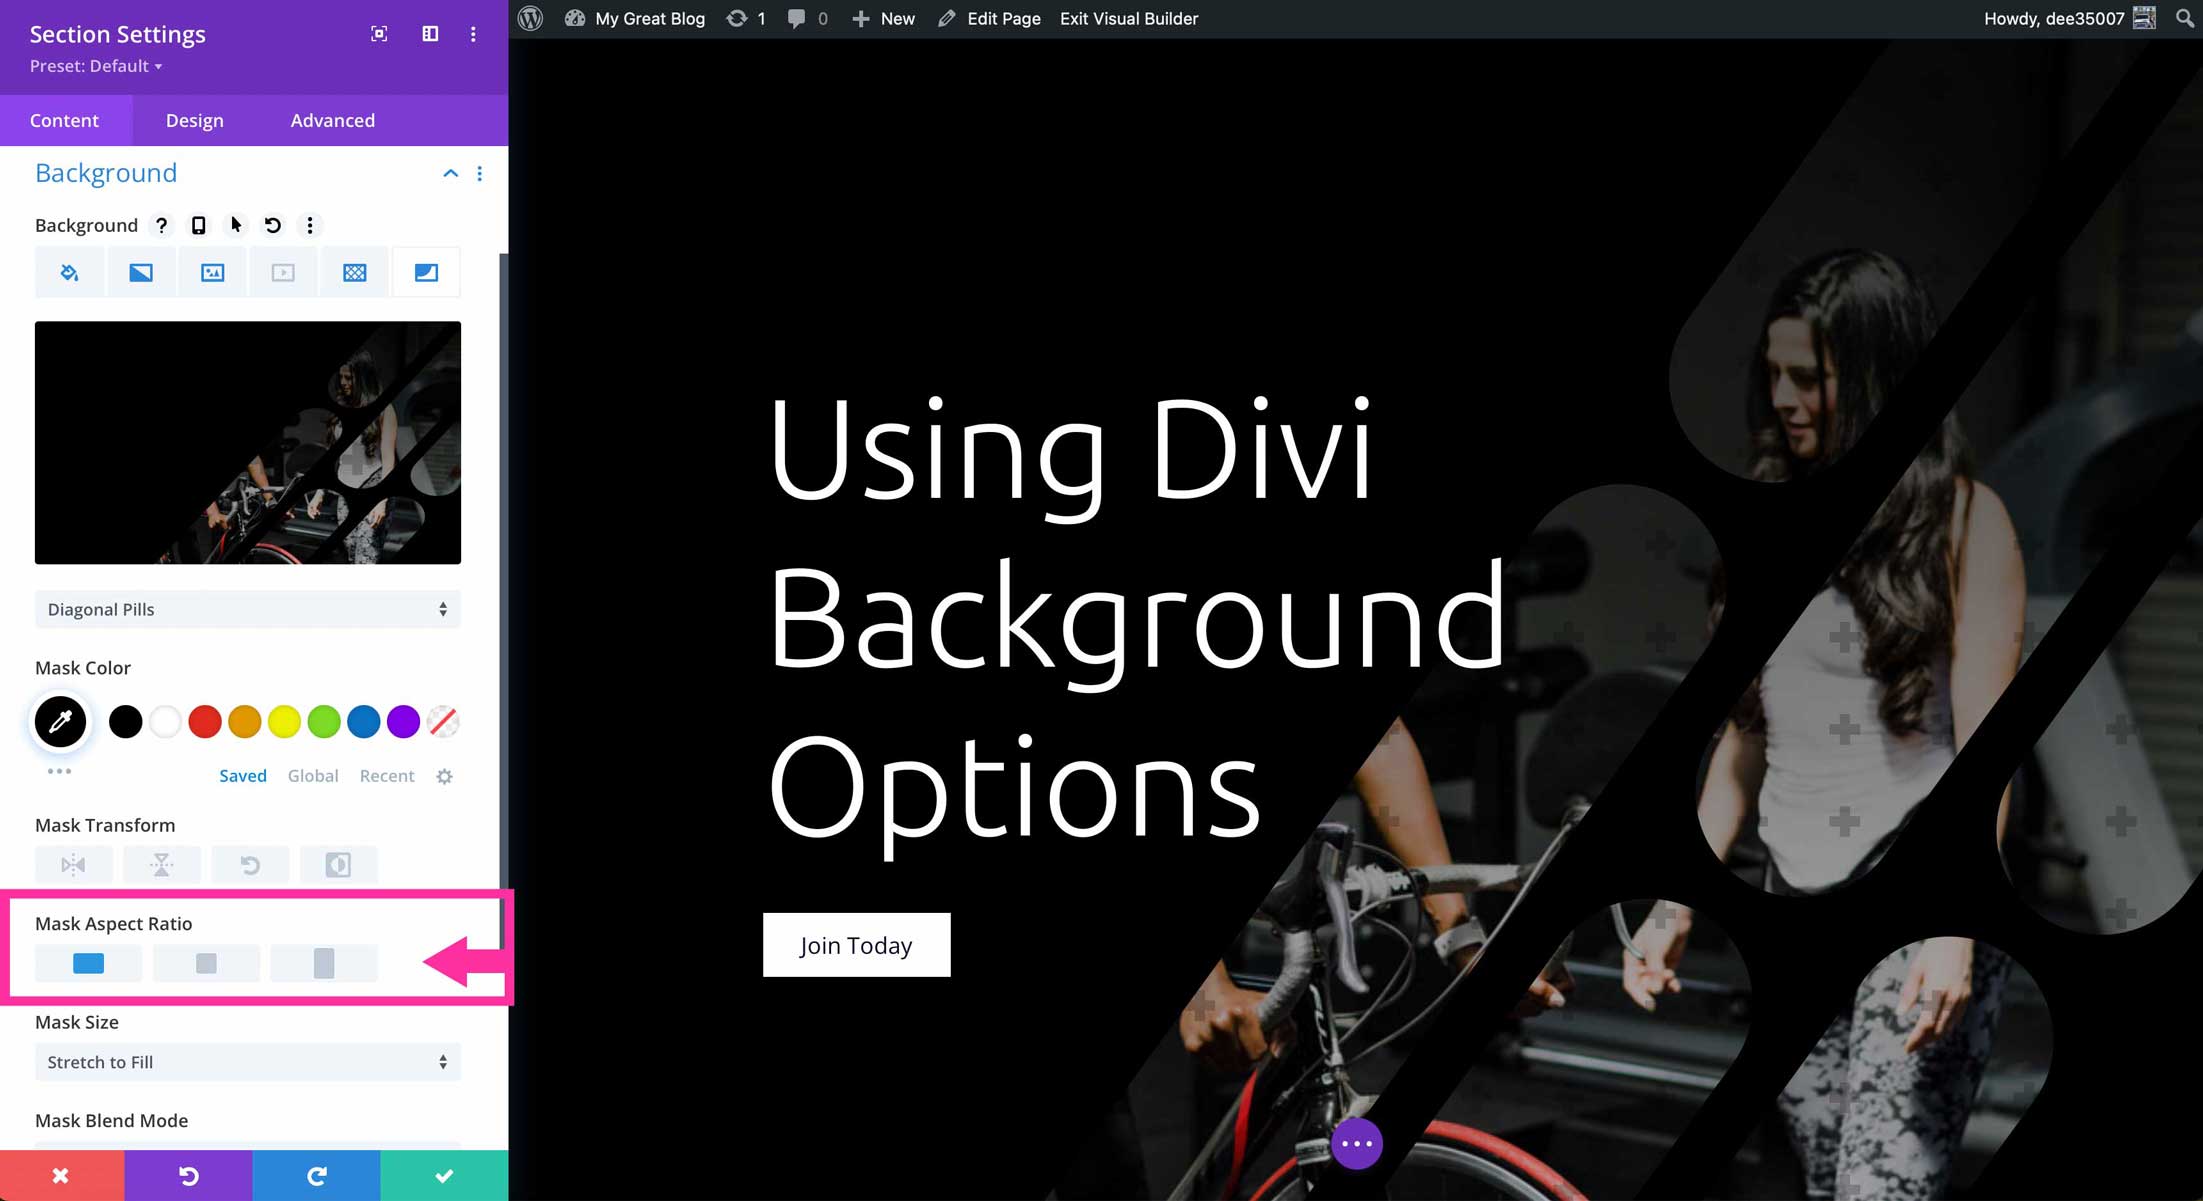
Mask Aspect Ratio
The mask aspect ratio allows for several orientations to change the appearance of the mask. By defuault, portrait is selected. Other options are square and landscape.
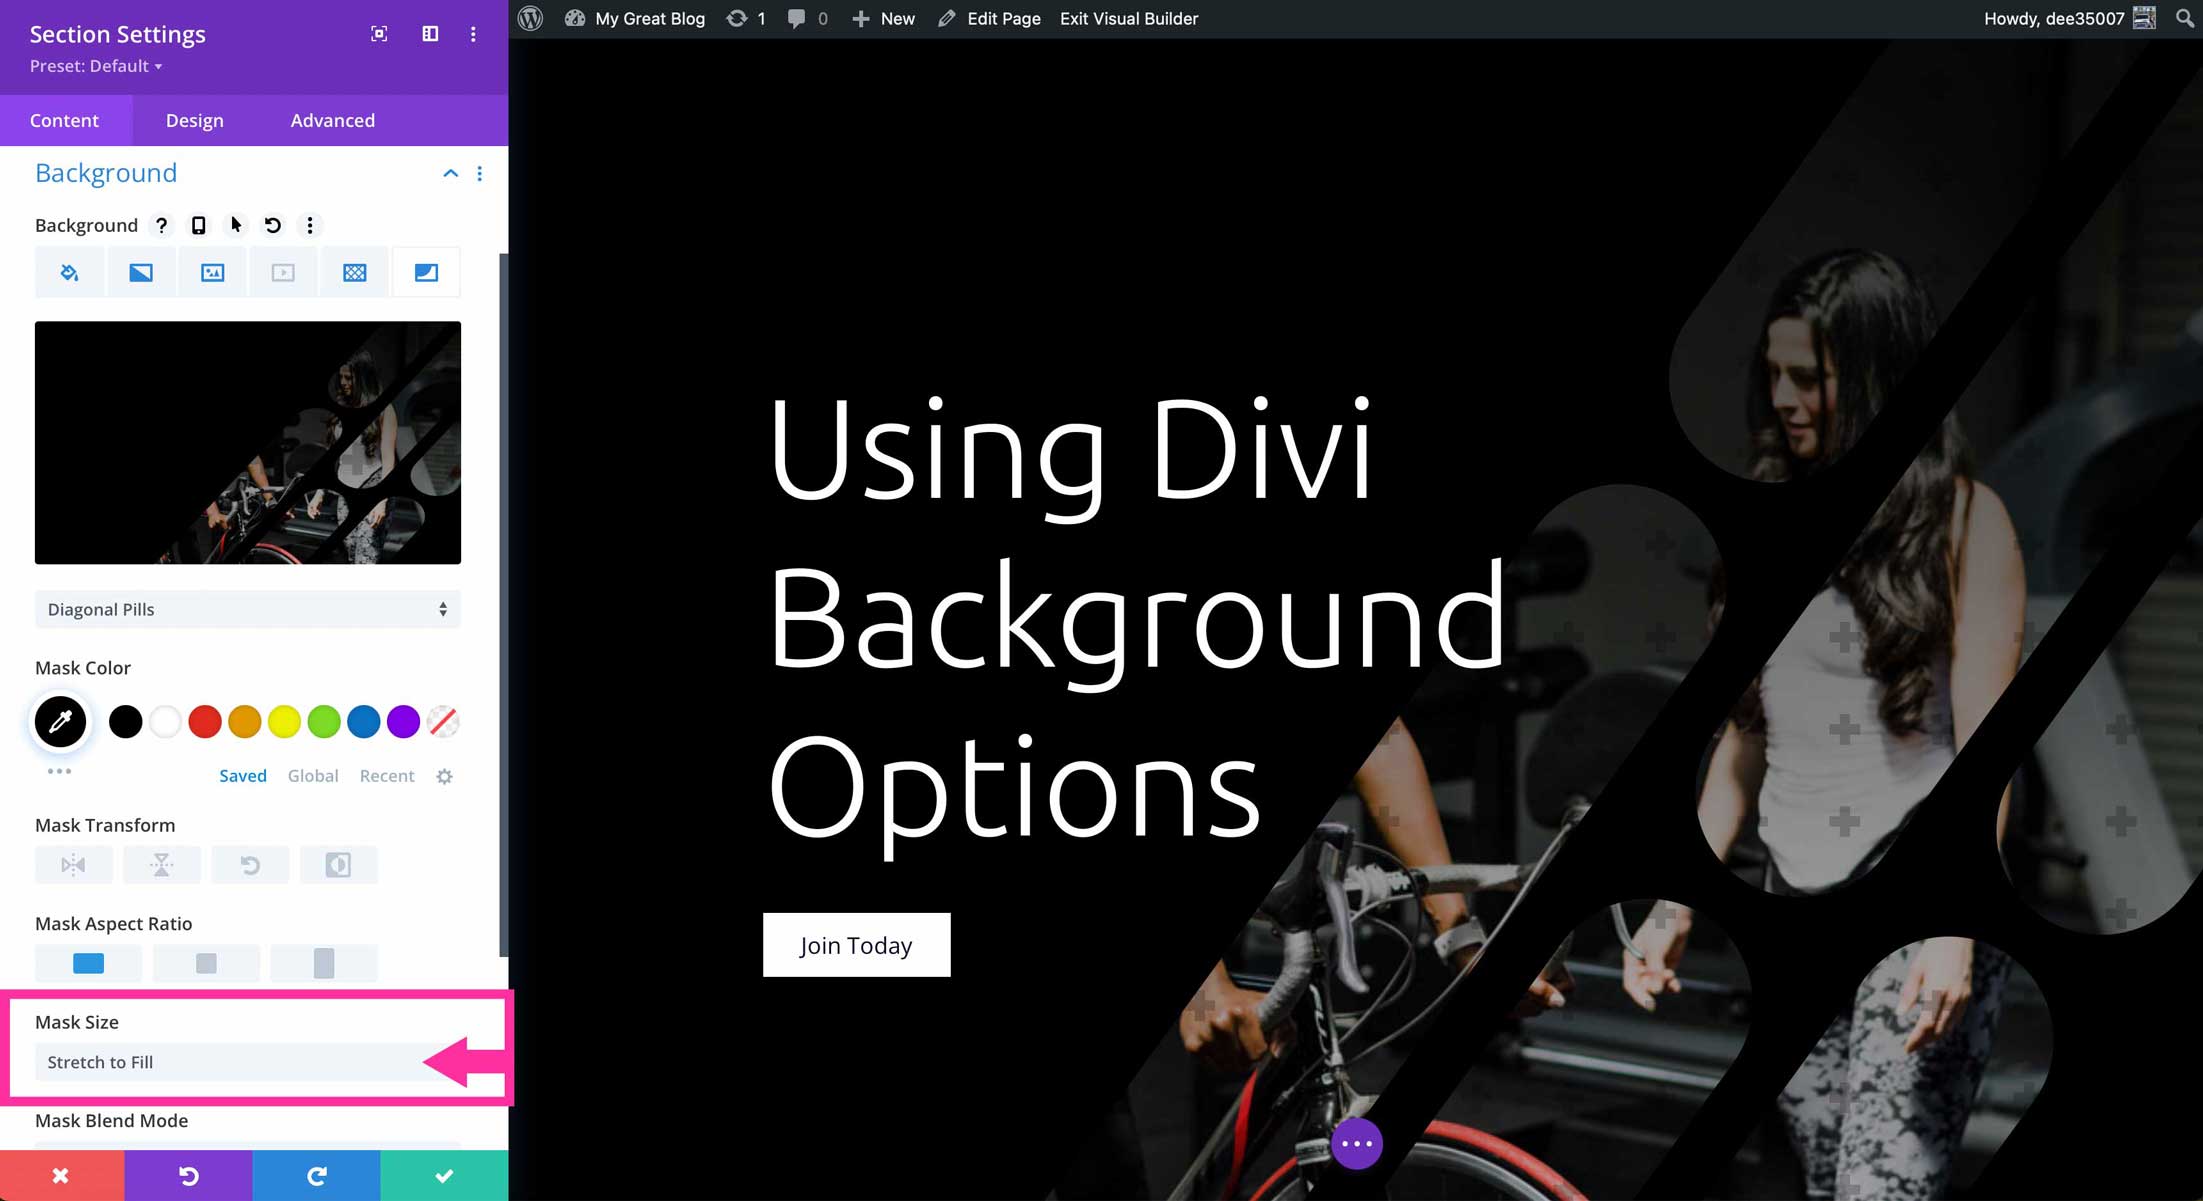
Mask Size
There are four mask sizes available with Divi background options: stretch to fill, cover, fit, and custom size. When stretch to fill is selected, the mask will occupy all available space allocateed. When choosing cover or fit, additional options are revealed. For example, when choosing cover, mask position, as well as horizontal and vertical offset appear. These allow you to control the position for your mask.
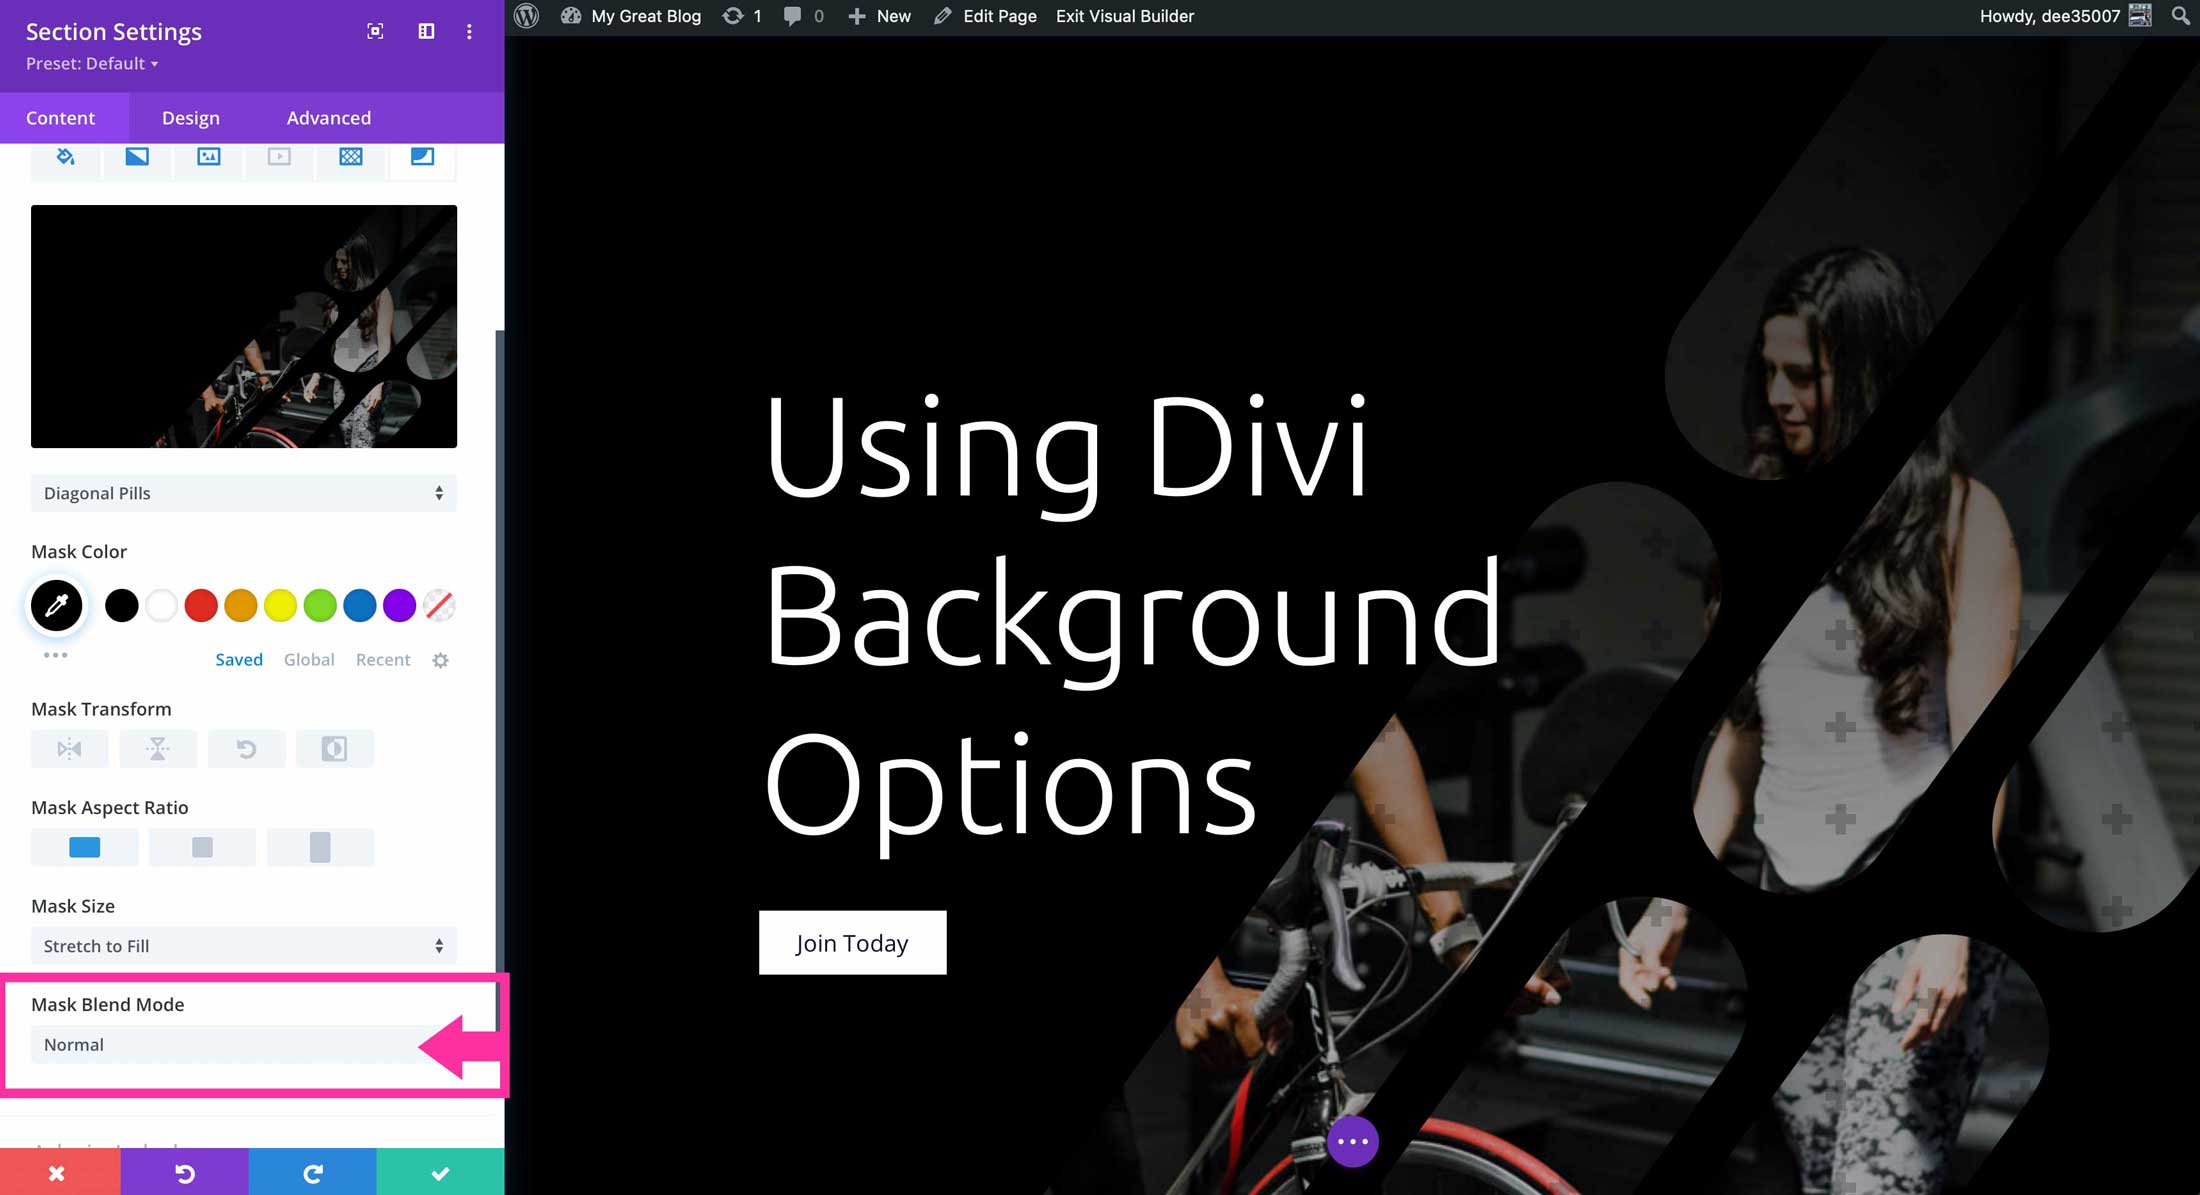
Mask Blend Mode
There are 16 blend modes available to apply to your masks including multiply, screen, overlay, darken, lighten, color dodge, color burn, hard light, soft light, difference, exclusion, hue, saturation, color, and luminosity. Each one allows for different effects for your masks.
Continue Learning
To learn more about how to use Divi’s background options, check out some of our useful tutorials and information to assist you in creating beautiful backgrounds for your Divi websites.
- How to Create Subtle Background Pattern Masks with Divi (3 Examples)
- How to Create a Unique CTA with Divi’s Background Pattern & Mask Options
- How to Use Divi’s Background Mask & Pattern Transform Settings
- How to Use Divi’s Gradient Repeat Option to Create Custom Background Patterns
- How to Design a Background with Two Layers of Gradients, Masks, and Patterns in Divi
- How to Use The Divi Gradient Builder to Design Unique Circular Background Shapes