

The way we use the Divi and its Theme Builder when setting up a website has sped up our workflow and made everything easier. Although we were able to create customized headers from day one ever since the Divi Theme Builder came out, one thing has been requested continuously, which is being able to create a sticky header without using additional code. With Divi’s new sticky options, creating a sticky header has become easier than ever. The sticky settings Divi provides will effortlessly help you turn any design element sticky and assign custom styles to a sticky state, which results in endless design and user experience possibilities.
In this tutorial, we’ll show you how to create a sticky header that contains the following:
- The header we’re creating has a top header bar + a menu bar
- We’re turning the section containing the menu bar sticky when you pass by it, as soon as you go back to the top, the header bar appears again
- We’re changing the sticky section’s (and its elements) design styles once the section is turned sticky
Let’s get to it!
- 1 Preview
- 2 Download The Global Header Template for FREE
- 3 Download For Free
- 4 You have successfully subscribed. Please check your email address to confirm your subscription and get access to free weekly Divi layout packs!
- 5 1. Building The Header Element Structure Inside a New Header Template
- 6 2. Apply Custom Sticky Effects
- 7 Preview
- 8 Final Thoughts
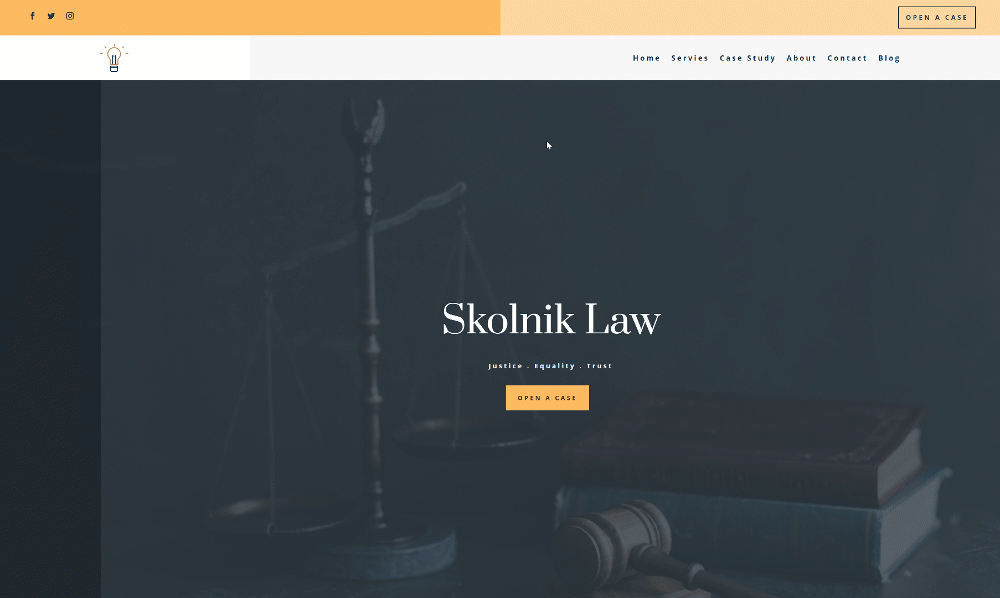
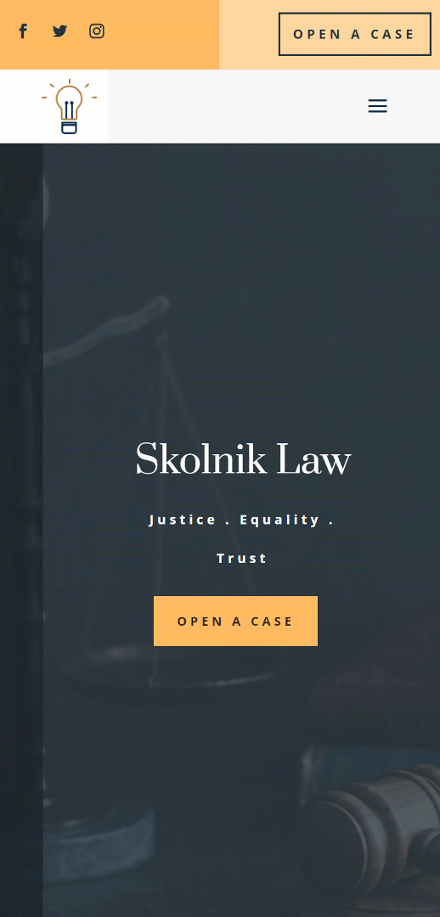
Preview
Before we dive into the tutorial, let’s take a quick look at the outcome across different screen sizes.
Desktop
Mobile
Download The Global Header Template for FREE
To lay your hands on the free global header template, you will first need to download it using the button below. To gain access to the download you will need to subscribe to our newsletter by using the form below. As a new subscriber, you will receive even more Divi goodness and a free Divi Layout pack every Monday! If you’re already on the list, simply enter your email address below and click download. You will not be “resubscribed” or receive extra emails.

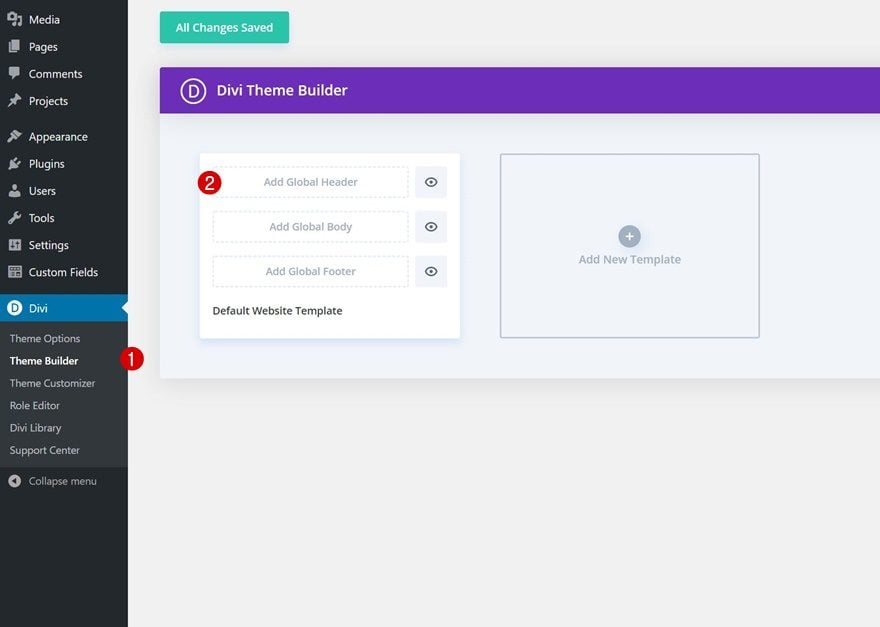
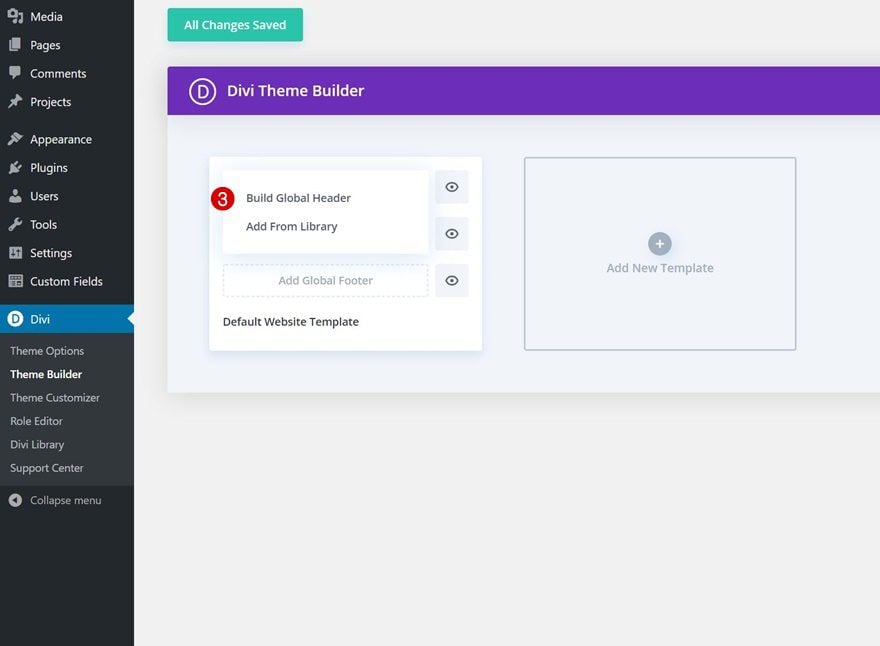
1. Building The Header Element Structure Inside a New Header Template
Create New Global Header Template
Go to the Divi Theme Builder and start building a new global or custom header.
Section #1 Settings
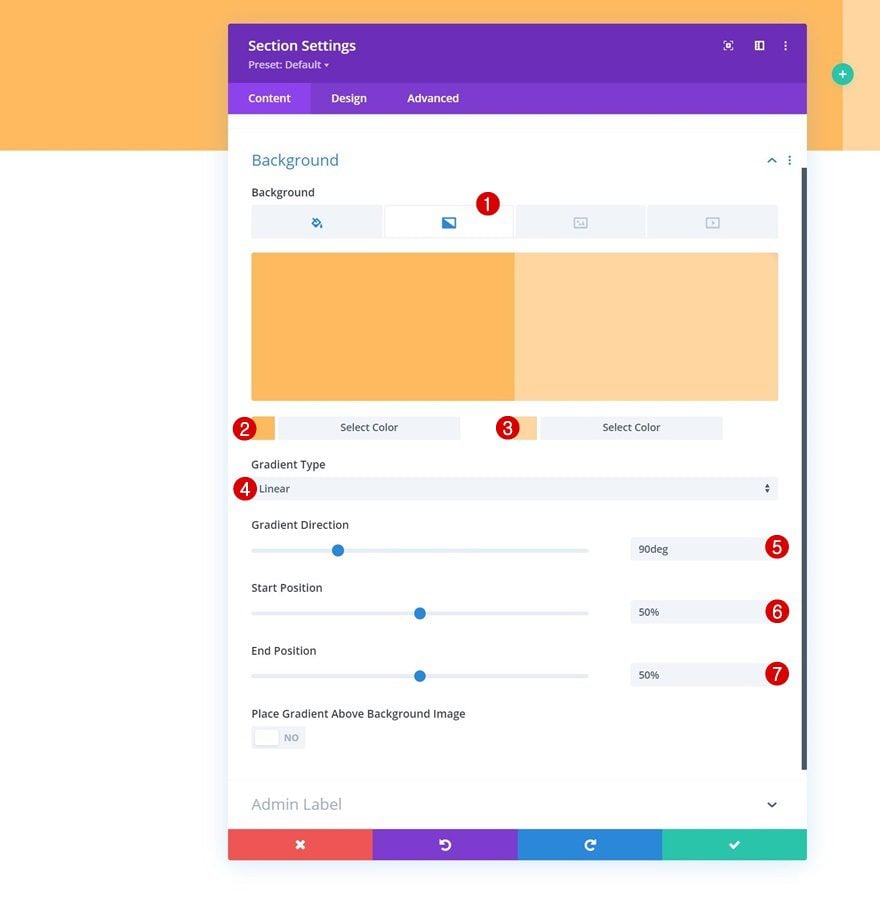
Gradient Background
Once inside the template editor, we’ll start by building the element structure of our header. In part two of this tutorial, we’ll focus on applying the different sticky settings to complete our sticky header design. Inside the template editor, you’ll notice a section. Open that section and apply a gradient background.
- Color 1: #ffba60
- Color 2: #ffd6a0
- Gradient Direction: 90deg
- Start Position: 50%
- End Position: 50%
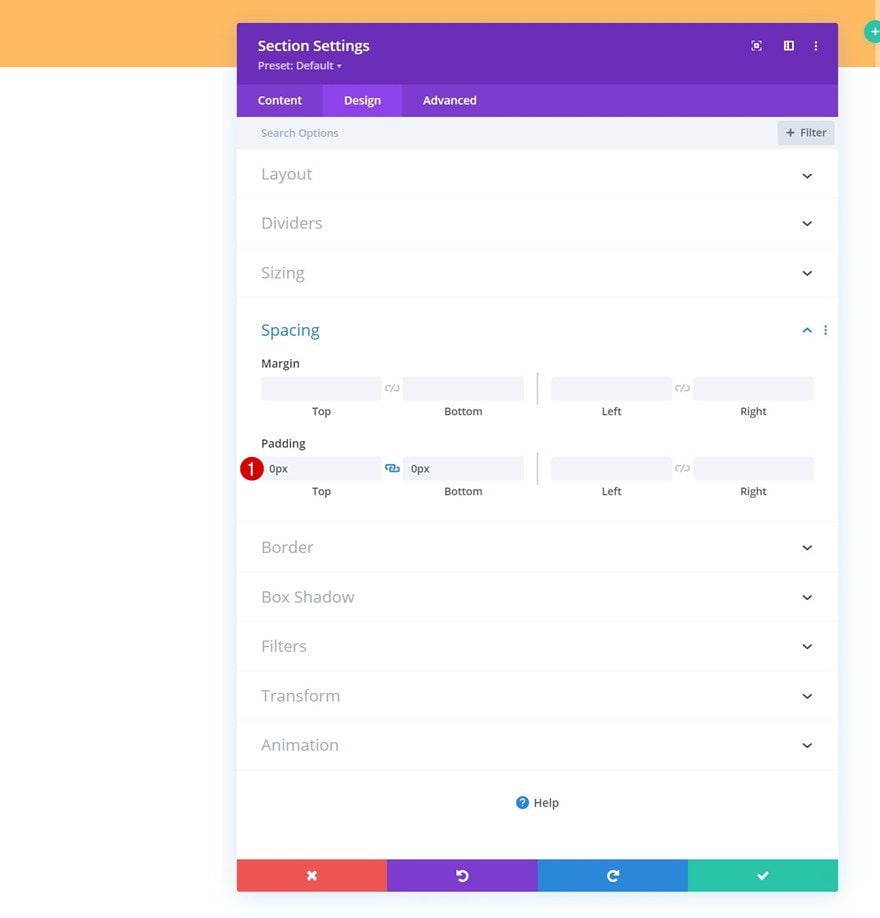
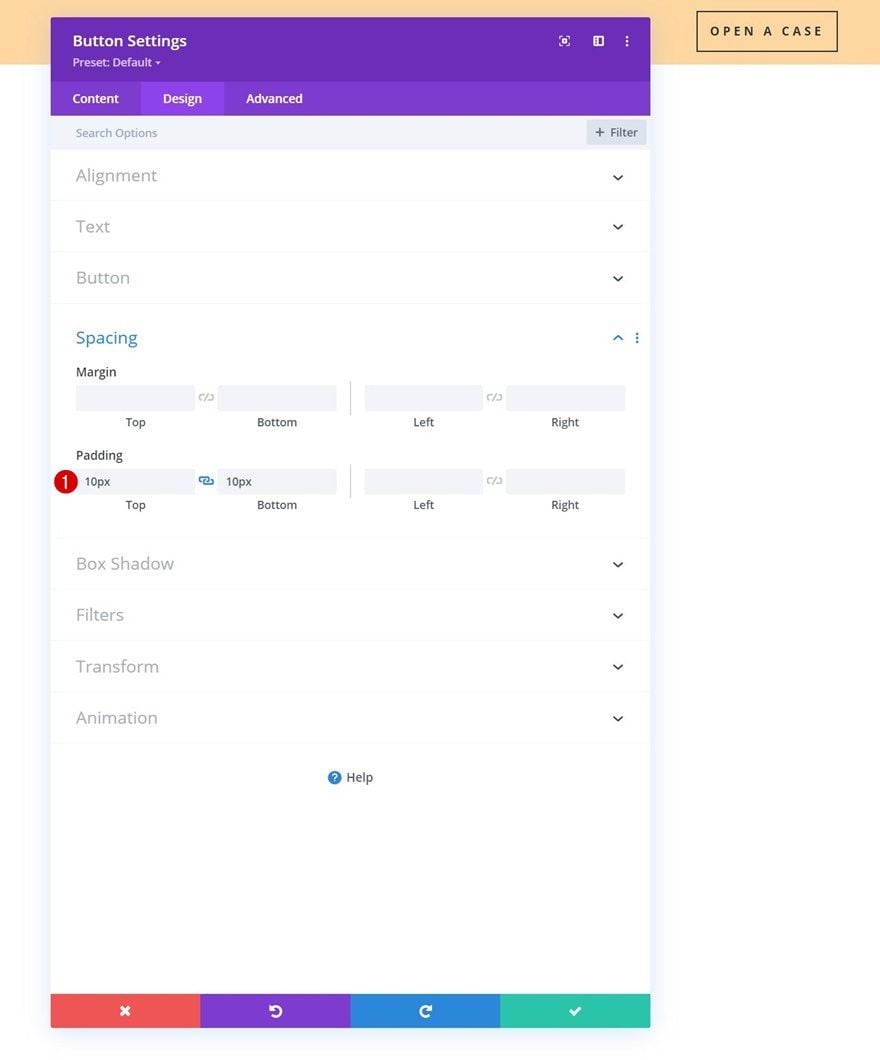
Spacing
Remove all default top and bottom padding next.
- Top Padding: 0px
- Bottom Padding: 0px
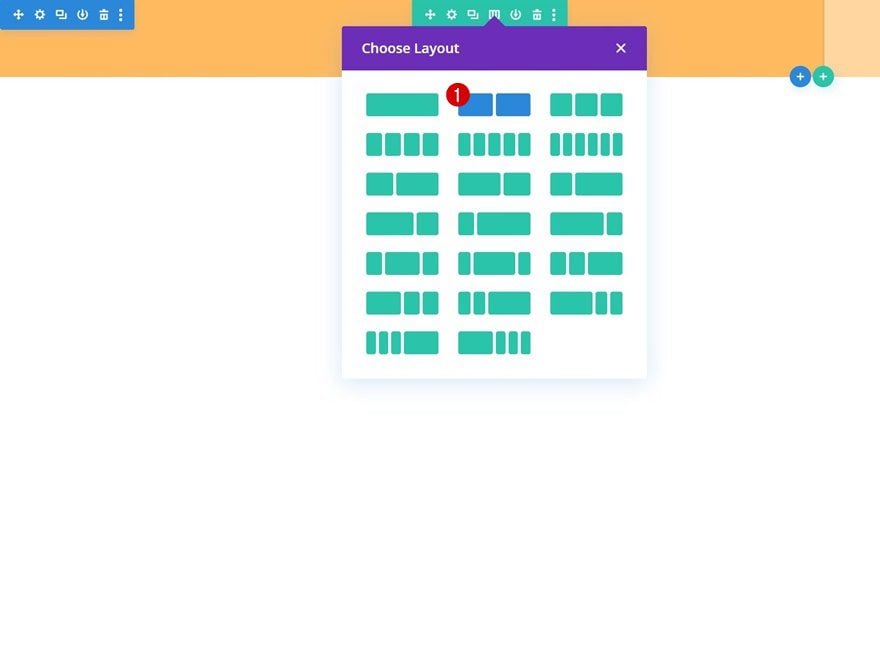
Add New Row
Column Structure
To create our top header bar, we’ll add a new row to our section using the following column structure:
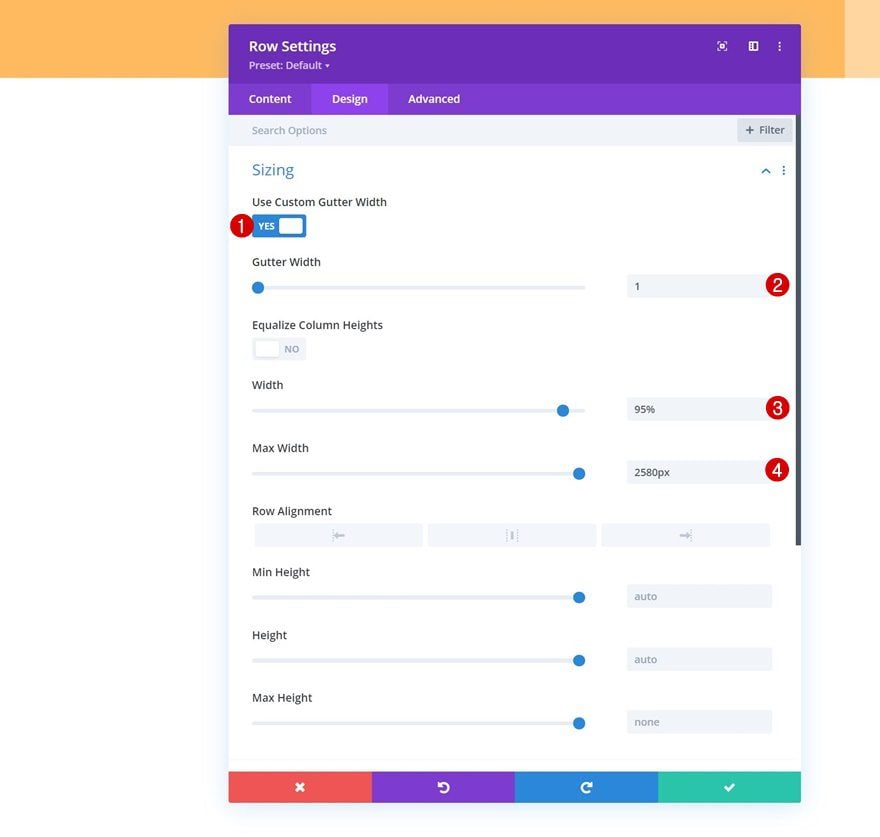
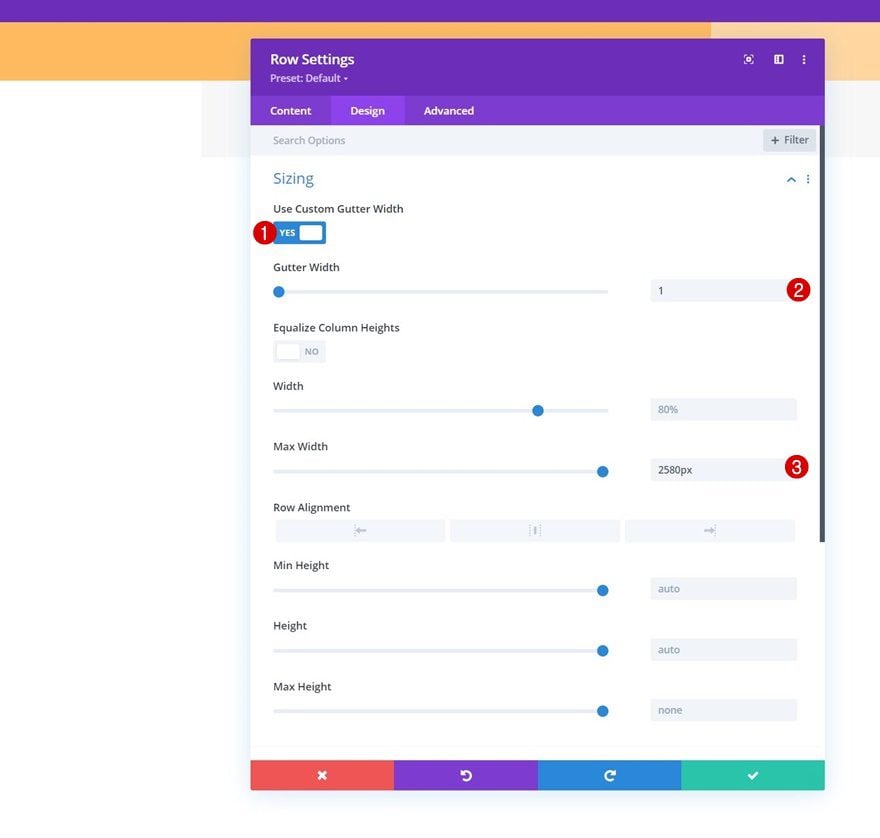
Sizing
Without adding any modules yet, open the row settings and modify the sizing settings as follows:
- Use Custom Gutter Width: Yes
- Gutter Width: 1
- Width: 95%
- Max Width: 2580px
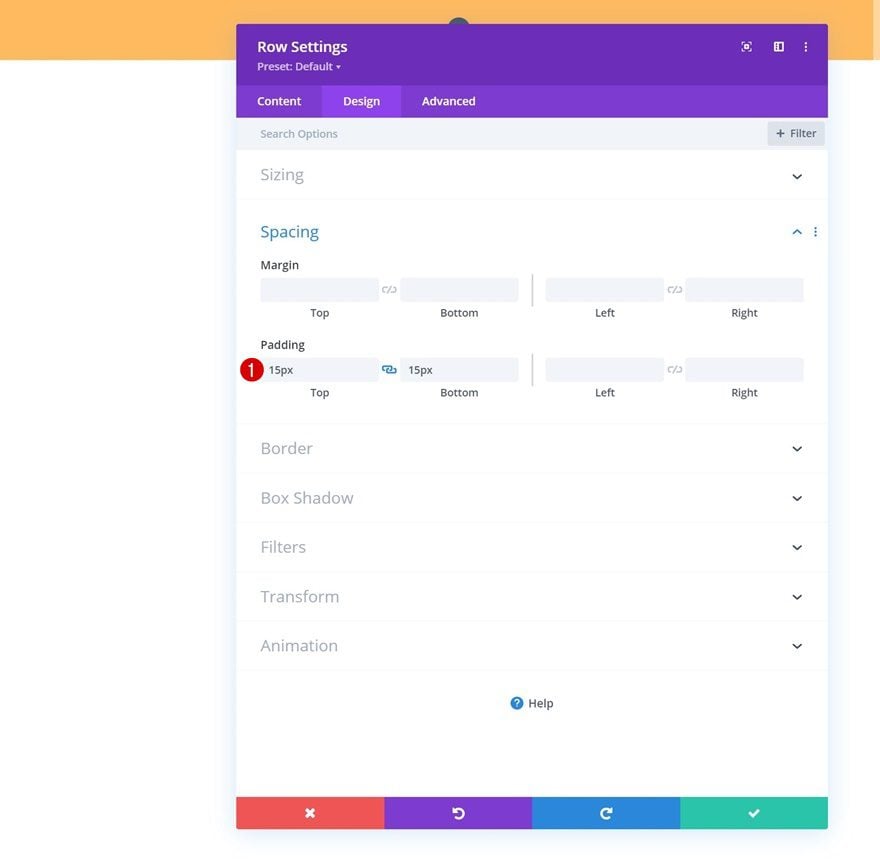
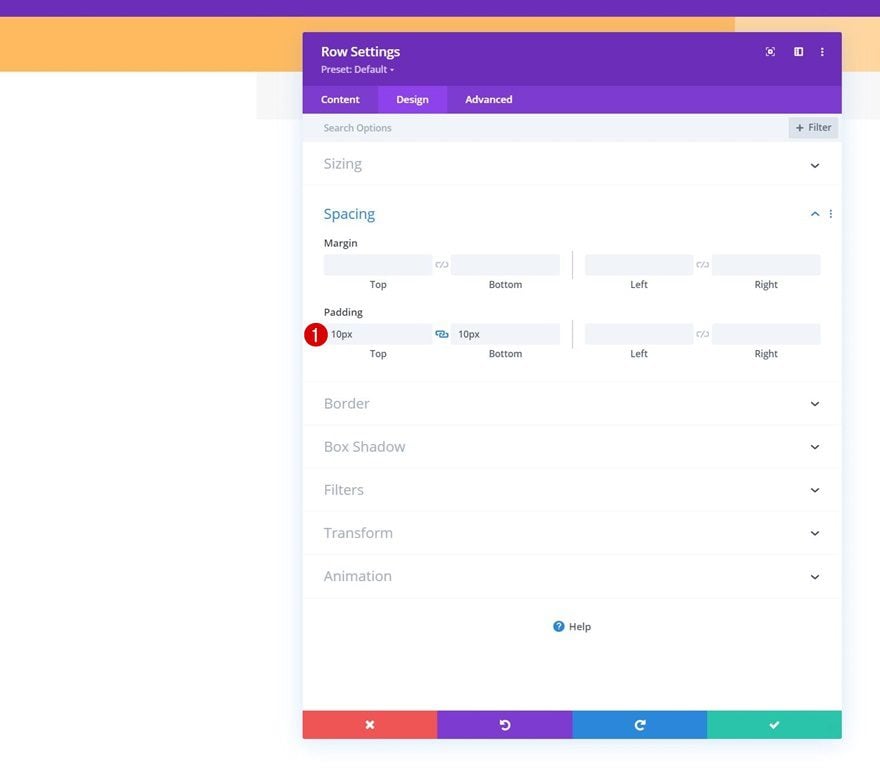
Spacing
Add some custom top and bottom padding too.
- Top Padding: 15px
- Bottom Padding: 15px
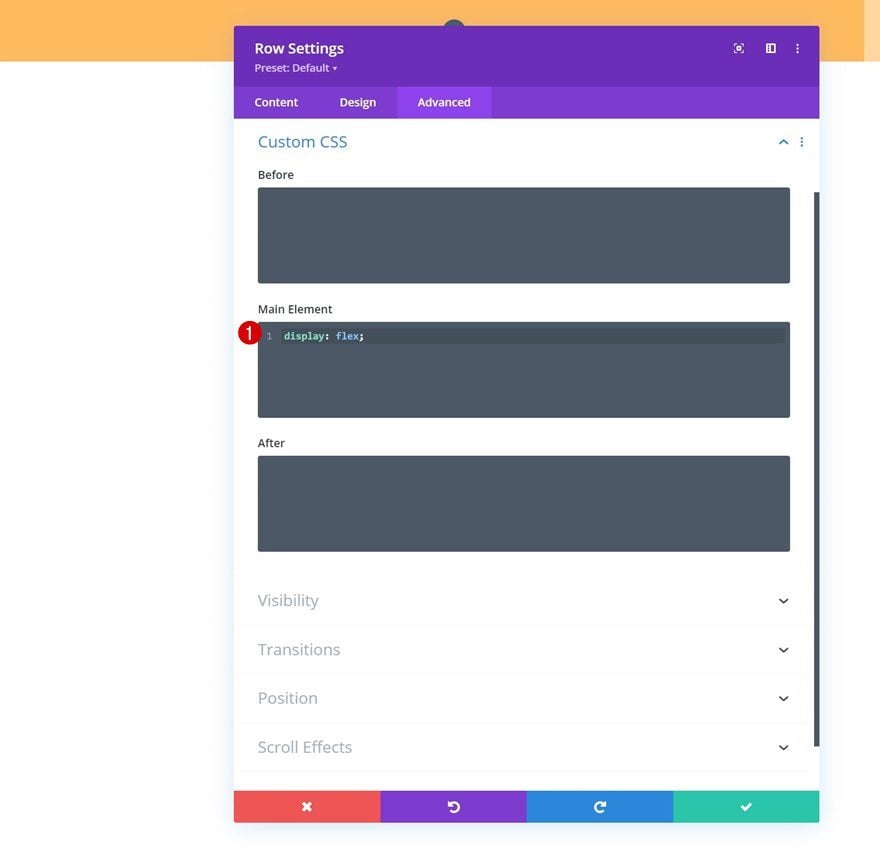
Main Element CSS
And to make sure the columns remain next to each other on smaller screen sizes, we’ll add one line of CSS code to the row’s main element in the advanced tab.
display: flex;
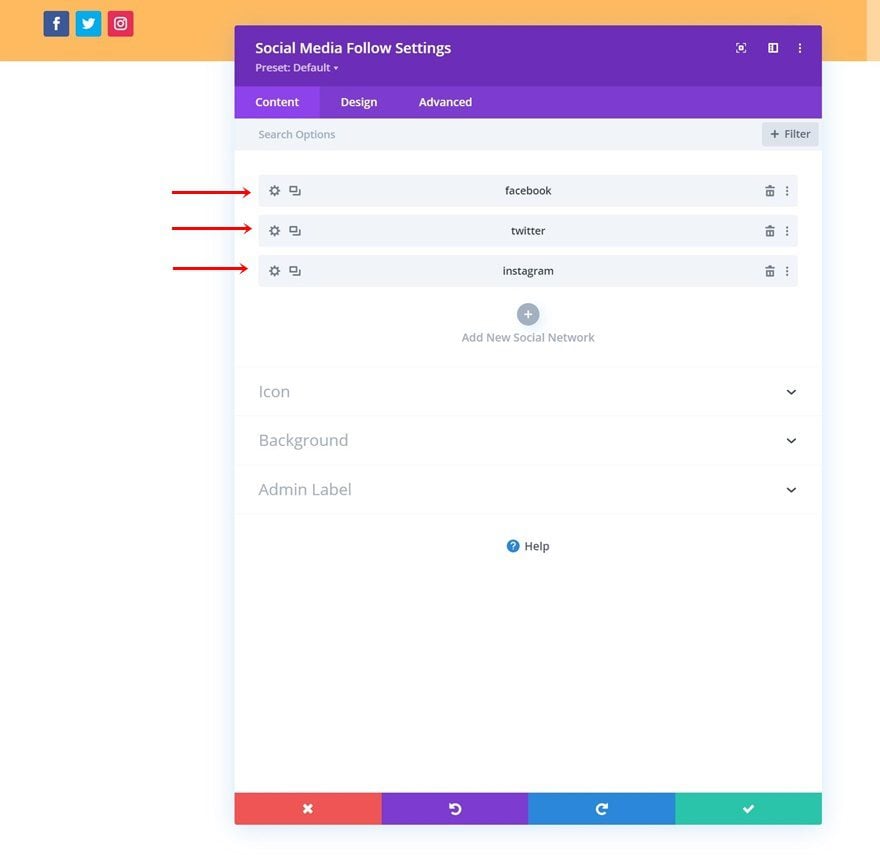
Add Social Networks of Choice
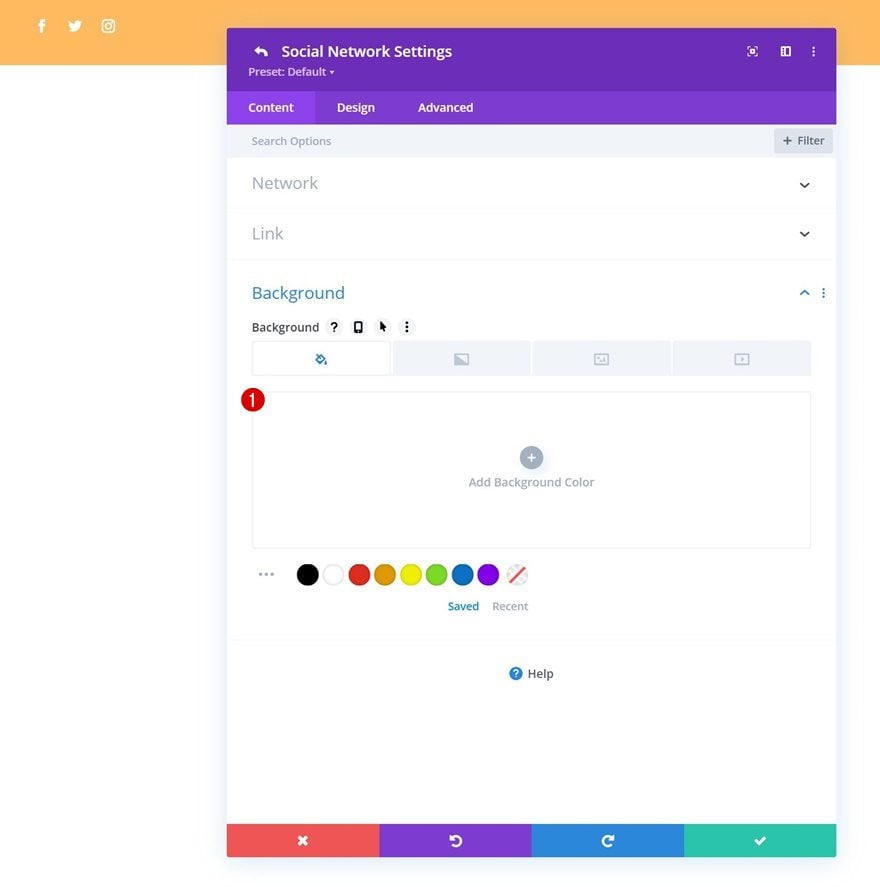
Time to add modules, starting with a Social Media Follow Module in column 1. Add the social networks of your choice along with their corresponding links.
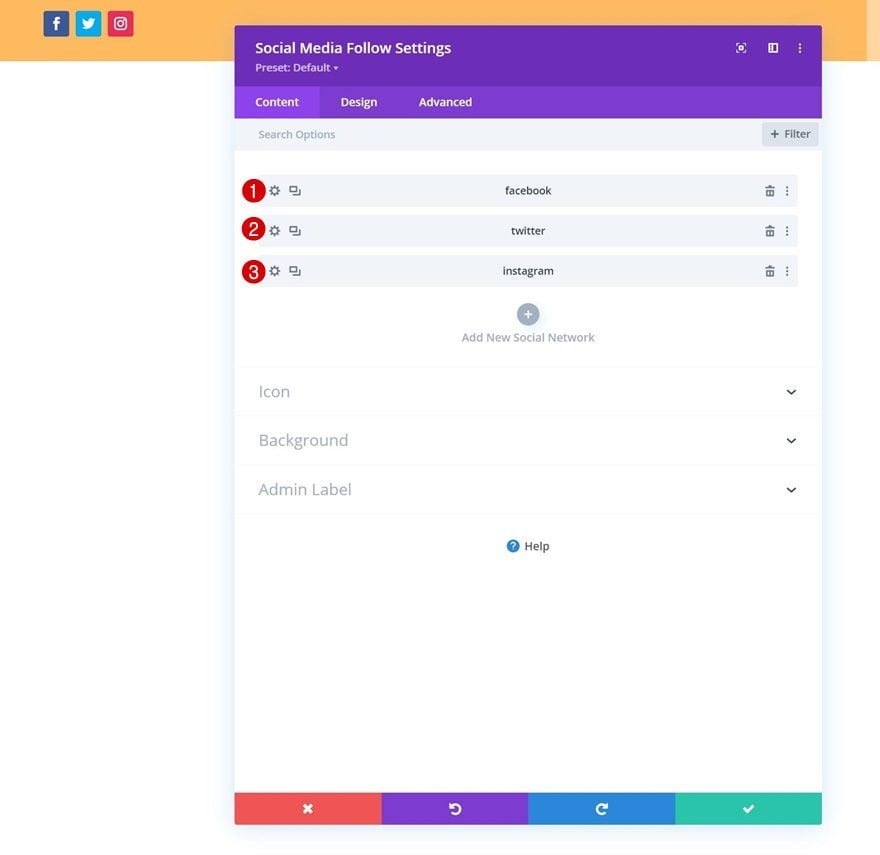
Remove Each Social Network’s Background Color
Continue by removing each one of the social network’s background colors individually.
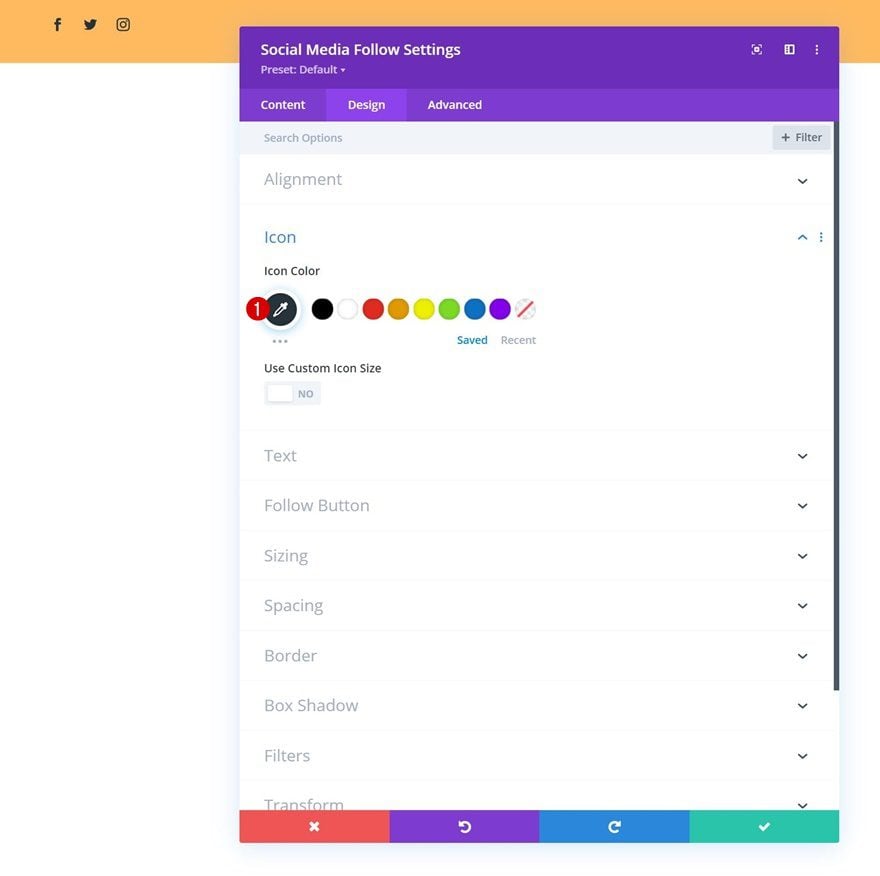
Icon Settings
Then, go back to the general module settings and change the icon color in the design tab.
- Icon Color: #26333a
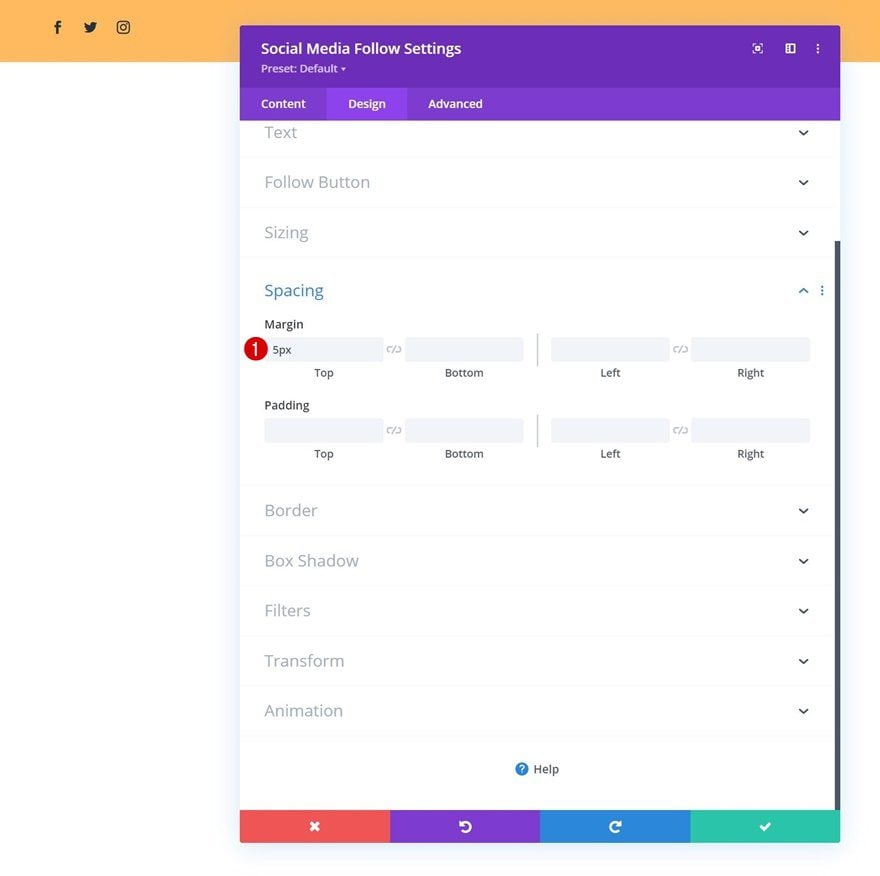
Spacing
Add some top margin too.
- Top Margin: 5px
Add Copy
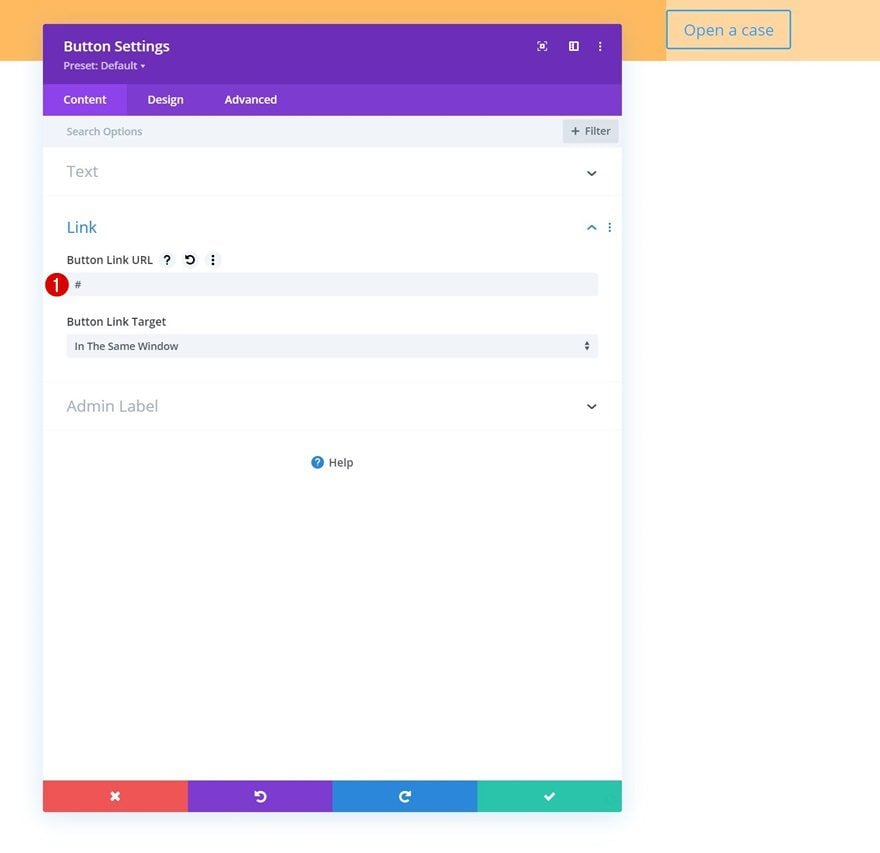
In column 2, the only module we need is a Button Module. Add some copy of your choice.
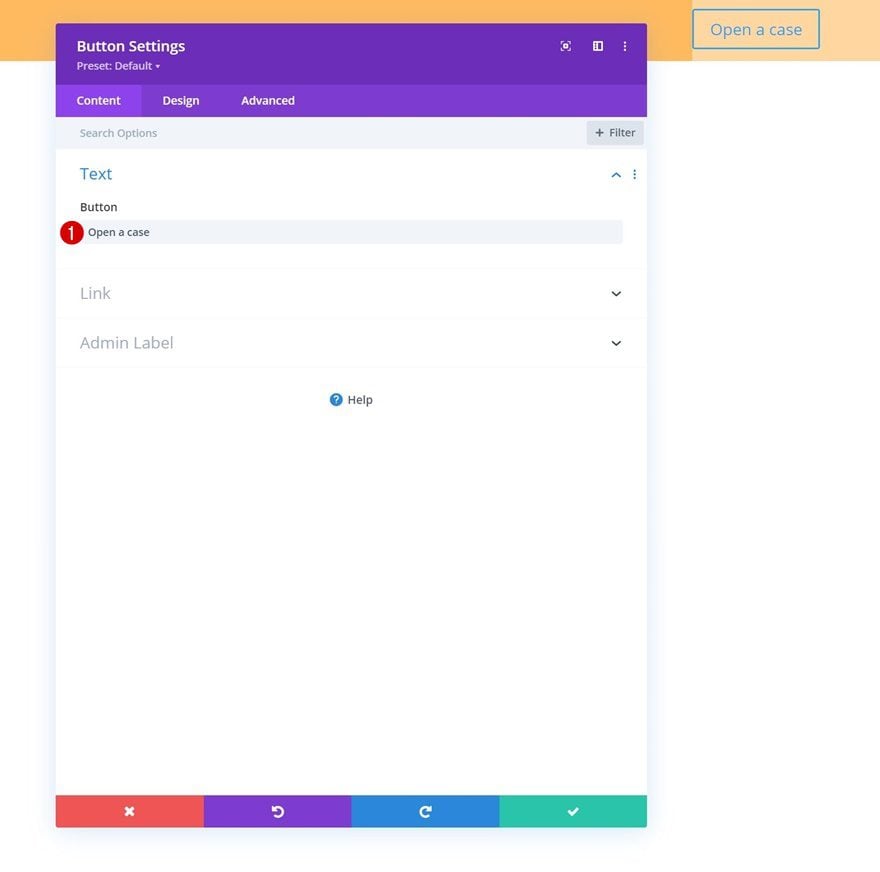
Add Link
Add a link next.
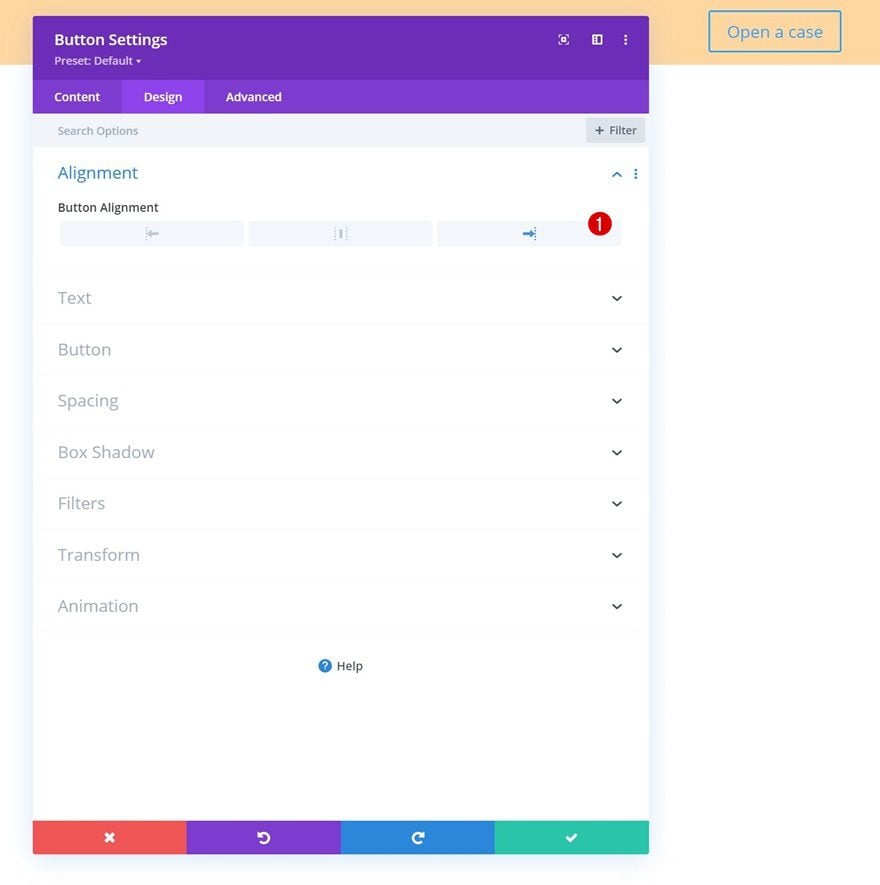
Button Alignment
Then, move on to the design tab and change the button alignment.
- Button Alignment: Right
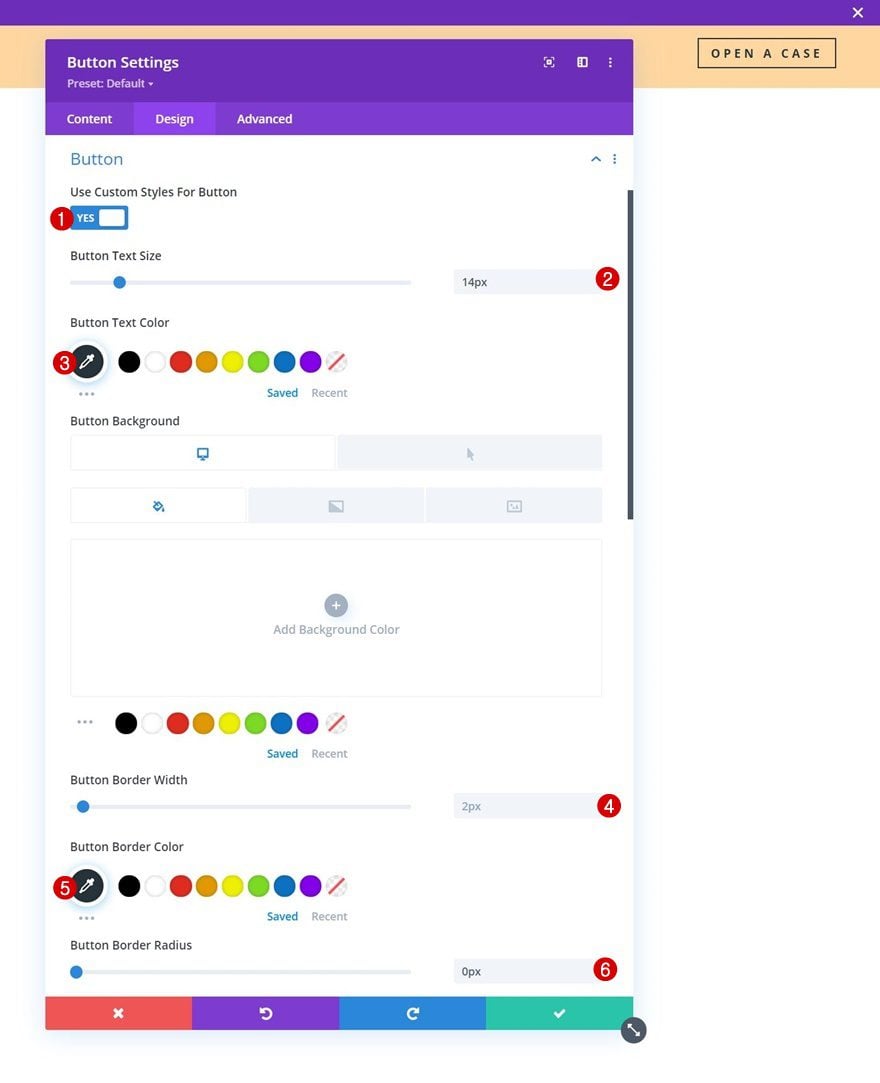
Button Settings
We’re styling the button too.
- Use Custom Styles For Button: Yes
- Button Text Size: 14px
- Button Text Color: #26333a
- Button Border Width: 2px
- Button Border Color: #26333a
- Button Border Radius: 0px
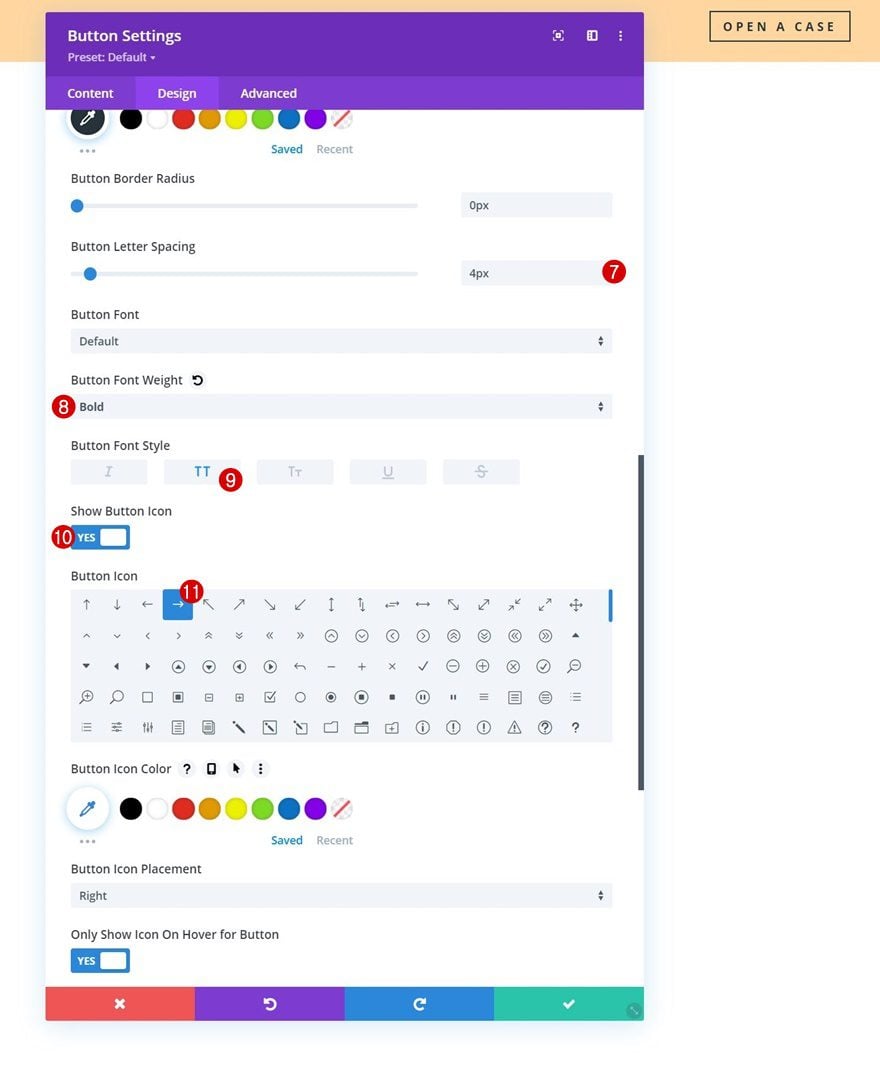
- Button Letter Spacing: 4px
- Button Font Weight: Bold
- Button Font Style: Uppercase
- Show Button: Yes
Spacing
And we’ll complete the module settings by adding some top and bottom padding to the spacing settings.
- Top Padding: 10px
- Bottom Padding: 10px
Add Section #2
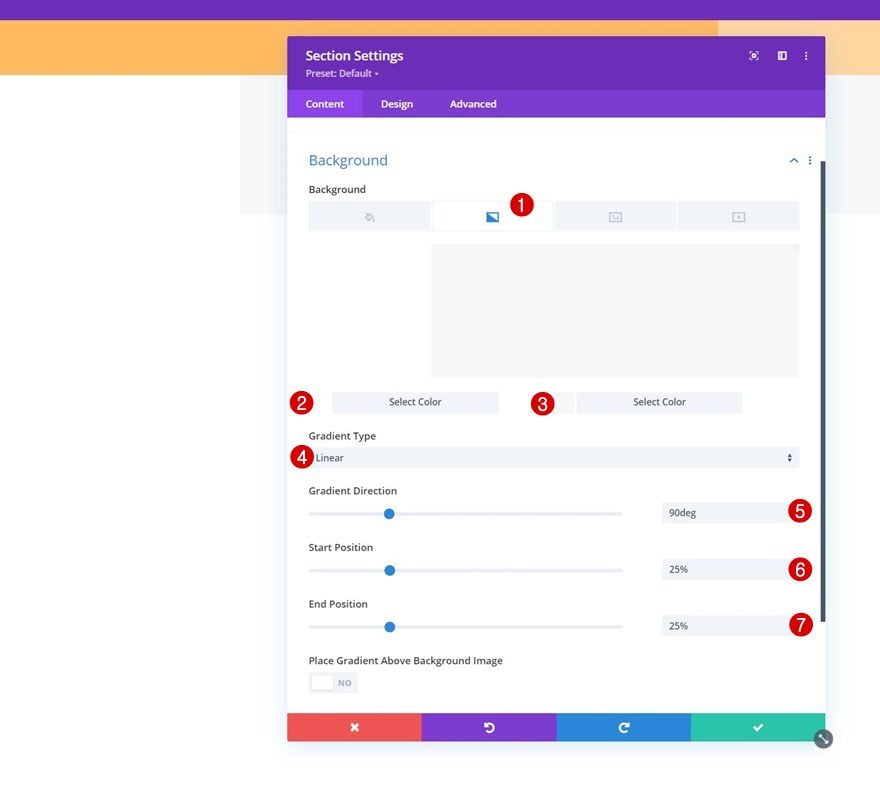
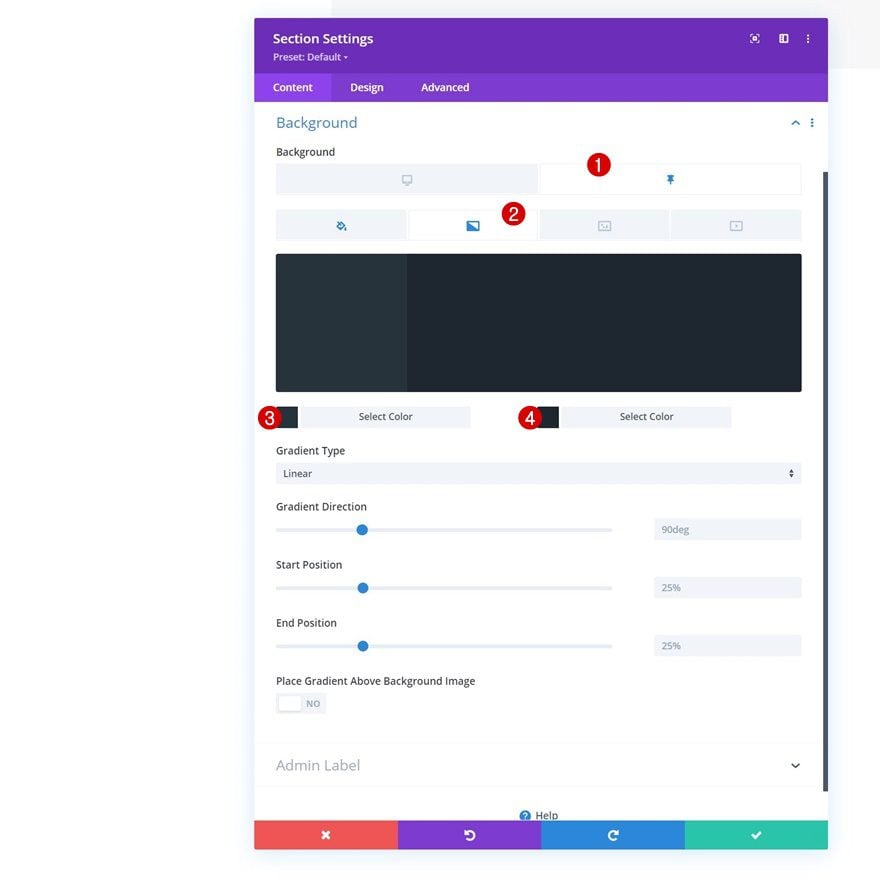
Gradient Background
Add another regular section right below the previous one. This section will be dedicated to our menu and will be turned sticky in the second part of this tutorial. Once you’ve added the section, apply a gradient background.
- Color 1: #ffffff
- Color 2: #f7f7f7
- Gradient Type: Linear
- Gradient Direction: 90deg
- Start Position: 25%
- End Position: 25%
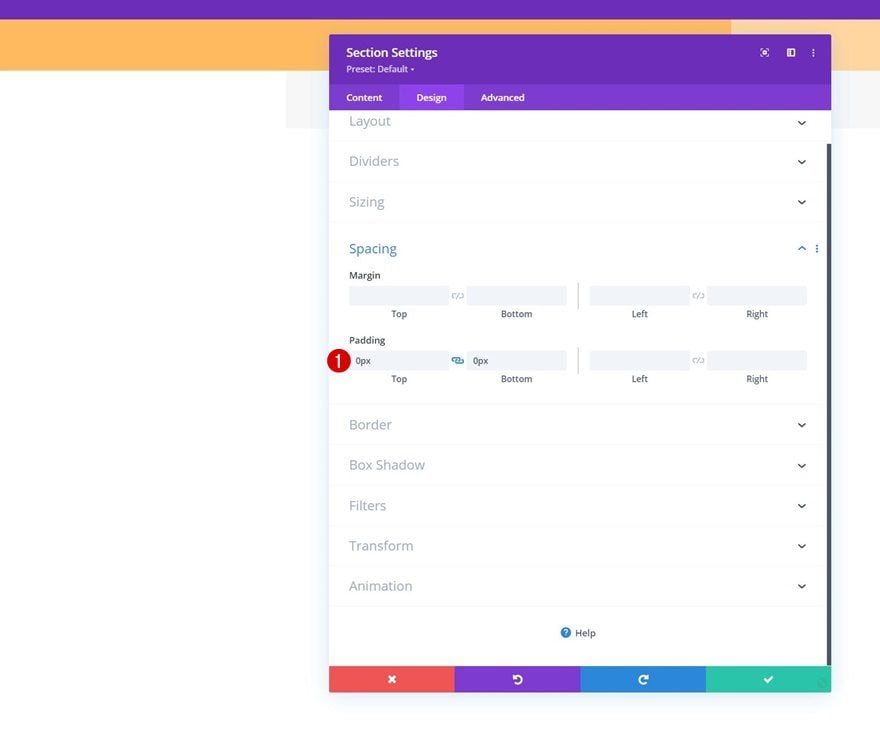
Spacing
Move on to the section’s design tab and remove all default top and bottom padding.
- Top Padding: 0px
- Bottom Padding: 0px
Add New Row
Column Structure
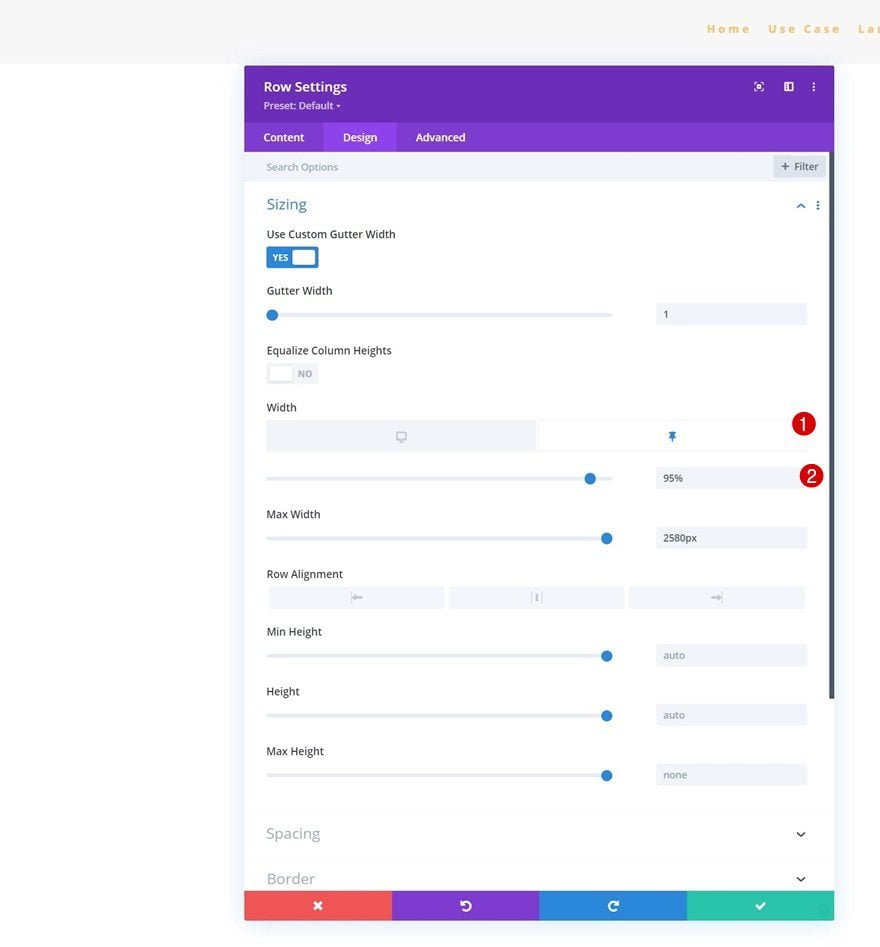
Continue by adding a new row to the section using the following column structure:
Sizing
Move on to the row’s design tab and change the sizing settings as follows:
- Use Custom Gutter Width: Yes
- Gutter Width: 1
- Max Width: 2580px
Spacing
Remove all default top and bottom padding next.
- Top Padding: 10px
- Bottom Padding: 10px
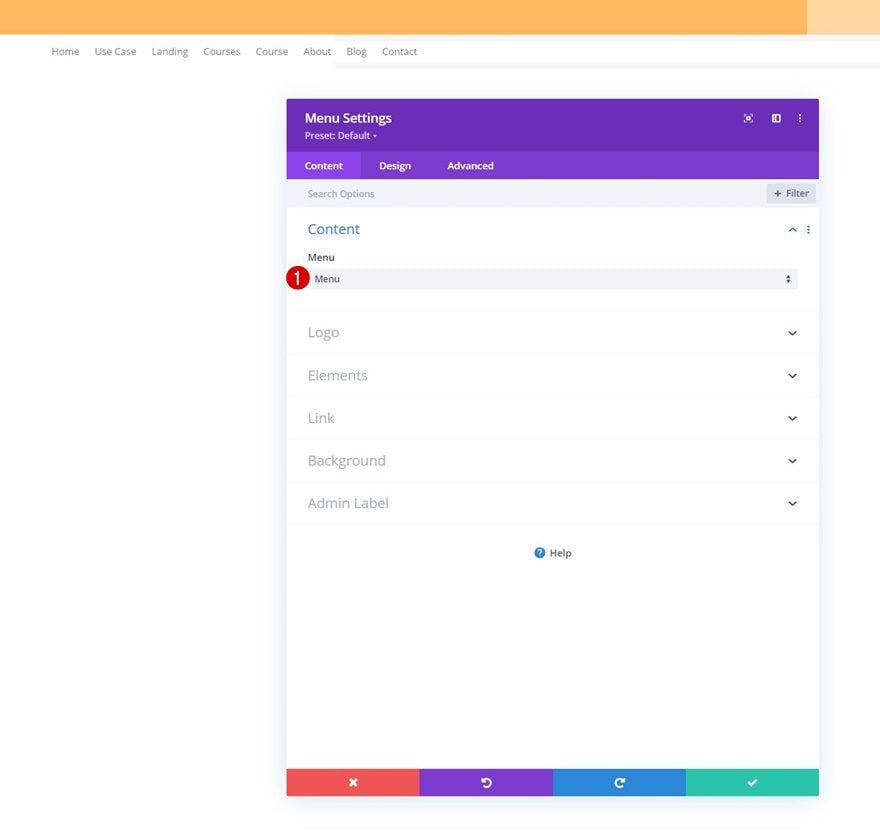
Select Menu
Then, add a Menu Module to the row’s column and select a dynamic menu of your choice.
Upload Logo
Upload a logo next.

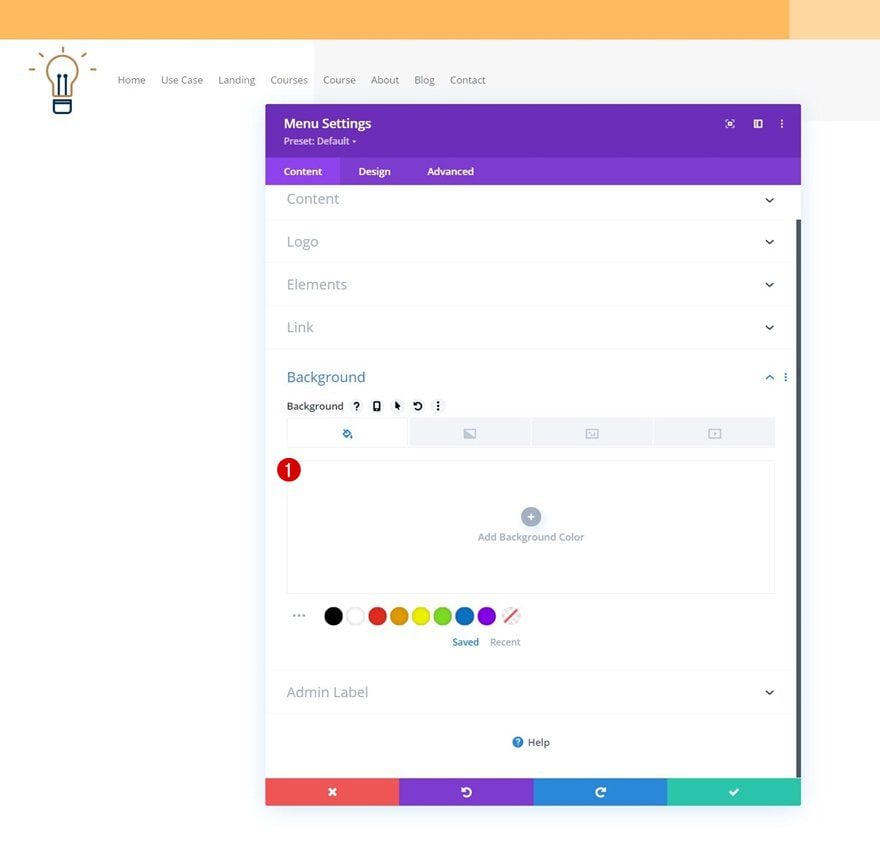
Remove Background Color
Then, remove the module’s default white background color.
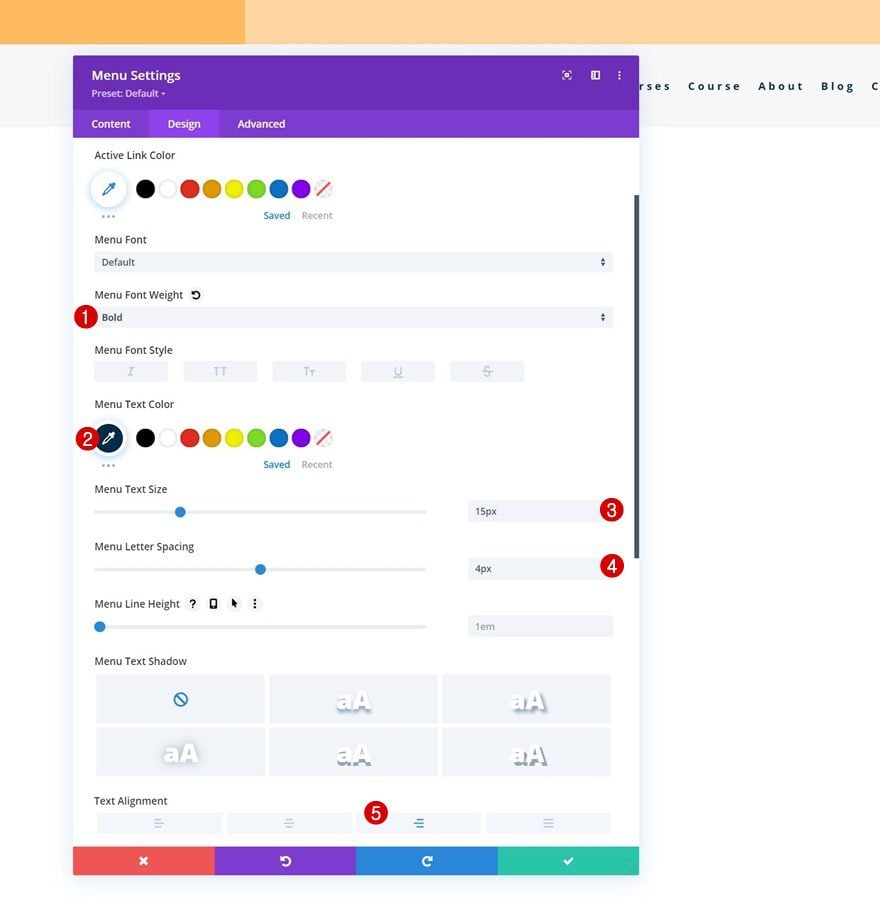
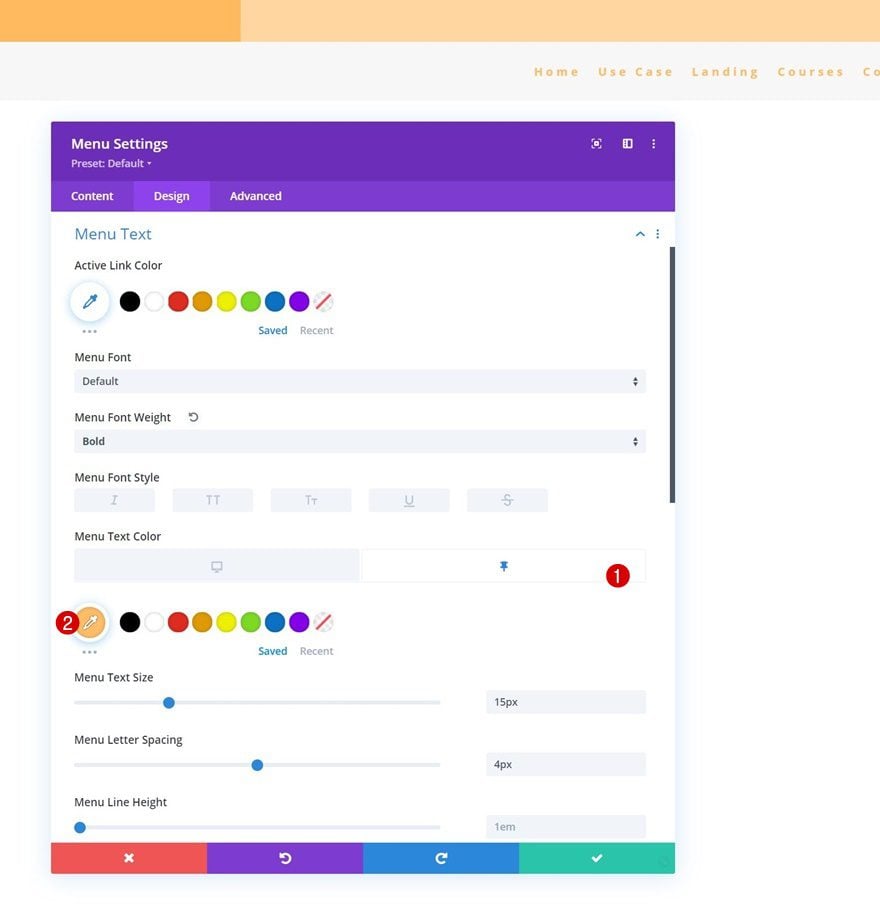
Menu Text Settings
Move on to the design tab and style the menu text settings too.
- Menu Font Weight: Bold
- Menu Text Color: #002d4c
- Menu Text Size: 15px
- Menu Letter Spacing: 4px
- Text Alignment: Right
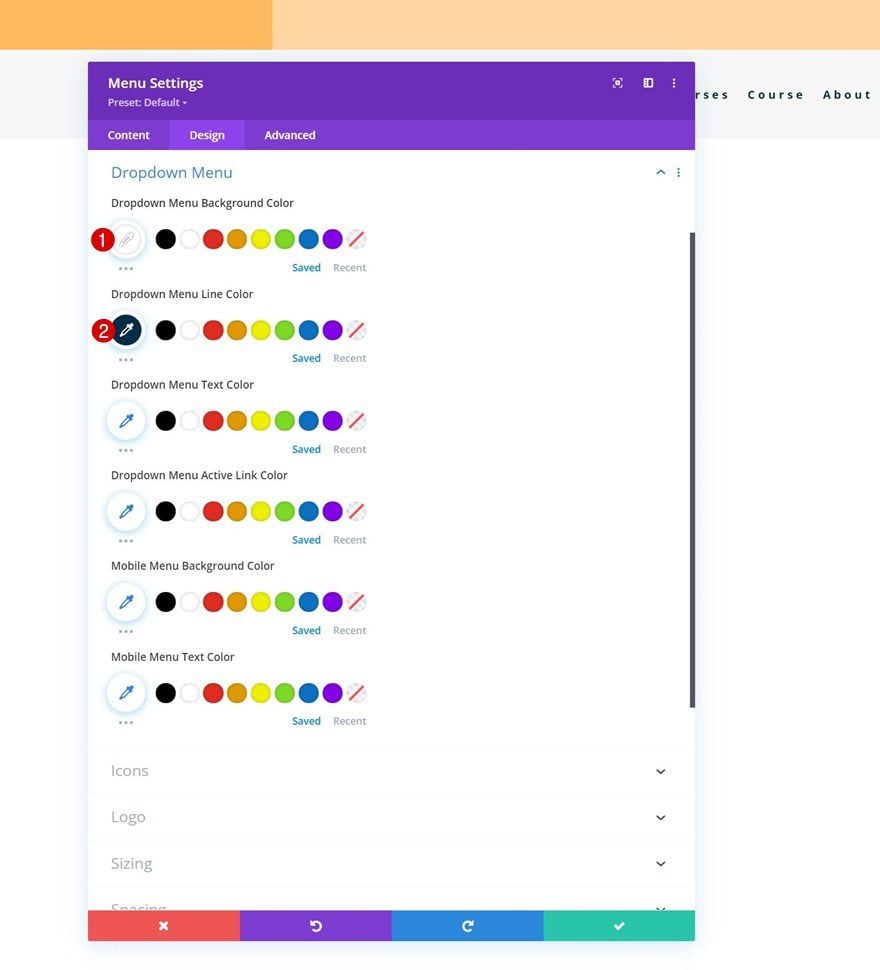
Dropdown Menu Text Settings
Then, make some changes to the dropdown menu settings.
- Dropdown Menu Background Color: #ffffff
- Dropdown Menu Line Color: #002d4c
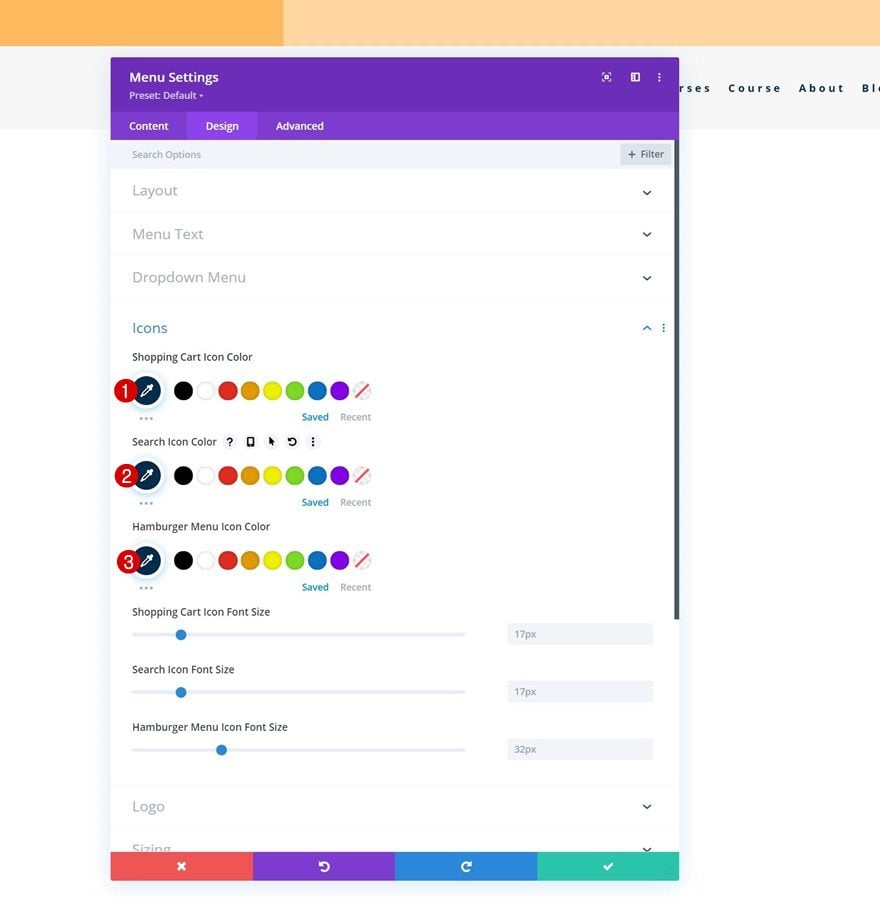
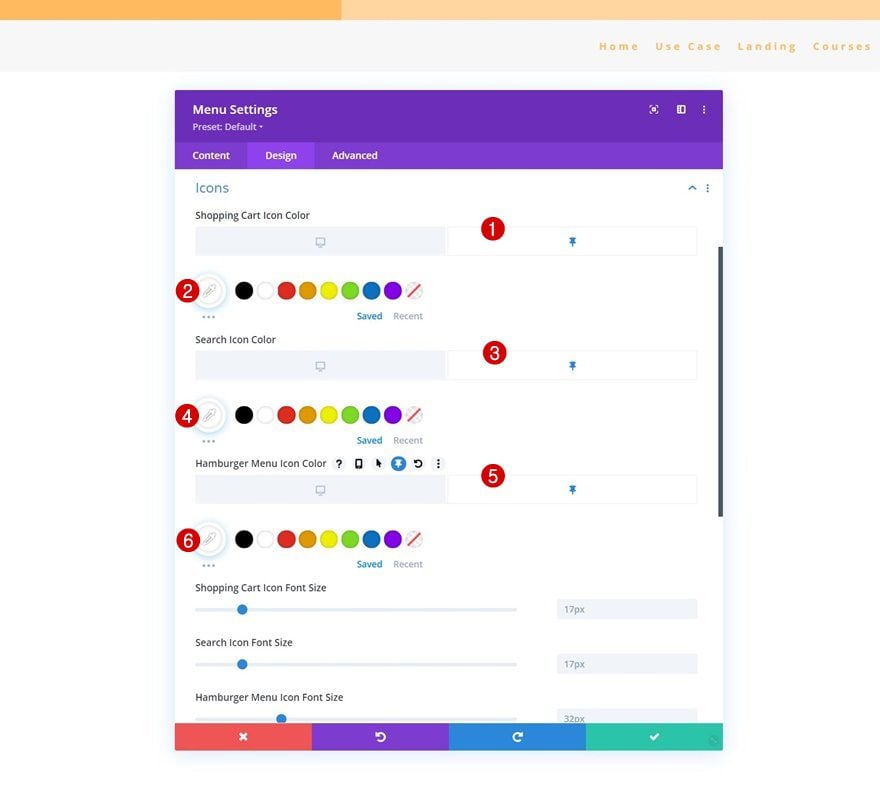
Icons Settings
Along with the icons settings.
- Shopping Cart Icon Color: #002d4c
- Search Icon Color: #002d4c
- Hamburger Menu Icon Color: #002d4c
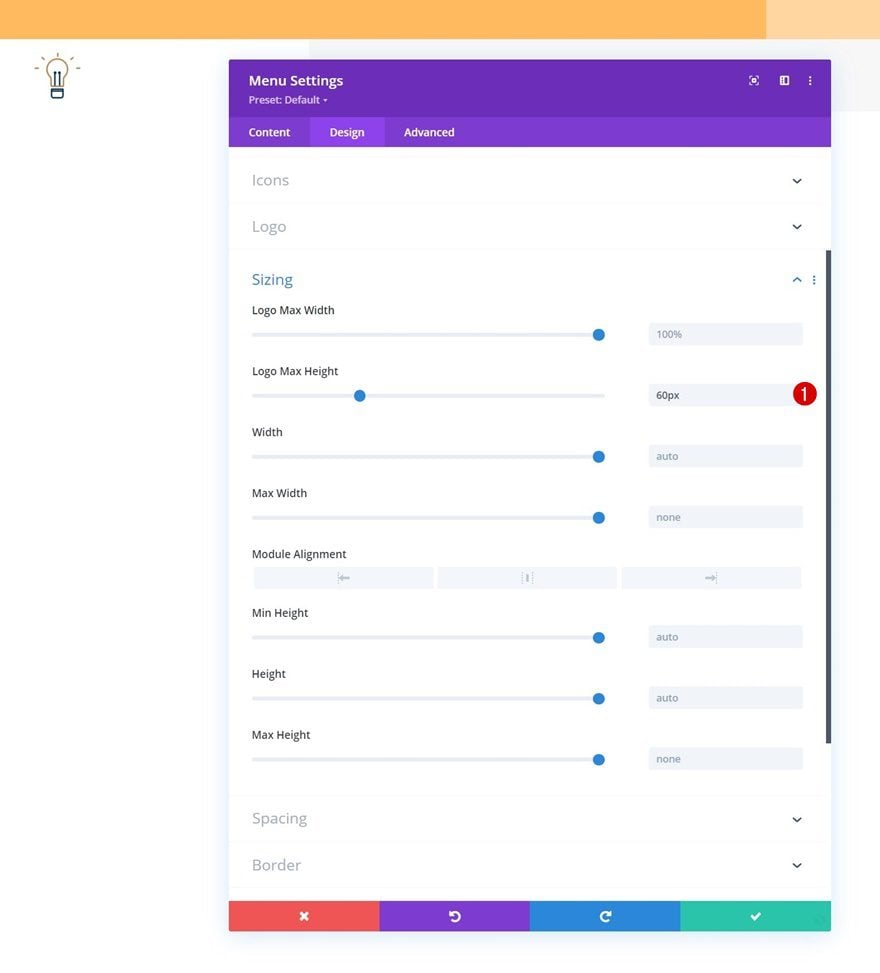
Sizing
And complete the module settings by adding a logo max height to the sizing settings.
- Logo Max Height: 60px
2. Apply Custom Sticky Effects
Turn Section #2 Sticky
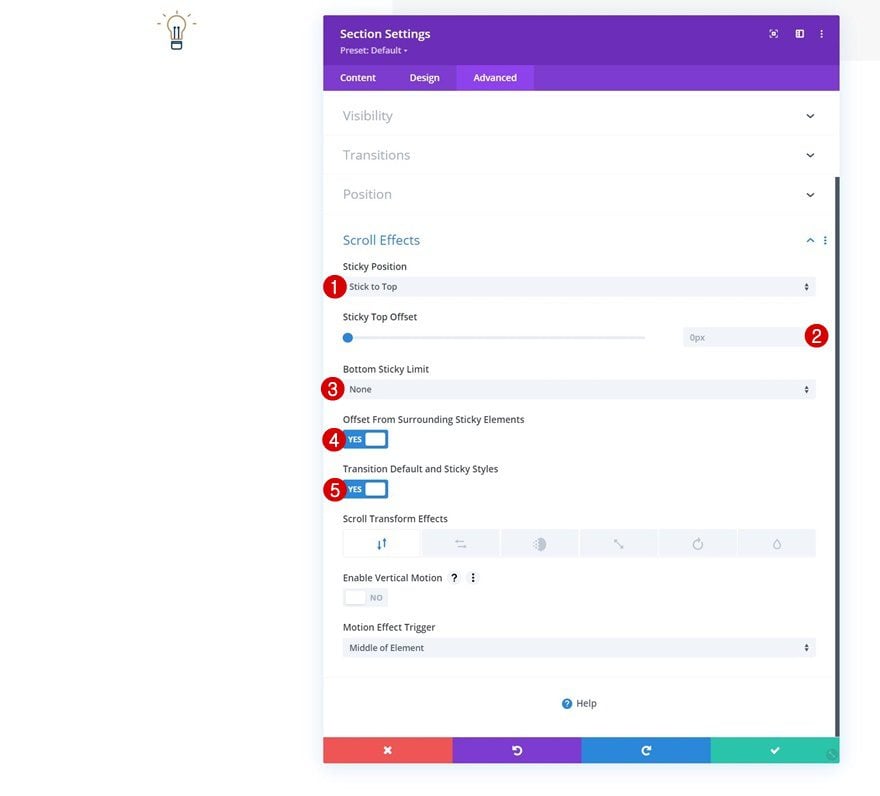
Now that we have created the element structure of our header, it’s time to turn our second section sticky and change the design style of it and its elements in a sticky state. Open the second section’s settings and move on to the advanced tab. There, go to the scroll effects settings and apply the following sticky options:
- Sticky Position: Stick to Top
- Sticky Top Offset: 0px
- Bottom Sticky Limit: None
- Offset From Surrounding Sticky Elements: Yes
- Transition Default and Sticky Styles: Yes
Change Section’s Gradient Background in Sticky State
Now that our section has been turned sticky, an additional option will appear inside our section, row and module settings; the sticky option. When you click this icon, you’ll be able to create an alternative style for the element you’ve selected while in a sticky state. We’re going to combine a couple of these sticky design settings to customize the look and feel of our sticky header on scroll. Start by going to the second section’s background settings and apply the following sticky gradient background:
- Color 1: #26333a
- Color 2: #1e272f
Stretch Row in Sticky State
Next, we’ll open the row containing the Menu Module and we’ll modify the width in a sticky state.
- Width: 95%
Remove Row Padding in Sticky State
We’re removing the sticky top and bottom padding of our row too.
- Top Padding: 0px
- Bottom Padding: 0px

Next, we’ll change the menu text color in a sticky state.
- Menu Text Color: #ffbd68
Along with the icon colors.
- Shopping Cart Icon Color: #ffffff
- Search Icon Color: #ffffff
- Hamburger Menu Icon Color: #ffffff
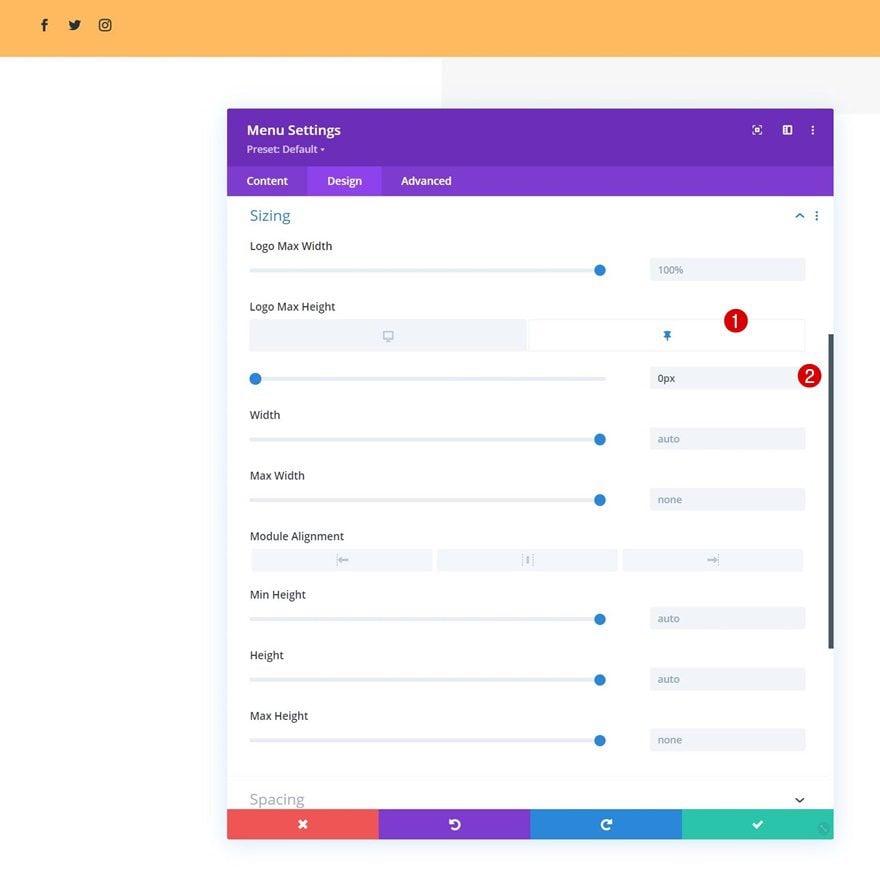
Remove Logo Height in Sticky State
And last but not least, we’ll change the logo max height to zero in a sticky state. This will remove the logo from our header entirely once the section’s sticky settings are enabled. That’s it! Make sure you save all Divi Theme Builder changes once you’ve completed your header design and preview it on your website.
- Logo Max Height: 0px
Preview
Now that we’ve gone through all the steps, let’s take a final look at the outcome across different screen sizes.
Desktop
Mobile
Final Thoughts
In this post, we’ve shown you how to create a sticky header using Divi’s Theme Builder and sticky options. As soon as the section containing our menu is turned sticky, we’re applying custom styles as well. These options are made possible by the new Divi sticky options that provide you with countless possibilities to improve the user experience and design you create. You were able to download the global header template for free as well! If you have any questions or suggestions, feel free to leave a comment in the comment section below.
If you’re eager to learn more about Divi and get more Divi freebies, make sure you subscribe to our email newsletter and YouTube channel so you’ll always be one of the first people to know and get benefits from this free content.


How do you get the sticky state options on the row and the menu module?
We only made the section sticky, only the section has sticky state options
the gradient is not changing in sticky header
Same identical problem. Did you find a solution?
Hi there, I recommend that you reach out to the Support Team directly so they can check that out for you. Just open a chat using the pink circle button floating at the bottom.
Loving the Divi Experience and these tutorials helping to get the most out of Divi 🙂
It’s really awesome to learn about some more cool customization with the DIVI.
The panel to customize with just some click is really awesome and I really love them.
First, I thought it wouldn’t look good on mobile, but after I tried I found out that it’s better for mobile as well.
Thanks for sharing such a great article.
The new sticky feature works well in most cases and would be 100% spot on if you could use it effectively on a simple set header that doesn’t move or change style. Ideally with sticky the header will set the page content correctly so it isn’t tucked under the header. This is good. The drawback is that while it is perfect when viewing in Firefox, in Chrome the header will judder slightly when you start to scroll and in Safari it jumps quite noticeably. So it isn’t really useable.
I have contacted support and they have acknowledged this issue. I really do hope that it gets fixed.
In the meantime you have to revert tho a fixed position for these basic headers and pad/margin your content for a few different viewports.
Then again the more complex headers, such as the one in the tutorial are probably fine and most welcome.
I’ve been using the Divi for the last 1 week in one of my websites and it is really awesome. Thanks to the developers. One small issue that I face is the adjustment of the logo. While using the sticky state, it is difficult for me adjust the logo height. When I scroll the page, the logo disappear. I tried a few tutorials but still stuck at the same place. Your answer might be a great help. Thanks
Hello,
thank you very much for this really interesting tutorial!
I have already implemented it on a site with some modifications,
but the effect is really great and even more so on mobile!
The “Sticky” options are truly amazing!
Thank you