Using Extra’s Theme Options
All of Extra’s basic configurations can be modified within the theme options panel.
Theme Options
Every Elegant Theme comes fully loaded with its own custom theme options panel. This is where you can control things like your logo, post meta information, and so much more. These options exist in what we call ePanel, and it can be accessed via the
Extra >> Theme Options menu.
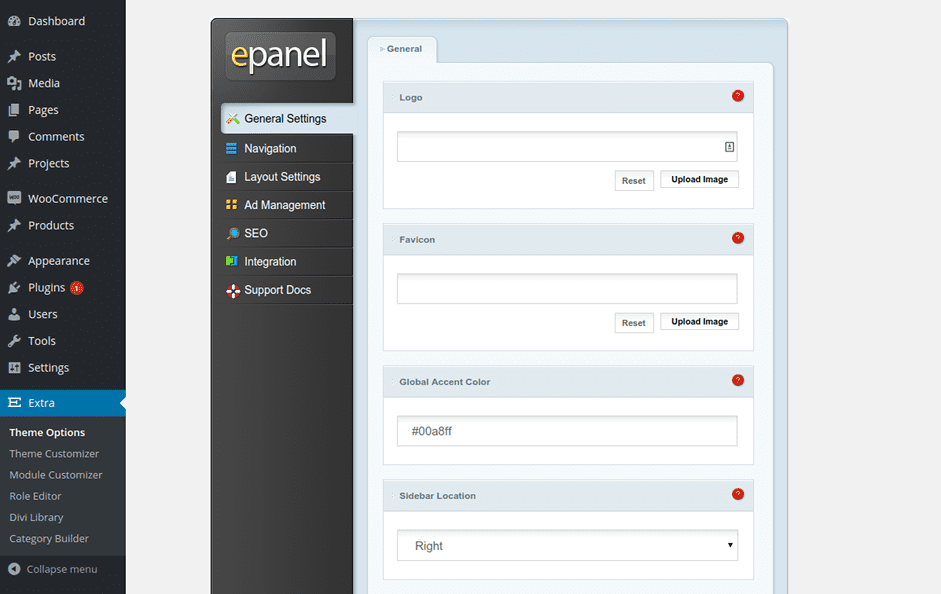
General Settings

Logo
This is where you can upload your own logo file to appear in the header of every page of your website.
Favicon
installing an image here will add a favicon image to represent your site in browser address bars and bookmark menus.
Global Accent Color
This allows you to control your site’s Global Accent Color which is used on all pages.
Sidebar Location
Here you can choose the default location of the Sidebar. You will still be able to control the sidebar location at the individual page/post level.
WooCommerce Sidebar Location
Here you can choose the default location of the Sidebar for WooCommerce pages.
Sidebar
Here you can choose the custom Sidebar (defined in Appearance >> Widgets) that will appear on your site’s category, archive, and index pages.
WooCommerce Sidebar
Here you can choose the custom Sidebar (defined in Appearance >> Widgets) that will appear on your site’s WooCommerce pages.
Social Network Follower Count Refresh
Here you can configure how frequently your social follow counts are retrieved from the social networks.
Social Media Icons
You can control which of Extra’s supported social networks’ icons are enabled using these controls. There is a control for each of the supported networks.
Social Media Profile URLs
In order for an icon to be shown on the frontend it must have a profile URL configured using these controls. Again, there is a control for each of the supported networks.
Numbers of posts per page
Define how many posts you would like to be displayed when a user visits a Category Page, an Archive Page, a Search Results Page, or Tag Page.
Date Format
This option allows you to change how your dates are displayed. For more information please refer to the WordPress codex here:
http://codex.wordpress.org/Formatting_Date_and_Time
Use excerpts when defined
This will enable the use of excerpts in posts or pages.
Responsive shortcodes
This option enables shortcodes to respond to various screen sizes
Google Fonts subsets
This will enable Google Fonts for Non-English languages.
Back To Top Button
This will enable a small button fixed to the bottom-right side of the screen that will scroll the page to the top when clicked.
Smooth Scrolling
This will enable smooth scrolling which is especially useful when using anchor links to link to specific areas of the page.
Custom CSS
This is where you can enter any custom css to customize your site. For extensive CSS modifications we recommend that you always use a child theme.
Navigation > Pages
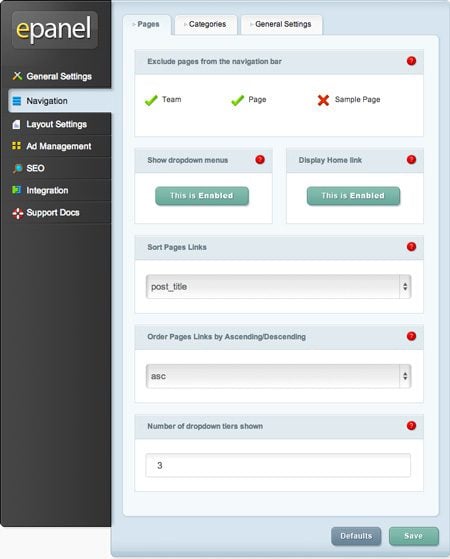
Exclude pages from the Navigation Bar
All of your existing pages will appear in this window. Every new page will appear in your navigation by default. You can uncheck any page here if you wish to not display a specific page or pages.
Show Dropdown Menus
If you would like to remove the dropdown menus from the pages navigation bar disable this feature.
Display Home Link
By default the theme creates a Home link that, when clicked, leads back to your blog’s homepage. If, however, you are using a static homepage and have already created a page called Home to use, this will result in a duplicate link. In this case you should disable this feature to remove the link.
Sort Pages Links
Choose how page links should be sorted here.
Order Pages Links by Ascending/Descending
Further, specify in which order your sorted page links should appear.
Number of dropdown tiers shown
This options allows you to control how many tiers your pages dropdown menu has. Increasing the number allows for additional menu items to be shown.
Navigation > Categories
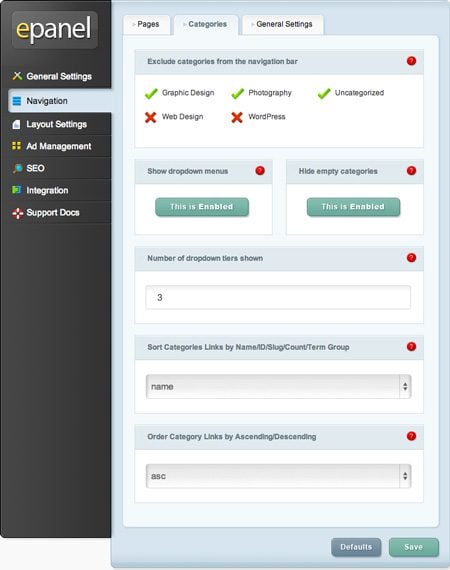
Exclude Categories from the Navigation Bar
All of your existing categories will appear in this window. Every new category will appear in your navigation by default. You can uncheck any category page here if you wish to not display a specific category or categories.
Hide Empty Categories
If a category has been made but is not being used by any posts, you can choose whether or not to display it in your navigation. By default empty categories are hidden
Number of Dropdown Tiers Shown
This options allows you to control how many tiers your pages dropdown menu has. Increasing the number allows for additional menu items to be shown.
Sort Category Links
Choose how category links should be sorted here.
Order Category Links by Ascending/Descending
Further, specify in which order your sorted category links should appear.
Navigation > General
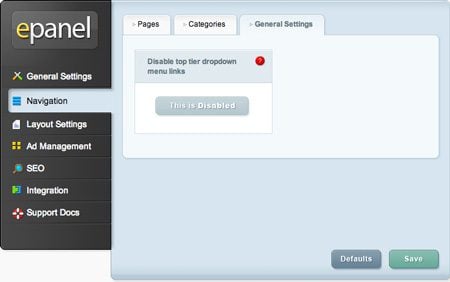
Disable top tier dropdown menu links
In some cases users will want to create parent categories or links as placeholders to hold a list of child links or categories. In this case it is not desirable to have the parent links lead anywhere, but instead merely serve an organizational function. Enabling this options will remove the links from all parent pages/categories so that they don’t lead anywhere when clicked.
Layout Settings
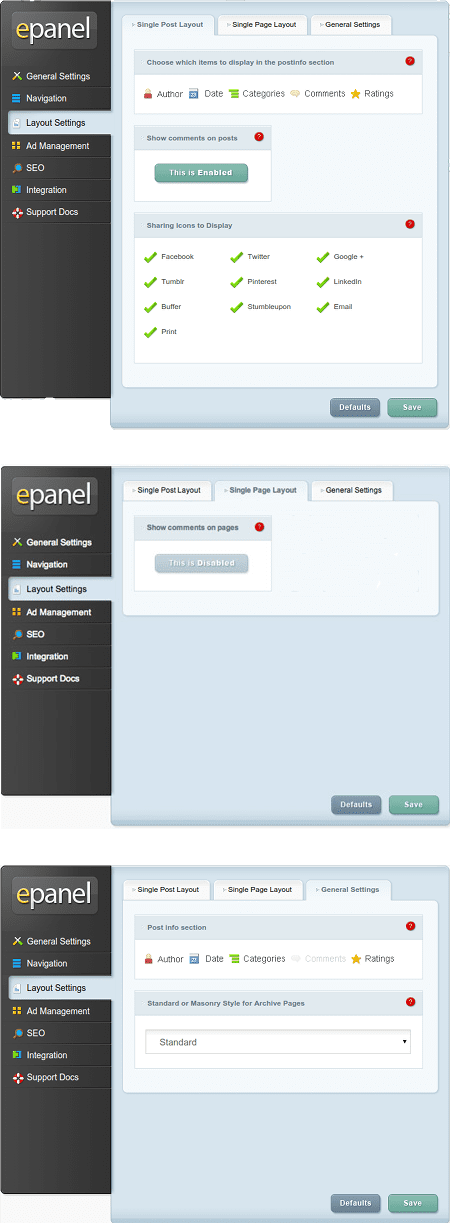
Single Post Layout
Choose Which Items to display in the post meta info section
Here you can choose which items appear in the post meta info section on single post pages. This is the area, usually below the post title, which displays basic information about your post. The highlighted items shown below will appear.
Show Comments on posts
You can disable this option if you want to remove the comments and comment form from single post pages.
Sharing Icons
You can choose which social networks’ icons are shown on your posts (for social sharing).
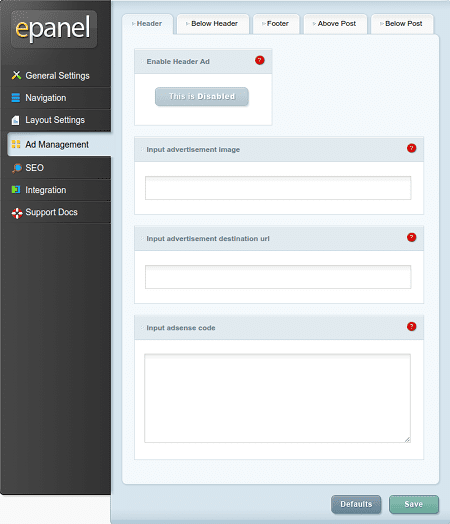
Single Page Layout
Show Comments on Pages
By default comments are not placed on pages, however, if you would like to allow people to comment on your pages simply enable this option.
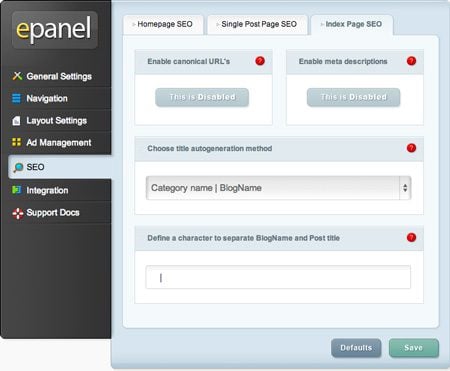
General Settings
Post Info Section
Here you can choose which items appear in the post meta info section on pages. This is the area, usually below the post title, which displays basic information about your post. The highlighted items shown below will appear.
Archive Page Style
Choose whether your archive/index pages list posts in the standard layout or the masonry layout.
Ad Management
Here you can control Extra’s five predefined Advertisement areas. Each Ad Area has the following options:
Enable Ad
Enable the Ad Area.
Input advertisement image
Here you can provide your image url
Input advertisement destination url
Here you can provide the URL that the image should link to.
Input Adsense code
Place your Adsense code here (if applicable).
SEO > Single Post Page SEO
The SEO options are only applied when you are not using a supported SEO plugin. Currently, Elegant Themes support Yoast SEO and All-In-One SEO.
Enable canonical URL’s
Canonicalization helps to prevent the indexing of duplicate content by search engines, and as a result, may help avoid duplicate content penalties and pagerank degradation. Some pages may have different URL’s all leading to the same place. For example domain.com, domain.com/index.html, and www.domain.com are all different URLs leading to your homepage. From a search engine’s perspective these duplicate URLs, which also occur often due to custom permalinks, may be treaded individually instead of as a single destination. Defining a canonical URL tells the search engine which URL you would like to use officially. The theme bases its canonical URLs off your permalinks and the domain name defined in the settings tab of wp-admin.
Enable meta descriptions
Check this box if you want to display meta descriptions on category/archive pages. The description is based off the category description you choose when creating/edit your category in wp-admin.
Choose title autogeneration method
Here you can choose how your titles on index pages are generated. You can change which order your blog name and index title are displayed, or you can remove the blog name from the title completely.
Define a character to separate BlogName and Post title
Here you can change which character separates your blog title and index page name when using autogenerated post titles. Common values are | or –
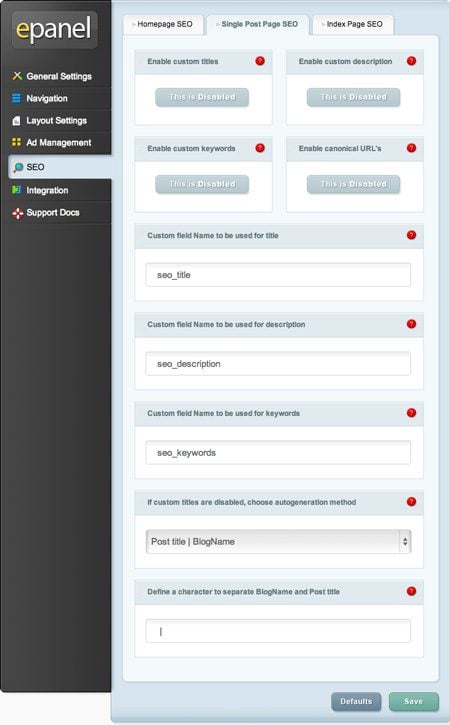
Enable custom titles
By default the theme creates post titles based on the title of your post and your blog name. If you would like to make your meta title different than your actual post title you can define a custom title for each post using custom fields. This option must be enabled for custom titles to work, and you must choose a custom field name for your title below.
Enable custom description
If you would like to add a meta description to your post you can do so using custom fields. This option must be enabled for descriptions to be displayed on post pages. You can add your meta description using custom fields based off the custom field name you define below.
Enable custom keywords
If you would like to add meta keywords to your post you can do so using custom fields. This option must be enabled for keywords to be displayed on post pages. You can add your meta keywords using custom fields based off the custom field name you define below.
Enable canonical URL’s
Canonicalization helps to prevent the indexing of duplicate content by search engines, and as a result, may help avoid duplicate content penalties and pagerank degradation. Some pages may have different URL’s all leading to the same place. For example domain.com, domain.com/index.html, and www.domain.com are all different URLs leading to your homepage. From a search engine’s perspective these duplicate URLs, which also occur often due to custom permalinks, may be treated individually instead of as a single destination. Defining a canonical URL tells the search engine which URL you would like to use officially. The theme bases its canonical URLs off your permalinks and the domain name defined in the settings tab of wp-admin.
Custom field Name to be used for title
When you define your title using custom fields you should use this value for the custom field Name. The Value of your custom field should be the custom title you would like to use.
Custom field Name to be used for description
When you define your meta description using custom fields you should use this value for the custom field Name. The Value of your custom field should be the custom description you would like to use.
Custom field Name to be used for keywords
When you define your keywords using custom fields you should use this value for the custom field Name. The Value of your custom field should be the meta keywords you would like to use, separated by commas.
If custom titles are disabled, choose auto-generation method
If you are not using custom post titles you can still have control over how your titles are generated. Here you can choose which order you would like your post title and blog name to be displayed, or you can remove the blog name from the title completely.
Define a character to separate BlogName and Post title
Here you can change which character separates your blog title and post name when using autogenerated post titles. Common values are | or –
SEO > Index Page SEO
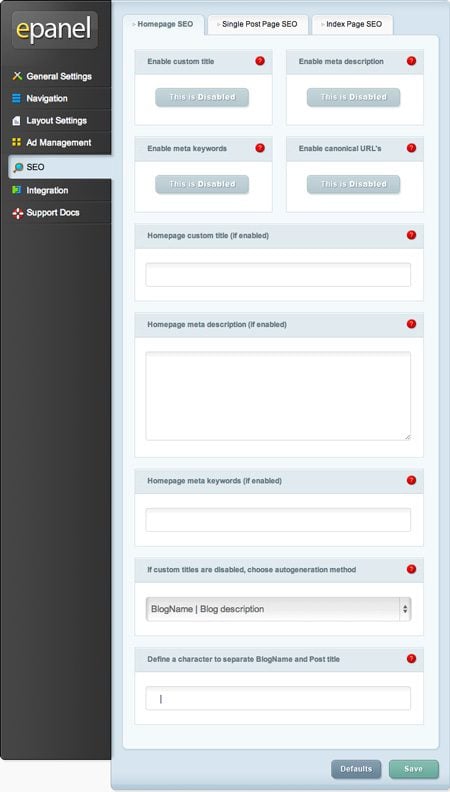
Enable custom title
By default the theme uses a combination of your blog name and your blog description, as defined when you created your blog, to create your homepage titles. However if you want to create a custom title then simply enable this option and fill in the custom title field below.
Enable meta description
By default the theme uses your blog description, as defined when you created your blog, to fill in the meta description field. If you would like to use a different description then enable this option and fill in the custom description field below.
Enable meta keywords
By default the theme does not add keywords to your header. Most search engines don’t use keywords to rank your site anymore, but some people define them anyway just in case. If you want to add meta keywords to your header then enable this option and fill in the custom keywords field below.
Enable canonical URL’s
Canonicalization helps to prevent the indexing of duplicate content by search engines, and as a result, may help avoid duplicate content penalties and pagerank degradation. Some pages may have different URLs all leading to the same place. For example domain.com, domain.com/index.html, and www.domain.com are all different URLs leading to your homepage. From a search engine’s perspective these duplicate URLs, which also occur often due to custom permalinks, may be treated individually instead of as a single destination. Defining a canonical URL tells the search engine which URL you would like to use officially. The theme bases its canonical URLs off your permalinks and the domain name defined in the settings tab of wp-admin.
Homepage custom title (if enabled)
If you have enabled custom titles you can add your custom title here. Whatever you type here will be placed between the < title >< /title > tags in header.php
Homepage meta description (if enabled)
If you have enabled meta descriptions you can add your custom description here.
Homepage meta keywords (if enabled)
If you have enabled meta keywords you can add your custom keywords here. Keywords should be separated by commas. For example: wordpress,themes,templates,elegant
If custom titles are disabled, choose autogeneration method
If you are not using custom post titles you can still have control over how your titles are generated. Here you can choose which order you would like your post title and blog name to be displayed, or you can remove the blog name from the title completely.
Define a character to separate BlogName and Post title
Here you can change which character separates your blog title and post name when using autogenerated post titles. Common values are | or –
Integration
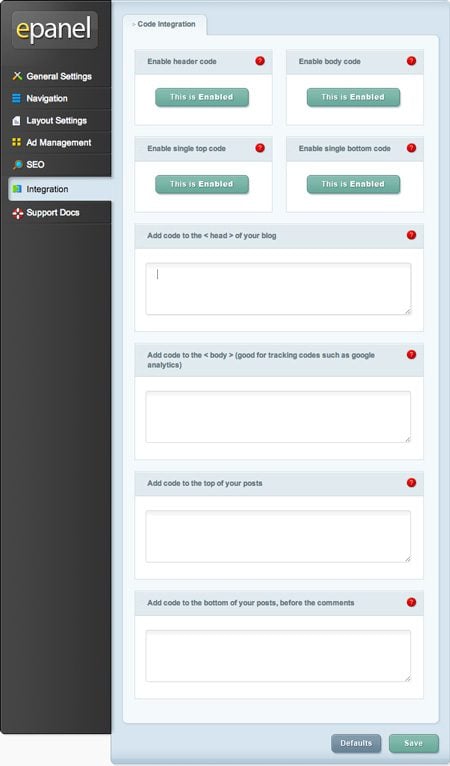
The integrate tab is great for adding third party code to certain areas of the theme. Code can be added to your websites head and body, as well as before and after each post. For example, if you need to add a tracking code to your website (such as google analytics), but are unsure which PHP file to edit in order to add the code to the < body > of your website, you can simply input this code into the “body” field of the Integration tab.
For more information on getting the most out of the Integration Tab, see our blog post on
Ways To Use The Integration Tab In Our ePanel Theme Options
Enable header code
Disabling this option will remove the header code below from your blog. This allows you to remove the code while saving it for later use.
Enable body code
Disabling this option will remove the body code below from your blog. This allows you to remove the code while saving it for later use.
Enable single top code
Disabling this option will remove the single top code below from your blog. This allows you to remove the code while saving it for later use.
Enable single bottom code
Disabling this option will remove the single bottom code below from your blog. This allows you to remove the code while saving it for later use.
Add code to the < head > of your blog
Any code you place here will appear in the head section of every page of your blog. This is useful when you need to add javascript or css to all pages.
Add code to the < body > (good for tracking codes such as google analytics)
Any code you place here will appear in body section of all pages of your blog. This is useful if you need to input a tracking pixel for a state counter such as Google Analytics.
Add code to the top of your posts
Any code you place here will be placed at the top of all single posts. This is useful if you are looking to integrating things such as social bookmarking links.
Add code to the bottom of your posts, before the comments
Any code you place here will be placed at the top of all single posts. This is useful if you are looking to integrating things such as social bookmarking links.