How To Perform Split Testing
Split tests are the key to optimizing your forms, making it easy to see which variation is most effective.
What Is Split Testing (Also Known As A/B Testing)
Split testing is an amazing feature that can help you greatly improve the effectiveness of your opt-in forms. Split tests can be created for any of the opt-in forms that you have built with Bloom. So what is a Split Test? Split testing is a way to compare the performance of multiple variations of the same opt-in form to help you figure out which one is the most effective. Using the Bloom Split Testing system, you can create different variations of an opt-in to test different headlines, colors, and offers. These different variations will be shown to different visitors, and their conversion rate will be compared to each other. Over time you can see which one is resulting in the most sign-ups, and you can pick the highest performing variation to be your main version.
Creating Your First Split Test
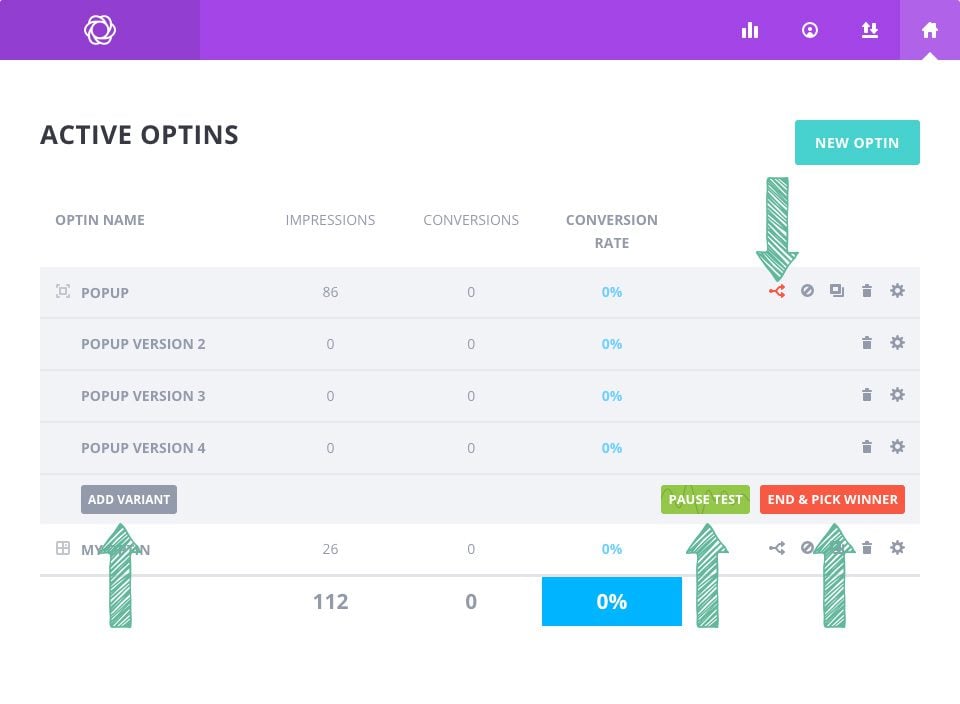
After you have created an opt-in, you can begin running split tests. Navigate to the Bloom > Email Optins tab in the WordPress Dashboard to display a list of your current opt-ins. You will notice that each of your active opt-ins have several icons to the right of the opt-in name. The first one is the “split testing” icon. Click this icon to initiate a split test.

Click the split testing icon shown above to initiate a split test.
Create New Variations
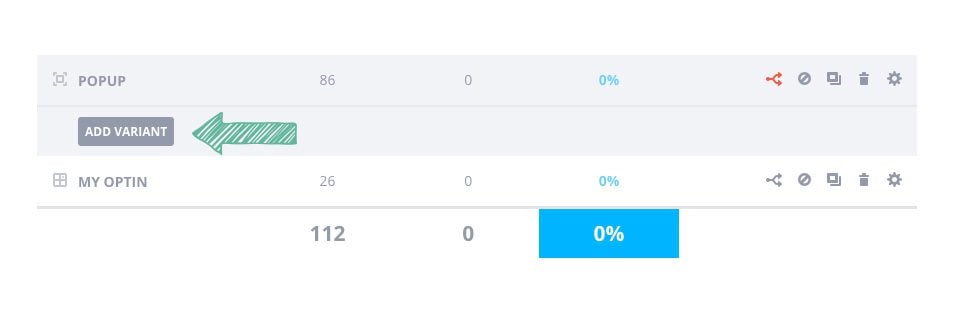
You can create as many variations as you like for your split test. Each of these variations will be split up equally between all of your visitors. To add your first variant, click the “Add Variant” button.
This will bring you to through the standard opt-in creation process. You will notice that the “Display” tab has been removed, since you are only modifying the appearance of the opt-in (not where the opt-in appears). Design your new opt-in with the changes you want to test (such as creating a new headline, or adjusting the colors of the button). Once you click “Save & Exit,” your new variation will be added to your opt-in list.
Beginning Your Split Test
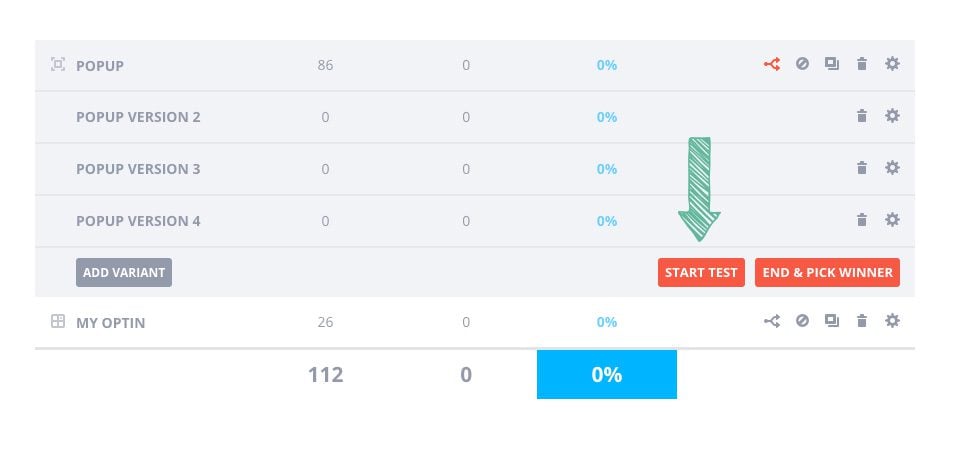
As you create new variants for a given opt-in, you will notice that these variations appear below the main opt-in in your list of active opt-ins in the Bloom settings panel. Once you have created all of the variations that you want to test, it’s time to begin the test. Press the “start test” button to activate the split test. Once the test has been started, you can also pause the test at any time by clicking the “pause test” button.
Observing The Results & Ending Your Test
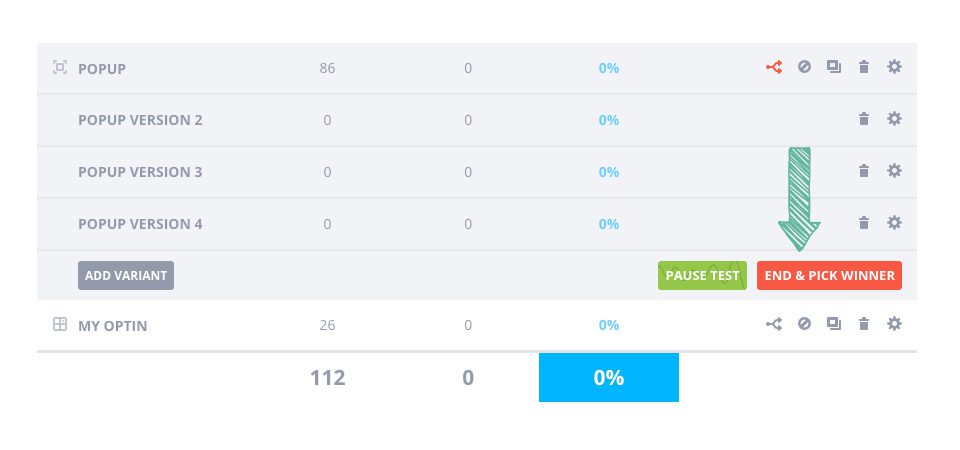
As your test runs, you can observe the conversion rate of each opt-in. The conversion rate is displayed right in the list of opt-ins, as well as in the Bloom stats page. Once you are satisfied with the results, it’s time to end the test and pick your favorite (the highest performing variation). To end the test, click the “End Test And Pick Winner” button.
This button will initiate a pop-up window with a list of all your variations, ranked by performance. Simply click on the one you would like to use to end the test and select this variant to use as the main version of your opt-in. This will delete the rest of your unused variations.