

It’s fairly common to sell multiple variations of a single product. Whether it’s t-shirt sizes, color preferences, or some other factor for shoppers to consider, you can easily display all of your available options with WooCommerce.
In this post, we’ll briefly discuss the uses of product variations, and then walk you through how to set them up in WooCommere. We’ll also share a handful of relevant plugins that can help you enhance your offers and product displays.
Let’s dive right in!
Understanding WooCommerce Product Variations
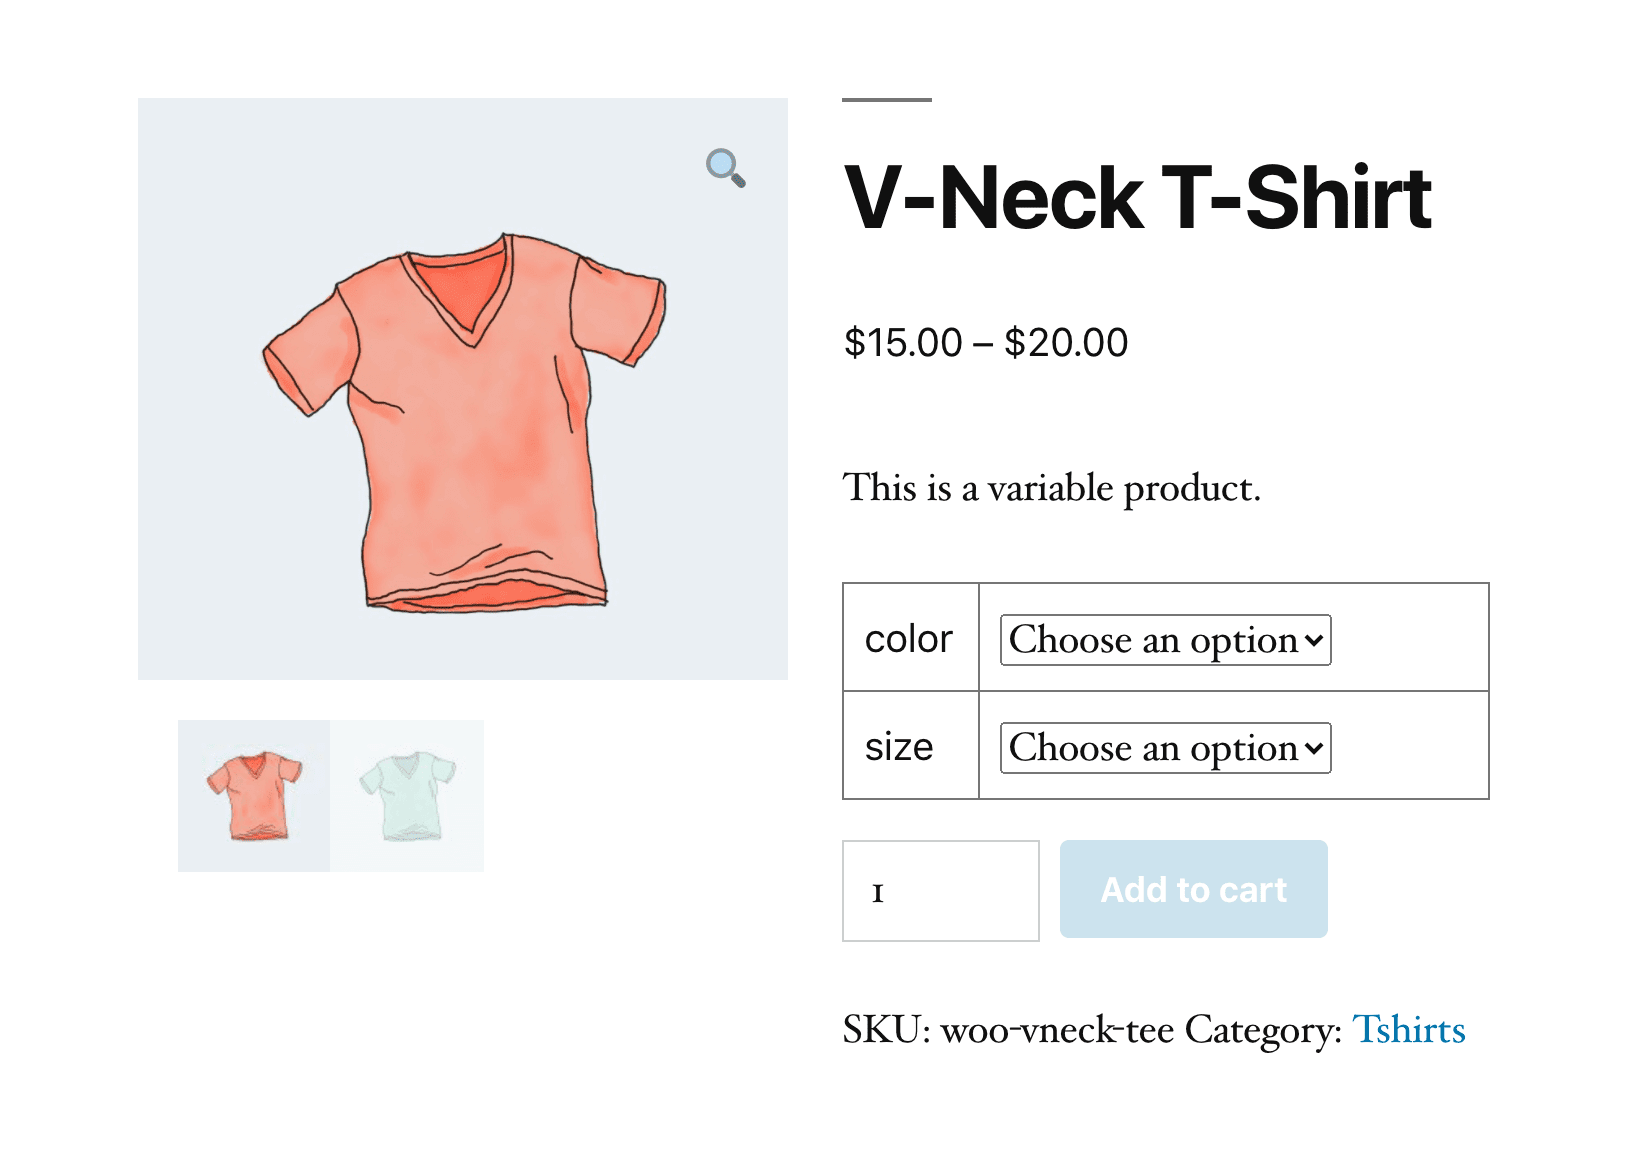
While you may not know the term, you’re probably extremely familiar with product variations. This is when a single item comes in a variety of options, such as different sizes, colors, flavors, or scents:
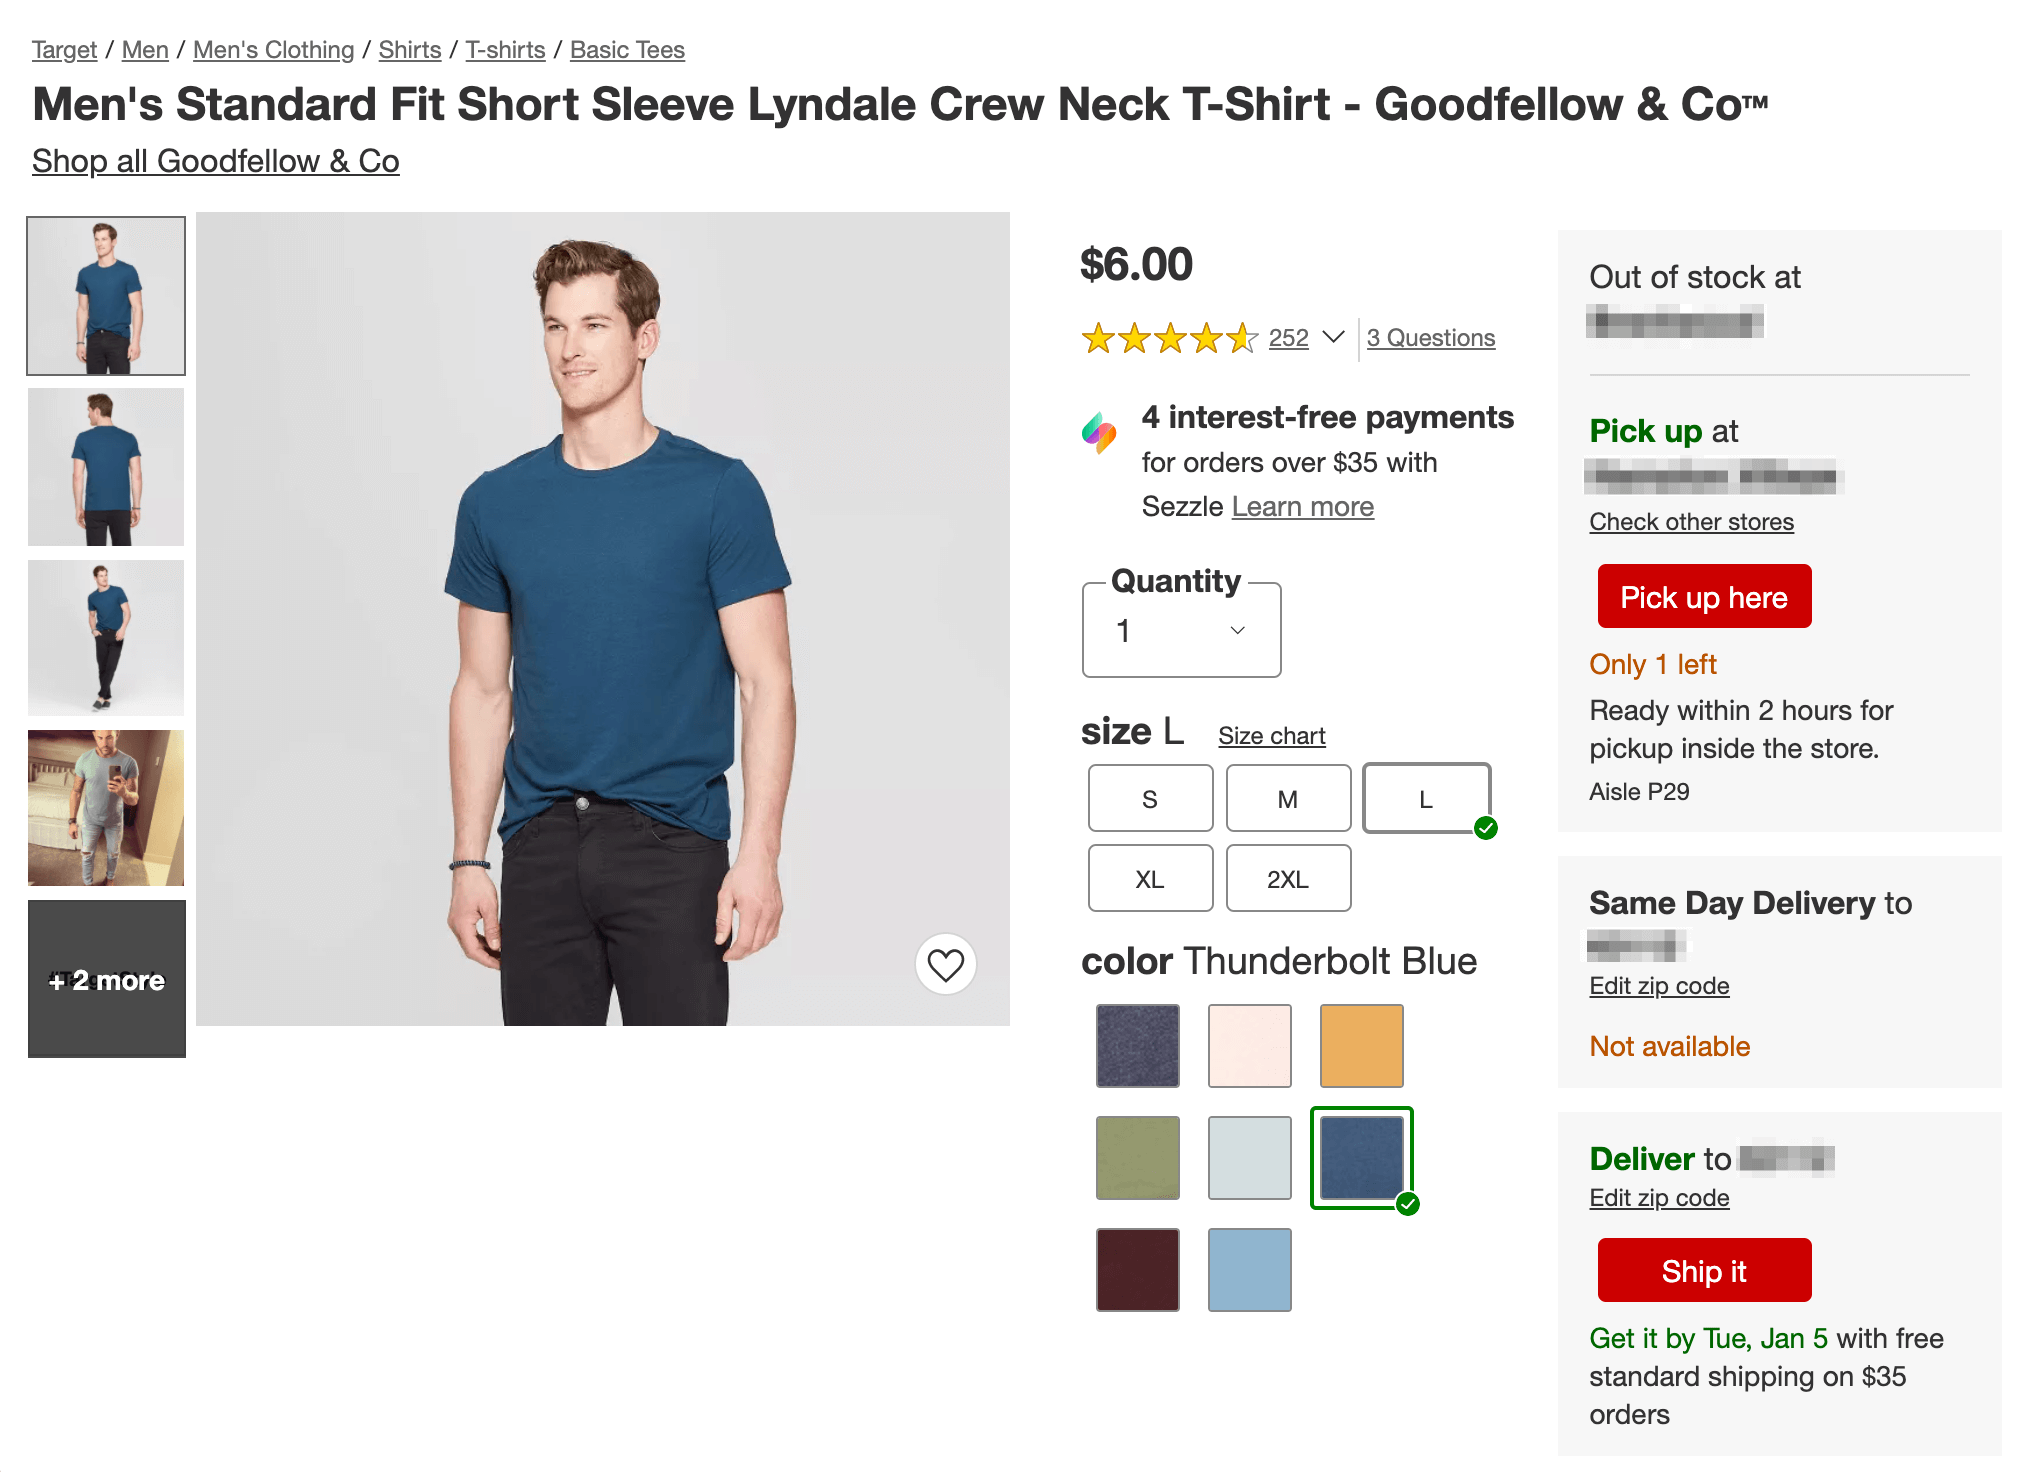
Each product variation will need its own Stock Keeping Unit (SKU) number to differentiate it from the others. However, variants are often all displayed on a single product page, with a selector to minimize confusion and make sure customers see all of the available options.
Product variations can serve many purposes. Some are practical, such as clothing sizes. Others are meant to help you appeal to different shoppers’ personal tastes, such as offering an item in multiple colors or patterns.
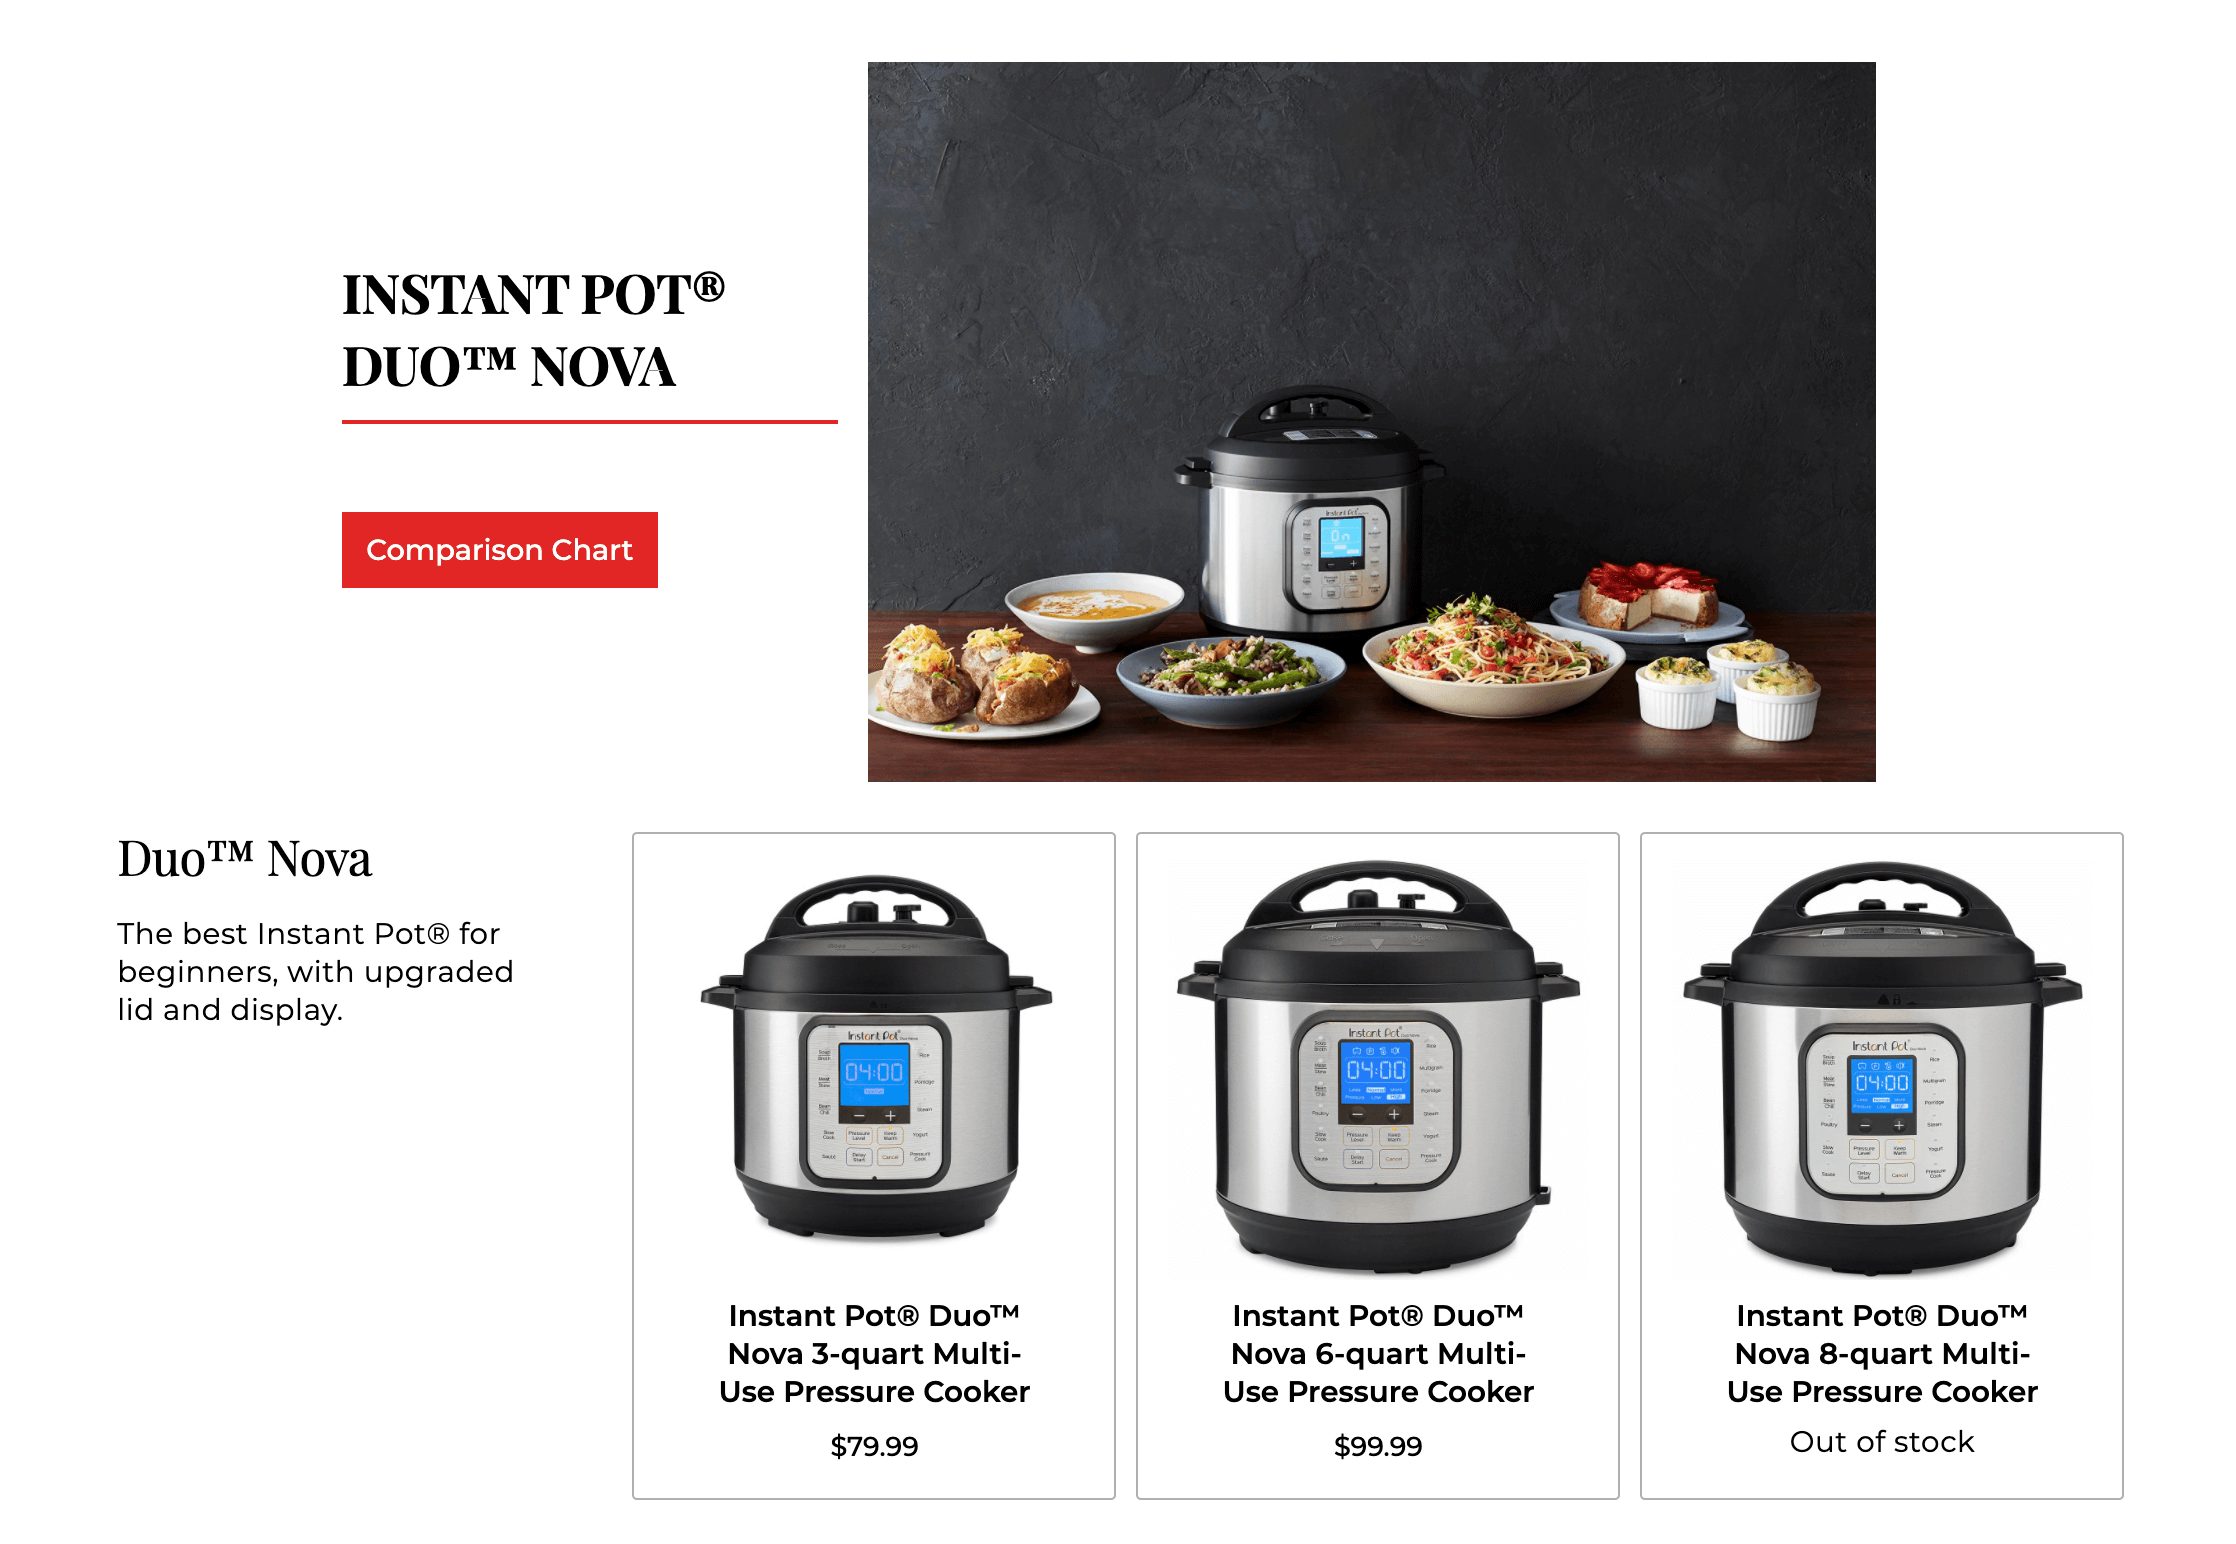
Additionally, you can keep the price the same for each variation, or adjust the cost depending on the options customers choose. For example, this pressure cooker comes in multiple sizes offered at increasing prices:
In short, there are many different reasons you might want to implement product variations on your WooCommerce site. Fortunately, the popular e-commerce plugin makes it easy to set this up.
How to Display Product Variations in WooCommerce (In 4 Steps)
Displaying product variations in WooCommerce is actually quite simple, especially if you’re already familiar with the plugin. Below, we’ll walk you through the process. However, note that for the purposes of this post, we’ll assume you already have your online store up and running, and you know how to create and edit simple products in WooCommerce.
Step 1: Create a Variable Product
WooCommerce enables you to set up product variations out of the box. Just select Products > Add New to get started.
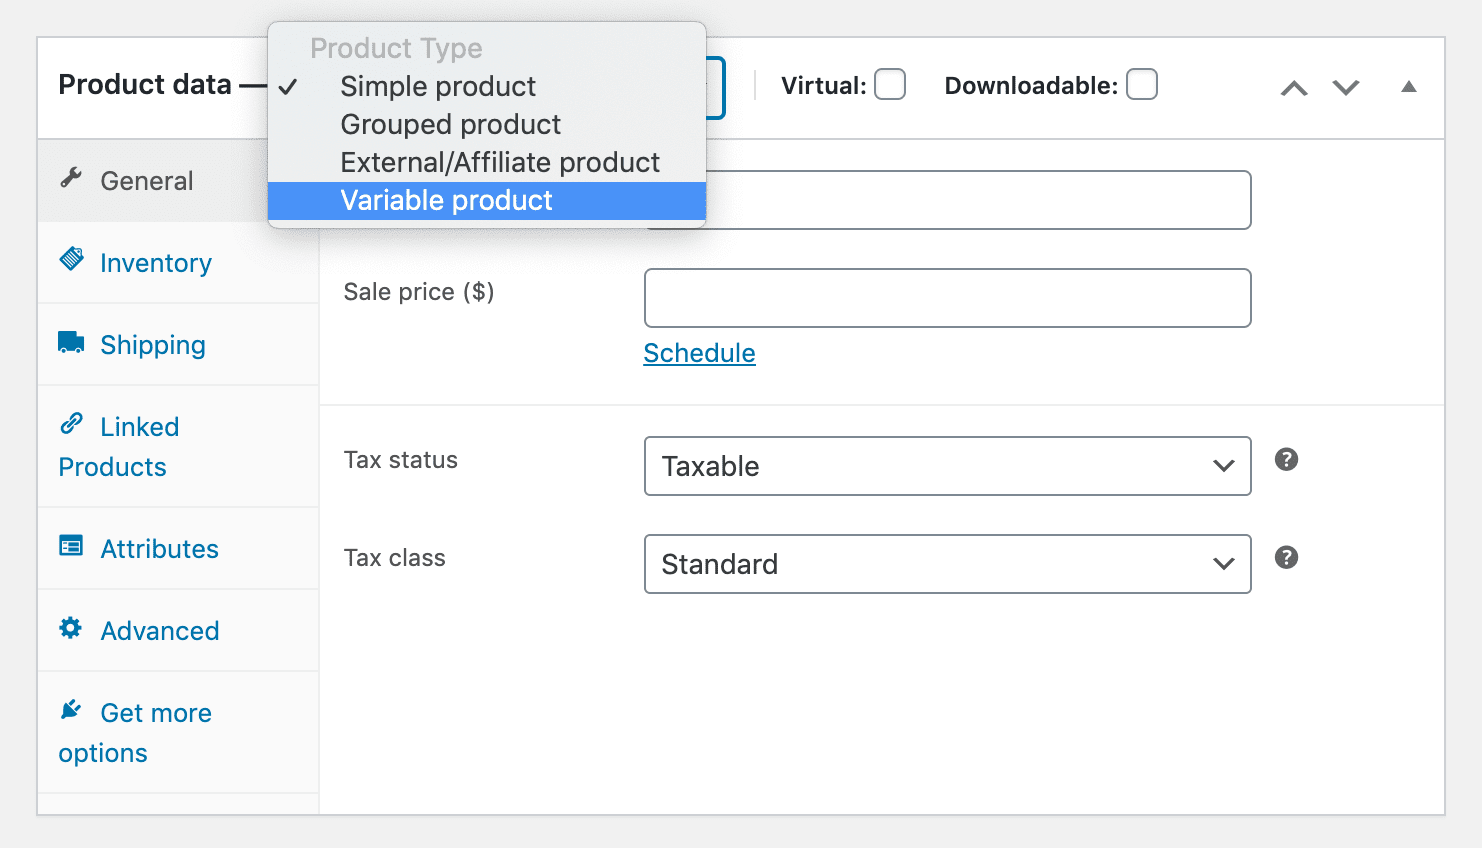
Once you’ve entered the item’s title and description, scroll down to the Product data section. From the drop-down menu at the top, select Variable Product:
You’ll see that the options for the product change accordingly. For instance, there’s no longer a field where you can enter the price for the item (you’ll be able to include this information later on).
Step 2: Add Product Attributes
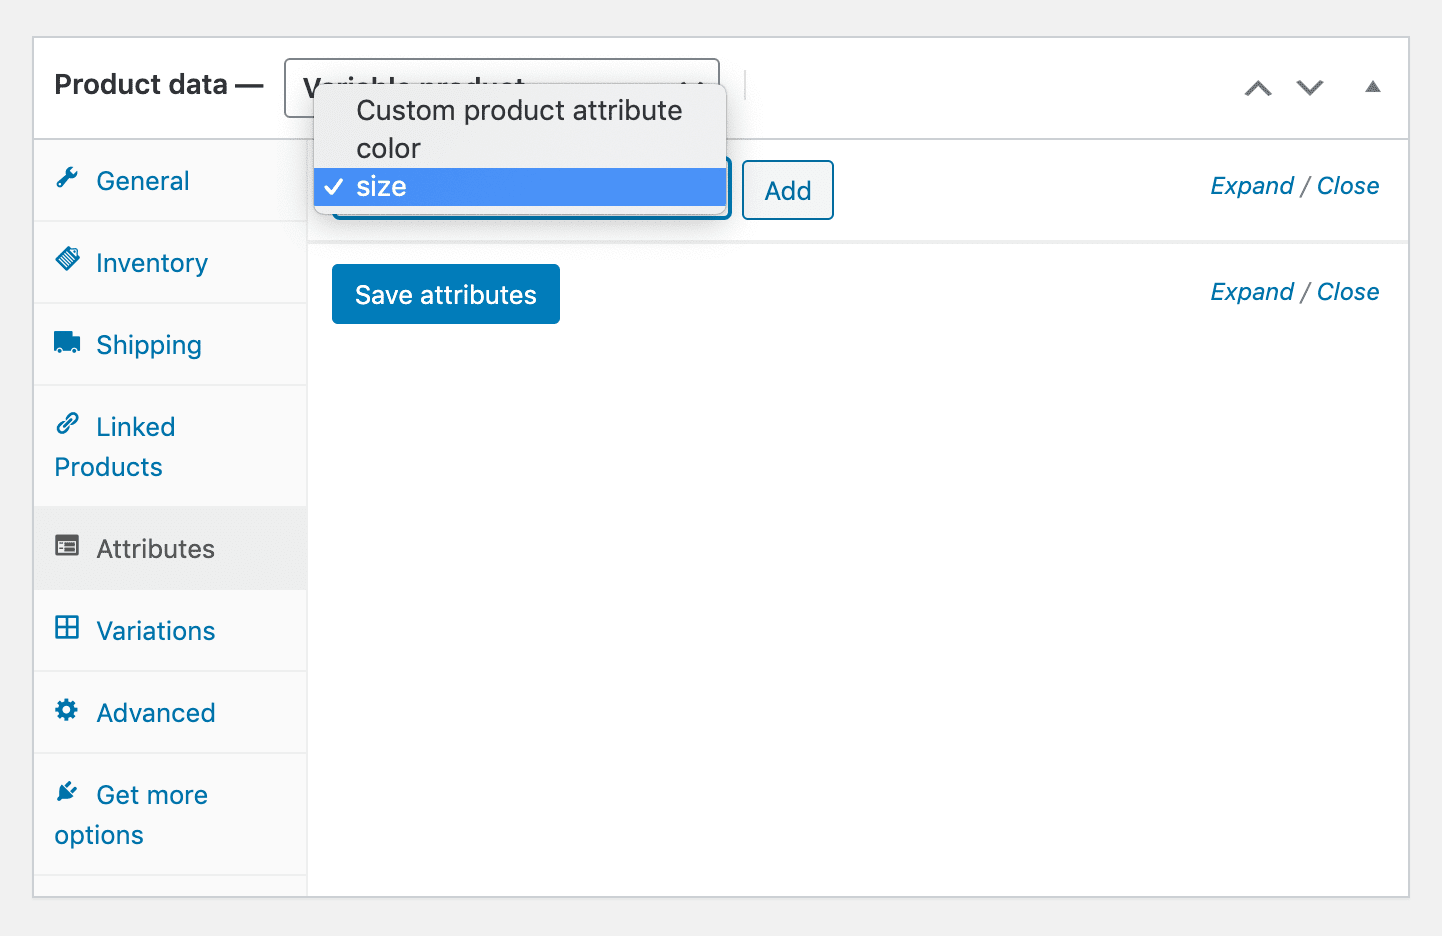
Next, click on the Attributes tab. From the drop-down menu, select the type of WooCommerce product variation you want to add. The default options are color and size, but you can also create custom attributes if you like:
Click on the Add button to apply your chosen attribute. Then fill out the required information below:
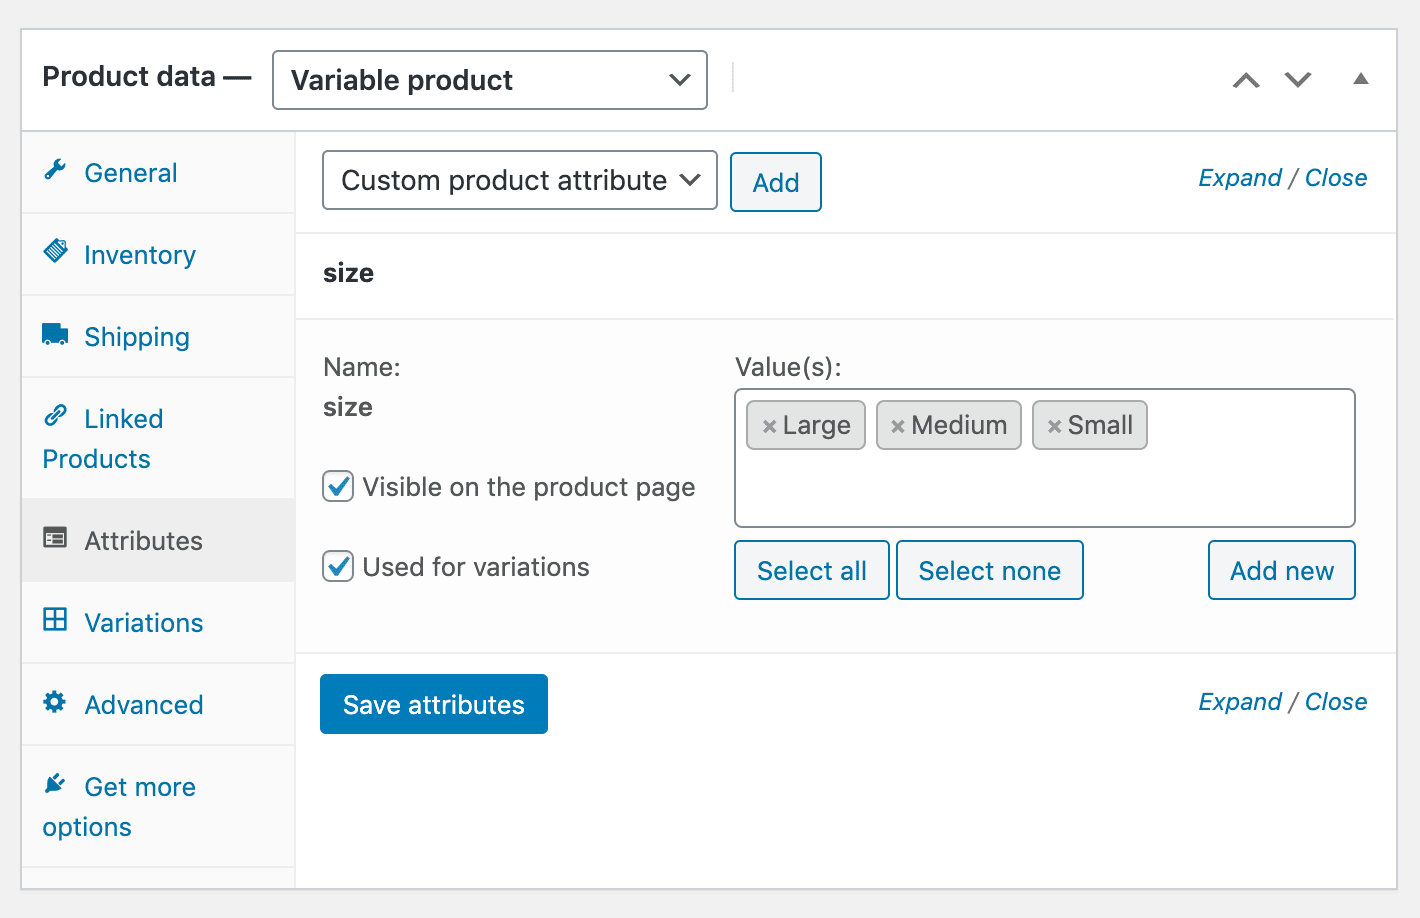
It’s important to enable both the Visible on the product page and Used for variations options. Then you can list your attribute values (such as small, medium, and large or red, yellow, and blue).
You can also repeat this process if your product has multiple variable attributes (for example, if it comes in various sizes and colors). Remember to click on Save attributes when you’re finished here.
Step 3: Generate Your Variations
Now you can go to the Variations tab. There you’ll see a drop-down menu with two options – Add variation and Create variations from all attributes:
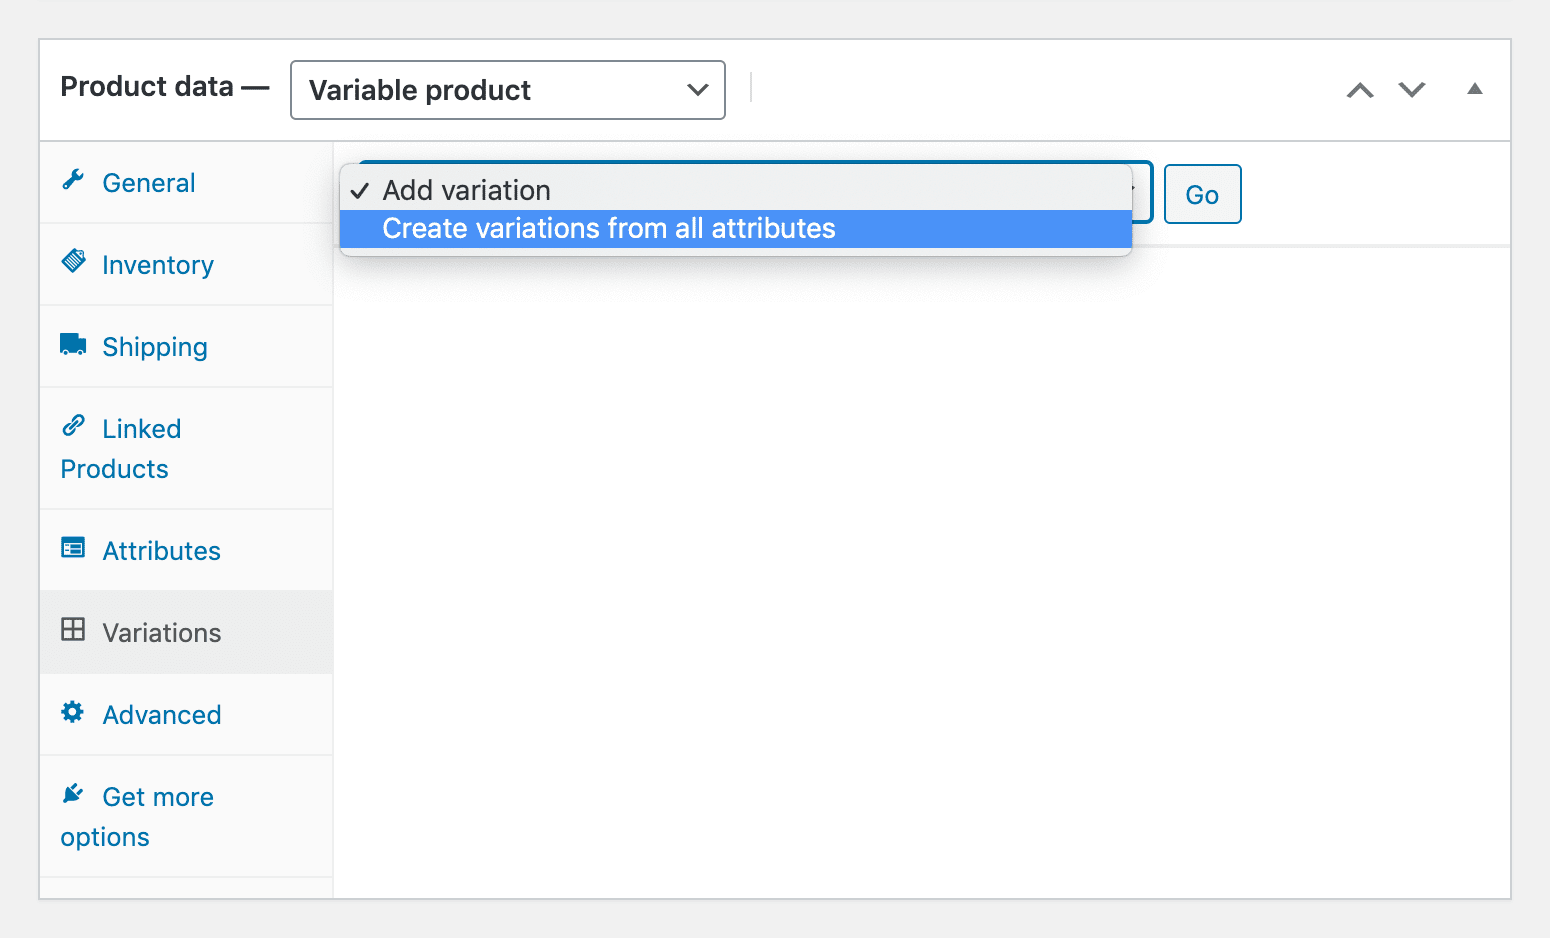
The second option will automatically generate WooCommerce product variations for every possible combination of attributes you’ve specified. If you would rather add the options manually, select Add variation and use the available menus to build each one:
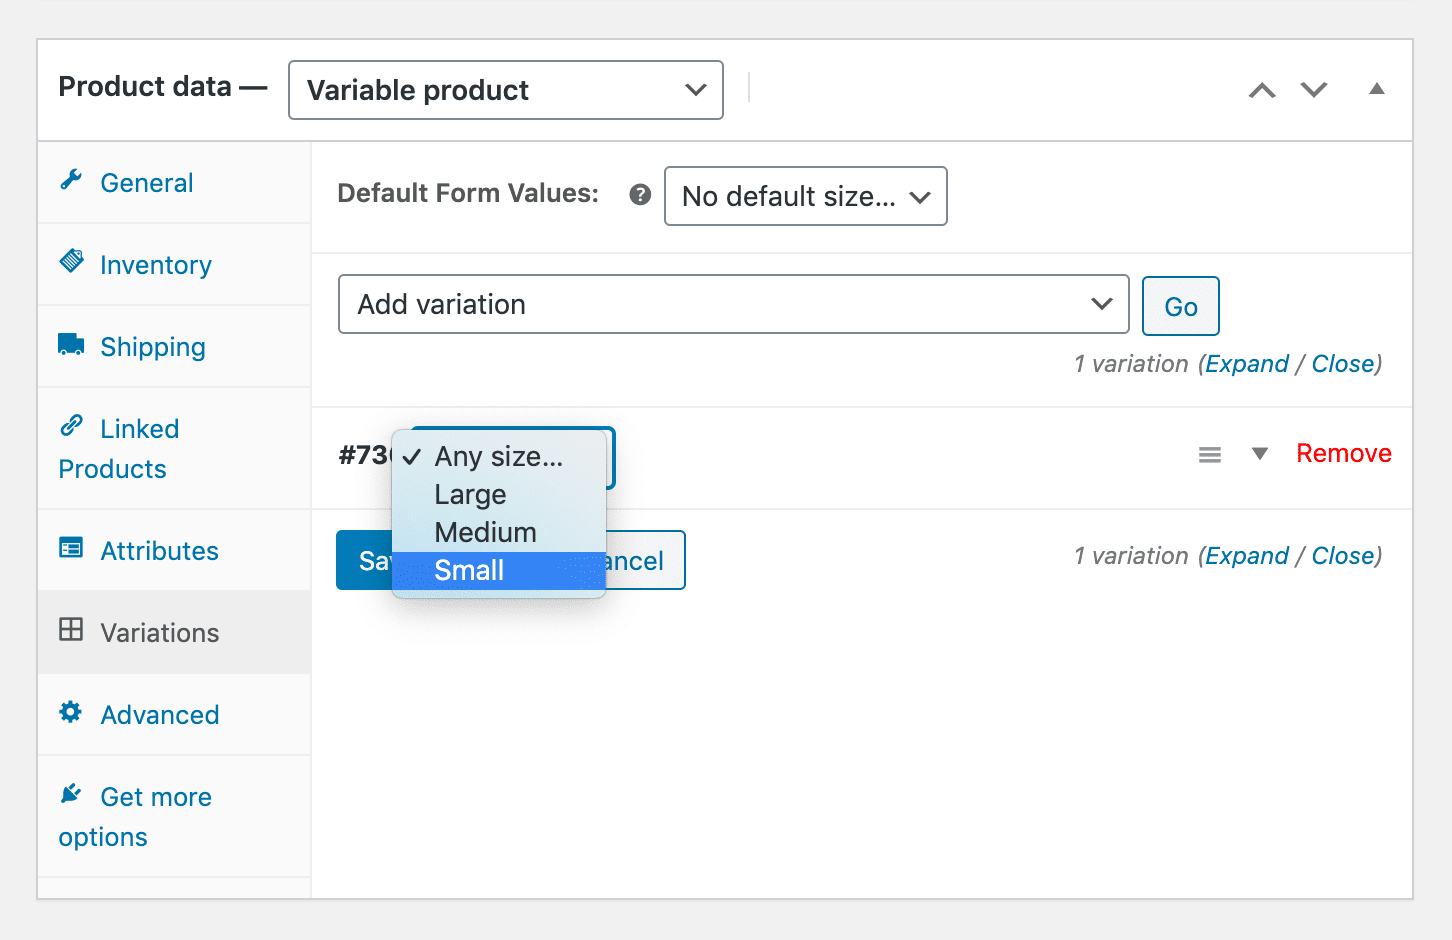
Then you can fill out the product information for each variation, just as you would if they were distinct items. As we mentioned earlier, each variation will need its own SKU number for inventory management purposes:
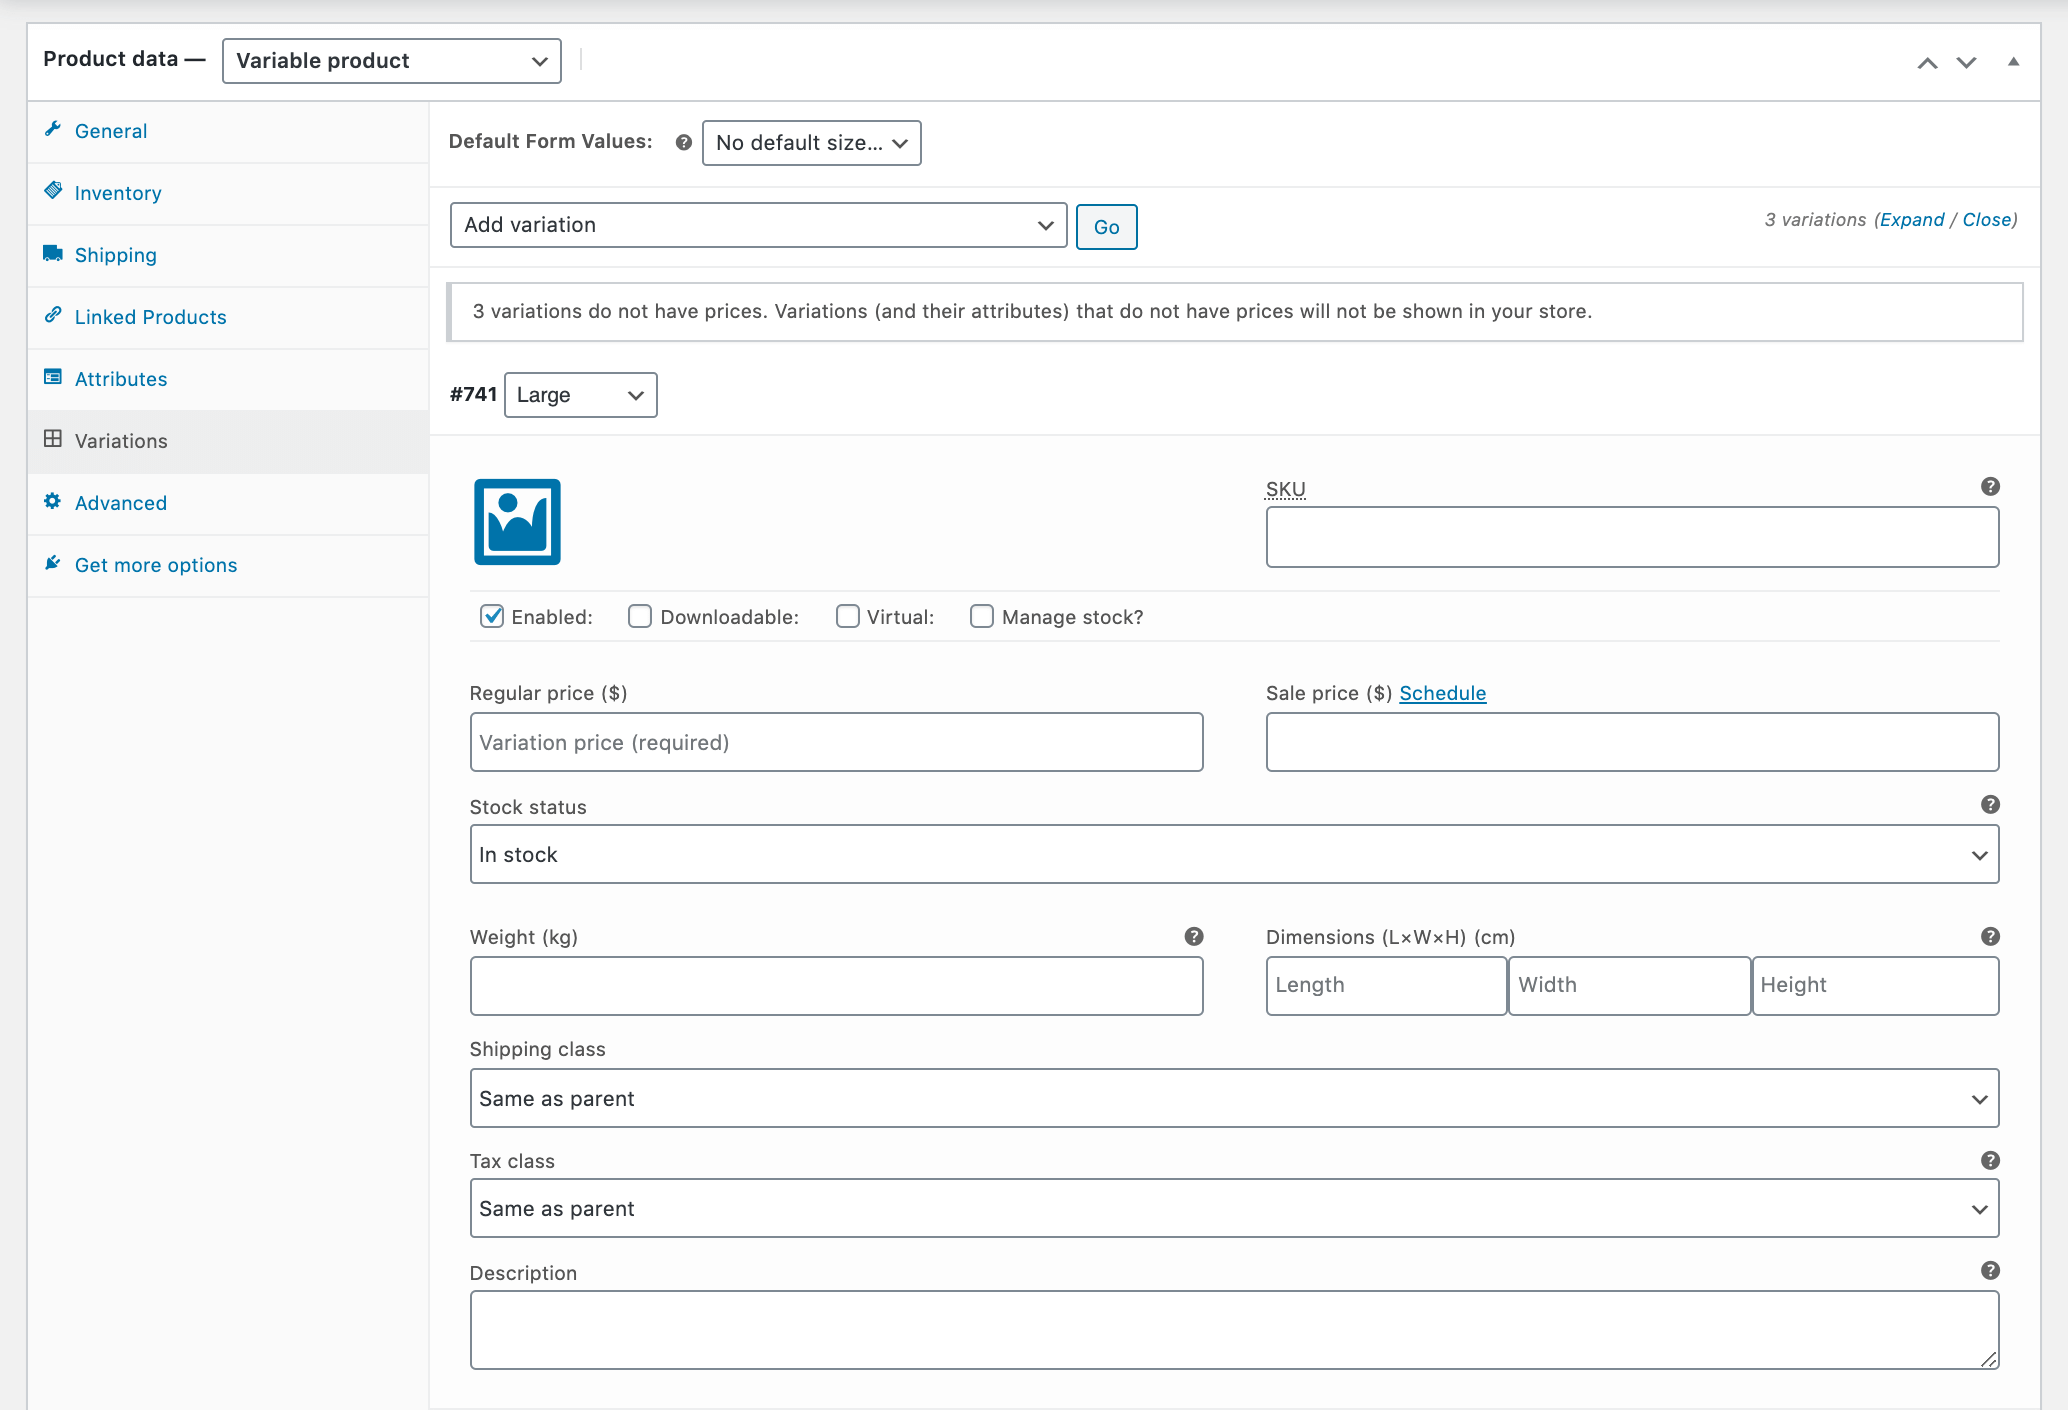
This is also where you can specify different prices for each variation if relevant. You’ll need to provide shipping and tax information as well. After you’ve done this for each of your WooCommerce product variations, click on Save changes.
Step 4: Preview and Publish Your Variable Product
At this stage, there may be other data you need to add in order to complete your product page. Once you’re done entering all the relevant information, you can save all your changes and preview the item:
Make sure to check the variation selector(s), and make sure all the options are there. If everything looks as it should and you’re ready to start selling this product, you can make the page live by clicking on the Publish button in the editor.
WooCommerce Product Variation Plugins
As we’ve seen, WooCommerce includes everything you need to set up product variations. However, there are some extensions and other plugins you may want to use to enhance this functionality.
First up, you can check out Additional Variation Images Gallery for WooCommerce:
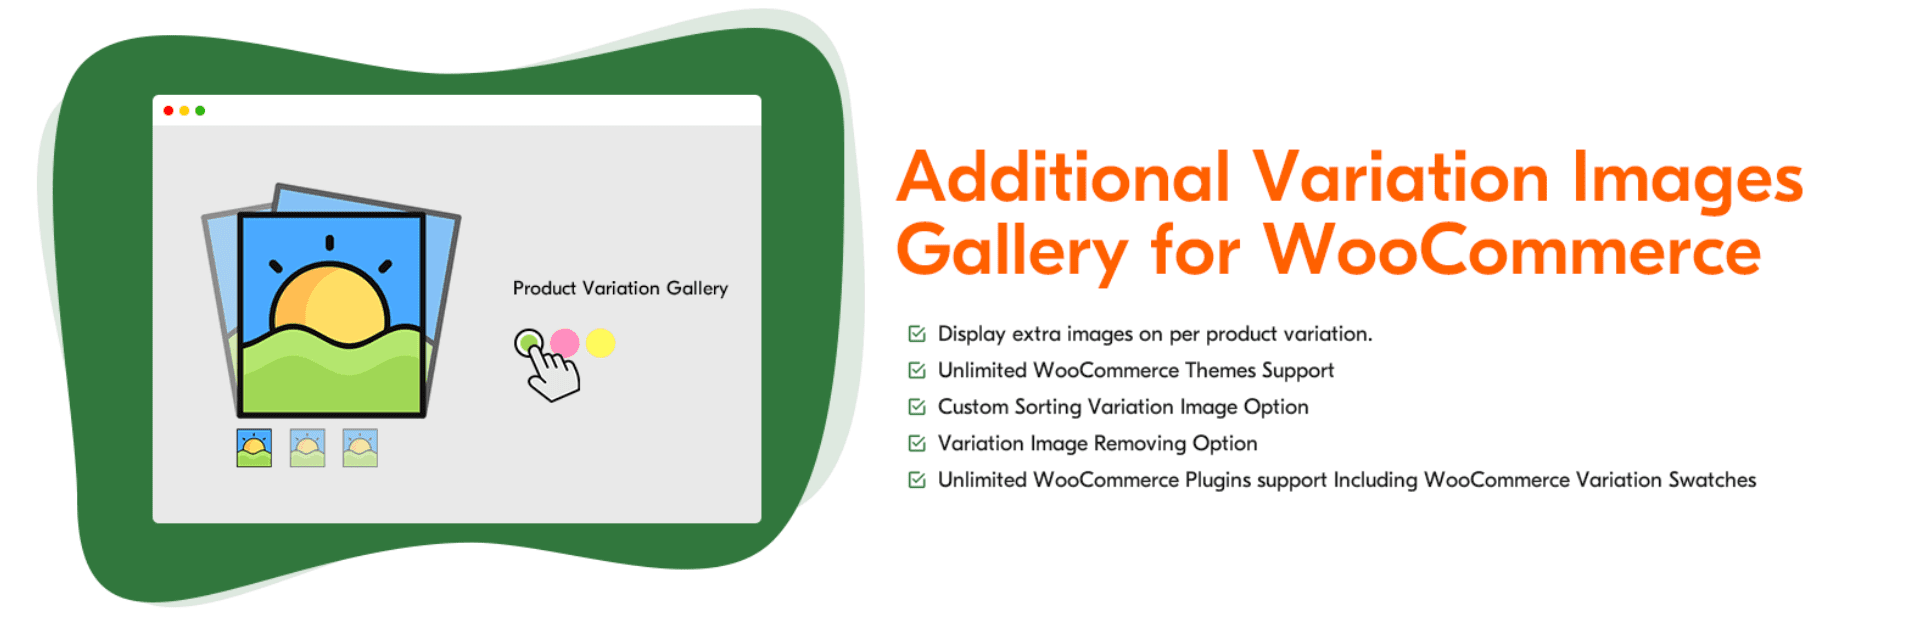
This gallery plugin enables you to add image galleries for each product variation, so customers can see the item with the attribute(s) of their choice from multiple angles. This prevents shoppers from having to page through photos that don’t showcase the color or size they’re actually interested in purchasing, and can also minimize confusion.
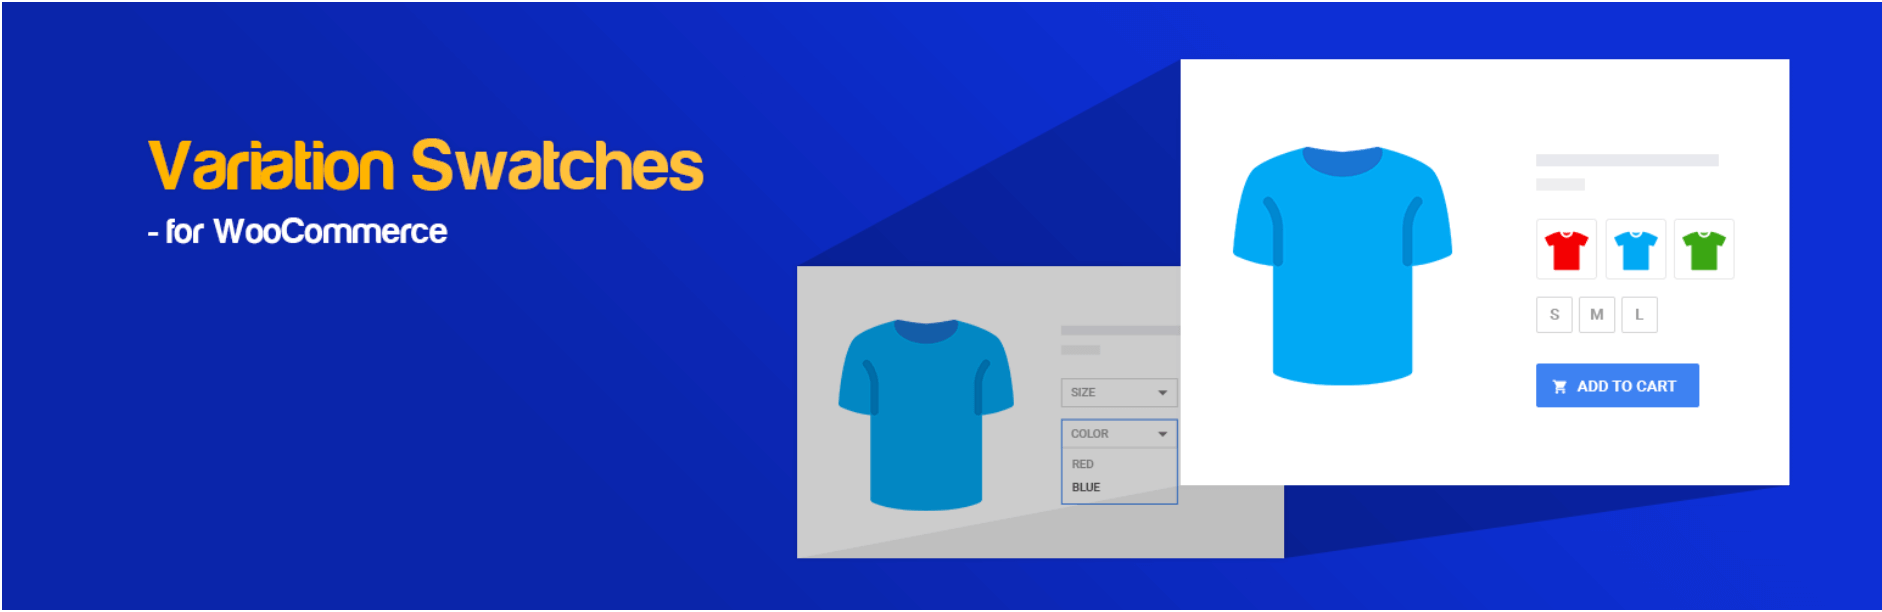
If you don’t have a lot of images to showcase, Variation Swatches for WooCommerce changes the default attribute selectors into visually appealing buttons, which show shoppers a sneak peek of what each option looks like:
You’ll also find premium product variation extensions in the WooCommerce marketplace, such as Product Variations Table for WooCommerce. This solution adds a table with sort and filter functionality, and includes all of your product’s variations so customers can quickly find what they’re looking for. The plugin is available for $49 per year.
Finally, if your customers often buy multiple variations of a single product, you may want to consider investing in Bulk Variation Forms. It enables shoppers to quickly add multiple variations to their carts at once, instead of having to select each one individually, and it also costs $49 per year.
Conclusion
Enabling product variations in WooCommerce can provide a better online shopping experience for your customers, and minimize the number of product pages you have to create and manage. Fortunately, you can use WooCommerce’s default functionality to set them up in no time.
Displaying product variations in WooCommerce requires just four steps:
- Create a variable product.
- Add product attributes (such as size and color).
- Generate your variations, so that each one has a unique SKU number (and price if applicable).
- Preview and publish your variable product.
Do you have any questions about product variations in WooCommerce? Ask away in the comments section below!
Image by Bloomicon/shutterstock.com


i have a question, this article for product page right?.. if i want to appear the product option on main page?.. you can help me?.. like current landing page nowadays, they have package, i want it can be choose the option, without go to the product page.. choose, and add to cart on the landing page.
Hello Will,
Thanks for great article.
May you also please help me to show swatches (variants) on list page instead of Product Details page.
I am using Woo Products for Divi to show all products.
Thanks
Would greatly appreciate detailed information regarding how to add “customize now button” for customer to: 1. upload instructions 2. Upload images 3. Insert custom price range for custom designs and sizes.
When you click the add to cart button is there a way to keep the page from redirecting to the product page by using this plugin?
Hi Eric,
Based on your question, I’m assuming you have a variable product and an Add to Cart button for it somewhere on your site other than its product page. In this scenario, WooCommerce will redirect customers to the product page when they click on the button so they can select their desired variation(s) before the product is added to the cart. If you wanted to get around this, you would need separate Add to Cart buttons for each variation (which may or may not be feasible, depending on what you’re selling).
So, the short answer to your question is no, there is not a WooCommerce setting you can configure to prevent this from happening. There are Add to Cart redirect settings (WooCommerce > Settings > Products > Add to cart behavior) but these refer to redirection to the cart page, not product pages. There is also an Add to Cart Redirect WooCommerce extension, but it hasn’t been updated in a while and I’m not sure it would be able to help you accomplish your goal.
That’s really all the guidance I can offer here – I hope at least some of it is useful.
Great post! I have worked on both DIVI and Elementor and have always found DIVI best for Woocommerce. Thanks for sharing.
Thank you, Shounak!
Can you tell me what theme you are using in the picture?
It’s Twenty Nineteen.
Great post! I am trying to find these days…if we use variations and there is a case where all of them are out of stock in a product, is there a way to show that directly at the product? By default, we won’t find the product is out of stock until we select each variation. Does Divi have any plugin that enhance this or any other plugin? Thanks for this amazing blog and information! 😉
Thanks for your question, Iciar. First, I’d recommend you check out the post on this blog titled “A Simple Guide to WooCommerce Inventory Management”. We mention several plugins in that article that you may find helpful.
As for the rest – in most cases, shop managers would want to treat each variation and its inventory as a separate product with its own SKU number. For example, if you sell a t-shirt that comes in small, medium, and large sizes, you would want to know when you’re out of large shirts so you can restock them. If you only restock when you’re out of all the sizes, you may have customers who need a size that’s out of stock and can’t buy the variation they need.
However, if you sell a product for which this is not the case, you may want to set up product options rather than product variations. With product options, you have a single item with one SKU number and customers can specify what variable features they want. This is common with handmade products. For instance, if you sell custom screen-printed t-shirts, you might have a field on your product page where shoppers can enter the text they want to have printed on their shirts.
There’s a plugin called Simple Product Options for WooCommerce that can help you set this up. Hope this helps!