

If there’s one area where WordPress is a bit lacking, it’s analytics. To access that critical information about your website, you’ll need to integrate the Content Management System (CMS) with a third-party service such as Hotjar.
In this article, we’ll talk about how Hotjar works and explain how to integrate it with WordPress. Then we’ll discuss how it compares to other WordPress-friendly heatmap tools.
Let’s get to it!
An Introduction to Hotjar
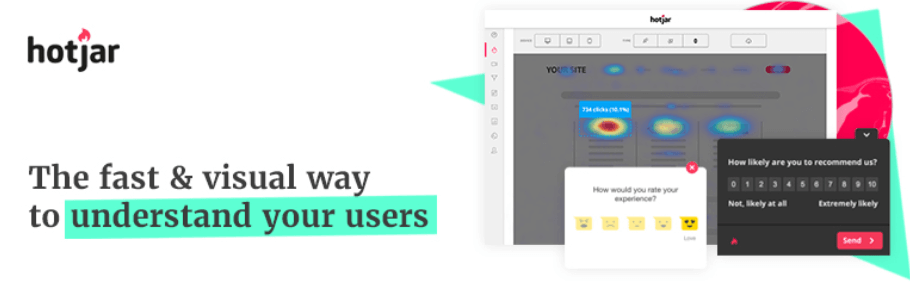
Hotjar is an analytics platform with a focus on heatmaps. The service enables you to track user behavior on your website, and generate several types of heatmaps to display the results.
With Hotjar, you get access to click, move, and scroll heatmaps that you can switch between with a just a click. The platform tracks both desktop and mobile sessions, so you can spot the differences in behavior between both sets of users.
If you want to dive deeper into understanding how visitors behave on your website, Hotjar also records full sessions. That means you can follow users along for their entire journey, and see precisely what they do at each stage. Beyond heatmaps and recording, Hotjar also enables you to analyze the use of forms on your pages, and conduct surveys.
As you might expect, Hotjar is not a free service. To use it, you’ll need to register for a plan on its website and connect it with WordPress through a plugin. Plus, in order to access your heatmaps and recordings, you’ll need to do so from the Hotjar platform.
Key Features:
- Analyze user behavior using three types of heatmaps
- Track data for desktop and mobile sessions
- Record full user sessions and replay them when needed
- Analyze form use on your pages
- Conduct surveys and polls for your visitors
Price: Hotjar offers a free tier for personal use, which supports up to 300 visitor recordings and three different heatmaps. Paid plans start at $29 per month, and scale upwards as needed.
How to Use Hotjar to Add Heatmap Functionality to Your Website (In 3 Steps)
As you can see, Hotjar offers some robust functionality. For this section, however, we’re going to focus on its heatmapping feature. Let’s explore how to set up and use this valuable analytics platform.
Step 1: Set Up a Hotjar Account and Install the WordPress Plugin
Before you do anything else, you’ll need to set up a Hotjar account. Fortunately, Hotjar doesn’t require a credit card to sign up for its free tier, so you can try it out with no commitment required:

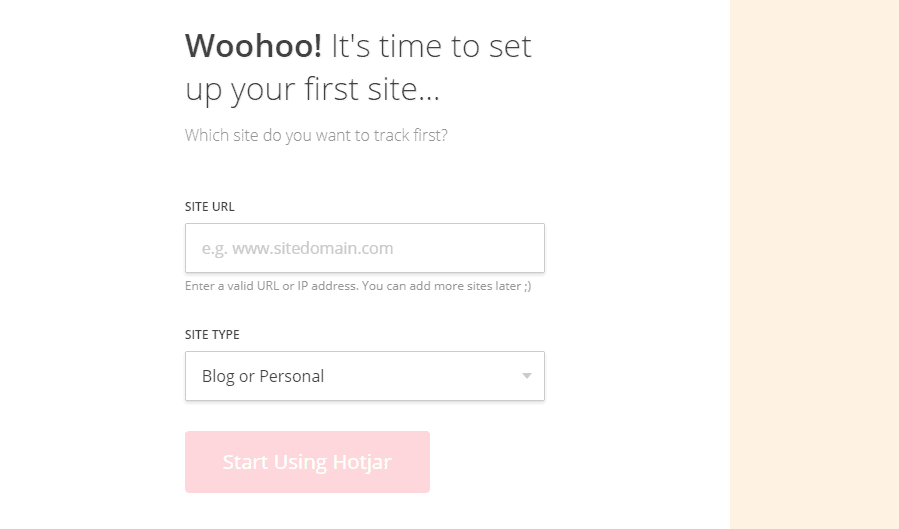
The signup process is straightforward. All you have to do is select what you’ll use the service for, and then type in the URL of the website you want to connect with your account:
Once that’s done, you’ll gain access to your Hotjar dashboard. The first thing you’ll see is a tracking code snippet that you can add to your website, in order to connect it with the platform:
![]()
If you’re using WordPress, however, you have access to a plugin that can save you the trouble of adding that code manually. For the plugin to work, you’ll need your Hotjar Site ID, which you can see in the bottom-right corner of the same screen.
Step 2: Get Your Hotjar ID and Add It to WordPress
At this point, you’ll want to copy your Site ID down or keep that Hotjar tab open. Then go to your WordPress dashboard, and install and activate the official Hotjar plugin.
Once the plugin is active, navigate to the Settings > Hotjar tab and enter your Hotjar ID into the corresponding field:
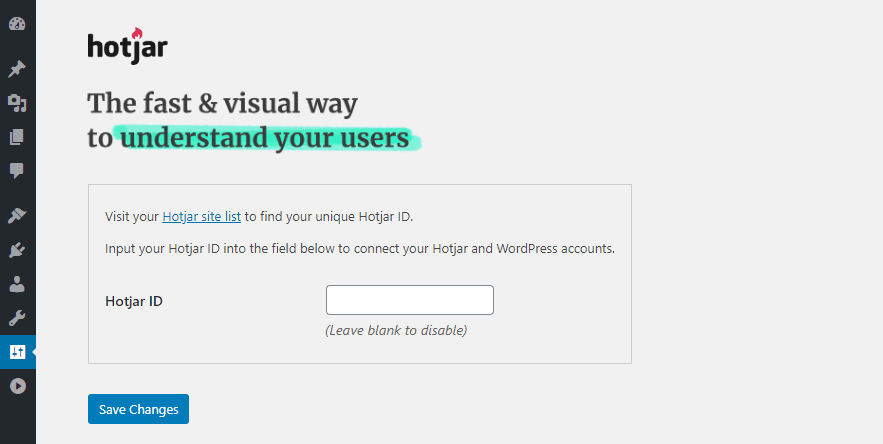
Save the changes, and you’re good to go. Now you can return to Hotjar and get access to heatmaps for your pages. Keep in mind, though – you just set up the service, so it needs a little time and user data before it can generate any useful reports.
Step 3: Access Your Website’s Heatmaps
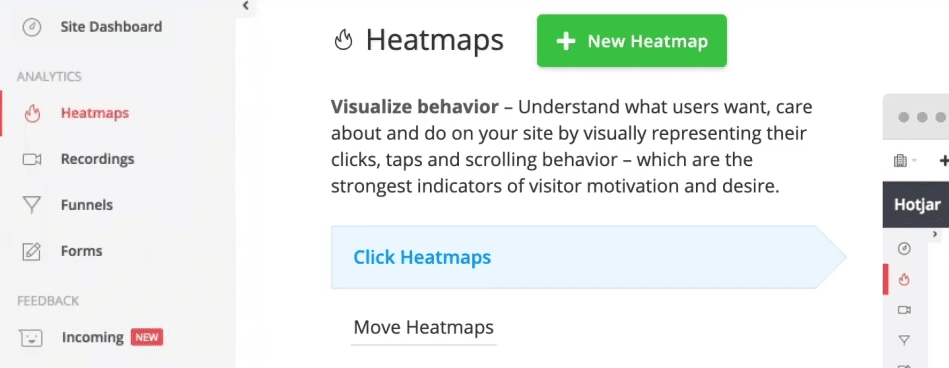
Now that Hotjar has access to your website, you’ll want to return to the service’s dashboard. Inside, jump over to the Heatmaps tab and hit the New Heatmap button:
Hotjar will ask you to set a name for your heatmap, and select how many page views it should track. On the free plan, you’re limited to 1,000 visitors. That is more than enough to provide you with some useful information:

Moving on, you can select what pages Hotjar should monitor. Remember that you’re limited to three pages with the free tier:
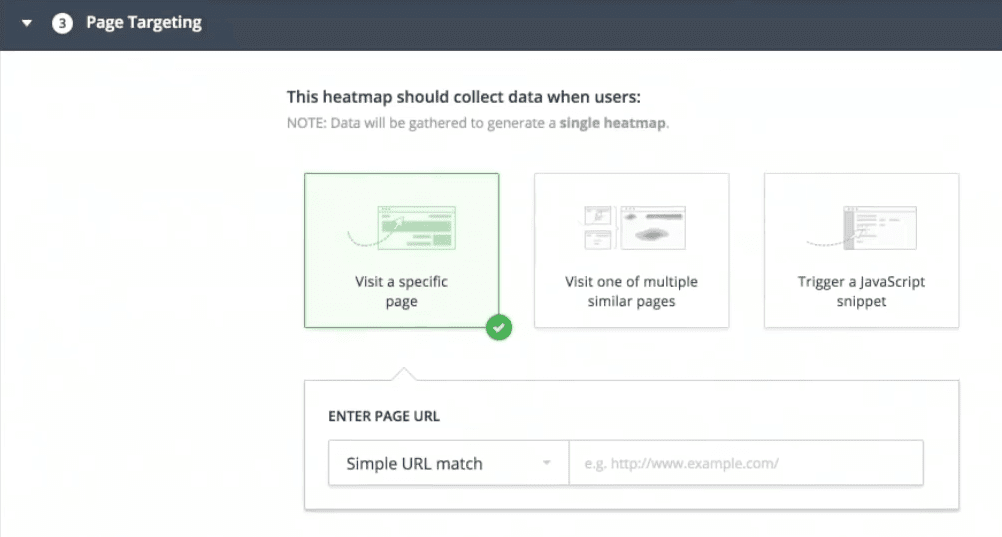
Finally, you can review your heatmap’s settings and confirm your choices. Afterward, you’ll just need to wait a while for Hotjar to collect enough data to provide you with some results.
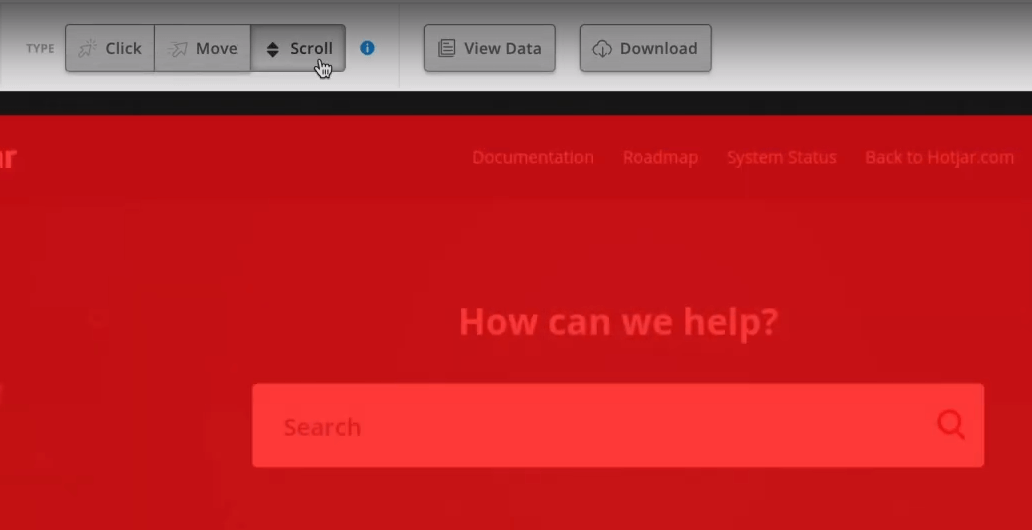
You can access your heatmaps at any time from the Heatmaps tab. Once you’ve had enough recent visits, you’ll find plenty to analyze. For example, here’s a ‘move’ heatmap from a test page we set up:

Note that the service enables you to jump between heatmap types with just a single click. Here, you can see a ‘scroll’ heatmap for that same page:
What you do with the data you get from these heatmaps is up to you. We’ve talked about how to analyze heatmaps in the past, and as far as tools go, this one is remarkably simple to use. Once it starts collecting data, all you have to do is monitor it and decide what changes (if any) you want to make to your site based on its findings.
When to Use Hotjar Versus Other Heatmap Tools
The issue with heat mapping tools is that they tend to either be expensive or hard to integrate with WordPress. Hotjar, fortunately, doesn’t fall into either of those categories. Although the free Hotjar tier offers limited functionality, the reports it gives you are detailed enough that you can take action based on them. Moreover, the service offers a sleek interface that’s very easy to navigate.
If you’re already using an analytics tool, such as Google Analytics, you’ll be glad to know that it plays nicely with Hotjar. Sadly, Google Analytics doesn’t offer a straightforward option for generating heatmaps. However, combining both services gives you access to a wealth of information about user behavior, and they don’t conflict with each other at all.
As far as WordPress-friendly heatmap tools go, Hotjar is an easy recommendation for most users. If you’d like to avoid using a third-party platform, though, you might want to look into alternatives, such as the Aurora Heatmap plugin.
Conclusion
There are a lot of analytics services and tools that you can integrate with WordPress. In almost every case, they rely on third-party platforms to power their functionality, so you want to make sure you choose the right tool for your needs.
Hotjar scores highly when it comes to ease of use, and its free plan is powerful enough for most small to medium websites. Moreover, it enables you to generate multiple types of heatmaps and switch between them in seconds, which makes it an excellent pick for many WordPress users.
Do you have any questions about how to use Hotjar with WordPress? Let’s go over them in the comments section below!
Article thumbnail image by Antun Hirsman / shutterstock.com


Hotjar is a great tool to map the user’s journey on your website. Very nicely written article! Thanks for sharing the overview. Really appreciate the effort to simplify the process for the Hotjar users.
Thanks very much Jyoti, very glad you liked it 🙂
I use to use hotjar for Facebook pixel. I had a very good experience using this tool. now I moved to another advanced tool. Thank you for reminding me of this tool.
You are very welcome Nauman Mohammed 🙂
It’s a very good tool and i would say FREE tier is very good BUT please consider this.
It adds 3+ seconds of load time on your website. If you know waterfall of the speed testing tools, you know what i am talking about.
Just 24 hours ago i was talking about this to their support team and they agreed that there’s nothing can be done about this cause those network requests that hotjar sends is compulsary. They just say that it doesn’t matter, doesn’t affects speed as it loads later. False. It does. 3+ seconds. I very well know how to read waterfall and as soon as i removed their script from body tag, the load time improved by 3 seconds! I didn’t touch anything other than that at all. So @Elegent Themes and @Will Morris please don’t recommend this tool.
Thank you.
Hello Soum, I’m sorry to hear the script is causing performance issues on your end, but during our tests, it never increased loading times beyond 500ms at its peak. On average, the script adds around 200ms to our loading times. The impact can’t be ignored, but we’re not seeing loading times anywhere near those you mention.
Let me know if you run into any issues with this!
Fab post, thanks guys. Used to use something similar when I was with Shopify but struggled to find something on WP so glad to see this recommendation
Glad to be of service Emma 🙂