
")
Running a cooking blog likely means you’ll need to display recipes and other related information on a regular basis. However, even if you provide outstanding instructions, your stellar creation may go unnoticed without a little style.
In this article, we’re going to talk about why styling your recipes is important and what to look for in a great cooking plugin. Then, we’ll introduce you to one of our favorite picks and teach you how to use it to create WordPress recipes. Let’s get started!
Why You May Want to Add Gorgeous Recipes to Your Website
The more attractive your recipes, the more compelling they’ll be.
It almost goes without saying, but you want all of your site’s elements to be as attractive as possible. The more important they are to your audience, the more attention you need to give them. When it comes to cooking blogs, few – if any – elements get more attention than recipes. Let’s discuss why:
- They can help boost engagement. Following a recipe takes time and focus. The more compelling your recipes are, the more time users may spend on your site reading them.
- You can style your recipes any way you want. A lot of people add a handful of pictures to their recipes and call it a day. While good photography is a must for a compelling recipe, you can do much more with WordPress. For example, you can add a separate section that covers nutritional values.
If you’re running a cooking blog – or thinking about starting one – giving a makeover to your recipes is an excellent idea. It’ll make your site look much more polished, and it may even give you an edge over competitors whose recipes look less professional. Just make sure they taste good before you recommend them!
What You Should Look For in an Awesome WordPress Recipe Plugin
Fortunately, WordPress enables you to implement stylish recipes on your site in a variety of ways. In this case, you can do so manually, and even use a theme such as Divi, which provides you with a lot of control thanks to its module system.
On the other hand, you have a wide variety of recipe plugins you can use such as Cooked, WP Recipe Maker, and WP Ultimate Recipe. Those are all top choices, and they share a lot of common features, such as:
- Providing you with an easy way to create recipes that look great.
- Multiple layouts to style your recipes so they can adapt to your website’s style.
- Cooking-friendly features, such as including cooking times, lists of ingredients, and more (all using unique styles).
- Optimized image galleries to accompany your recipes.
If you take any of these elements separately, it’s not particularly hard to replicate them without a plugin. For example, you can use a free image gallery plugin like Photo Gallery by 10Web to easily create engaging galleries for your recipes. However, it’d likely involve you creating custom post types on your own and spending a lot of time making changes to your theme. If you’re up to the task so be it, but you can always use a plugin to do the heavy lifting.
An Introduction to the Cooked Plugin
The Cooked plugin enables you to create some of the most gorgeous WordPress recipes we’ve seen without breaking a sweat. It works by providing you with multiple styled elements, such as nutrition facts, preparation and cooking times, galleries, and more.
You can take these elements and re-arrange them in any way you want using a shortcode system that’s easy to master. All you have to do is input your recipe’s information, and let the plugin turn it into something that wouldn’t be out of place in a cooking magazine.
If you’re a Divi user, you’ll be glad to know the plugin and theme play nice together. Since your recipes are based on shortcodes, you can add them to any module you want, and customize their style to look good with the rest of your site.
Key Features:
- Create stylish WordPress recipes using a broad range of pre-built elements.
- Use shortcodes to arrange your recipe’s elements any way you want.
- Display your recipes using an attractive masonry grid layout.
- Include key information, such as cooking times, recipe difficulty levels, and nutritional facts.
- Enable your visitors to tick off ingredients from each recipe’s list to make sure they don’t miss anything.
- Include a search functionality just for your recipe library.
Price: Free and premium versions available | More Information
How to Create Gorgeous WordPress Recipes (In 4 Steps)
For this section, we’re going to use the Cooked plugin to teach you how to create WordPress recipes. As we mentioned earlier, this isn’t the only recipe plugin available online, but it’s one of the best-looking ones, and it works well to boot. Before we jump in, make sure to install and activate the Cooked plugin so you can follow our instructions.
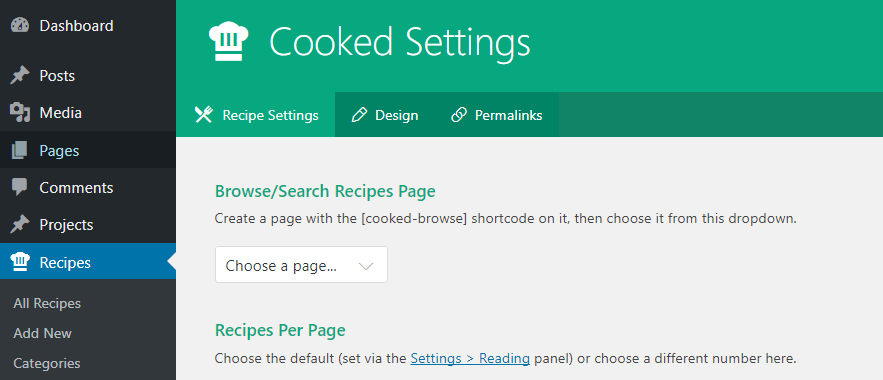
Step #1: Configure the Plugin
Before we start, you’ll want to configure the Cooked plugin. To do so, go to the Recipes > Settings tab on your dashboard:
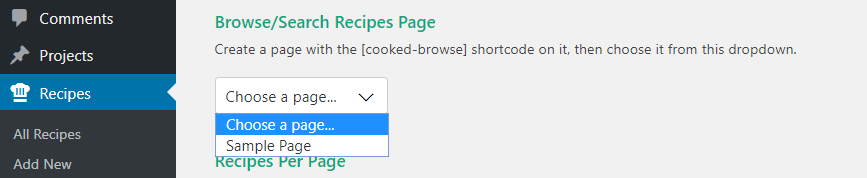
First off, you’ll want to designate a page as your ‘recipe library’. To do that, create a new page and add the [cooked-browse] shortcode somewhere within. Then save your changes and enable the recipe search feature by choosing that page from the drop-down menu at the top of the Settings page:
Moving on, you’ll also want to set the number of recipes to include on each page of your library. The default is nine, but feel free to experiment with other numbers to see if they’re more to your liking. Right below that option, you’ll find a setting to enable taxonomies for your recipes. We recommend keeping it enabled so you can categorize them for better organization:

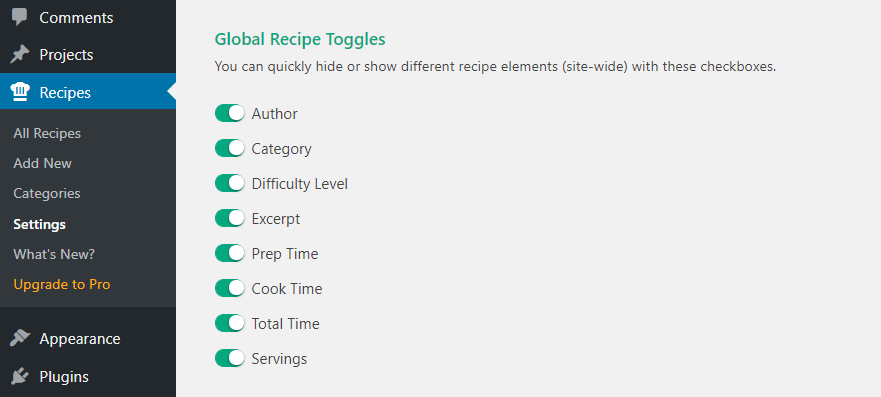
Now, scroll down and check out the Global Recipe Toggles settings. You’ll find eight elements within, and toggling one will disable it for all your recipes, so take a minute to think what you want yours to include:
Last but not least, you’ll want to choose a format for displaying the names of each recipe’s author. For consistency’s sake, we recommend selecting a format that’s as close as possible to the one you use on your blog’s posts:

With that out of the way, save your changes and move on to step number two.
Step #2: Set Up Categories for Your Recipes
Depending on how many recipes you plan on adding to your site, you’ll probably want to set up separate groups for them. Even if you’re just starting out, adding a category or two doesn’t hurt, and it’ll make it easier for visitors to look through your library.
To get started, go to the Recipes > Categories tab. On the left side of the screen, you’ll find the options you need to add new categories, and a list of all the existing categories right next to those:
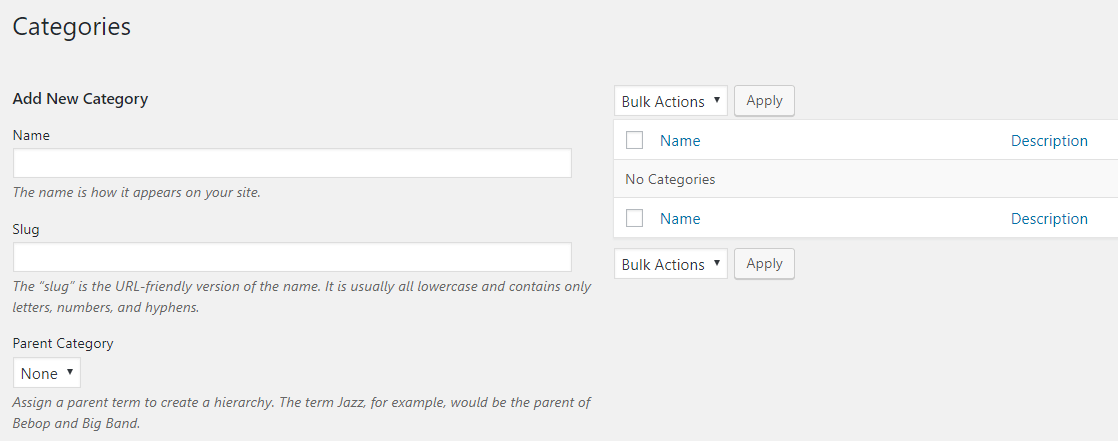
The process here is very straightforward. Just pick a name and a slug for your new addition, then choose a parent category if necessary. For example, if you want to add a category for pasta dishes, you could set Italian as its parent (which means you’d need to create that one first):
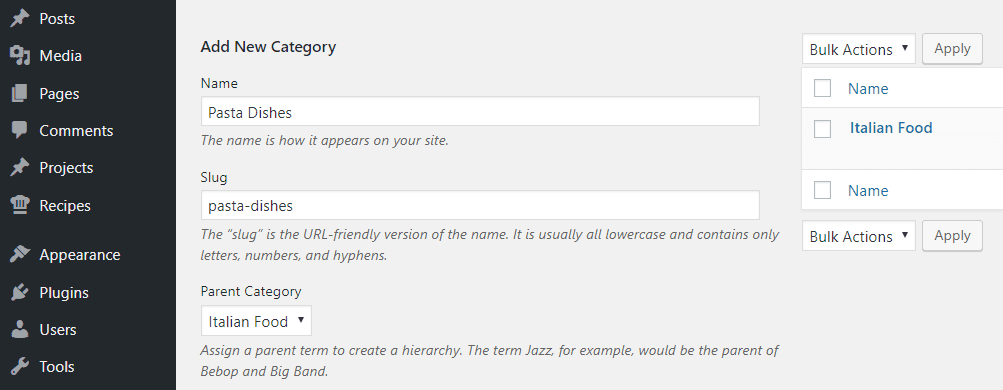
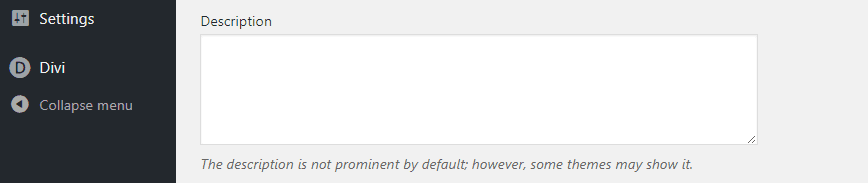
Keep in mind – there’s a field at the bottom of the page that enables you to add descriptions for each of your categories. These descriptions are usually only for internal identification purposes. However, some themes – not Divi – may show them, so be careful what you write here:
You can always ignore this feature altogether if you don’t want to add descriptions for your categories. Either way, once you have your basic taxonomy in place, it’s time to finally hit the kitchen (or the dashboard) and get working on your first recipe.
Step #3: Create Your First Recipe
To get started, click on the Recipes > Add New tab. This will send you to the WordPress editor with a few custom tabs courtesy of the Cooked plugin:
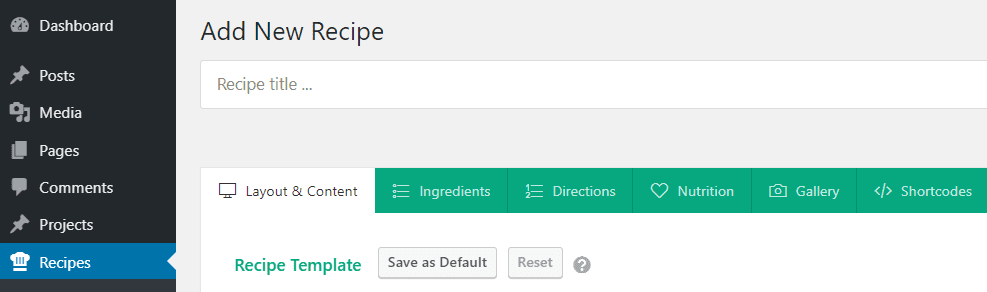
First off, set the name for your recipe, then scroll down to the main body of the editor. You’re going to see multiple shortcodes here, each one representing a different element of your recipe:

For now, let’s not touch those codes. Instead, click on the Ingredients tab. Inside, you’ll be able to add each of your recipe’s ingredients, specifying amounts and measurements for each of them:
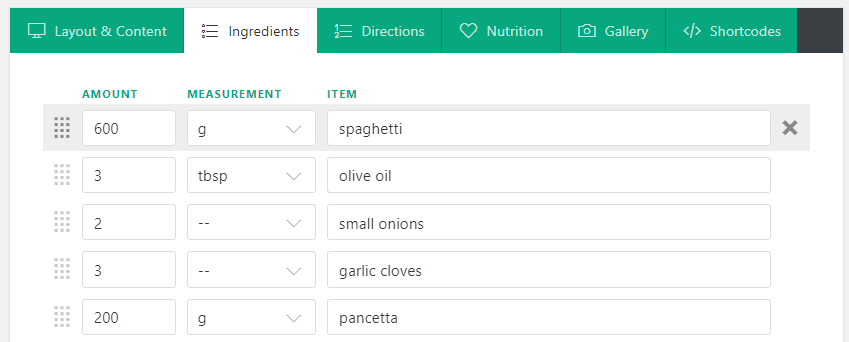
Go ahead and list all of your recipe’s ingredients. If you make any mistakes, you can edit each item or remove it by clicking on the X icon that shows up on mouseover. When you’re done, move to the next tab – Directions.
As far as recipes go, clear instructions are vital to ensuring your visitors don’t make any mistakes. One of Cooked’s best features is the fact it enables you to break instructions down into easy-to-follow steps. To do that, you can combine both headings and short instructions:
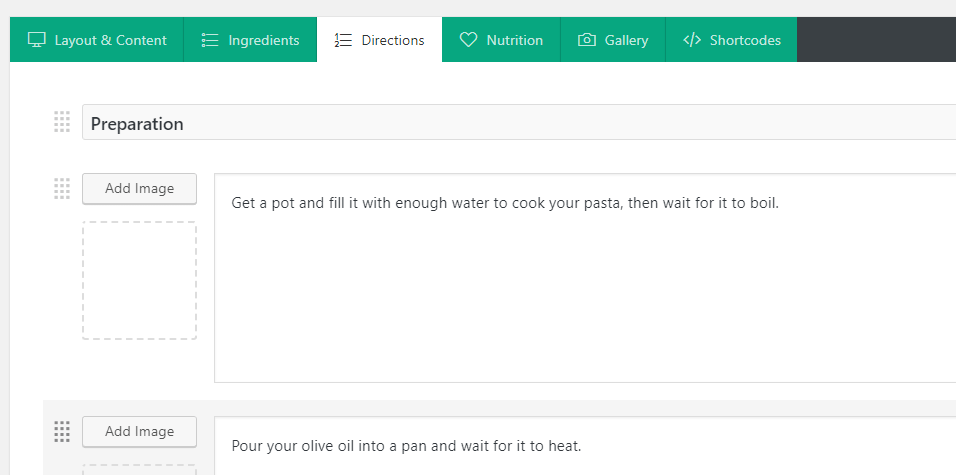
If you want to liven your recipes further, there’s also an option to add images alongside any steps you deem necessary. It’s extra work, but it can help illustrate how your dish should be prepared. Keep going until you have a full set of instructions, then jump to the Nutrition tab:
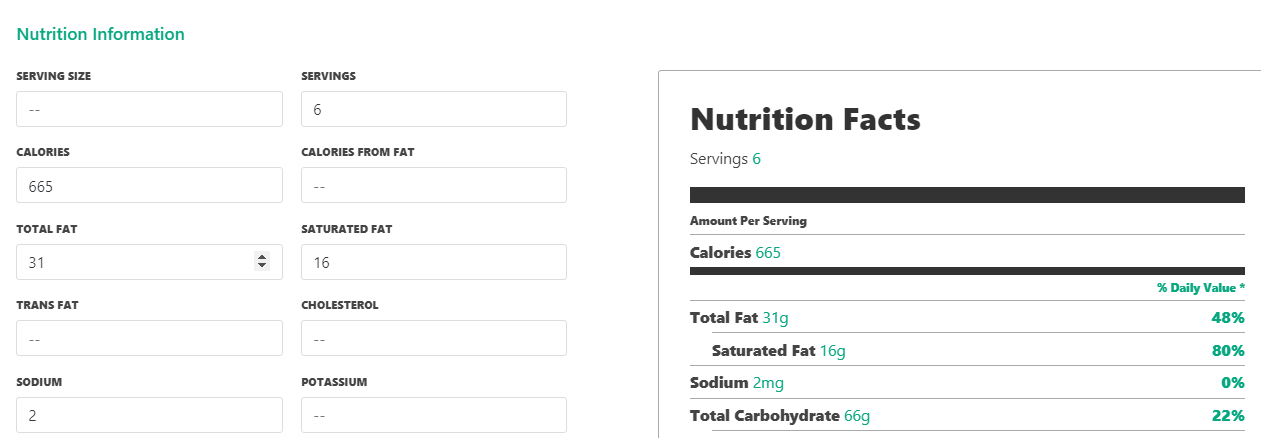
This tab looks complicated, but appearances are deceiving. As long as you know the nutritional information for your recipe, simply fill out the required fields and ignore those you don’t need. If you don’t want to include this information for a particular recipe, feel free to skip it, as you can remove the corresponding shortcode accordingly.
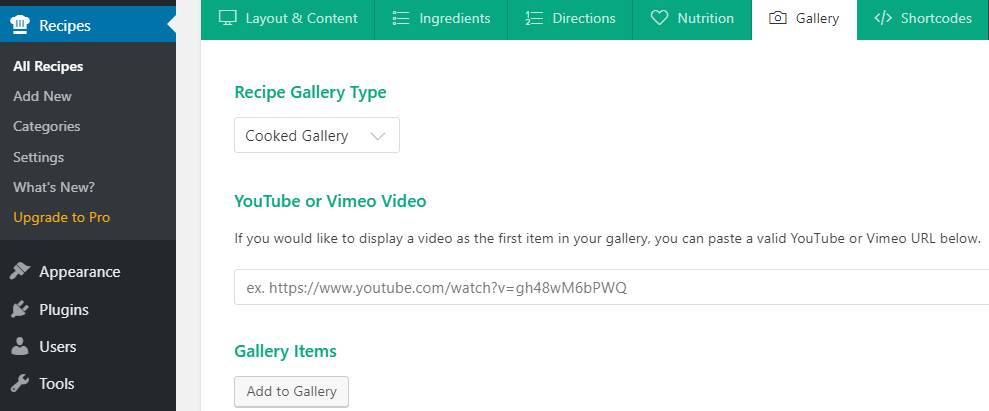
Finally, move to the Gallery tab and upload any images you want to display alongside your recipe:
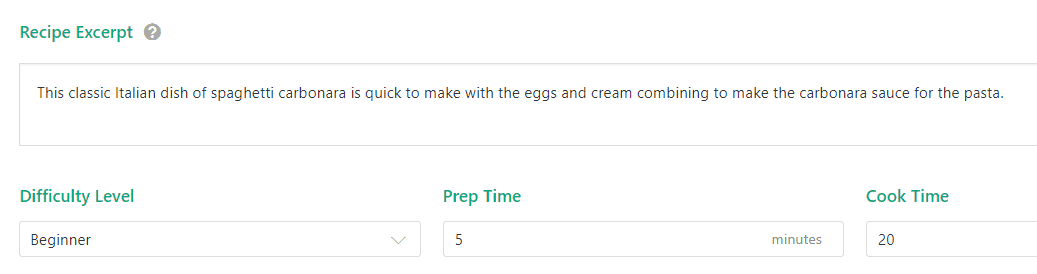
When you’re ready, return to the Layout & Content tab, scroll down, type in an excerpt for your recipe, and indicate a difficulty level, prep time, and cook time:
Now, all that’s left is to customize what your recipe looks like from the front end. We’ll go over that during the final step.
Step #4: Style Your Cooked Recipes
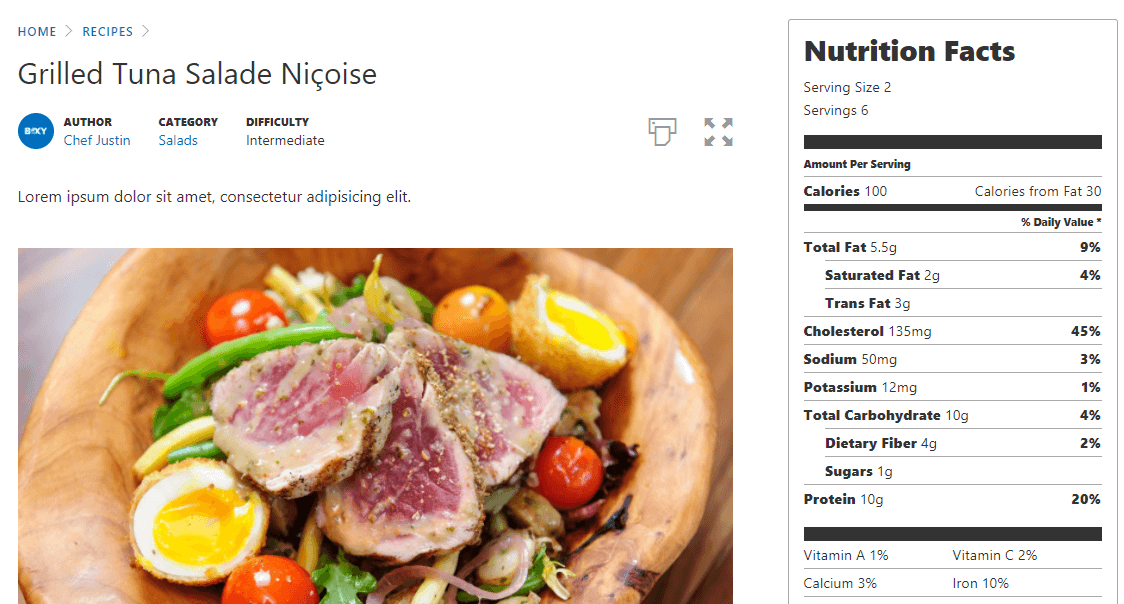
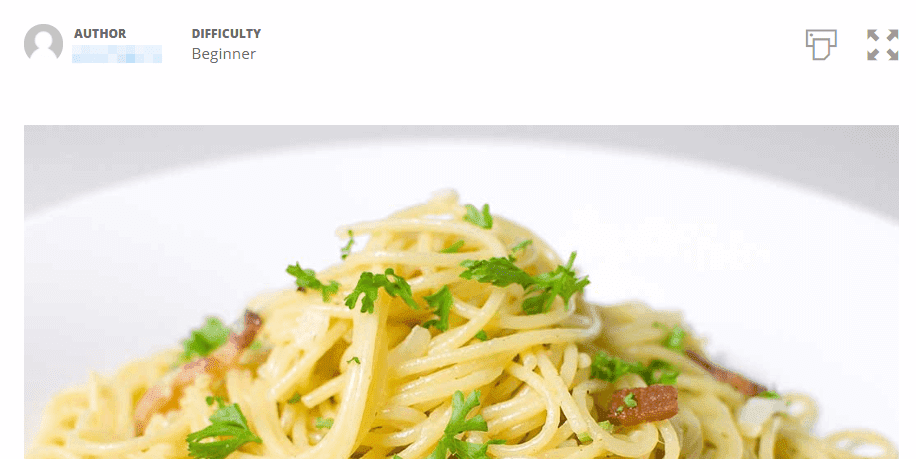
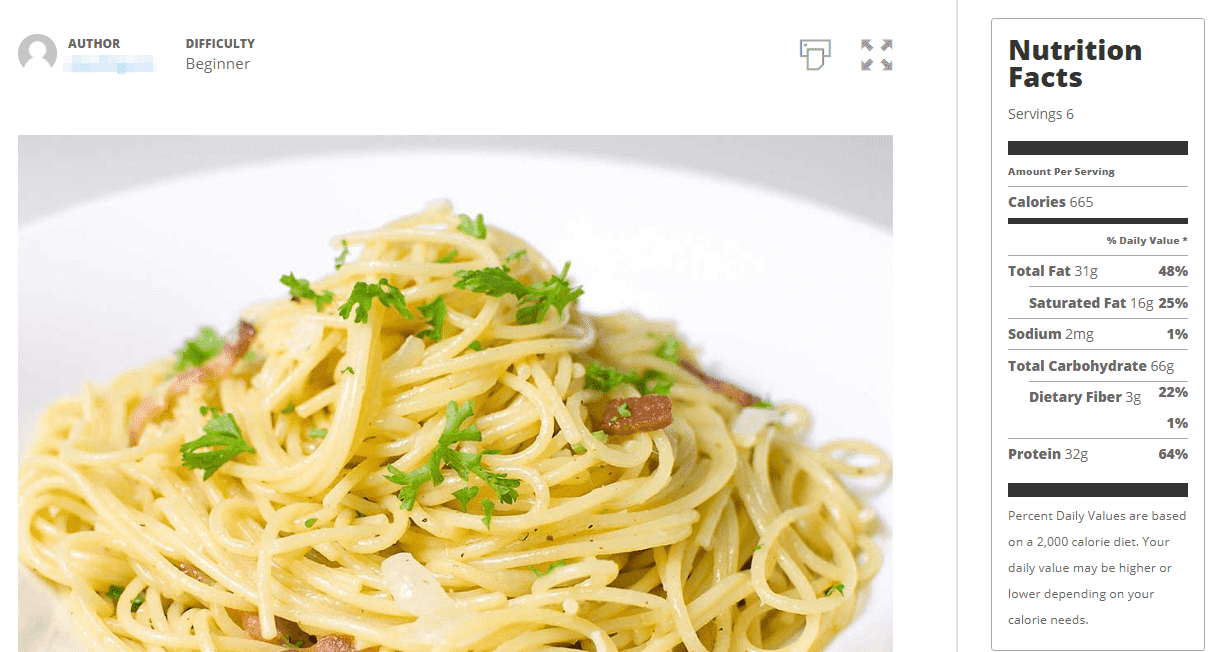
Before we dive in any further, let’s check out how our recipe is looking. Here’s the recipe’s author, difficulty level, and printing feature…
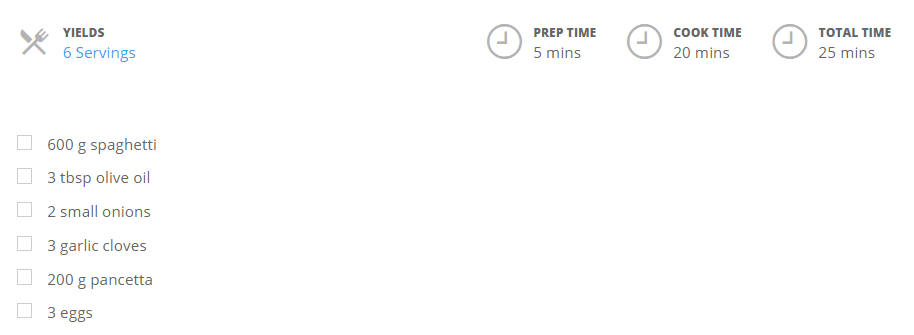
…and right below we have the timing information and list of ingredients:
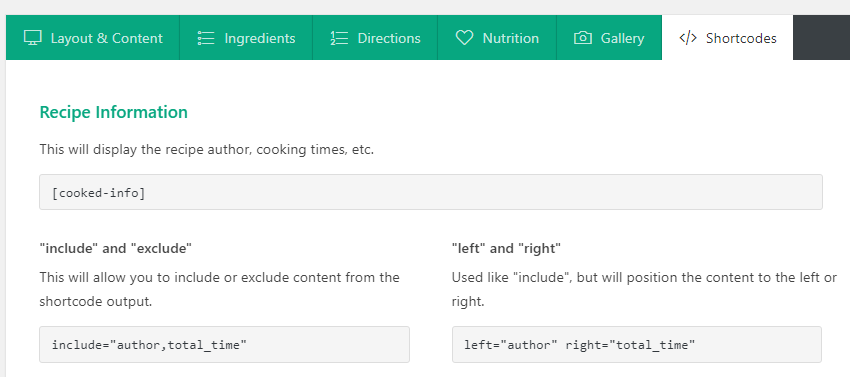
Not bad, but you can customize it all to your exact requirements by re-arranging the shortcodes on the Layout & Content tab. Their names are self-explanatory, but if you need any help, you can find a cheat sheet under the Shortcodes tab:
All in all, our recipe is already looking pretty good, but it can still get better. Let’s try adding its nutritional information to our sidebar (that way, it won’t crowd the rest of the recipe’s elements). Fortunately, Cooked enables you to do this out of the box. Just go to Appearance > Widgets and drag the Cooked Widget over to your sidebar:
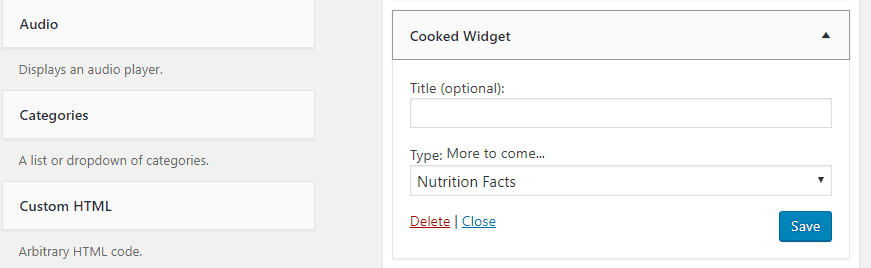
There’s no need to configure the widget, since the only option it offers is to display your recipe’s nutritional facts. Here’s how our recipe is looking now:
It looks pretty good, and you can keep customizing yours by playing around with the shortcode system. When you’re done, save your changes and move on to the next recipe!
Conclusion
Adding stylish recipes to your WordPress blog is a great way to engage more users. Using captivating images, displaying nutritional information, and offering detailed instructions can lead visitors to pay more attention and stay on site for longer. This is something you can do without a plugin, but using the right one can save you a lot of time.
Cooked isn’t the only recipe plugin around, but it’s one of our favorites. Here’s how to use it:
- Configure the plugin.
- Set up categories for your recipes.
- Create your first recipes.
- Style your creations.
Do you have any questions about how to create WordPress recipes using Cooked? Ask away in the comments section below!
Article thumbnail image by Oxy_gen / shutterstock.com.


Great timing John!
I was about to make my own custom post type for a project but this has just saved me a lot of time.
I appreciate the in-depth look at this plugin.
Glad to help! 🙂
Thank you!! Just the push I needed to start posting the recipes to the blog. I will try it for sure 🙂
Hi Juan, you’re welcome! Good luck. 🙂
Nice post. We have actually just finished the new website for Nadiya Hussain a celebrity chef here in the U.K. We built her site using DIVI and decided to keep her recipe pages simple which you can see on Nadiya’s site here: nadiyahussain.com (shameful plug :). All built with DIVI, the recipes are using the inbuilt DIVI projects post type which allow visitors to quickly filter her different types of recipes.
DIVI rules 🙂
Thanks, Murray! Your site looks pretty awesome, and we’re glad Divi could help. 🙂
Perfect timing! I’m in the process of setting up my food blog. I purchased Simple Recipe Pro, but just installed and played around with this. So here’s the bottom line. I live Cooked’s design and UX. However, it fails miserably with SEO. Almost all other plugins provide rich snippet integration and some even pinterest integration. I’m wondering if there are other plugins that specialize in those things.
Hi Guy, thanks for your comment! Sorry to hear you’ve had some trouble with that plugin. When it comes to recipe pluins, though, there are plenty of options: https://www.elegantthemes.com/blog/tips-tricks/6-of-the-best-wordpress-recipe-plugins-to-help-your-site-get-cookin.