

We’ve all done it – lived on the edge and clicked Update on a live WordPress site; especially for ‘small’ changes we think won’t matter much. However, we’ve also all had those panicky moments when, seconds later, our entire site goes down with the famous ‘white screen of death.’
Making changes on a live site is a risky way to operate, and professionals know that you need to test all your changes first. With that in mind, a WordPress staging site comes in very handy as a complete copy of your live site – enabling you to fiddle to your heart’s content, without fear of breaking anything accessible by the general viewing public.
This article will take you through how to create a staging site so that you can test changes to your WordPress site before going live. We will look at the various options available to you and show you how to select the best one.
Let’s get cracking!
Why You Should Use a Staging Site
In case you’re wondering, a staging site is simply a ‘clone’ (or copy) of your site that you can work on, typically offline and/or inaccessible to the public.
A staging site offers several benefits to a site owner or developer, including:
- It enables you to thoroughly test your site and any changes without the time pressure of the real site being in maintenance mode or otherwise unavailable.
- Your visitors’ experience of your website won’t be interrupted by changes as you work on the site.
- You can reduce the risk of damage to your business due to a bad impression caused by errors or downtime.
- It helps to eliminate the effects of a damaged or broken site on search engine optimization, conversions, and sales.
Now that you know exactly how a staging site will benefit you, let’s start looking at the options available to you for creating one.
Your Options for Creating a WordPress Staging Site
As with most things in the WordPress world, there are multiple ways to solve a problem. Now that you understand how a staging site can help you, you need to choose the option that most suits you.
The most suitable option for you will depend on a few factors, such as where you host your website, and your level of WordPress expertise. We’re going to explore them all in ascending order of technical difficulty below, and explain the advantages and disadvantages of each method.
Option #1: Create a Staging Site Through Your Host

WP Engine offers one-click staging sites as part of their WordPress managed hosting.
Managed hosting solutions add speed, security, and other features that make it worth the extra the cost for many users.
Furthermore, most modern managed hosts provide one-click staging sites as one of their key features. If your host does offer this, you can stop reading right here, because they have made it super-easy. We’ve done a complete WordPress hosting review that looked at the various features available – including staging sites – so you can select one that offers this feature if you are looking for hosting at the moment (or are willing to switch).
The exact process to create a staging site on a managed WordPress host varies slightly, but the process is somewhat similar across hosts. Your host will provide documentation on how to create a staging site in their environment, and we’ve linked to a few of the more popular ones below:
- WP Engine: Staging Environment Overview
- FlyWheel: Getting Started with Staging
- Pressable: Cloning Your Site
The clear advantage of this method is its simplicity. Using your host’s staging tools to create a copy of your site requires nothing on your side, so even the most non-technical user can easily create a staging site for testing.
A disadvantage of this is the lack of control over anything in the staging process. However, even more technical WordPress developers appreciate the convenience of a one-click process, and it is definitely one of the features that makes a managed host worth the cost.
Option #2: Create a Hosted Staging Site
If you are with a host that does not offer staging sites as an option but still want to have access to simple staging site creation, you should take a look at WP Stagecoach. They provide hosted one-click WordPress staging sites with pricing that starts at $4 per month for a single site, so WP Stagecoach is within reach for budget users.
Their service enables you to create a staging copy of your site with one click. When you are ready to push the changes back to your live site, you can choose which file and database changes to import. The staging site can be automatically password-protected, and you can reverse changes if the import to your live site didn’t work as expected.
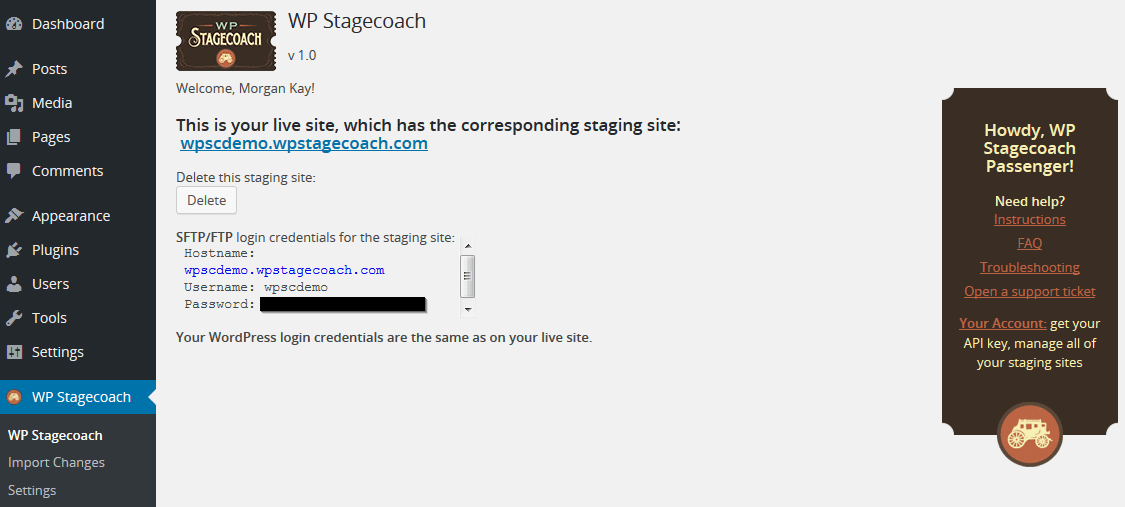
WP Stagecoach offers one-click staging from within your WordPress admin.
To use WP Stagecoach, you install and activate their WP Stagecoach plugin and enter your API key. From within your website’s admin area, you click on WP Stagecoach, set the URL for your staging site, and set up the password if necessary. Click Ride the Stagecoach to create your staging site, and wait for the process to finish. You can then log in to your staging site using the same admin username and password as your original site.
The biggest advantage of using a hosted solution like WP Stagecoach is that it provides one-click staging site, even if you are on a shared host. It is extremely easy to set up and offers rollback functionality if the staging site doesn’t update the live site correctly. Even a non-technical site owner should have no trouble setting up a staging site using WP Stagecoach.
The disadvantage is that your staging site now resides in a completely different environment to your original site, so there may be underlying technical differences that can impact the staging site. Ideally, you would want your staging site to be in an environment identical to the live site, so that you are testing under the same conditions.
Option #3: Create a Staging Site With a Plugin
We look at three different plugin solutions below, again in order of increasing technical difficulty. The overall advantage of the plugin approach is that you are working within the familiarity of the WordPress admin interface, and the plugin handles the heavy lifting of copying the necessary files and database tables.
The plugin approach (in most cases) does have some disadvantages, however, as it is typically a multi-step process that requires you to interact with both the original and staging site to complete the process. In the case of some migration plugins (like Duplicator), technical knowledge is required to setup the staging site.
1. WP Staging
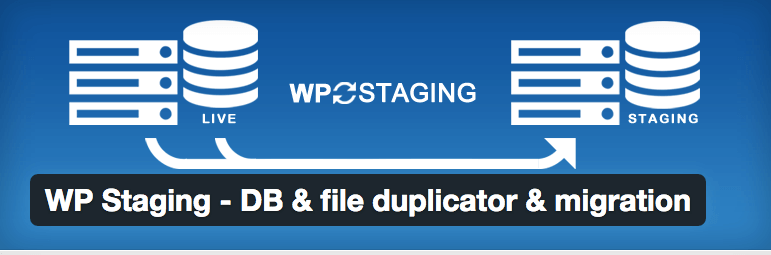
The first plugin we will look at is relatively new, so it only has some 3,000 active installs, but its 4.8-star satisfaction rating suggests it is working well for those users. WP Staging is attempting to bring one-click staging sites into the WordPress admin.
Once the plugin is installed and activated, go to Plugins > Staging to get started, then:
- Click on Create New Staging Site.
- Enter a name for your staging site to create subdirectory under your existing WordPress website.
- Confirm the scan of files and database tables and set any of the advanced options.
- Click Start Cloning.
- Once the process is complete, you can click the button to login to your staging site using the same admin credentials.
At this stage the plugin cannot push the changes back to the live site, so the staging site is really just a testing ground for themes and plugins.
Pros
- One-click staging
- No configuration required
- Fast
Cons
- Permalinks don’t work without .htaccess file changes
2. All-in-One WP Migration
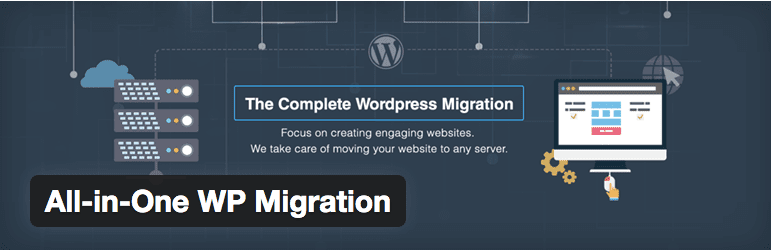
All-in-One WP Migration is a very well-known plugin for migrating WordPress websites, with over 100,000 active installs and a 4.7-star satisfaction rating.
The plugin enables you to export an exact copy of your website, which is what we need for testing purposes.
- You start by going to All-In-One WP Migration > Export in the WordPress admin.
- You can do a ‘find and replace’ to change, for example, the occurrences of the original domain name to a subdomain you plan to use for the staging site.
- You can also opt to exclude spam comments or post revisions to reduce the size of the export.
- Once you have saved the export file the plugin creates, you can import it to a new WordPress installation on your subdomain.
- You have to install the plugin on the new site and then go to All-In-One WP Migration > Import in the WordPress admin.
- You can drag-and-drop the export file into the import area to start.
- Once the import completes, you need to log in with the admin credentials from the original site.
- Once logged back in, you update your permalinks by clicking Save twice, and then you are done.
Pros
- Easy to use
- Simple to set up
- Can find and replace to change URLs, etc.
Cons
- Requires setup of separate WP site
3. Duplicator
Another plugin you can use to create a staging site is the very popular Duplicator. With over 700,000 active installs and a 4.9-star satisfaction rating, this plugin is clearly a preferred choice for many to migrate or clone their sites.
Clicking on the Duplicator menu in the WordPress admin will take you to a Packages screen, which will show you any previous exports you have done.
- To get started click on the Create New button on the Packages screen.
- A system scan will show you the details of your site. Click Build.
- Once the build has completed, you can download both the installer and archive files by clicking on the respective buttons.
- You will need to upload both files to an empty directory on your web host using FTP, or if you prefer to work locally, copy them to an empty folder under your web root.
- In a web browser, visit the URL for the install file (e.g. http://mywebsite/my-wp-directory/installer.php)
- Enter the necessary configuration details, including connection settings for an empty database.
- Click Run Deployment and follow the instructions to update the database and test the website when it is complete.
Pros
- Completely configurable
- No need to install WP for new site
Cons
- Requires some technical skills
Option #4: Create a Staging Site Manually
If you want to get really hands on, you can create a staging site manually. The basic steps for this process are:
- Setup WordPress locally, or at a subdomain on your web host. (We’ve previously written before about how to set up a local copy of WordPress on Mac and Windows.)
- Create a copy of your site (both the files and the database).
- Import data into new WordPress installation, making sure to update URLs and links in the database.
This is not a process we’d recommended for beginners, so unless you are comfortable with MySQL database operations, we would suggest you stick to one of the other options. If you do choose to go this route, you can follow this step-by-step tutorial: The Ultimate Guide to Cloning a WordPress Site.
Obviously, this approach gives you complete control over the process, and for those with the requisite experience, is relatively quick to implement. However, it does require technical skills and there is significant room for error. You will also need to manually make corrections or restart the process if any issues arise.
Conclusion
Updating a live site seems like no big deal until it takes your site down for what you thought was a minor change. Using a staging site protects you from the drama by giving you a safe space to test your changes first.
We’ve outlined why you should create a staging site and shown you the options available:
- One-click through a managed host
- Using a hosted staging solution
- Using a plugin to create a staging site
- Going the manual route
We also explained how to go through the process, and the advantages of each method. So, protect yourself and your site by creating one today.
We’d love to hear your experiences and tips and tricks for creating and working with a WordPress staging site. Share them in the comments section below and subscribe to the comments to keep up with the conversation!
Article thumbnail image by robuart / shutterstock.com


I tried duplicator but could not get it to run the site locally.
I think I am going to try WP stagecoach. However, there is incorrect information in this article – the price is not $4/month. It is not $12/month.
Thanks for the heads-up, Sam!
I consider creating a staging site for one of my WordPress websites, but the problem is that I have an SSL certificate installed on this website (I’m also using an SSL plugin), so I won’t be able to replicate it to be 100% the same. Maybe the option would be to buy an SSL certificate for this staging website, too?
Andrew, Let’s Encrypt (https://letsencrypt.org/) offer open-source and free SSL certificates, and are highly praised. It may be the answer you’re looking for!
As Dan pointed out, the real pain is going fro the testing site back to the production site. In may case, I’ve gone the manual route of cloning a live site to production to use Divi as a new theme.
Lots of online tutorials for that.
Going from the testing site and bringing that into the live site is the difficulty.
Copying theme, child theme, importing custom divi settings –ok
new graphics — manual copy?
changes to pages and new projects — database has changed
How is one supposed to handle the mismatched databases?
You’d be looking for a plugin that will push certain parts of your site live, in that case. The best course of action is to download a few and try them out locally. The worst case scenario is you’d have to uninstall. Good luck. 🙂
Hi Tom
Stagecoach seems to be from USD12/m not 4…. which is a pity! I think USD4 a month is reasonable! 😉
Perfectly timed article btw! Thank you.
Question:
Do the All-in-One WP Migration or Duplicator plugins allow you to push live only the bits you want to push like Stagecoach does?
Cheers!
Steve
Steve, I’m not sure either of those plugins can do that; however, that particular functionality wasn’t the focus of the article. I suggest browsing each website, and maybe even contacting the developers to ask.
Great article Tom and something we should all pay more attention to. A question though….
With regards to duplicate content, how do we ensure that the staging site is not pinged by the search engines and possible duplicate content issues or (possible worse) that the search engines index the staging site and it ranks above the production site?
I know we can set a “Ask search engines not to index my site” but they do not have to honour the request and I also know we could deny access via robots.txt however with Google recent declarations about the denial of access for robots this is probably not such a good idea?
Thanks again Tom.
John
This might be something to discuss with your particular host as they may have their own methods for dealing with this. In my experience, though, enabling “Ask search engines…”, along with the password protection of your entire site, should be enough.
Cheers Tom, much appreciated and I will look into it, for my peace of mind and perhaps my sanity! 😎
Tom
Thankyou for the information you posted about “how to create a staging site”.
Things get a bit more complicated (I am sure you know) once initial development is completed, and the site goes “live”. At that moment, if your “production” (LIVE site) is collecting and storing data from “users” such as “posts”, and/or from “customers” placing orders (ex: woocommerce), your staging site no longer is in sync with your production site.
It then becomes necessary to develop a methodology for using the staging site but NOT overwriting the important data in the production site. And THIS is where it CAN get VERY messy.
The WP ENGINE tech support agent advised (where I just opened an account), I DEVELOP the PRODUCTION site. Once initial “development” is completed, and the PRODUCTION site is made LIVE, I can PUSH a copy of the production site to the staging site. At that moment, the 2 sites would be “synced”, if only for a brief moment. From that point forward, the tech advised to use the staging site to TEST any changes, and then, upon “successful” testing, to MANUALLY make the SAME change(s) to the PRODUCTION site as were successfully completed on the STAGING site.
To quote exactly > ” I only recommend using PRODUCTION SITE for data changes. And use STAGING SITE ONLY to test updates to plugins or wordpress core. I do not recommend pushing database data from staging to live, as this creates tons of problems.”
Of course, there’s ALSO the absolute mandate of BACKING UP both production and staging sites BEFORE doing ANY changes to either. And you need the functionality which allows you to “easily” restore such backups of EITHER production or staging, when required, which very few hosting companies currently provide.
When I asked the tech if wpengine had some post(s) which went into detail about all of this, I was told NO.
I’m not a tech expert, but want to identify the most efficient method for working with a staging and production site, so I MINIMIZE future PAIN & SUFFERING. I am very adverse to BOTH. I understand that the rules might differ depending on the hosting environment.
Any guidance you can provide is appreciated, and perhaps you will consider writing a DETAILED post about all of this in the near future.
Thankyou
Dan, it seems like you have a workflow down already! I would say if this method is working for you, stick with it. Of course, getting the advice from fellow developers from sites like ours is also going to help! 🙂
Thanks Tom for the Info.. You just helped a newbie wordpress here,
Thanks for posting this
No problem! Glad we could be of service! 🙂
I’ve used Bitnami wordpress for local install since 2009 on both mac and window as a test/ dev stage, It’s so easy and free. I’ll try these plugin mentioned and that pushlive plugin Puru added.
Thanks for your suggestion Omar!
Thanks for the article,
I personally use Backup Buddy, they have a push/pull staging option since version 6.
Quite convenient I must say 🙂
Hello Kaycy! A number of people in the comments have mentioned BackupBuddy – thanks for your suggestion!
My question is, what will be the server load if we use “WP Stagecoach” as many shared hosting providers have CPU limitations.
Jake, I’m afraid I don’t have an answer as that was beyond the scope of the article. Most hosts would be happy to discuss it with you, however!
In Cpanel there is a clone option. If any hosting is using Cpanel it is possible to create a clone.
Thanks for the advice!
Good Post. Many of the issues are solved from comment section only.
Its great
Thanks, Kodi!
I use Softalicious in my hosting, and have a domain name that I put all staging sites on in subfolders. If it’s a client site who is hosting with me, I simply clone the softalicious installation. If they’re hosting elsewhere, I move it using BackupBuddy or manually. I price my work to encourage hosting with me by offering free hosting for the first year (it can mean a 3-5 minute migration to live on my server vs up to 1 hour or more if they’ve decided to host elsewhere, and I have a $150 PIA fee if they choose to use Godaddy). I should technically use a localhost, but just quicker and easier this way. It’s simple and works for me.
Thanks for giving an insight into your workflow, Jessica! Much appreciated! 🙂
Maybe you can also add VersionPress, a free and open source version control plugin for WordPress built on Git.
Thanks for the addition, Liew!
There is another plugin which claims to provide the Push from Staging to Love facility. You can check it here :
https://wordpress.org/plugins/pushlive/
Thanks of the extra suggestion, Puru!
InfiniteWP is currently developing a staging addon for it’s WordPress management system
https://infinitewp.com/blog/sneak-peek-infinitewp-2-8-0beta1/
Thanks for the tip-off!
Hi! Very good article! I think backupbuddy should be also mentioned as it is also has option for creating staging env.
Hi,
Thx for this simple and clear tutorial.
But May you add information of staging for Multisite wordpress installation.
This is a much bigger burden, and really require some help. Because moving separatly the updated sub site or to automise database update that is much difficult.
Thanks for concern
Regards
We run a multisite as well and the answer for us has been to clone the server and bring it up in an isolated VLAN. This ensures an exact duplicate of the live server and all the same domains work within the isolated VLAN.
Updraft is our backup tool and they recently added some Multisite tools which may be helpful but we have not tried them yet.
When I’m not using the staging feature provided by the host, I like to use DesktopServer + MigrateDB Pro
Thanks for your insight, Calvin!
Thanks for sharing. I didn’t know staging was a thing!
Well, now you do! 😀
I use 3 environments for each site – dev, test, prod. I do development in test, have the client test in test and then deploy to prod when the client approves go live. Each environment has it’s own copy of the database. I do not maintain separate copies of all files that make up each of the three environments. Rather, I keep one copy of the latest and most recent version of WP and Divi files. I export the database from each environment on a regular basis. Then I keep scheduled back ups of all of the above. I track all of this in a spreadsheet so that I know exactly where I am with configuration management.
Thanks for the insight into your workflow, Bill! I’m sure some will find it useful to read!
Thank you! All-In-One WP Migration worked perfectly.
Thanks, Lana!
I am a newbie to WordPress and just making my first website using this platform. When making new posts or pages there is the function to either save it as a draft (or to be reviewed). When I do this, the pages aren’t published, but you can preview them. Isn’t this a simple way of checking to see if the things looks okay, especially if I use different browsers on my computer to make the previews?
John, thanks for your question!
Preview is exactly what you say – a method to check the page looks correct to you without publishing – and will be something you use all the time.
Pending Review is tied into WordPress roles – it enables authors to write content, before a site administrator publishes it to the live site.
I hope this helps!
Since I can remember, even before WP, I’ve always created my sites on a local server / localhost environment. Once every little detail is checked and working properly I upload to the final server. When its about upgrades I always update first my sites on localhost, check them and then I proceed to update on live server. Also makes it easy to tweak, test and try when working locally. Some minor features might need to be tested live (like Facebook plugins for example).. but otherwise I still think it is the best way to go.
Van, it’s a tried and tested method – for some its enough, for others a staging site is ideal, and for the very greedy they need both! Thanks for your comment!
This is a very helpful article and extremely timely for me … I have a well established authority site which I need to redesign and I plan to do it in Divi. One of the issues holding me back is I’m not technically skilled and I’ve been very concerned about downtime or “under construction” messages on my site. Doing the changes on a staging site lets me take my time, make sure the changes look good, and eliminates most of the pressure.
Good stuff, Jim! Glad you’ve found a workflow! 🙂
Awesome! I didn’t know staging was a thing!
Well, Mikey, now you do! And as a bonus, you now know how to do it! 😀
Can’t beat XAMPP with php 7.0!! I can test till the end of time. I keep it manually updated to mimic the live site minus new blog articles. It prevents premature greying. Of course, I still perform daily backups using blog vault; a superb server side backup system.
Thanks for the insight, Mark!
I don’t see any mention of this but I’ve dabbled with DesktopServer and it’s pretty cool as a way to do some testing and development outside of your WP installs.
Nathan and Preston discussed DesktopServer above – two more fans to add to the group! 😀
Is one of your better articles Tom Ewer.
Nicely comprehensive without too much up-sell to sponsors.
I like that you mentioned WP Staging, a solid, free alternative to the paid options (albeit it has no push to live option yet).
I found WP Staging recently. Yes, everyone is waiting for its push to live option 🙂
Thanks for your kind words, Jim! However, I will point out that we’re never paid to include or promote anything within our articles – everything we say is 100% truth!
I like ManageWP for this process. Many sites I create come from a template I’ve created, using the Divi theme, natch, that I clone.
Thanks for your comment, Cliff!
I think that the easiest way to experiment and develop a site, is with Desktop Server from ServerPress. Also, if you have just finished a new site, it is almost a 1 click upload to your host, with the use of their wordpress plugin.
I’ve been using Desktop Server lately too and I really like it.
An important issue rarely addressed.
Thanks!
Thanks, David!
I have been using the Duplicator plugin since past 2 years.
Recently I have start facing some issues with the plugin. It stops in between and the backup process stops.
I searched about it and found that the hosting provider closes the connection before the backup completes.
I don’t know how do I take the complete backup now. Any suggestions?
Start with the Duplicator FAQs for a solution, specifically #11 “Timeout Issues What can I try for Timeout Issues?”.
If that doesn’t help, don’t hesitate to ask for help on the Support section.
I was using the free version until my site exceeded 700MB, and I started have failed backups, so I purchased the Pro version and have not been having any problems with big backups or timeouts.
Free or Pro, I generally try to create both a PHP and SQL versions, maybe one will work better for you. Also, you could try excluding the “/Wordpress/wp-content” folder, which will make your backup much smaller and faster, and if that helps, then copy over the same wp-content folder to your computer using a FTP client software. Yes, that makes it more complicated, but it may offer you a temp solution until you can figure out why Duplicator fails.
FAQs
http://lifeinthegrid.com/support/knowledgebase.php?article=12
Support
https://wordpress.org/support/plugin/duplicator
I’ve been using Duplicator for a couple years. My definite go to favorite.
Only place I’ve had a problem is with a client hosting on GoDaddy who definitely closes the connection messing with my back-up. The Duplicator folks did tell me that they though there Pro version would get through. They did tell me if I bought it and it didn’t they’d refund my money. Haven’t tried yet but I will. I really like Duplicator.
For that site on GoDaddy I use UpDraftPlus. And I have tried to get my client to move their hosting. But no luck yet.
The other option for development is to use MAMP and develop on your desktop. Though you can’t show clients your progress this way. BUt I do use this for my own plugin testing and personal site development. (I wrote a nice little blog about setting MAMP up for this, but I don’t think I am allowed to put a link in here.)
Thanks for your insight, Ernest! MAMP is good, as you say, for local development, but a staging environment gives your site a bit more of a real world test. Plus, as you alluded to, you can collaborate with your client before your site goes live.
Hello Tauseef. You’ve said yourself where the problem lies – your hosting provider. It’s going to be well worth your time to get in touch with them and ask some questions.
They could even recommend a plugin that works with their services, or you may find a list on their website.
Good luck! 🙂
—
Try out the All-in-One WP Migration plugin and see if the same thing occurs.
I use BackupBuddy and had the same issue with my clients who use shared hosting with godaddy. Chunks are too big to save in the short time you have.
Check if in the settings you have ‘a max time per chunk saved’ and make it longer, for example to 90 (seconds)
Then set max content size for a single burst to something low like 20 (MB)
i have transfered from godaddy my website to a hosting and i lost some data.. you have the some problem with godaddy?