

You really do only have one chance at a first impression and the same is true for your website. When a visitor lands on your site for the first time (and maybe the last), how you welcome them will have a big impact. For many, a well crafted landing page with clear call to action above the fold will suffice. But, there are other (more crafty) ways to welcome your users before they interact with your landing page. This can be accomplished with pop-up boxes, fullscreen welcome mats, live chat invitations, and more. All in an effort to force the user to interact with a call to action. And there are many reasons to do so.
In this post I’m going to talk about why you should consider adding a custom welcome message for your visitors and how to do it.
- 1 Why Bother Users with a Welcome Message
- 2 The Content of Your Message
- 3 The Method of Your Message
- 4 How to create a Welcome Message with WordPress
- 5 Example 1: Creating a Welcome Message with Popup Maker
- 6 Welcome Message with Optin Monster
- 7 Welcome Message with SumoMe
- 8 Creating an Email Opt-In with Bloom
- 9 Final Thoughts
Why Bother Users with a Welcome Message
I know… I know… Everyone hates those pop-ups that try to con you out of an email address. And to some extent it seems that we have developed an involuntary reflex for clicking that “X” at the top right of those boxes. But you would be surprised at how effective they can be for you and your visitors.
Let’s review just a few of the benefits these welcome messages can bring.
Benefits for You (The Owner)
- You can direct the user where you want them to go much quicker
- You can create more traffic for your website
- You can make more money
- You can gain useful data about your visitors by tracking user engagement with your message
Benefits for Them (The Visitor)
- They can get to where they want to go much quicker.
- They can become aware of discounts that will save them money
- They can get free stuff they actually want
But these benefits are completely dependant (you may have guessed) on both what you say (the content of your message) and how you say it (the method of delivery).
The Content of Your Message
Here are a few examples of message content that may work for you and your visitors.
- A call to action to redirect users to a specific page.
- A simple message on how the visitor can receive push notifications for future updates
- A free gift offering in exchange for subscribing to your email list.
- A fun game visitors can quickly play for a chance to win a prize
- A featured promotion (like coupon codes or black friday deals)
- A chance to share on social media (Get Social Shares (get your site more traffic through facebook, twitter, pinterest, etc…)
- An invitation to a live chat
- A notification for user consent (like cookie notices for GDPR compliance)
The Method of Your Message
Here are a few example methods for displaying your message to your visitors:
- Pop-up Boxes
- A Lead Page with a redirect
- Fullscreen Pop-up Boxes
- Welcome Mats
- Inline Boxes
- Floating Bars (bar that sticks to the top of the page)
- Exit Intent (popup when user moves cursor out of display window)
How to create a Welcome Message with WordPress
If you are looking to add a welcome message to your site (and you have a good reason to do so), you have some powerful plugins and software options to consider. Here are a few:
- OptinMonster
- Sumo (previously SumoMe)
- Bloom
- Ninja Popups – most popular on CodeCanyon.
- Leadpages – Allows you to quickly deploy landing pages to welcome your visitors.
- Popup Maker
- HelloBar
- GDPR Cookie Consent
- Icegram
Example 1: Creating a Welcome Message with Popup Maker
Popup Maker is a free WordPress plugin that allows you to create pop-ups of almost anything. It even integrates with certain email providers for email opt-ins.
To create a welcome message with Popup Maker, install the plugin and follow these steps:
1. Add a new pop-up by navigating to Popup Maker > Add Popup.
2. Register the name of the Pop-up.
3. Enter the content/html you want displayed in the pop-up.
4. Configure your pop-up settings by adding a new trigger called “Time delay / Auto Open”, set the target to your homepage, set the display theme you want to use, and configure how you want the pop-up to close.
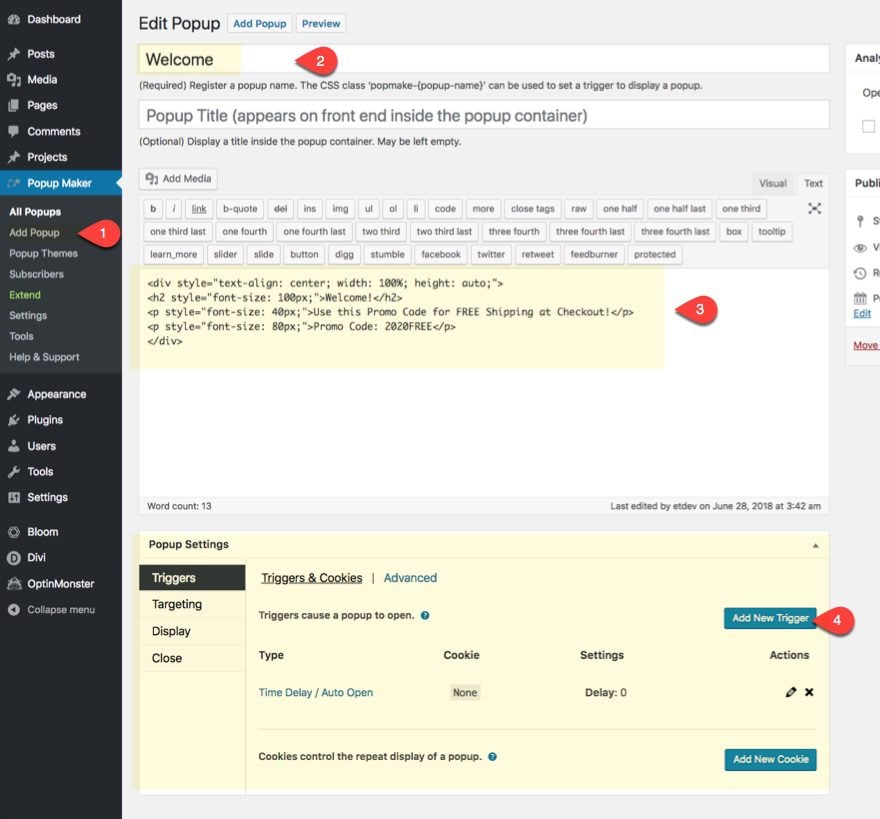
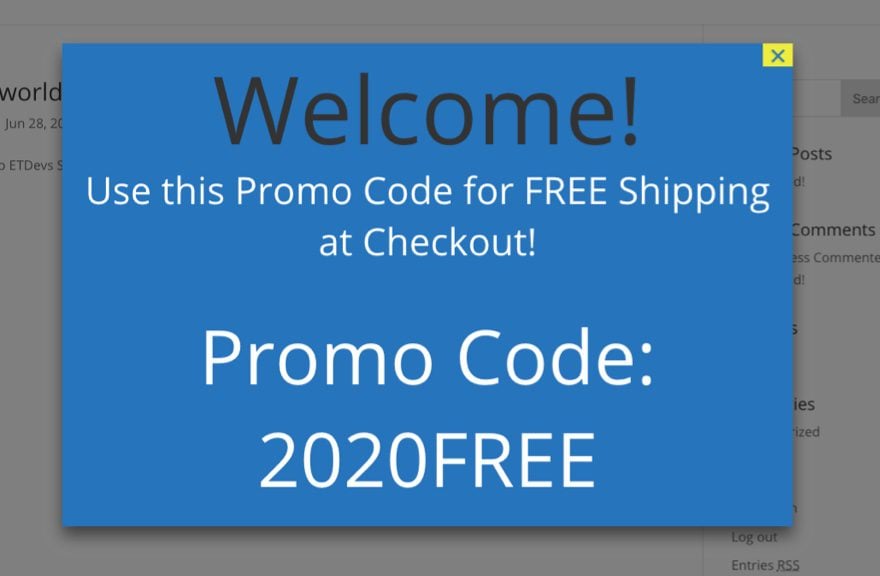
Here is an example of what a simple message would look like:
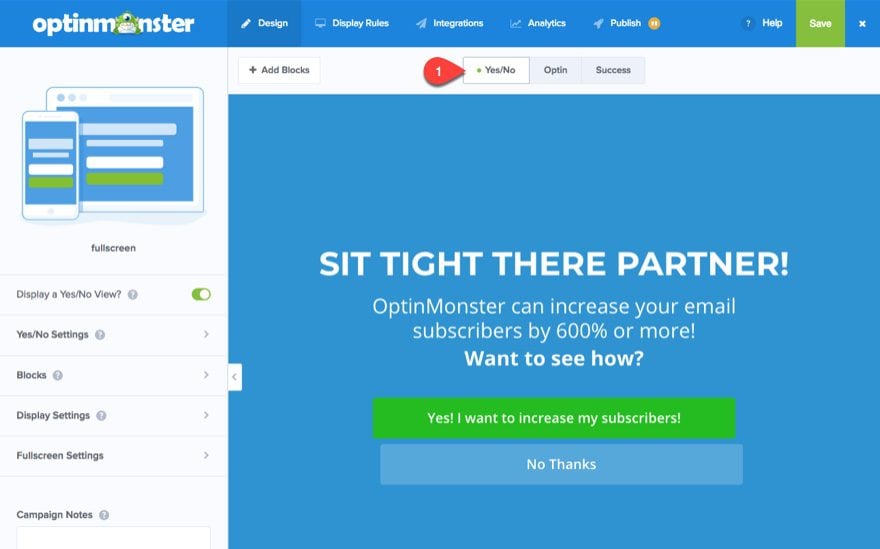
Welcome Message with Optin Monster
Optinmonster is an extremely popular lead generation software and can be used to create fullscreen pop-ups, slide-ins, floating bars, and inline opt-ins.
To create a custom message or opt-in with Optinmonster, you will need to create an account. They offer a forever free plan but it is fairly limited. After your account is set up, you can integrate your account with WordPress using their WordPress plugin.
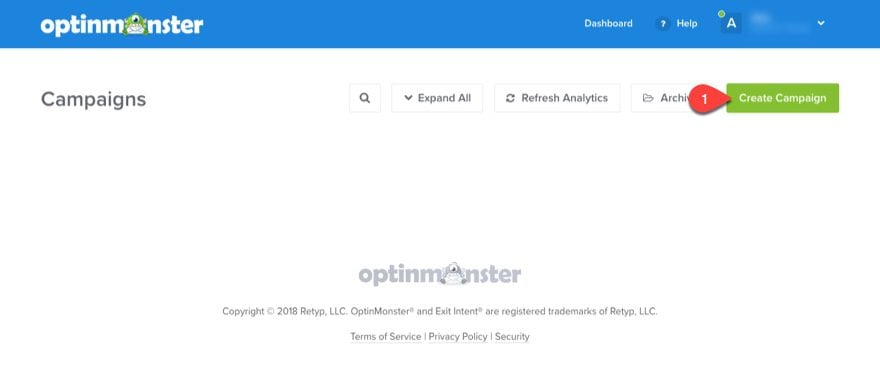
go to your dashboard and Click Create Campaign.
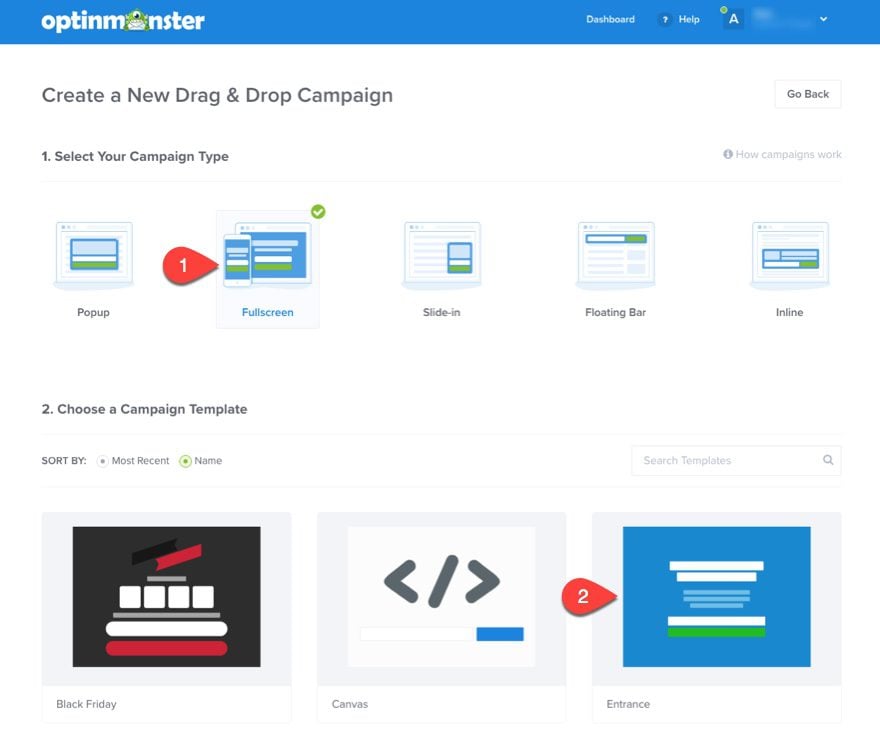
Select the campaign type and the template you want to use.
Then continue the process of setting up campaign. There are tons of options for customizing your design (how you want it to look and function), display rules (when and where you want the pop-up to show), and integrations (the email list you want to use with the form).
For a less intrusive option, you can enable a yes/no functionality that allows the user to click yes before the email opt-in field appears.
Welcome Message with SumoMe
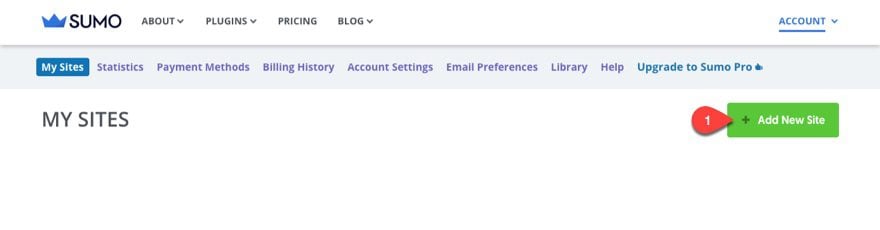
Sumo (previously SumoMe) is another popular lead generation software with tons of options for capturing leads. They offer a free “Just Starting” plan but you will need to upgrade if you want to take advantage of tools like Cart Casino Forms (a cool way to capture emails by allowing visitors to “spin” to win prizes).
To get started with Sumo, you will need to create an account and then add your new site from the dashboard.
The software will walk you through the process of building out your new form. The free version will allow you to create a form to collect emails, add a call to action, get social shares, or use custom code.
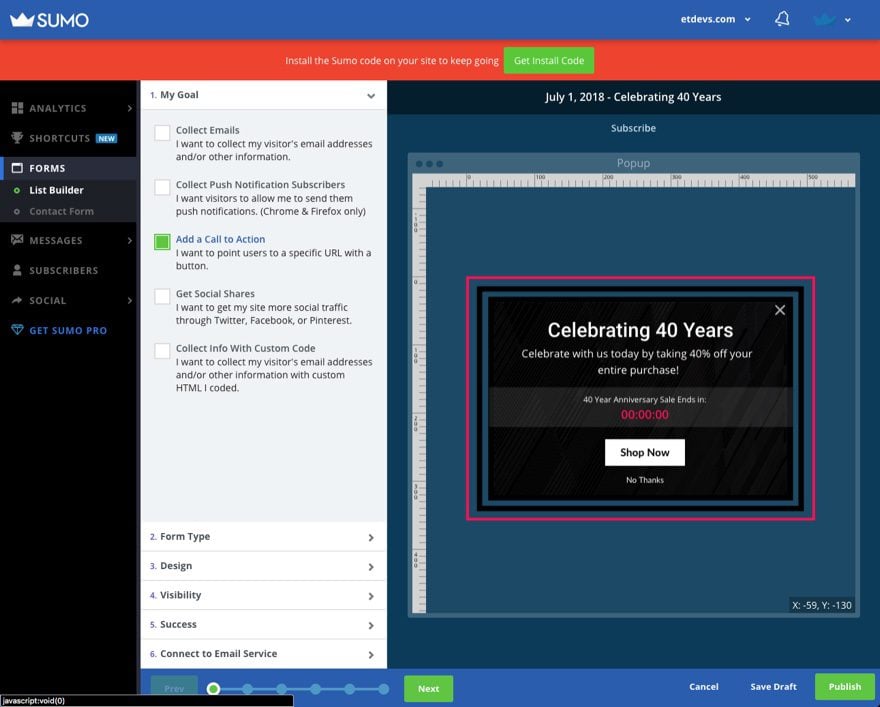
Once your new form is published, you can integrate it to your site with their WordPress plugin.
Sumo also has some unique welcome mat opt-ins that show on page load and allow the user to scroll down to see the webpage. You can view some examples of their tools here.
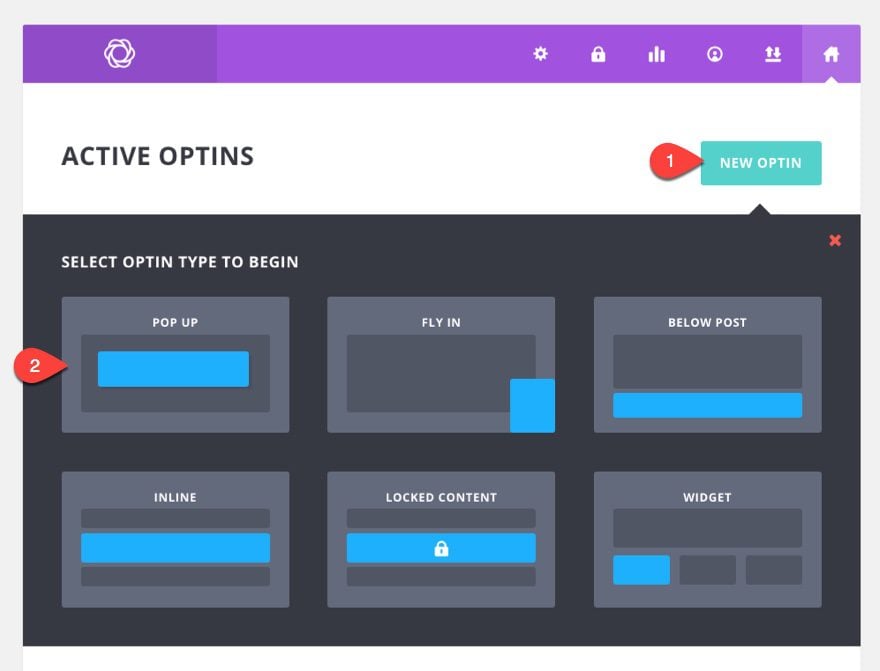
Creating an Email Opt-In with Bloom
If you love Divi, Bloom is a popular plugin that comes as a package deal with your Elegant Themes subscription which includes access to all themes (87 themes including Divi) and plugins.
Bloom comes with 7 different display types including pop-ups, fly-ins, inline opt-ins, widget area opt-ins, and even opt-ins to unlock content.
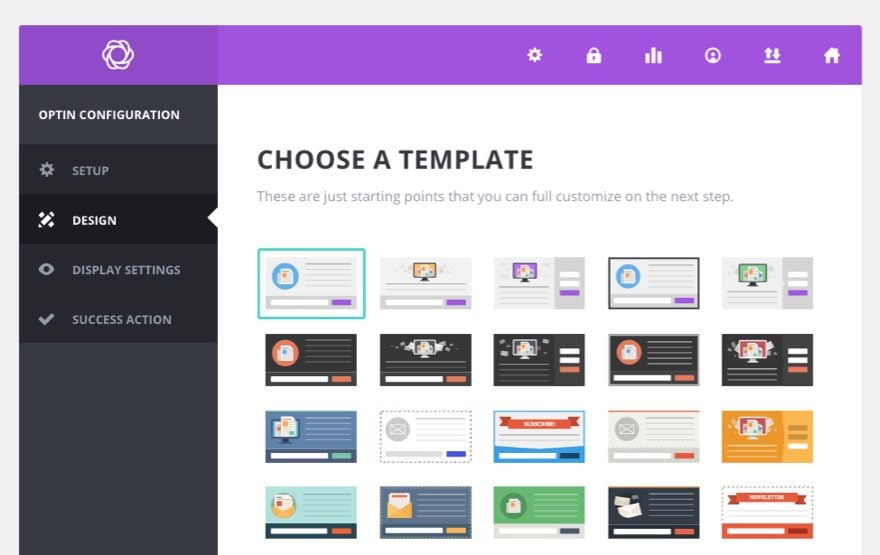
Once you install the plugin, you can create a new opt-in by navigating to Bloom > Optin Forms and clicking “New Optin”. Then you can select the opt-in type.
After that, choose the template you want to use.
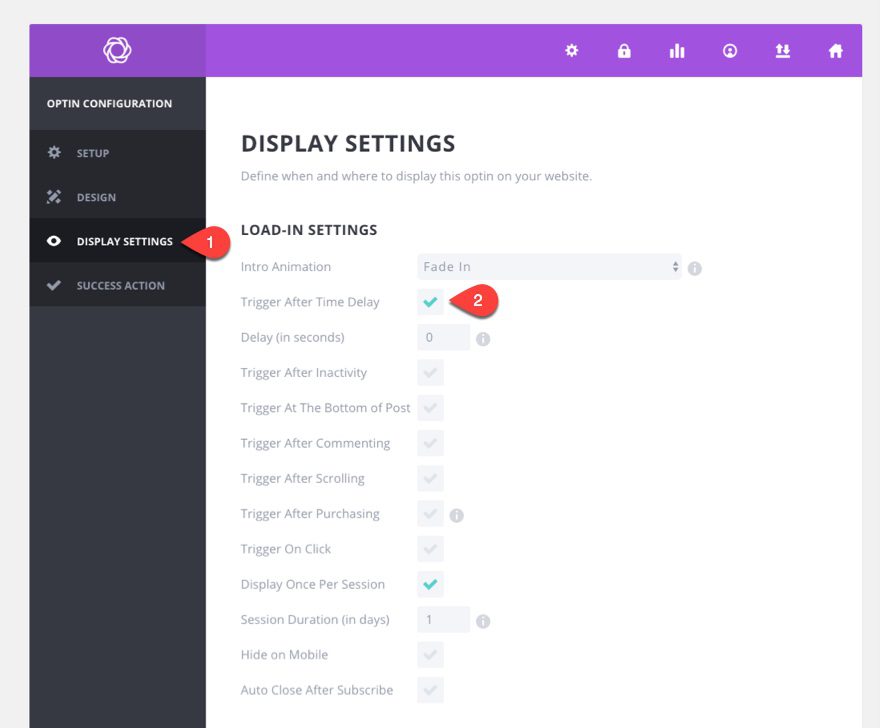
There are a number of trigger types for displaying your form under display settings.
If you want to have a custom opt-in pop-up automatically when you load your homepage, customize the display settings to show the pop-up with a time delay of 0 seconds and only show it on the homepage. It is also a good idea to set a session duration so that the user only sees the pop-up once every few days (or weeks).
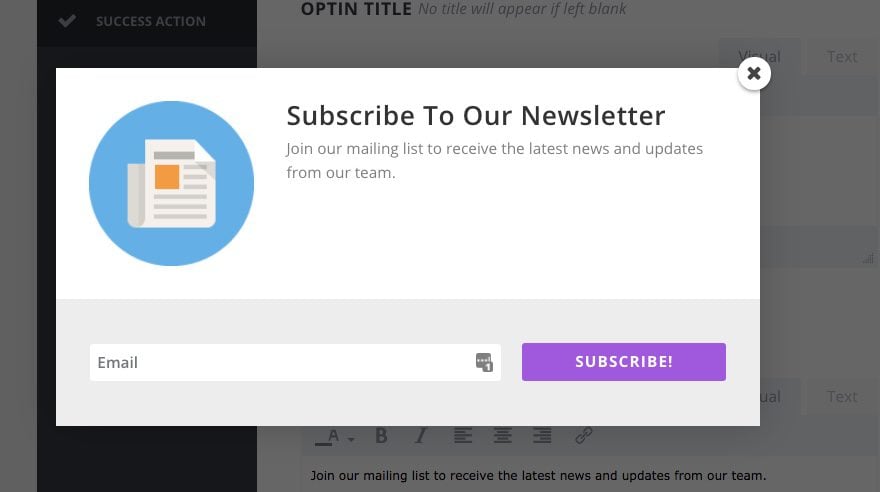
Here is a little preview of what will show up on the homepage.
The plugin supports analytics and will allow you to view your opt-in stats like conversion rate. And you can learn everything you need about how to use Bloom in our documentation.
Final Thoughts
No doubt, you have probably used or considered using one of the plugins mentioned here to create a custom message or opt-in for your site. There are some great solutions out there in the world of WordPress. I guess the best place to start would be to decide what is your primary goal for greeting your visitors with a custom message. You definitely don’t want to bother them without a good reason. And whatever message or offer you choose should be beneficial for your visitor as well as for you. Then you can decide what is the best tool to use. A free option should be all you need for those simple sites not getting too much traffic (or conversions). But if you are serious about lead generation, you would do well to shell out a few bucks to get all the bells and whistles you may need.
For this post, I simply concentrated on the software/plugins most familiar to me. I’m sure I failed to mention some of your favorite plugins that have worked well for you. So, I look forward to hearing from you in the comments!
Cheers!


I would go for the Popup maker. Just installed and tested on my site. It comes with lots of customizations plus a few good styles.
Thanks for sharing this piece. Please which is the best GDPR consent bar for wordpress?
Bloom needs new optin forms…The designs are so…Not really sure how to explain it…I guess you could say boring? I wish we had more control over the designs. I know we can do more with CSS but it would be easier if we can use the divi builder to design the forms.
OptinMonster actually looks great! Their designs are very trendy. It also comes with drag n drop buider. I might have to give them a spin…