
Running a WordPress site that allows users of different roles to upload files can be dangerous. If the site is not well-managed, users could upload plenty of unnecessary and even malicious files. This would affect your website loading time and security at the worst.
So, guess what to do in this case? You must restrict file uploading permissions for the users. This is what we will talk about today.
Why should you restrict file uploading?
I would say why not. If the users have the access to upload files to your WordPress site. They may begin uploading unnecessary, bulky, and harmful files. While this file uploading access has a lot of benefits there are also some potential threats. Only restricting file uploading permission can rescue you from this unwanted mess.
What type of sites require restricting file uploading?
Literally, any site that allows users to upload files upon having an account needs to restrict file uploading to stave off potential threats. WordPress sites that offer membership, let people enlist different items, or let the users upload files using the media uploader for any reasons need to have a solid system to restrict file uploading.
How to restrict file uploading permissions in WordPress
Restricting file uploading permissions in WordPress sites is not as hard as it may seem. In fact, with our step by step tutorial, it’s going to be way easier. Anybody even with just the familiarity with WordPress would be able to restrict file uploading without running into any error. We will show you the whole process with a plugin. So, let’s begin.
Wondering which plugin we are going to use in this case? It’s WP Upload Restriction, an easy to use plugin that helps you restrict different file formats and file size. An administrator can select the file types and file upload limit according to user roles. This plugin restricts users from uploading unwanted file formats and sizes using the WordPress media uploader.
Step 1: Install WP Upload Restriction plugin
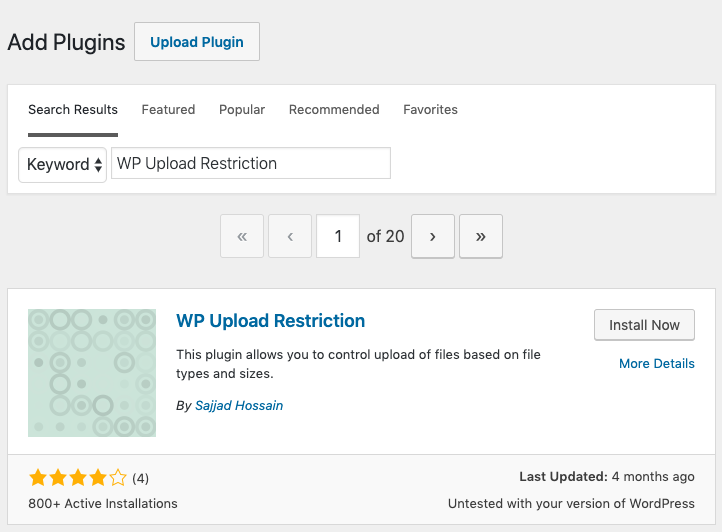
Installing WP Upload Restriction plugin is just like the way you usually install any regular WordPress plugin.
You can either download the WP Upload Restriction plugin from the official WordPress plugin directory and install it. Or install directly by searching on your website’s plugins dashboard.
Step 2: Go to WP Upload Restriction settings
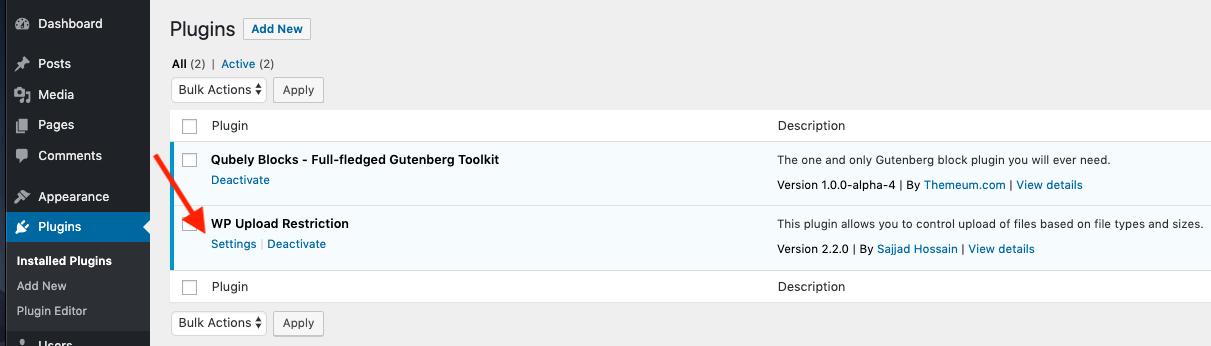
Once you have installed and activated the plugin, you have to set it up. Go to Dashboard > Plugins > WP Upload Restriction settings.
Step 3: Decide what to restrict and allow
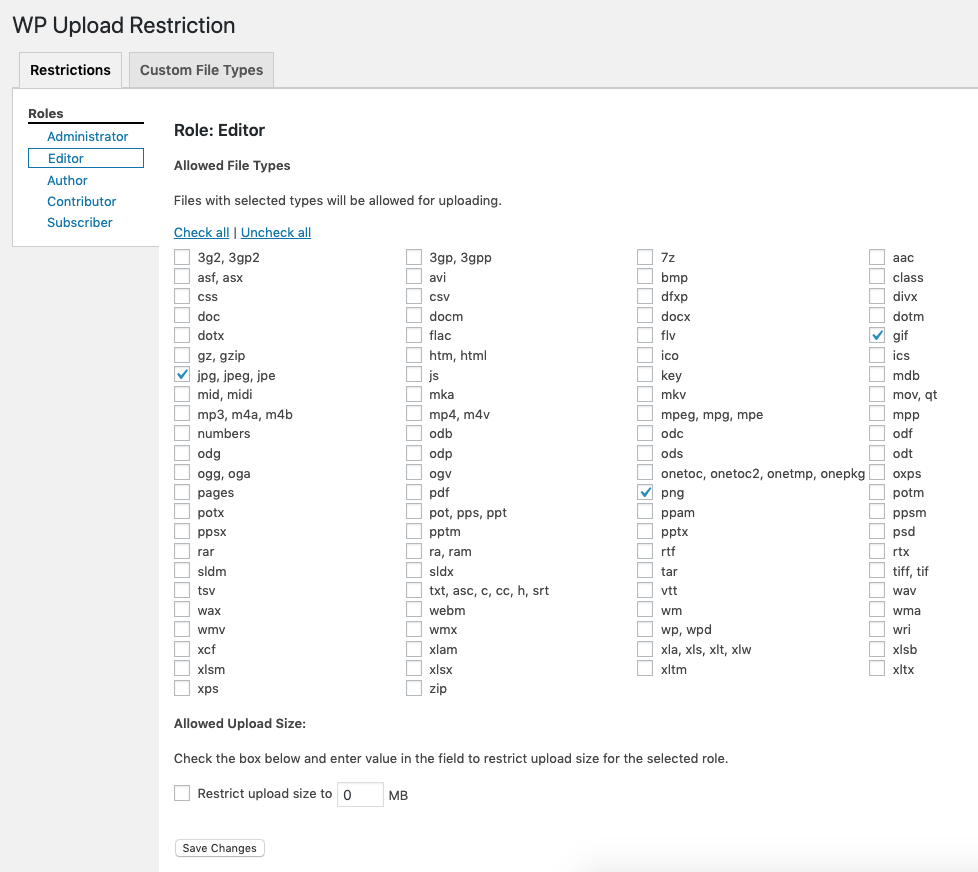
Upon clicking on the Settings, you will be redirected to the plugin’s main playground where you can decide on which files to restrict. Here, you can check/uncheck all files. You can also check and uncheck them individually. The file types that you have selected (checked) will be allowed for uploading. Each unchecked file format will be restricted.
Also, you can add support for custom file types by clicking on Custom File Types beside Restriction. Add file Extensions and MIME Type, then click on Add Type.
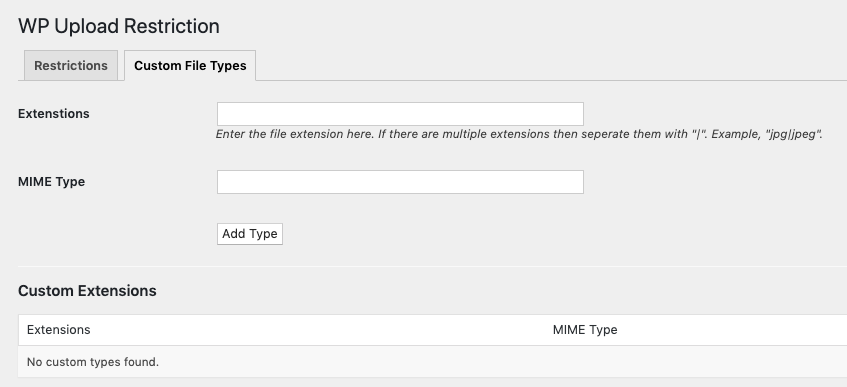
The added custom file extensions will be displayed under the Custom Extensions section.
There’s an option to restrict the upload file size at the bottom. Check the box and enter value (file size in megabyte, no decimal value allowed currently) in the field to restrict upload size for the selected role above.

Click on Save Changes at the bottom and you are done with restricting file uploading via the media uploader.
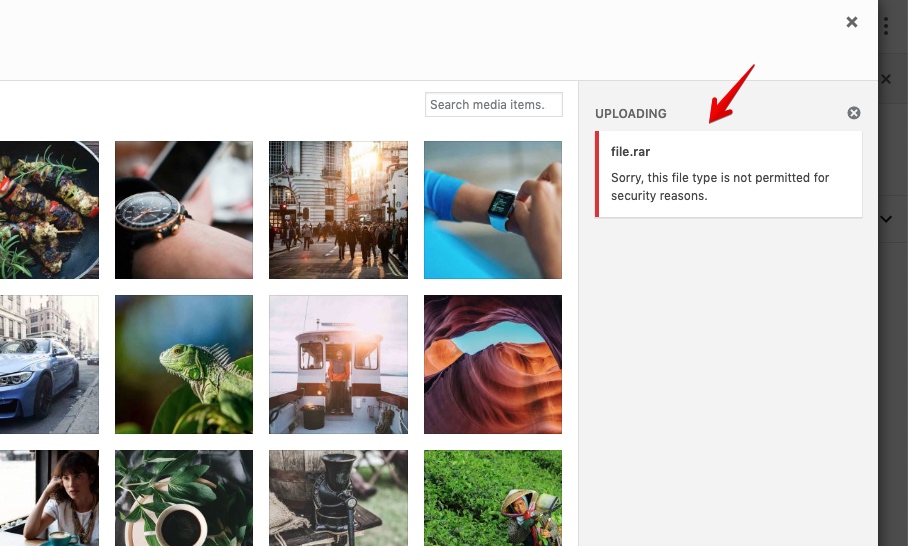
When a user will try to upload a restricted file (type/size), s/he will see an error like the following one.
If you have followed all the above steps carefully, you must have been able to restrict file uploading to your website. So, restrict file uploading permission and file size as your requirements and enjoy a seamless experience with your site. We do publish such types of WordPress tutorials and guidelines on Themeum blog. Do visit for more.