

Not only is YouTube the second largest search engine in the world, Google search prioritizes articles and pages with embedded video, too. Both of which are reasons for each and every content creator and blogger out there to foray into video creation. And while that can be an intimidating prospect for those not acquainted with professional video software, Camtasia is one of the easiest and simplest ways to get into video creation with the lowest possible learning curve.
Subscribe To Our Youtube Channel
What is Camtasia?
TechSmith, the company behind Camtasia, also makes the highly recommended photo capture and editing software SnagIt. If you’re familiar with that app, then Camtasia will feel like coming home. While there are obviously differences between them, the concept is the same. You capture, edit, enhance, and annotate the media.
For many content creators and bloggers, having an industry-standard app like Final Cut Pro or Adobe Premiere is a bit of overkill. Camtasia fills that space by letting you do pretty much the same things, only perhaps with a little less granular control. We’re not going to be making Hollywood blockbusters in Camtasia, but we’re going to be making some killer YouTube and Vimeo hits.
Camtasia is a premium app, meaning that you’re going to be paying for it if you want to use it for any production work. You can sign up for a free trial, but any videos you export will be watermarked until you purchase a license (which is good for the life of that version and any updates to it). The software is $249 to purchase, but license-holders can always add a $49.75 annual maintenance plan to include the next year’s point release.
Getting Started with Camtasia
Installation is just a standard wizard, whether you’re on PC or Mac. You will be asked to log in to your TechSmith account, and once you’ve done that, you will find yourself staring at a robust dashboard that has been automatically loaded with a sample project that can play around with to to get a feel for the app.
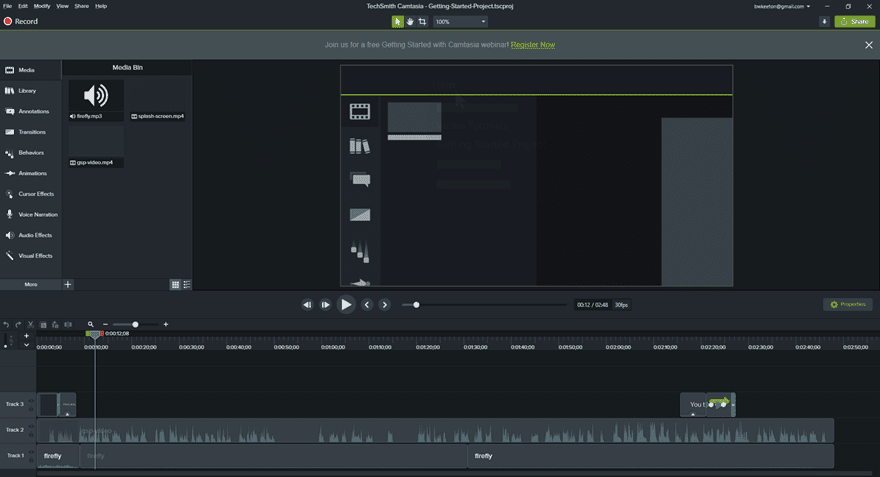
The left-hand side of the screen holds the primary navigation for Camtasia. You get the sidebar where you interact with your tools and effects. Their options open up directly beside the tab. Above them, you find the main feature of the software: the record button for screen capture.
Recording with Camtasia
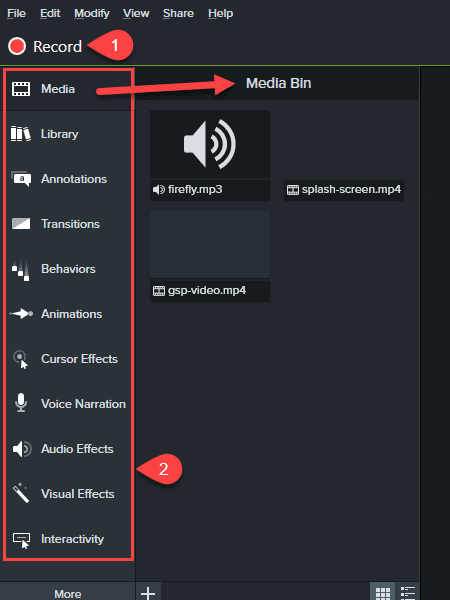
The primary task that Camtasia has is to record your screen in some way. When you press the Record button in the top left of the dashboard, a new overlay appears with all the options you need for capturing nearly anything.
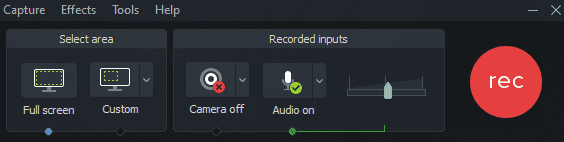
You can pick sizes of the screen to capture (either default widths or custom cut-outs), specific windows or apps, or just the entire screen. You can select between multiple displays, too. As well as whether Camtasia records from your webcam, microphone, or system audio.
You can play around with tons of options and preferences, too.
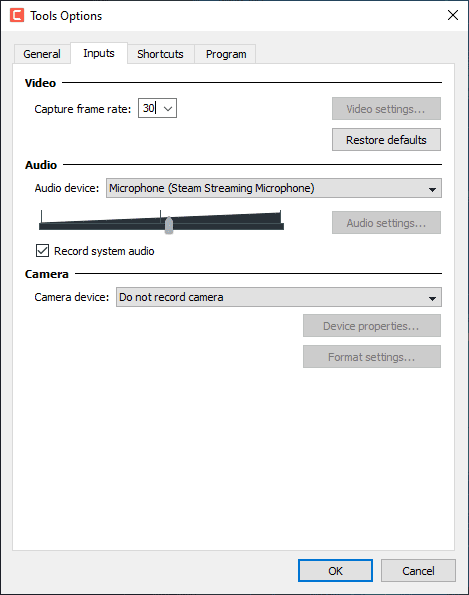
Spend a few minutes there, and you will be adjusting everything from frame rate to whether or not you record mouse click sounds. When that’s all taken care of (and the defaults are decent enough to use while learning), just press the big, red record button. And you’re live!
Editing Video and Audio with Camtasia
Actually editing the video and audio with Camtasia is simple. At the bottom of your screen, you have a timeline with various tracks. Each track represents one piece of audio, video, or effect you apply to the recording.
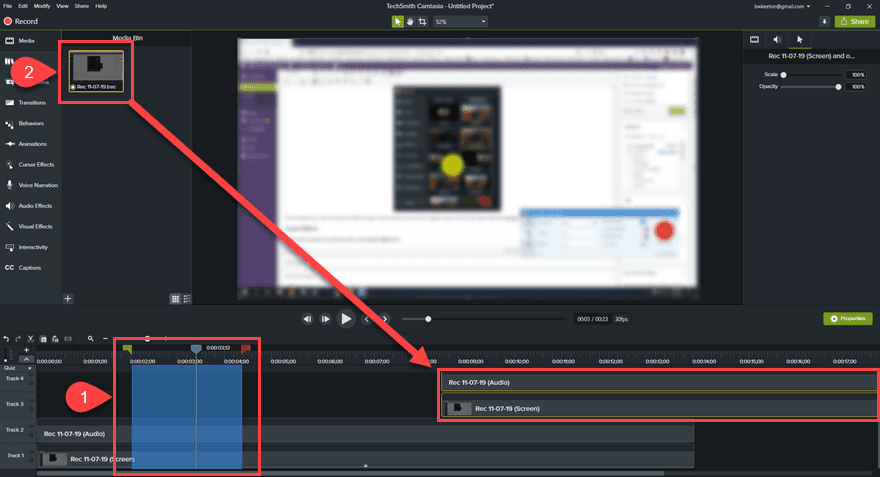
Most of Camtasia’s editing is drag-and-drop. You use the green and red flags at the top of the timeline (1) to adjust any section you want to highlight, then you can cut, copy, paste, delete, or apply an effect (which we will touch on below) to that section. You can also grab the end of any track with the mouse to truncate it simply by dragging.
Additionally, adding new content is easy, too. You can either simply click into the timeline and paste some clip you have copied, or you can drag it from your Media or Library tabs to insert it automatically. Just use your cursor to place it. You can always move them around as you like.
With those basic controls under control now, let’s check out what Camtasia can really do.
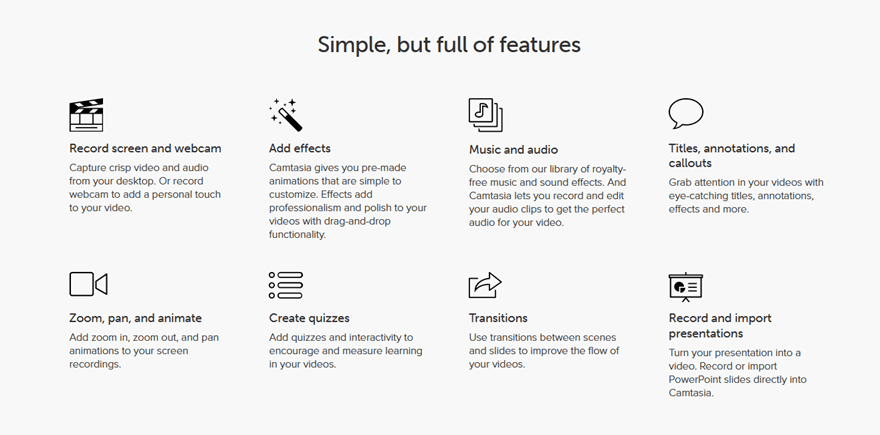
A Brief Rundown of What Else Camtasia Can Do
The labels on the tabs for the sidebar are actually pretty self-explanatory. However, when you’re starting out, the specifics of using them may not be quite apparent. So let’s walk through the basics of what you can do with Camtasia.
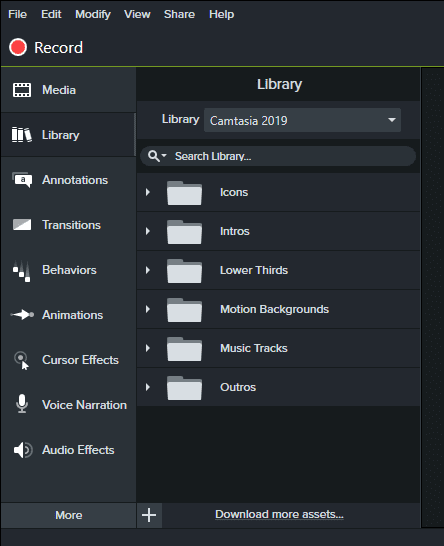
The Media and Library tabs may seem similar, but they aren’t the same thing. Media is a collection of all the screen recordings and other media that you have imported into this particular project. There is no overlap with any other work unless you specifically say so. Library, on the other hand, is a global collection of assets that you can pull into any project you want. This contains all the media that you will likely reuse over and over again.
Annotations
These are what you use to make notes on the recording. Arrows, speech bubbles, blurs and highlights, handwriting or drawing. They’re all here.
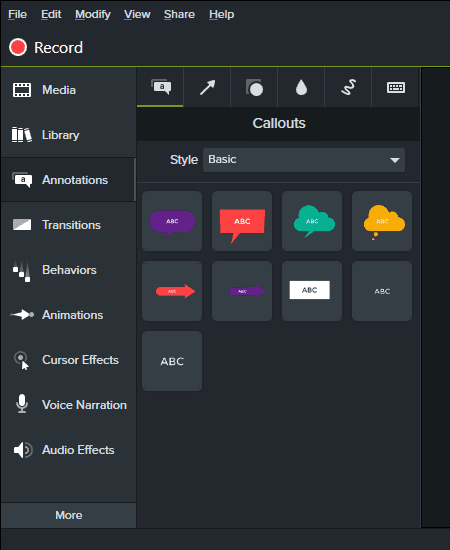
Those of you who use SnagIt regularly will recognize these as the primary tools in the editor.
Transitions
When you splice together multiple clips or cut apart sections of a longer one, you need to transition between them. Hard cuts work sometimes, but a fade out makes a world of difference in professional appearance. And is less jarring for the viewer.
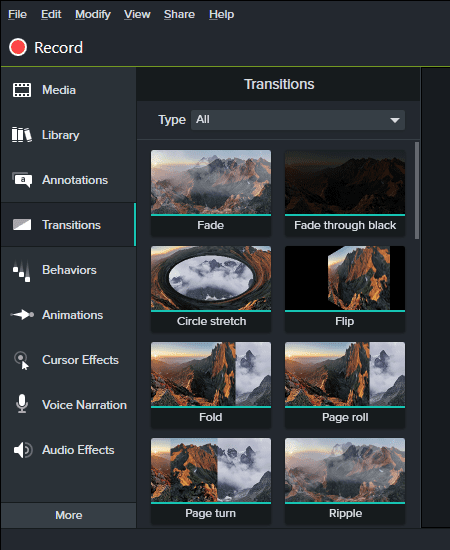
Camtasia comes packed with dozens of transitions for you to use. Just click and drag the transition to where you want it, and Camtasia handles the rest.
Behaviors
Similar to Animations, Behaviors is about creating effects with text.
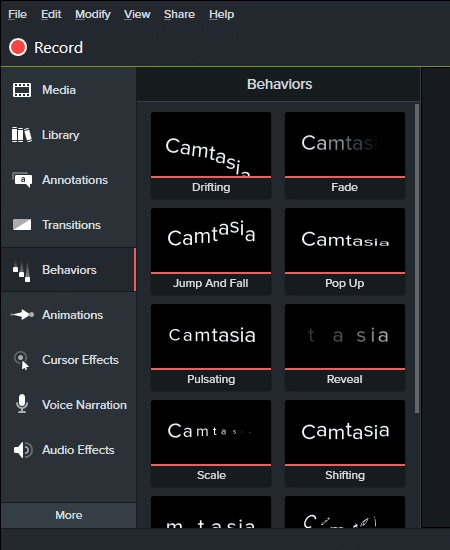
You can adjust the properties of any option you see in the window. Then you can insert it as an overlay in the video timeline. The actual video will not be adjusted with the Behavior, only the text you’ve set.
Animations
Whereas Behaviors animated and added effects as overlays to the video, the Animations tab gives you the option to manipulate the recording itself.
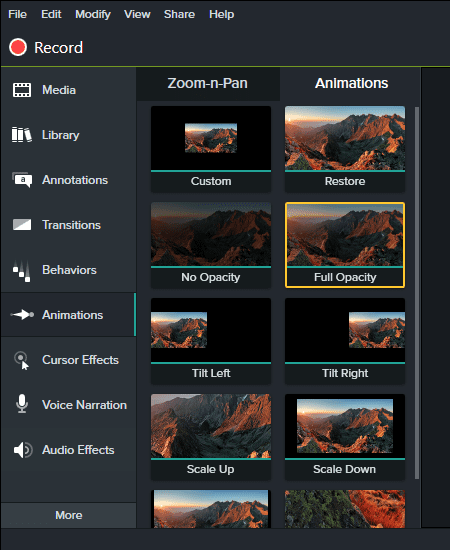
You can split screen, move the shot to a different spot at scale so that you can insert a caption, zoom in for the Ken Burns effect that iMovie has helped popularize, or tons more
Cursor Effects
Pretty much necessary for tutorial creators, the Cursor Effects tab lets you make sure that your viewers follow along. Because Camtasia is smart, all you have to do is drag the effect you want to apply to the cursor onto the video track at the bottom of the screen. It will automatically apply to the cursor across the recording. You have to do nothing manually except choose which effects you want on which track.
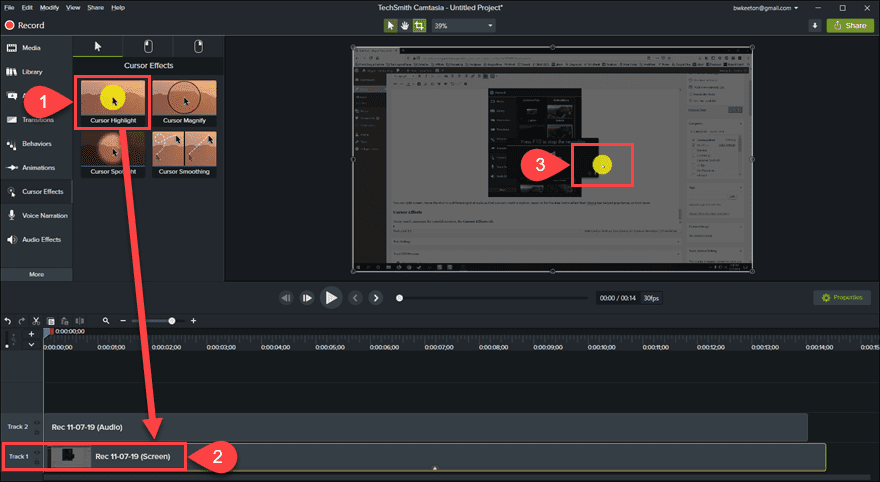
In the box containing the effects, you can also choose effects for both right-clicks and left-clicks for your audience to see, too.
Voice Narration
Voice Narration is different than adding an audio track. You use this when you want to add explanation (or other commentary) over the video as you watch the video play.
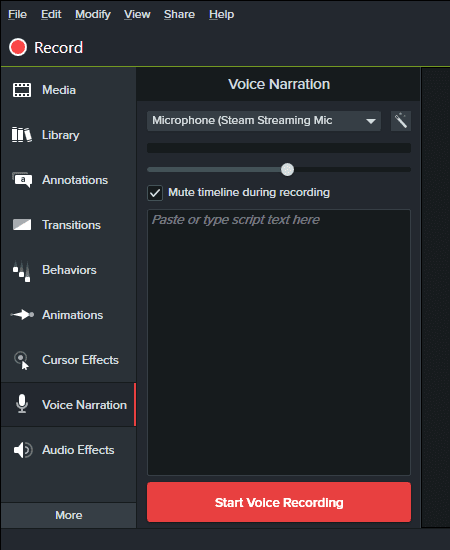
When you finish the recording, Camtasia will prompt you to save it as an audio file. At which point, you can either add it to your Library or Media collections for use. But since Media was for this particular project, and you’re likely narrating something specific, Media will probably be your next step after this.
Audio Effects
Audio Effects is very straightforward. Like the Cursor Effects above, you choose a section of audio in the tracks at the bottom of the dashboard and drag the effect you want to apply to that selection.
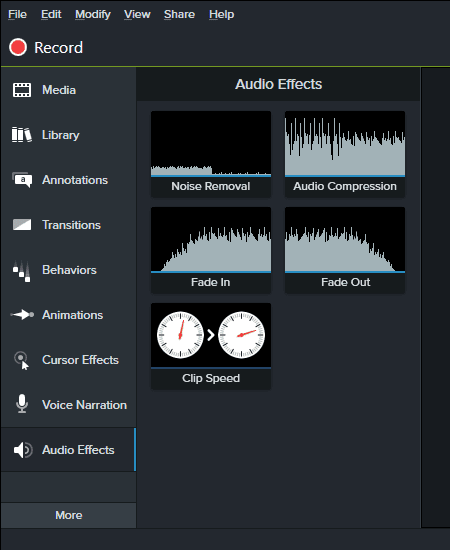
Maybe you have intro music that needs to fade out instead of just end. Or you can keep your peaks compressed, background hum removed, or even adjust the speed at which the audio plays.
Visual Effects
Again, something that might be mistaken for Animations or Behaviors (or even Transitions), Visual Effects gives you control over specific displays for your video.
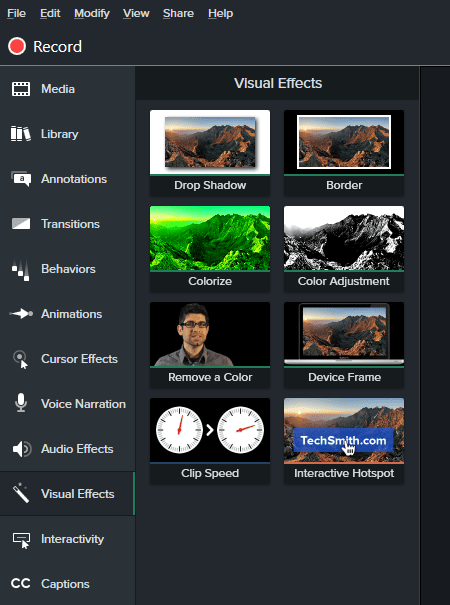
You can add a frame so that your video looks as though it’s playing on a laptop, add a green tint to the whole screen, or remove all traces of a color from the shot (for green screen shots, for instance). These effects tend to be static for what they do, either applied to a section or the whole track, not just a momentary insertion like a transition or animation.
Interactivity
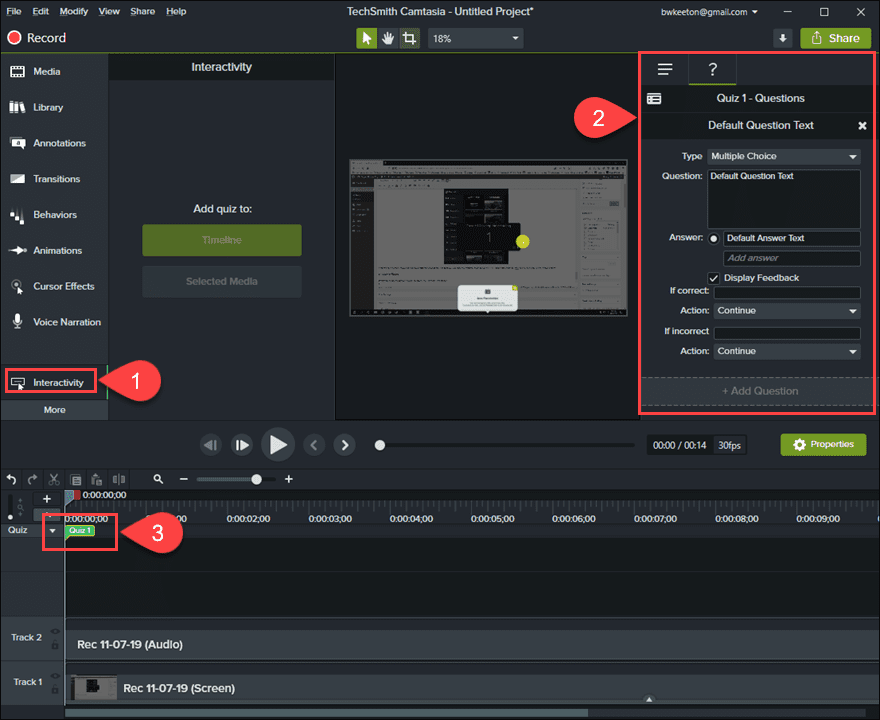
If your video is going to be used as, for example, a webinar, the Interactivity tab may interest you. If you use ScreenCast.com or a supported smart player for your cast, you can include quizzes along the way that respond to your viewers’ answers. You set where the quiz falls in the video, what questions are there, how responses are calculated, etc. Unfortunately, this will not work on big platforms like YouTube or Vimeo, but for specialized cases, this can be a killer feature if taken advantage of.
Captions
Potentially the most important feature for your video creation process, Captions gives you total control over how subtitles and captions are used throughout it. Accessibility is a huge priority right now, and videos that provide captions and subtitles are appreciated and necessary.
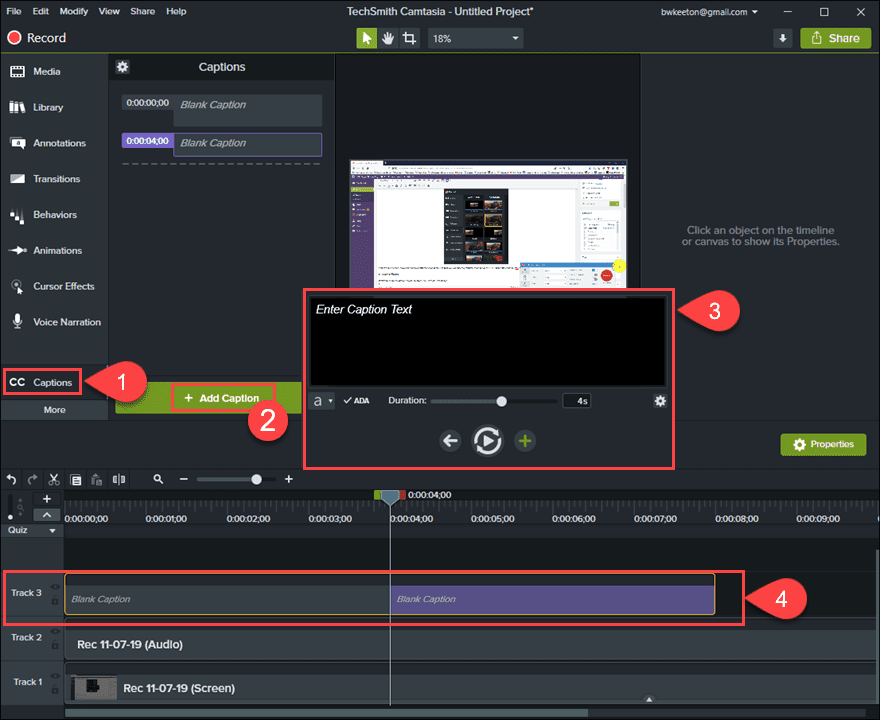
You can choose the length and duration and location of any caption that you want. It can be a full-length script that you paste in, or you can simply add text to explain or clarify what the audio is detailing. Regardless, adding captions or subtitles to your video is about as painless as it can get with Camtasia. If you misplace the text, you just drag it on the timeline at the bottom, and it’s fixed.
Camtasia also includes various options for text sizes and colors. You can set them to whatever you want, but the caption window will alert you if you’re using a combination that is not ADA compliant.
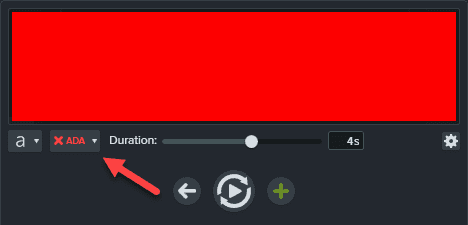
That alone makes using Camtasia for captions worth its portion of the license fee.
Conclusion
As far as lightweight and versatile video editors go, Camtasia works great. It’s easy enough for new editors to pick up, but powerful enough to work on full productions at the enterprise level. If you’re not sure if this is the software for you, check out their 30-day free trial and see how it runs and if you like the workflow. If you do, great. However, if it turns out that you need something else, you can always check out one of these fantastic video editors as another option.
What is your favorite thing about Camtasia?
Article featured image by Golitsyna / shutterstock.com


i need something which can convert text to audio is this possible with this tool which are you offering?
Camtasia is really cool except for one very annoying thing. The audio level slider doesn’t stay where you place it to set recording level. And it has to be changed every time you record. The audio also dips at times forcing you to have to enhance audio in post.
Oh, wow. I haven’t noticed that. Thanks for pointing it out for us all to keep an eye on. 🙂
What version are you using? I bounce between 2019 and Camtasia 3, myself.