

Divi and its gallery module allows you to create a beautiful gallery of images in a grid layout with little effort. And, perhaps the most important design element of a grid is spacing. With Divi, you can adjust the gutter width to control the spacing between grid items (or images). However, even with four gutter width values to choose from, these set gutter width values can be limiting in some instances. So, if you want to have complete control over the spacing between images, Divi still has you covered. There is actually an easy method to do this.
In this tutorial, I’m going to show you how to gain complete control of your gallery spacing by adding custom padding to an image gallery using the Divi Gallery Module.
Let’s get started.
Sneak Peek
Here is an image gallery with each image having a custom padding of 2vw. Notice the slight change in spacing as the 2vw padding scales according to the width of the viewport.
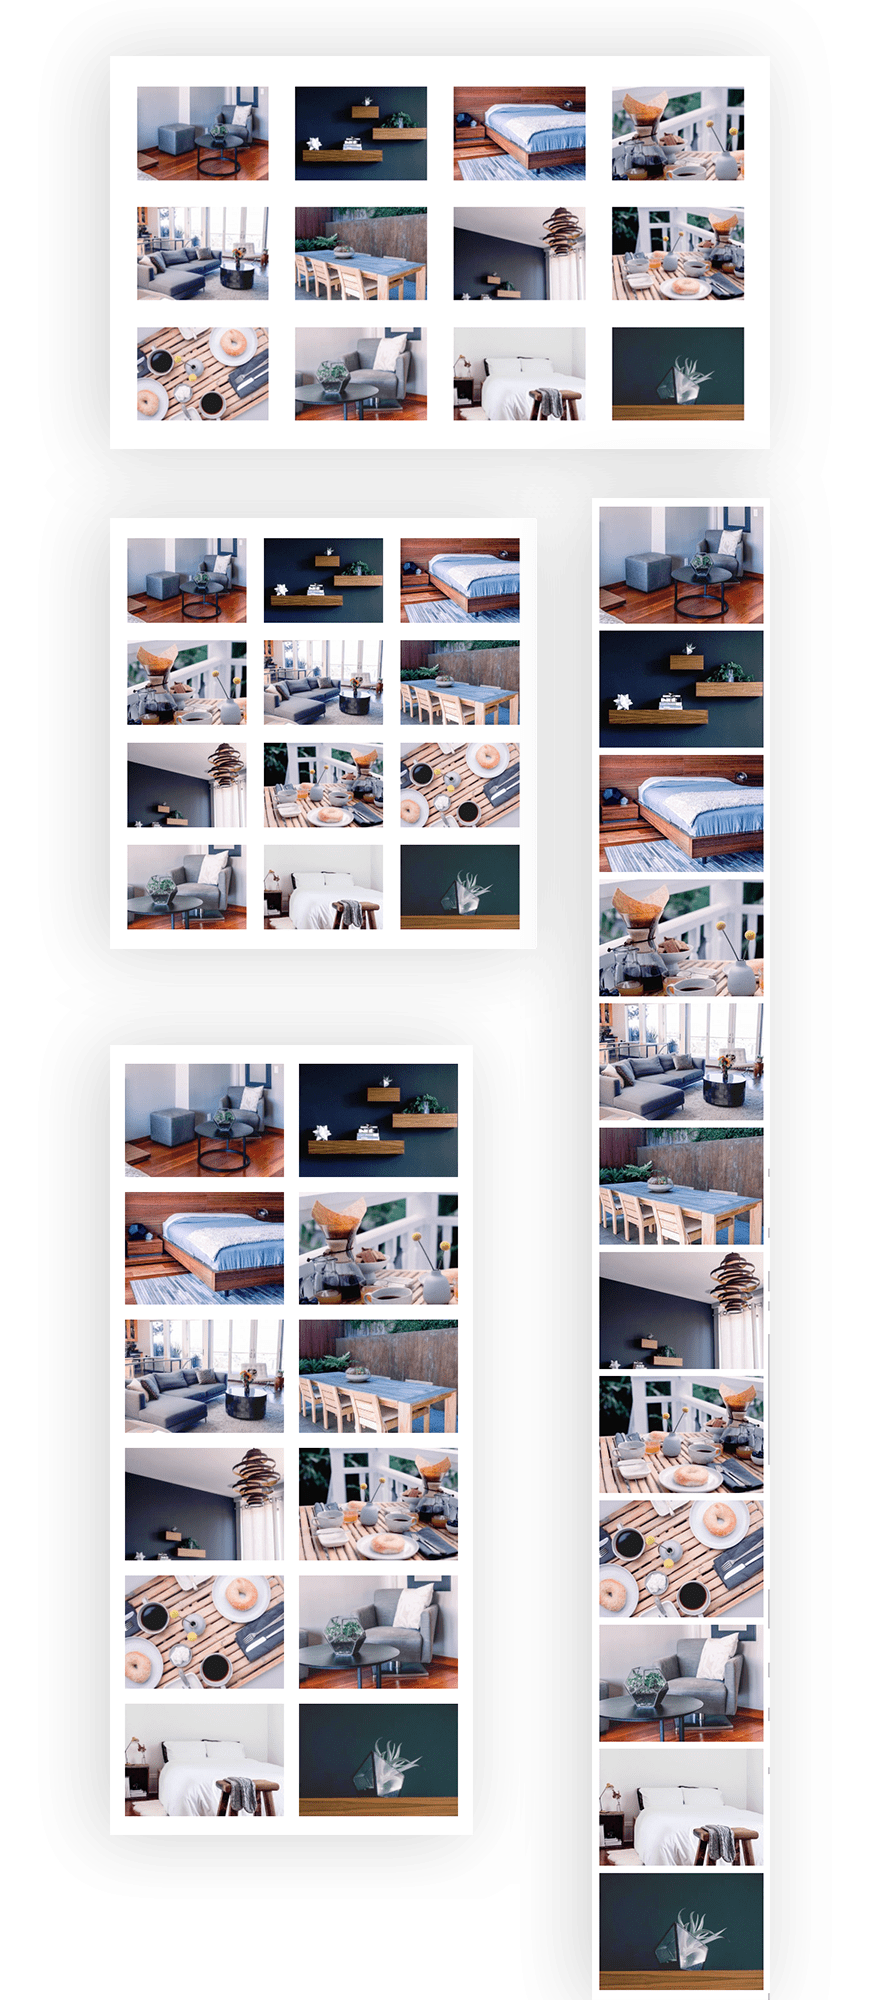
Here is what it looks like as you change the browser width.
Preparing Your Design Elements
Subscribe To Our Youtube Channel
For this tutorial, you will need the Divi theme installed and active. You will also need 12 images added to your media library to be used for the building the image gallery. For a Divi gallery module using a grid layout, the size of your images should be around 1500px by 800px if you plan on your images opening up in lightbox display so that it fills the screen nicely on most desktops.
Implementing the Custom Spacing for the Divi Gallery Module
Setting up your New Page
For starters, you will need to create a new page, give your page a title, and deploy the Divi Builder. Select the option “Build from Scratch” and then publish your page. Then click to build on the front end.
Creating the Tiled Gallery
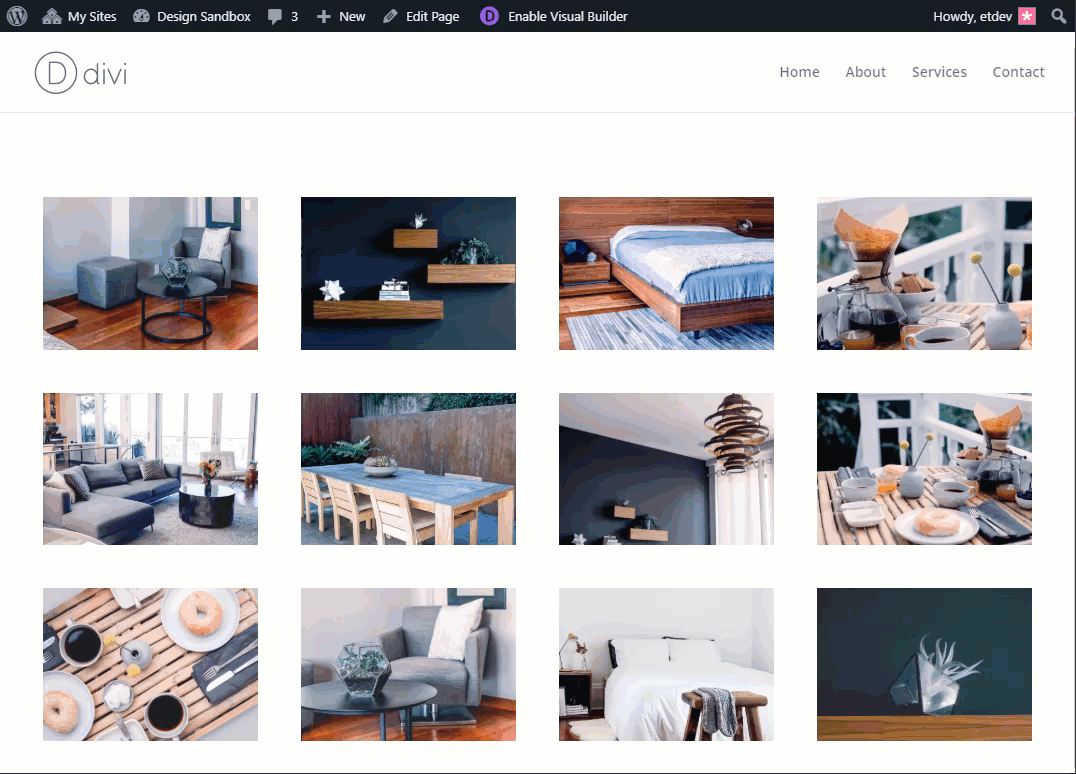
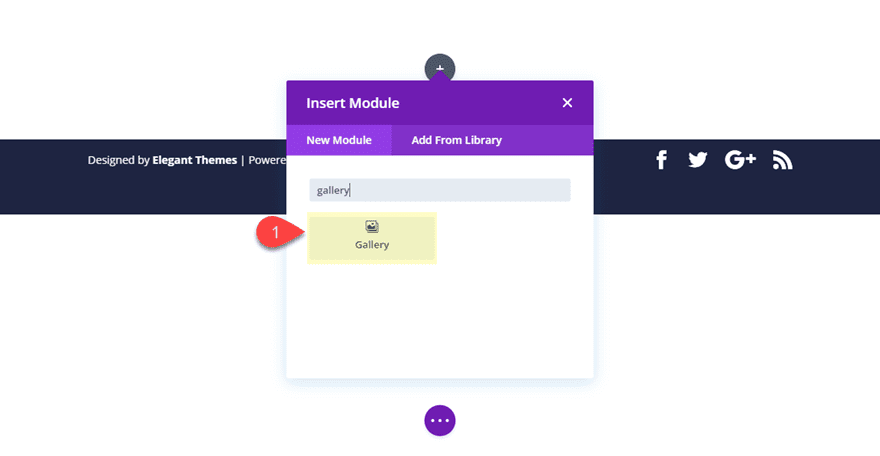
With the Divi Builder deployed, go ahead and create a new regular section with a one-column row and add a Divi Gallery Module to the row.
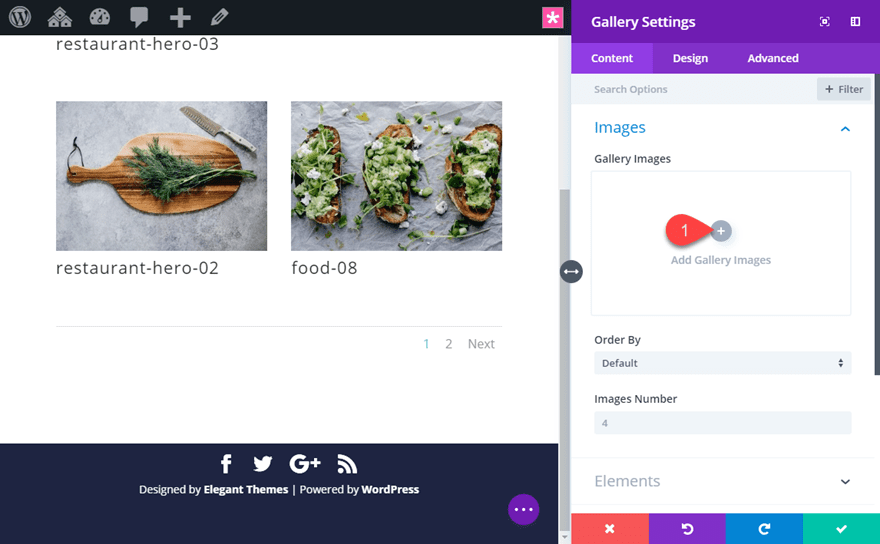
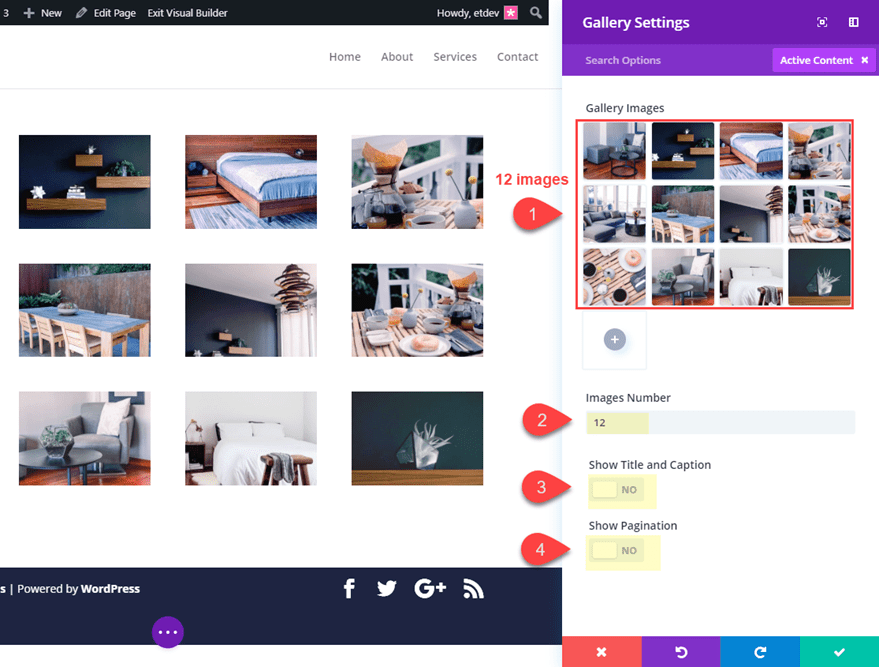
Then click the gray plus icon to add 12 images to the gallery.
Then update the Divi Gallery Module settings as follows:
Images Number: 12
Show Title and Caption: NO
Show Pagination: NO
That was easy enough. I’m going to leave the default styling in place so that we can focus more on spacing the images in our grid layout.
Creating a Full Width Gallery by Adjusting the Row Settings
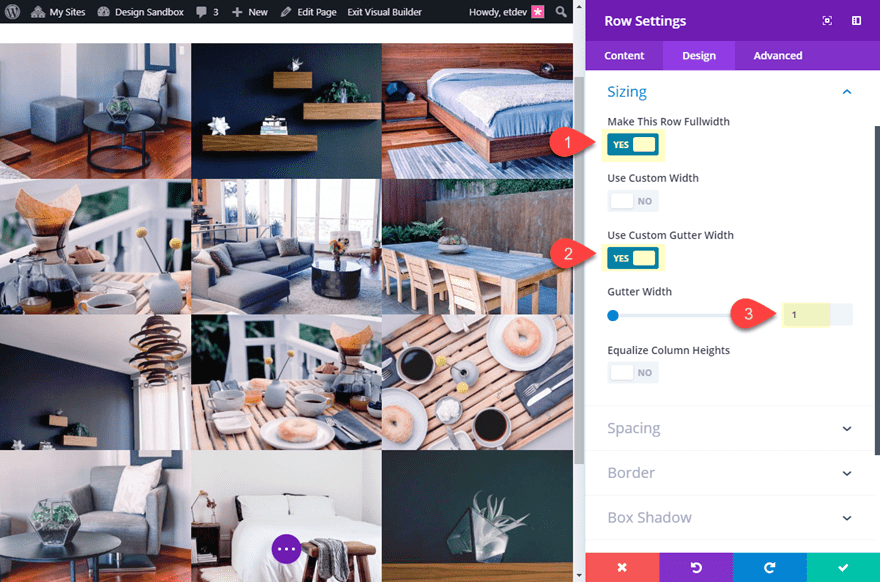
For this image gallery layout, I want to make the gallery fullwidth. This will best demonstrate the custom spacing that will be applied around each of our images. And since we are going to use custom padding instead of gutter width (margins) to space out the images, we want to get rid of the gutter width altogether. To do this, open the row settings and update the following:
Make This Row Fullwidth: YES
Gutter Width: 1
In case you were wondering, the values for gutter width range from 1 to 4 and represent the following:
1 represents zero margin between columns.
2 represents a 3% right and bottom margin between columns.
3 represents a 5.5% right and bottom margin between columns.
4 represents a 8% right and bottom margin between columns.
By setting the gutter width to 1, the images have 0 margin between them.
This simple setup will allow you to gain full control over the amount of spacing you want between the images using a different set of options in the Divi gallery module settings.
Creating Custom Spacing Between Images by Adjusting Gallery Module Settings
There are two ways you can add spacing between the images in your gallery – with image borders or with custom padding. Using image borders to create spacing is easy enough. Simply adjust the border width to create the exact amount of space you need between the images. You can even choose a different color for the border, but if you set the border to transparent, you will be able to see the row background color which is a bit cleaner.
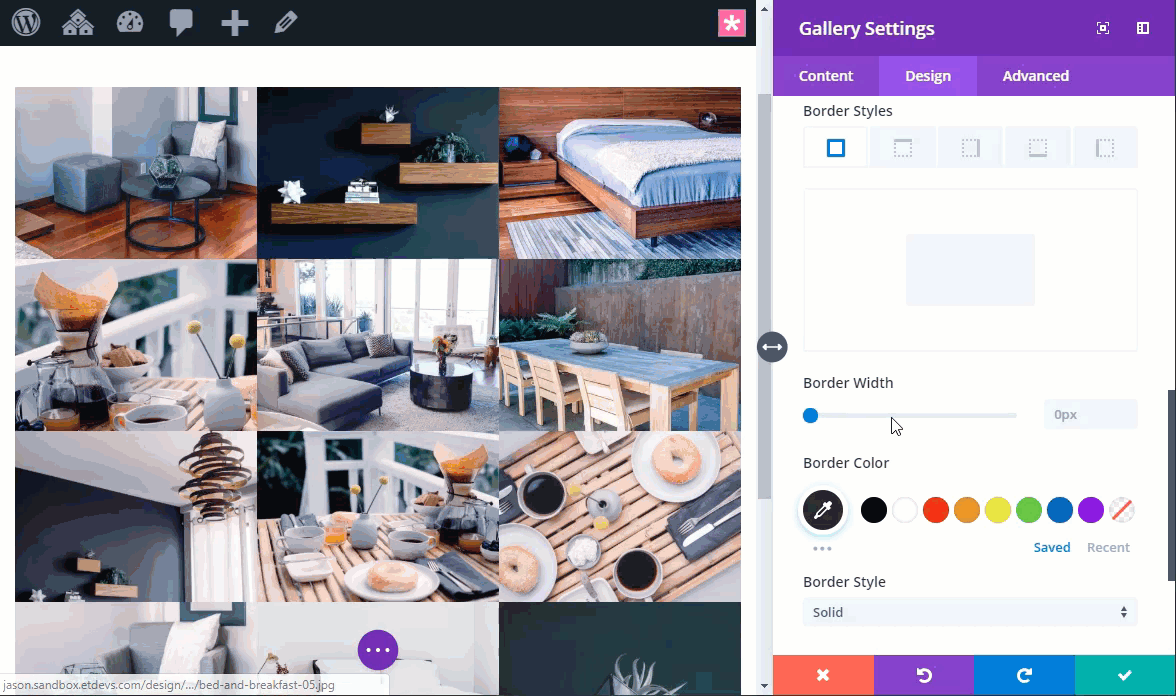
Using borders can be useful to add custom spacing, but you will probably want the ability to design a border for your images that is separate from the custom spacing. That’s why it is best to use custom padding around your images.
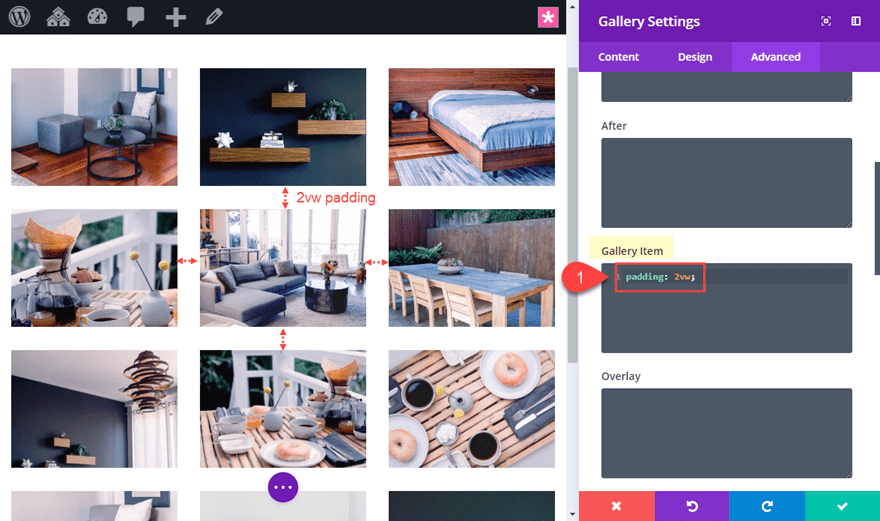
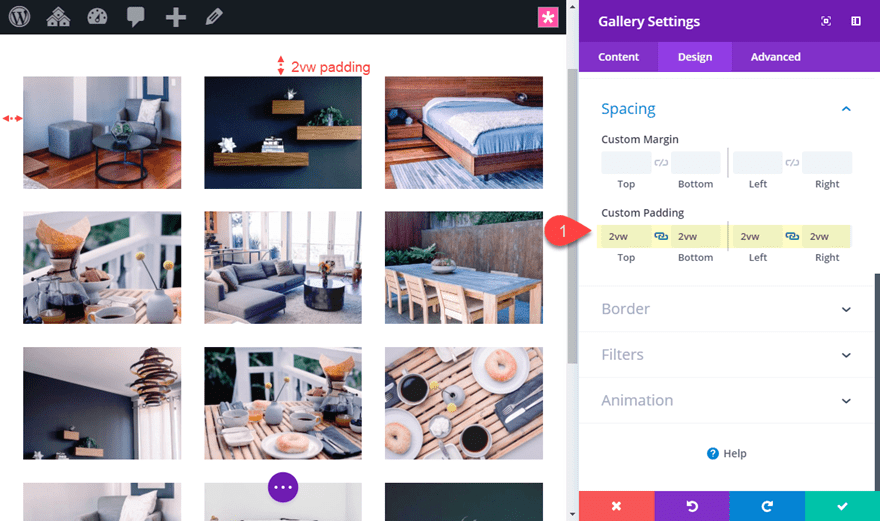
For this example, we’re going to add a 2vw padding around each image. You can use any length unit you prefer (px,em,%) but I really like the vw length unit because it is relative to your browser’s viewport (or browser) width. This means that it will increase in length as the browser width increases and it will decrease in length as the browser decreases. This is great for responsive design because you don’t have to worry about setting separate padding values for tablet and smartphone.
To set the custom padding, open the Divi Gallery Module settings and add the following custom CSS to the Gallery Item:
padding: 2vw
Now we need to add the same custom padding value to the Divi gallery module to match the spacing on the edges of the gallery. Go to the design tab and add the following custom padding to the module:
Custom Padding: 2vw top, 2vw bottom, 2vw left, 2vw right
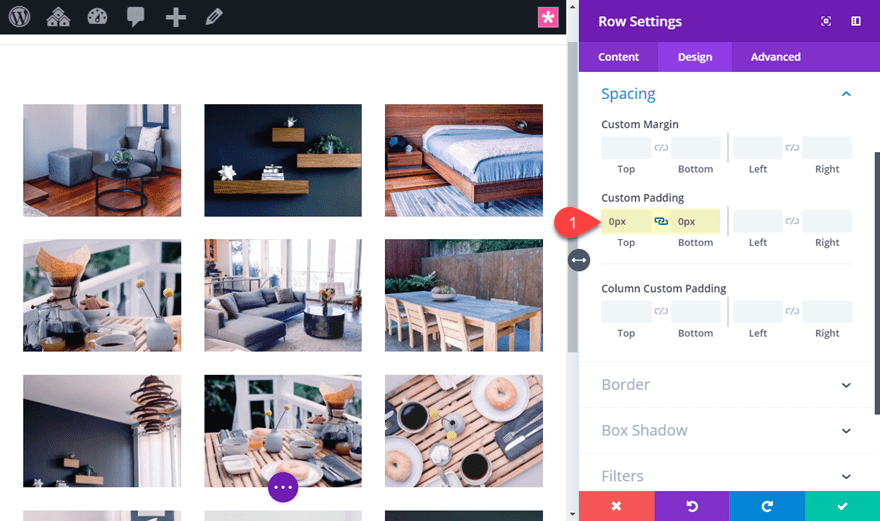
Now open the row settings and get rid of the top and bottom default padding so that there is equal amounts of padding around the module inside the row. Open the row settings and update the following:
Custom Padding: 0px top, 0px bottom
Final Result
Here is the final result on different browser widths. Notice the slight change in spacing as the 2vw padding scales according to the width of the viewport.
Here is what it looks like as you change the browser width.
Final Thoughts
I hope this simple design tip will help you fine tune the spacing of your galleries so you can create beautiful grid layouts for your images. And, this same technique also can be used for the portfolio module as well! Feel free to experiment with different length units to meet your needs and try out different row background colors and gradients as well.
I look forward to hearing from you in the comments.
Cheers!


This is a nice function that I have used for several clients. However – since you HARD-CODE the thumbnail sizes to 400px widht – the images gets blurry when you use the full-width row settings with little or no spacing between the images. You really need to fix this so we don’t have to setup a child-theme and edit in the php code to get this working properly. Some simple option to set the wanted thumbnail sizes in the gallery module settings would be great! :-)
This is same happening with me, images are getting blurry because image width is setup as 400px . That would be great if we get more flexibility on this
Great Jason….when a user visits, is it possible to show 12 random images from a collection of say 36 images so that each time a user visits they see diffrent images?
Really easy to follow! Thanks so much.
Nicely done. Thanks as always…
Very interesting article. How does this portfolio behave when there are also vertical images? Is it possible to have a “Masonry” look?
Thanks for always providing helpful and regular information.
Wonderful! Easy to follow. Can’t wait to try it.
Thanks Jason!!
Fabulous run through – thank you. I’m just creating a gallery for a photographer, so this will be really useful. Perfect timing.
That’s exciting! Glad it helped you, Vicky.
Really appreciate this. Very helpful.
This is great. Is there a way to link the gallery images to a page or custom taxonomy?
Tim,
Good question. Unfortunately I’m not sure there is an easy way to do this. You may be better off building a grid layout using a row with a custom column structure and using individual image modules. That would give you the ability to set the image link to whatever you want for each one.
I tried it with a portfolio grid. Works perfectly!
I have the same question!