
")
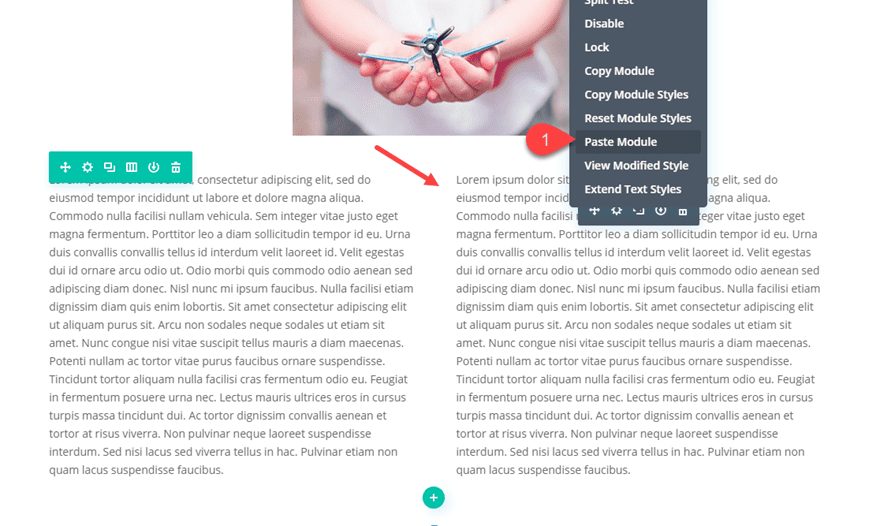
Wrapping text around images is a common design technique most commonly found in print media like magazines and newspapers. But you can also find this being used on the web, especially for blog posts. Wrapping text around an image is actually a pretty standard part of WordPress involving a simple alignment adjustment on the WYSIWYG editor. The only problem is that it is difficult to customize the style of your page using the default WordPress editor. That’s where Divi can help!
In this tutorial, I’m going to show you 3 ways you can use Divi to wrap text around images. This will allow you to create classic print style layouts with the power of Divi to help you with the design. Here is what we are going to cover:
- How to Wrap Text Around Images (and Blockquotes) Inside a Text Module with WYSIWYG Editor
- How to Wrap text around an Image by Floating an Image Module Next to a Text Module in Divi
- How to Wrap Text Around a Centered Image for a Unique Two-Column Layout
Although this tutorial will concentrate on images, you can actually use this same process to wrap text around any module in Divi.
- 1 Sneak Peek
- 2 Download the Wrapping Text Around Images Layout for FREE
- 3 Download For Free
- 4 You have successfully subscribed. Please check your email address to confirm your subscription and get access to free weekly Divi layout packs!
- 5 What You Need to Get Started
- 6 How to Wrap Text Around Images and Blockquotes Inside a Text Module with WYSIWYG Editor
- 7 How to Wrap Text Around an Image by Floating an Image Module Next to a Text Module in Divi
- 8 How to Wrap Text Around a Centered Image or Module for a Unique Two-Column Layout
- 9 Final Thoughts
Sneak Peek
Here is a sneak peek of the main design we will build today.

Let’s get started!
Subscribe To Our Youtube Channel
Download the Wrapping Text Around Images Layout for FREE
To lay your hands on the designs from this tutorial, you will first need to download it using the button below. To gain access to the download you will need to subscribe to our newsletter by using the form below. As a new subscriber, you will receive even more Divi goodness and a free Divi Layout pack every Monday! If you’re already on the list, simply enter your email address below and click download. You will not be “resubscribed” or receive extra emails.

To import the layout to your page, simply extract the zip file and drag the json file into the Divi Builder.
Let’s get to the tutorial shall we?
What You Need to Get Started
To get started, all you need is Divi and a few images.
- Divi – Make sure the Divi Theme is installed and active. We will be creating our designs from scratch using the Divi Builder on the front end (visual builder).
- Images – Also, make sure to have at least one image that is 400px by 250px to use for the tutorial.
When you are ready, go to your WordPress Dashboard and navigate to Pages > Add New. Give your new page a title and deploy the Divi Builder on the front end. Select the option “Build from Scratch”. Now you are ready to go!
How to Wrap Text Around Images and Blockquotes Inside a Text Module with WYSIWYG Editor
WordPress makes it easy to wrap text around images using the default WordPress (WYSIWYG) editor. And because Divi’s text module has the same WordPress WYSIWYG editor built-in, we can use the same method WordPress users have always used to wrap text around images.
Here’s how to do it.
Create a regular section with a one-column row and then add a text module to the row.
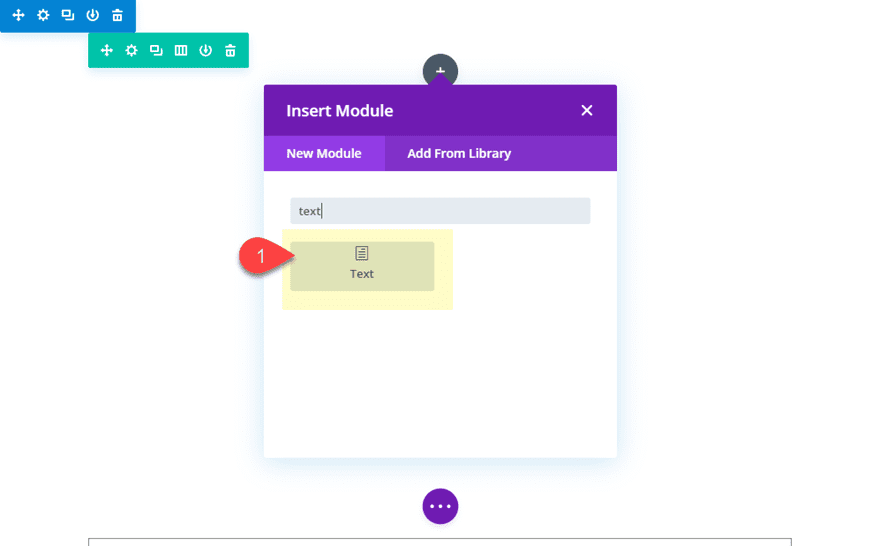
Update the content of the text module with your copy. For now I’m using a couple of paragraphs of lorem ipsum.
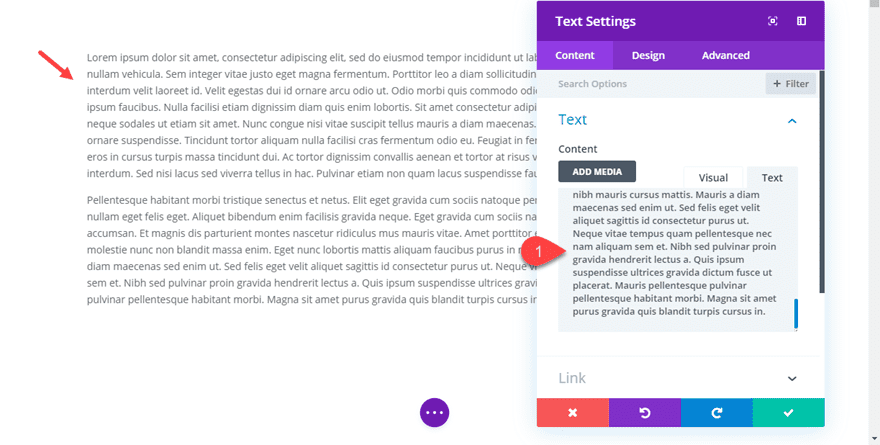
Now if you haven’t already, select the visual tab on the content editor. Then make sure to click the top of the content area where you want to add an image and click the Add Media button.
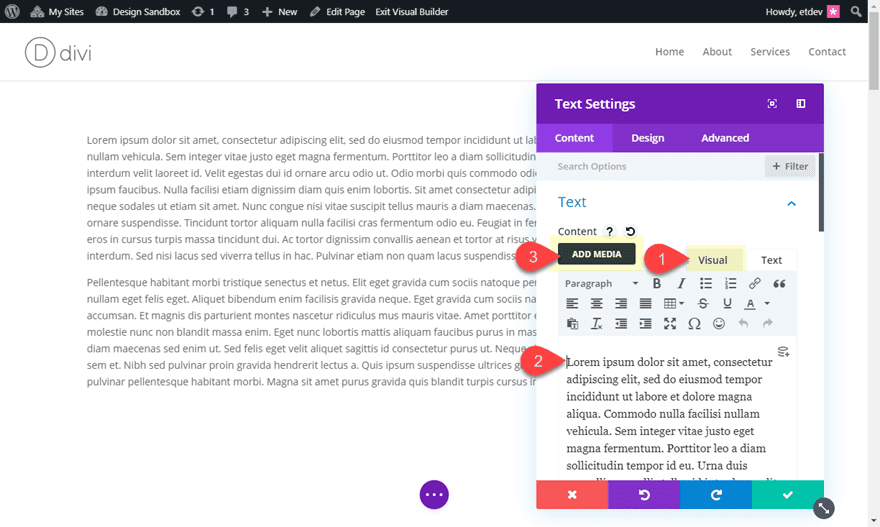
In the media library popup, select the image you want to use. And under the attachment display settings choose either left or right for the alignment option. For this example, I want to position the image to the left.
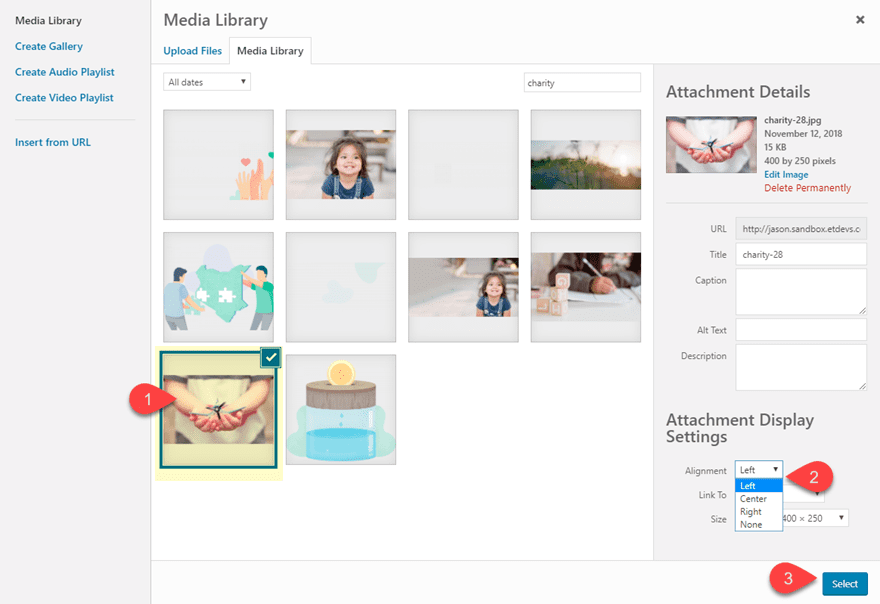
WordPress will add a class to your image (called “alignleft”) which will float the image to the left. The float property that is added will allow the text to wrap around the image. WordPress will also add a buffer around the image using margins to create little spacing between the image and the surrounding text.
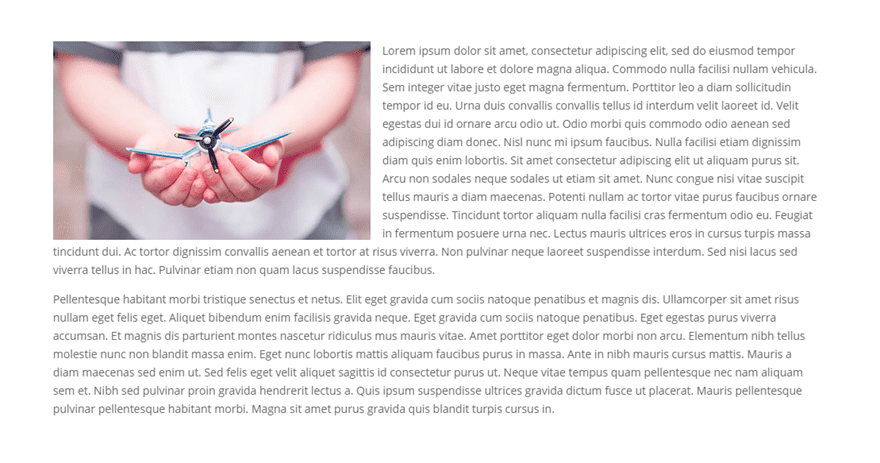
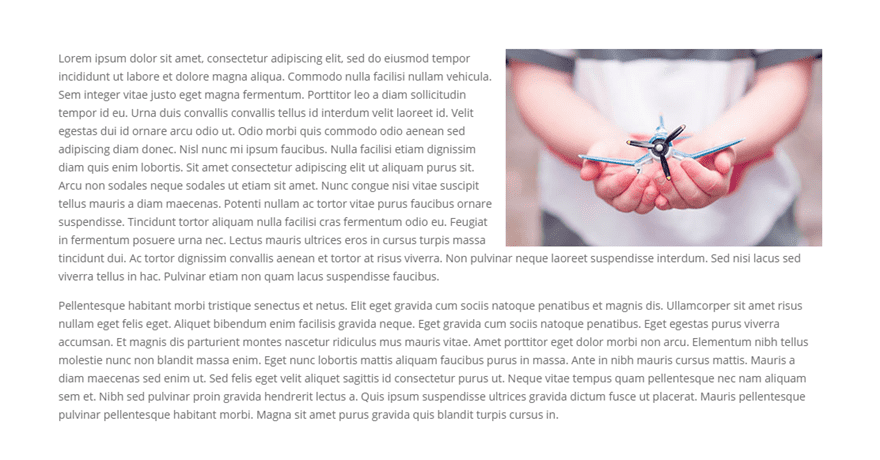
And, of course, if you give the image a right alignment, the image will float to the right allowing the text to wrap around the image.
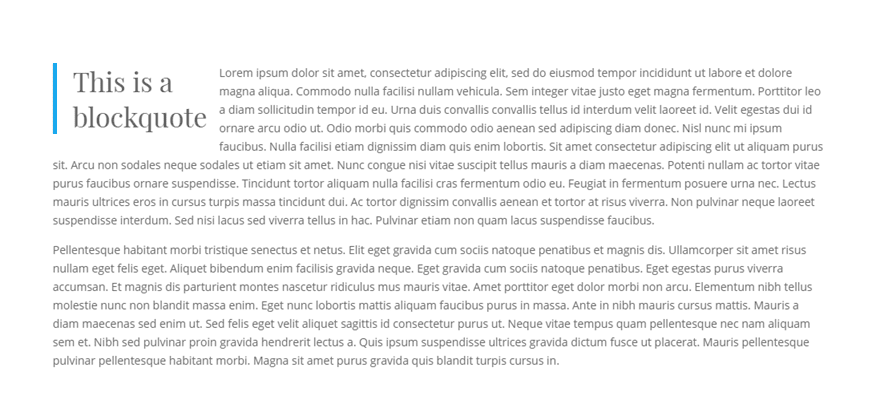
You can also use a similar technique to wrap text around a blockquote in a text module. To do this, create a blockquote using the Content editor.
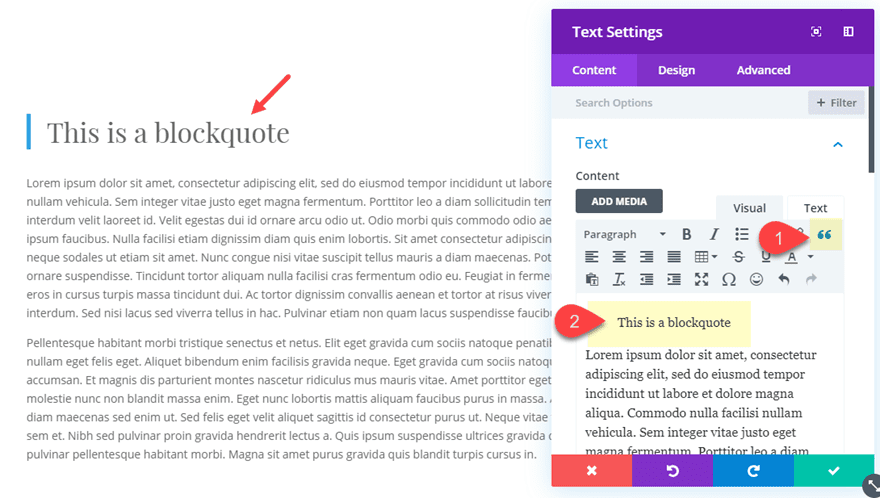
Then style the blockquote using the built-in text modules settings for a blockquote.
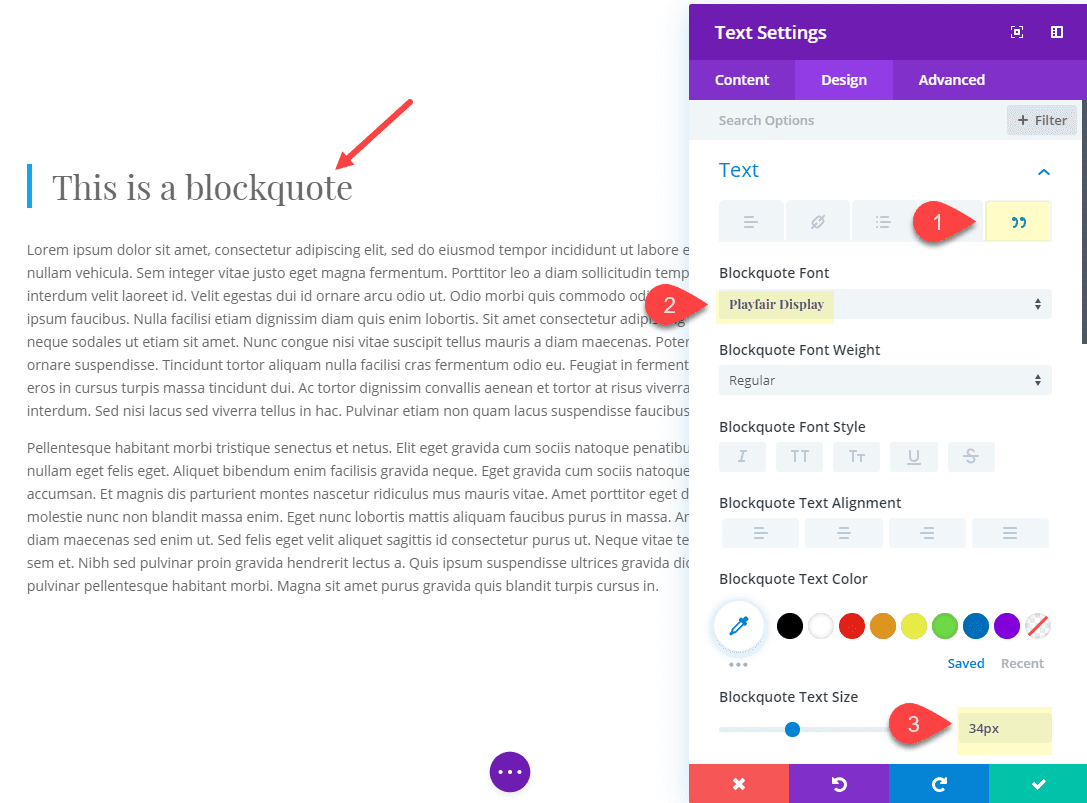
Then go back to the content editor and switch over to the text tab. Then add some inline styling to the blockquote tag to create some spacing around the blockquote and float it to the left. Your blockquote html should look something like this.
<blockquote style="margin: 0 15px 15px 0; float:left;">This is a <br> blockquote</blockquote>
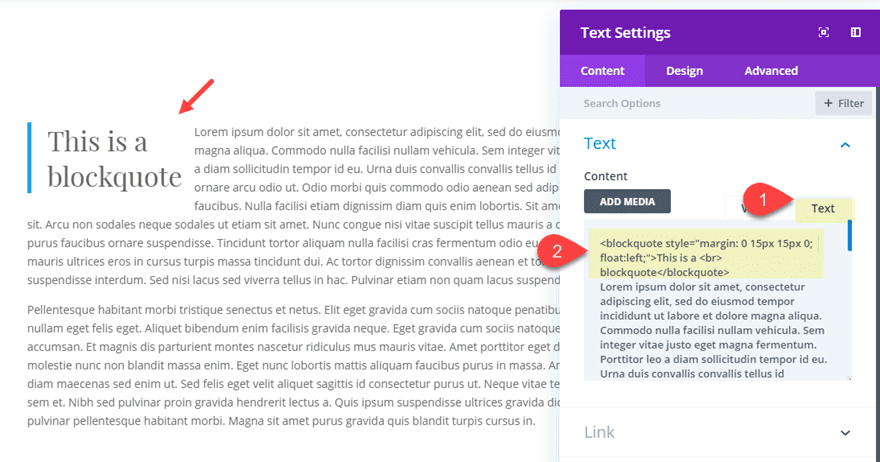
Now the text will wrap around the blockquote.
How to Wrap Text Around an Image by Floating an Image Module Next to a Text Module in Divi
To wrap text around an image module, we can float the entire image module next to a text module. This may be a preferred method to using the WordPress editor above because it allows you full control over the style of your image using the Divi builder settings instead of adding inline styling or external css to an image tag.
Here’s how to do it.
Create a new regular section with a one-column row. Then add an image module to the row with the image of your choosing. The image I’m using is from the Charity Layout Pack and is 400px by 250px.
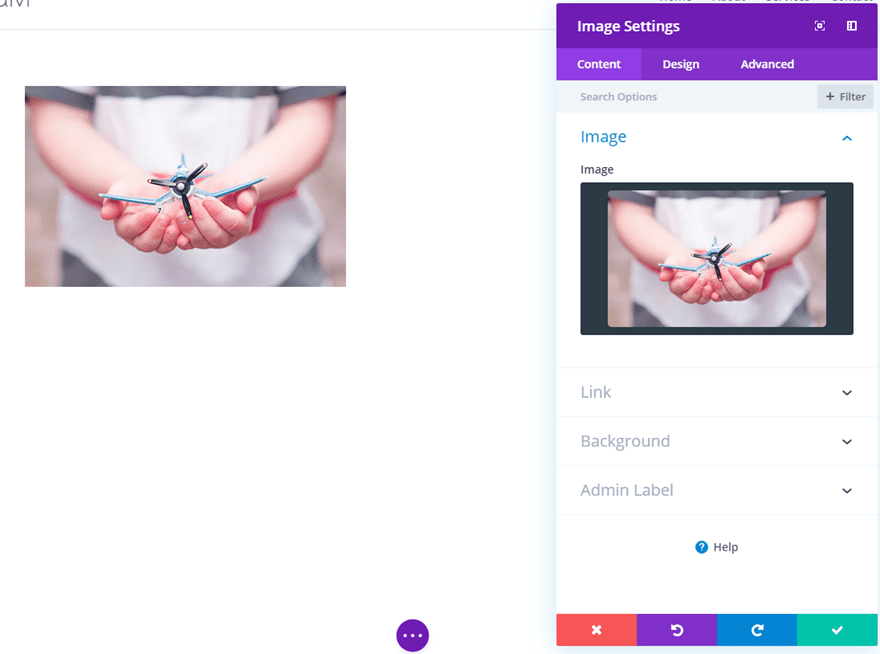
Then add a text module under the image module with some mock text content.
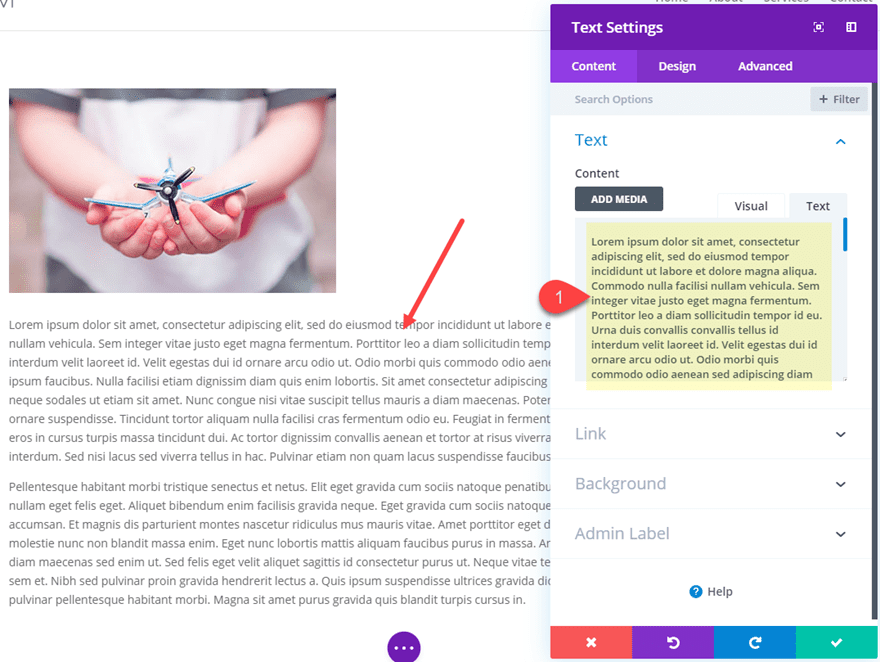
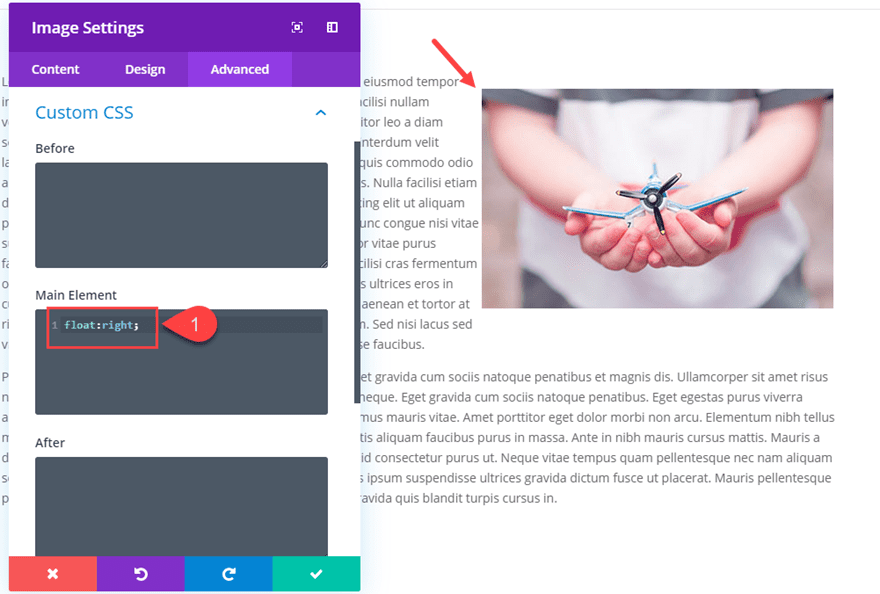
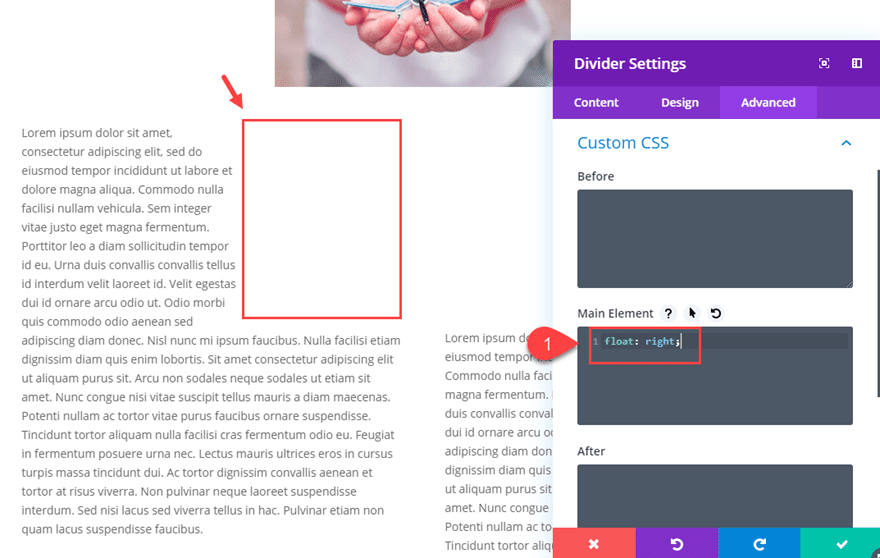
Now with both modules in place, we need to float the image to the left of the text module. To do that, open the image module settings and add the following custom CSS to the Main Element:
float:left;
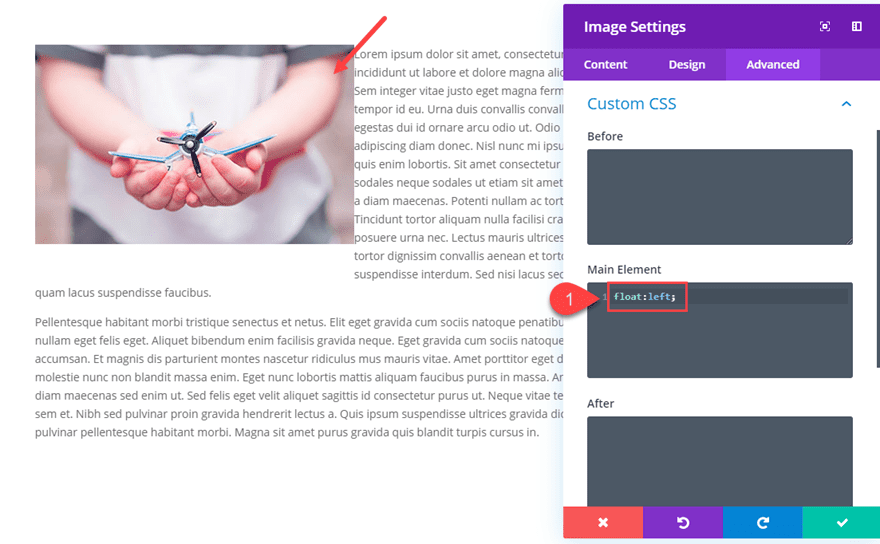
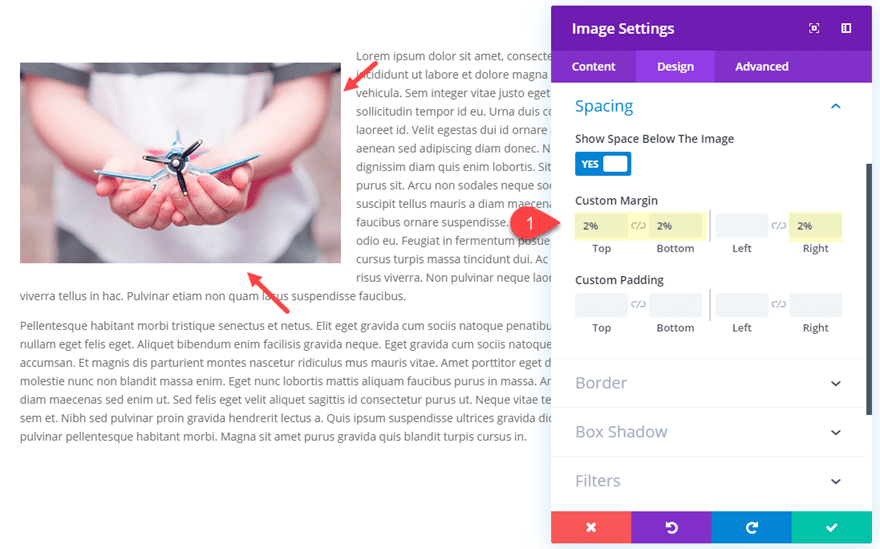
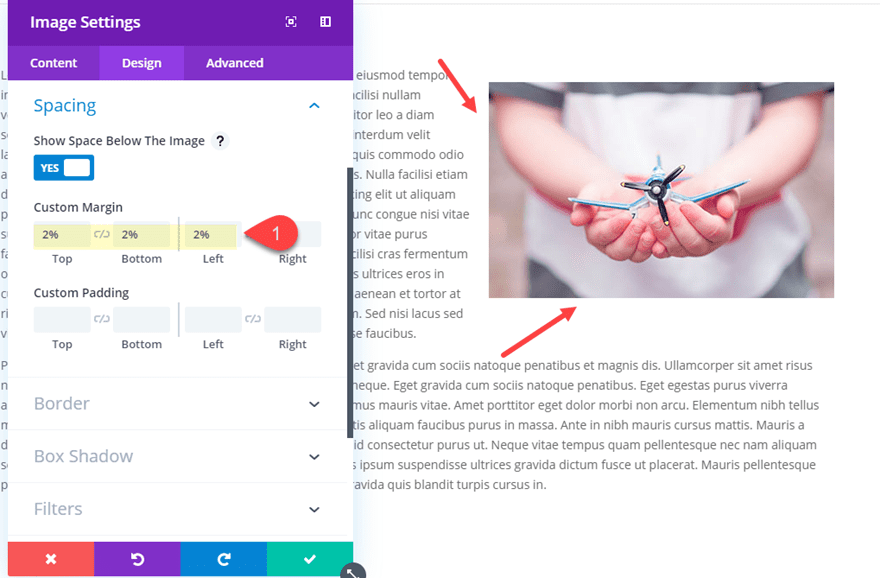
Then update the custom margin of the image to create the buffer we need for the text wrapping around the image:
Custom Margin: 2% top, 2% bottom, 2% right
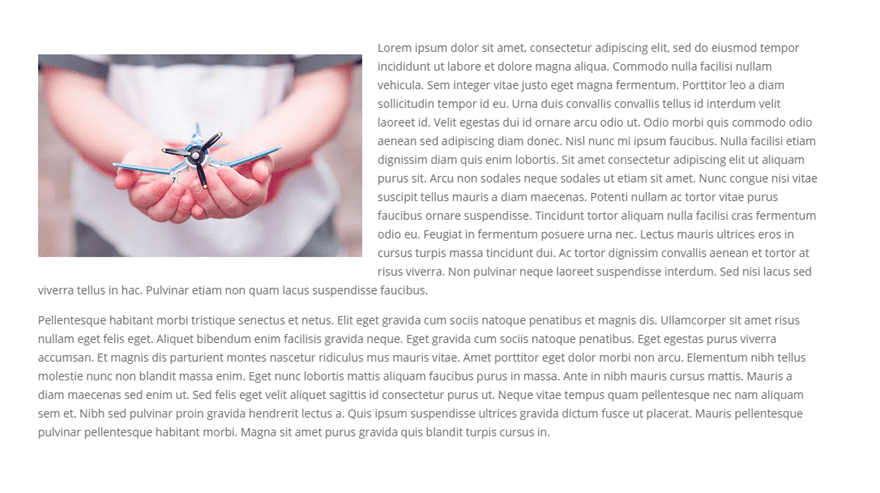
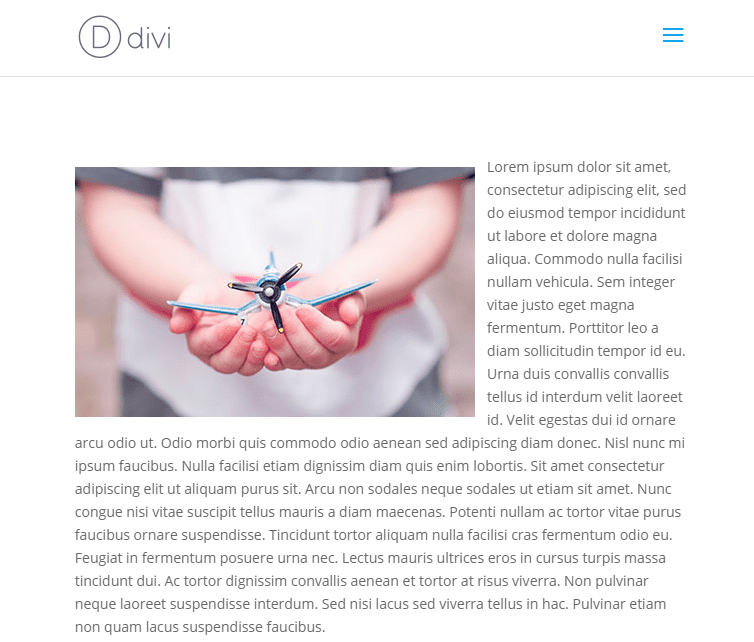
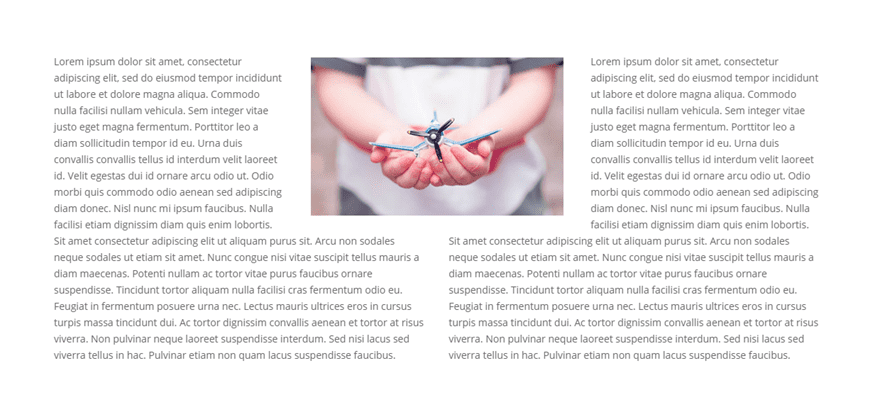
Here is the result.

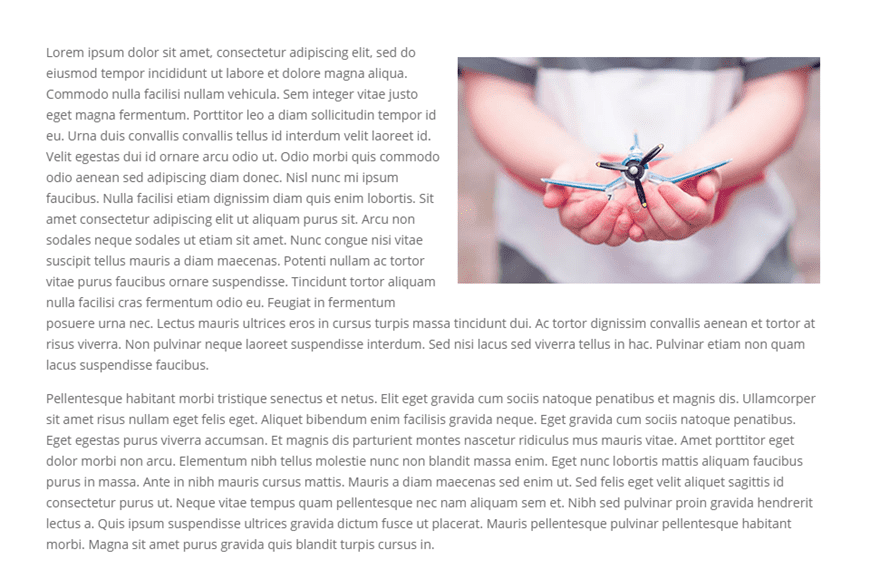
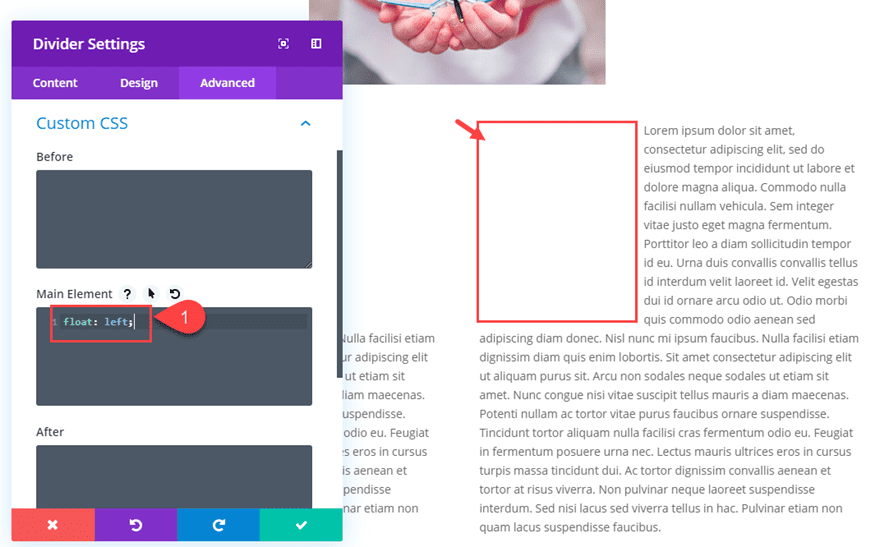
And, if you want to float the image to the right, open the image module settings and replace the css with the following:
float:right;
And update the margin spacing to the following:
Custom Margin: 2% top, 2$ bottom, 2% left
Here is the result.
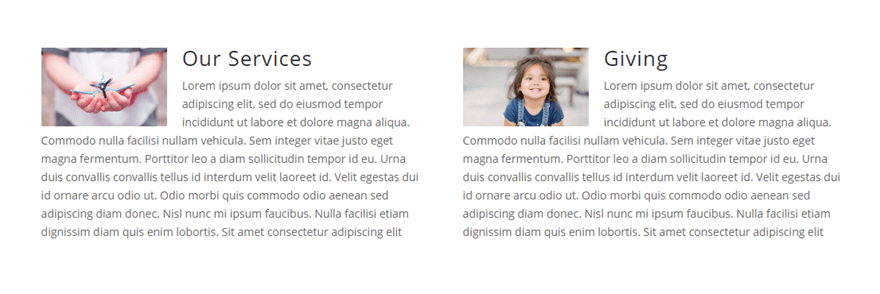
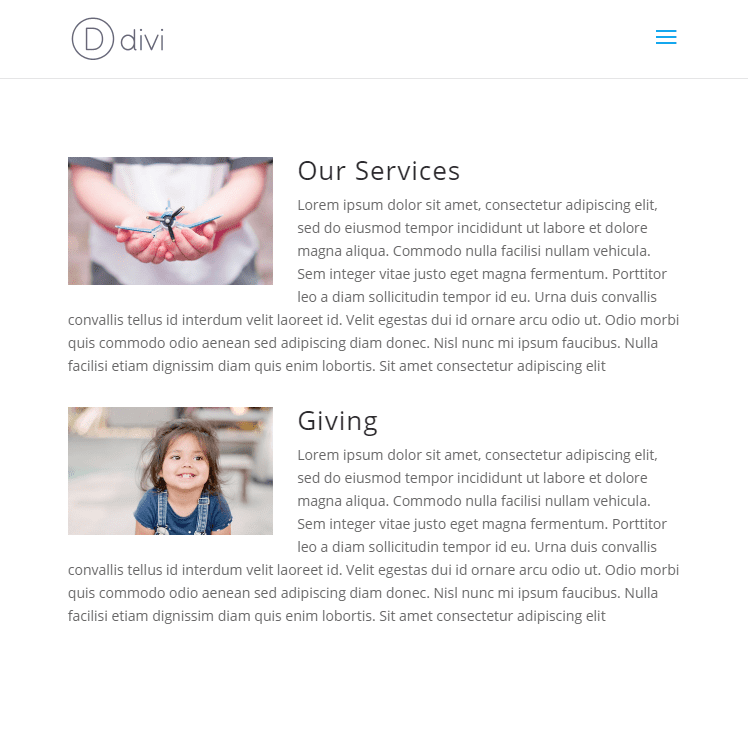
Using this design on multiple columns
You can also use this setup in multiple columns to create a text wrapping design for showcasing your services. To do this change your row’s column layout to two columns.
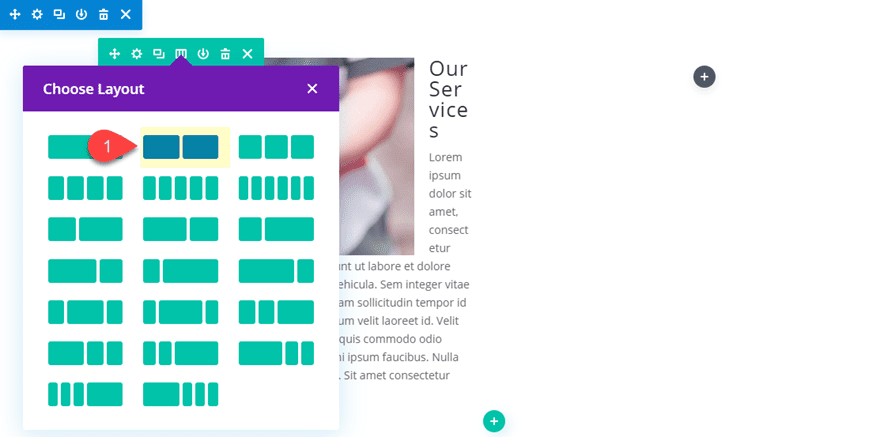
Then give the image a max-width percentage value so that it responds to different browser widths.
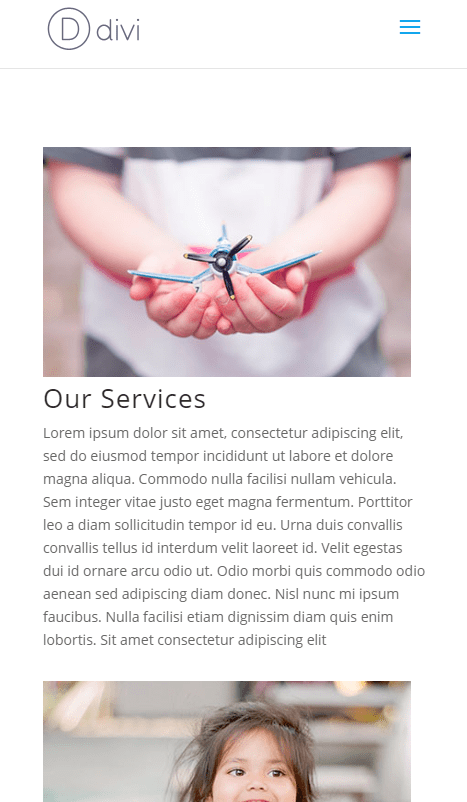
Max Width: 33.33% (desktop), 100% (phone)
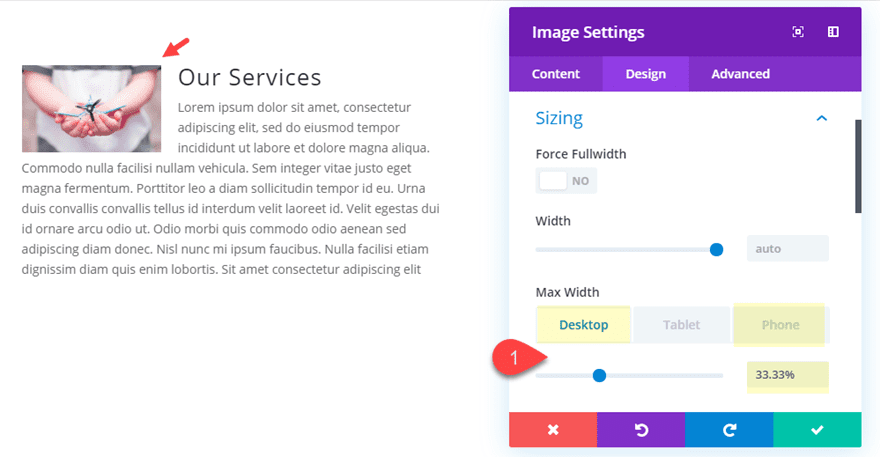
Copy the image and text module from the first column and paste them into column 2. Then update the content and images as needed.
That’s it. Here is the result.
How to Wrap Text Around a Centered Image or Module for a Unique Two-Column Layout
In this example, I’m going to show you how to wrap two columns of text around a centered image module. This allows you to create a unique magazine or newspaper style layout. But, since there is not “float: center” css property, we will need to get a bit creative with the layout for this design to work.
Here’s how to do it.
Creating the Top Row Content with a Centered Image
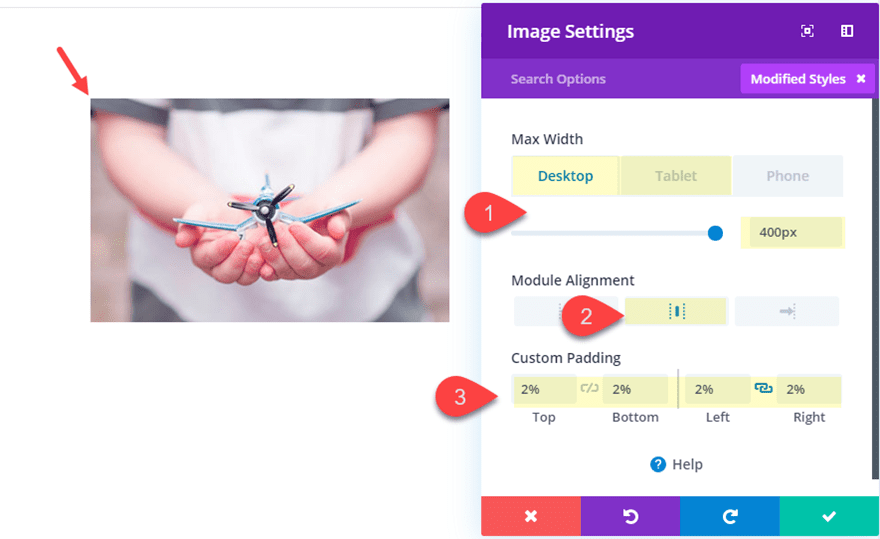
To start, create a new regular section with a one column row. Then add an image module to your row. Upload an image that is 400px by 250px. The sizing must be exact for this design.
Then update the design settings as follows:
Max Width: 400px (desktop), 100% (tablet)
Module Alignment: center
Custom Padding: 2% top, 2% bottom, 2% left, 2% right
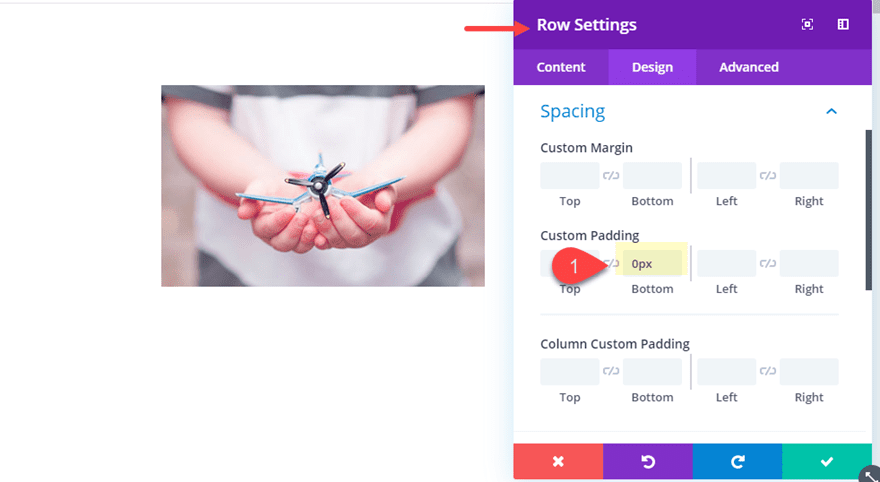
Then save your settings and open the row settings. Take out the bottom padding of the row.
Custom Padding: 0px bottom
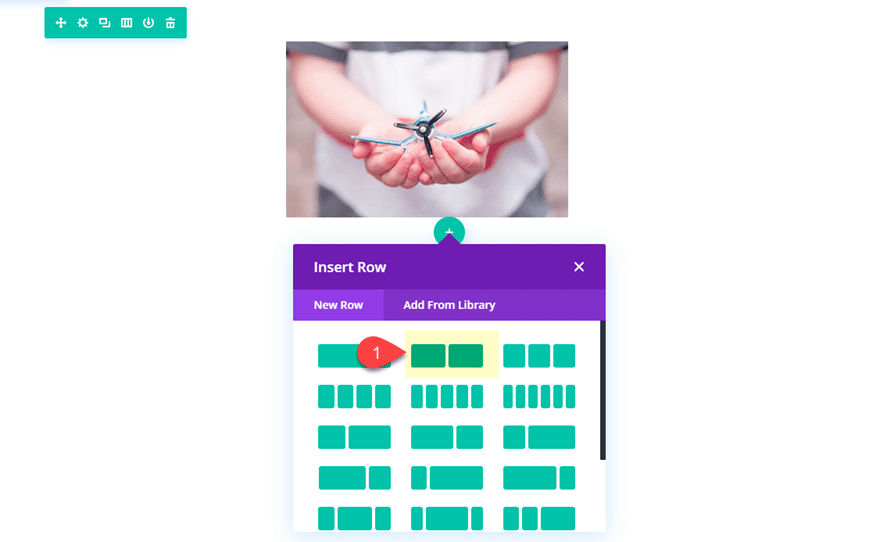
Create the Two Column Row of Text
Under the row containing the image, create a new row with a two-column layout.
In column 1, add a text module with some mock content.
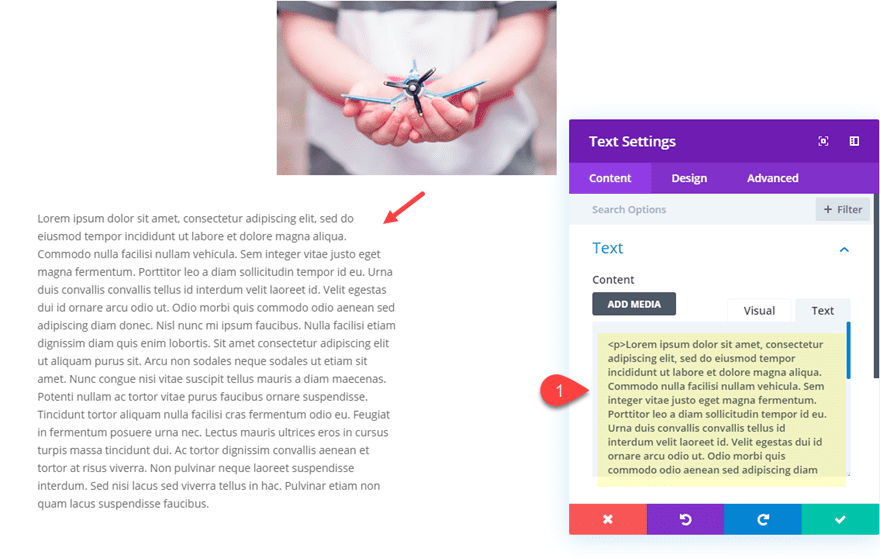
Then copy the text module and paste it into column 2 for a second column of text.
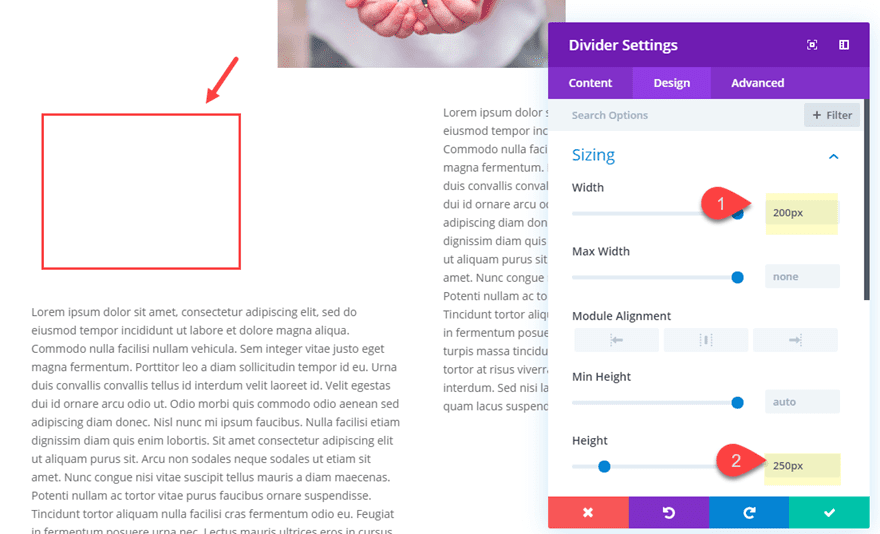
Creating Empty Space with Floated Dividers
To create the space we need for the image, we can use divider modules. On the left column we will create a divider module that is half the size of the image and float it to the right so our text module will wrap around the divider. Then in the right column we will create another divider that is half the size of the image and float it to the left.
To do this, create a divider module and place it directly above the text module in column 1.
Then update divider module settings as follows:
Show Divider: NO
Width: 200px
Height: 250px
Make sure the height is the same height of the image you created earlier and the width is exactly half the width of the image.
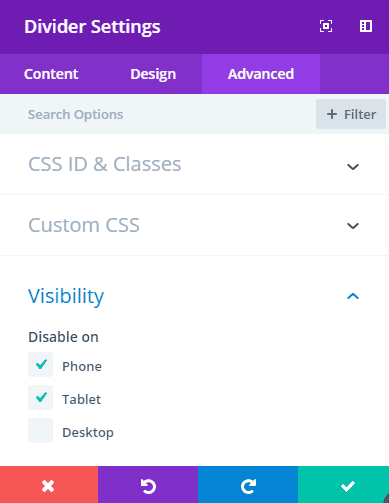
For mobile, we want to disable the dividers on tablet and phone. To do that update the visibility settings to disable the tablet and phone display.
Now that our first divider is created, copy the divider module and paste it above the text module in column 2.
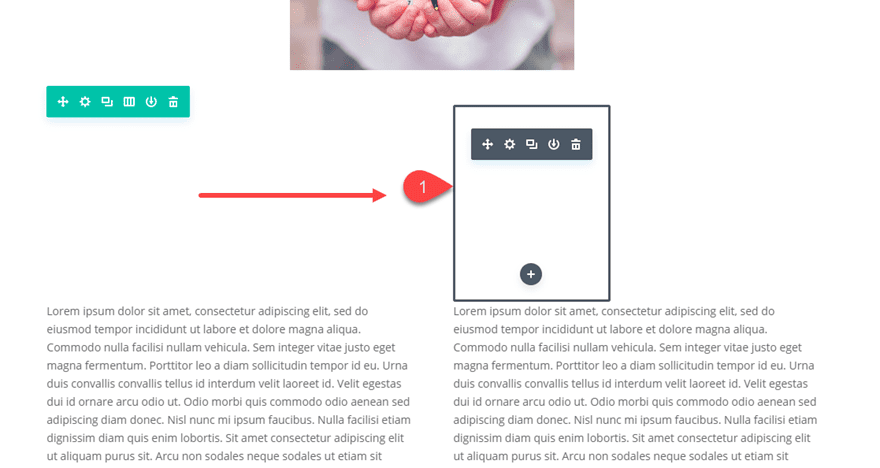
Next, we need to float our dividers. To do this, open the settings of the divider in column 1 and add the following custom CSS to the main element:
float: right;
Then, open the settings for the divider module in column 2 and add the following custom CSS to the main element:
float: left;
Moving the Image into Place with Custom Margin
Now all we need to do is bring down our image in the first row so that it fits inside the space we created with our dividers.
Open the image module settings and add the following custom margins:
Custom margin: -250px bottom (desktop), 20px (tablet)
Here is the result so far.
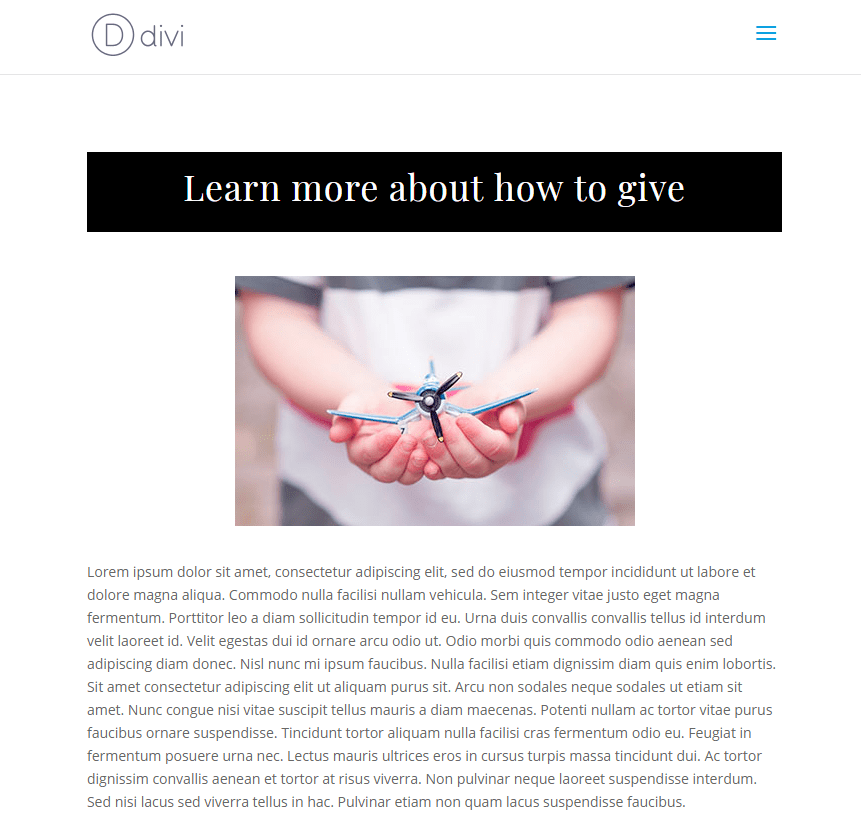
Adding a Title to the Section
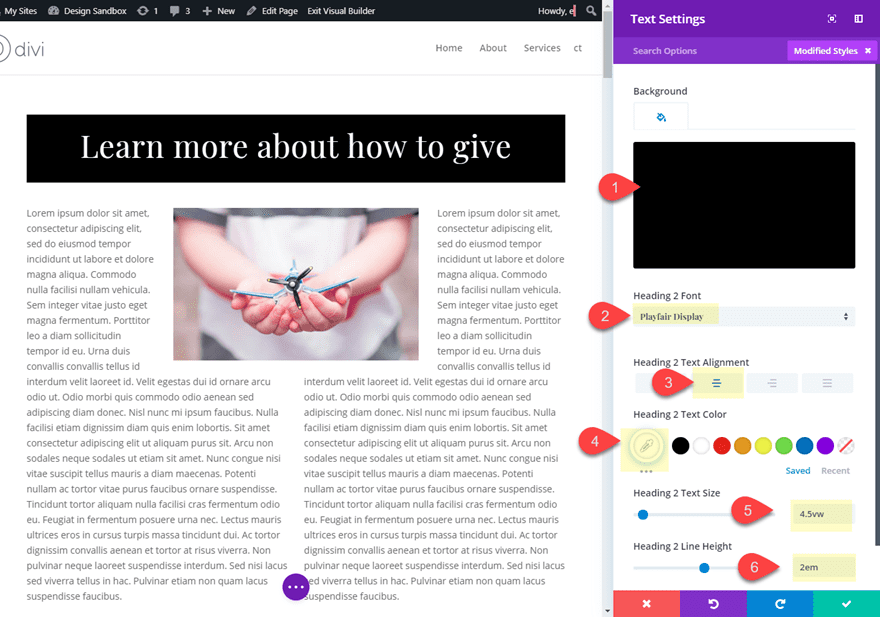
This last step is optional, but if you wanted to add a title to the section, create a text module and position it above the image.
Then add the following content to the text module:
<h2>Learn more about how to give</h2>
Then update the text settings as follows:
Background Color: #000000
Heading 2 Font: Playfair Display
Heading 2 Text Alignment: center
heading 2 Text Color: #ffffff
Heading 2 Line Height: 2em
Justify Text for Cleaner Text Wrapping Design
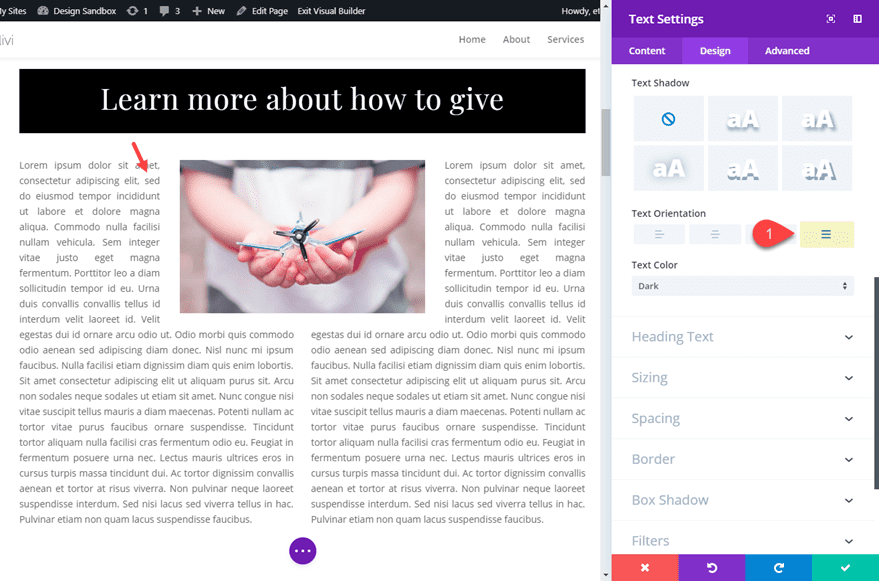
When wrapping text around images, especially if the text is centered like this, it is always a good idea to use justify the surrounding text. In this case, all we need to do is change the text orientation to justify for both text modules containing our wrapping text content.
Final Result
Here is the final result.
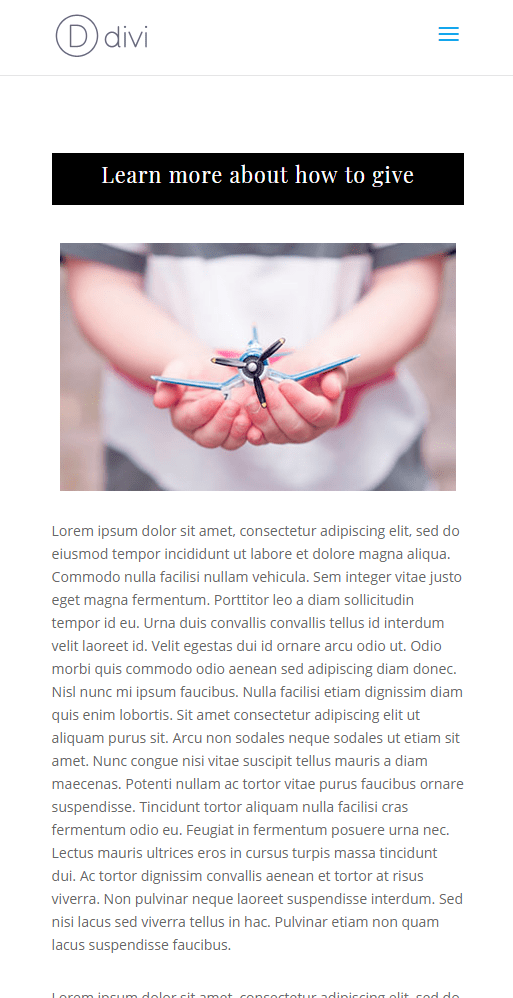
And here it is on tablet and phone display.
Final Thoughts
Knowing how to wrap text around images effectively can really make your content look professional and easy to read. The concept is pretty straight forward. All you need to do is float your image to the right or left and then use custom spacing around the image for buffer. And what I love is that you can float any module (not just images) to wrap text around any type of content in Divi. I hope this gives you a little inspiration for your next project.
I look forward to hearing from you in the comments.
Cheers!


hi Jason, you may have out missed the / before #two. as when i click on link section, it does point to that specific section! any thank you for the good and neat post, stylish way to presesent infor! i will incorporate in my blog/page!
divi-resources/how-to-wrap-text-around-images-in-divi-3-ways#two
thanks. How can you use method 2 with captions? I agree it’s preferable, but I usually use method one because the captions are inserted automatically and also word wrapped.
Is there part of this (or other directions) that I could use for wrapping text around the image in a blurb module? I haven’t really seen anything and couldn’t figure out how to do it. But this is very helpful for text modules at least, thanks so much!!
Kelly,
To wrap text around a blurb image, you will need to adjust the width of the blurb image (wrap) and float it to the left or right. Add the following CSS to the blurb image custom CSS box in the blurb module:
width: 33.33%;
float: left;
Wrapping Text Around Images Divi Layout.json file has only 63 kb size. This file shouldn’t be imported in this context tells me when I try to import it into Divi library. Please any suggestion. Thanks.
Nice work Jason, thx 🙂
You are most welcome, Miroslav. Thanks for the comment.
I downloaded the zip file Wrapping Text Around Images Layout but after extraction i don.t see json file in it. Is my comp. problem or the file isn’t there. thanks.
enestrumic,
Just tested it on my end and it is there for me. Are still having issues?
Is this Json file has only 64 kb? I see it now but uploading into library stops after few seconds with saying – This file shouldn’t be imported in this context. Thank you Jason and sorry that I am wasting your time.
enestrumic,
Don’t add it to the library first. Just drag it into a new page with the Divi Builder active (or use the portability feature in the builder’s settings menu).
O man, it worked perfectly. I will use these layouts for blog posts. I tried already and no problems. Vauuu. All hard work you did. Amazing. Thank you very much and the only advertisement I am gonna put on my web will be the elegant theme advertisement the because people should know how easy is to build a website and that all hard work you guys do and that you go above and beyond t help us maintain our websites. Thanks.
Awesome!
This is great, thank you!
I’ve often wanted to do this and just ended up frustrated with it so I look forward to giving this a try.
Cheers!
Thanks Jason,
that’s great.
Exactly what I needed! Have to try it to see how it works. Thanks
Obrigado pelo artigo. Trabalho com diagramação desde 1998 e sei o quanto é importante conseguirmos um bom resultado de diagramação para prender a atenção dos usuários. Tornar a navegação clean e moderna não é uma tarefa fácil, mas ao conseguir esse resultado temos uma taxa de retenção acima da média. COntinue escrevendo posts interessantes como este, obrigado.
Wow, that’s really nice – can’t wait to try it in an upcoming web site development.
However, I wonder if it is possible to have a multicolumn text module – I mean in ONE text module having 2 or more columns of text where 1 column text will flow into the next so it would fill up all columns to the same height when resizing the screen.
I know, this can be done by 2 or more text modules side by side but each time you change the text of one text module you have to rearrange the text in all modules to keep the same column height.
You can also add “column-count” stile attribute to your p tag. Something like this
Chris,
Not sure about that. Would be nice though. Thanks
Very simple.
In the Custom CSS tab, just put in the width that you want your column to be using. For instance:
column-width: 300px
To define space between columns, use:
column-gap: 50px
THIS is what I’ve been looking for! Thank you! Thank you! Thank you! I’ll have to try it out!
Awesome Julie! Hope it helps
A comprehensive post, thanks. Our clients are always struggling to wrap text around images so I’ve bookmarked this for future reference. Very helpful indeed.
That is so creative! Love the idea! Thank you Jason! 🙂
Great! Glad to help.