

Recently, our design team released a professional Photo Marketplace layout pack as one of our free Divi Layout Packs we have been giving away every week. Since this layout is really built to function as a marketplace, I thought it would be a great opportunity to introduce multi-vendor functionality. This is going to be valuable for marketplace owners wanting to expand the quantity of their products for their members and increase revenue for their store.
Today, I’m going to show you how to build a multi-vendor marketplace using the photo marketplace layout pack. The plugins I will be using are WooCommerce, Product Vendors, and WooCommerce Products Filter. I’ll be showing you how to properly setup the Product Vendors plugin to add and manage new vendors, create a vendor registration page, and more. I’ll also give you tips on how to use elements of the existing layout to create new (but necessary) pages for your marketplace.
Let’s get started.
- 1 The Setup
- 2 Setup Your Product Vendor Settings
- 3 Adding a New Vendor for your Marketplace (Manually)
- 4 Adding a New Vendor with a Registration Form
- 5 What Happens When a Vendor Fills out The Form?
- 6 Adding New Products
- 7 Managing Commissions
- 8 Add WooCommerce Products Filter
- 9 Add Products Filter to your Sidebar
- 10 Final Thoughts
The Setup
For the sake of time, I’m going to start this tutorial with the following steps already completed:
- Install and activate the Divi Theme
- Install and activate the following plugins:
WooCommerce
Product Vendors (by WooCommerce)
WooCommerce Product Filters - Download the Photo Marketplace Layout Pack and Import the Fashion_All.json file to your Divi Theme Library.
- Create new pages for each layout.
- Create your primary menu.
If you are confused by the setup listed above, you can find more detailed instructions on how to setup your layout properly by checking out these 10 steps for using a layout pack for your new project.
Once you have completed the steps above, you are ready to start.
Setup Your Product Vendor Settings
Once you have installed and activated the Product Vendor plugin for WooCommerce, you will have the ability to setup your vendor marketplace settings. From your wordpress dashboard, go to WooCommerce > Settings > Products > Vendors. Here you will find settings for how you want to handle vendor payments. After you have finished updating your settings, click Save Changes.
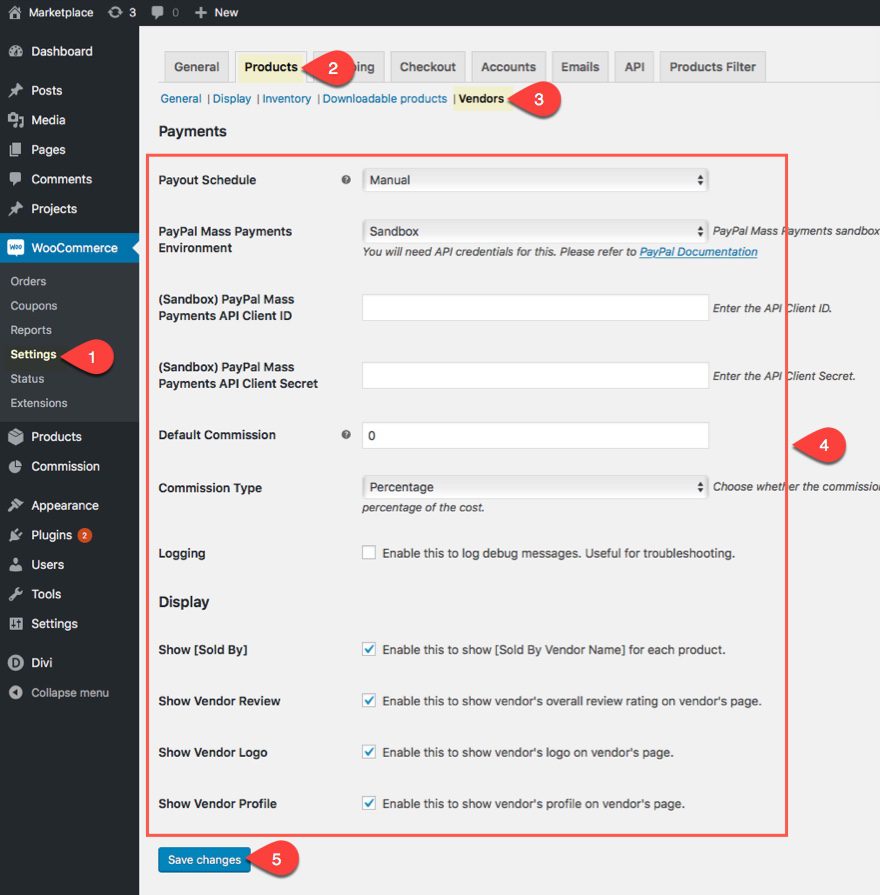
You will notice that there settings for Paypal Mass Payments. Paypal is really the only gateway that works seemlessly with the plugin. But the cool thing is that it utilizes the mass payments API to allow you to pay commissions to your vendors all at once.
Adding a New Vendor for your Marketplace (Manually)
There are two ways to add a new vendor to your marketplace. You can add each vendor manually or create a registration form that allows the vendor to do it. To add a vendor manually, complete the following:
- navigate to Products > Vendors
- Add a new name for your vendor
- Add a slug for your vendor
- Click the additional settings right under the slug input box.
- Fill in the info for your new vendor
- Save Settings
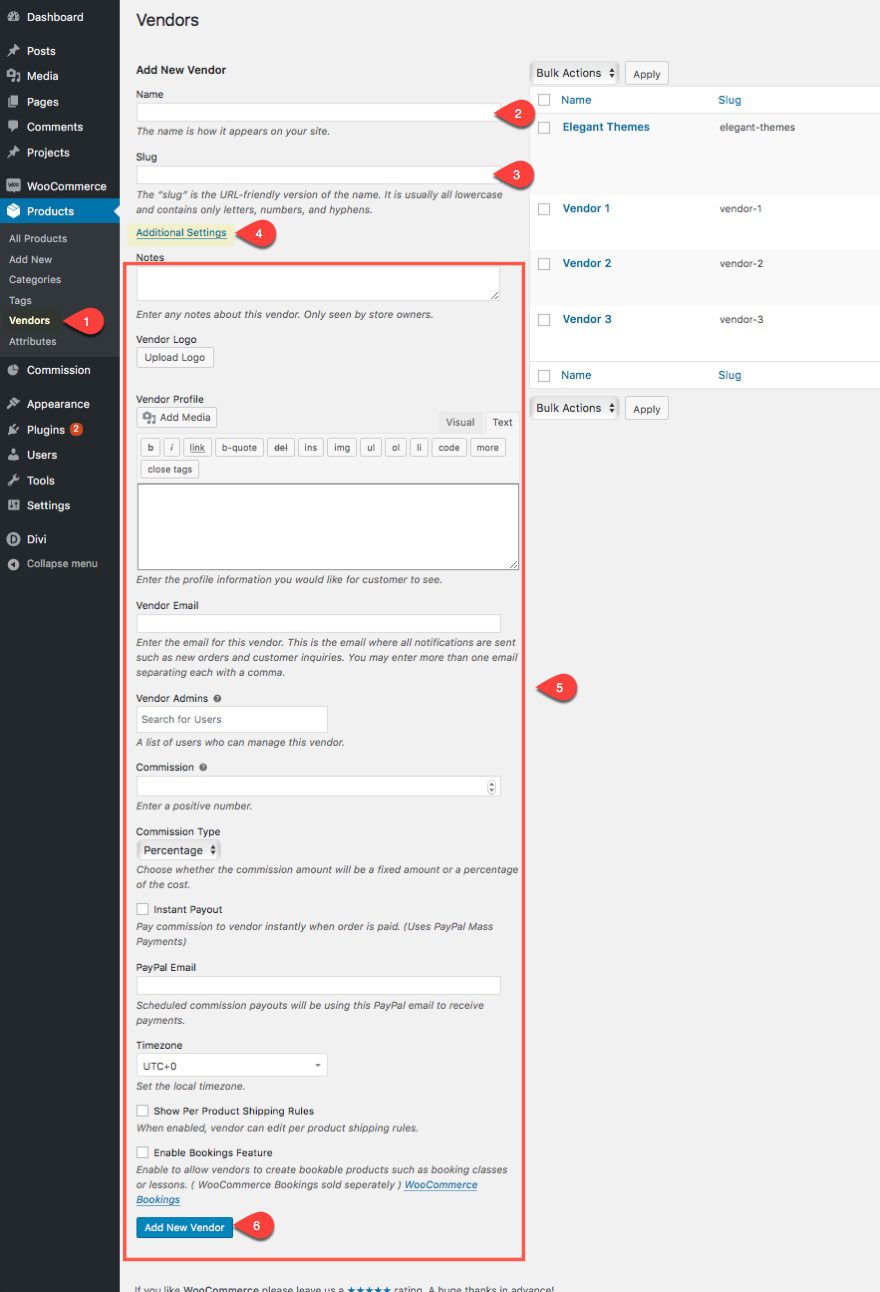
Now everytime you want to edit a certain vendor you can come to this page and find them listed in the right side of the page. The functionality of the vendor is much like a category within WordPress.
Adding a New Vendor with a Registration Form
The second way you can add new vendors to your website is to put the ball in the vendor’s court and allow them handle this process for you. All you will need to do is create a registration form that vendor’s can use to sign up for a vendor membership.
Create the Vendor Registration Page Using the Categories Page Layout
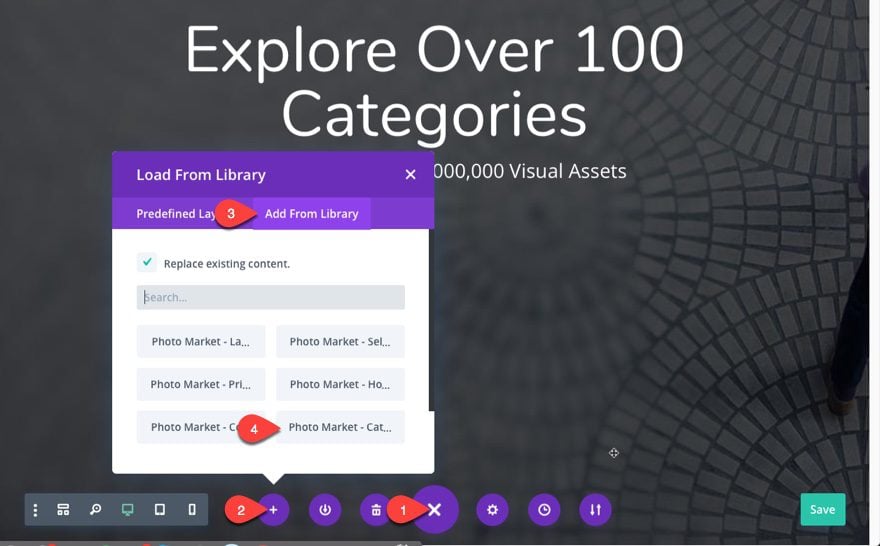
We will need to create a new page to send our vendors to so that they can access our registration form. Since we are using the Photo Marketplace Layout Pack, we can easily use the Categories page layout (already saved to my library) to kickstart our registration page.
Create a new page and name it “Vendor Registration”. Then deploy the Visual Builder and import the Photo Market – Categories layout for the page.
Click to edit the Fullwidth Header Module settings, go to the design tab, and change Make Fullscreen option to “NO”.
In the section below the fullwidth header, delete the second and third rows containing the category blurbs.
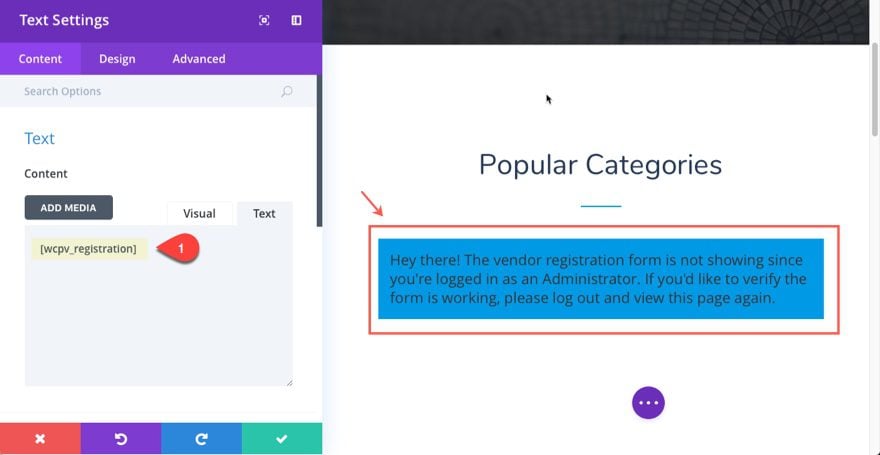
In the row that is left, copy the text module (currently containing the title “Popular Categories”) and paste it under the divider module directly under the text module. This is where you are going to place the shortcode used to generate the vendor registration form. Edit the text settings and enter the following shortcode in place of the title in the content box:
[wcpv_registration]
Under the Design tab update the following…
Text Text Size: 20px
Width: 600px
Module Alignment: Centered
Note: Because you copied this text module over, the design settings for the H2 header carried over and will be used to style the header of the form deployed in the shortcode. You can add additional styling in the text module because, even though this is a shortcode, the text on the form it deployes can be stylized by some of the settings in the text module. This way you can gain some control of the design of form to match your site.
Save Settings
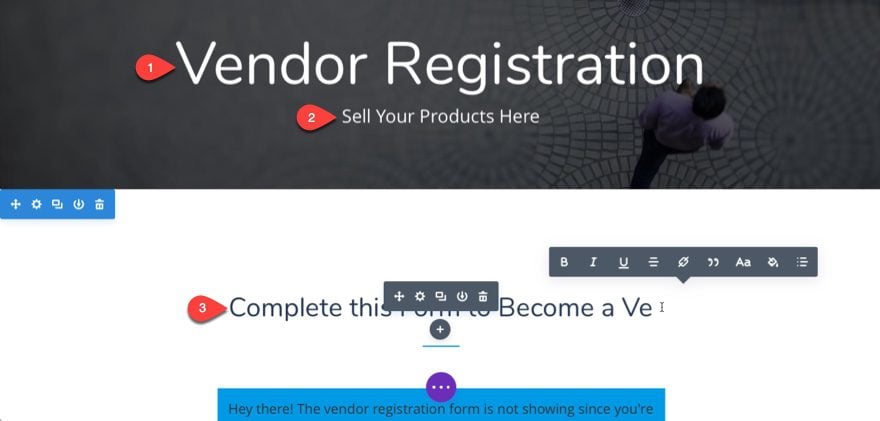
Now use the inline editor to update the main header text to read “Vendor Registration” and the subheader text to something like “Sell Your Products Here”.
Then update the section title above the form shortcode to read “Complete this Form to Become a Vendor”.
After that, you can delete the rest of the sections below that you aren’t using.
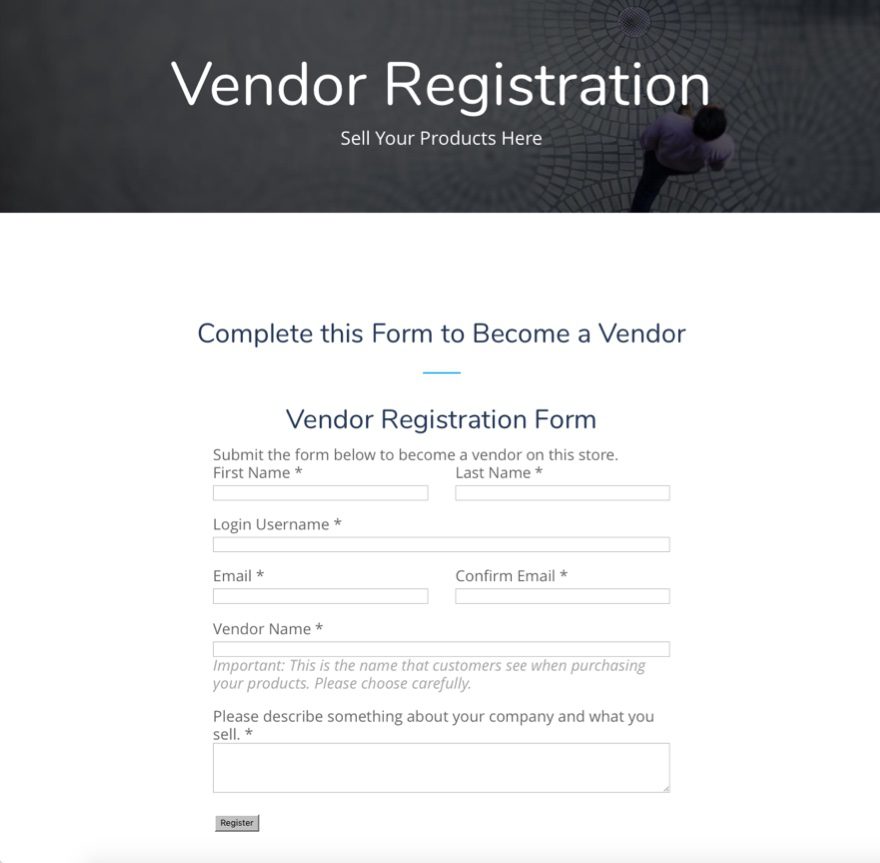
Click to Save your new page and you are done.
To see what your form looks like, open the page in a private browser window so that you aren’t logged in.
What Happens When a Vendor Fills out The Form?
When a vendor fills out the form, he or she is automatically added to your site as a pending vendor. In order to activate their vendor membership, you will need to update their user role to Vendor Admin (or Vendor Manager if you want them to have control over other vendors).
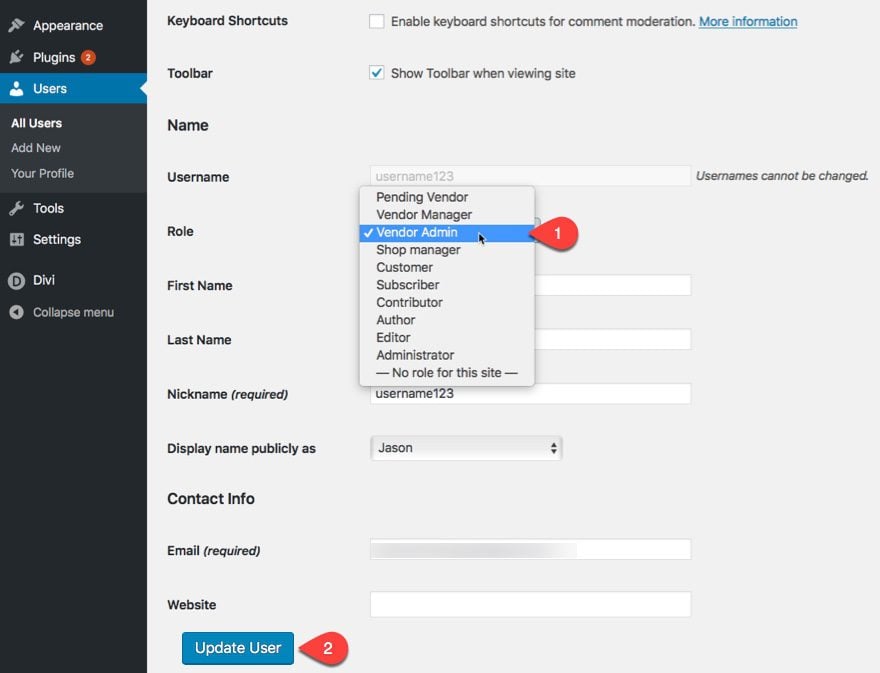
Once the role is updated, the pending vendor will now have access to the site as a vendor admin and an email is automatically sent to them notifying them that their membership has been approved.
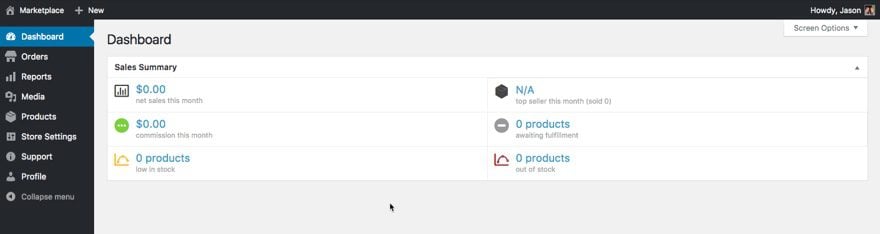
Once the new vendor logs in to your site with there new credentials, they will have a custom dashboard display on the WordPress dashboard that gives a helpful sales Summary. The vendor can then use the custom links in the menu to manage their online store by adding products, optimizing their store settings, generate reports, and more.
Adding New Products
Adding a new product for a vendor is pretty much the same way you would add products normally with WooCommerce. The only real difference is that you now have the option to assign products to specific vendors.
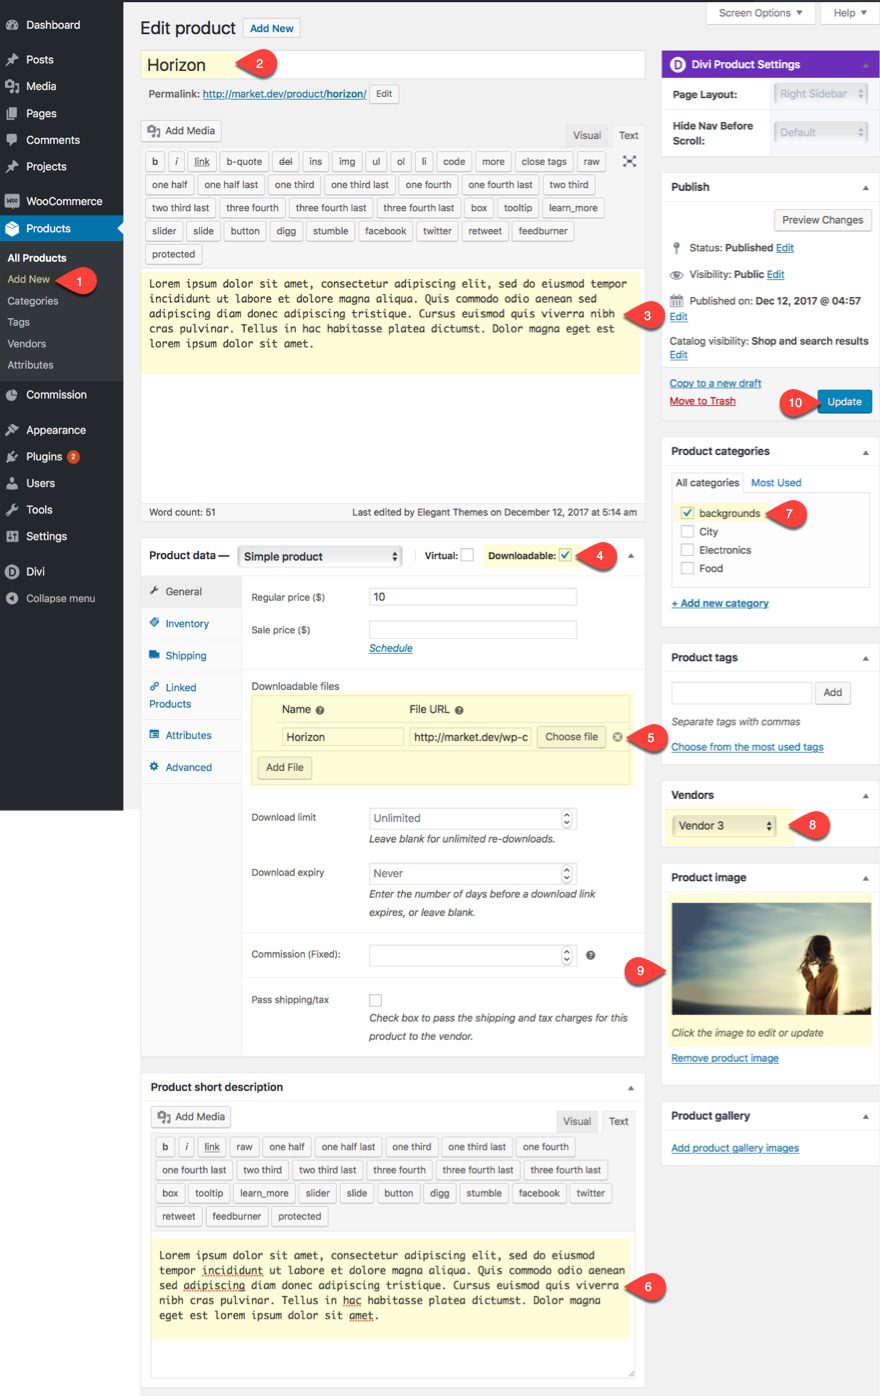
For example if I wanted to add a new photo download for a photo marketplace, I would complete the following steps:
- Add new Product
- Enter the Product Name
- Add Long Description Content
- Select Downloadable as the product type
- Add your downloadable file (in this case a high resolution image)
- Add a short description of the product
- Add a category for your product
- Assign a Vendor to your product
- Add a product image
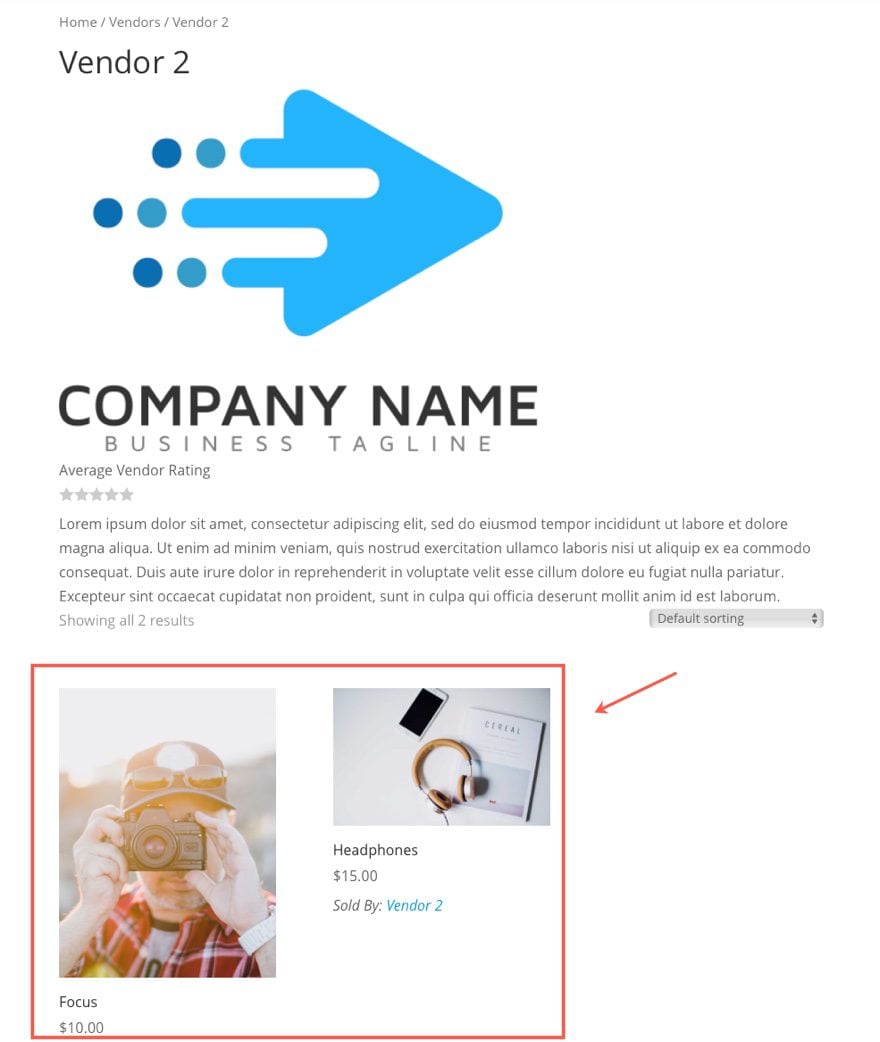
Once you assign a vendor, that product will show up under that vendor’s vendor page which they can customize.
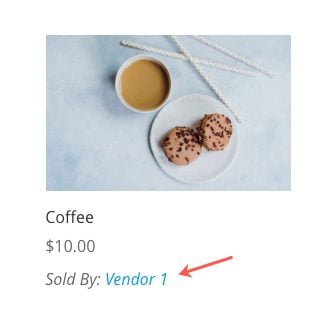
The vendor name will also show up under each of the products in the store.
Also, once a vendor has access to the site as a vendor admin, they will be able to create their own products so you don’t have to. Each product a vendor creates will automatically be assigned to them in the store.
Managing Commissions
As the store owner, you have the ability set a default (or specific) commission to be paid to the vendor for each product sold. You can manage the payment of these commissions on the Vendor Commission page by going to Commissions in the WordPress Dashboard.
Here you can see all the products sold and their commission status (like void, paid, or unpaid). A convenient feature is the bulk actions dropdown that allows you to pay commissions in bulk among other tasks.
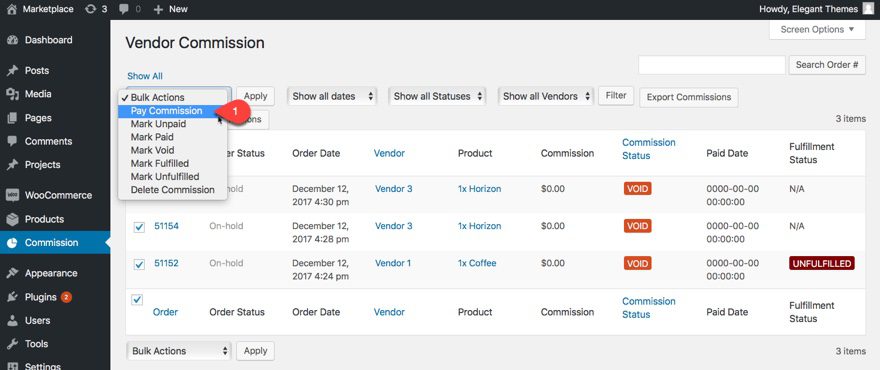
You can also click on a product’s order number to update the order details.
Add WooCommerce Products Filter
With every install of WooCommerce, a shop page is created on your behalf. This shop page will show all of your products with the ability to filter the results using a dropdown menu in the upper right corner.

With the WooCommerce Products Filter plugin, you can create a much more advanced filtering experience for the user (probably necessary for a large photo marketplace).
Once you have installed and activated the plugin, go to WooCommerce > Settings > Products Filter and update the structure to include the filters you want to include. For this example, I’m using the following:
Search by Text
Search by Price (as woo range-slider)
Product Categories (checkbox)
Vendors (checkbox)
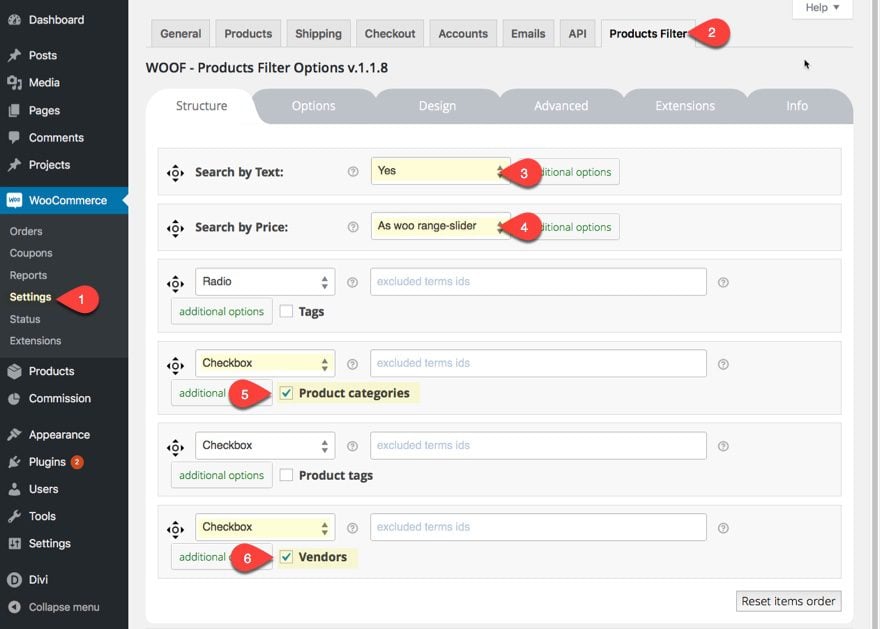
They have more options you can use but I won’t go into those right now. Instead, I’ll jump right into how you can add the filter to your shop page.
To add the Products Filter to your shop page sidebar, go to Appearance > Widgets. Locate the widget called “WOOF – WooCommerce Products Filter” and drag it into your sidebar.
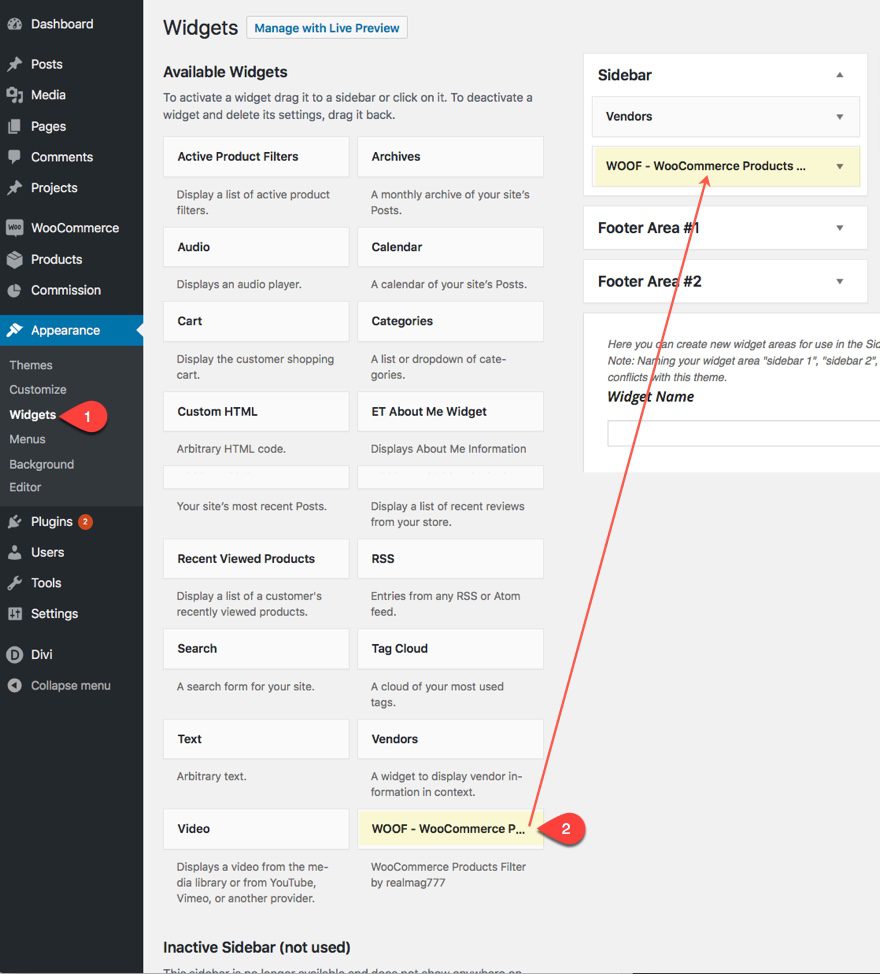
Note: Another option is to also drag the Vendors widget (it comes with the Product Vendors plugin) to your sidebar as well. This will display the vendor associated with a specific product when view a single product page.
Now go check out your shop page so see the new product filter.
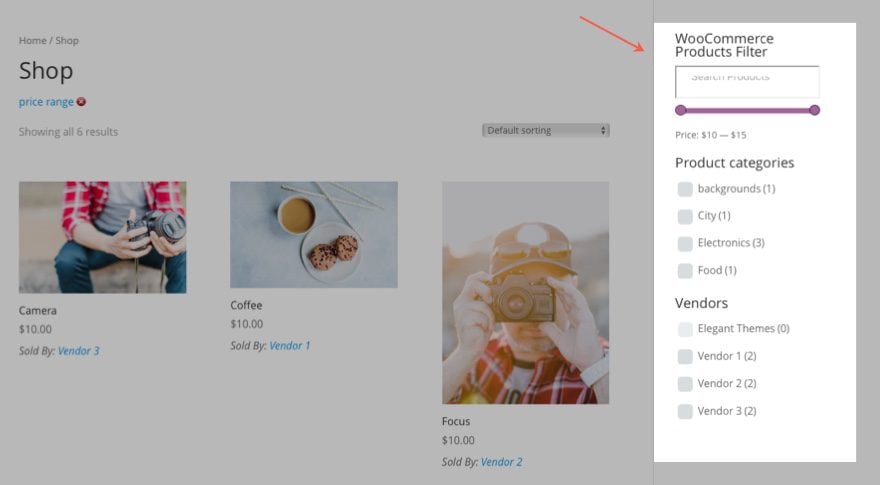
That’s pretty much it! Now you have a powerful filter to give your users an extremely easy way to find the right product.
Final Thoughts
I hope you find this post useful for setting up your own multi-vendor marketplace. The majority of this use case focused on the implication of the Product Vendors plugin so that you can see how it integrates with WooCommerce and Divi. The limited payment gateway is a bit of a bummer, but for those who want to use paypal, this setup is very convenient for paying commissions. Of course, you can use this setup to sell any kind of product, not just digital downloads. You would just need to look into how you want to handle things like shipping with your other vendors.
Like usual, styling the WooCommerce pages and extensions still remain a challenge. But Divi does make it easier with the ability to use modules to style certain content deployed by shortcodes (like WooCommerce pages) and incorporate elements of the layouts to better match the design of the site.
That’s all for now folks.
I look forward to hearing from you in comments.
Featured image By girafchik / Shutterstock.com


Woocommerce needs some serious love from Divi. It really holds the theme back for stores, and on this demo is a standout class below the rest of the site.
^ ditto that comment.
Also ditto
Would it be fair to assume that woocommerce integration with the divi builder is on the roadmap?
Is it possible for multiple vendors to sell the same product (or service in my case)? Basically, what I want is to list services for sale and for the customer to choose which vendor to order from. It doesn’t look like this is an option with the Product Vendors plugin.
You possibly need to research comparison product or price plugins, sorry I can’t recommend one, because I only noticed them whilst researching something else!
Thank you Liz! I’ll look into it.
“YES! YES! YES! Finally I’m getting some of what she’s having” !!
Can’t believe your doing a MV tut 🙂 Please tell me they are free plugins to try out!
Stopping work right now to follow along with this.
Also I absolutely agree with all previous comments about Woo Commerce looking terrible compared to our beautiful ET sites, although it must be almost impossible to do much about it, because how can ET do anything about
Another companies “plugin”, after all Woo Commerce is “Automatics” plugin.
It’s nice to dream about it and hope it were possible 🙂 No matter how gorgeous your product images are, The Woo Commerce plugin out of the box is very ugly!
Your themes are Lovely
This is a really really useful document and while I have no need of it now I will certainly be filing it away for future use. Thanks
Great work guys! I’m so loving what you are doing, keep it up. Just wondering what kind of websites can I really use this layout for?
Has anyone found a way to allow the customer to choose a photo then select what size they want as a downloadable product?
small, medium, large or b/w vs color?
thanks for providing this valuable post. I am a beginner and was searching this types of post but i got from your website thank you so much you make my day..