

This week, as part of our ongoing Divi design initiative, we’re going to show you how to transfer a new design style to another page using Divi’s Furniture Store Layout Pack. With all the new layout packs that are coming out, you might have wanted to change the style of an existing page using the new layout pack’s style. Instead of replacing the entire page, you can also transfer the design style using Divi and its efficiency features. One of the newest options that’s included in the Visual Builder is the cross-page copy and paste feature. This will allow you to make many changes throughout the layout without touching a design element’s settings.
But of course, each layout is unique, which means you’ll have to apply some manual changes as well. The good news is that you can extend those manual settings to similar elements on the page in one click. This post is hopefully going to help you follow a certain structure when transferring a design style.
Let’s get to it!
- 1 Preview
- 2 Approach
- 3 Part 1: Opening Two Pages Next to Each Other
- 4 Part 2: Resetting Certain Section Settings
- 5 Part 3: Using Divi’s Cross-Page Copy-Paste & Extend Styles Features for Hero Section
- 6 Part 4: Make Manual Changes (According to Layout) & Use Efficiency Features
- 7 Part 5: Add Design Characteristics
- 8 Preview
- 9 Final Thoughts
Preview
Before we dive into the tutorial, let’s take a quick look at the outcome.

Approach
Page structures differ from each other, that’s why it’s hard to completely transfer a design style in one click. But with Divi, you can use the efficiency features to speed up the process. We’ll combine the cross-page copy-paste feature, the extend styles feature and the find and replace feature to save time transferring a design style to an existing page, without having to change the page structure.
Part 1: Opening Two Pages Next to Each Other
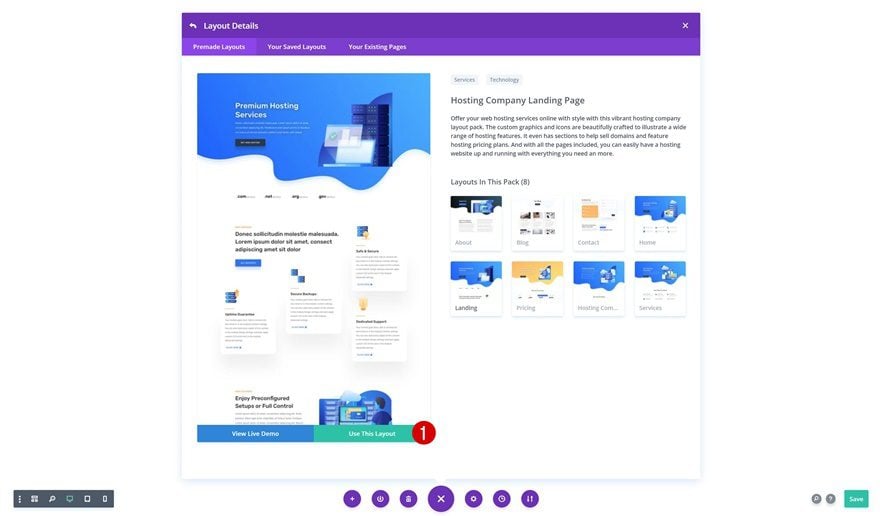
We’ll start off by opening two pages next to each other. The existing page and the new page containing the design style we want to apply. We’re going to take the Furniture Store Layout Pack’s landing page (the design style we want to apply to the existing page) and the Hosting Company Layout Pack’s landing page (the page we want to change around).
Part 2: Resetting Certain Section Settings
The second part will be about resetting certain section settings. The settings you need to reset vary from layout to layout but usually include the background settings and divider settings.
Part 3: Using Divi’s Cross-Page Copy-Paste & Extend Styles Features for Hero Section
Then, we can start using Divi’s cross-page copy-paste feature to start changing things. The natural thing to do is starting with the hero sections. We’ll change each design element in the hero section to the new design style by copying the settings of the new design style and pasting them on the existing page. After doing that, we’ll extend these styles to similar elements on the page.
Part 4: Make Manual Changes (According to Layout) & Use Efficiency Features
As mentioned before, each layout is unique. That’s why making manual changes to the existing page is necessary as well. Once the few changes are made, you can extend the style or use find and replace to make it apply to similar elements on the page.
Part 5: Add Design Characteristics
Last but not least, you can add certain design characteristics to the existing page as well.
Part 1: Opening Two Pages Next to Each Other
Create New Page Using Layout Using the Furniture Store Layout Pack’s Landing Page
Now that we’ve gone through the approach part of this post, let’s start using Divi! Add a new page using the Furniture Store Layout Pack’s landing page.

Create New Page Using the Hosting Company Layout Pack’s Landing Page
Create another page using the Hosting Company Layout Pack’s landing page as well. We’re going to replace the design style of this layout with the Furniture Store Layout Pack’s landing page design.
Part 2: Resetting Certain Section Settings
Reset Section Specific Settings of Hosting Company Landing Page
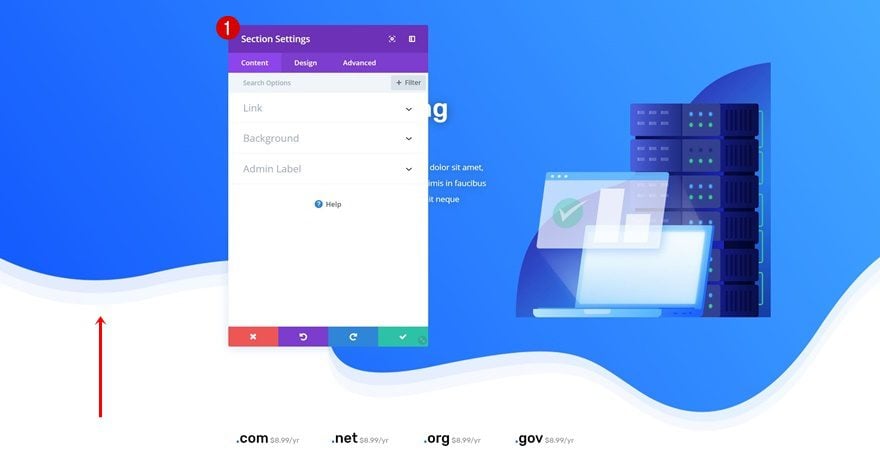
Open Hero Section
Once you have both layouts closeby, continue by opening the hero section settings of the hosting company landing page.
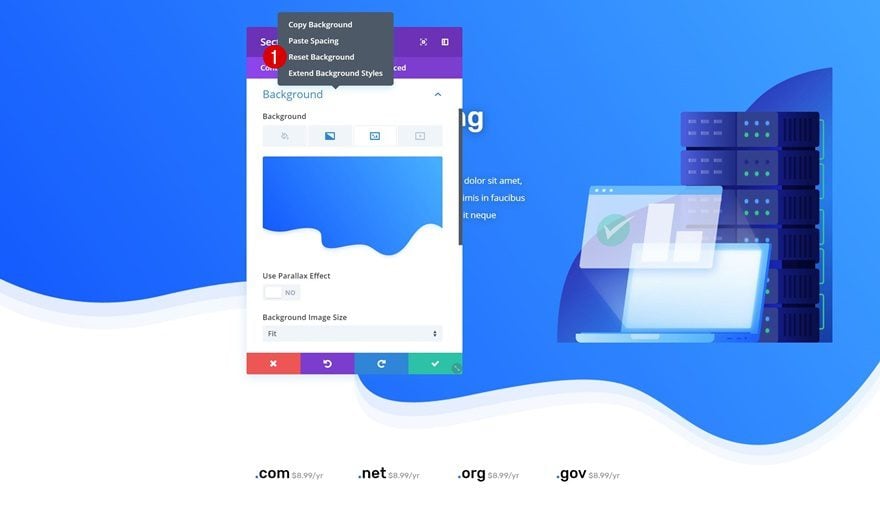
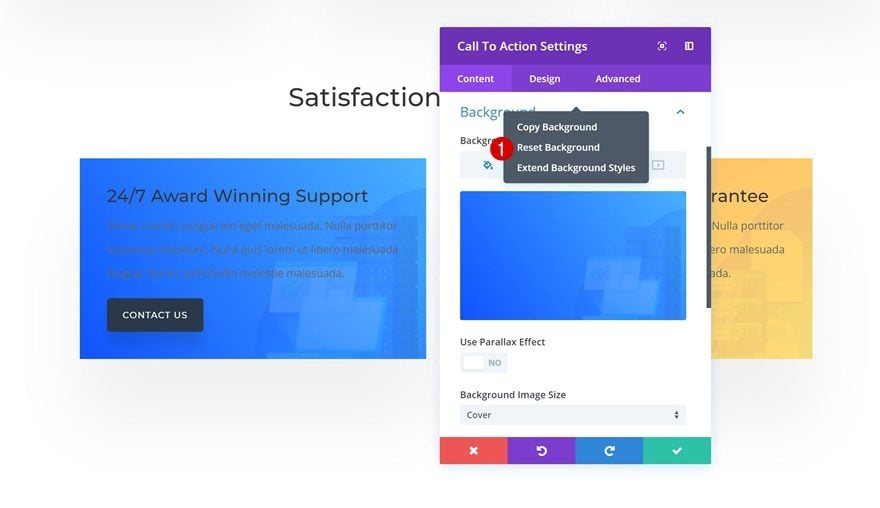
Reset Section Background & Extend to All Sections
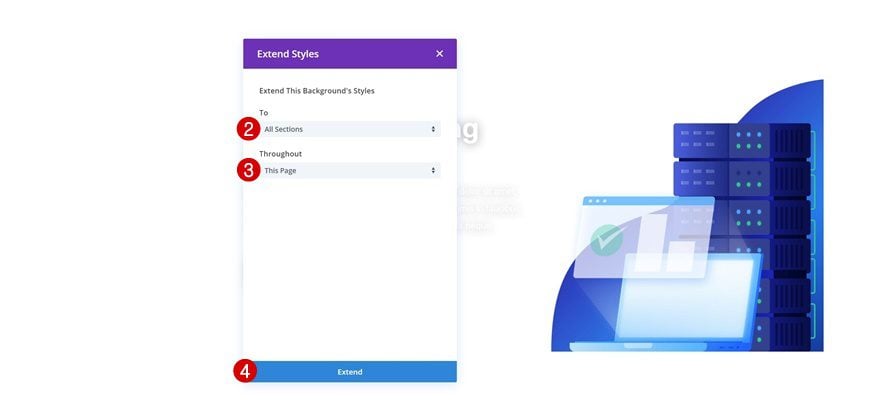
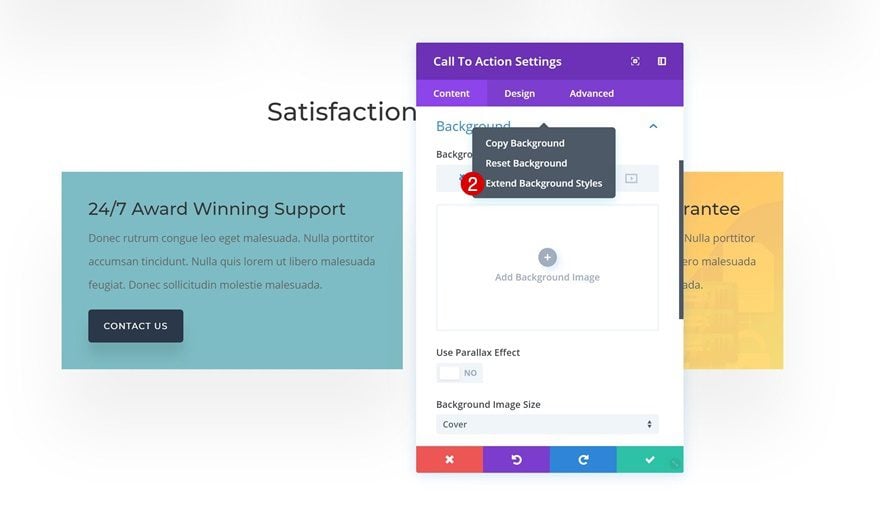
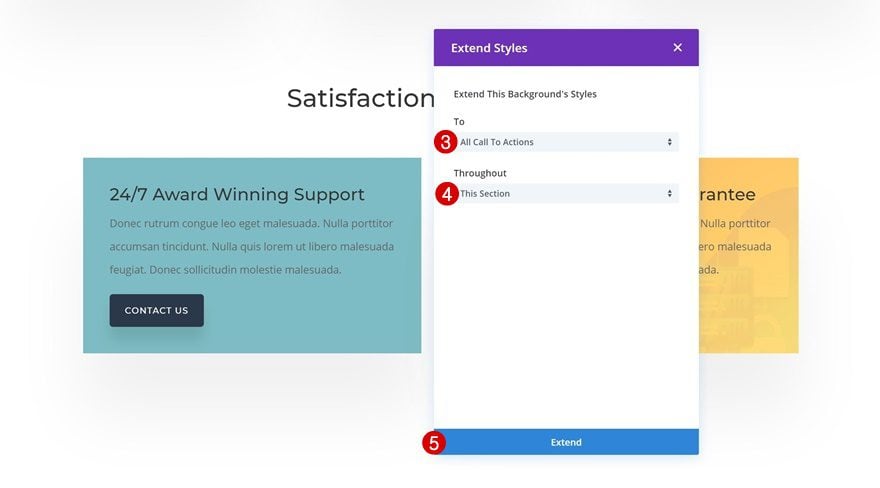
Go to the background settings and reset the options by right-clicking and clicking on Reset Background. Once that’s done, you can extend these background styles to all sections on the page to make sure no section on your page contains background elements.
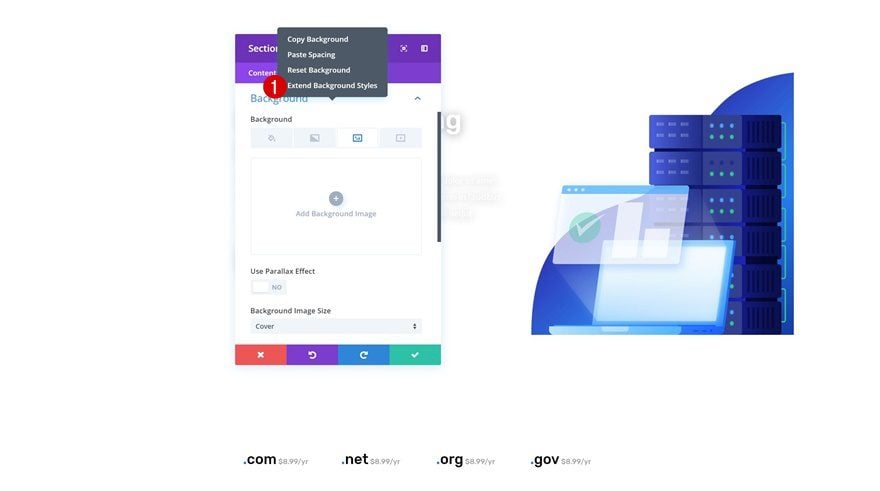
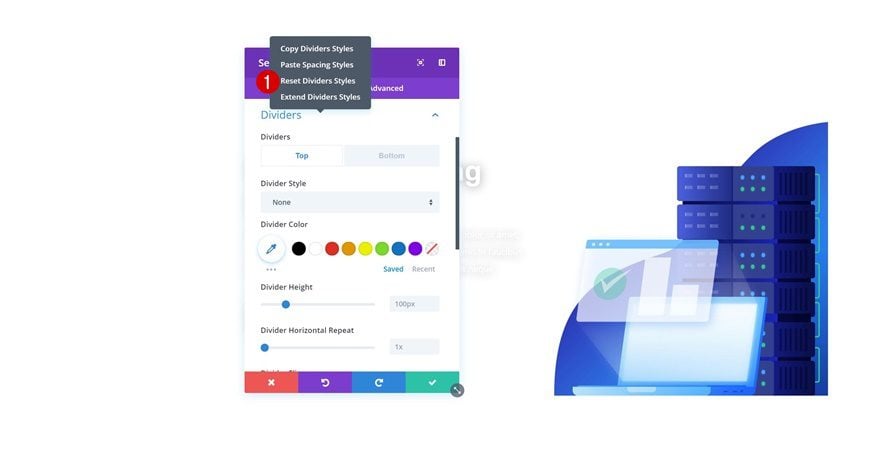
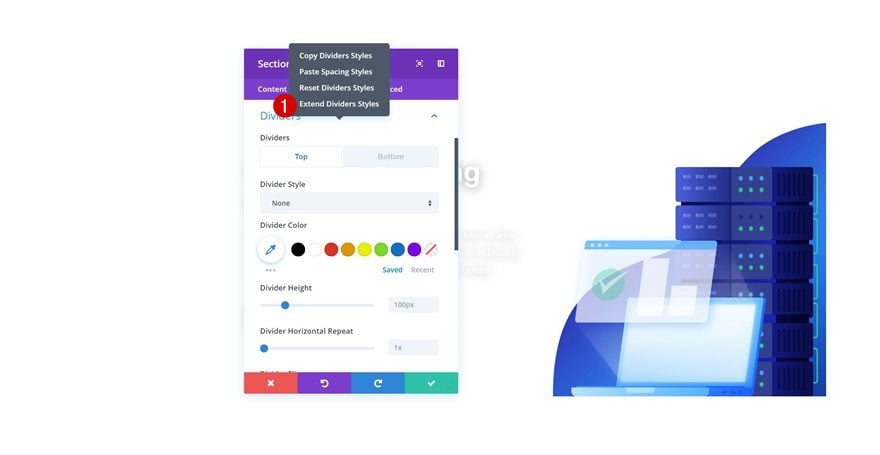
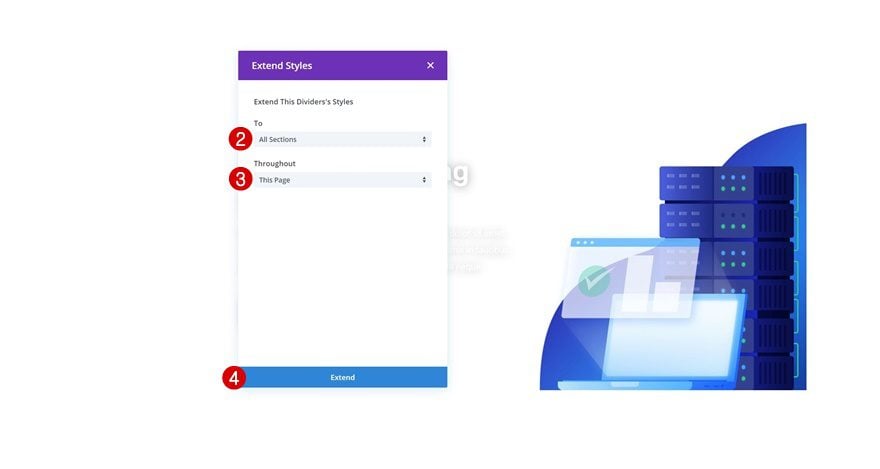
Reset Dividers & Extend to All Sections
Do the same things for the section dividers to make sure all section dividers on the page are gone.
Part 3: Using Divi’s Cross-Page Copy-Paste & Extend Styles Features for Hero Section
Cross-Page Copy-Paste Hero Section Elements
Section Settings
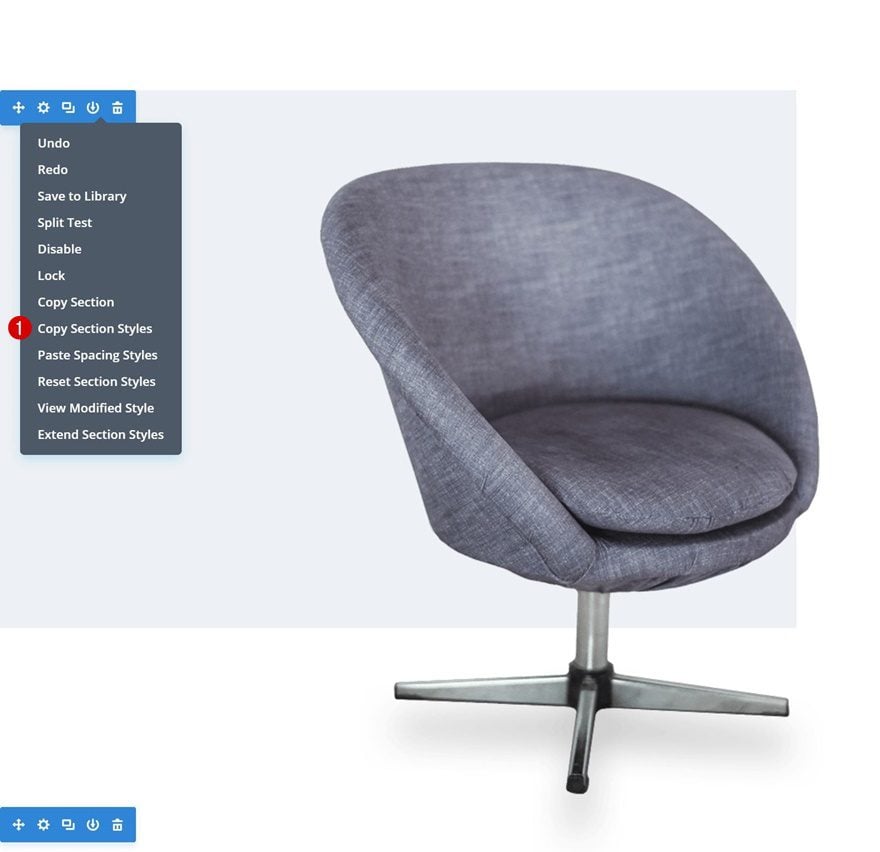
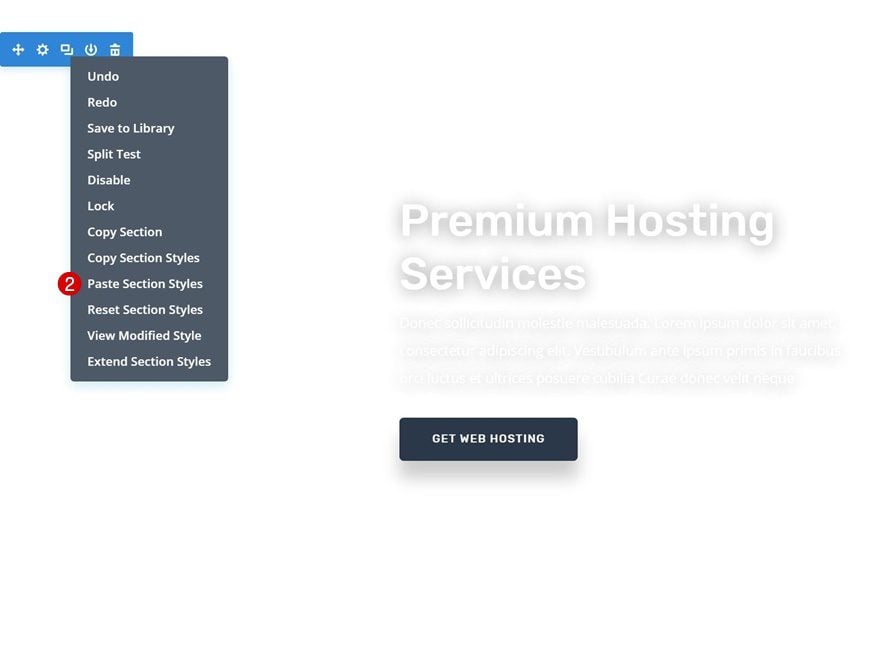
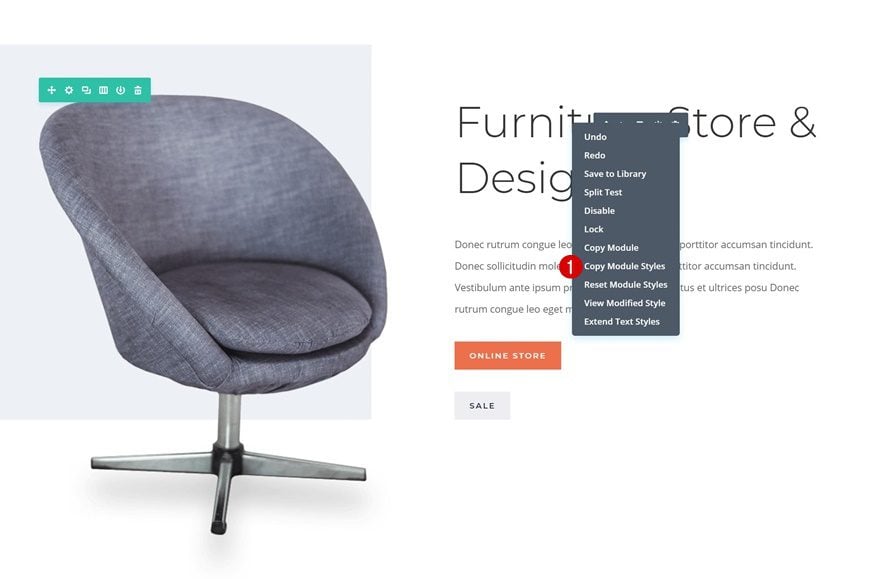
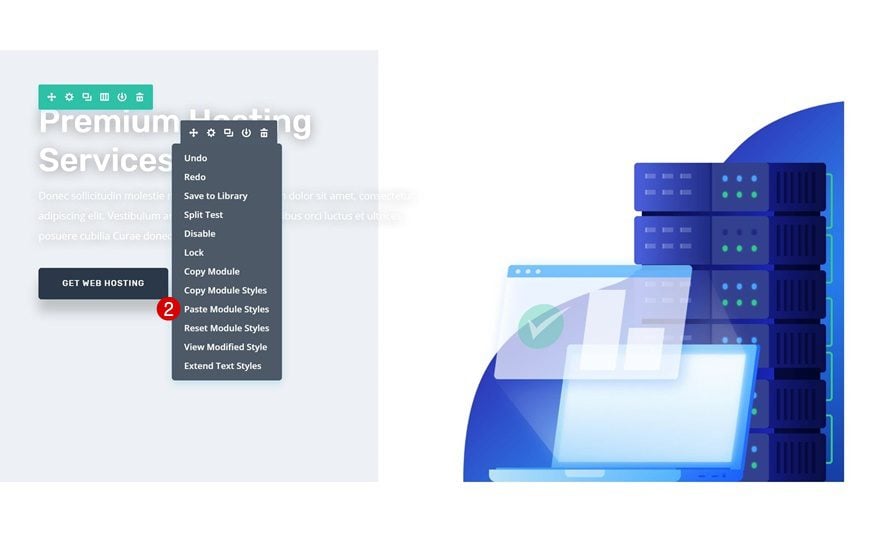
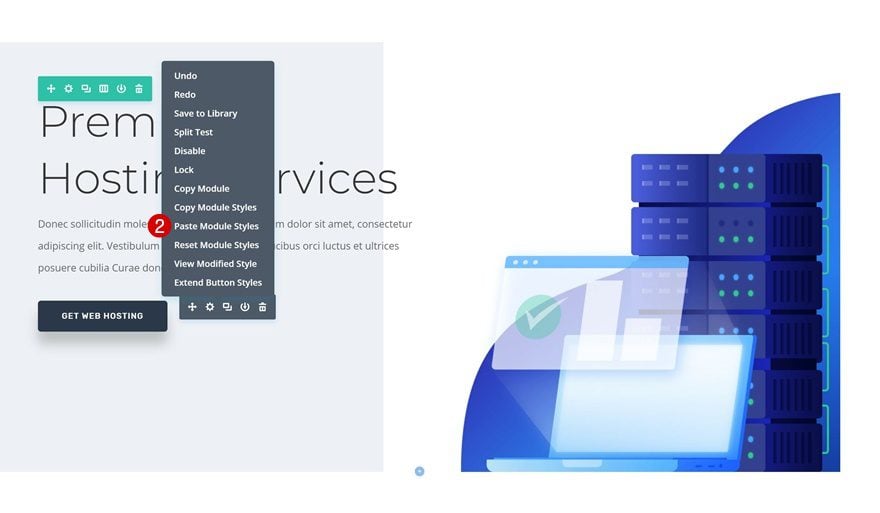
Time to start using the cross-page copy-paste option! We’ll modify every design element in the hero section. Start by copying the hero section styles on the furniture store landing page. Then, go back to the hosting company landing page and paste the copied section styles.
Row Settings
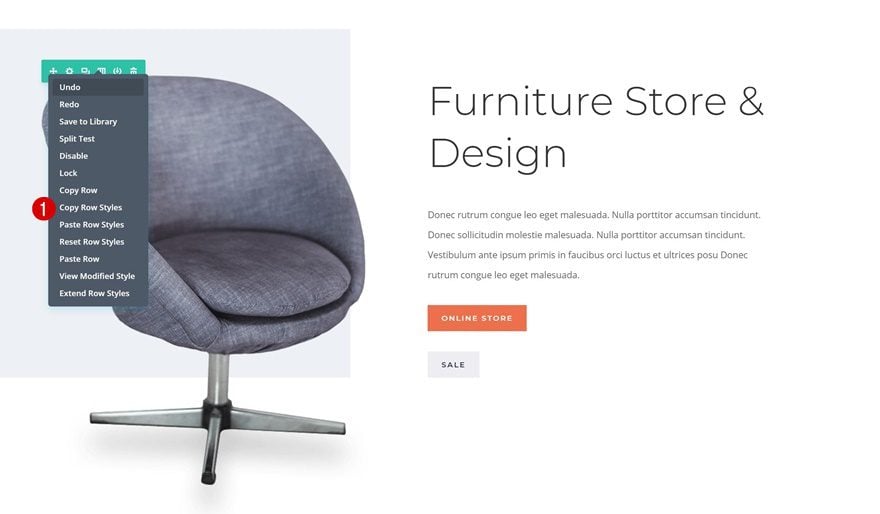
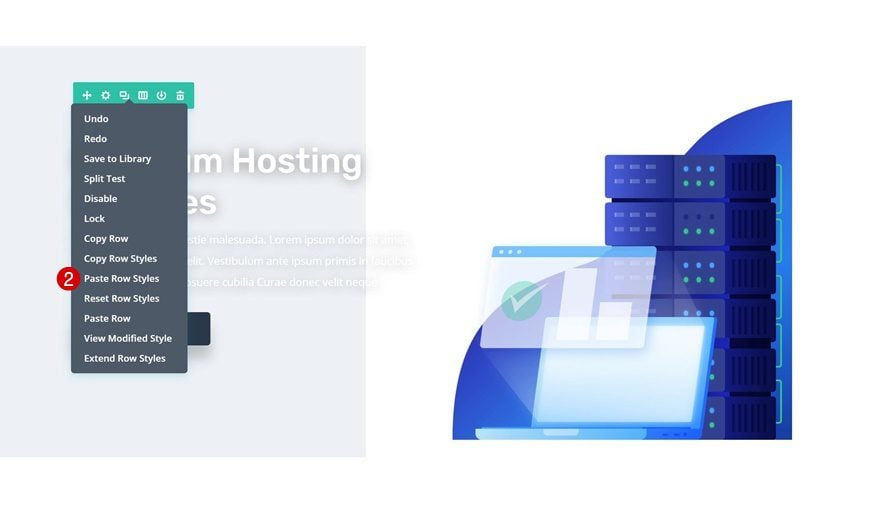
Do the same thing for the row.
Title Text Module
Copy the module styles of the title Text Module as well and make them apply to the title of the hosting company landing page.
Body Text Module
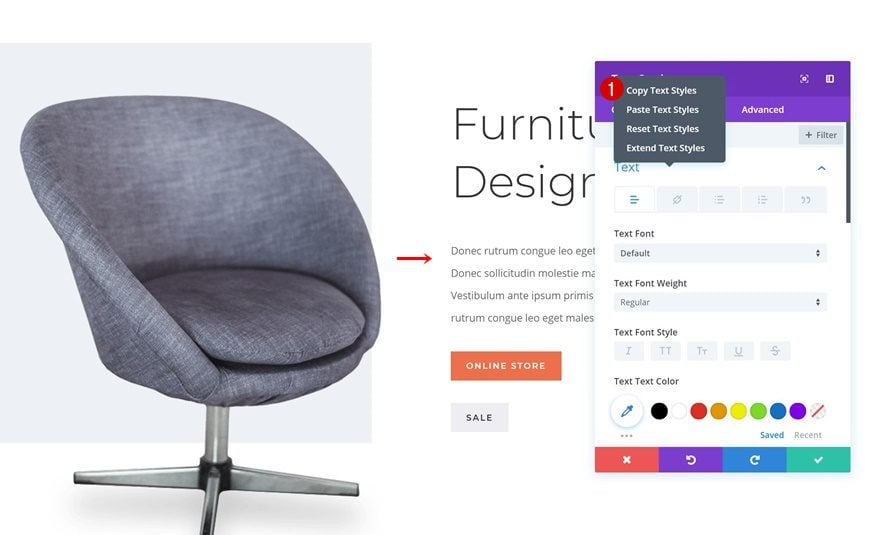
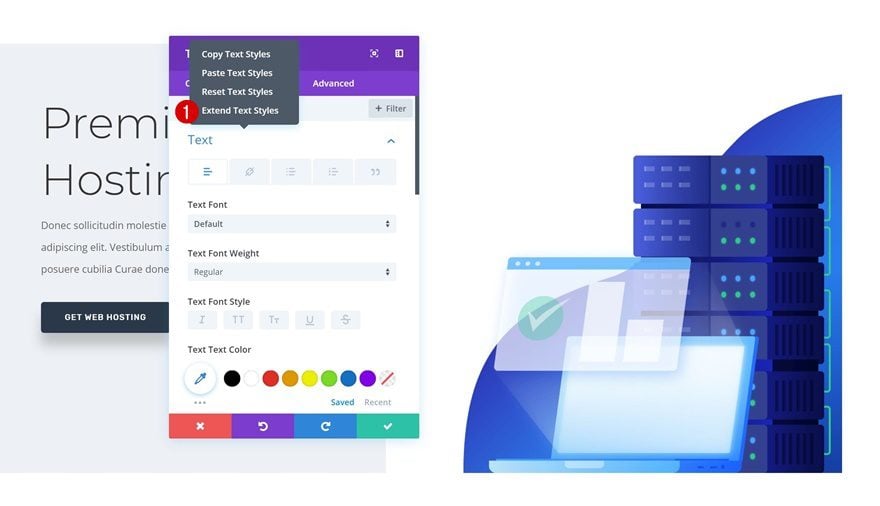
Open the description Text Module next and copy the text styles. Once you do, make them apply to the Text Module on the hosting company page.

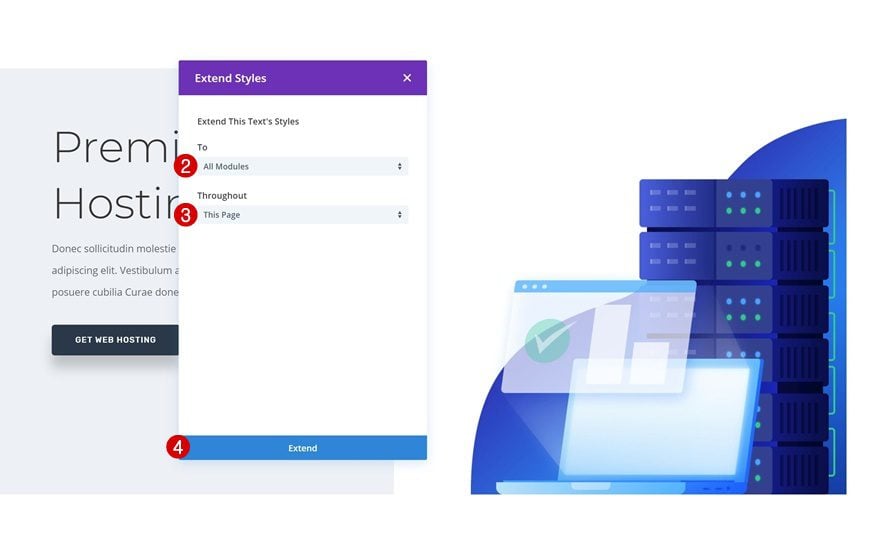
Extend Styles
Once you’ve applied the new text styles, go ahead and extend these styles to all modules throughout the page.
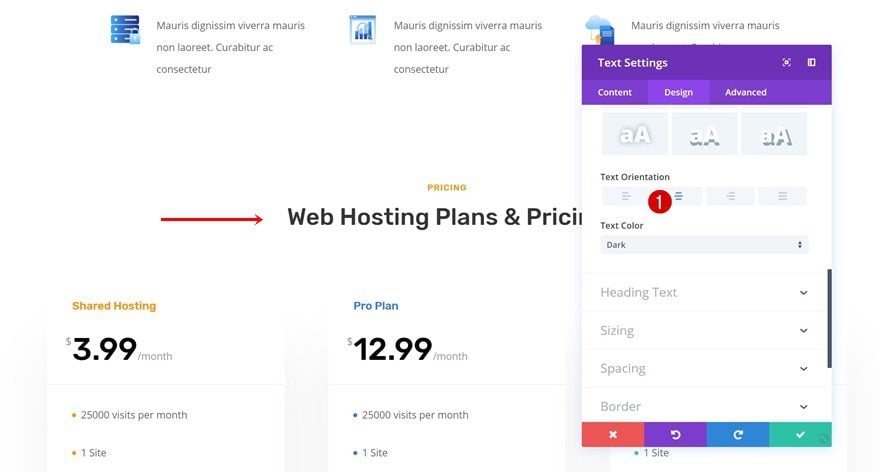
Change Back Text Orientations to Center Where Needed
You’ll notice that the left text orientation will be applied to all design elements throughout the page. You can keep it that way or change back the text orientation manually.
Button Settings
The last module in the hero section you’ll need to apply new module styles to is the Button Module.

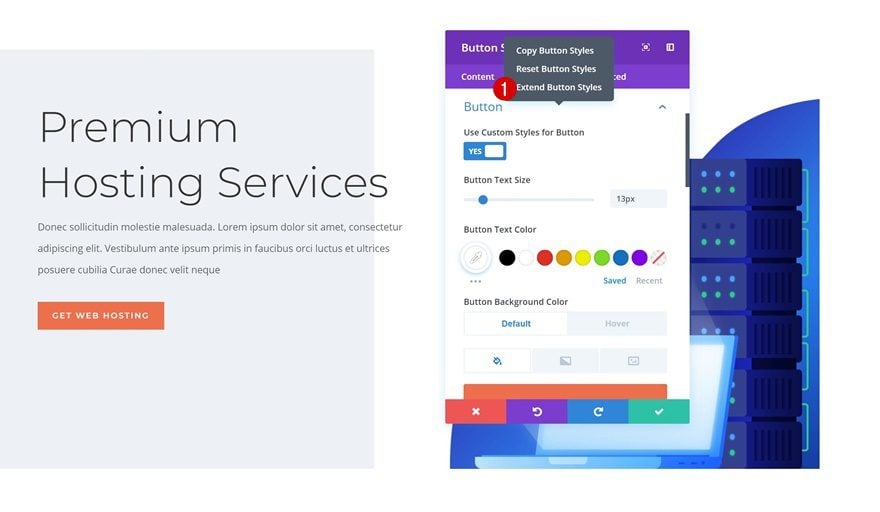
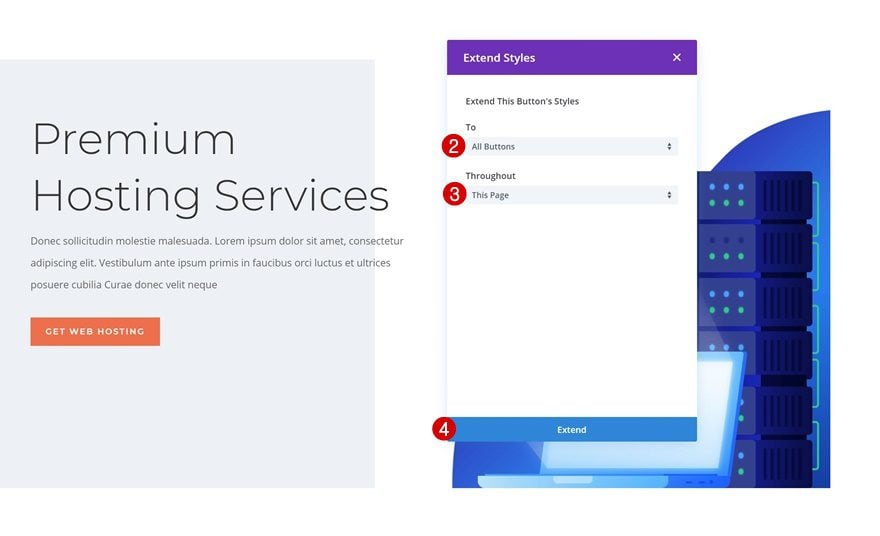
Extend Styles for Button Settings
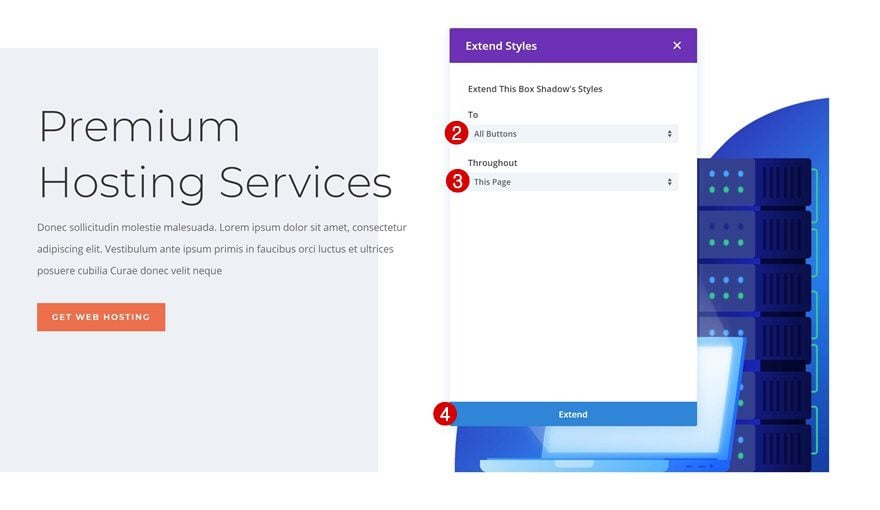
Instead of extending the entire Button Module styles, we’ll extend the specific button settings.
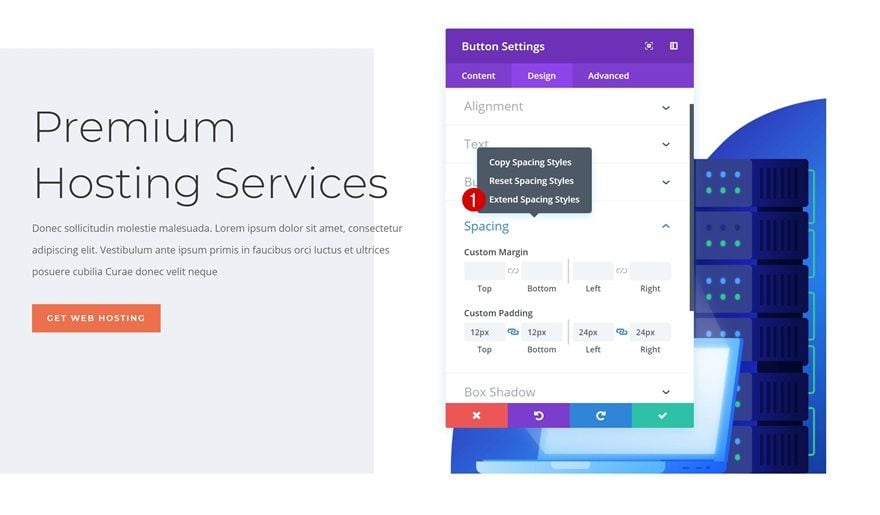
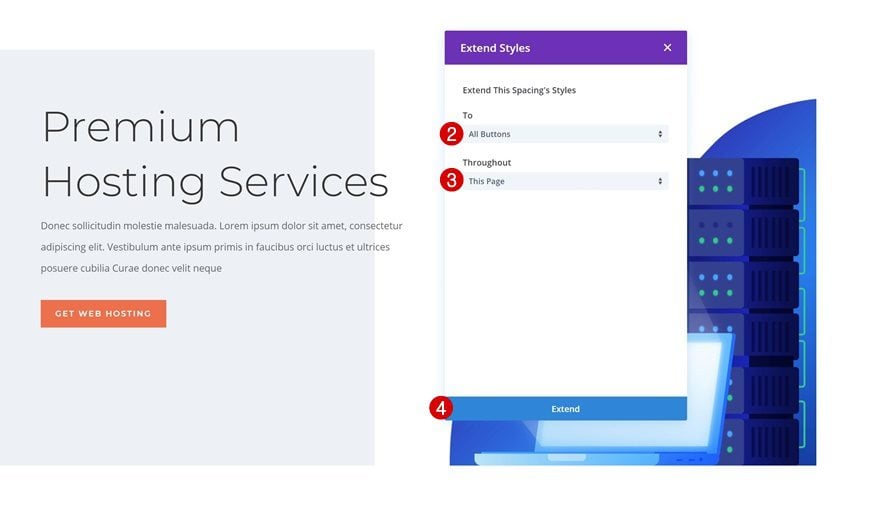
Extend Styles for Spacing
Along with the spacing settings.
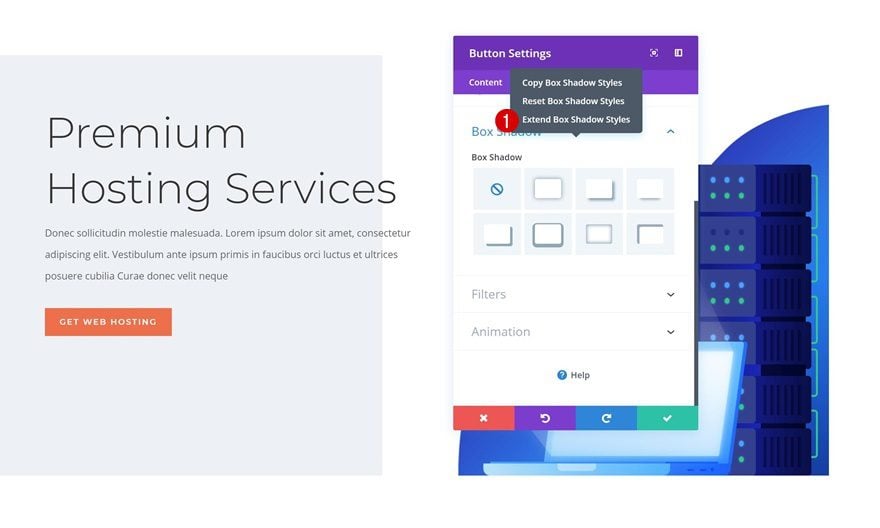
Extend Styles for Box Shadow
And the box shadow settings as well.
Copy-Paste Remaining Elements Once + Extend Style
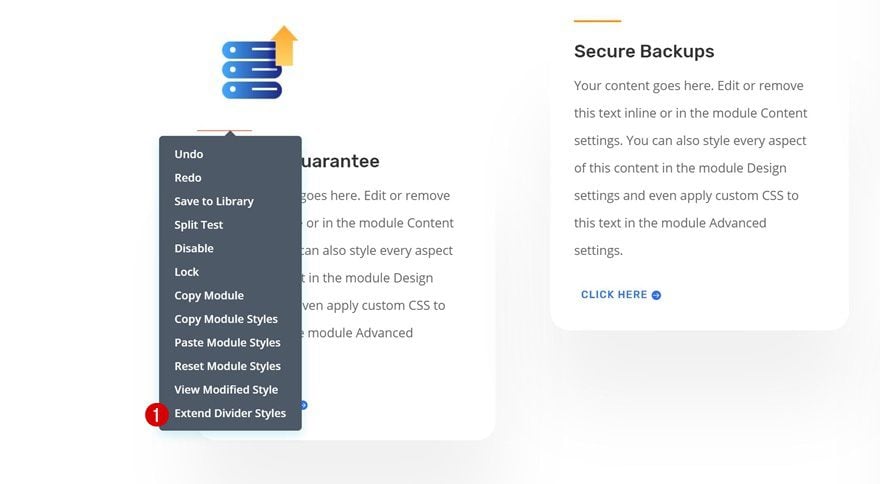
Divider
We’ll also need to copy and paste the Divider Module styles and make them apply to the dividers on the hosting company landing page.

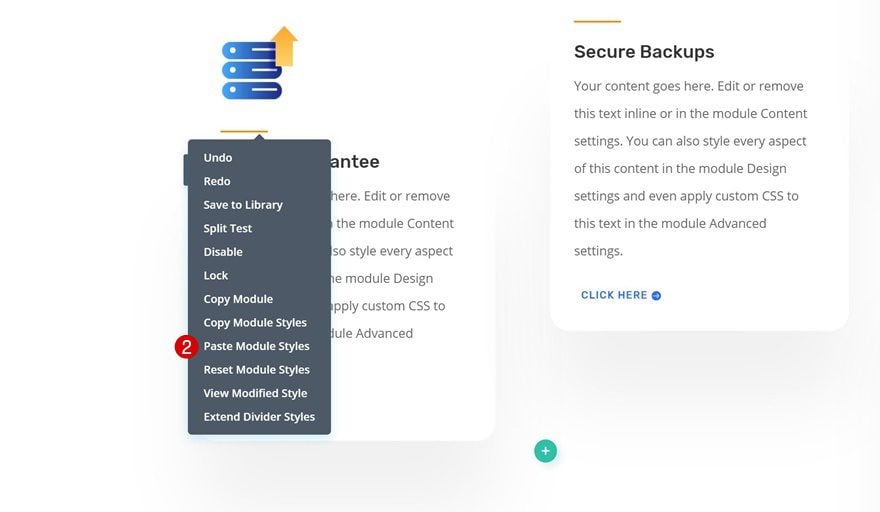
Extend Styles
Again, extend the styles of this module throughout the entire page.

Part 4: Make Manual Changes (According to Layout) & Use Efficiency Features
Layout Specific Changes
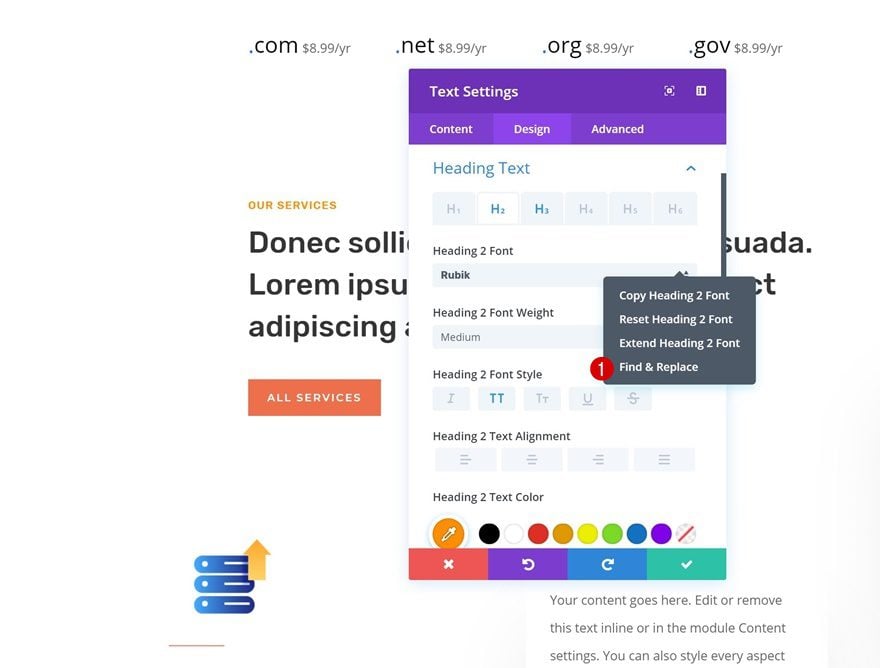
Find & Replace Title Font
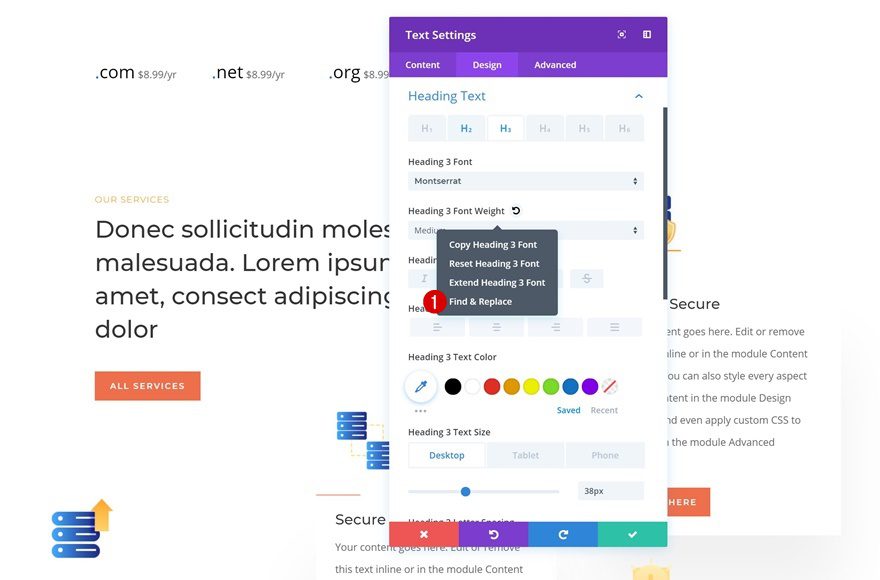
Time to start making some manual changes! The first thing we’ll do is match the font. Open a Text Module on the page and find the Rubik font that is used throughout the page. Then, click on Find & Replace and replace the font with Montserrat.

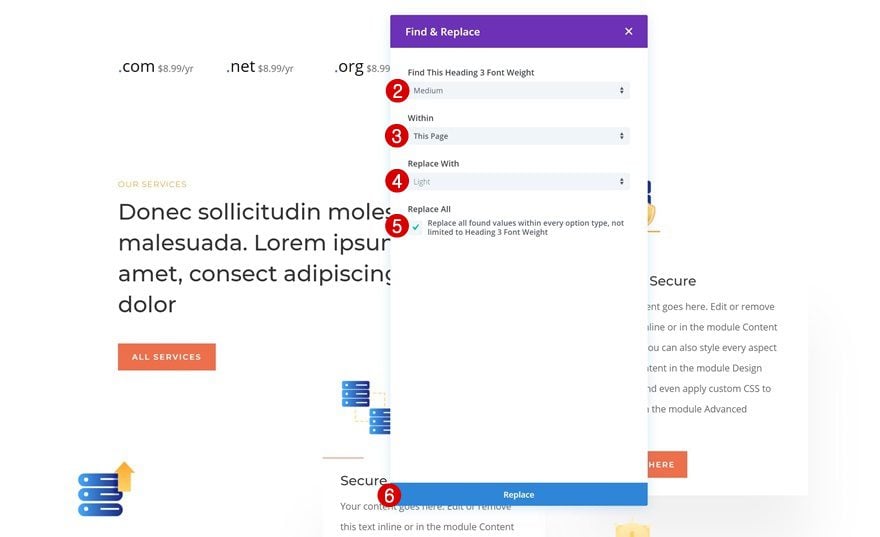
Find & Replace Title Font Weight
Do the same thing for the font weight. Instead of using Medium, select Light.
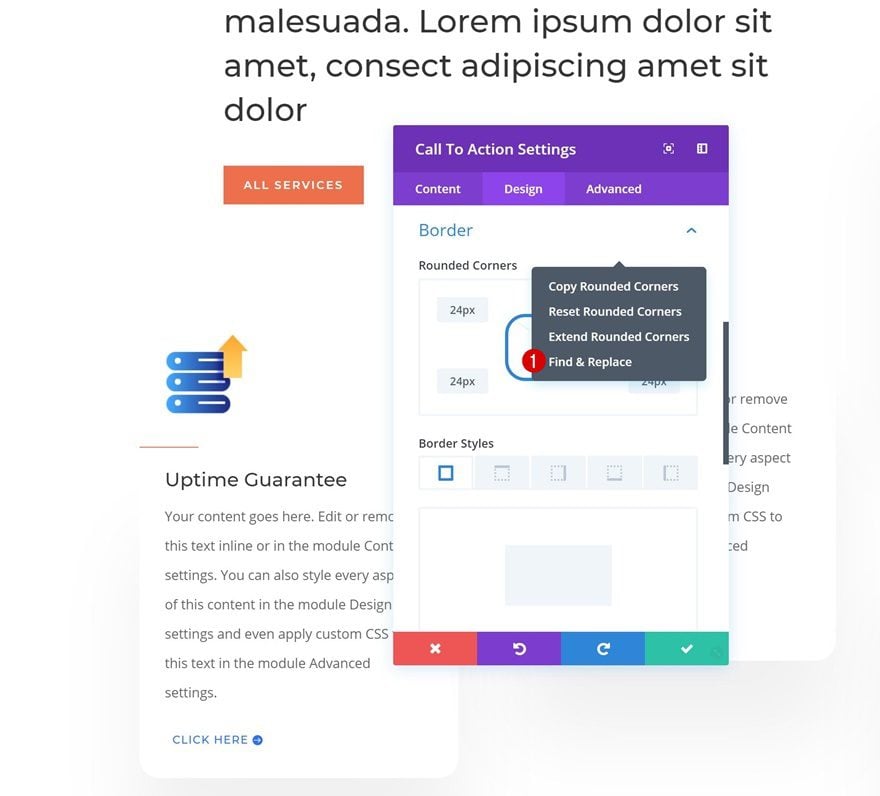
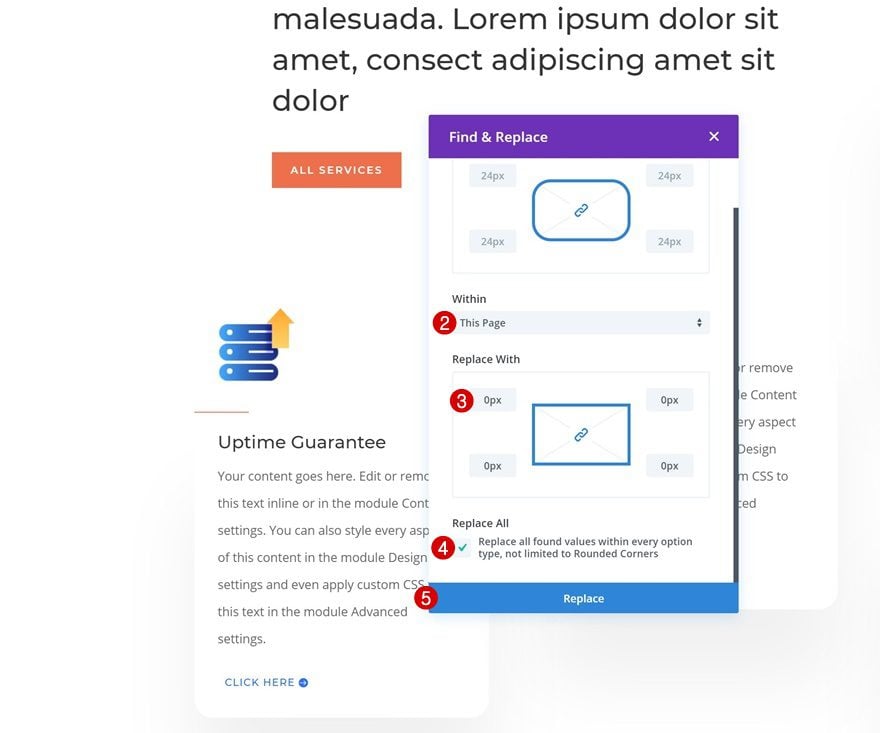
Find & Replace Rounded Corners
We’re also removing the rounded corners borders throughout the page by using Find & Replace and applying ‘0px’ to each one of the corners throughout the page.
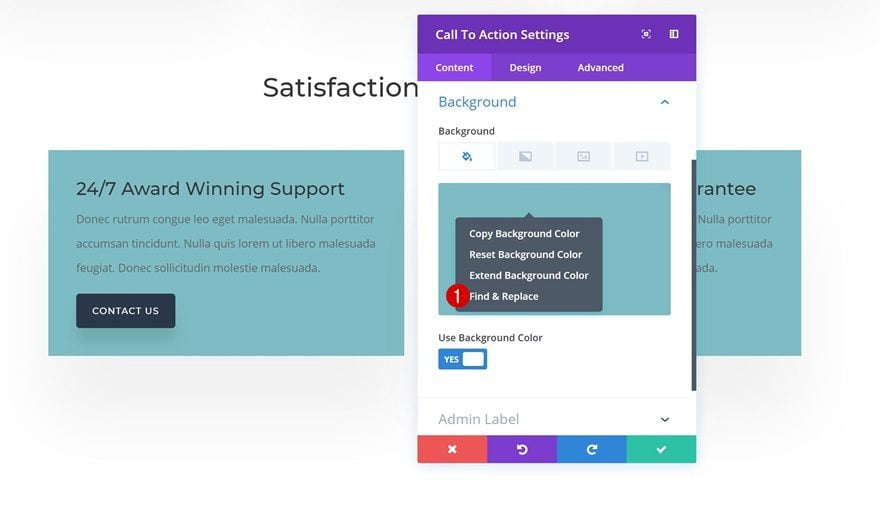
Reset CTA Background Settings & Extend Style in Section
Continue by finding the Call to Action Modules on the page and reset the background settings of the first module. Then, extend these styles to all Calls to Action in the section.
Find & Replace CTA Background Color in Section
Once you do, the default background color will appear. Find & Replace this color and change it into ‘#1a2545’ throughout the section.
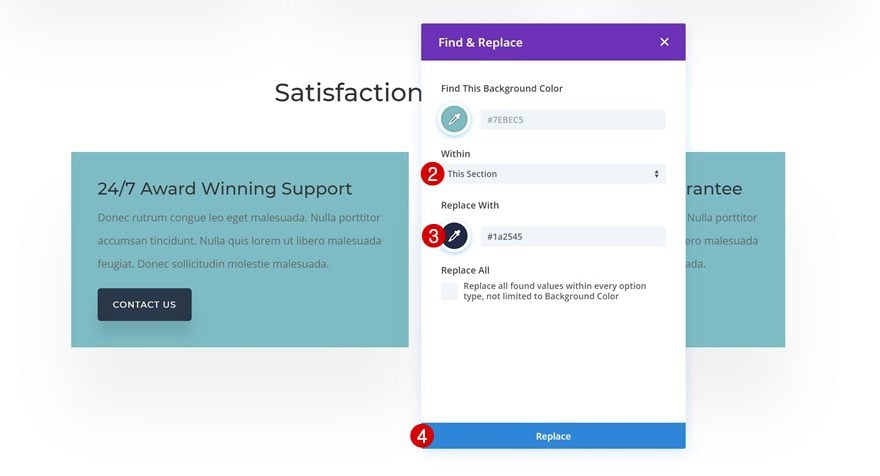
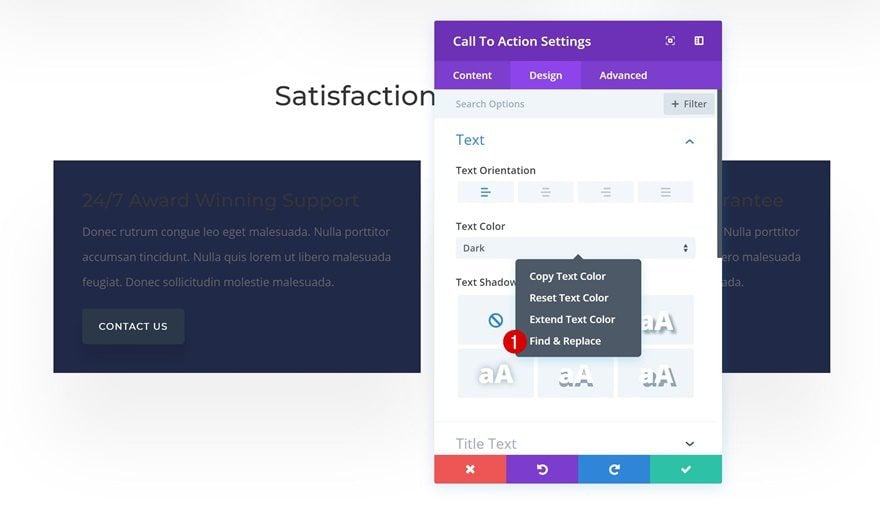
Find & Replace CTA Text Color in Section
Replace the Text Color with ‘Light’ throughout the section as well.

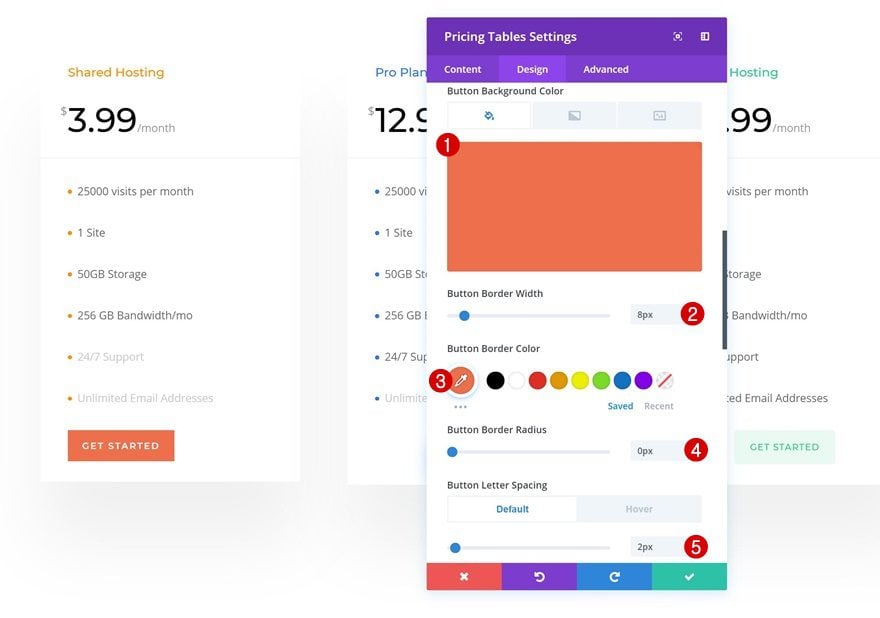
Change Pricing Table Button Settings
Then, go to the pricing tables on the page and change the button settings:
- Button Background Color: #ef6f49
- Button Border Width: 8px
- Button Border Color: #ef6f49
- Button Border Radius: 0px
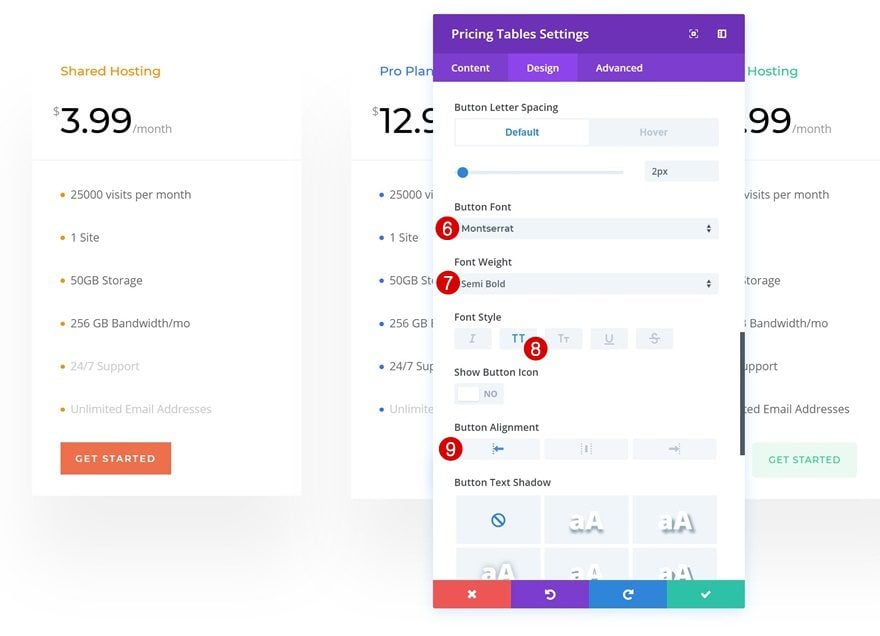
- Button Letter Spacing: 2px (Default), 1px (Hover)
- Button Font: Montserrat
- Font Weight: Semi Bold
- Font Style: Uppercase
- Button Alignment: Left
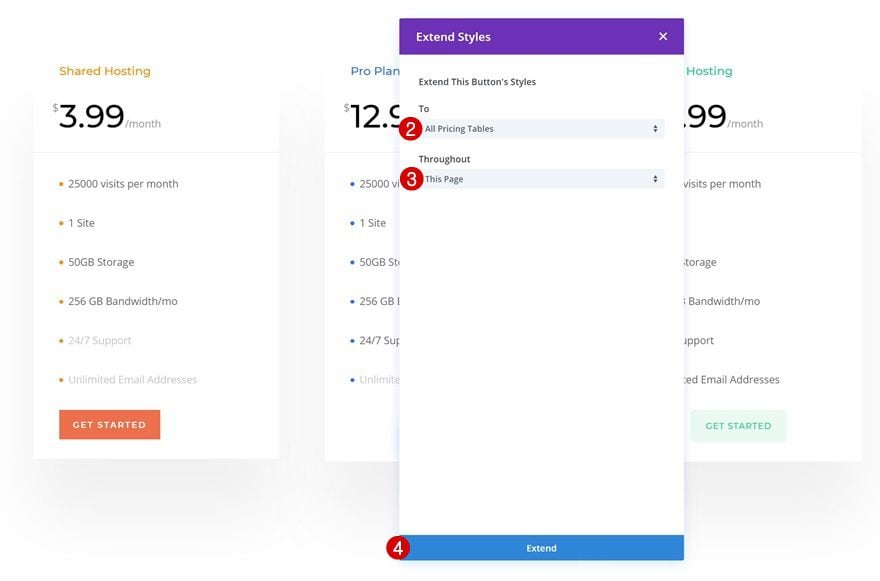
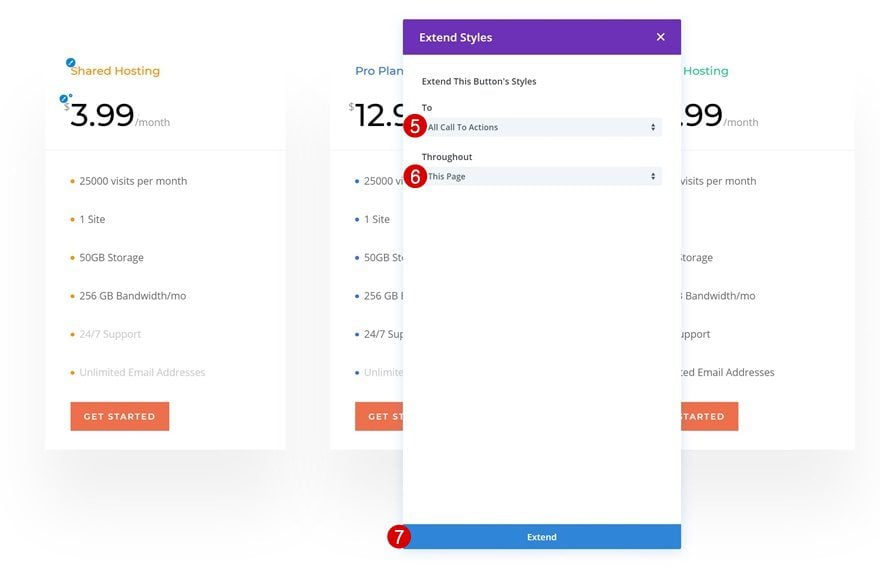
Extend Styles for Pricing Tables & CTA Modules
Extend the new button setting to all pricing tables and Call to Action Modules throughout the page.

Part 5: Add Design Characteristics
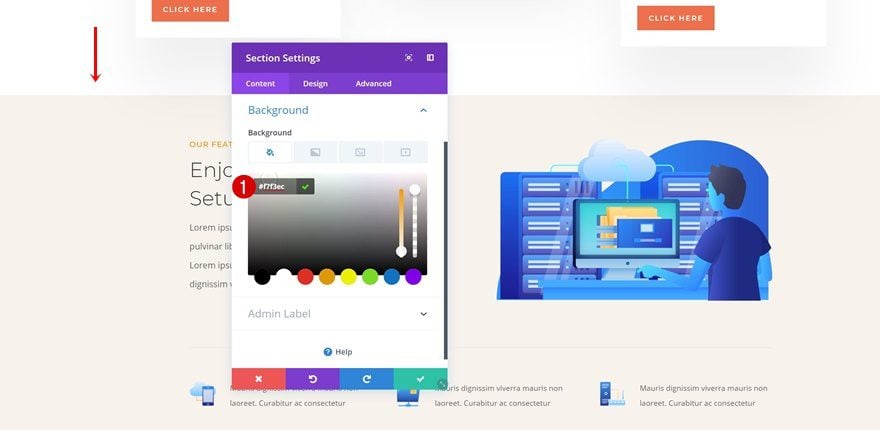
Section Background Color #1
In the last part of this tutorial, we’re going to manually add some design characteristics. This includes, but is not limited to, background settings. Open the section marked in the print screen below and change the background color.
- Background Color: #f7f3ec
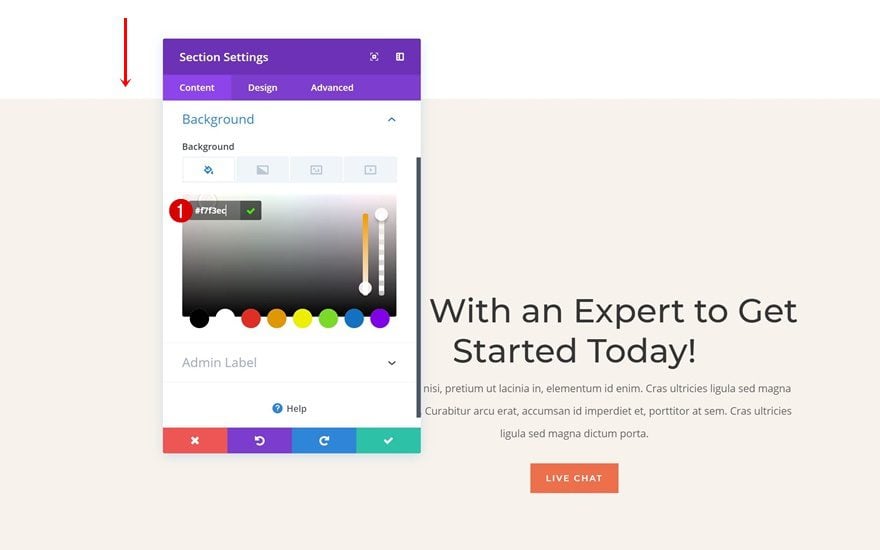
Section Background Color #2
Do the same thing for the section below.
- Background Color: #f7f3ec
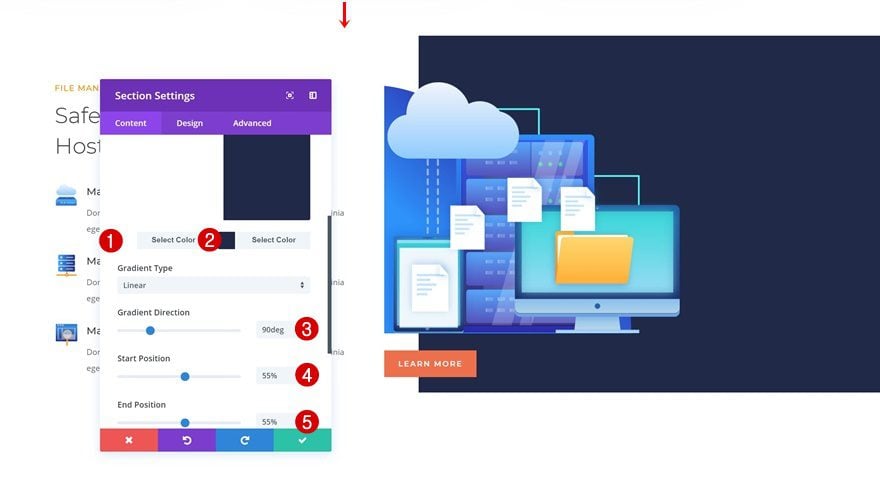
Section Gradient Background #1
Then, find the section in the print screen below and add a gradient background.
- Color 1: #ffffff
- Color 2: #1a2545
- Gradient Direction: 90deg
- Start Position: 55%
- End Position: 55%
Section Gradient Background #2
Use another gradient background for the section below:
- Color 1: rgba(210,218,228,0.38)
- Color 2: #ffffff
- Gradient Direction: 90deg
- Start Position: 45%
- End Position: 45%

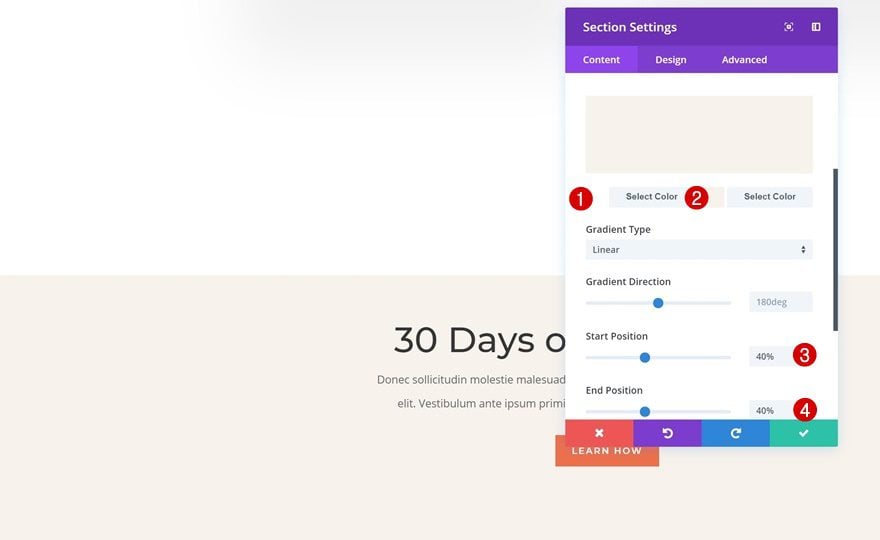
Section Gradient Background #3
Last but not least, add a linear gradient background to the last section on the page as well.
- Color 1: #ffffff
- Color 2: #f7f3ec
- Start Position: 40%
- End Position: 40%
Preview
Now that we’ve gone through all the steps, let’s take a final look at the outcome.
Final Thoughts
In this post, we’ve shown you how you can transfer a layout’s design style using Divi’s efficiency features. This tutorial takes advantage of the new cross-page copy-paste feature that is part of the new Visual Builder. This tutorial is part of our ongoing Divi design initiative where we try to put something extra into your design toolbox each and every week. If you have any questions or suggestions, make sure you leave a comment section below!


Does Divi have a post on how to move one page’s design or all of the elements to a different URL without having to bring over every page (WP import/export) from the original URL to the new URL?
It would be ideal for this to work between two different sites, which would allow downloading each page with their styles and uploading them to another site, for the agencies it would be ideal, it would save a lot of work, since in the utility we should revise module to module and copy the same characteristics, something It takes a lot of time. It would also serve to perform tests, if I want to try a third-party plugin, I would see it in another site and not damage the one that is online (it happened to us :()
Hola
Francamente muy bueno esta opción, pero echo de menos un video para ver cómo queda la página finalmente
Saludos
Once again, Divi’s insanely potential Divi Library with Global Modules and Selective Sync, could reduce the time spend applying new styling to existing content by a factor equal to the number of pages or posts.
Imaging using a saved module layout for a text box, a product image, a person, etc, and an option to edit its styling in *one* place instead of hundreds.
That’s what Divi Library is for.
And even though its intermittent quirks and occasional bugs, its tremendously powerful and complete game-changer not found in any other commonly used page bulder I know of, except maybe Oxygen Builder which is rather technical.
I hope that ET will continue to refine Divi Library, Global Modules and Selective Sync, and for heavens sake – blog about it! So many Divi users out there have no clue on what they are missing out on
/Bjarne
I’d like to +1000 but as you say, using Divi Library with Global Modules and Selective Sync has frequently been subject to bugs in the past so it is difficult to trust it.
Too bad because it is one of the golden assets of Divi.
Divi should communicate more on it and explicitly commit to strengthen it in order to re-establish trust in this in key feature.
ChrisK
This is helpful, thanks.
I didn’t know about any cross-page shortcut. Can you explain when that came out? I must have missed the announcement.
I think there is another update in the future that will allow you to extend style site-wide. What would be cool would be the ability to copy paste between two different sites, as long as they are open in the same browser. I tried, but it doesn’t work.
Thanks for sharing such a nice article…..
Wow! Thank you for this. Somewhat complex at first sight – but certainly time-saving as soon as you’ve familiarized yourself with it.