

Have you ever tried experimenting with font families and letter spacing at the same time? Let me tell you that it can bring eye-catching results. It gives an abstract feeling to your design and it also matches design trends in 2018.
Not only can you add extra letter spacing to your text, you can also use negative letter spacing to bring your characters closer to each other. In this tutorial, that is inspired by one of Roney Gibson‘s designs, we’re going to show you how to creatively and effectively use letter spacing to obtain beautiful results on all screen sizes. For this, we’re using Divi and its built-in options only.
Preview
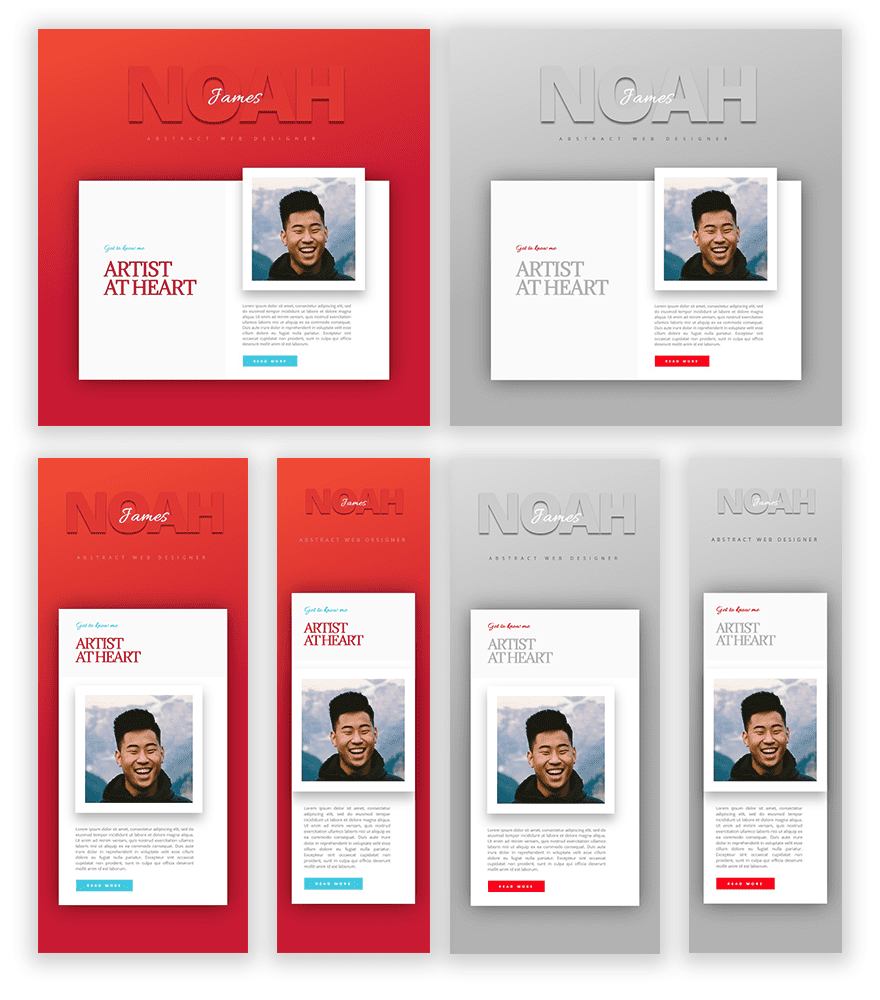
Before we dive into the tutorial, let’s take a quick look at what you can expect from this tutorial on different screen sizes.
Color Palette #1
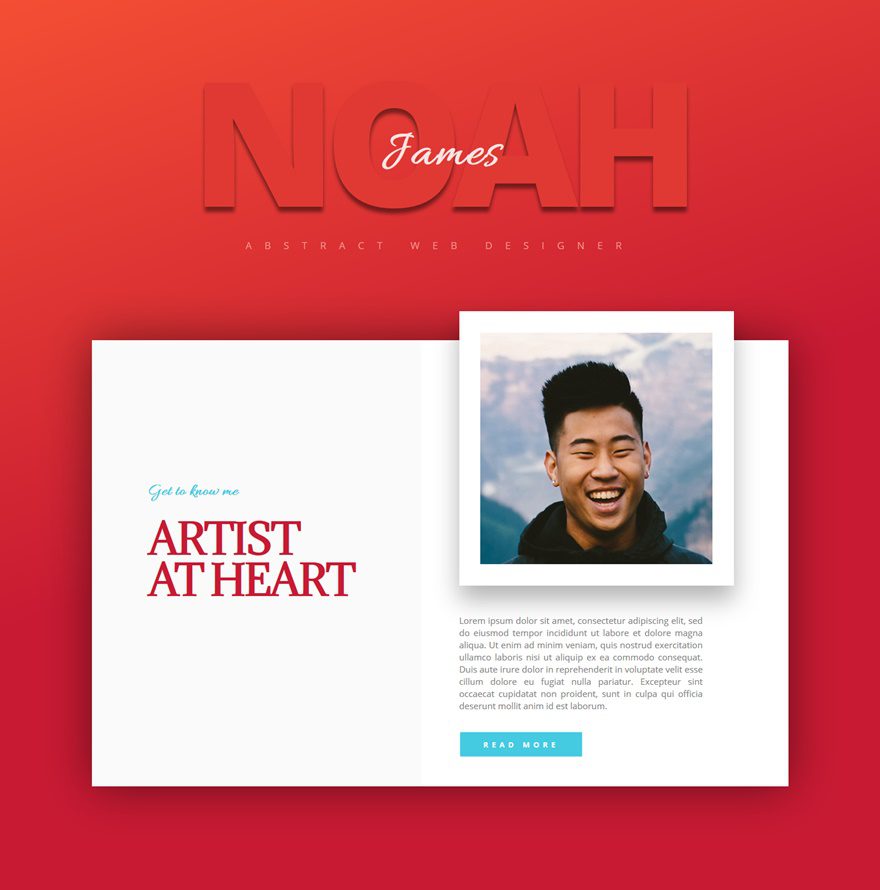
- Color #1: #f44f34
- Color #2: #c81a33
- Color #3: #e03933
- Color #4: #f29d96
- Color #5: #44cae1
Color Palette #2
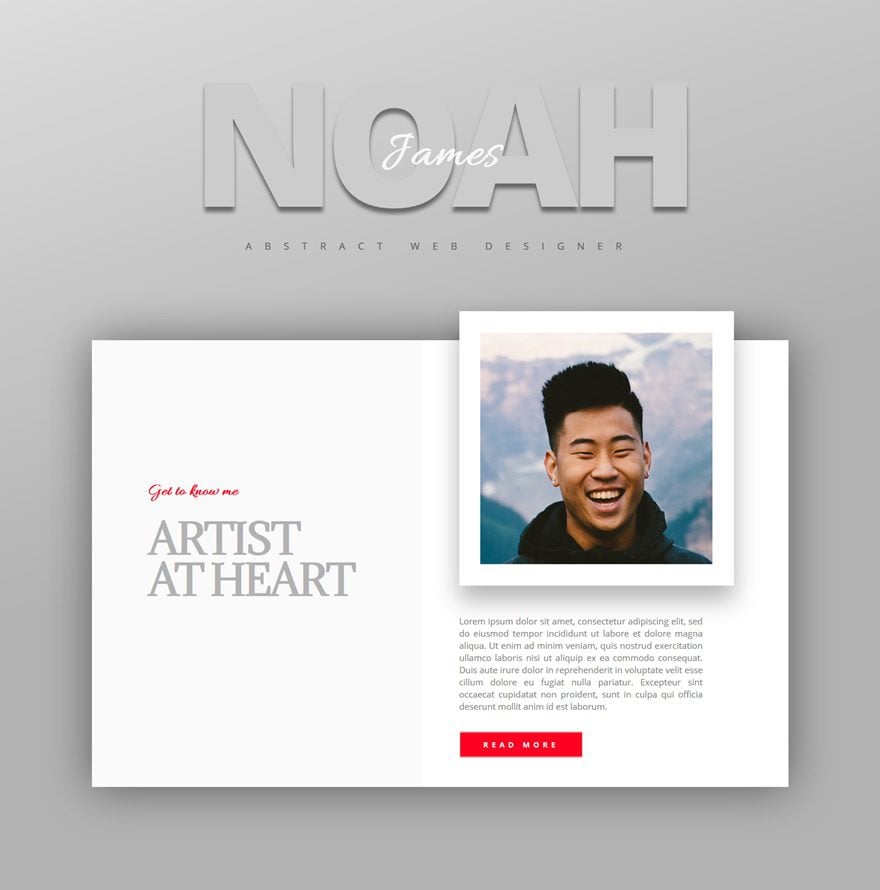
- Color #1: #dddddd
- Color #2: #b2b2b2
- Color #3: #cccccc
- Color #4: #5b5b5b
- Color #5: #ff0022
How to Effectively Use Letter Spacing to Create a Stunning Design with Divi
Subscribe To Our Youtube Channel
Approach
- There are two color palettes that you can apply to this design
- Choose one color palette and keep the numbering the way it is
- Throughout the tutorial, we’ll refer to a certain color number which you have to get from the color palette of your choice
- Afterwards, you can still clone a section and apply the other color palette to it instead
- We’re using both extra and negative letter spacing to create the overall look and feel
- The letter spacing value depends on the size of your font
- That means we’ll need to change the letter spacing for every font size (desktop, tablet, phone)
Add a New Standard Section
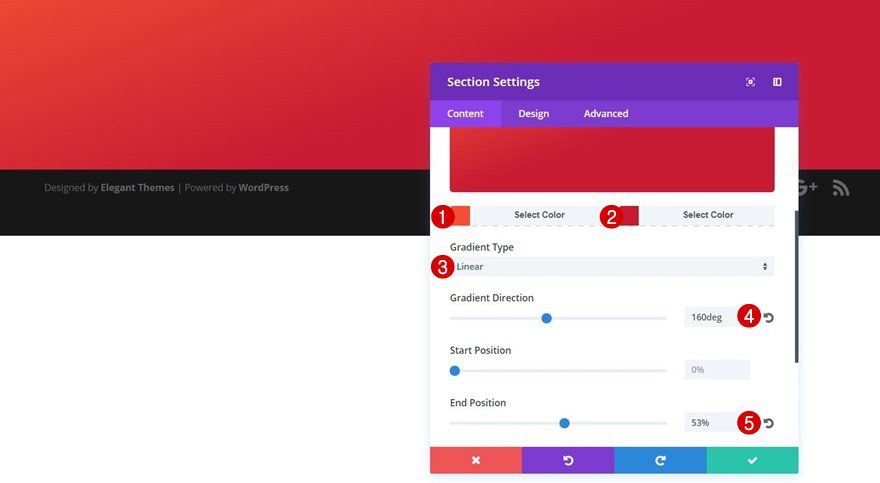
Gradient Background
Create a new page or open an existing one and switch over to Visual Builder. Add a new section next, open the settings and apply the following gradient background color to it:
- First Gradient Color: Color #1
- Second Gradient Color: Color #2
- Gradient Type: Linear
- Gradient Direction: 160deg
- End Position: 53%
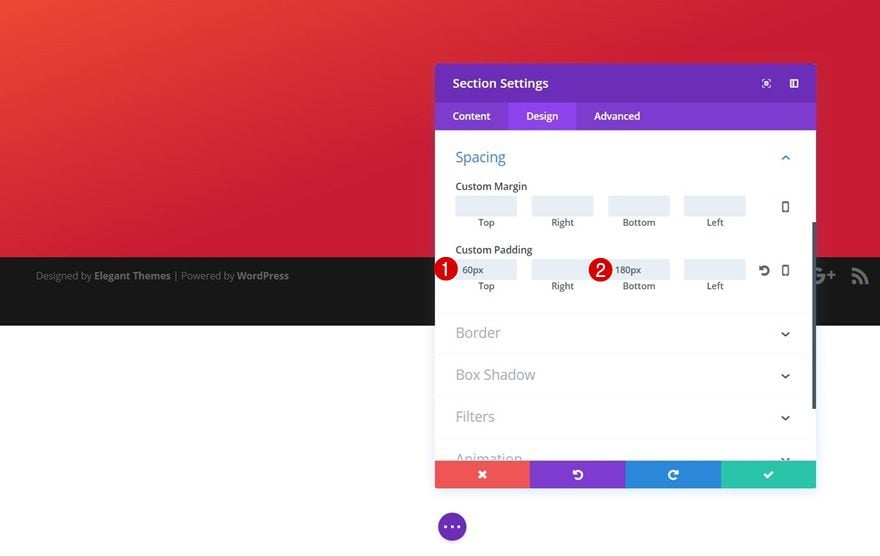
Spacing
Then, move on to the Design tab, open the Spacing subcategory and create some space at the top and bottom of your section by adding the following custom padding:
- Top Padding: 60px
- Bottom Padding: 180px
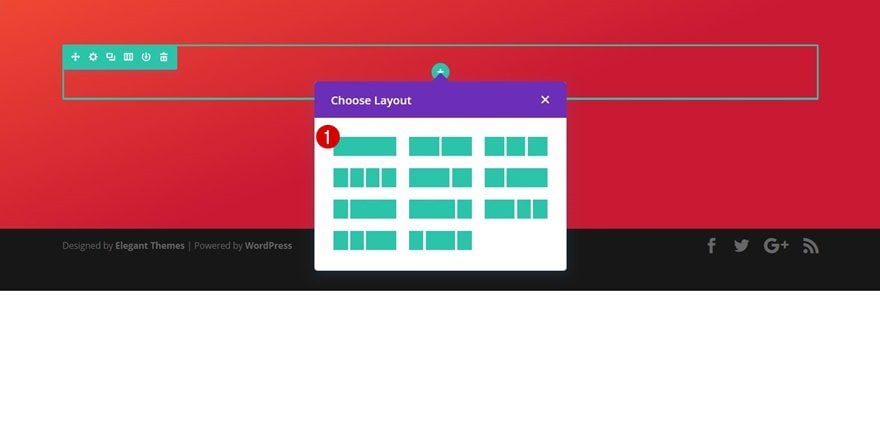
Add First Row
Column Structure
Once you’re done with the section settings, you can add your first row using the following column structure:
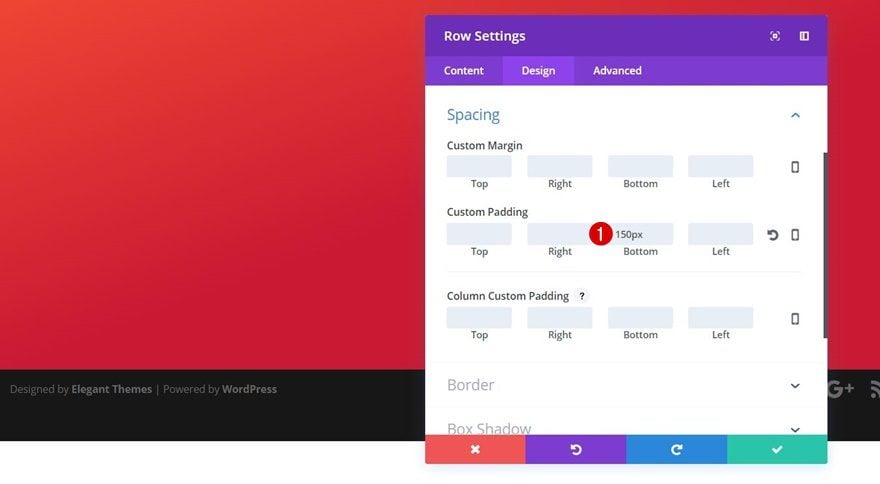
Spacing
Before adding any modules, open the row settings and add ‘150px’ to the bottom padding.
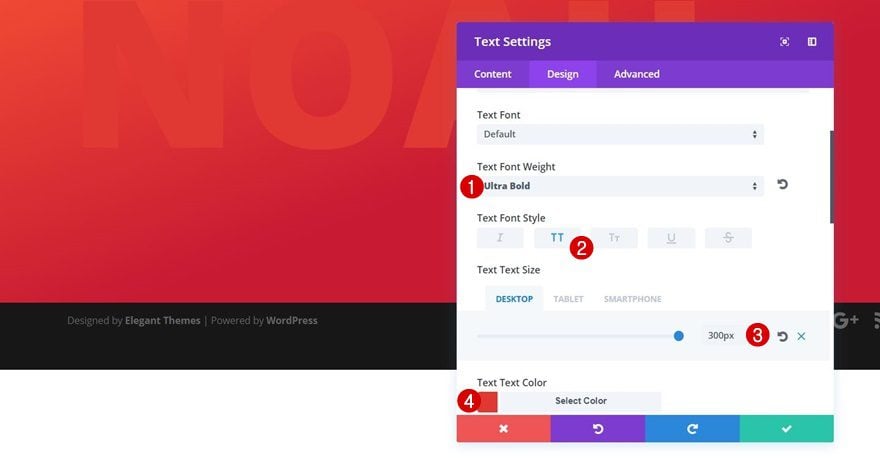
Add First Name Text Module
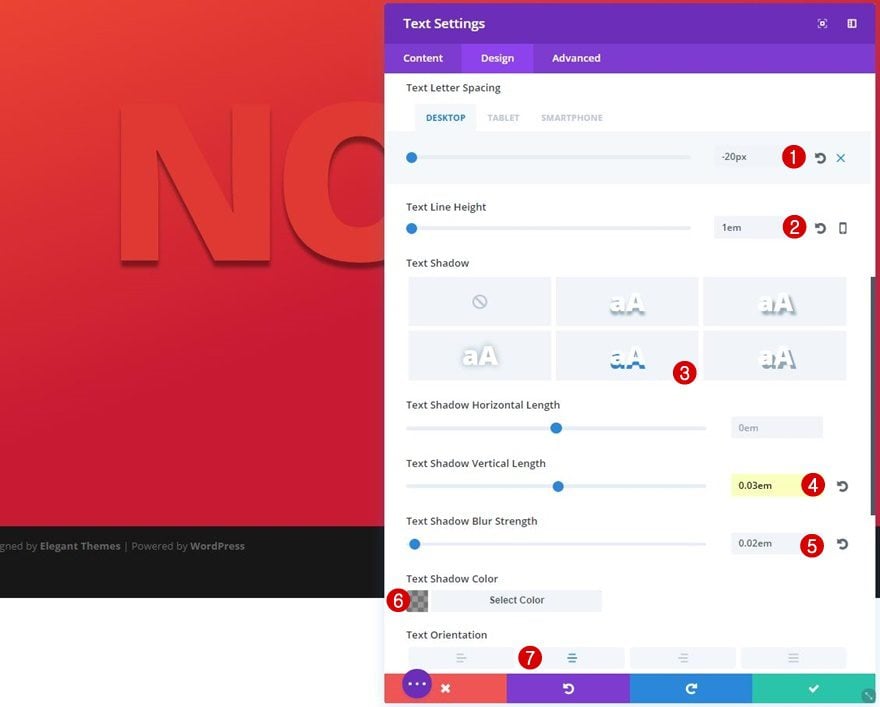
Text Settings
Now we can start adding the desired modules to this row. The first thing we’ll do is add a Text Module for the first name. The text size and letter spacing will be different for each screen size. We’re using negative letter spacing to bring the characters closer to each other while still keeping the size of the text:
- Text Font Weight: Ultra Bold
- Text Font Style: Uppercase
- Text Size: 300px (Desktop), 210px (Tablet), 125px (Phone)
- Text Color: Color #3
- Text Letter Spacing: -20px (Desktop), -15px (Tablet), -8px (Phone)
- Text Line Height: 1em
- Text Shadow Vertical Length: 0.03em
- Text Shadow Blur Strength: 0.02em
- Text Shadow Color: rgba(0,0,0,0.47)
- Text Orientation: Center
Add Last Name Text Module
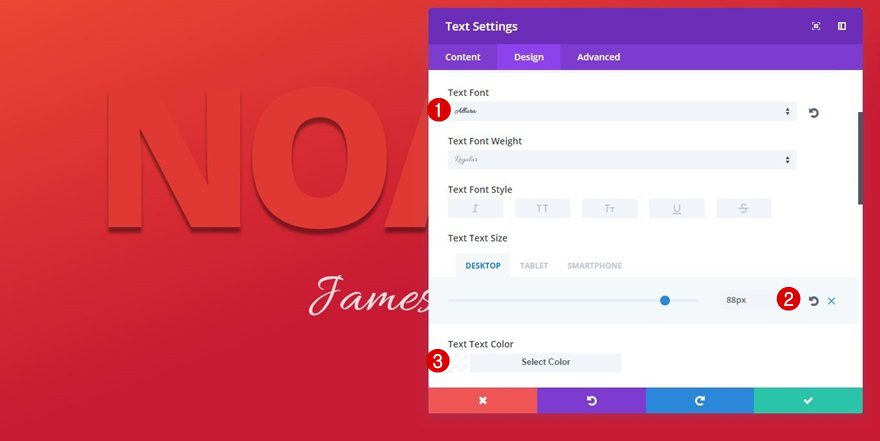
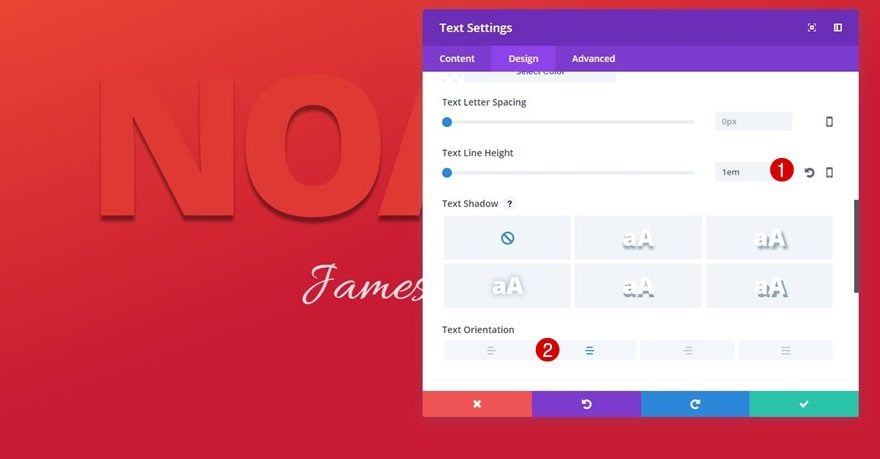
Text Settings
Right below the previous Text Module, add another one containing the last name. Apply the following text settings to it:
- Text Font: Allura
- Text Size: 88px (Desktop), 78px (Tablet), 39px (Phone)
- Text Color: rgba(255,255,255,0.86)
- Text Line Height: 1em
- Text Orientation: Center
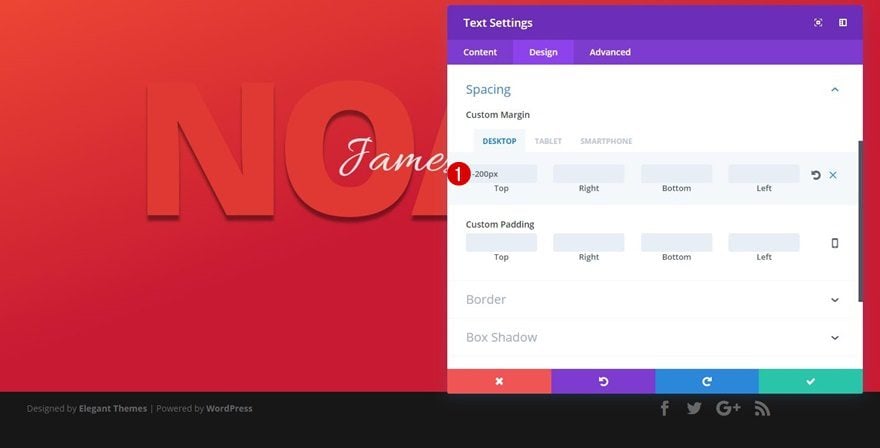
Spacing
To make this Text Module overlap the previous one, add the following top margin to it as well:
- Top Margin: -200px (Desktop), -150px (Tablet), -100px (Phone)
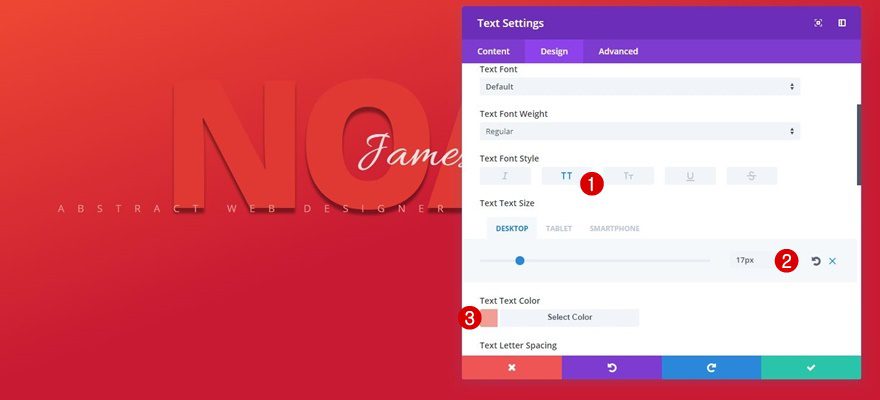
Add Job Title Text Module
Text Settings
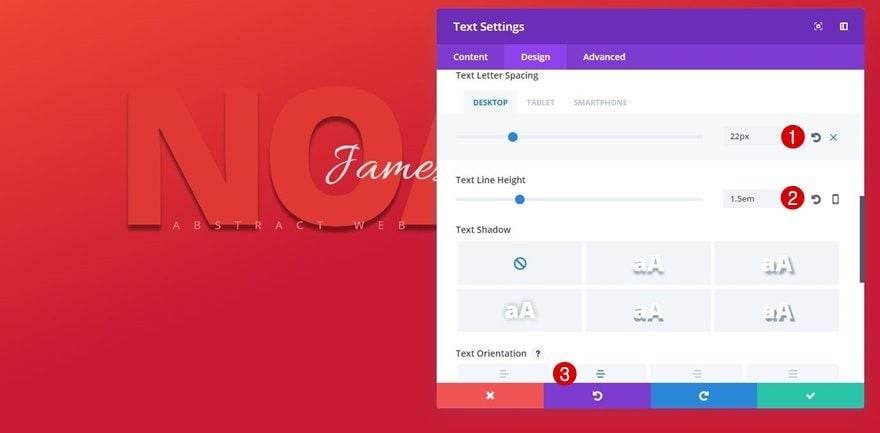
The last Text Module in this row is used to share the job title (or anything else you’d like to share). For this Text Module, we’re using extra letter spacing to create contrast.
- Text Font Style: Uppercase
- Text Size: 17px (Desktop), 16px (Tablet), 14px (Phone)
- Text Color: Color #4
- Letter Spacing: 22px (Desktop), 14px (Tablet), 8px (Phone)
- Text Line Height: 1.5em
- Text Orientation: Center
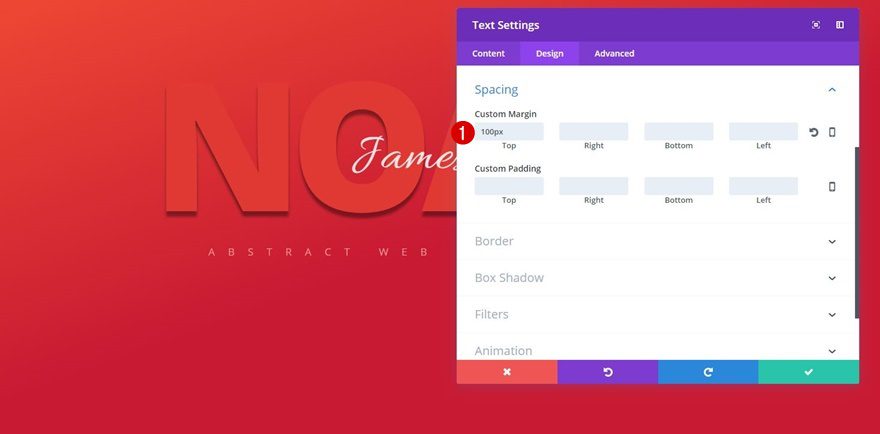
Spacing
We’ll also add ‘100px’ to the top margin of this Text Module to create sufficient space between this Text Module and the previous ones.
Add Second Row
Column Structure
Now that we’re done with the first row, we can move on to the next. We’ll need the following column structure:

Background Color
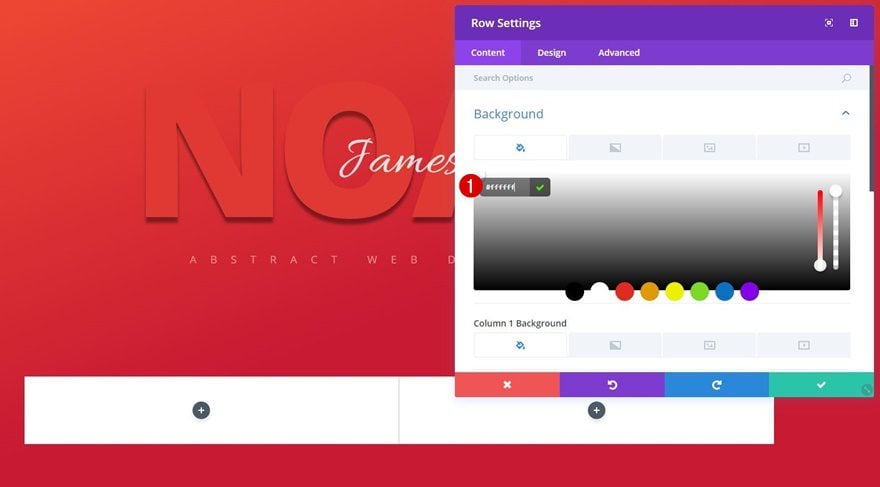
Before adding any modules, open the row settings and use ‘#ffffff’ as the row background color.
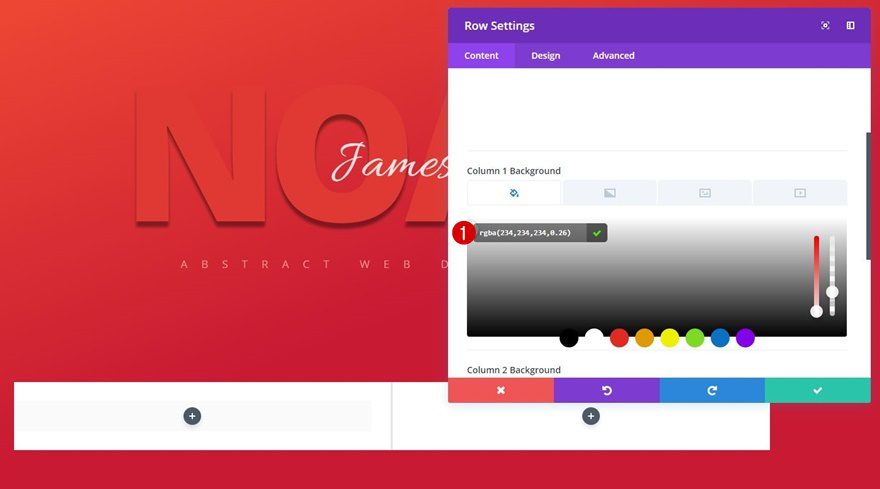
Column 1 Background Color
We’ll also apply a slightly gray background color to the first column using the ‘#f7f7f7’ color code.
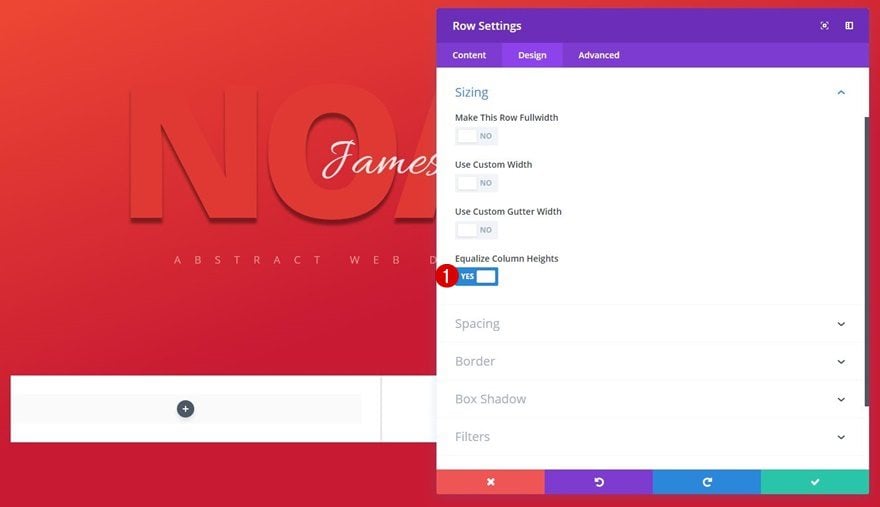
Sizing
We want the columns to have the same height, that’s why we’ll enable the ‘Equalize Column Heights’ option in the Sizing subcategory.
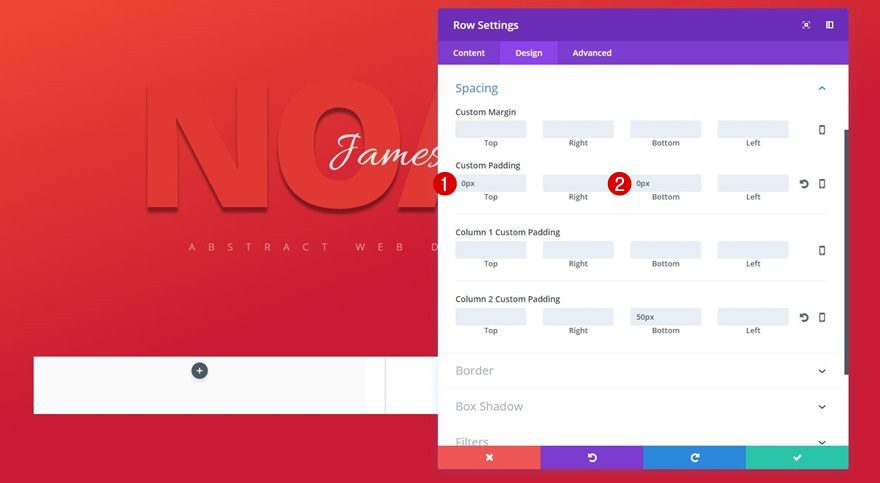
Spacing
And to remove all of the space above and below the columns, we’ll add ‘0px’ to the top and bottom padding of our row.
Box Shadow
Lastly, we’ll apply a Box Shadow with quite a blur strength in combination with a darker shadow color:
- Box Shadow Blur Strength: 80px
- Shadow Color: rgba(0,0,0,0.49)

Add First Text Module to Column 1
Text Settings
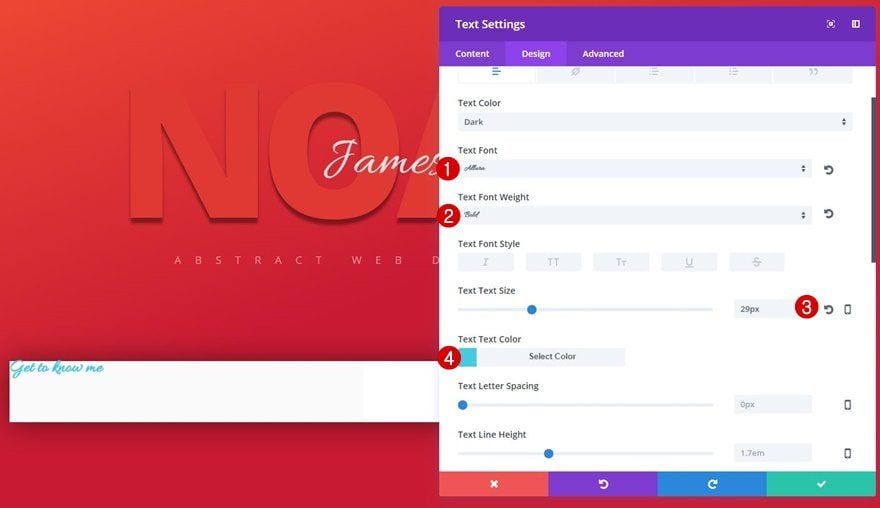
Now, let’s start adding modules to the first column. We’ll start with a ‘get to know me’ Text Module for which we’ll use the following text settings:
- Text Font: Allura
- Text Font Weight: Bold
- Text Size: 29px
- Text Color: Color #5
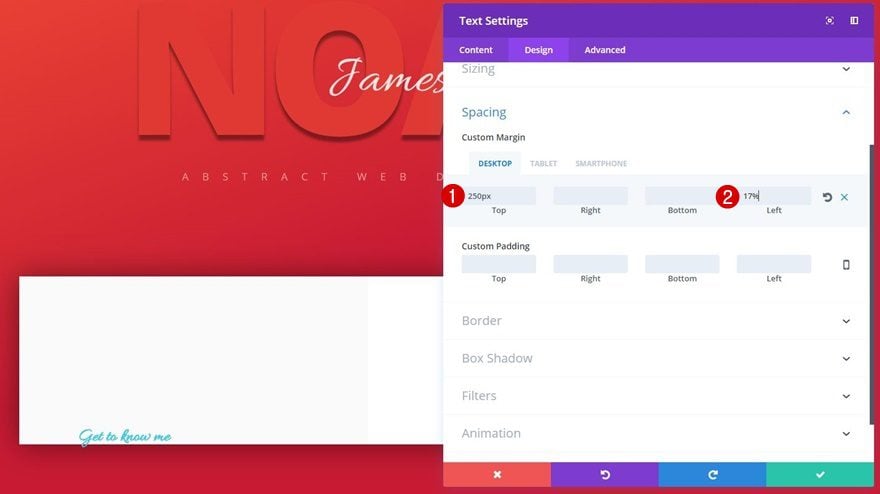
Spacing
To vertically center the Text Module on desktop, we’ll need to add some top margin. We’ll also create some space at the left side:
- Top Margin: 250px (Desktop), 50px (Tablet & Phone)
- Left Margin: 17% (Desktop), 10% (Tablet & Phone)
Add Second Text Module to Column 1
Text Settings
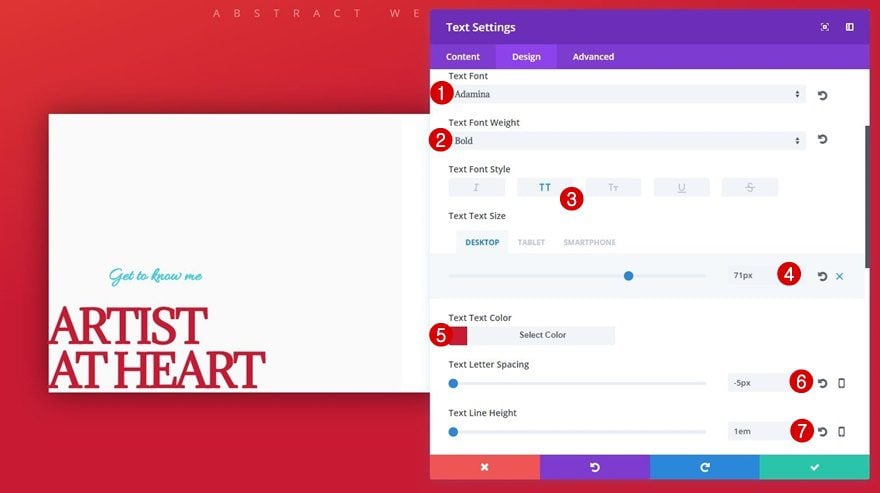
Right below the previous Text Module, add another Text Module. After you’ve added your content, apply the following text settings:
- Text Font: Adamina
- Text Font Weight: Bold
- Text Font Style: Uppercase
- Text Size: 71px (Desktop), 50px (Tablet), 45px (Phone)
- Text Color: Color #2
- Letter Spacing: -5px (The text size difference between screen sizes is neglectable, that’s why we’re using this value across all screen sizes)
- Text Line Height: 1em
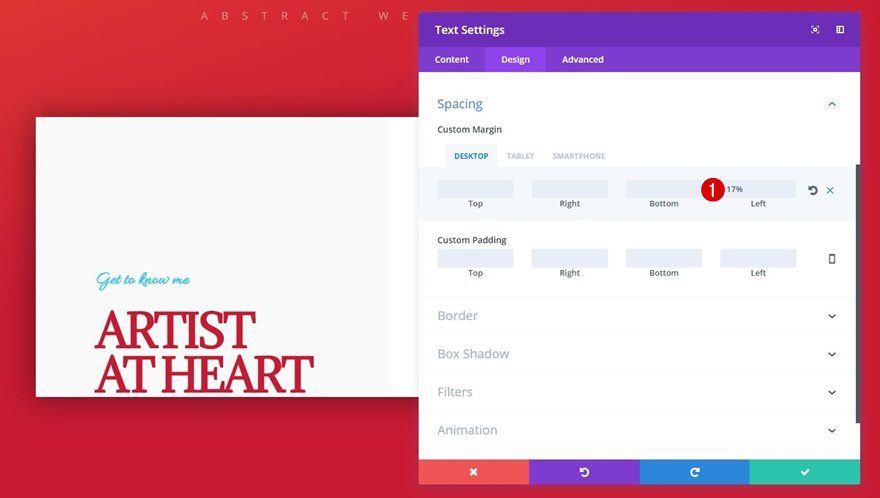
Spacing
Open the Spacing subcategory next and apply the following custom margin to it:
- Bottom Margin: 50px (Tablet & Phone)
- Left Margin: 17% (Desktop), 10% (Tablet & Phone)
Add Image Module to Column 2
Upload Image
We’ve added all the needed modules to the first column so now we can move on to the second one. The first thing we’ll add there is an Image Module.
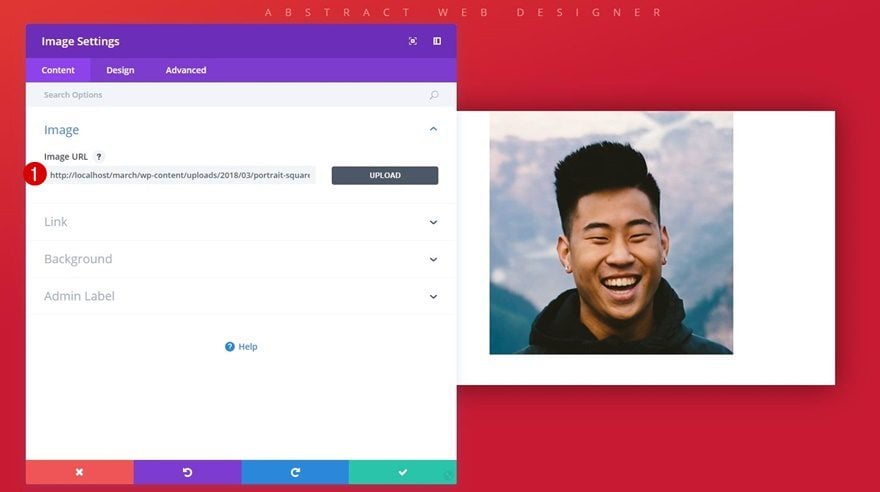
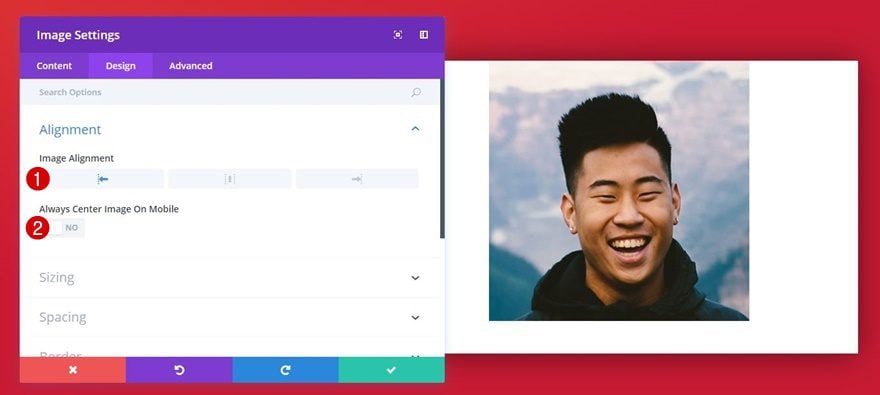
Image Alignment
Go to the Design tab next and enable left Image Alignment in the Alignment subcategory. Also, make sure the ‘Always Center Image on Mobile’ option is disabled.
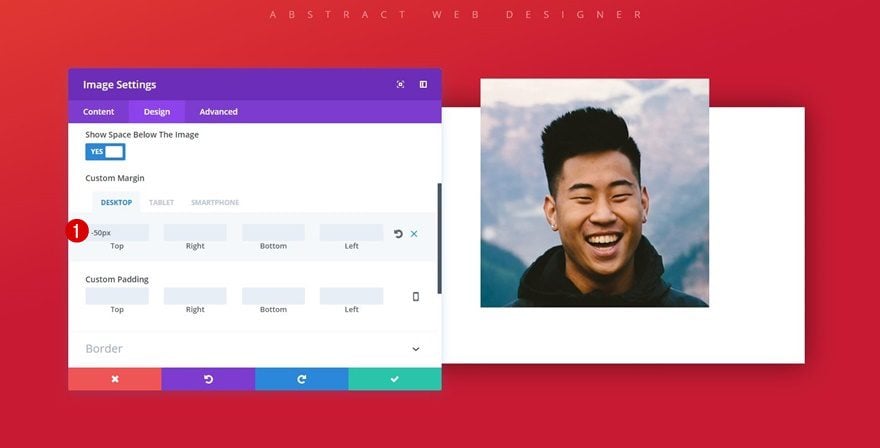
Spacing
We’re going to make this image overlap the top of the row by using the following top margin for it:
- Top Margin: -50px (Desktop Only)
- Left Margin: 5% (Tablet)
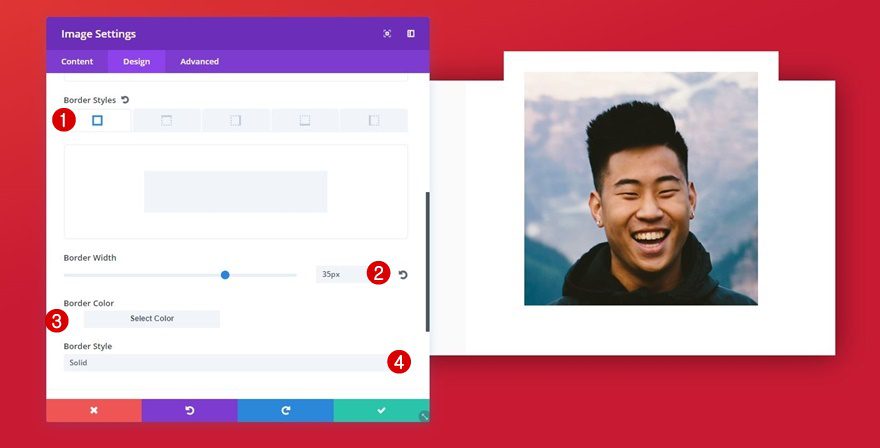
Border
We’re also going to add a border to this image using the following settings:
- Border Width: 35px
- Border Color: #ffffff
- Border Style: Solid
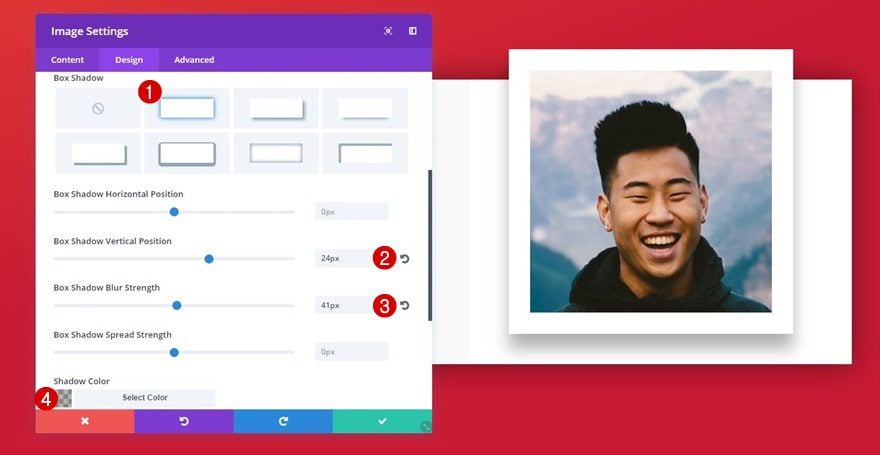
Box Shadow
Lastly, we’ll add a box shadow to create some depth:
- Box Shadow Vertical Position: 24px
- Box Shadow Blur Strength: 41px
- Shadow Color: rgba(0,0,0,0.3)
Add Text Module to Column 2
Text Settings
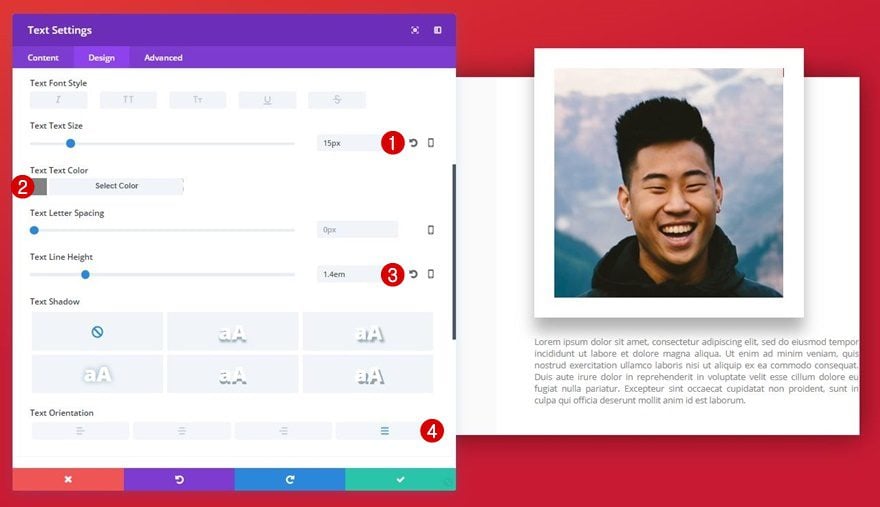
Right below the Image Module you’ve added, add a Text Module for your description. After adding your content, apply the following text settings to it:
- Text Size: 15px
- Text Color: #828282
- Text Line Height: 1.4em
- Text Orientation: Justify
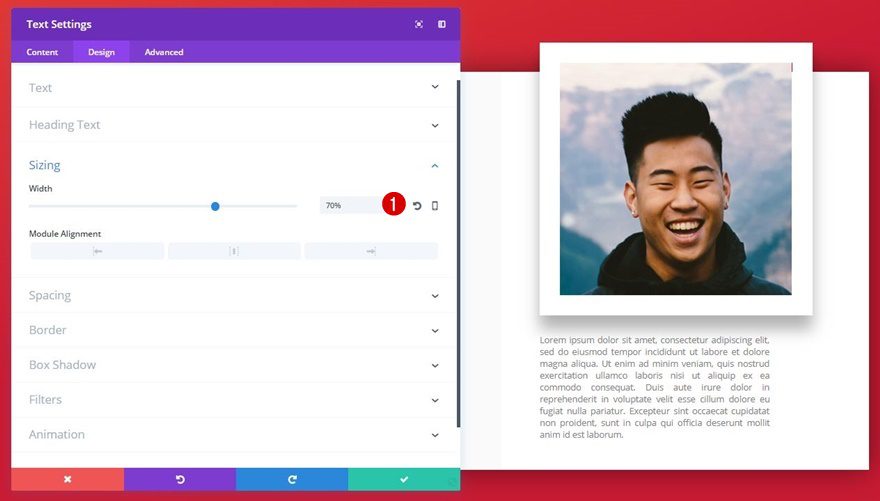
Sizing
We’re going to change the width of this Text Module as well by opening the Sizing subcategory and assigning ‘70%’ to the Width.
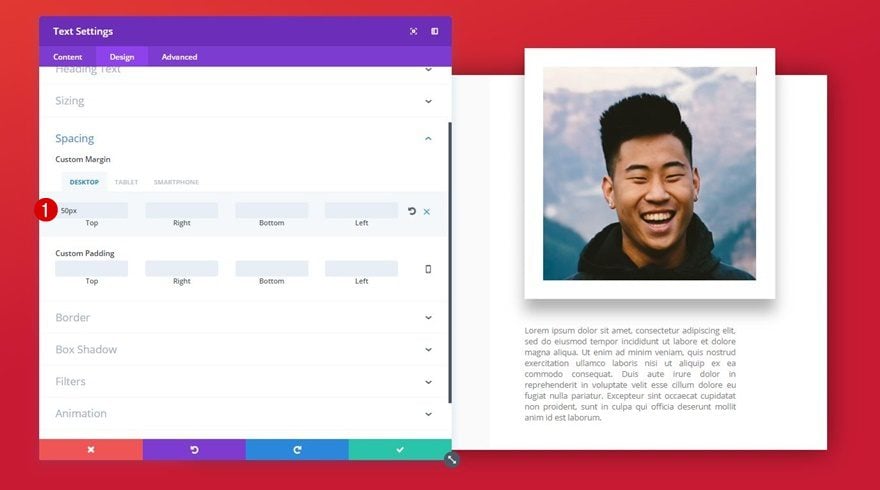
Spacing
Lastly, we’re going to add some top and left margin too:
- Top Margin: 50px (Desktop Only)
- Left Margin: 10% (Tablet & Phone)
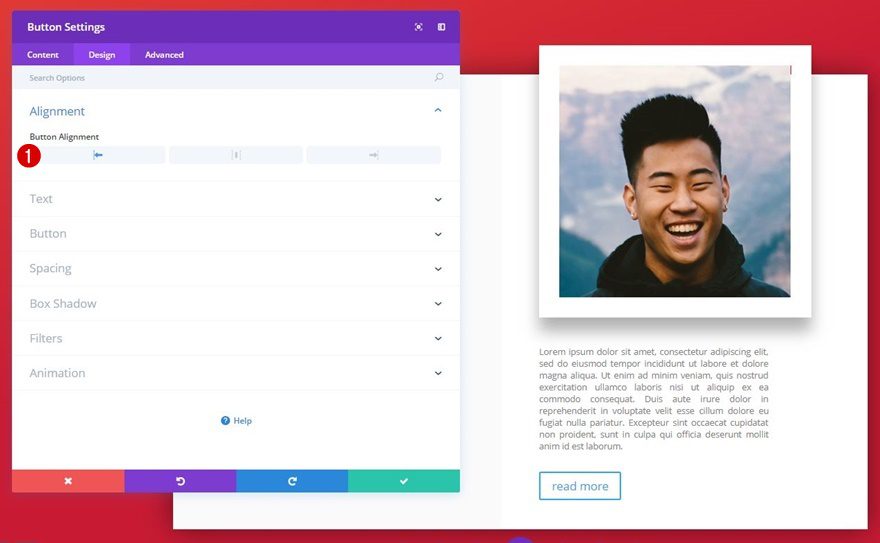
Button Alignment
The last module we’ll need to add is the Button Module. After you’ve added your CTA, open the Alignment subcategory within the Design tab and enable left Button Alignment.
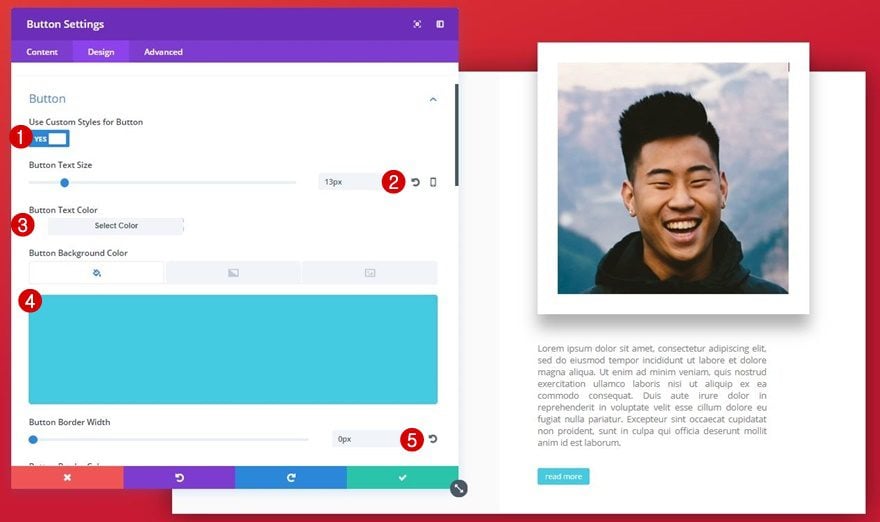
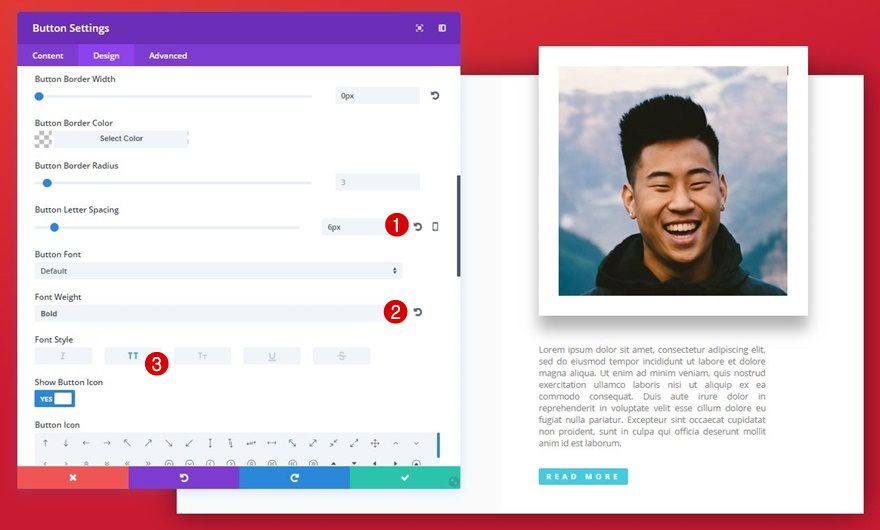
Button Settings
We’re changing the appearance of the button by using the following settings:
- Use Custom Styles for Button: Yes
- Button Text Size: 13px
- Button Text Color: #ffffff
- Button Background Color: Color #5
- Button Border Width: 0px
- Button Letter Spacing: 6px
- Button Font Style: Uppercase
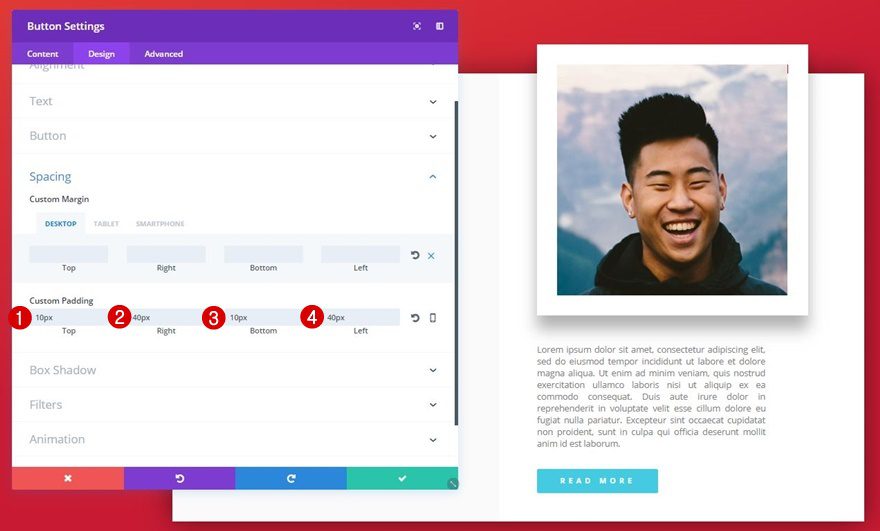
Spacing
Last but not least, to create some more background space for the button, we’ll apply the following custom padding:
- Top Padding: 10px
- Right Padding: 40px
- Bottom Padding: 10px
- Left Padding: 40px
Preferential Extra Step
You can always take these tutorial designs a step further and make them unique. One of the things you can do is add a vibrant top divider, for instance:
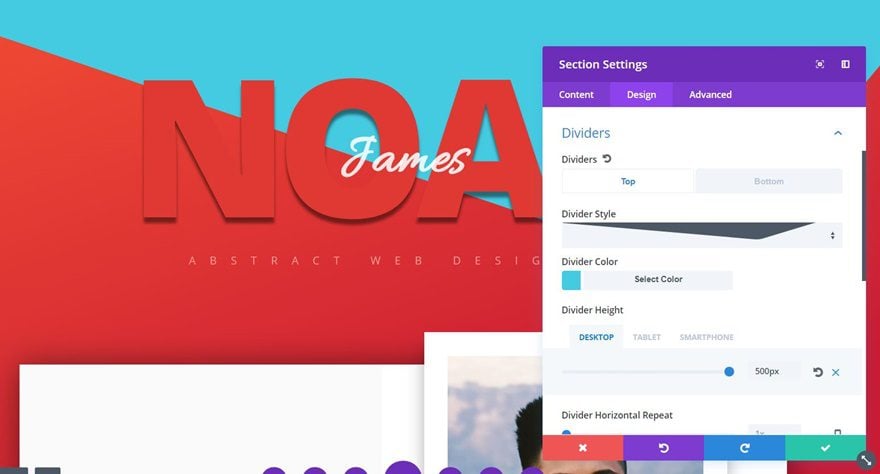
Add Top Divider to Section
To add this top divider, go to the Design tab of your section, open the Dividers subcategory and apply the following settings to it:
- Divider Style: Find in List
- Divider Color: Color #5
- Divider Height: 500px (Desktop), 300px (Tablet), 250px (Phone)
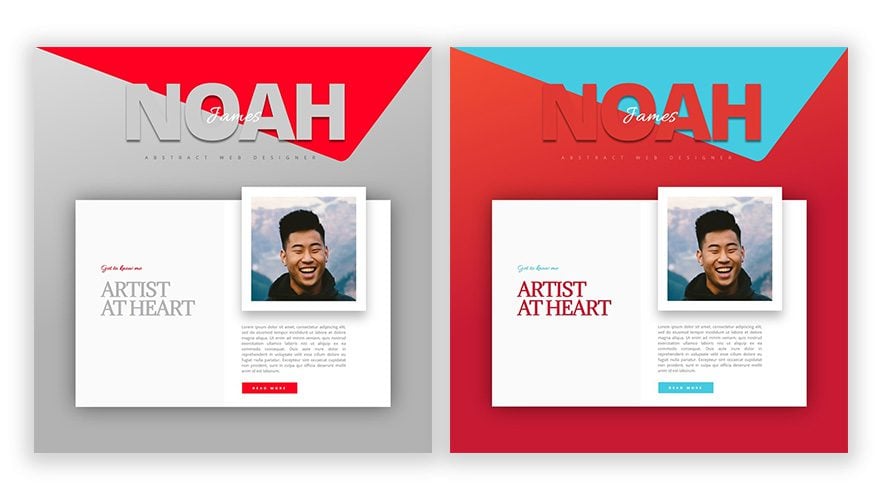
Preview
Now that we’ve gone through all of the steps, and even shared a preferential extra step you can add, let’s take a final look at the result on different screen sizes.
Final Thoughts
Experimenting with letter spacing within your design can bring amazing results. To illustrate that, we’ve shown you how to create a stunning design that uses both extra and negative letter spacing. We’ve also provided you with two color palettes that look great when applied to this design. There’s a flashy red and a subtler gray one. If you have any questions or suggestions, make sure you leave a comment in the comment section below!


Great tutorial, worked perfectly.
Hi, I really love this and would love to put that on a website I manage but for some reason, the gradient does not appear. I tried doing a simple gradient on other pages and it doesn’t show up there either. Not sure if it is because of the latest Divi update or not but since then I can not display gradients.
This is really a fun implementation. With a longer first name, you have to tweak the font size and letter spacing to keep it from wrapping as the browser width narrows. And, as you say, experiment and tinker to get other effects.
Awsome as usual 🙂
just one question (maybe I missed something) – what is your default font (‘noah’)?
Thanks, Richard! It’s Divi’s default theme font Open Sans (haven’t changed my typography in the general settings).
thank you 🙂
Thank you Donjete. Very creative text control. I learned so much.
Nice to hear, Jade, thank you!
Hi,
Nice tutorial Donjete! While I was scrolling I noticed the footer on this page. (The “492,154 Customers Are Already Building Amazing…” module). How is that made it
colorshifts goes fullscreen and so on?
I assume this page is made with divi? Keep up the great tutorials!
Hi there, thank you! We have a blog post dedicated to creating that expanding CTA section: https://www.elegantthemes.com/blog/divi-resources/how-to-create-an-expanding-cta-like-elegant-themes
And students feel exhausted and start losing the interest after a certain time. To keep that interest alive, we provide such authentic and original research based assignments to students that will qualify even the toughest of standards set by the concerned authorities.
As usual, this is awesome! Thank You Donjete! You rock girl!
Thanks a lot Alicia!! 🙂
Nice work Donjete, I love these tutorials you guys go, shows the endless possibilities available with Divi. Not to mention gets the creative juices flowing again.
Keep them coming.
We’ll keep them coming! 🙂 Thank you Herby!