

Image overlays have been around for a long time in web design. They are great for engaging visitors by revealing additional content and design elements when hovering over the image. Because this is such a popular design feature, there are many plugins out there dedicated to creating image overlays. However, depending on the plugin, they can be fairly limiting or they can be a bit overkill for what you may need. That’s why it helps to have the know-how to build these yourself in Divi.
In this tutorial, we are going to show you how to design custom image overlays in Divi. These overlays will change and reveal elements when hovering over the image. The best part is that you have complete control over the design of your image overlays using Divi’s built-in design options. And, with a few snippets of custom CSS, you can have some gorgeous image overlays to take your site to the next level. No plugin is necessary.
Let’s get started!
- 1 Sneak Peek
- 2 Download the Divi Image Overlays Layout for FREE
- 3 Download For Free
- 4 You have successfully subscribed. Please check your email address to confirm your subscription and get access to free weekly Divi layout packs!
- 5 What You Need to Get Started
-
6
Creating Custom Image Overlays in Divi
- 6.1 Building the Section, Row, and Columns
- 6.2 Adding the Image
- 6.3 Adding the Image Overlay Color Using a Divider Module
- 6.4 Adding the Overlay Heading Text
- 6.5 Creating the Overlay Body Text
- 6.6 Creating the Overlay Button
- 6.7 Adding the Custom CSS with the Code Module
- 6.8 Duplicating the Column for More Designs
- 6.9 Creating Image Overlay Design #2
- 6.10 Creating Image Overlay Design #3
- 7 Final Touches
- 8 Final Results
- 9 Final Thoughts
Sneak Peek
Here is a quick look at the design we’ll build in this tutorial.
Download the Divi Image Overlays Layout for FREE
To lay your hands on the designs from this tutorial, you will first need to download it using the button below. To gain access to the download you will need to subscribe to our newsletter by using the form below. As a new subscriber, you will receive even more Divi goodness and a free Divi Layout pack every Monday! If you’re already on the list, simply enter your email address below and click download. You will not be “resubscribed” or receive extra emails.

To import the section layout to your Divi Library, navigate to the Divi Library.
Click the Import button.
In the portability popup, select the import tab and choose the download file from your computer.
Then click the import button.

Once done, the section layout will be available in the Divi Builder.
Let’s get to the tutorial, shall we?
What You Need to Get Started

To get started, you will need to do the following:
- If you haven’t yet, install and activate the Divi Theme.
- Create a new page in WordPress and use the Divi Builder to edit the page on the front end (visual builder).
- Choose the option “Build From Scratch”.
After that, you will have a blank canvas to start designing in Divi.
Creating Custom Image Overlays in Divi
Building the Section, Row, and Columns
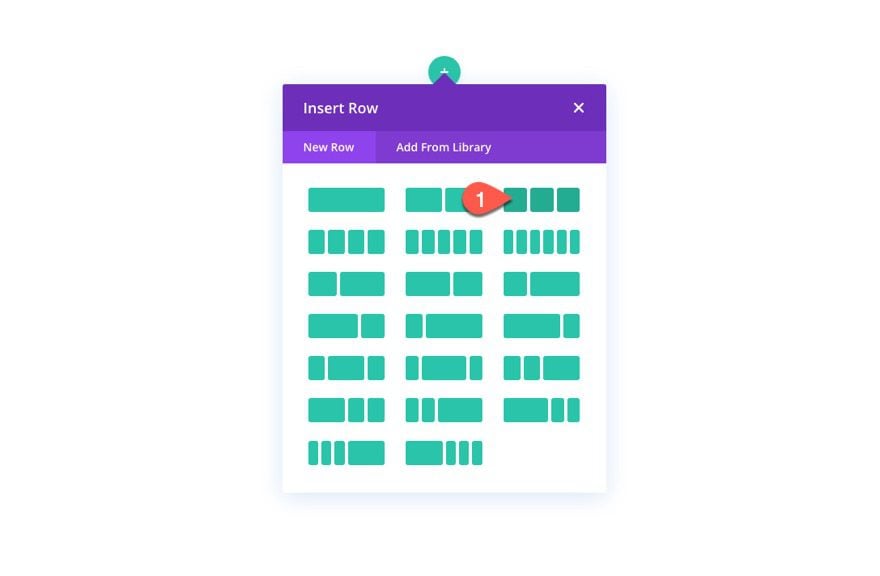
To get started, create a three-column row inside the default section.
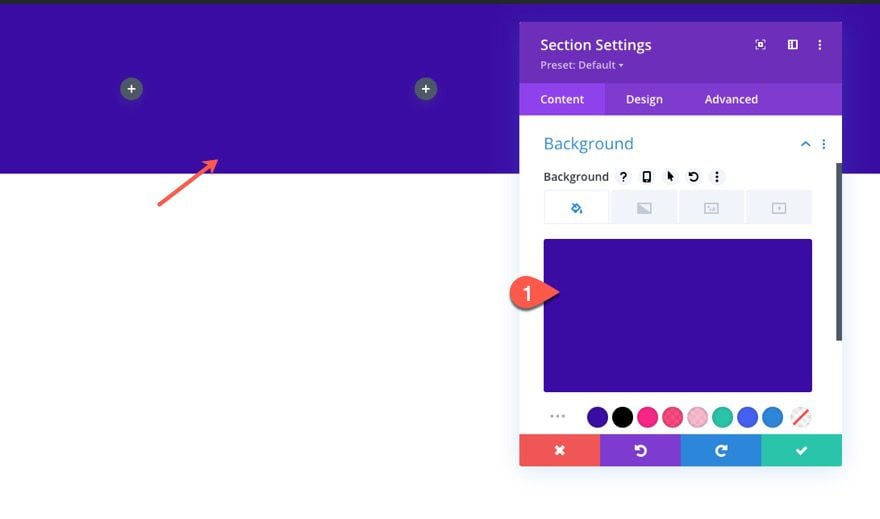
Open the section settings and add the following background color:
- Background Color: #3a0ca3
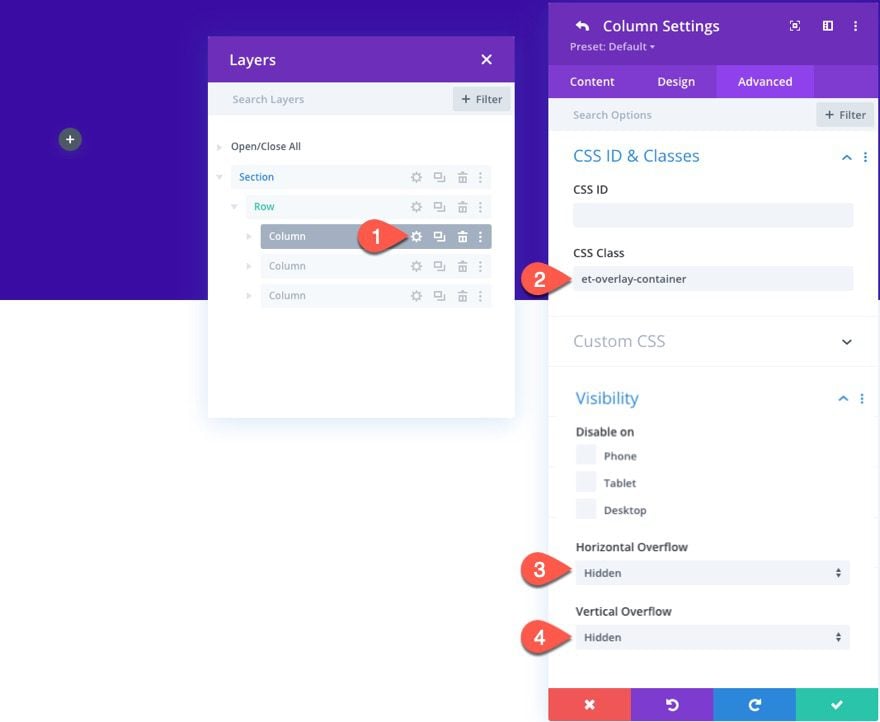
Next, open the settings for column 1 and update the following:
- CSS Class: et-overlay-container
- Horizontal Overflow: Hidden
- Vertical Overflow: Hidden
The CSS Class is needed to trigger the hover effects of the overlay items that we are going to build. The hidden overflow is needed to because we are going to have a hover effect that scales the image beyond the column container.
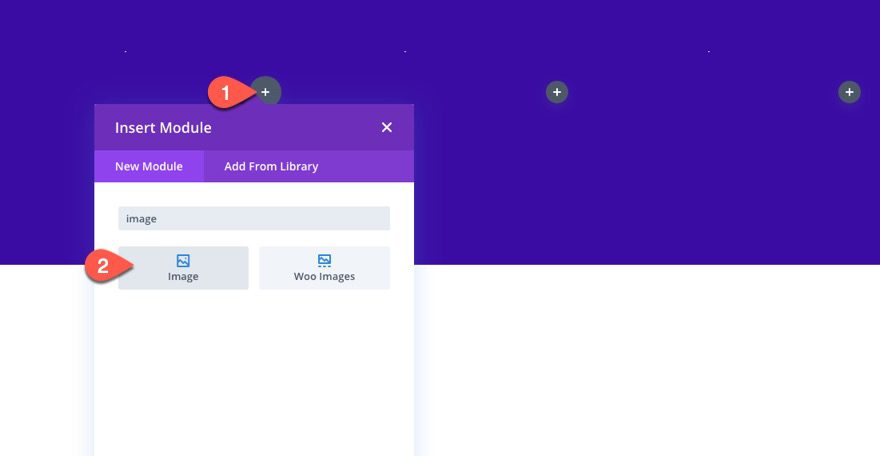
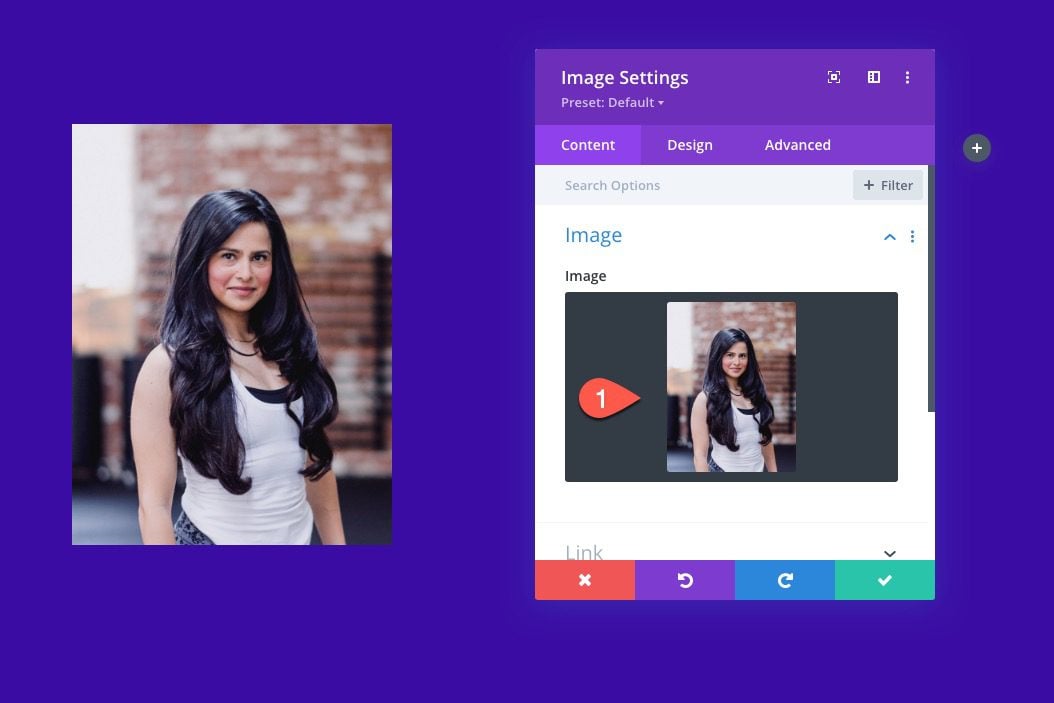
Adding the Image
Now that the section, row, and column are ready, go ahead and add a new image module to column 1. This will be the main image behind our overlay designs.
Upload an image that is more of a portrait rather than a landscape. I’m using one that is roughly 800px by 1050px. Make sure it is wide enough to span the full width of the column on all browser sizes.
(NOTE: You can use landscape images but you may need to adjust the positioning of the overlay elements accordingly so that they don’t overlap.)
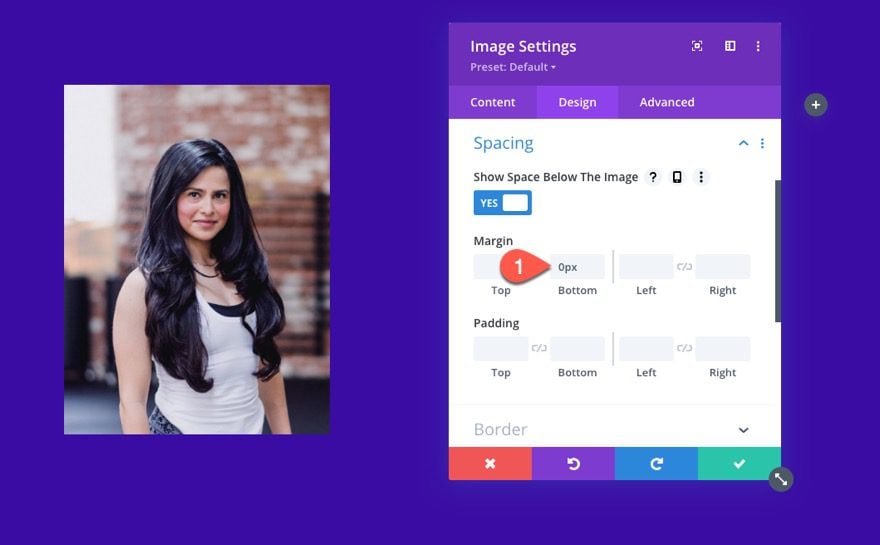
Under the design tab, update the following:
- Margin: 0px bottom
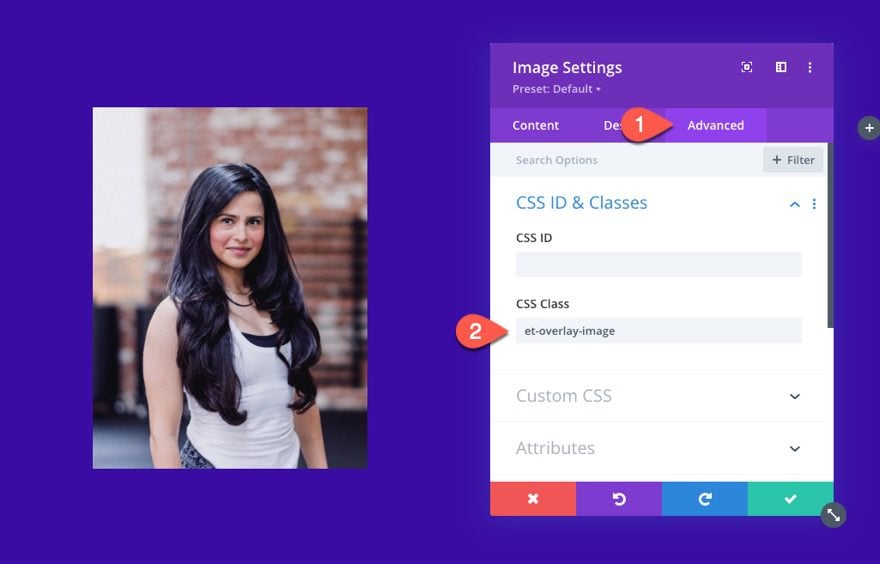
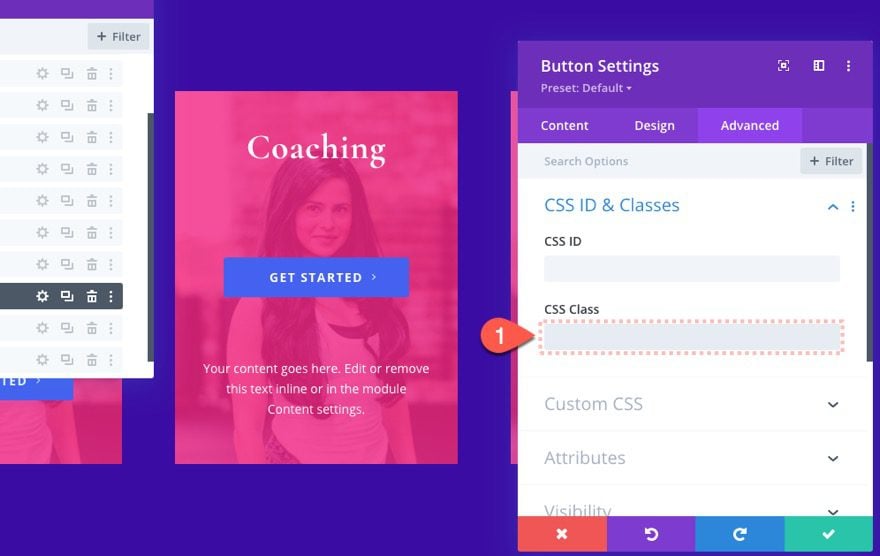
Under the advanced tab, add the following CSS Class:
- CSS Class: et-overlay-image
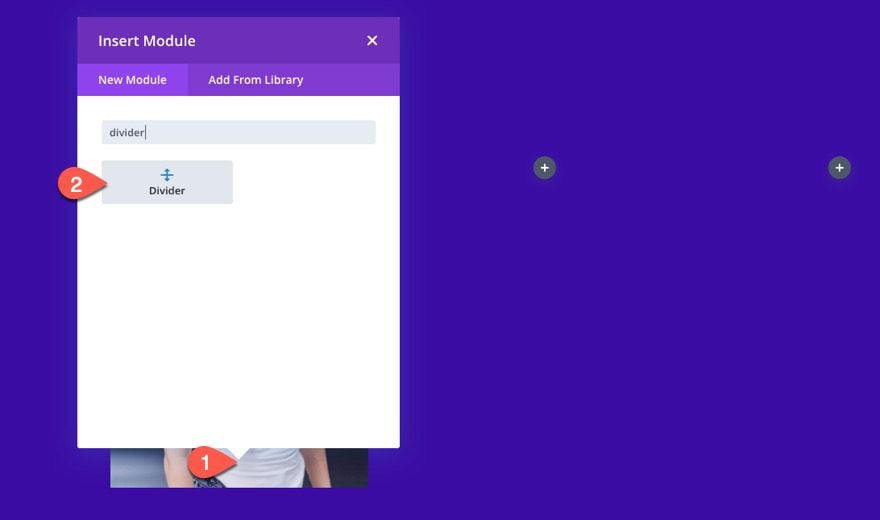
Adding the Image Overlay Color Using a Divider Module
To create the image overlay color, we are going to use a divider module. The idea is to create a cover over the image by making the divider span the full height and width of the column so that it sits perfectly over the image. Once in position, you can adjust the background color of the divider module to get the overlay color we want.
First, add a divider module under the image.
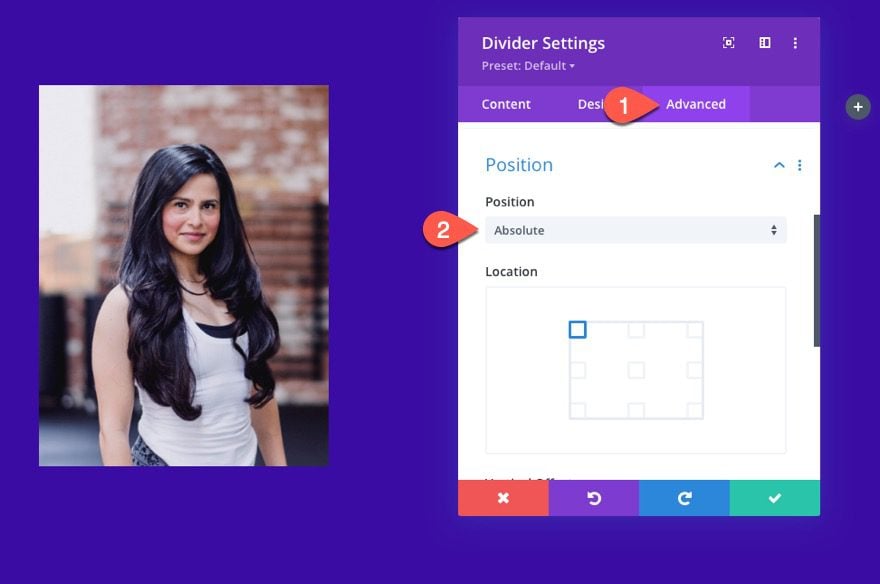
Then position the divider as absolute so that it will sit on top of the image:
- Position: Absolute
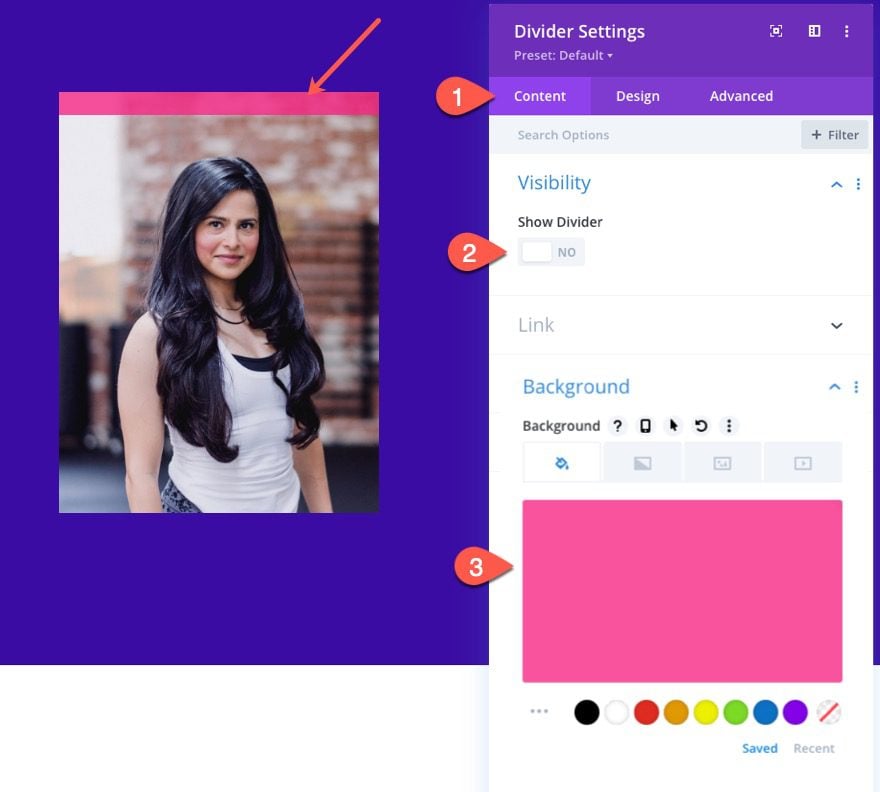
Under the content tab, update the following:
- Show Divider: NO
- Background Color: rgba(247,37,133,0.8)
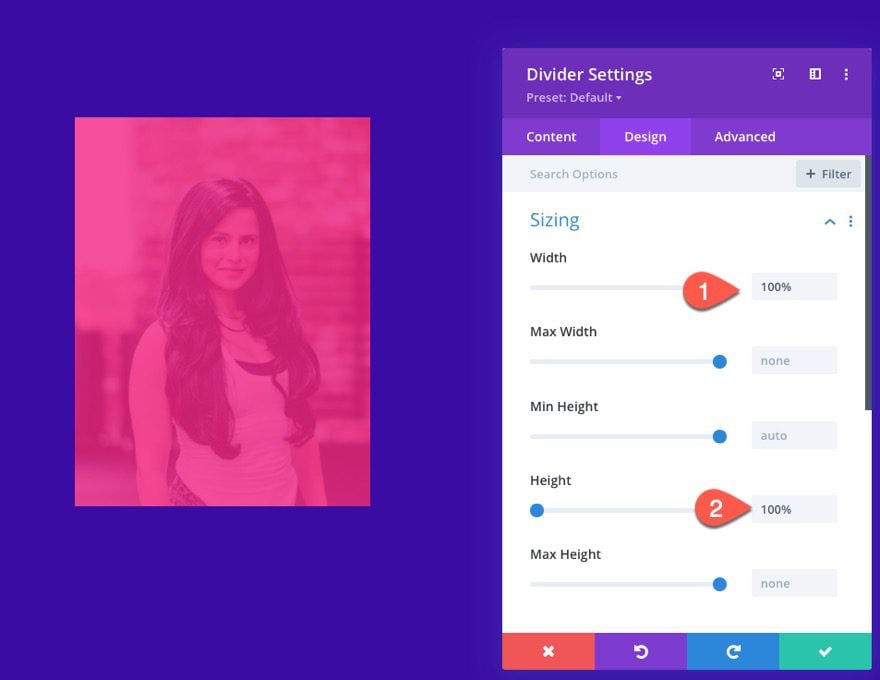
Then update the height and width of the divider:
- Width: 100%
- Height: 100%
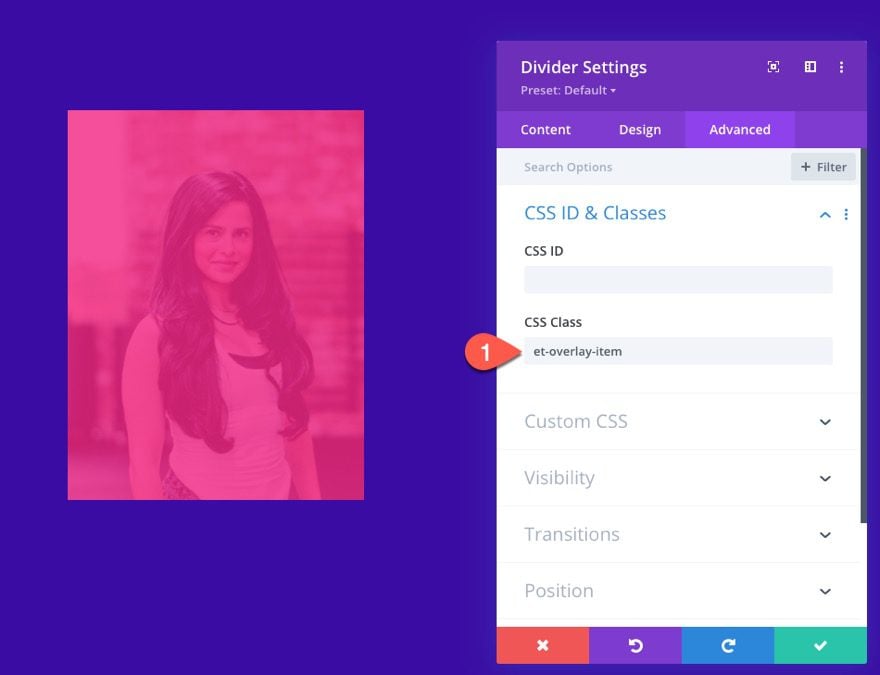
Once the design is in place, add the following CSS Class to the divider:
- et-overlay-item
(NOTE: This class should be added to all overlay design elements that you want to show only on hover. If you don’t want the element to be hidden initially, leave it out.)
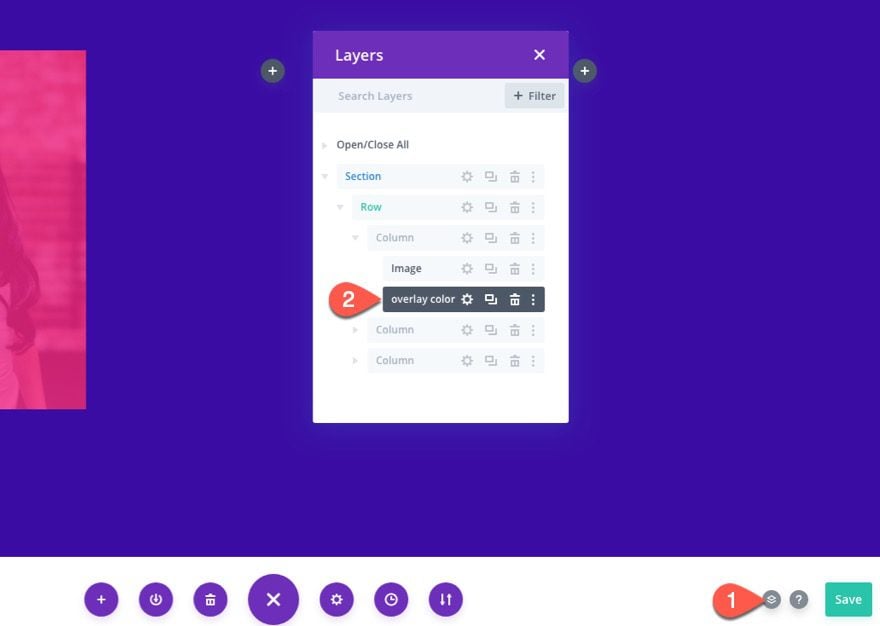
To help keep track of the design elements/modules, open the layers modal, and label the divider module (“overlay color”).
Adding the Overlay Heading Text
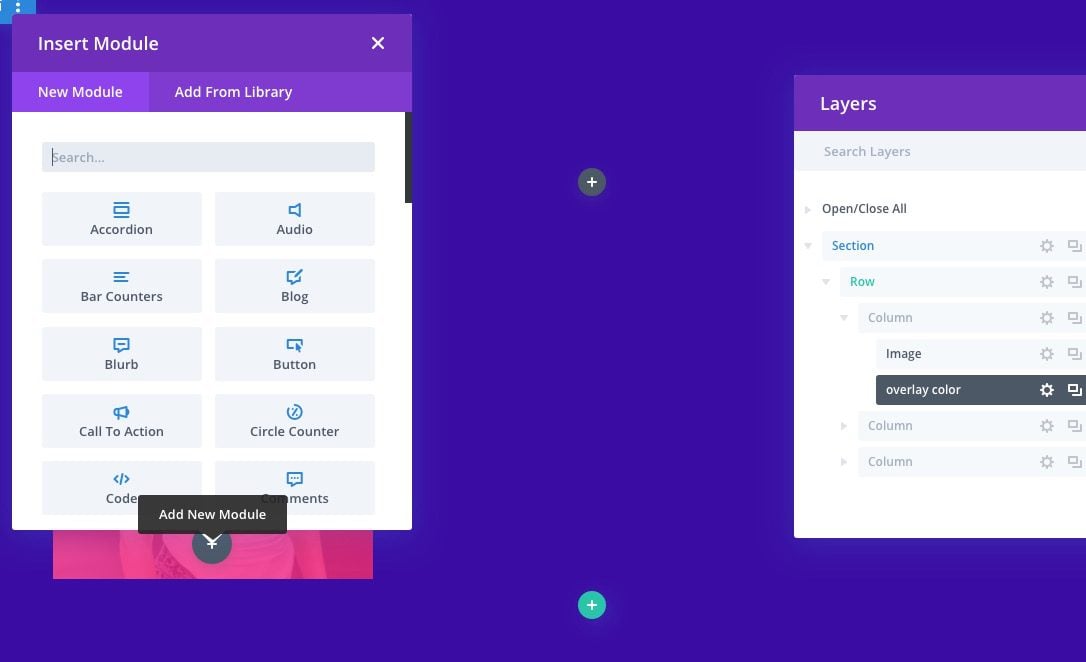
Under the divider module, add a new text module. This will serve as our overlay heading text that will appear at the top of the image on hover.
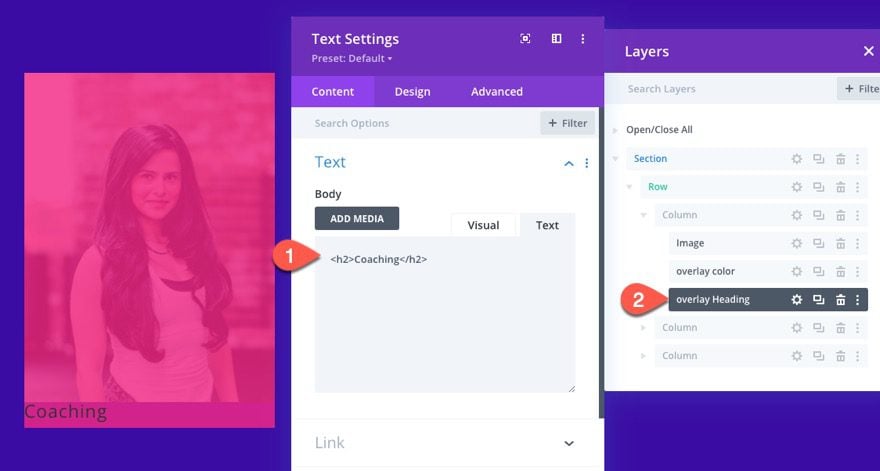
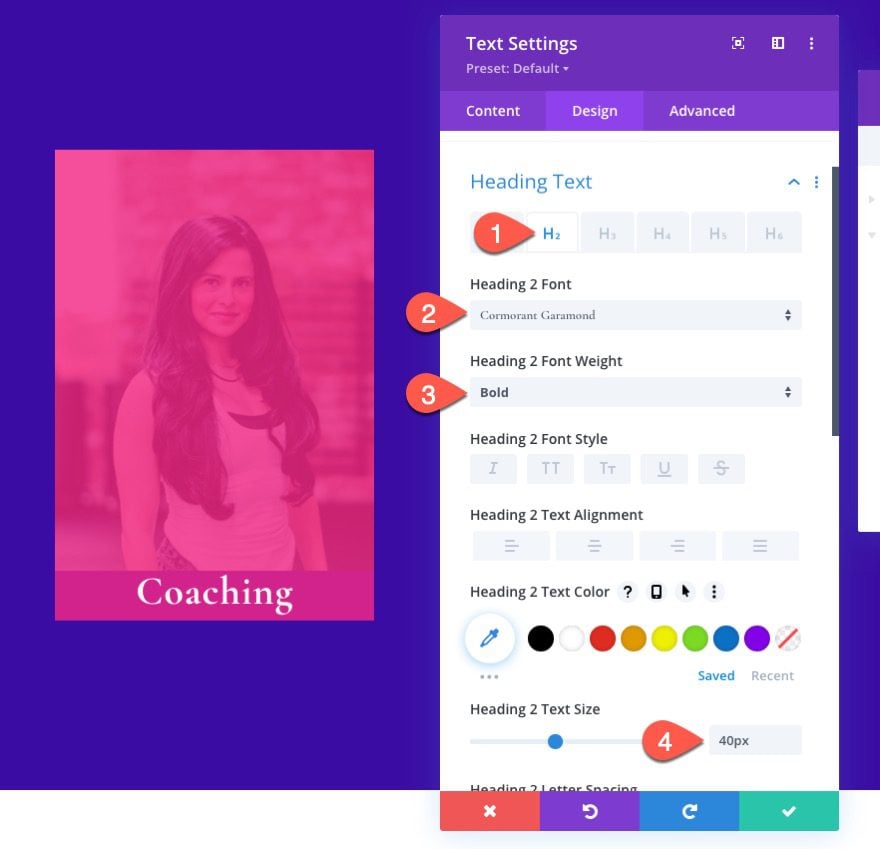
Update the content with an H2 heading:
<h2>Coaching</h2>
Then update the label of the text module for referencing later.
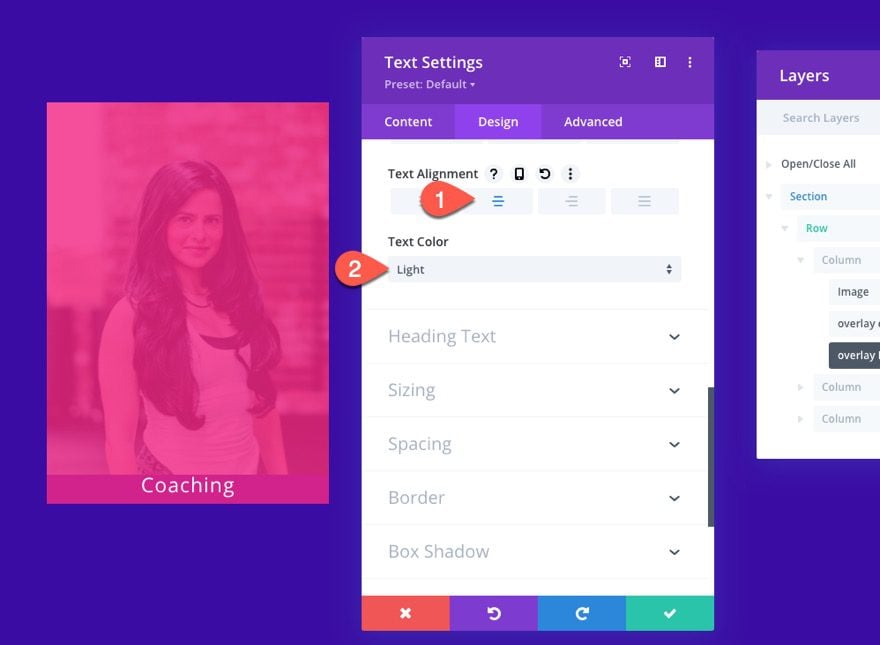
Under the text design settings, update the following:
- Text Alignment: Center
- Text Color: Light
- Heading 2 Font: Cormorant Garamond
- Heading 2 Font Weight: Bold
- Heading 2 Text Size: 40px
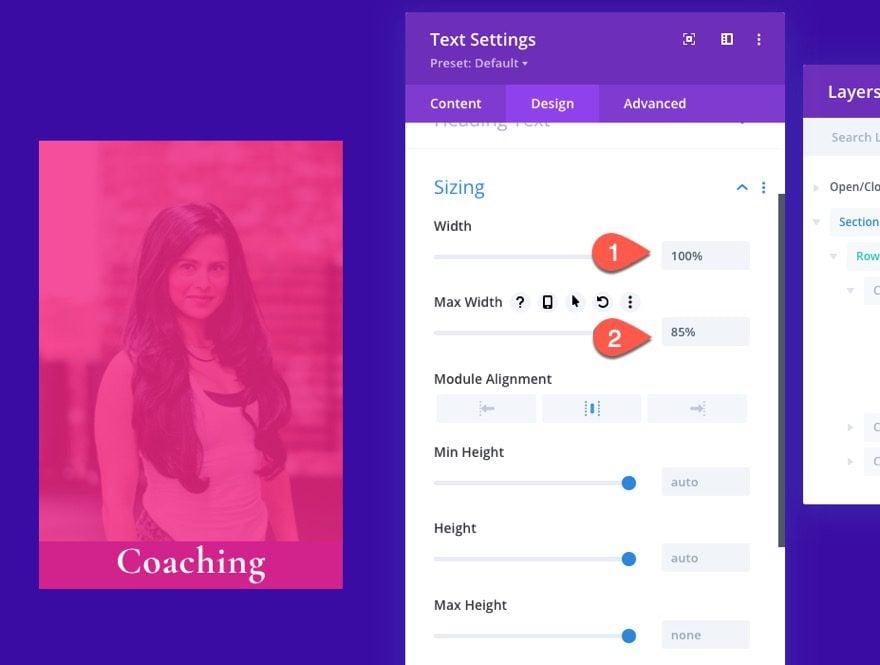
- Width: 100%
- Max-Width: 85%
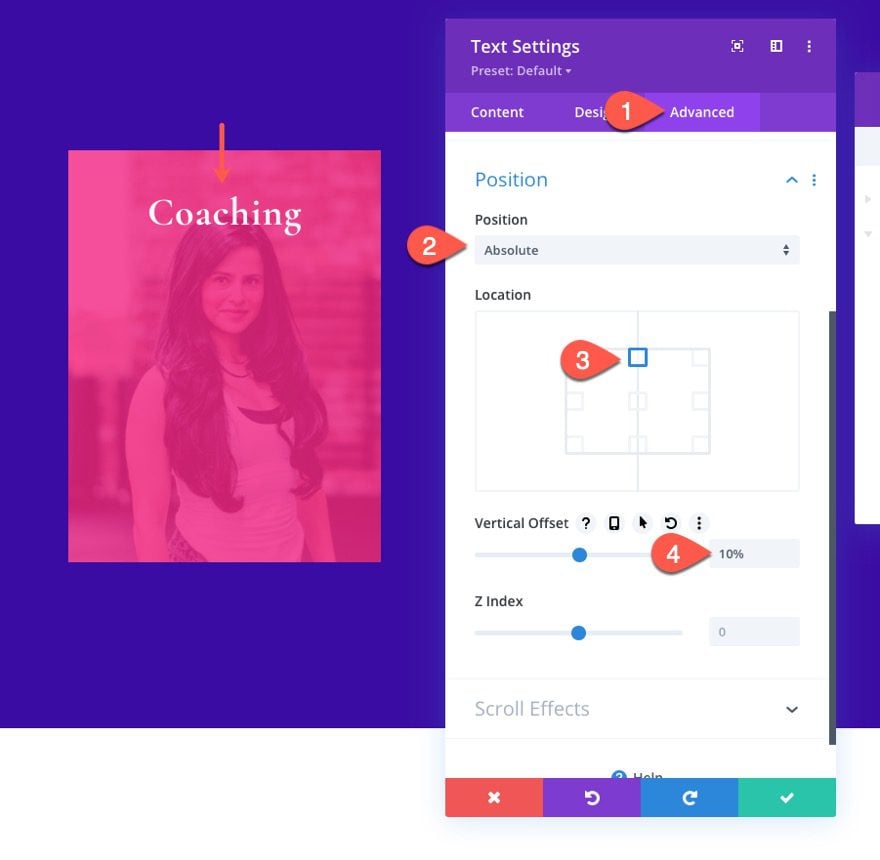
Under the advanced tab, update the position as follows:
- Position: Absolute
- Location: top center
- Vertical Offset: 10%
(NOTE: The vertical offset may need to be adjusted depending on the size of the aspect ratio of the image. For example, a landscape type image may need less of an offset)
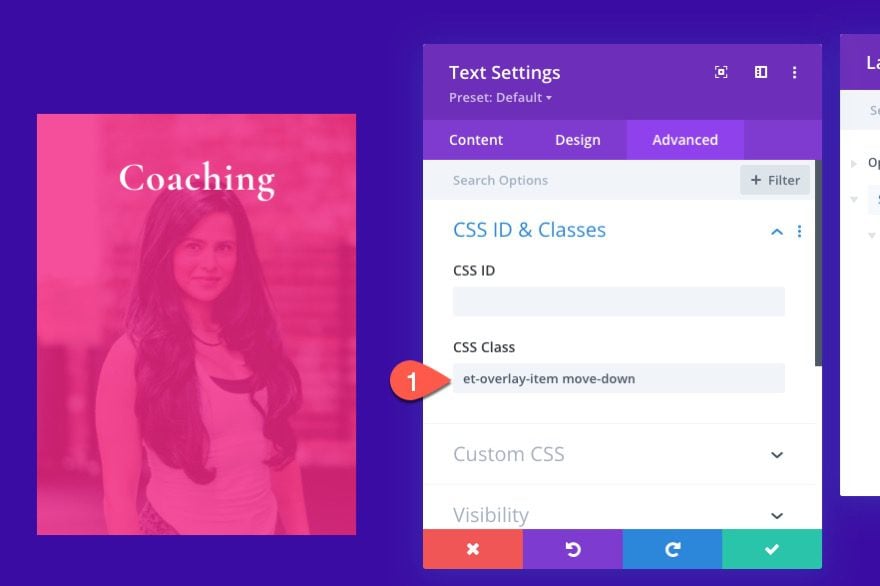
Next, add the following CSS Classes to the text module:
- CSS Class: et-overlay-item move-down
In addition to “et-overlay-item” class, we are adding an additional “move-down” class in order to use custom CSS to move the heading downward slightly on hover.
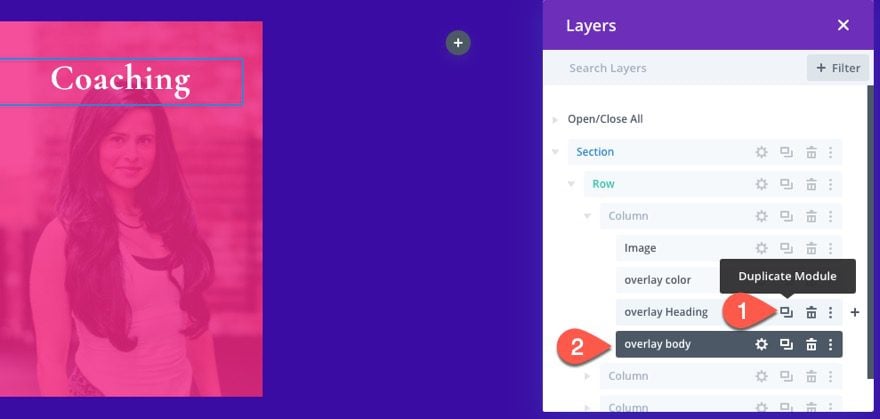
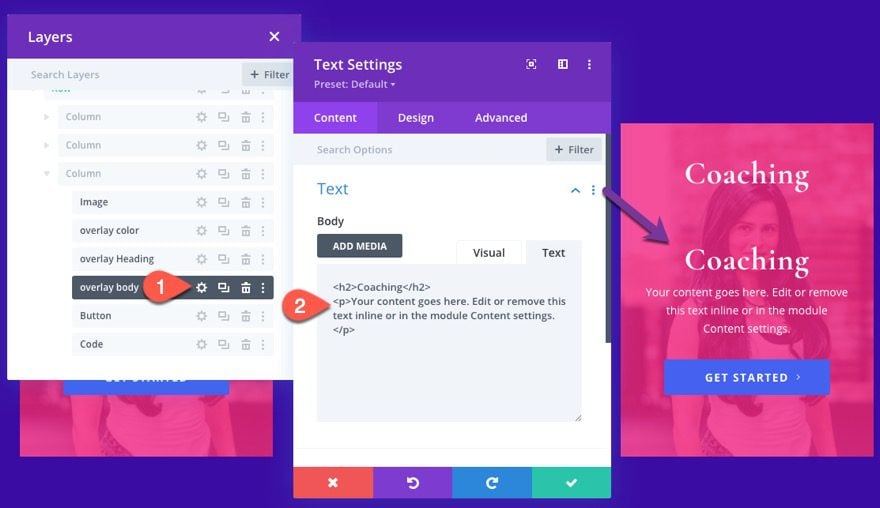
Creating the Overlay Body Text
To create the overlay body text, we can duplicate the text module used for the overlay heading. Before we update the settings for the duplicate, change the label to “overlay body”.
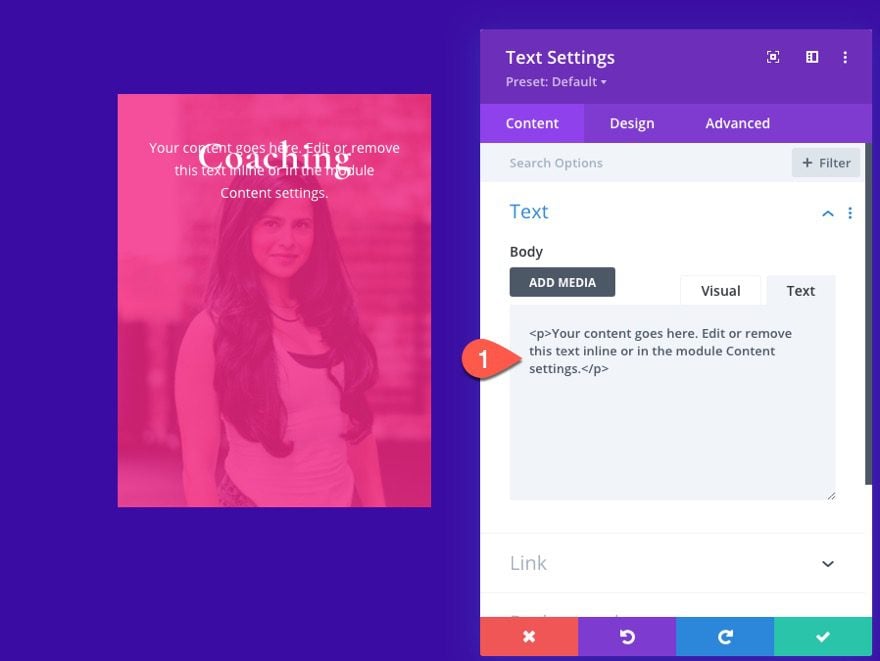
Open the text settings for the new text module and update the body content with a few sentences of paragraph text.
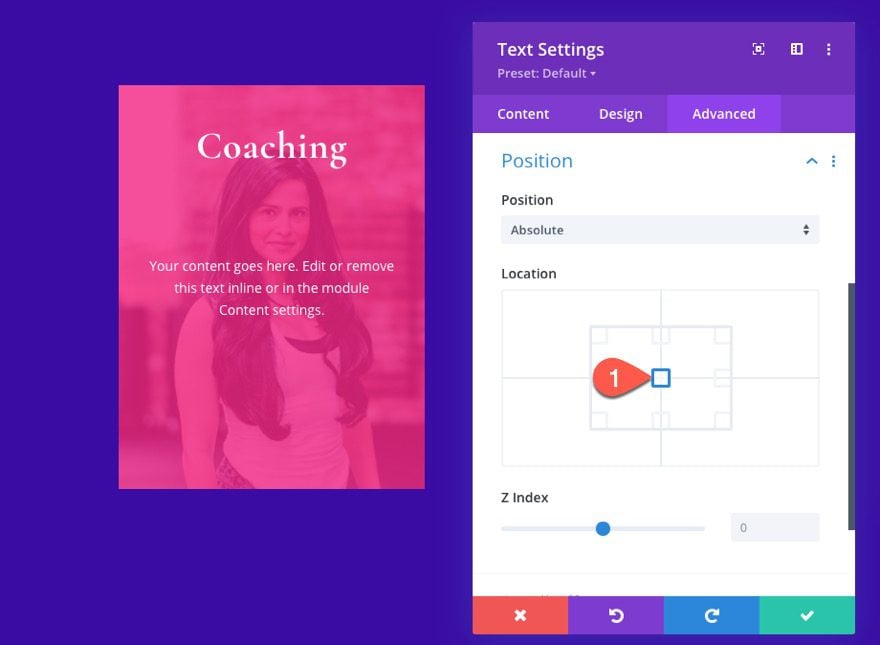
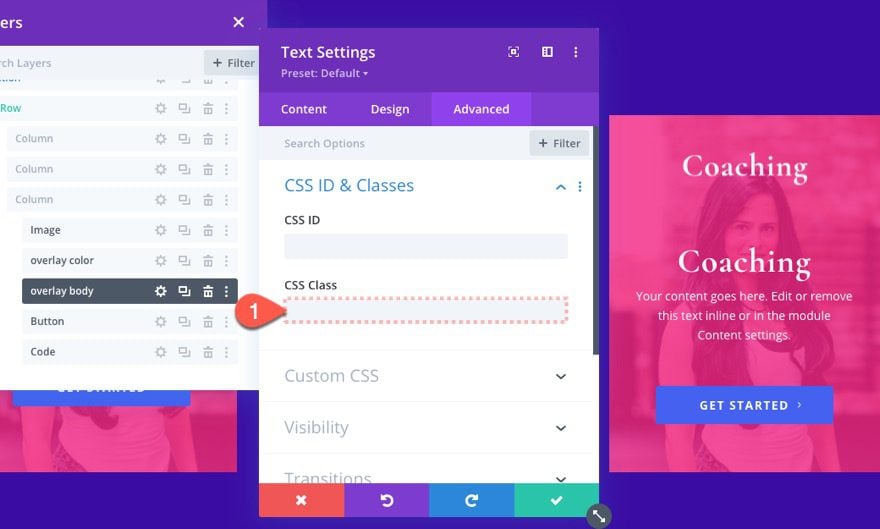
Under the advanced tab, change the absolute location of the module to the center.
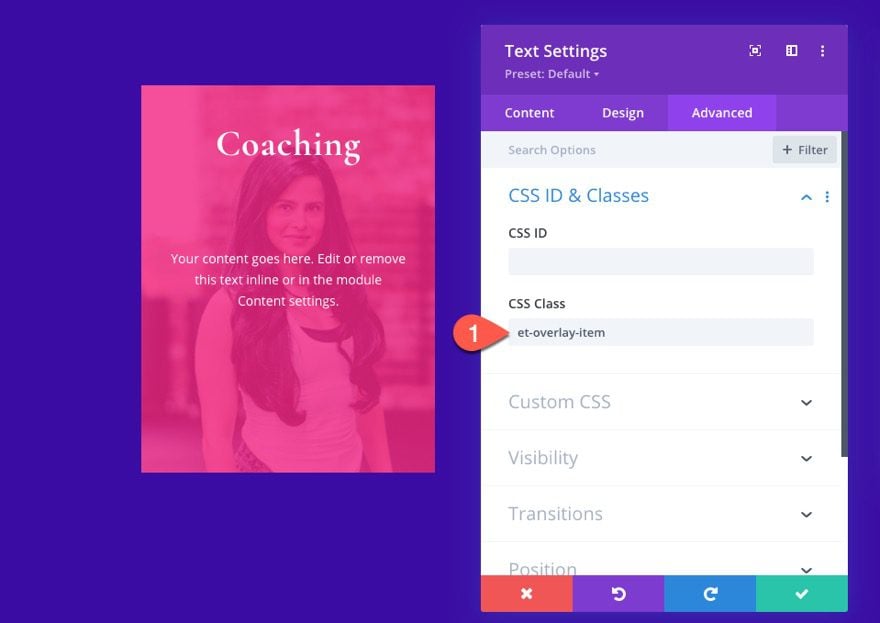
Since we don’t want this one to move on hover (only appear), update the CSS Class to only included the following:
- CSS Class: et-overlay-item
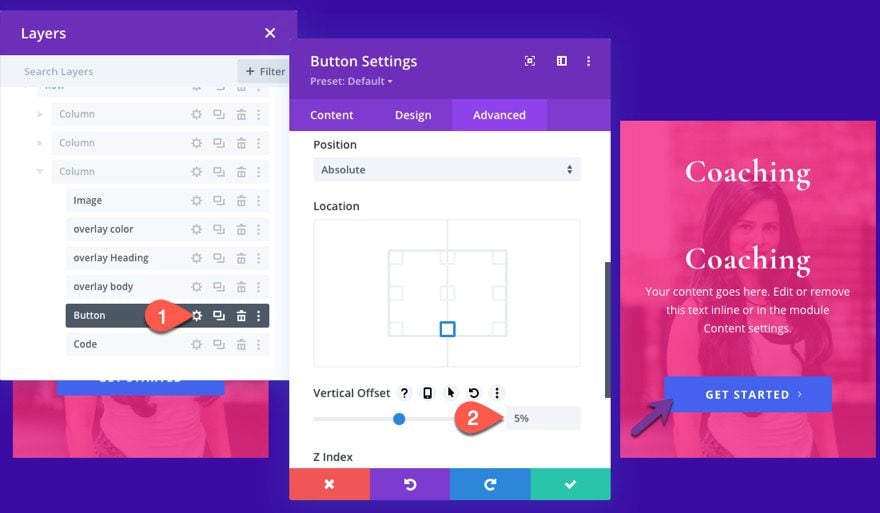
The last overlay element on this image will be the button. To create the button, add a new button module under the “body text” text module.

Before changing the design, update the position of the button as follows:
- Position: absolute
- Vertical Offset: 10%
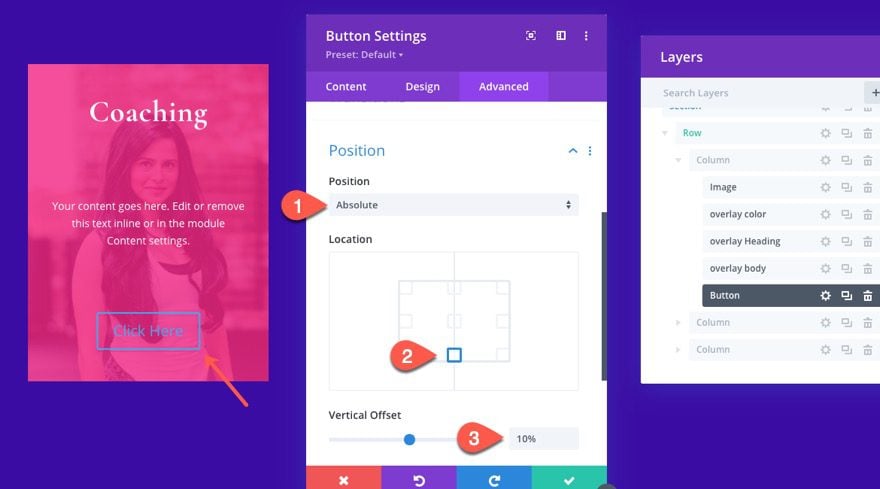
Now the button should be centered at the bottom portion of the image.
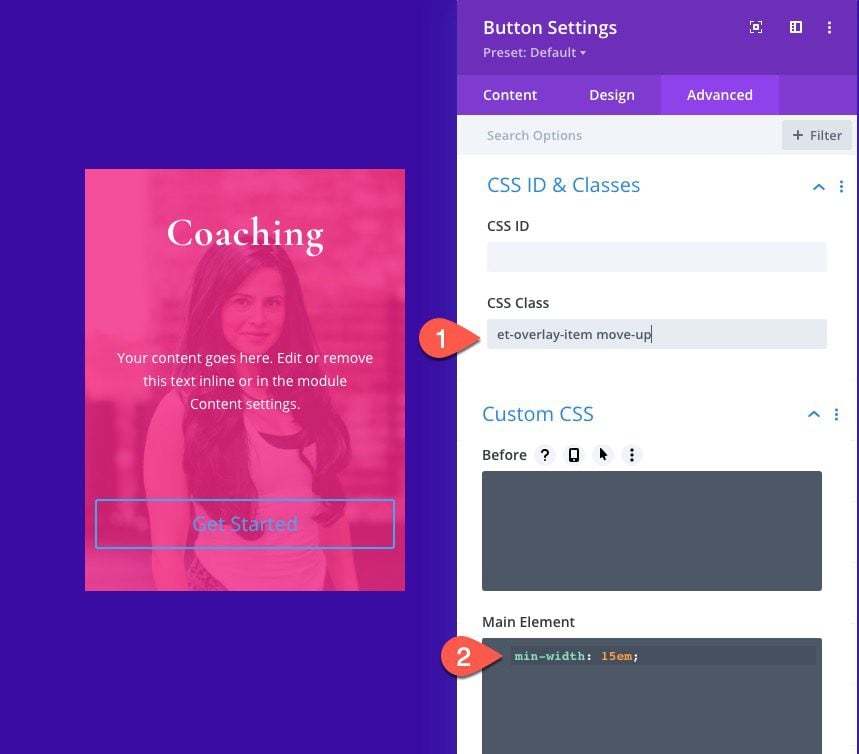
While in the advanced tab, update the CSS Class and add a snippet of custom CSS to the Main Element as follows:
- CSS Class: et-overlay-item move-up
- Main Element CSS:
min-width: 15em
Notice there is an additional class added to the button in order to move it upward slightly on hover. This is to compliment the heading text downward movement on hover.
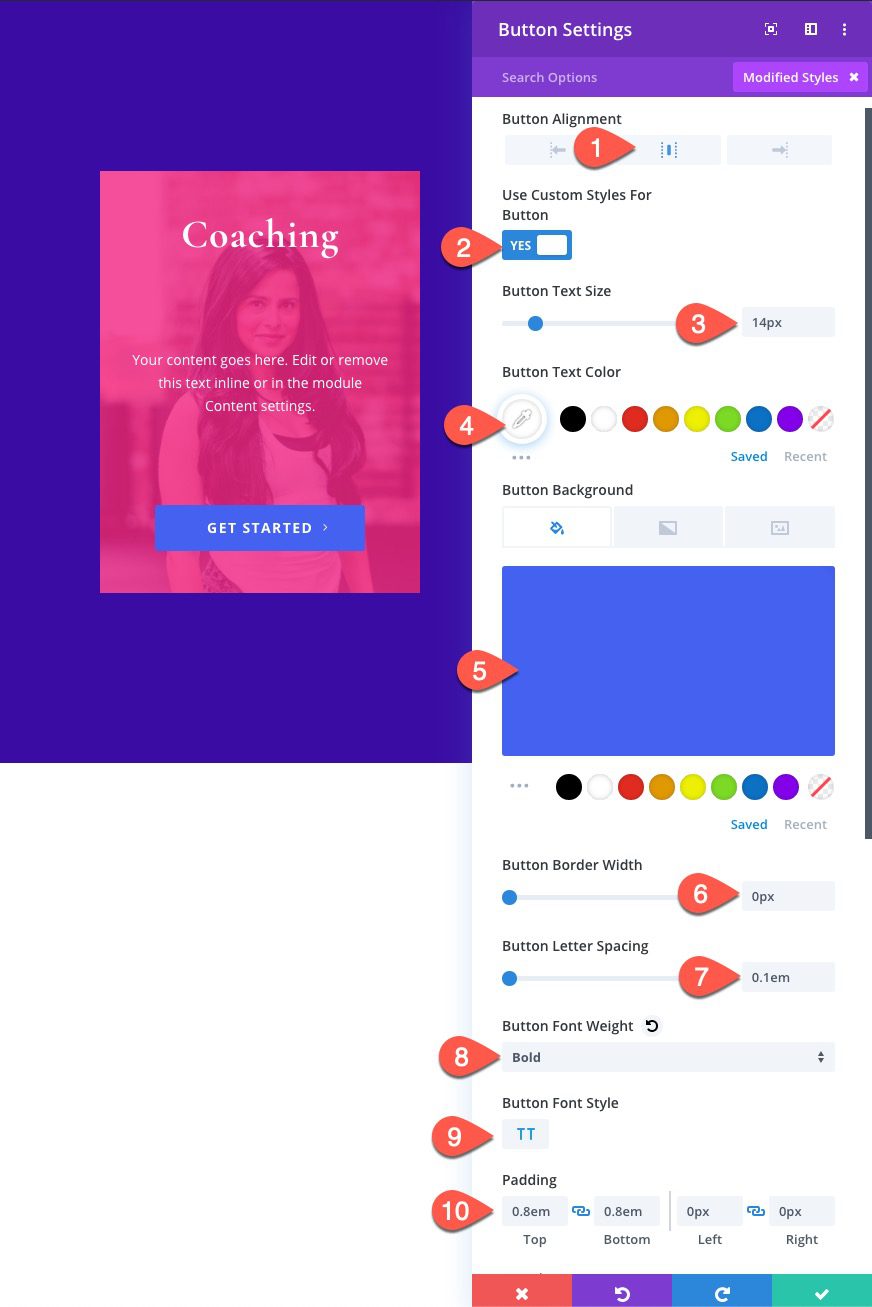
Then update the following design settings:
- Button Alignment: Center
- Button Text Size: 14px
- button Background Color: #4361ee
- button Border Width: 0px
- Button Letter Spacing: 0.1em
- Button Font Weight: Bold
- Button Font Style: TT
- Padding: 0.8em top, 0.8em bottom, 0px left, 0px right
Adding the Custom CSS with the Code Module
Before we create a few other versions of this overlay design, let’s add the custom CSS needed for the overlay hover effects. To do this, add a code module under the button.
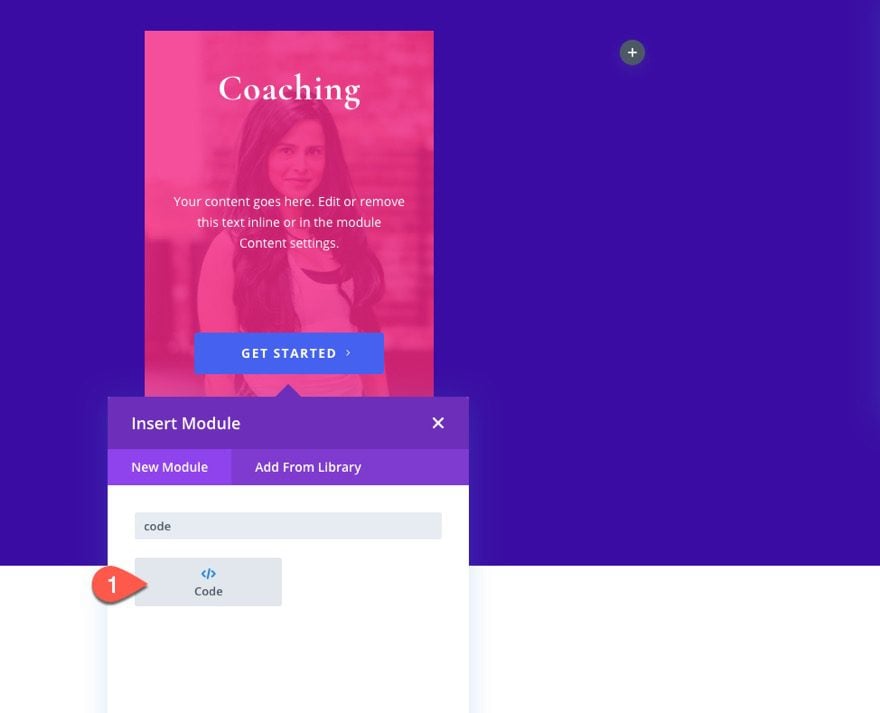
Then paste the following CSS inside the code content. Don’t forget to wrap the code in the necessary script tags.
<style>
 @media all and (min-width: 981px) {

  .et-fb-root-ancestor .et-overlay-item {
    opacity: 1; /*shows hidden overlay items when using the visual Divi Builder*/
  }
  .et-overlay-item {
    opacity: 0; /*hides overlay items by default*/
    margin-bottom: 0px;
  }
  .et-overlay-item, .et-overlay-image {
    transition: all 400ms !important; /*sets transition speed of all overlay items*/
  }
  .et-overlay-container:hover .et-overlay-item {
    opacity: 1; /*reveals hidden overlay items on hover*/
  }
  .et-overlay-container:hover .et-overlay-image {
    /*add new styles here to change image on hover*/
  }
  .et-overlay-container:hover .et-overlay-image.et-scale {
    transform: scale(1.2); /*adjust scale of image here*/
  }
  .et-overlay-container:hover .et-overlay-image.et-rotate {
    transform: scale(1.4)
    rotateZ(10deg)!important; /*adjust rotation of image and scale needed for rotation here*/
  }
  .et-overlay-container:hover .et-overlay-item.move-up {
    margin-bottom: 15% !important; /*adjust how far you want the overlay item to move up*/
  }
  .et-overlay-container:hover .et-overlay-item.move-down {
    margin-top: 10%; /*adjust how far you want the overlay item to move down*/
  }

}
</style>
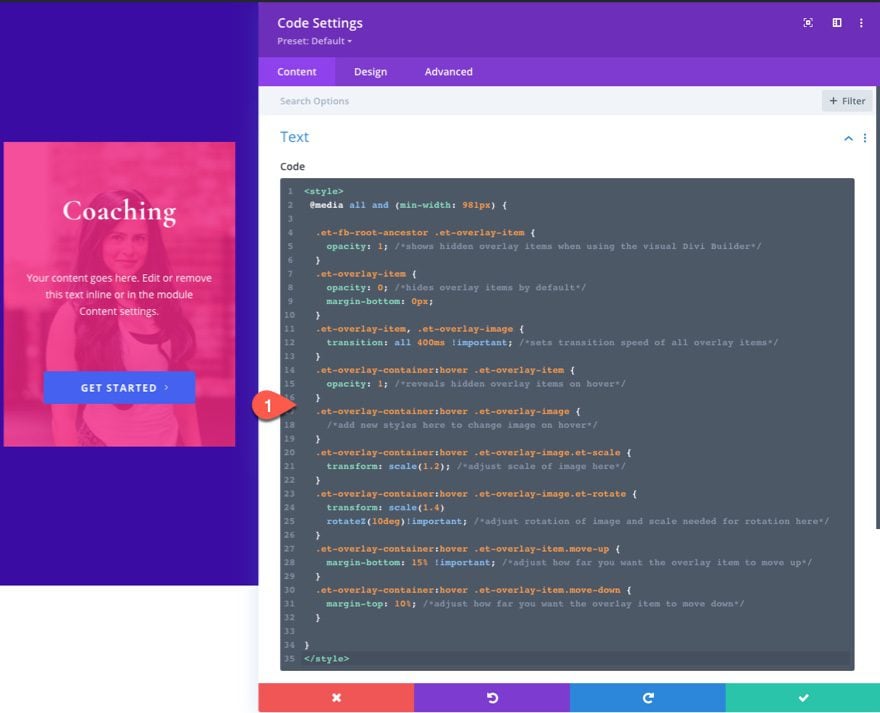
The code is commented so that you can understand where you can adjust the CSS as needed.
Duplicating the Column for More Designs
Although we already have two additional empty columns to work with, it is easier to transfer all the modules and design within the first column over to a new column by duplicating the entire column. To do this, open the layers modal, delete the two empty columns, and then duplicate the column containing the image overlay design twice. You should have a total of three columns with identical designs.

Creating Image Overlay Design #2
Now that we have all the design elements in place within each of the columns, we can tweak the design to create additional image overlays. For this next design, we are going to place the button in the center of the image (always visible). Then we will move the heading and body text into view from the top and bottom of the image.
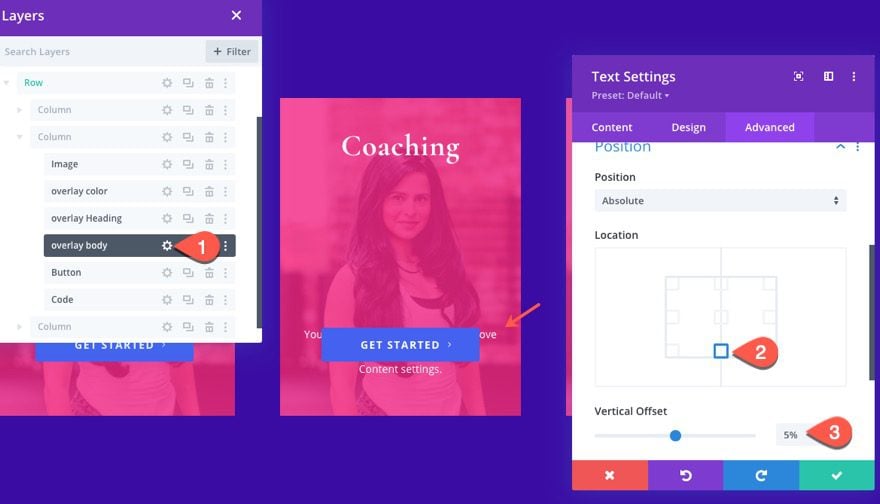
Adjust Body Text Location and CSS Class
Open the settings for the overlay body text module in column 2 and update the position:
- Location: Bottom Center
- Vertical Offset: 5%
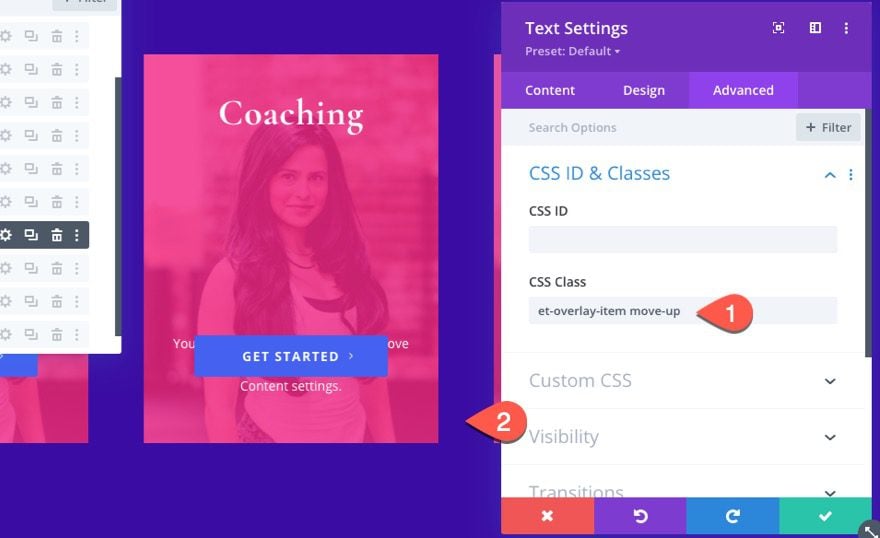
Then update the CSS Class with the following:
- CSS Class: et-overlay-item move-up
Adjust Button Location and CSS Class
Next, open the settings for the button in column 2 and update the following position location:
- Location: Center Center
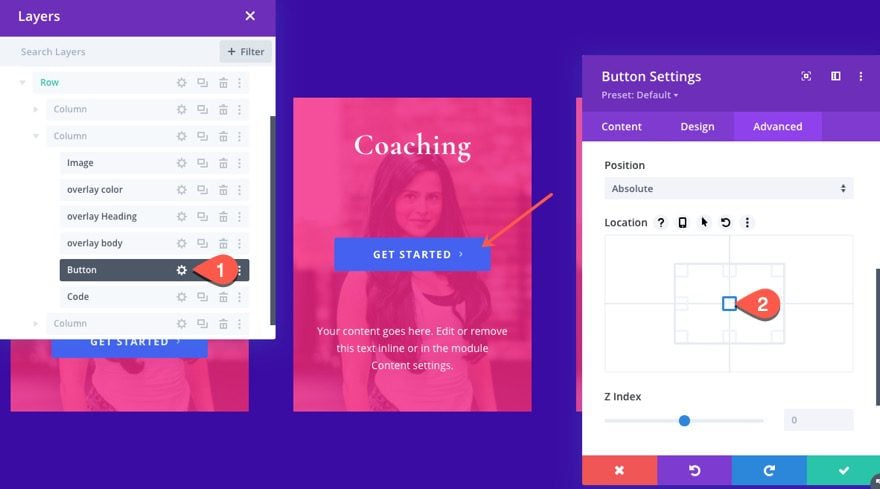
Then take out the CSS Class because we want to keep the button visible always.
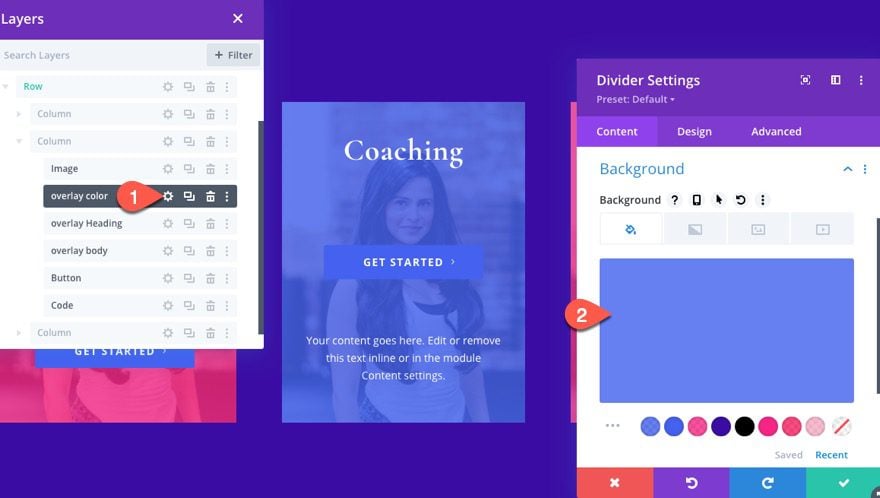
Open the settings for the divider module (overlay color) and change the background as follows:
- Background Color: rgba(67,97,238,0.8)
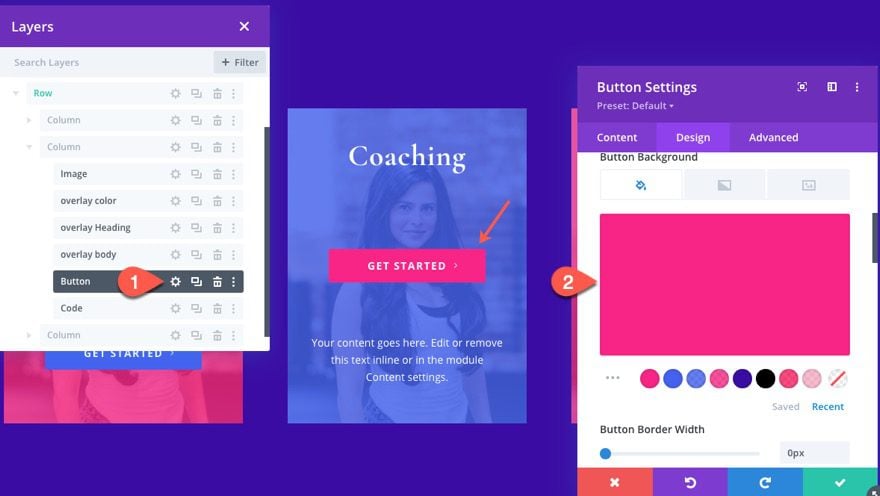
Then open the settings for the button and change the background color:
- Button Background Color: #f72585
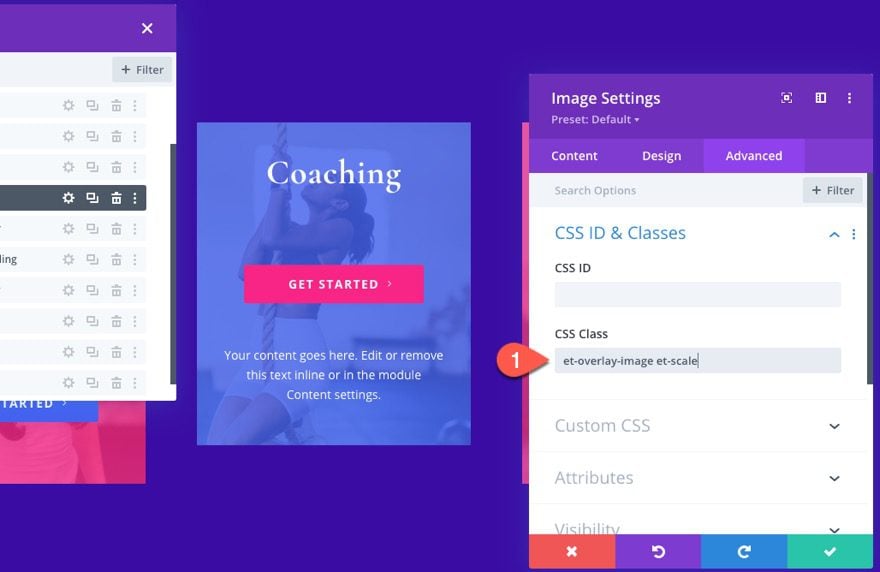
Adjust Image and CSS Class
Next, open the settings for the image and upload a new image (if you want).
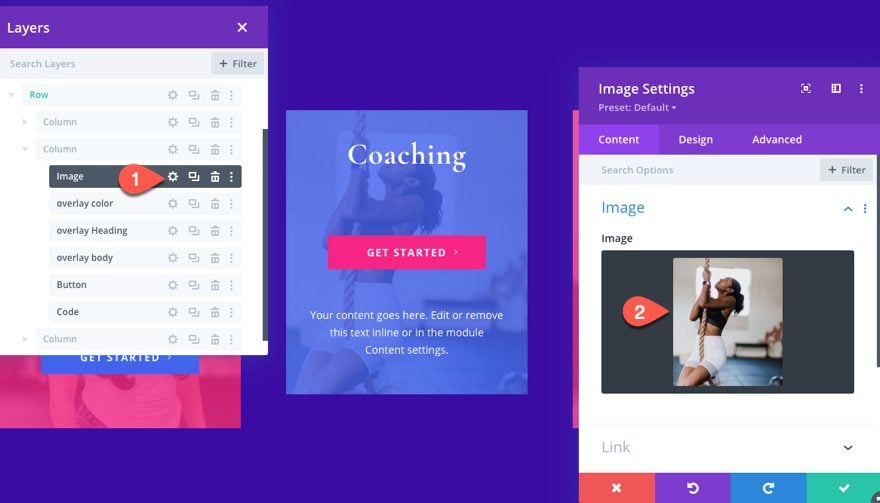
Then add the following CSS Class to the Image:
- CSS Class: et-overlay-image et-scale
Notice that in addition to the class “et-overlay-image”, there is an additional class called “et-scale” that will cause the image to scale up in size, creating a zoom-in effect on hover.
Creating Image Overlay Design #3
Now its time to create the third image overlay design in column 3.
Adjust Overlay Body Text Content and CSS Class
Start by opening the settings for the overlay body text module in column 3 and add the H2 heading above the paragraph text. Now the two will be inside one module instead of two.
Then take out the CSS Class so that the text remains visible on top of the image.
Adjust Button Offset and CSS Class
Open the settings for the button module and update the position vertical offset:
- Vertical Offset: 5%
Delete Overlay Heading
Next, delete the overlay heading text module.

Adjust Overlay Color and CSS Class
Open the settings for the divider module (overlay color) and update the background with the following:
- Background Gradient Left Color: rgba(67,97,238,0.8)
- Background Gradient Right Color: rgba(247,37,133,0.8)
- Start Position: 25%
- End Position: 75%
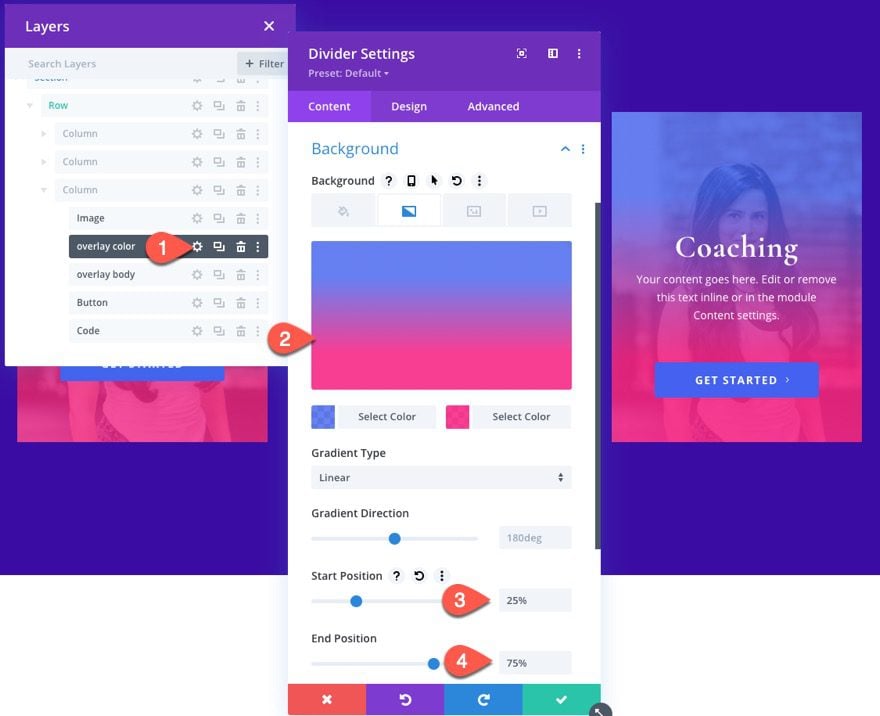
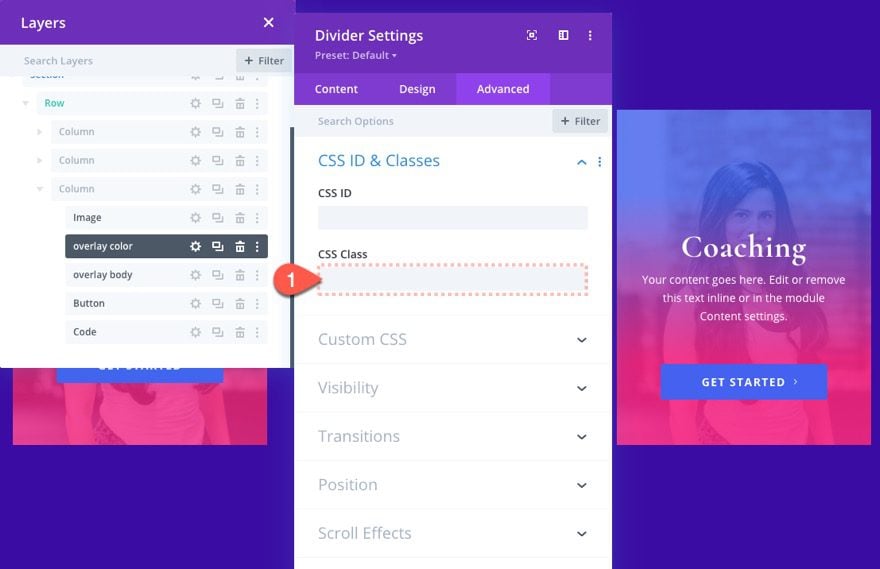
And since we want to keep the gradient overlay visible at all times, take out the CSS Class.
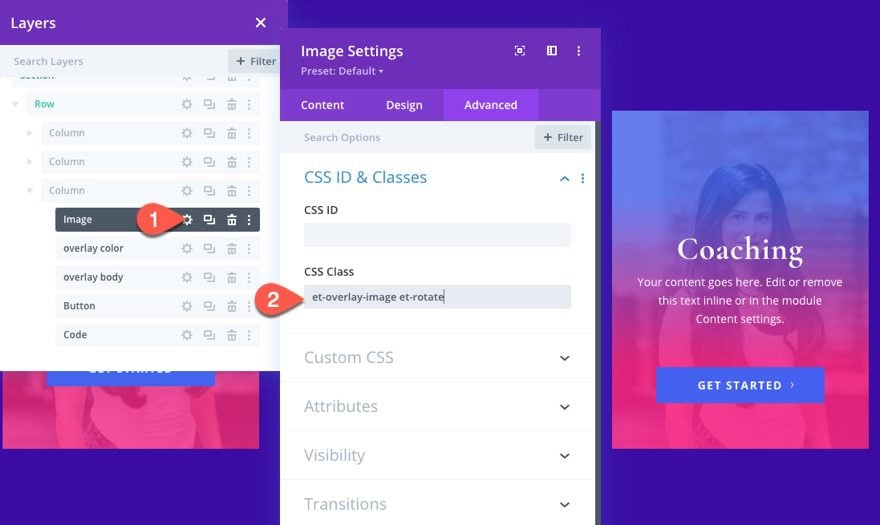
Adjust Image CSS Class
Lastly, we are going to add an additional CSS Class (“et-rotate”) to the main image that will both scale and rotate the image on hover.
- CSS Class: et-overlay-image et-rotate
Final Touches
Before we check on our final results, we need to make a few adjustments.
Take out the default bottom margin for all modules
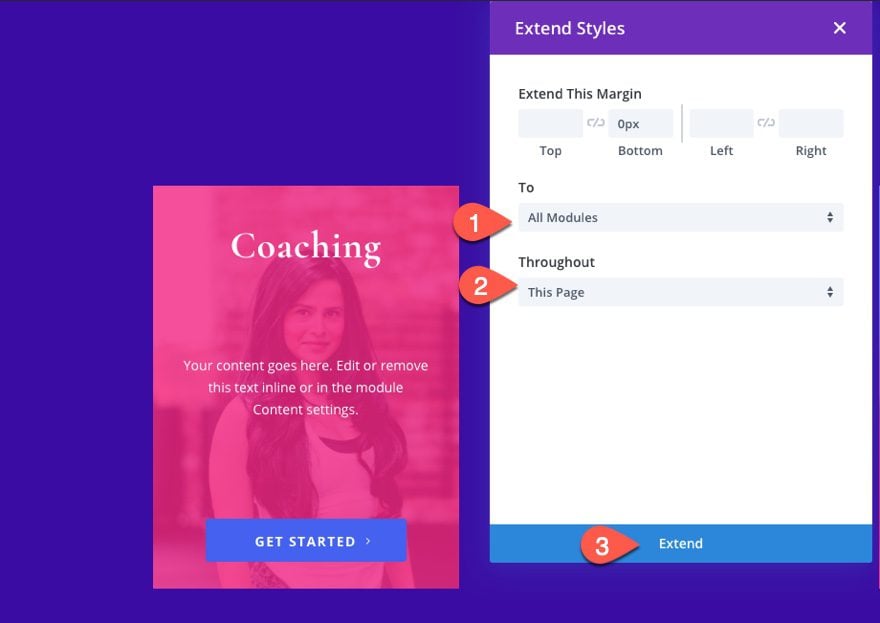
By default, each module comes with a bottom margin of 30px due to the default gutter width (3) in the row settings. This can throw off the positioning of the modules in our overlay design. To take them out, open the image module settings for one of the images in the design. Since we already updated the margin with a 0px bottom margin, we can extend this margin to all modules.
Right-click on the margin setting and choose “extend margin”.
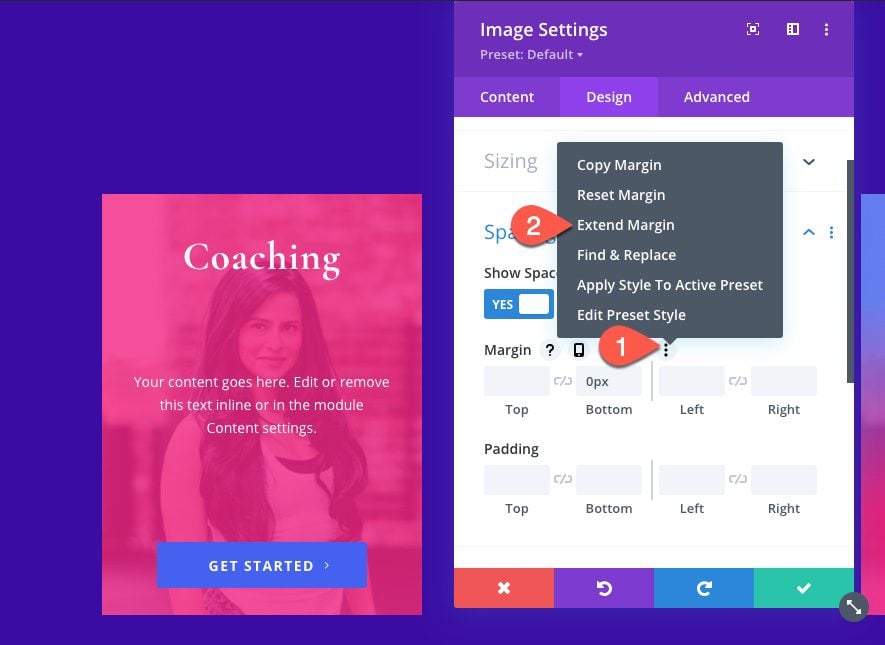
Then choose to extend the margin to All Modules on the page.
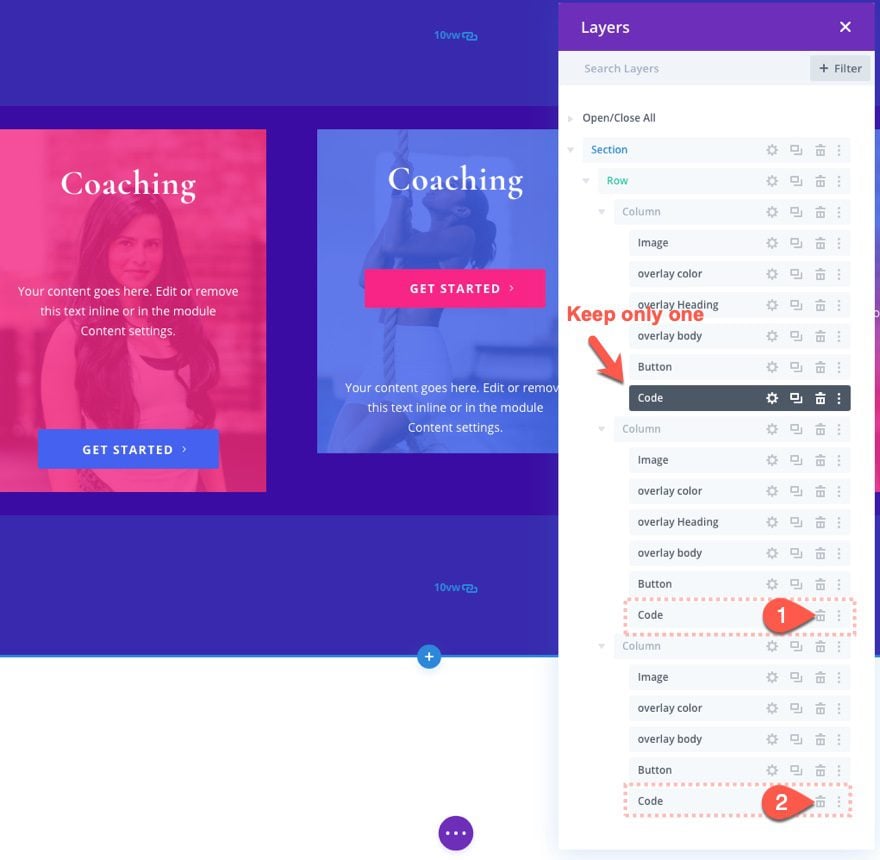
Delete Duplicate Code Modules
Make sure to delete additional code modules that have been carried over when duplicating the first column. You should only have one. You can do this easily from the layers modal.
Final Results
Now that our three designs are complete, let’s check out the final results of our image overlay designs.
And here is the design on mobile. The overlay hover effects apply only to desktop via the custom CSS media query in the code module. Therefore the overlays will be visible always on mobile.

Final Thoughts
Building custom image overlays is actually a lot of fun. There are countless designs you can test out visually with the Divi builder and it only takes a small amount of custom CSS to apply the hover effects. Even the hover effects for the overlay items require custom CSS, you can still take advantage of the built-in hover options to target each of the overlay elements individually.
I look forward to hearing from you in the comments.
Cheers!


Hi there, I downloaded the file and imported through Divi Library –> Import –> Portability and used the .json file, but after getting the check mark that it downloaded and shows in my divi library, and after refreshing my page, it doesn’t show up as an option to import for sections, columns, or modules!
Any idea why that might be?
Hi there – thanks for the tutorial. Unfortuanately it doesn’t work for me. I triple checked everything and I entered everything they way you suggested – but nothing ever overlays the image. All content modules are just display below the image 🙁
Do you have an suggestions for me?
I suggest that you contact the Support Team so they can check how you set it up or what might be missing.
Hello,
nice tuto but it appears that i can’t integrate this with a layout like the influencer theme provided with divi for example
why ?
This is great, thanks, am I right in thinking that on mobile it just displays the hovered state?
Just purchased Divi last week and this was the first tutorial I’ve gone through. As a newbie coder, I was happy to learn how to put in some custom css, such a fun way to integrate what I’ve been learning! Thanks for putting this together, I look forward to learning more!
The tutorial is really great!!!
The stuff was really good . Thanks for sharing
Thanks Jason.
I had abandoned a request from our designer to do image overlays with a link and overlays on other items. This gives a great work around to basically create custom modules in a way.
Nice! Glad to help. Thanks for the comment.
Hi Jason!
The tutorial is really great!!!
But, in the article, remember to change the class of the columns as it is not match the class in the code.
Thank you very much for yor work.
Greetings!
Thanks, Miquel. I just updated it.
Hello,
This looks like Cool. Need to practice the same.
Thanks, Divi
nice article
Thanks, honey.
Thanks Jason, this is super helpful to know!
Glad to help, Jean. Thanks for the comment!
Just the article i was looking for, it was really helpful i was able to create a professional looking overlay Thanks.
Awesome! Glad it helped, Sameep.