

If you run or help volunteer at an organization that puts on events, then you’re likely familiar with a wide range of event planning, management, and promotional tools. There are Facebook, Meetup, and loads of WordPress plugins with slightly different approaches to the task of putting on an event.
These tools are great. And for almost every use case I can think of, one of them works perfectly. But in some instances, such as in the case of an organization that only does a few one-off events or a small number of annual events, these options can be overkill. Or perhaps they don’t do a good enough job of representing just how important the event is to your organization since in many of these tools, all events look the same.
Should a graduation ceremony or dinner to honor a special guest really look and feel the same as a casual cookout?
If you’re asking me, the answer is a resounding no.
But if none of these tools is quite right for the task, that prompts another question: what should we do instead?
My answer is: create custom events listing and registration pages with Divi!
Preview of End Result
The Farmers Market Layout Pack that we released on Monday already has a custom events page. So that element is taken care of. You can download that layout pack for free and use the design as is or tweak it to your preferences.
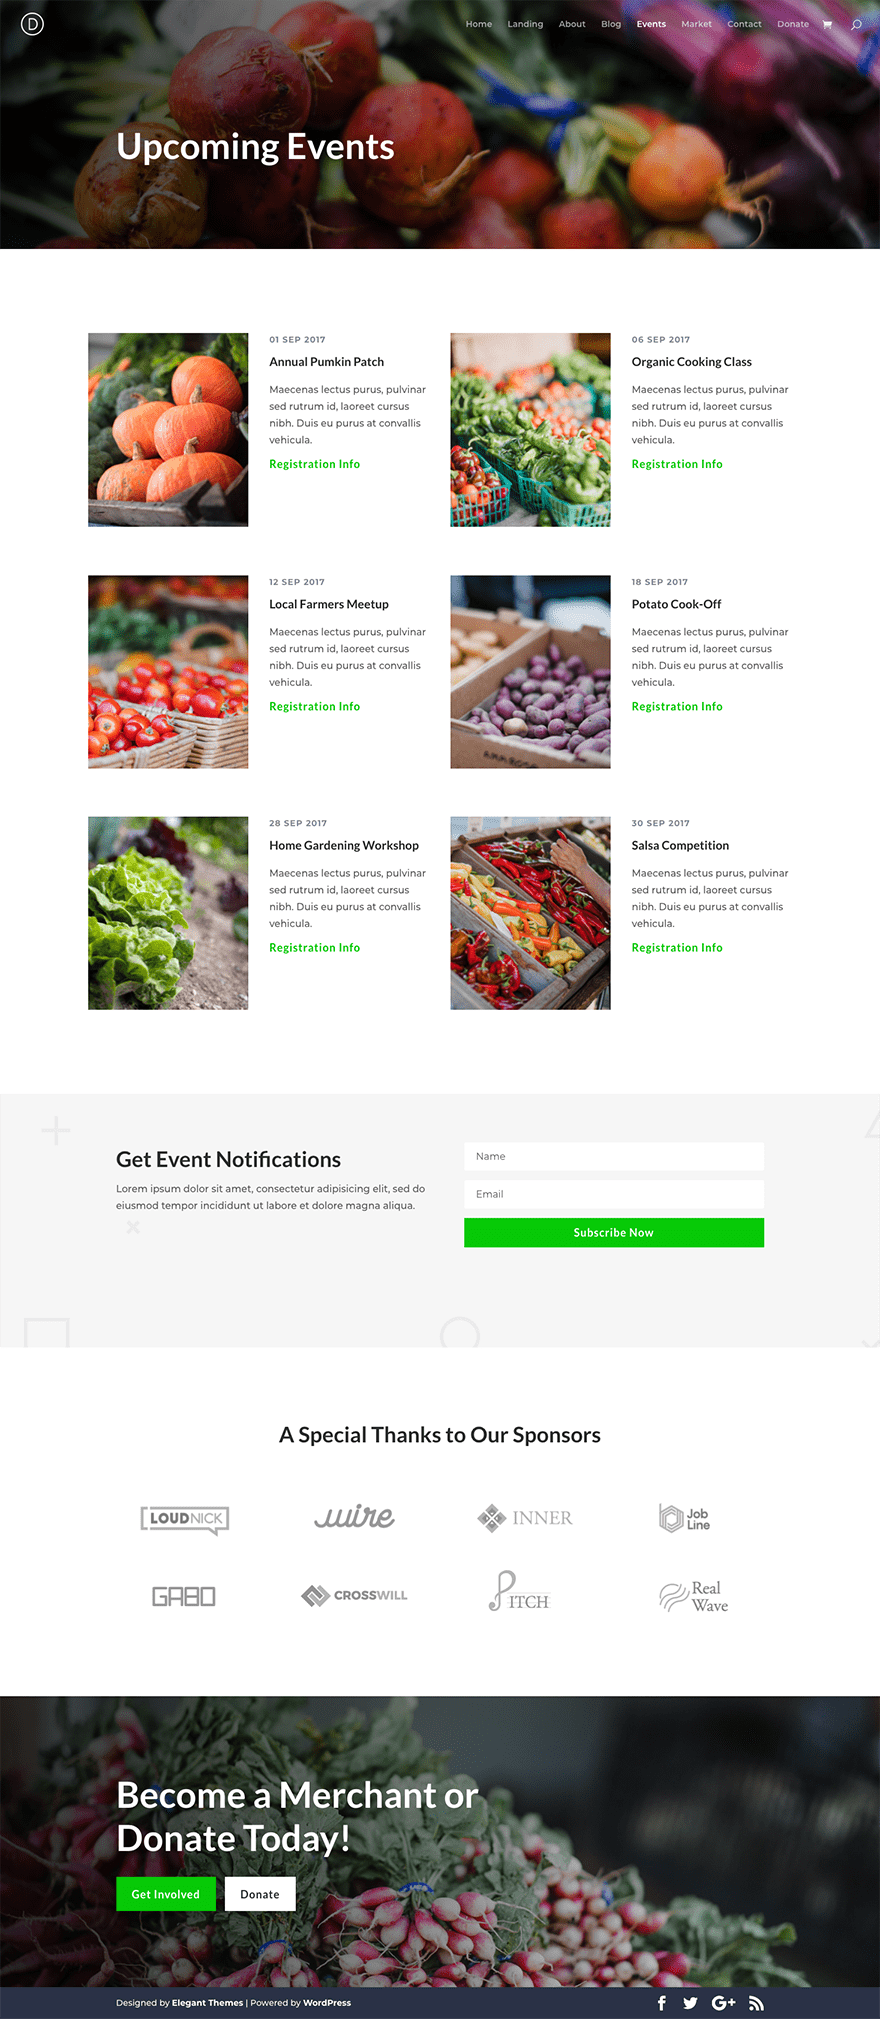
But as you can see, each of these events has a link that says “Registration Info”. If you want to link that up to Facebook or Meetup–job done. But if you want more control over the design of your full event details and registration process you can link them to a page on your website like the one I’ve designed below.
This custom event listing/registration page will allow you to present your event in a fully branded way that provides the experience you want those who interact with your organization to have.
Pretty neat, right?
Here’s how to create it yourself!
Preparing Your Design Assets
The primary asset you need to follow along with this tutorial is our brand new (free) Farmers Market Layout Pack. Follow the instructions in that post to download and install it. Then, I highly recommend following the steps outlined in this post to take your site to the next level.
You will also want to download the image assets folder from the Farmers Market Layout Pack post. It’s located at the very bottom of the post. There is an image in there that’s not in the layout pack itself that we will want to use called farmers-market-22.jpg. I’ve resized this image from it’s full resolution size of 2496px by 1665px to 1200px by 800px.
The only image I’m using that’s not already included in the Farmers Market Layout Pack or image assets is a 600px by 800px portrait image for the “Meet Your Instructor” section of the design. So when following along you will need to provide your own image for this section.
(Or grab the one I used from our previously released Travel Layout Pack.)
How to Create Custom Event Listing and Registration Pages with Divi and WooCommerce
Subscribe To Our Youtube Channel
Creating a Custom Event Registration Page in Divi
First things first, let’s create a new page by going to Pages > Add New in the WordPress Admin. The event from our listings page that I’m going to create a registration page for is the Organic Cooking Class that’s supposed to take place in the month of September. So I’ll call my new page “September Organic Cooking Class”. Then, we need to click the purple Use Divi Builder button.
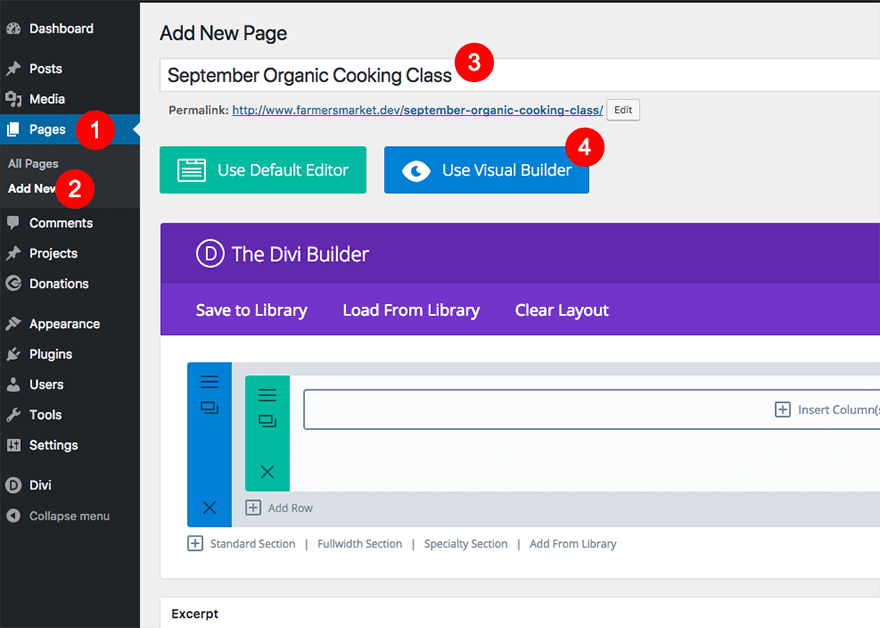
Now we can move things to the frontend of the website for our design work by clicking the blue button that says Use Visual Builder.
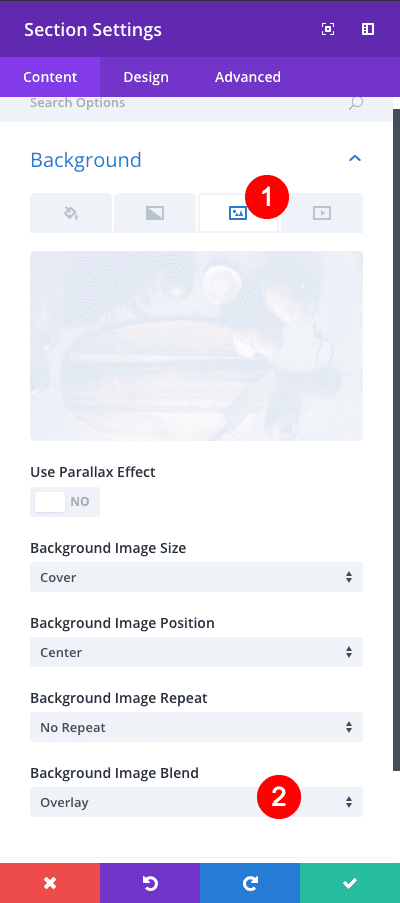
To get things started, click on the blue gear icon to open up your section settings. Under background click on the image tab and add our re-sized farmers-market-22.jpg image. Then, set the background Image Blend to Overlay.
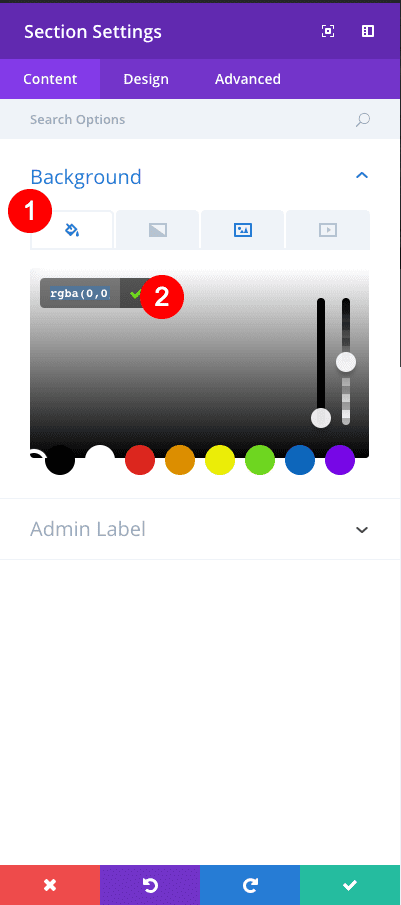
Then, still in the background settings, jump over to the color tab and set the background color to rgba(0,0,0,0.47). Save your settings.
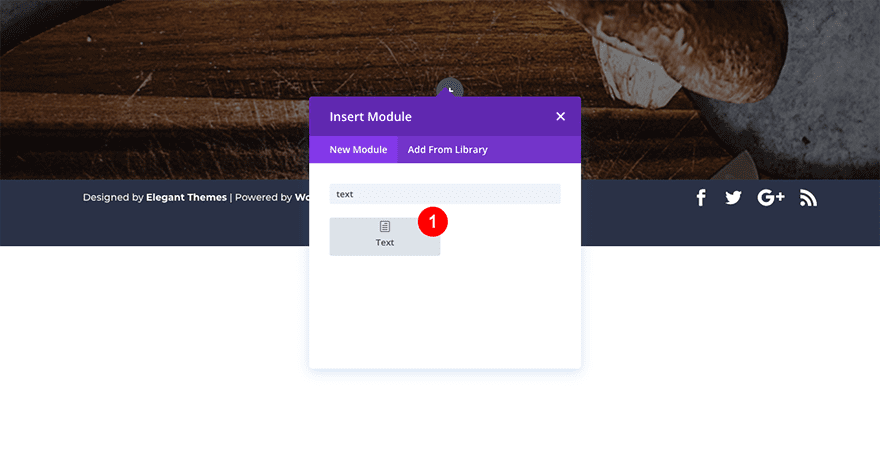
Next, it’s time to add our page title. click the green plus icon in the middle of the green row (not at the bottom of it) to select your column preferences for this row. Choose single column. You will then be prompted to insert a module. Insert a text module.
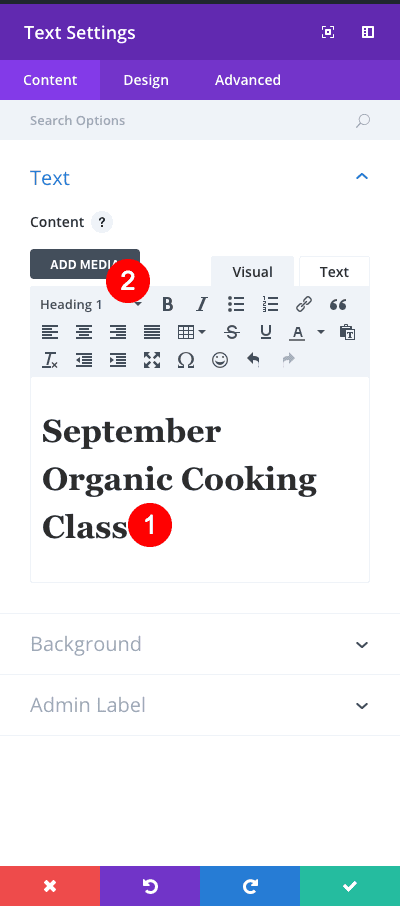
Enter the text “September Organic Cooking Class” and set your paragraph style to h1.
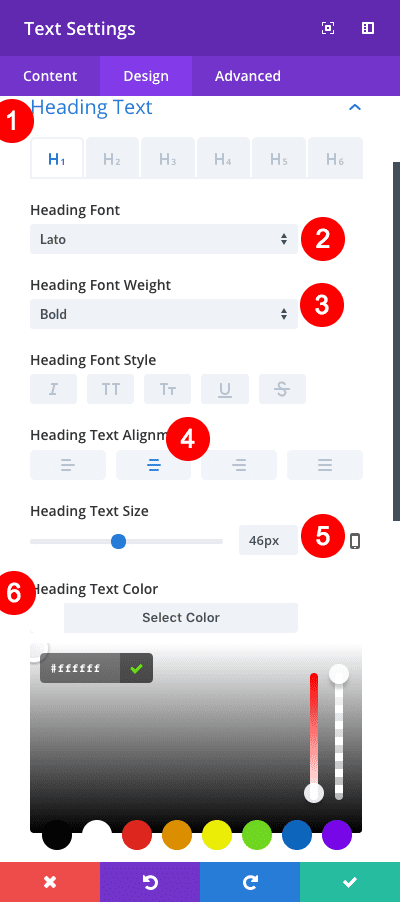
Then jump over into your text module’s design tab and open up the design settings for Heading Text. Configure the following settings:
Heading Font: Lato
Heading Font Weight: Bold
Heading Text Alignment: Center
Heading Text Size: 46px
Heading Text Color: #ffffff
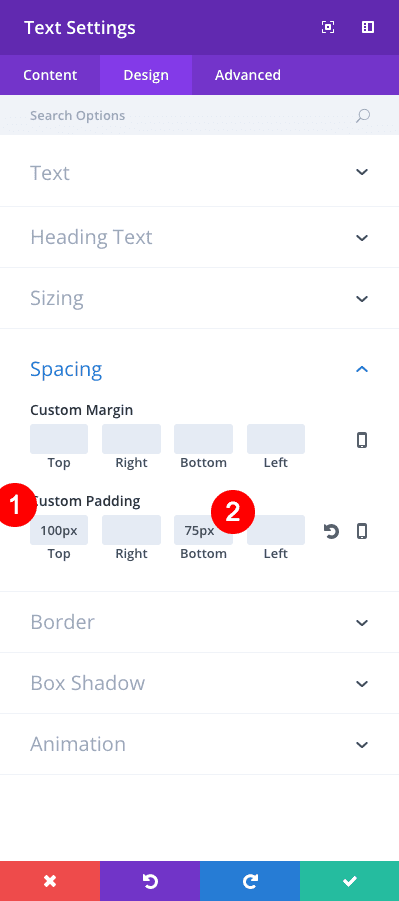
Next, scroll down to the Spacing options. Configure the following settings.
Padding Top: 100px
Padding Bottom: 75px
Save these settings and then create a new regular section (blue). Select the two equal columns option for your row. In the lefthand column add an image module. The image I used is called produce-14.jpg and it should already be in your media library since you’re using the Farmers Market Layout Pack.
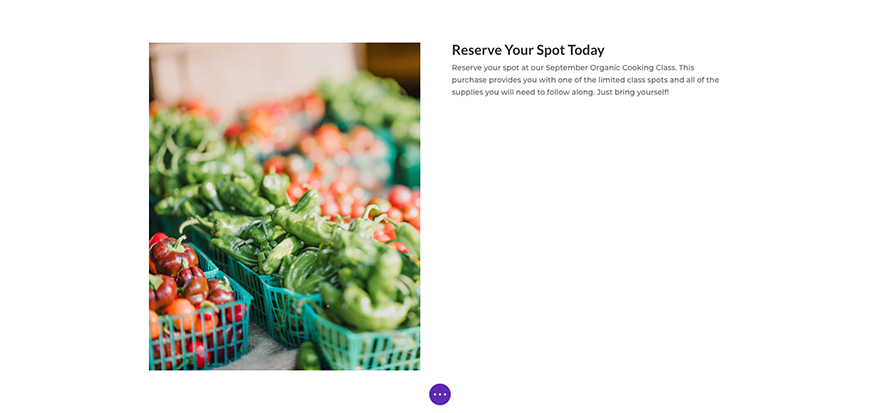
In the second row column, add a text module. Write the following text:
“Reserve Your Spot Today
Reserve your spot at our September Organic Cooking Class. This purchase provides you with one of the limited class spots and all of the supplies you will need to follow along. Just bring yourself!”
Set the text “Reserve Your Spot Today” to an h2 using your paragraph styles. Save your settings. You should now have a section/row that looks like this.
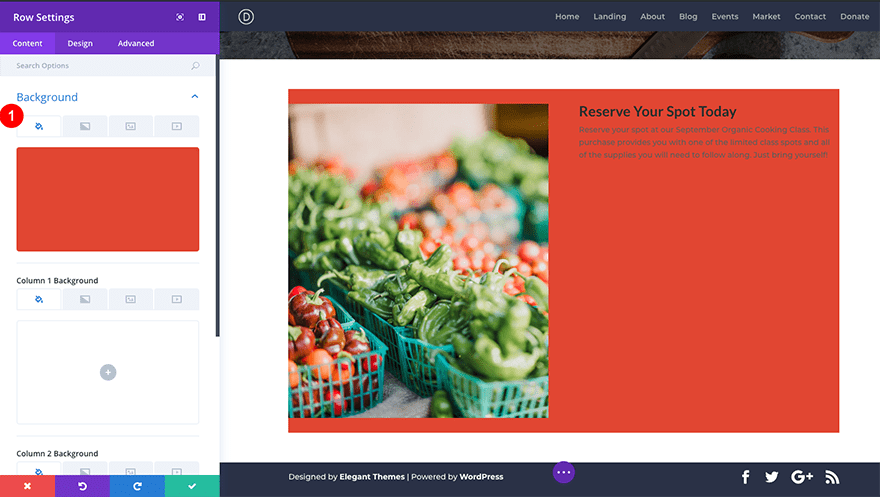
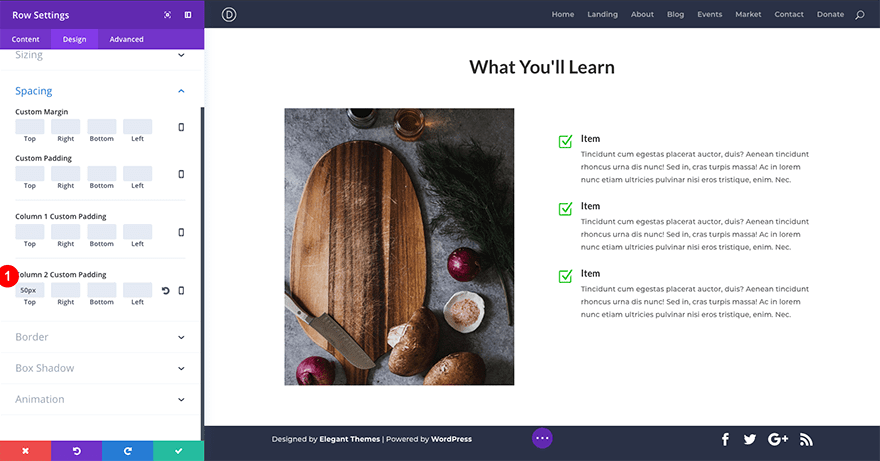
Now it’s time to customize! Let’s start with the row. We want it to stand out since this is our registration page’s primary call to action. Set the row background color to #e55039.
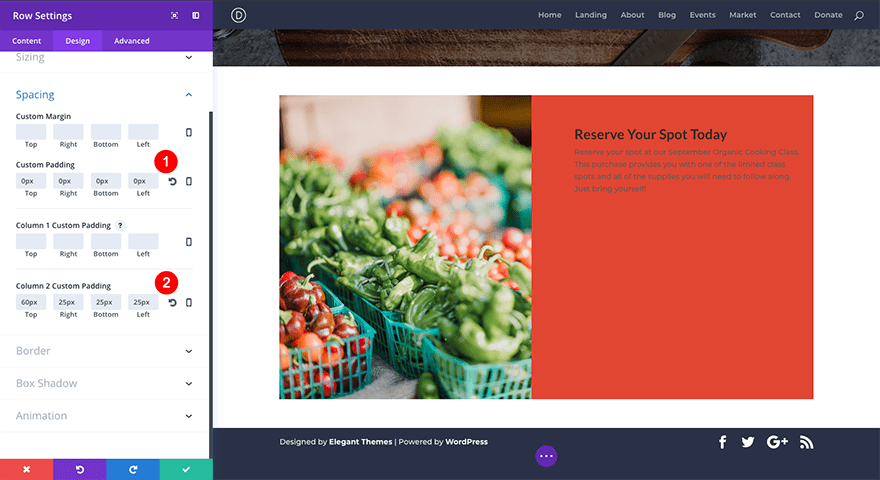
Now let’s hop over into our row’s design tab. Open up the Spacing options and configure the following settings:
Custom Padding: 0px for all options.
Column 2 Custom Padding:
Top: 60px
Right: 25px
Bottom: 25px
Left: 25px
Save settings.
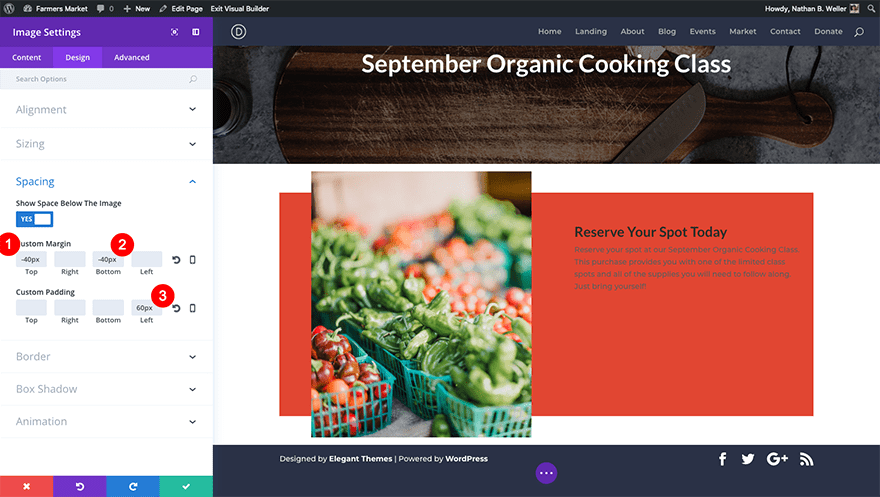
Now open up the image module design settings. Under Sizing choose Yes under Force Fullwidth. Under Spacing configure the following settings.
Custom Margin:
Top: -40px
Bottom: -40px
Custom Padding:
Left: 60px
Lastly, go to the Animation design settings and configure these settings.
Animation Style: Slide
Animation Direction: Up
Animation Intensity: 8%
Animation Starting Opacity: 100%
Save settings.

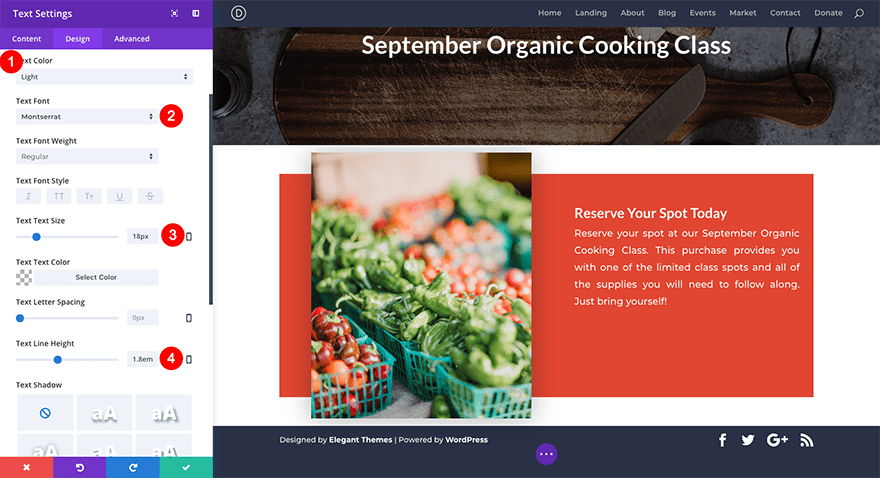
Now it’s time to work on our second row column. Starting with the text module that’s already there. Open up the text module settings and go to the design tab. Under the Text configure the following settings.
Text Color: Light
Text Font: Montserrat
Text Text Size: 18px
Text Line Height: 1.8em
Text Orientation: Justified
(To set the Text Orientation, scroll down past the Text Shadow settings.)
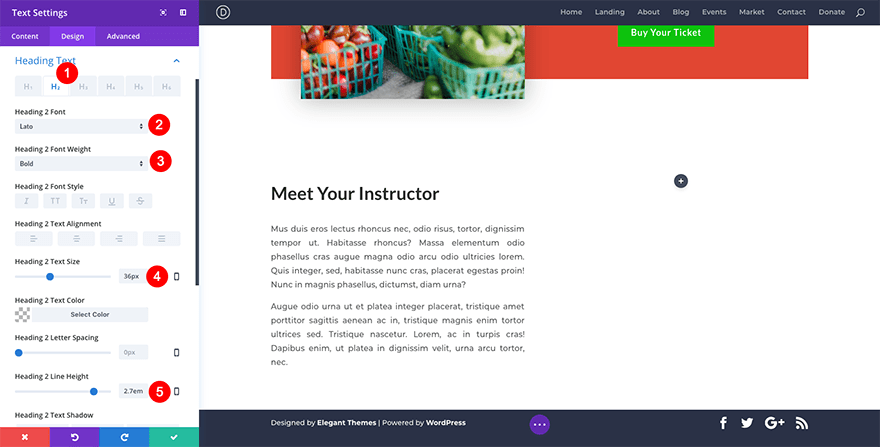
Under the Heading Text design settings, apply the following to the h2 heading styles.
Heading 2 Font: Lato
Heading 2 Text Alignment: Center
Heading 2 Text Size: 36px
Heading 2 Line Height: 1.8em

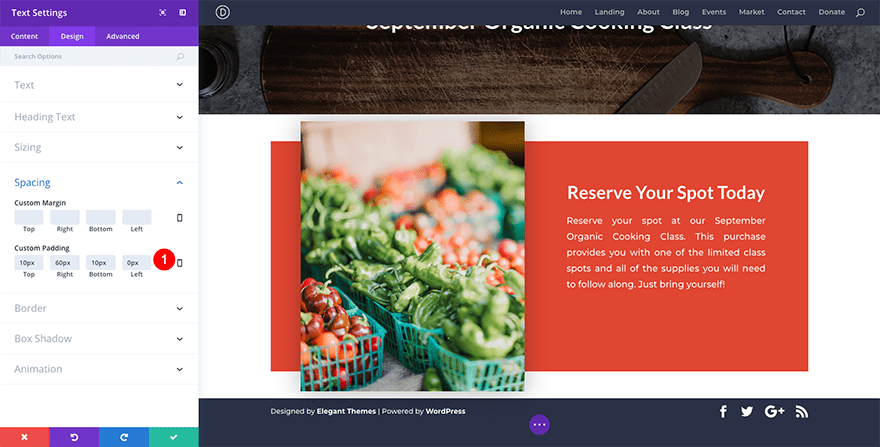
Next, under Spacing, apply the following settings.
Custom Padding:
Top: 10px
Right: 60px
Bottom: 10px
Left: 0px
Now we need to add our button. Under the text module we just styled, add a new button module by clicking on the grey plus icon floating at the bottom of the text module. Enter “Buy Your Ticket” as the button text and move straight into the design settings tab.
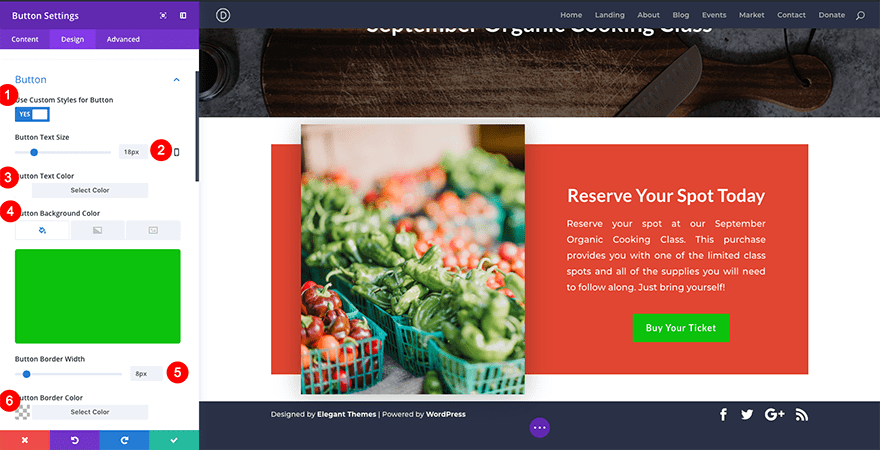
Set your button alignment to center. Then, move down into the Button options and choose to Use Custom Button Styles for Button. Apply these settings to your button.
Button Text Size: 18px
Button Text Color: #ffffff
Button Background Color: #07c907
Button Border Width: 8px
Button Border Color: rgba(0,0,0,0)
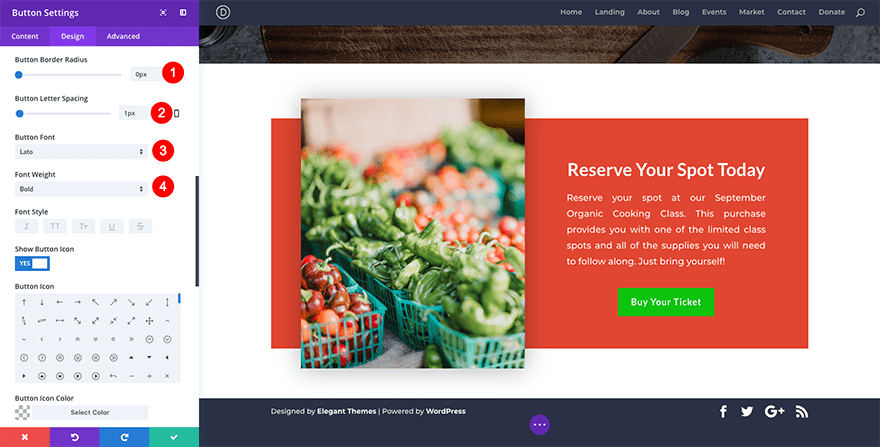
Continue to apply these custom button settings.
Button Border Radius: 0px
Button Letter Spacing: 1px
Button Font: Lato
Font Weight: Bold
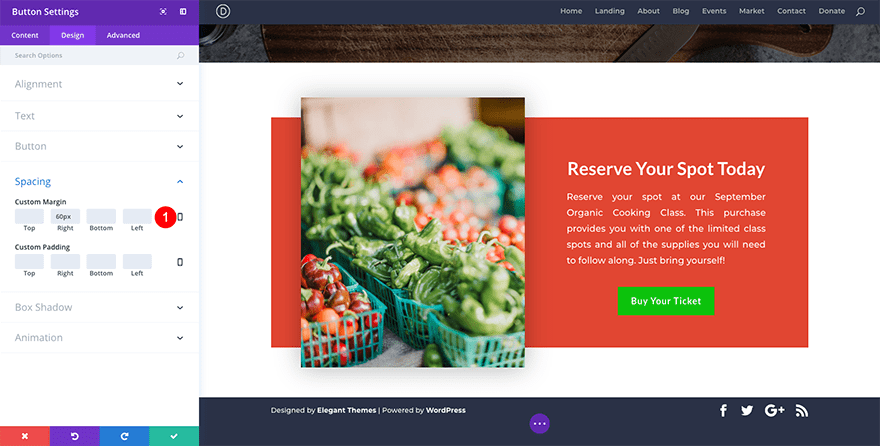
Next, move down the Button Design Tab settings to Spacing. Apply these settings.
Custom Margin Right: 60px
Save settings.
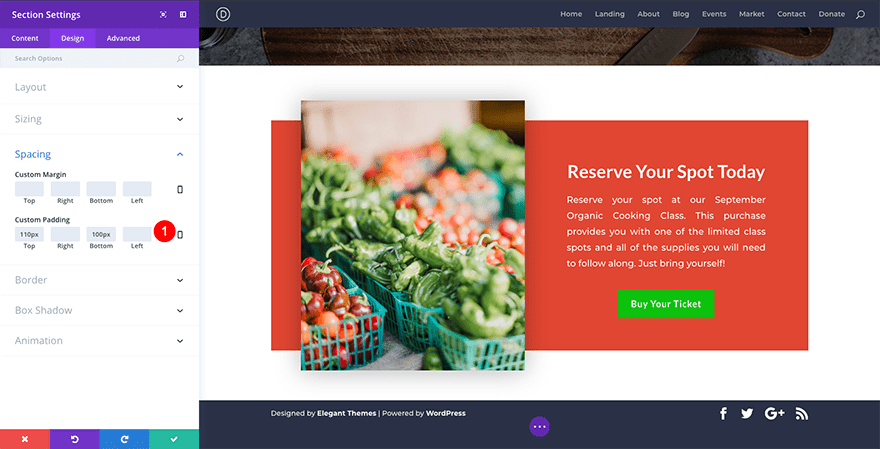
Your primary call to action is now complete, but the settings we’ve configured for it have left the section feeling a little cramped. Let’s go back into our section settings and add the following to our Spacing options.
Custom Padding:
Top: 110px
Bottom: 100px
Save settings.
Now we can move on to the next section. Add another regular blue section and choose a two column row again. In the first column on the left, insert a text module.
Add the following text:
“Meet Your Instructor
Mus duis eros lectus rhoncus nec, odio risus, tortor, dignissim tempor ut. Habitasse rhoncus? Massa elementum odio phasellus cras augue magna odio arcu odio ultricies lorem. Quis integer, sed, habitasse nunc cras, placerat egestas proin! Nunc in magnis phasellus, dictumst, diam urna?
Augue odio urna ut et platea integer placerat, tristique amet porttitor sagittis aenean ac in, tristique magnis enim tortor ultrices sed. Tristique nascetur. Lorem, ac in turpis cras! Dapibus enim, ut platea in dignissim velit, urna arcu tortor, nec.”
Set the “Meet Your Instructor” line at the top to an h2. Then go to the text module’s design settings.
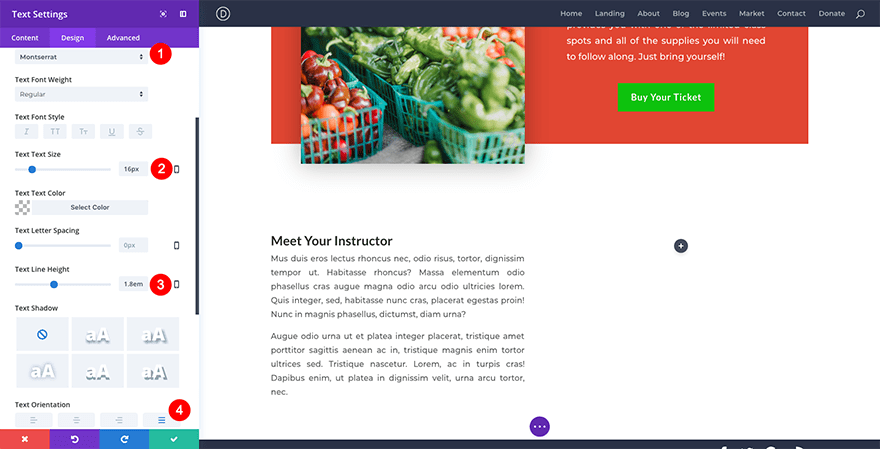
Under the Text design options, configure the following settings:
Text Font: Montserrat
Text Text Size: 16px
Text Line Height: 1.8em
Text Orientation: Justified
Next, go down to the Heading Text design settings and configure the following for your h2 text.
Heading 2 font: Lato
Heading 2 Font Weight: Bold
Heading 2 Text Size: 36px
Heading 2 Line Height: 2.7em
Save settings.
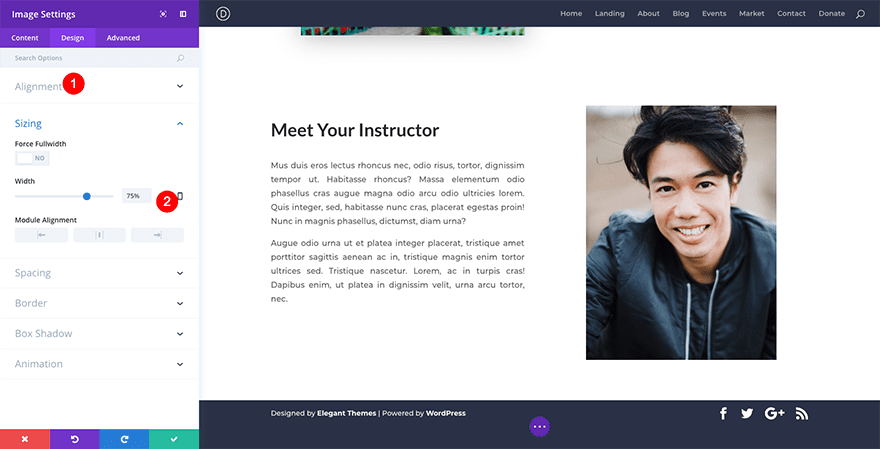
Now it’s time to add our portrait image in the second column of our new row. Add an image module, select your portrait image and configure the following design settings.
Alignment: Center
Sizing Width: 75%
Save settings.
Ok, we’re almost done with this section. We just need to put a few final touches on the section settings themselves. Click on the blue gear icon and under background select the image options. Add the image called background-texture.png. Then, jump over to the Design tab and configure the following settings:
Spacing:
Top: 60px
Bottom: 60px
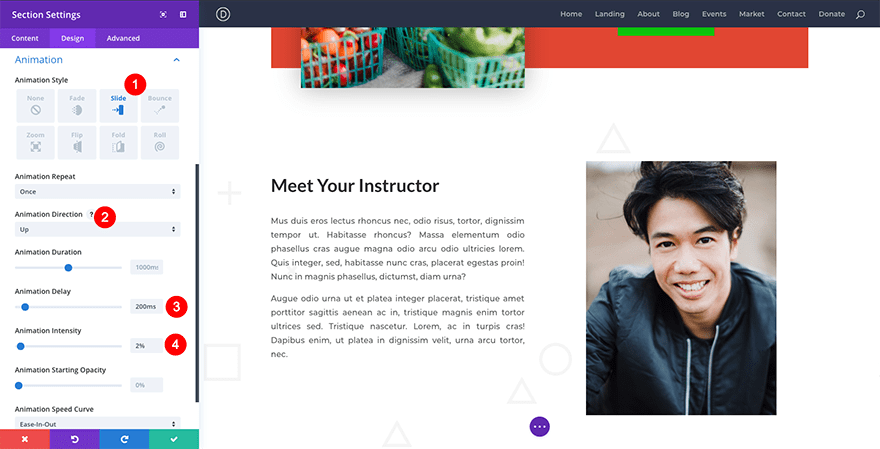
Animation:
Animation Style: Slide
Animation Direction: Up
Animation Delay: 200ms
Animation Intensity: 2%
Save settings.
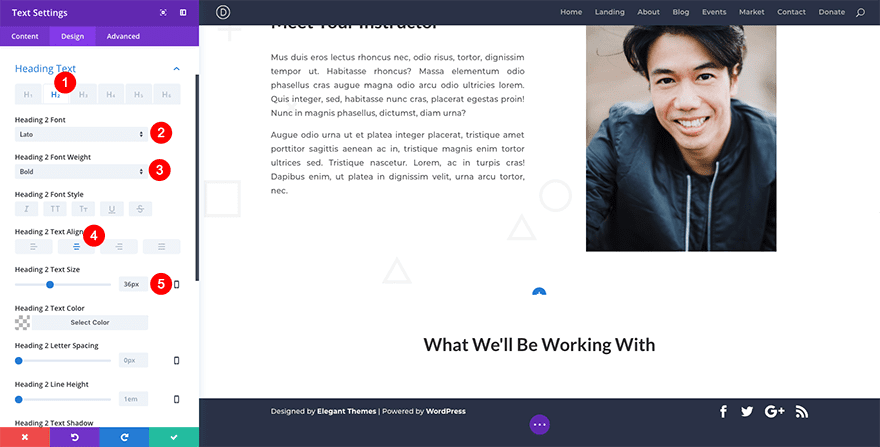
Ok, we’ve got two sections left. Add another blue regular section, this time with a single column row. Add a text module to your row and write “What We’ll Be Working With” in it. Set the text to an h2 and jump over into the design tab. Configure the following settings under Heading Text (h2 of course).
Heading 2 Font: Lato
Heading 2 Font Weight: Bold
Heading 2 Text Alignment: Center
Heading 2 Text Size: 36
Save settings.
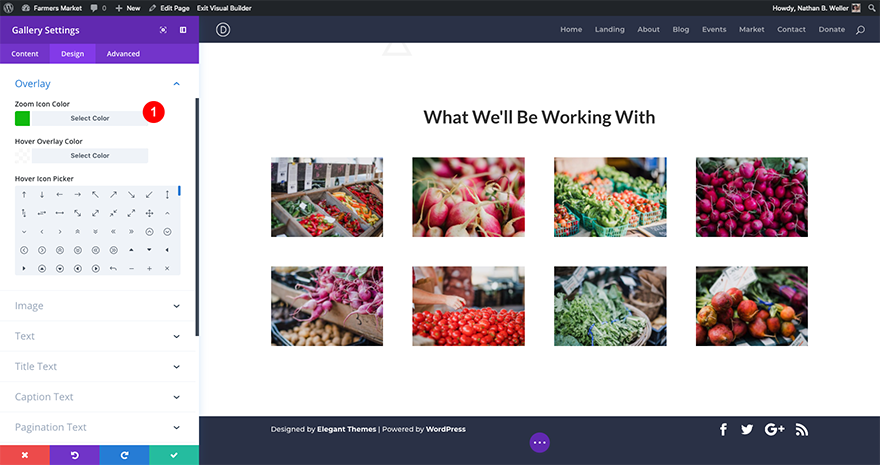
Add another single column row directly beneath the one we just finished working on. This time, add a gallery module to it. Change your image number to 8 and select eight images from your media gallery. Under elements toggle off both options so that there are no titles, captions, or pagination showing.
Next, hop over to the design tab and change the overlay color to #0DC20D. Save your settings.
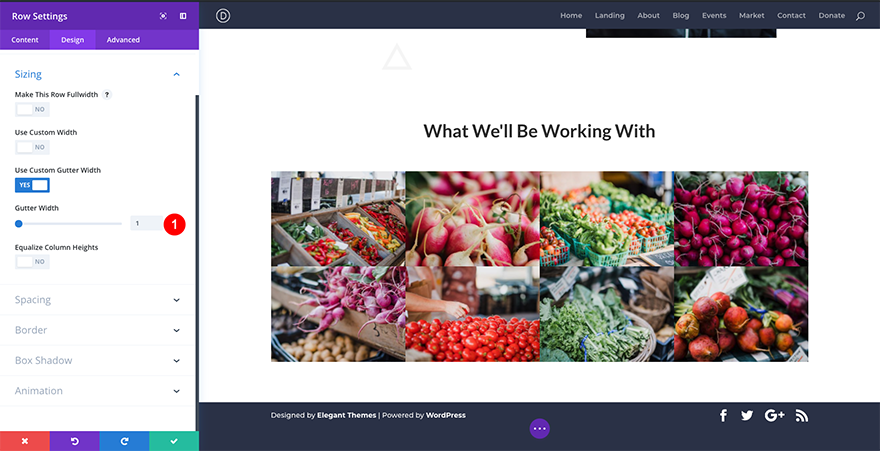
Now open up the gallery module’s row settings. Go to the design tab and under Spacing set the gutter width to 1. Save settings.
Lastly, open up this sections design tab and under spacing give the entire section a top padding of 80px. Then create a new blue regular section. This will be the page’s final section.
Add a new single column row. Instead of inserting a blank module though, copy the text module from the section above (the one that says “What We’ll Be Working With”). You can do this by right-clicking on it and selecting Copy Module. Paste it into your new row.
Click directly into the text and replace it with “What You’ll Learn”.
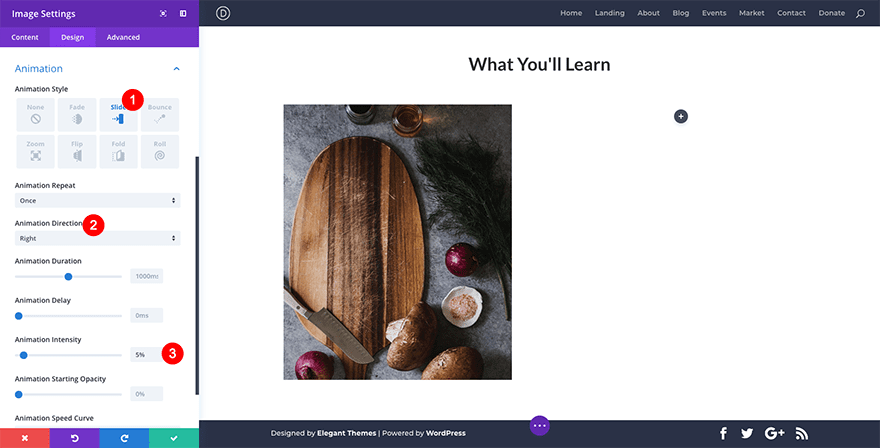
Add a new two column row beneath your new text. In the left-hand column add an image module. Select the vertically oriented cutting board image from your media library.
In the image module design tab, set the Alignment to center and the Sizing to 90%. Then, apply the following settings to the Animation section.
Animation Style: Slide
Animation Direction: Right
Animation Intensity: 5%
Save settings.
In the right-hand column, add a blurb module. Under the content settings, add your title and descriptive text. Then make sure to turn on your icon under Image & Icon. I chose to use the checkmark icon.
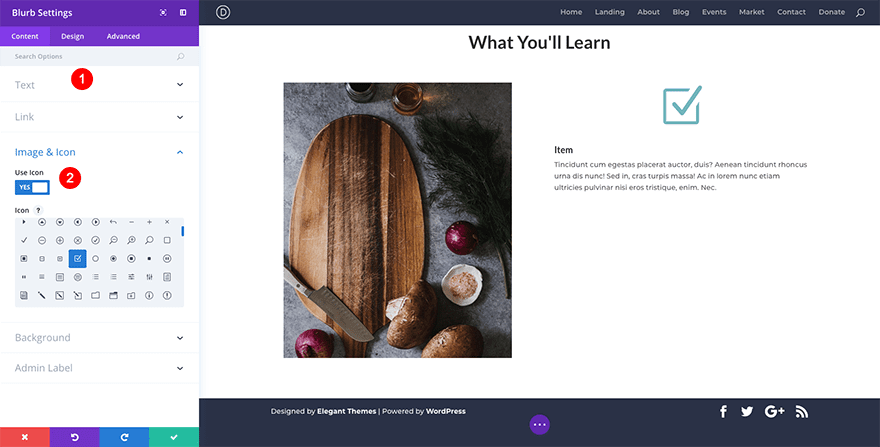
In the blurb module design tab under Image & Icon, change the Icon Color to #07c907 and the Image/Icon Placement to Left. Under Body Text, set your line height to 1.8em. Then, scroll down to the Animation options and apply the following settings.
Animation Style: Slide
Animation Direction: Left
Animation Intensity: 5%
Save settings.

Next, copy and paste your blurb twice. You can change the content but this will carry your design settings over much more easily that re-creating each blurb.
We have one more row to add, but before we do that, let’s add a bit of padding to the two column row we’ve been working in. Open up the row settings. Go to the Design tab and under Spacing add 50px to the top of column 2 only.
The last design element we need to add to our page is a final call to action button. Since we already have a button for this at the top of the page, this will be easy.
Add a new single column row. Instead of adding a new button module to it though, copy the button we created earlier and paste it here. Then, open up the button settings.
Change the text to “Reserve Your Spot Today”. Then go to the Design tab. Under spacing remove the custom margin already there and add 100px of top margin. Save your settings.
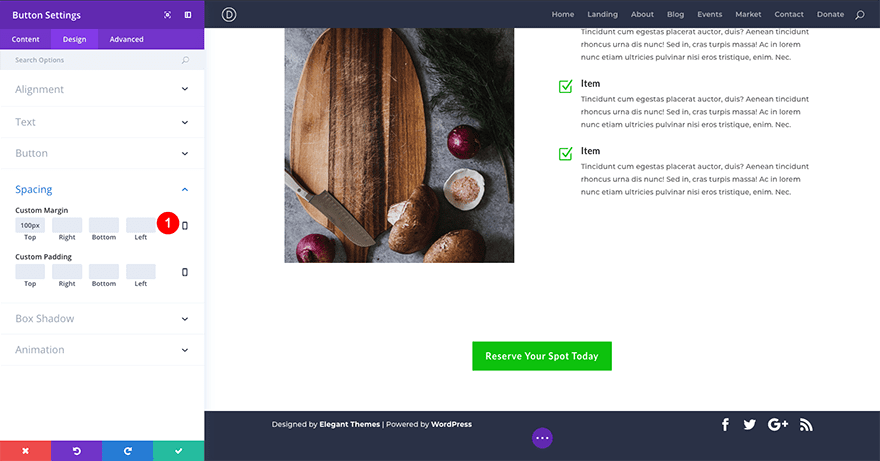
And last but not least, go into your last section’s design settings and give the entire section 80px of top padding and 60px of bottom padding. Save those settings. Save your page settings. And exit the visual builder.
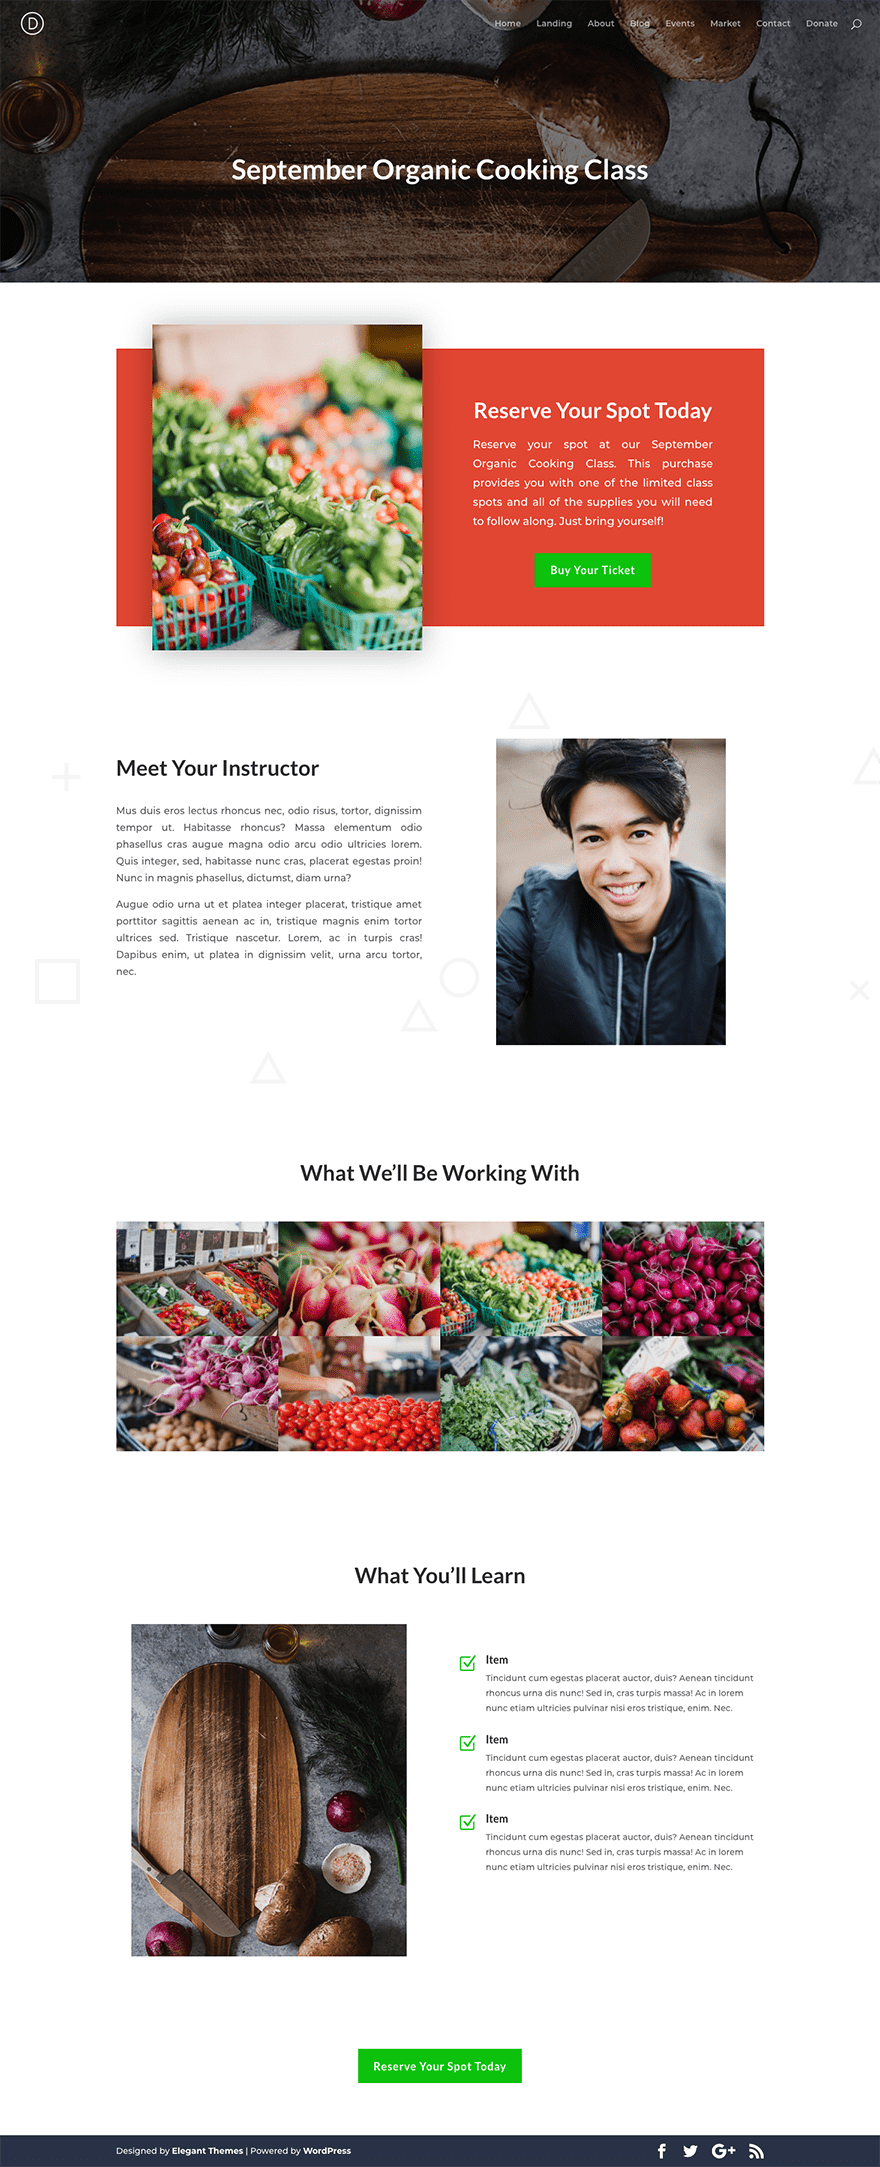
Your final design should look like this.
Connecting Your Registration Page to a WooCommerce “Ticket”
At this point we’ve got a nice looking registration page. But it doesn’t connect to anything! We can fix that of course. Here’s how.
We’re going to create a virtual product in WooCommerce to sell our tickets. There are ticketing extensions for WooCommerce, but for our purposes this will work just as well. Navigate in your WordPress Admin to Plugins > Add New. Search for WooCommerce and install/activate it. Follow the startup wizard. When prompted at the end, choose to create a new product.
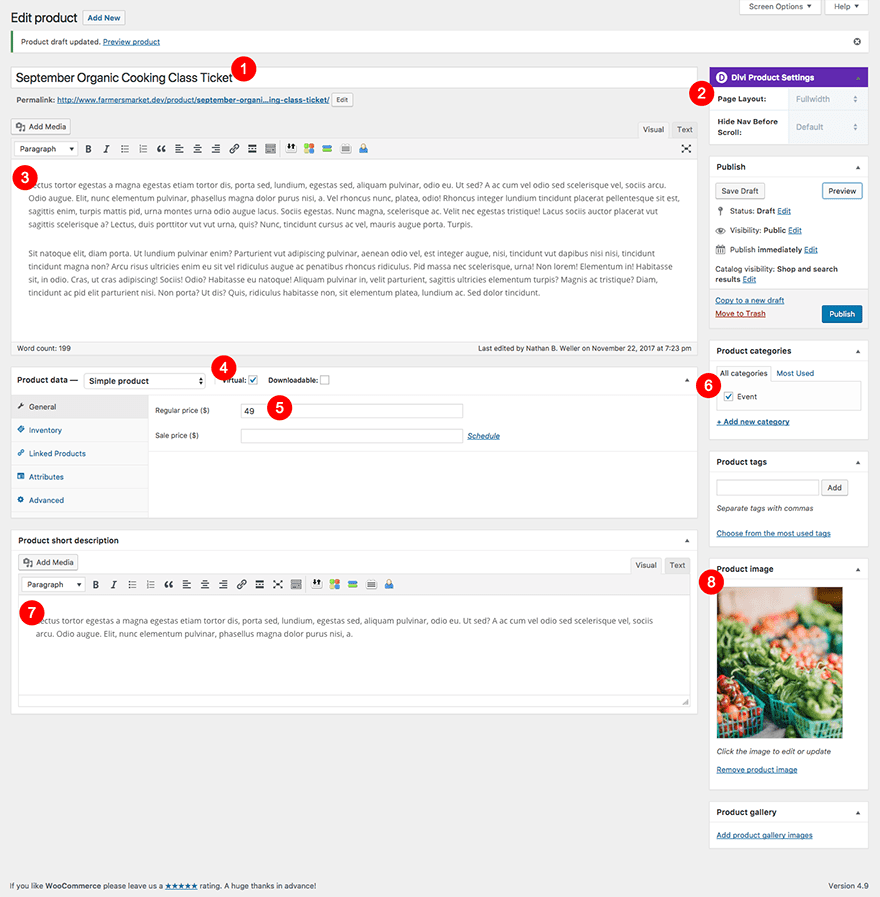
Add your product title, change your page layout to fullwidth, add your full product description, set your product to virtual, set your price, add a product category, enter a short product description, and then add your product’s featured image. Preview to make sure everything is displaying correctly and then publish your new “ticket” product.
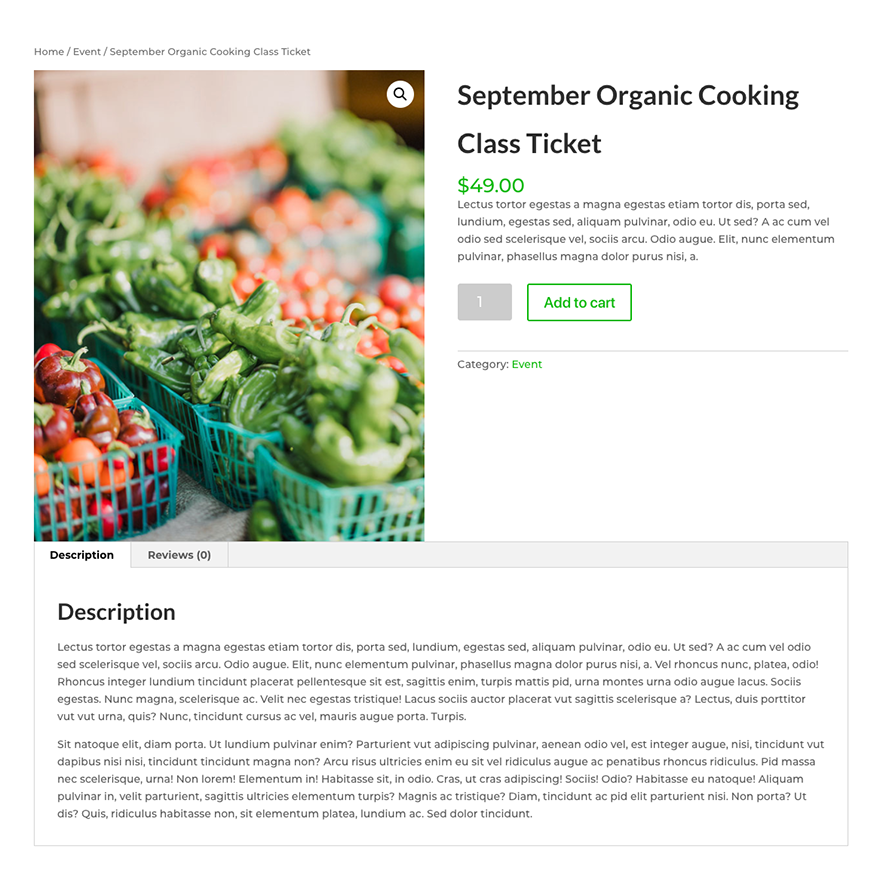
You can now link your new product to the buttons we created above. Another link you’ll want to be sure to set is the “Registration info” link on the Events page to your new Registration Page.
Final Thought
Throwing a big event is a lot of work. So, to my way of thinking, if you’re already doing a lot of work to put the thing on you might as well go the extra mile when presenting it to the public. That’s where a solution like this is perfect. I hope you found it helpful and that your next big event is a big success! If you have any questions about the execution or tools used above please feel free to drop them in the comments below.


Its nice to make the image bigger than the row, however, is it possible to make the column larger/higher than the row, so everything in that column would stretch over the row like the image does?
What about your page ‘Upcoming Events’, is this also made by setting virtual products with WooCommerce, adding the category ‘event’ and make them display at this page?
The way I envisioned this setup working is that the “registration info” links on the Upcoming Events page would all lead to different registration pages like the one we designed above. Then that page would be where the tickets are purchased.
Hi,
I would like know Elegantthemes is using your own theme for this website?
so,I can trust this theme and can use for my website
Much love to all of you, Mak, Donjete, Nick, all of elegant themes team and YOU Nathan.
Thank you so much for all you do; it’s really, really, appreciated!
When would I need to use the Events Calendar, too, if I am setting up classes and accepting payment through Woocommerce?
You may not need to use it at all. Without knowing about your business or organization, you’ll just have to compare the features you want/need with what you’re able to accomplish this way or with the Events Calendar.
Thanks for the article – useful. I have put together a number of sites for event management using various tools, all of which have their plus points and tricky issues, depending on what the client wants and needs.
I can recommend that if you are using WooCommerce, try the Box Office Extension.
If not WooCommerce, It’s possible to use Gravity Forms for a lot of events too.
Cool, thanks for the tip Neal.