

When looking for ways to boost online conversion rates, you’ll notice that many website have a ‘deal of the day’ product section on their landing pages. This gives visitors a sense of urgency and can shorten the decision-making process. In this post, we’ll show you how to create a stunning countdown deal of the day product section design with Divi and its built-in options only. The design style we’re using is elegant and clean and includes a splash of color to emphasize different elements in the design. You’ll be able to download the JSON file for free as well!
Let’s get to it.
- 1 Preview
- 2 Download The Countdown ‘Deal of the Day’ Product Section for FREE
- 3 Download For Free
- 4 You have successfully subscribed. Please check your email address to confirm your subscription and get access to free weekly Divi layout packs!
-
5
Let’s Start Recreating!
- 5.1 Add New Section
- 5.2 Add New Row
- 5.3 Column 1
- 5.4 Column 2
- 5.5 Add Woo Image Module to Column 1
- 5.6 Add Text Module to Column 1
- 5.7 Add Text Module to Column 2
- 5.8 Add Countdown Timer Module to Column 2
- 5.9 Add Woo Title Module to Column 2
- 5.10 Add Woo Description Module to Column 2
- 5.11 Add Woo Price Module to Column 2
- 5.12 Add Woo Add To Cart Module to Column 2
- 6 Preview
- 7 Final Thoughts
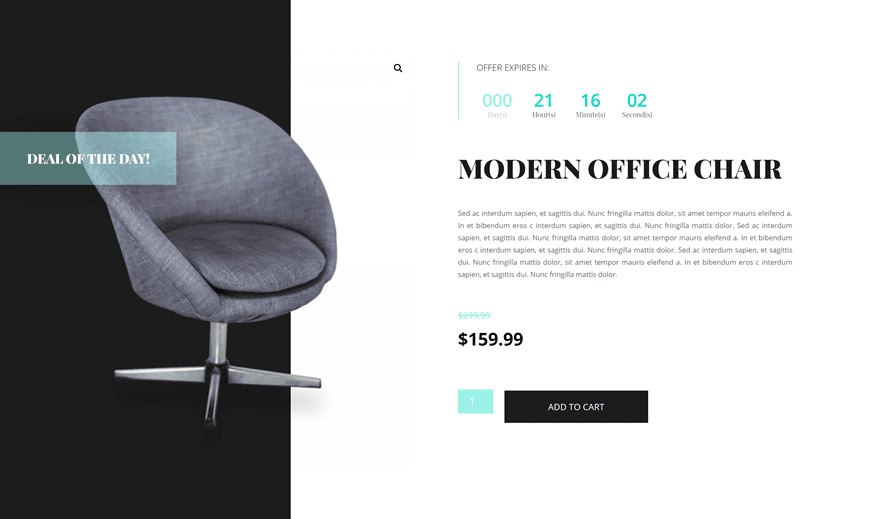
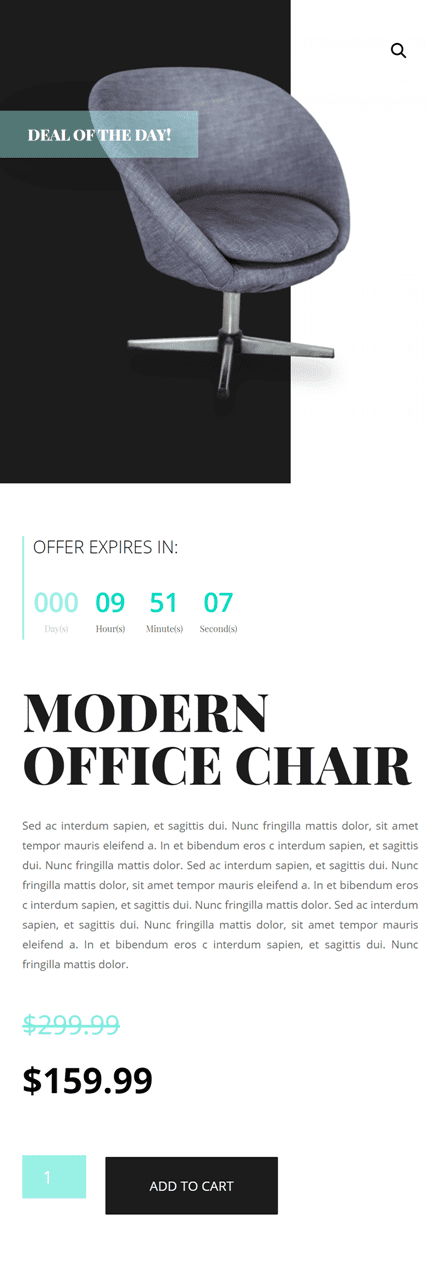
Preview
Before we dive into the tutorial, let’s take a quick look at the outcome across different screen sizes.
Desktop
Mobile
Download The Countdown ‘Deal of the Day’ Product Section for FREE
To lay your hands on the free countdown ‘deal of the day’ product section, you will first need to download it using the button below. To gain access to the download you will need to subscribe to our newsletter by using the form below. As a new subscriber, you will receive even more Divi goodness and a free Divi Layout pack every Monday! If you’re already on the list, simply enter your email address below and click download. You will not be “resubscribed” or receive extra emails.

Subscribe To Our Youtube Channel
Let’s Start Recreating!
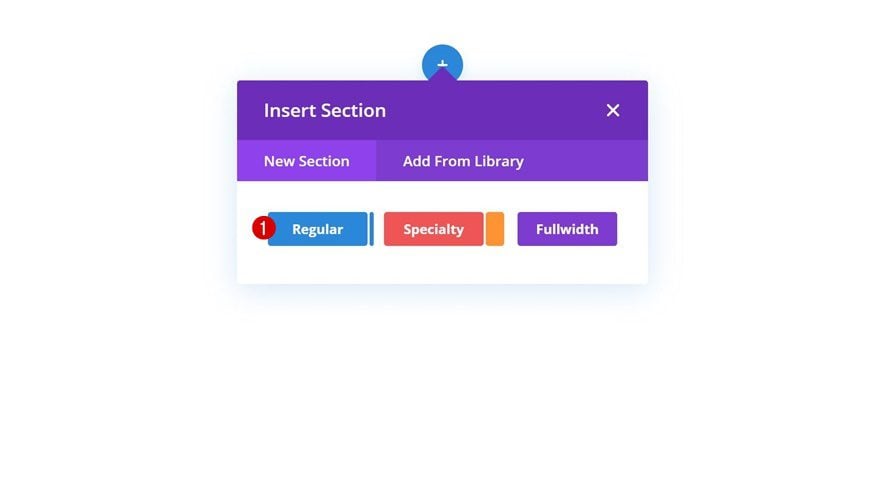
Add New Section
Open the page you want to add the deal of the day product section to and add a new regular section.
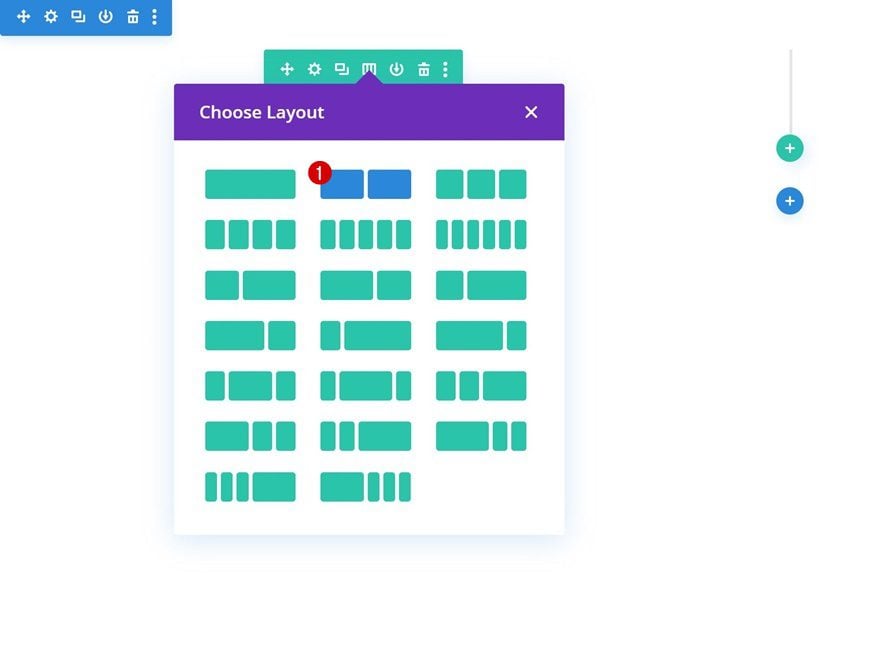
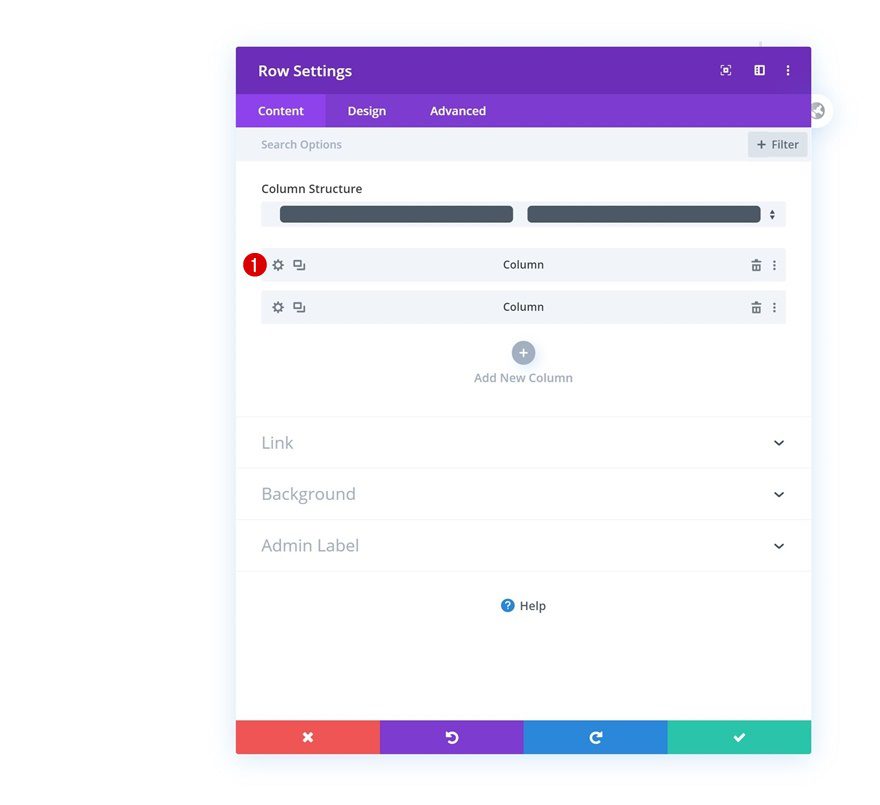
Add New Row
Column Structure
Continue by adding a new row using the following column structure:
Sizing
Without adding any modules yet, open the row settings and allow the row to take up the entire width of the screen in the sizing settings.
- Use Custom Gutter Width: Yes
- Gutter Width: 1
- Equalize Column Heights: Yes
- Width: 100%
- Max Width: 100%

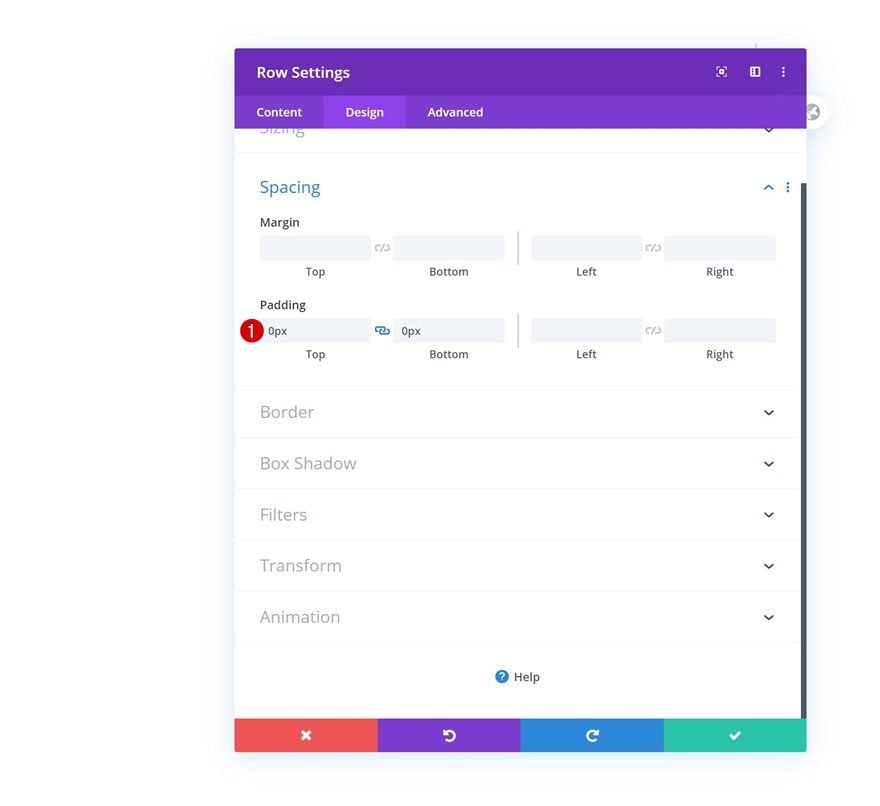
Spacing
Continue by removing the row’s default top and bottom padding in the spacing settings.
- Top Padding: 0px
- Bottom Padding: 0px
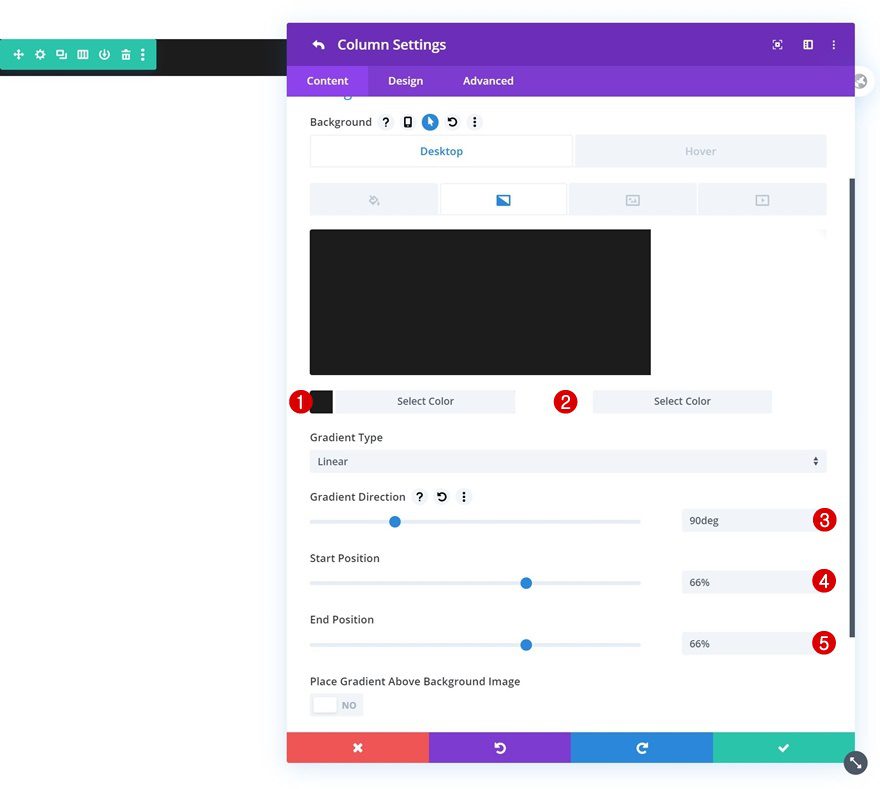
Column 1
Open the column 1 settings next.
Default Gradient Background
And add a default gradient background to it.
- Color 1: #1c1c1c
- Color 2: #ffffff
- Gradient Direction: 90deg
- Start Position: 66%
- End Position: 66%
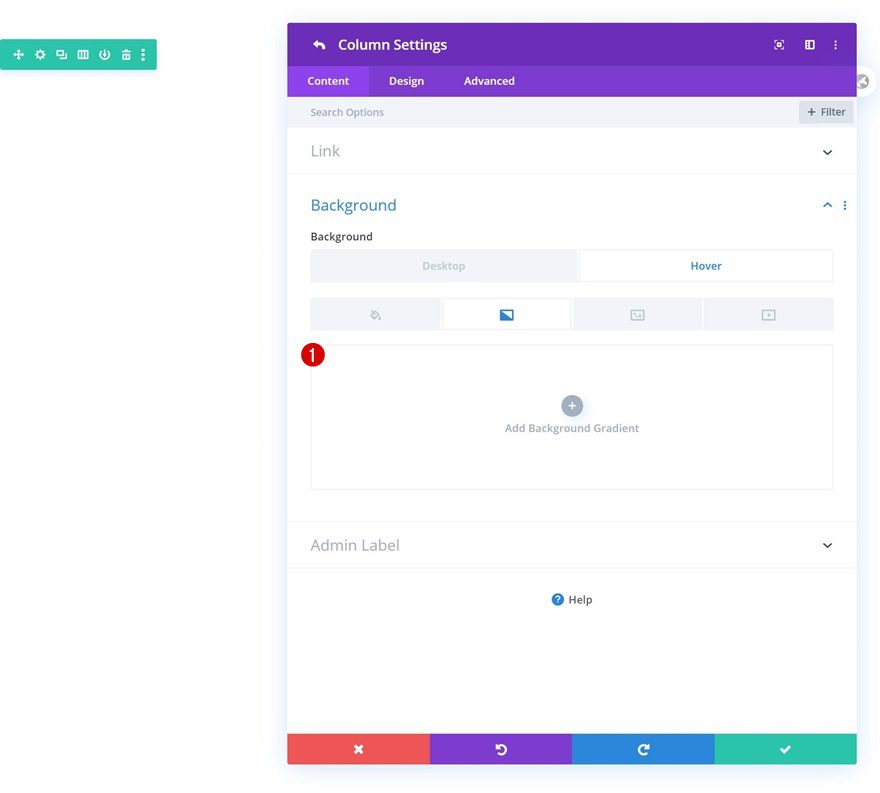
Remove Hover Gradient Background
Remove that same gradient background on hover.
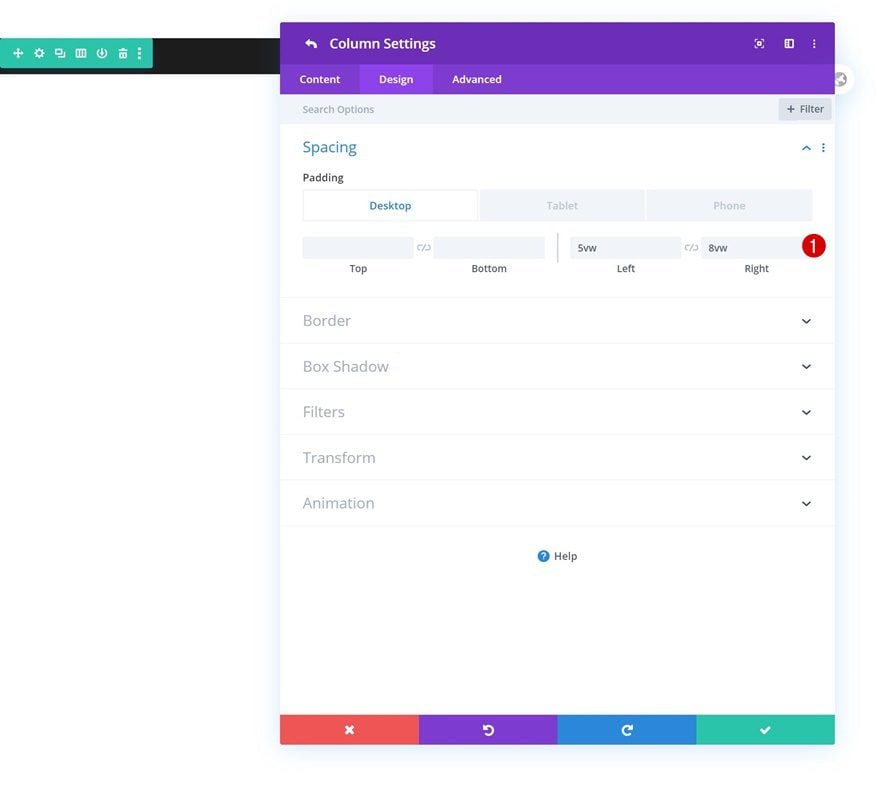
Column 2
Open the column 2 settings next.
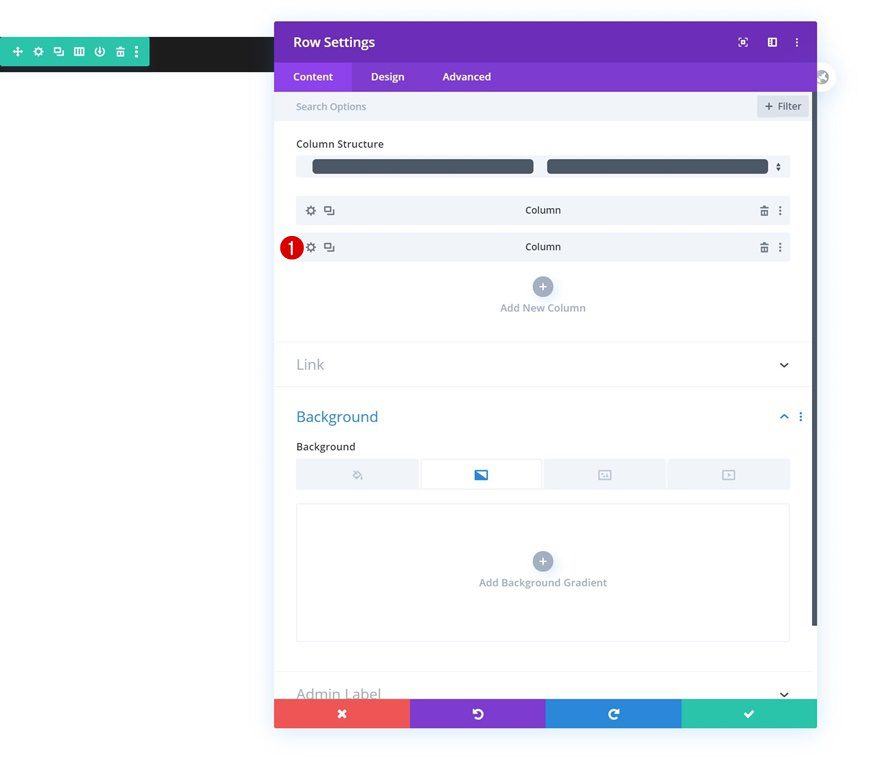
Spacing
And add some custom left and right padding across different screen sizes.
- Left Padding: 5vw
- Right Padding: 8vw (Desktop), 5vw (Tablet & Phone)
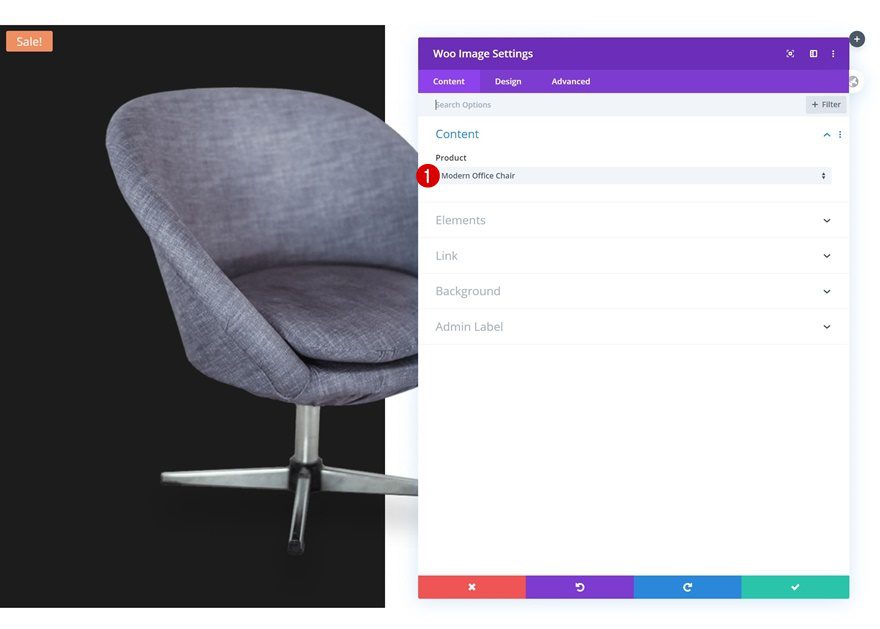
Add Woo Image Module to Column 1
Dynamic Content
Now that we’ve completed the row and column settings, we can start adding modules. Add a Woo Image Module to column 1 and select your product of choice.
- Product: Find in list
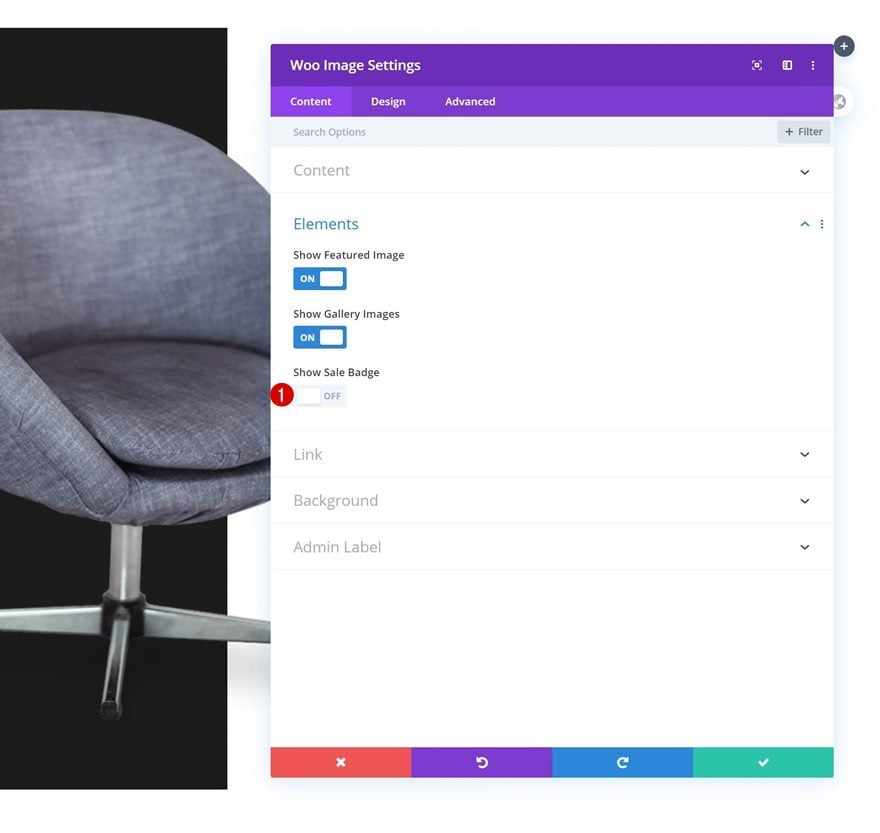
Elements
Remove the sale badge next.
- Show Sale Badge: OFF
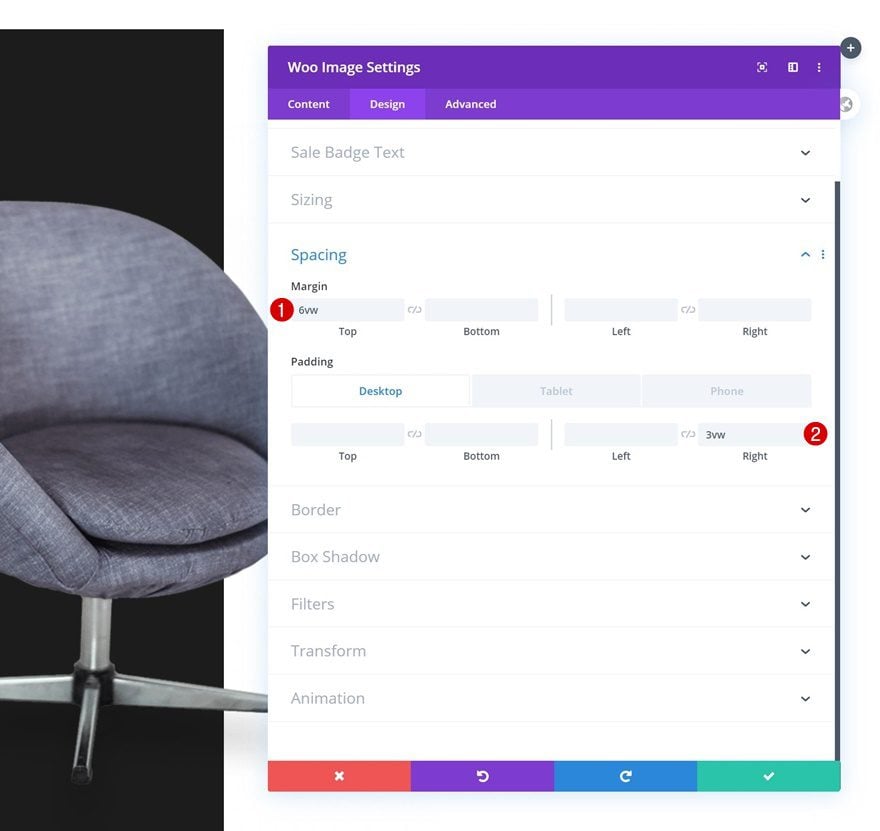
Spacing
Add some custom spacing values as well.
- Top Margin: 6vw
- Left Padding: 3vw (Tablet & Phone)
- Right Padding: 3vw
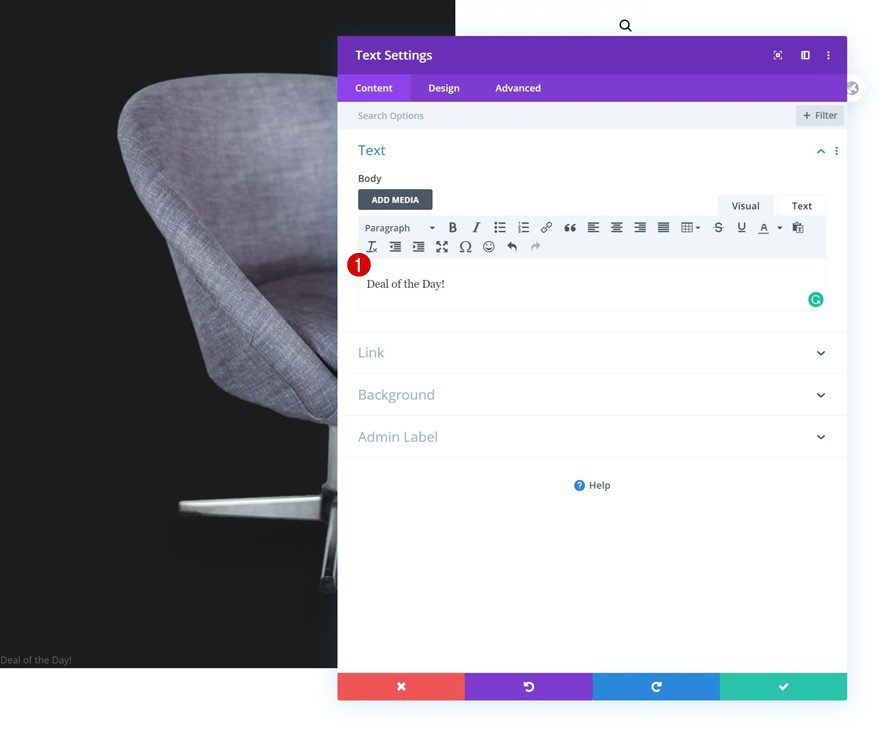
Add Text Module to Column 1
Add Content
The next and last module we need in column 1 is a Text Module. Enter some content of your choice.
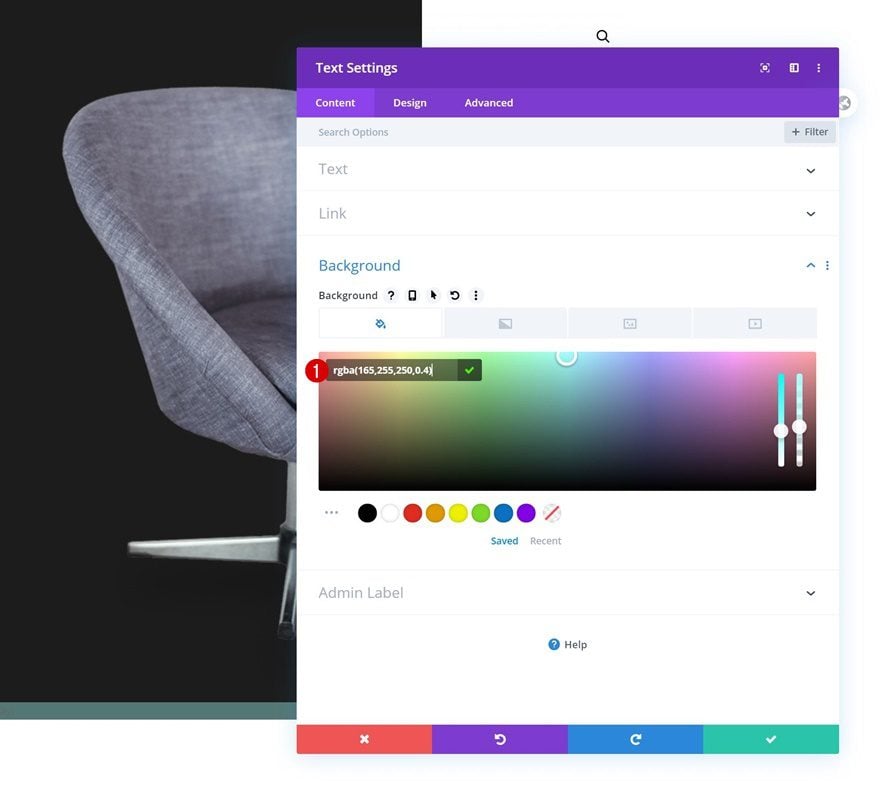
Background Color
Change the module’s background color.
- Background Color: rgba(165,255,250,0.4)
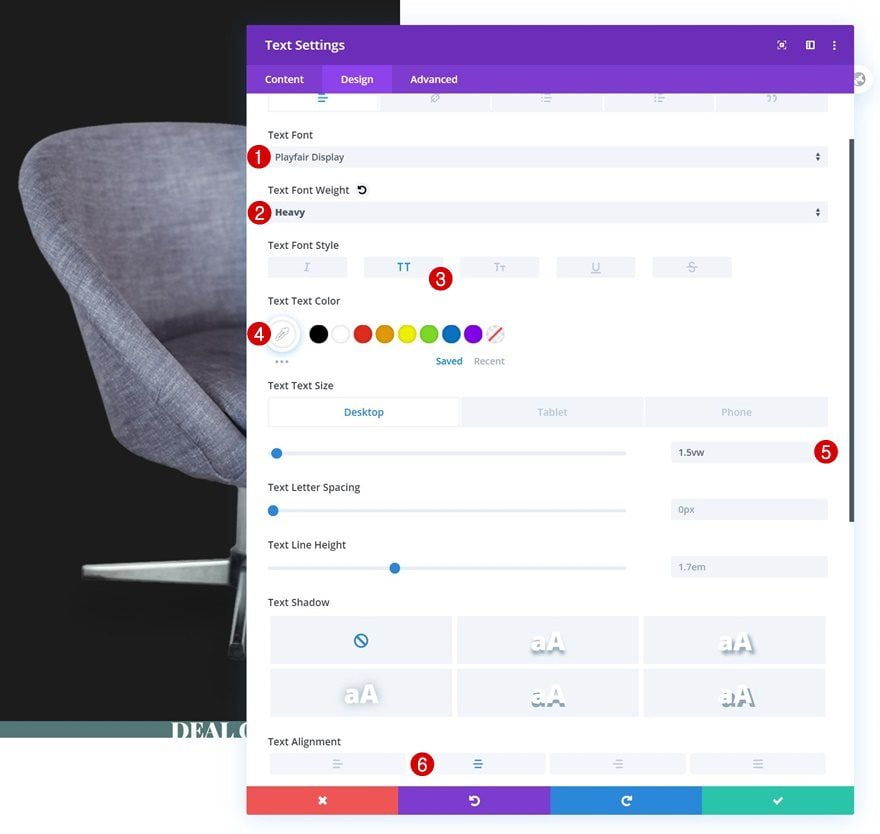
Text Settings
Move on to the design tab and change the text settings accordingly:
- Text Font: Playfair Display
- Text Font Weight: Heavy
- Text Font Style: Uppercase
- Text Color: #ffffff
- Text Size: 1.5vw (Desktop), 3vw (Tablet), 3.5vw (Phone)
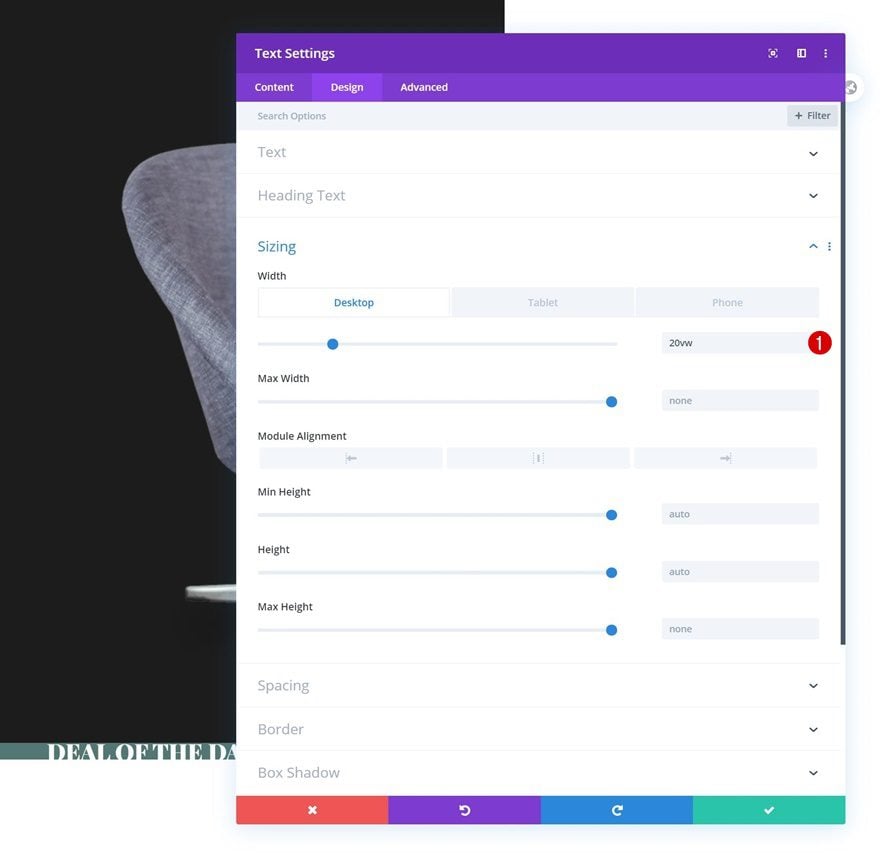
Sizing
Play around with the width across different screen sizes as well.
- Width: 20vw (Desktop), 40vw (Tablet), 45vw (Phone)
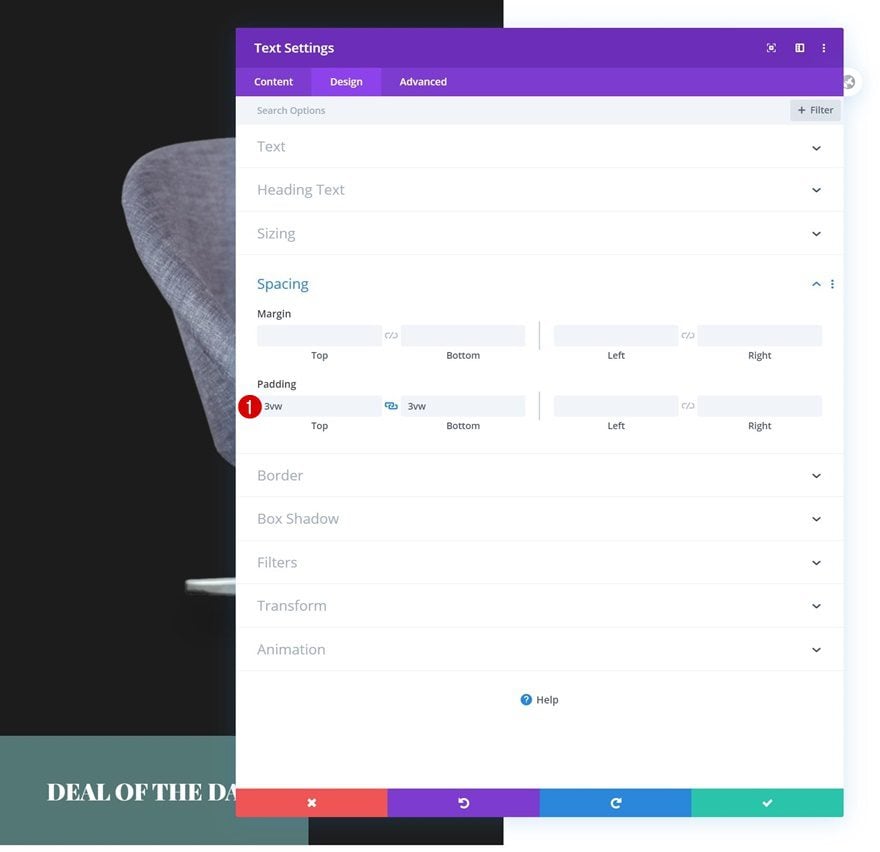
Spacing
Then, go to the spacing settings and add some custom top and bottom padding.
- Top Padding: 3vw
- Bottom Padding: 3vw
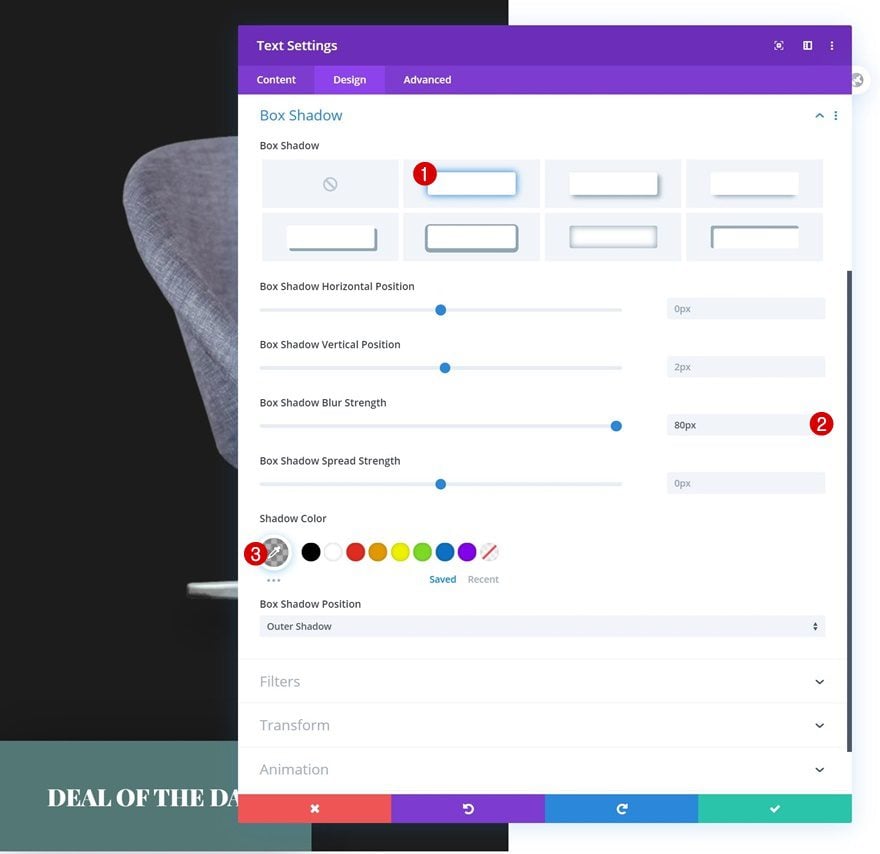
Box Shadow
To give some depth to the design, we’ll add a box shadow too.
- Box Shadow Blur Strength: 80px
- Shadow Color: rgba(0,0,0,0.3)
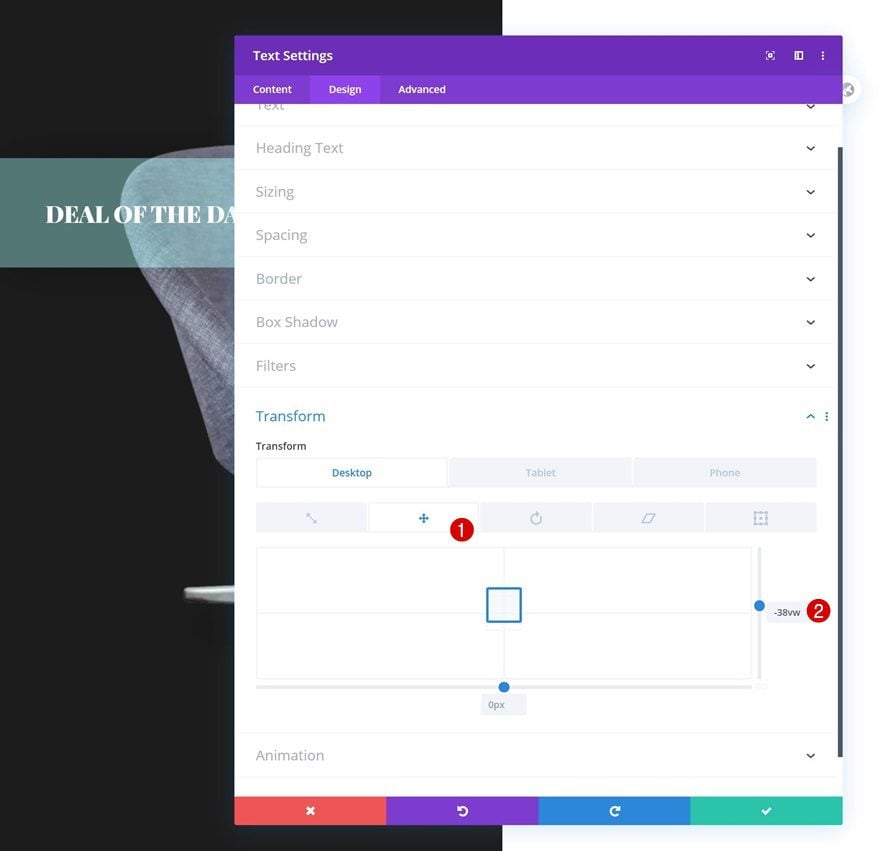
Transform Translate
Complete the text module by repositioning the module using the transform translate values.
- Right: -38vw (Desktop), -74vw (Tablet & Phone)
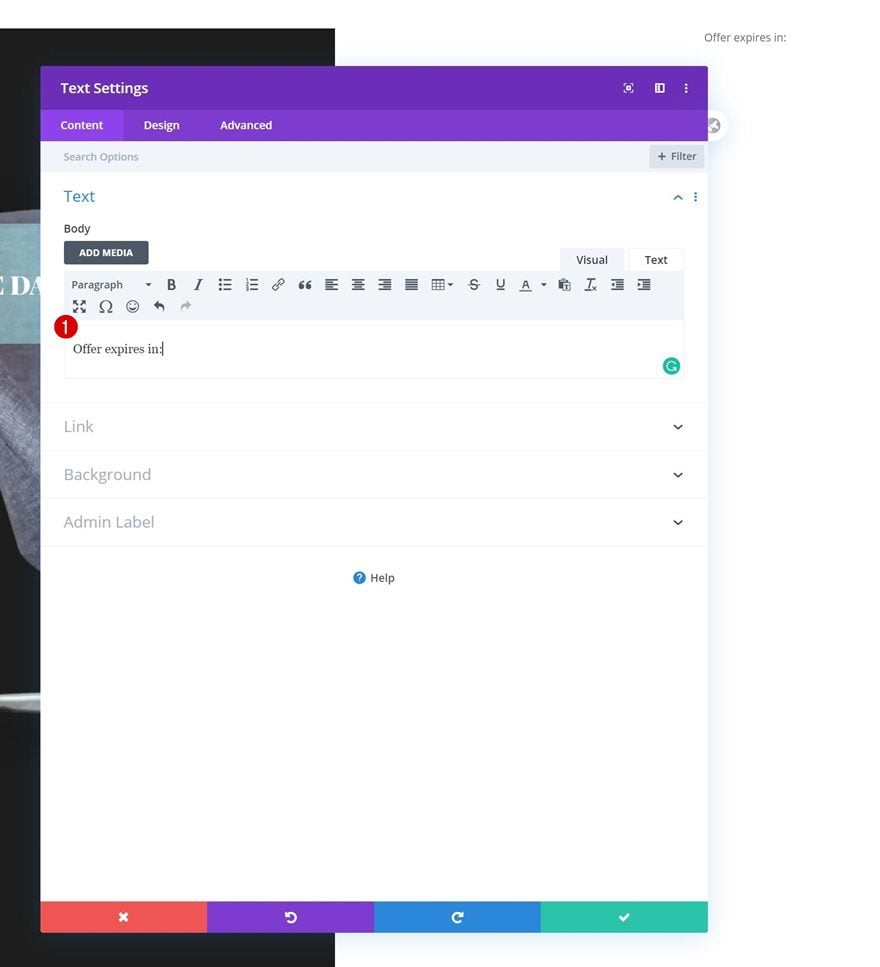
Add Text Module to Column 2
Add Content
On to the next column! There, the first module we need is a regular Text Module. Insert some content of your choice.
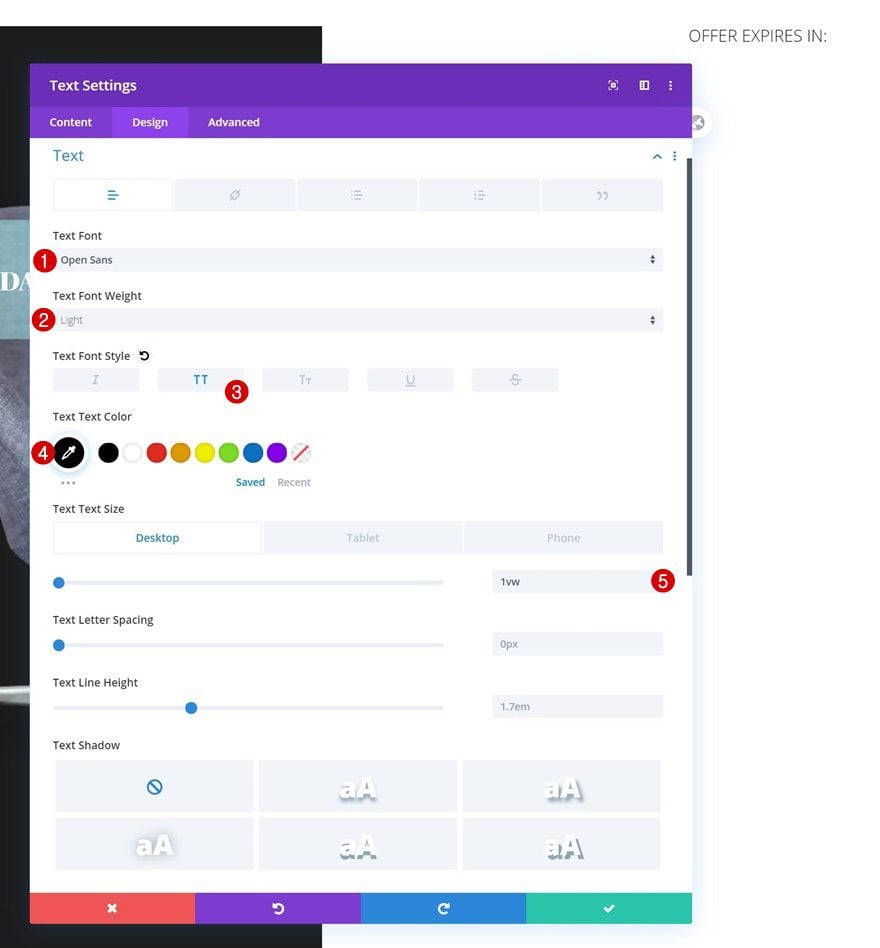
Text Settings
Move on to the design tab and change the text settings as follows:
- Text Font: Open Sans
- Text Font Weight: Light
- Text Font Style: Uppercase
- Text Color: #000000
- Text Size: 1vw (Desktop), 3vw (Tablet), 4vw (Phone)
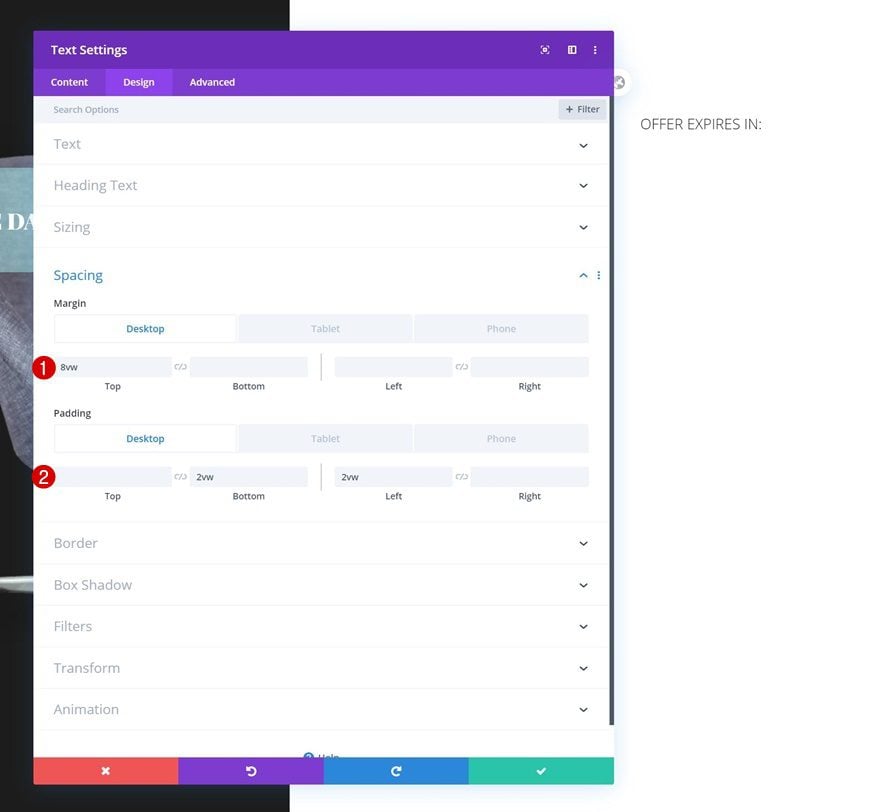
Spacing
Modify the spacing settings too.
- Top Margin: 8vw (Desktop), 12vw (Tablet & Phone)
- Bottom Padding: 2vw (Desktop), 5vw (Tablet), 7vw (Phone)
- Left Padding: 2vw
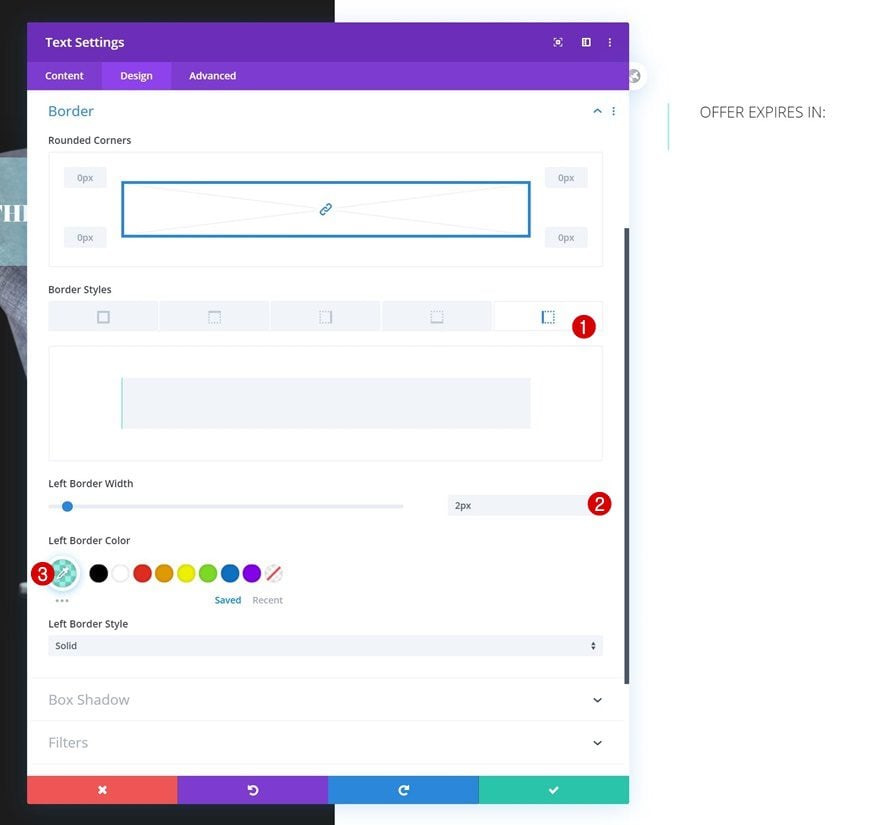
Border
We’re adding a left border next.
- Left Border Width: 2px
- Left Border Color: rgba(0,219,193,0.4)
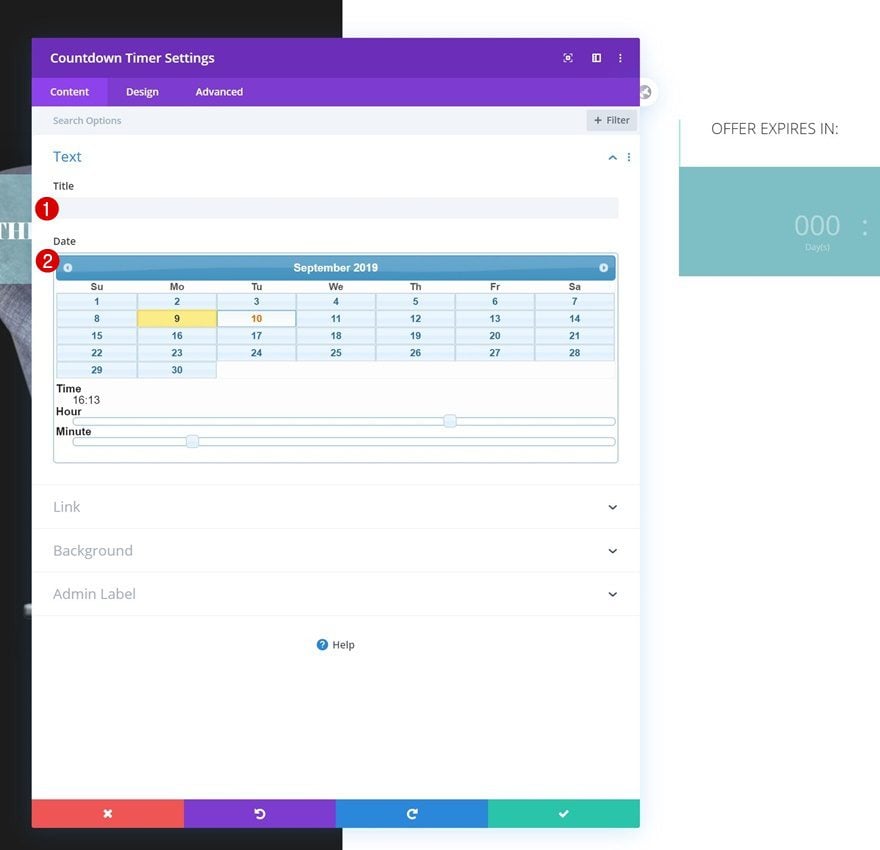
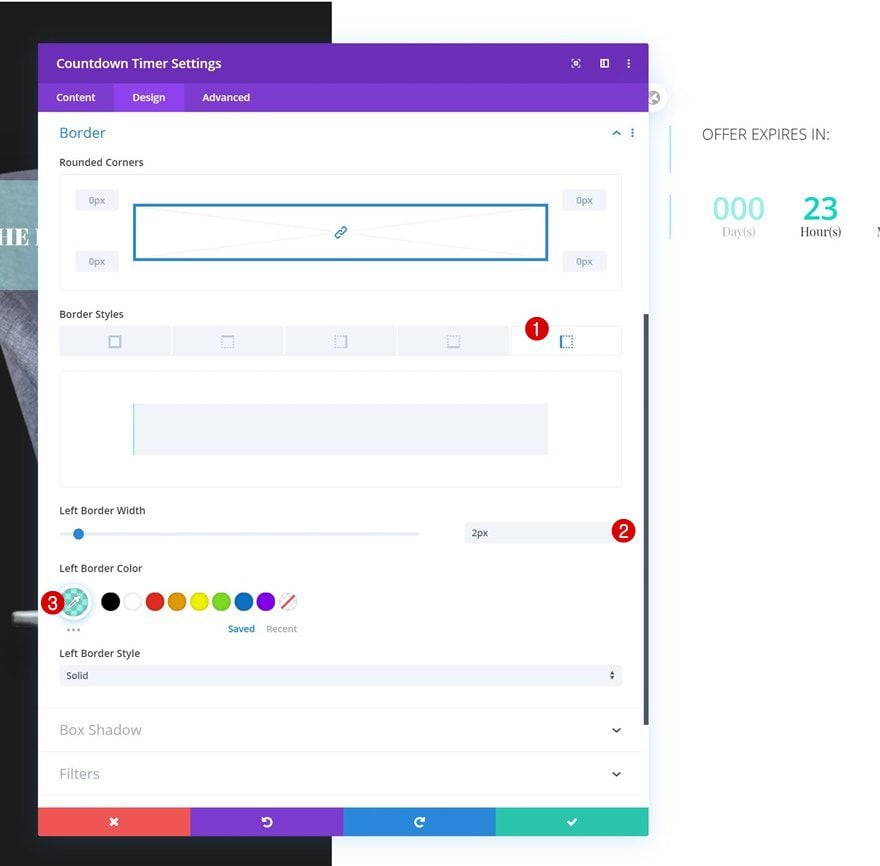
Add Countdown Timer Module to Column 2
Leave Title Box Empty & Set Date
On to the next module, which is a Countdown Timer Module. Make sure you leave the title box empty and select your date of choice.
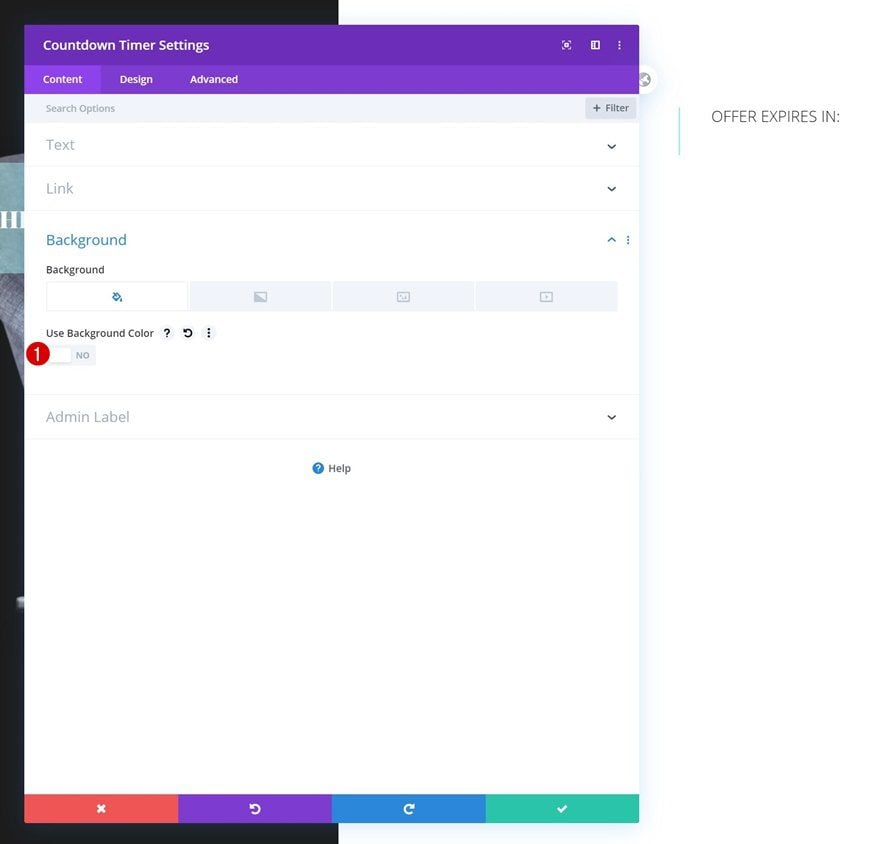
Remove Background Color
Open the background settings next and disable the background color.
- Use Background Color: NO
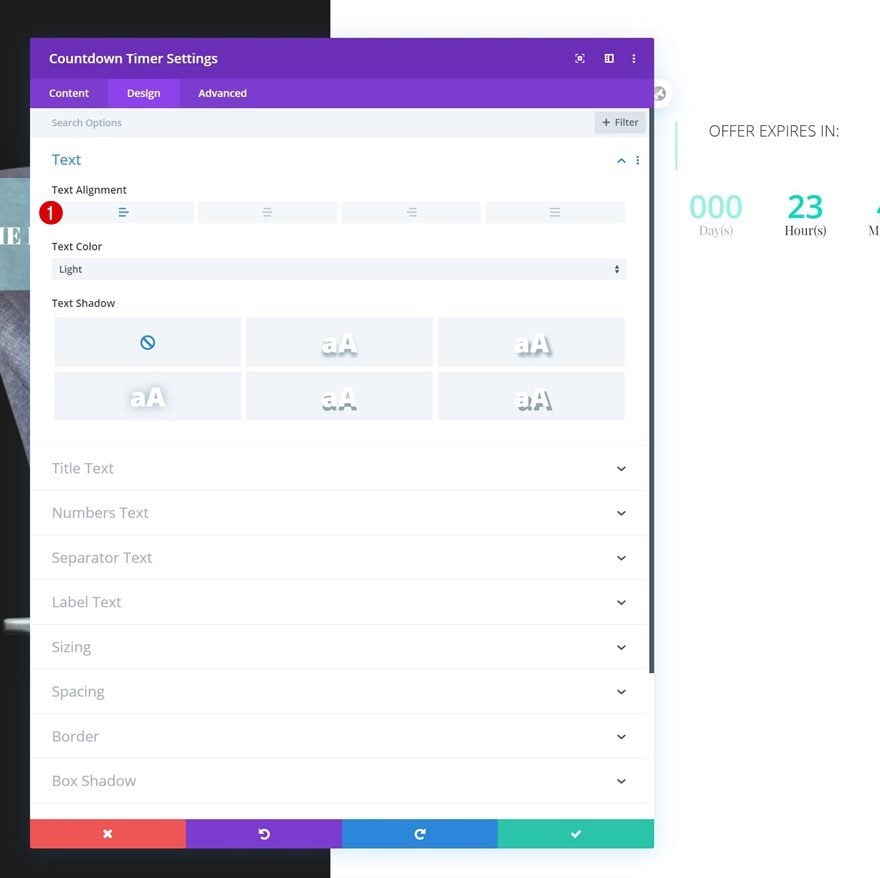
Text Settings
Move on to the design tab and change the text alignment.
- Text Alignment: Left
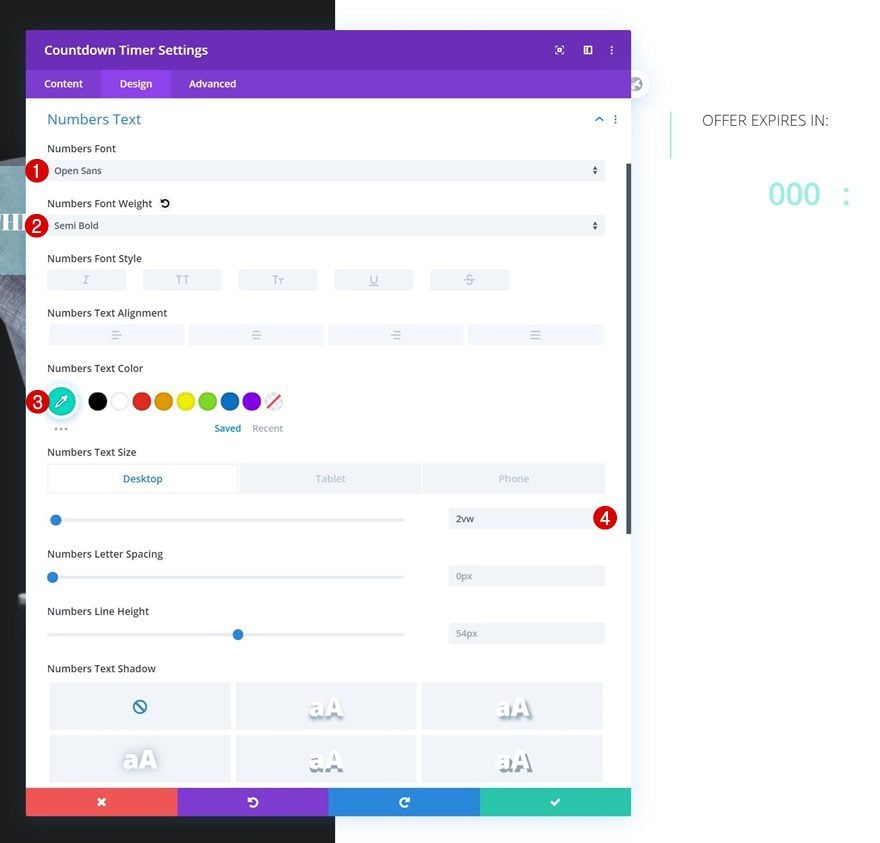
Numbers Text Settings
Modify the numbers text settings next.
- Numbers Font: Open Sans
- Numbers Font Weight: Semi Bold
- Numbers Text Color: #00dbc1
- Numbers Text Size: 2vw (Desktop), 4vw (Tablet), 6vw (Phone)
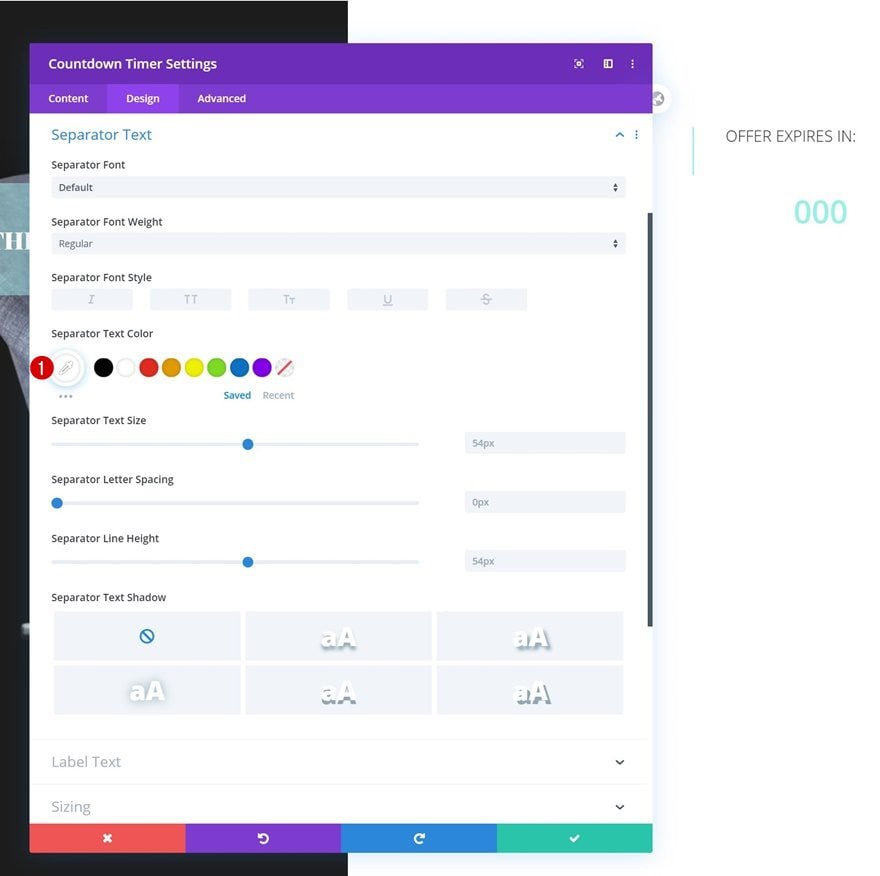
Separator Text Settings
Then, change the separator text color.
- Separator Text Color: #ffffff
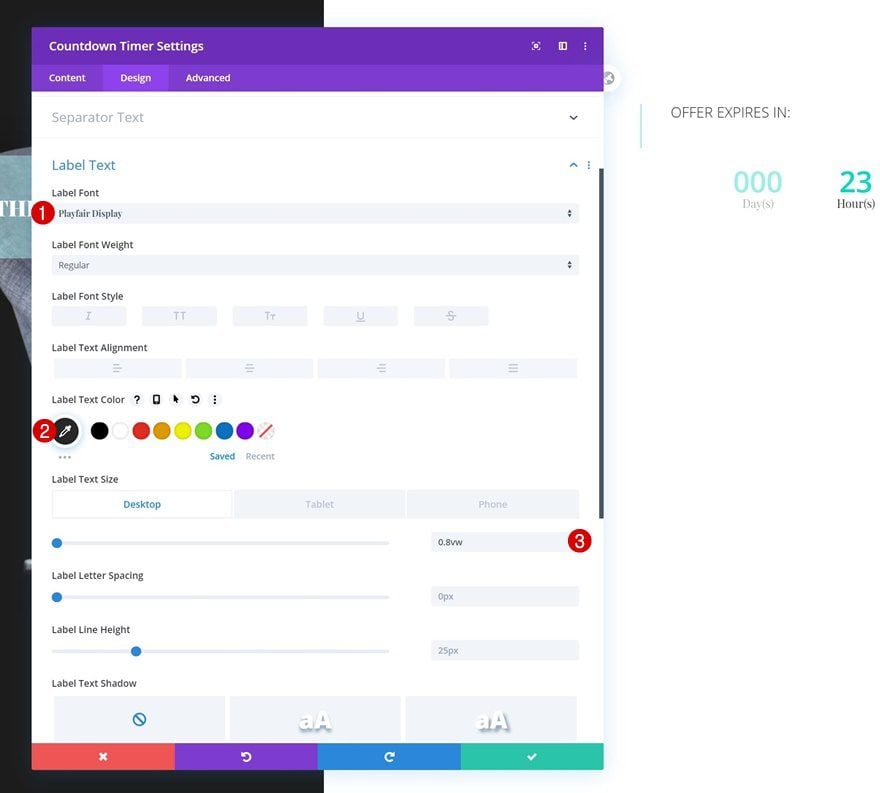
Label Text Settings
And change the look and feel of the label text as well.
- Label Text Color: #282828
- Label Text Size: 0.8vw (Desktop), 1.3vw (Tablet), 2vw (Phone)
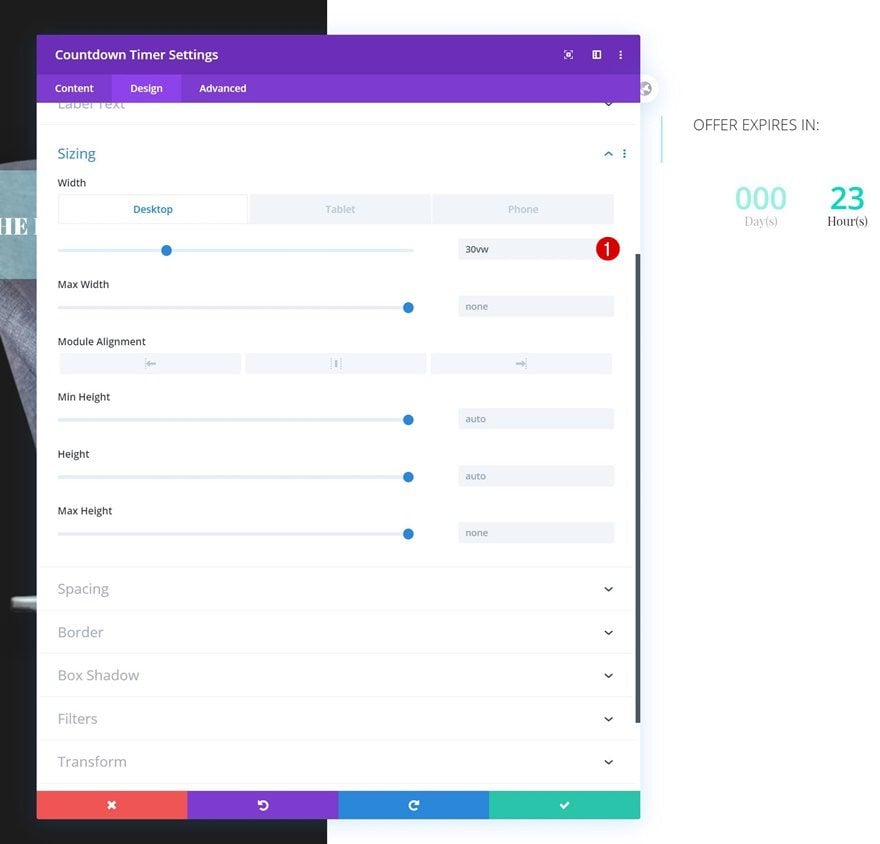
Sizing
Shrink the width of the module across different screen sizes.
- Width: 30vw (Desktop), 45vw (Tablet), 65vw (Phone)
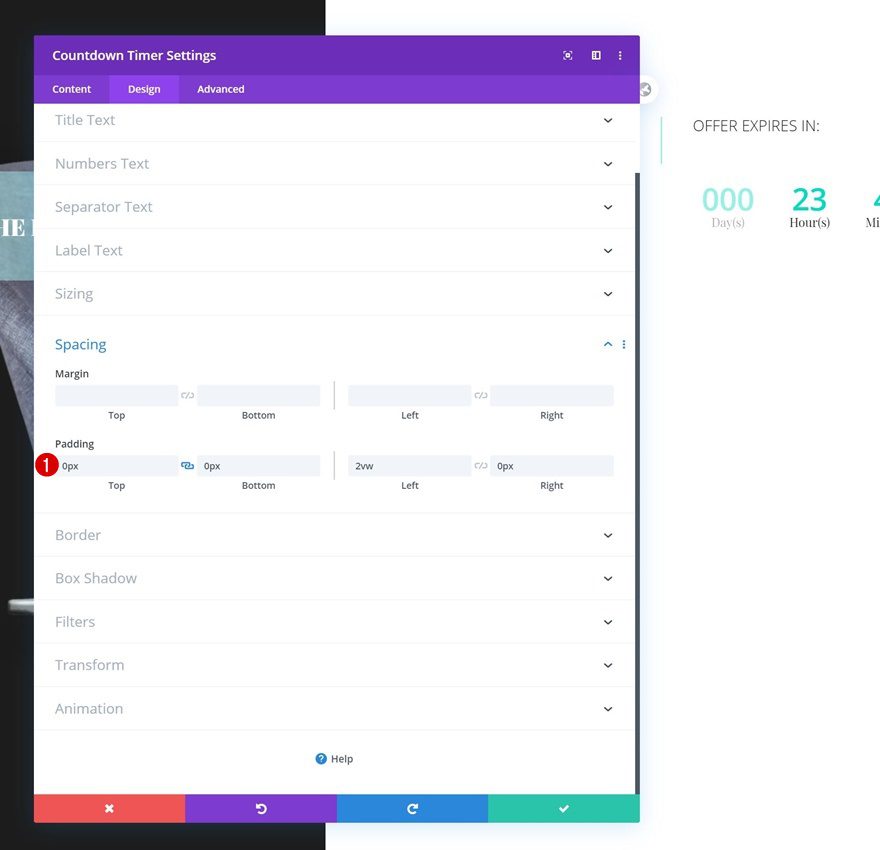
Spacing
And modify the padding values in the spacing settings.
- Top Padding: 0px
- Bottom Padding: 0px
- Left Padding: 2vw
- Right Padding: 0px
Border
Complete the module’s settings by adding a left border.
- Left Border Width: 2px
- Left Border Color: rgba(0,219,193,0.4)
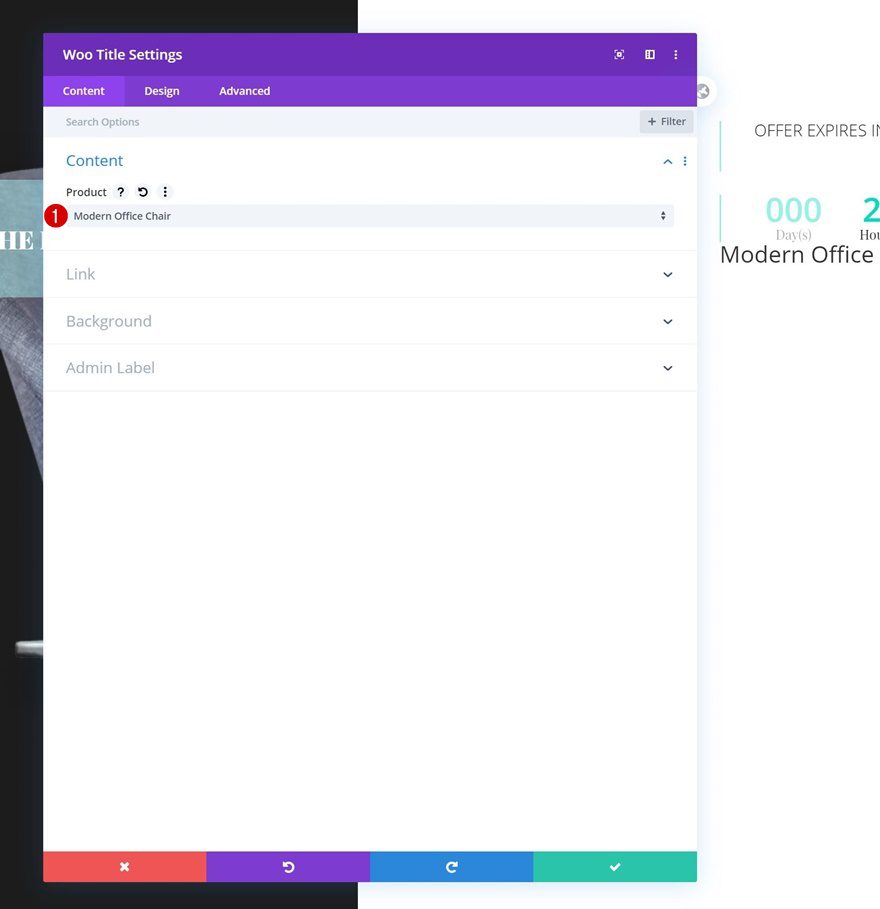
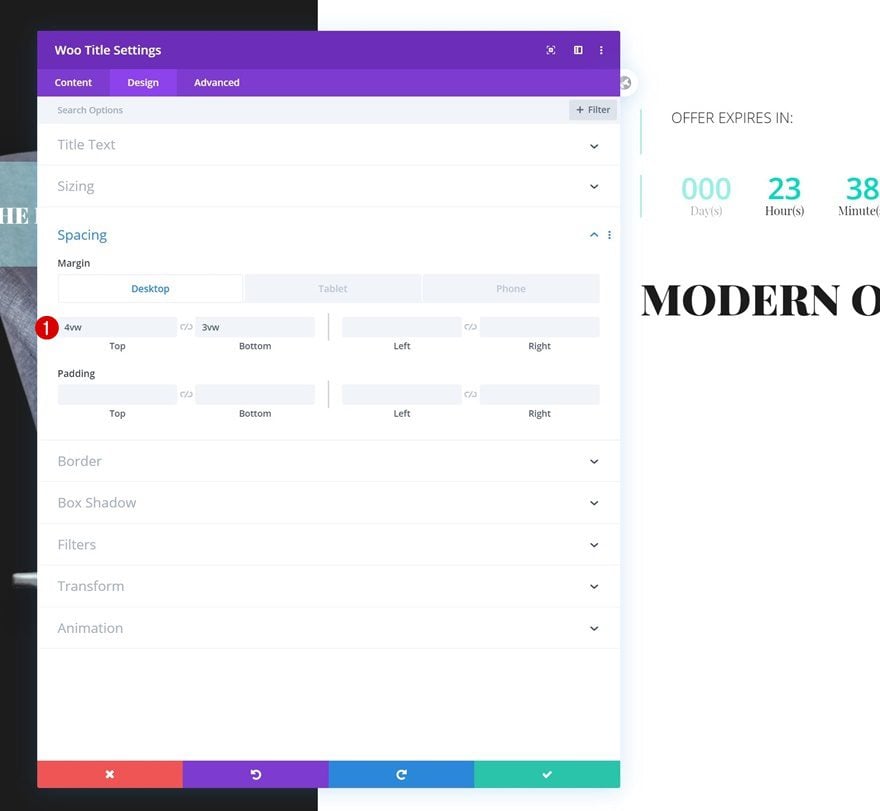
Add Woo Title Module to Column 2
Dynamic Content
On to the next module, which is a Woo Title Module. Select a product of your choice.
- Product: Find in list
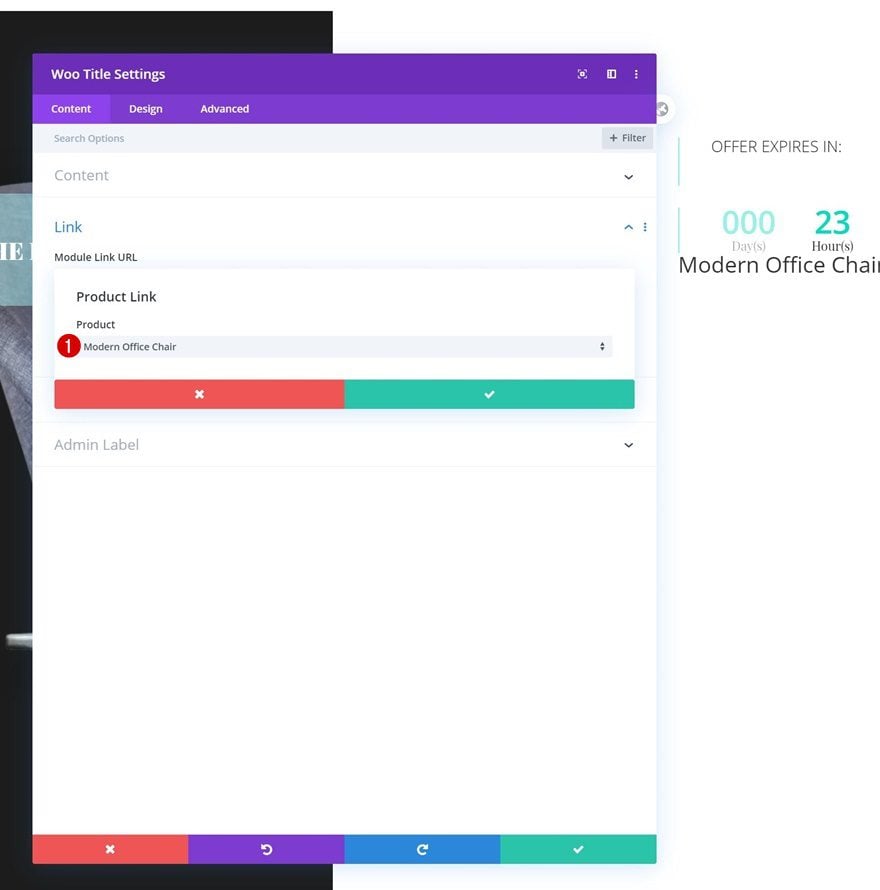
Link
Add a product link to the module next.
- Product Link: Find in list
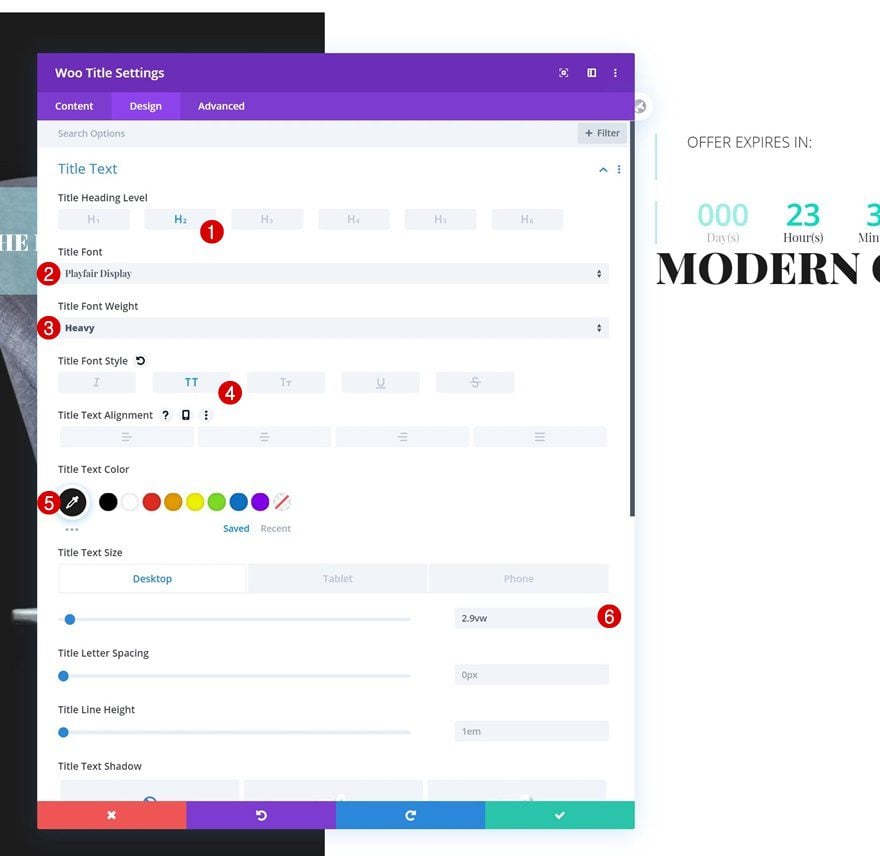
Title Text Settings
Continue by modifying the module’s title text settings.
- Title Heading Level: H2
- Title Font: Playfair Display
- Title Font Weight: Heavy
- Title Font Style: Uppercase
- Title Text Color: #1c1c1c
- Title Text Size: 2.9vw (Desktop), 10vw (Tablet), 12vw (Phone)
Spacing
Move on to the spacing settings and play around with the margin values.
- Top Margin: 4vw (Desktop), 10vw (Tablet & Phone)
- Bottom Margin: 3vw (Desktop), 6vw (Tablet & Phone)
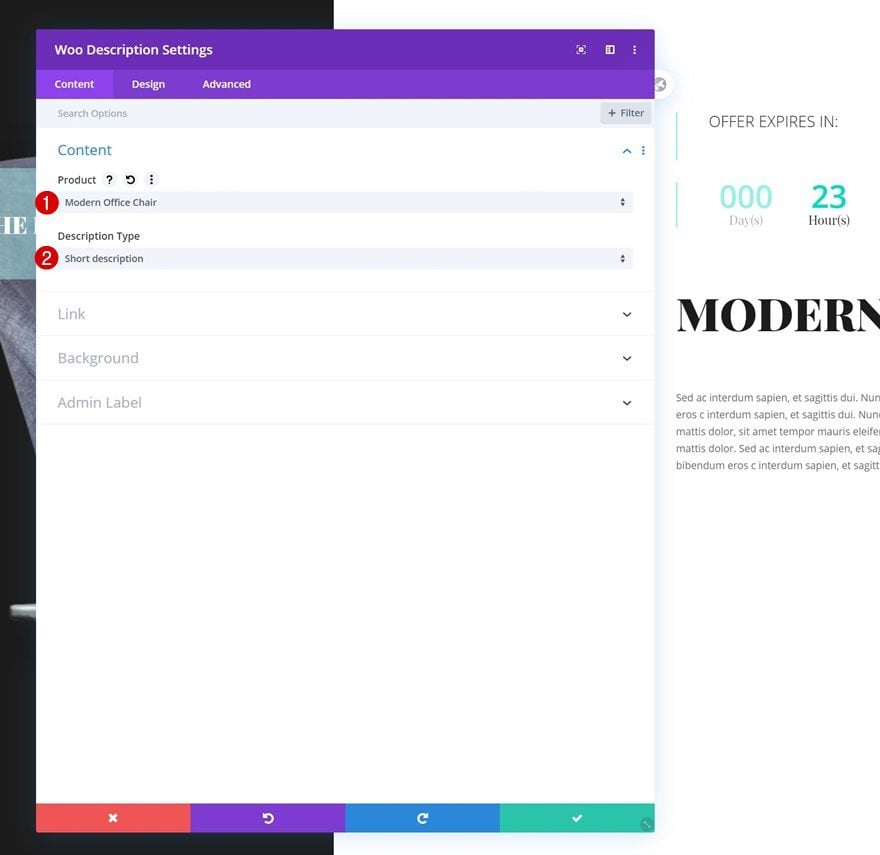
Add Woo Description Module to Column 2
Dynamic Content
The next module we need is a Woo Description Module. Select the product of your choice.
- Product: Find in list
- Description Type: Short description
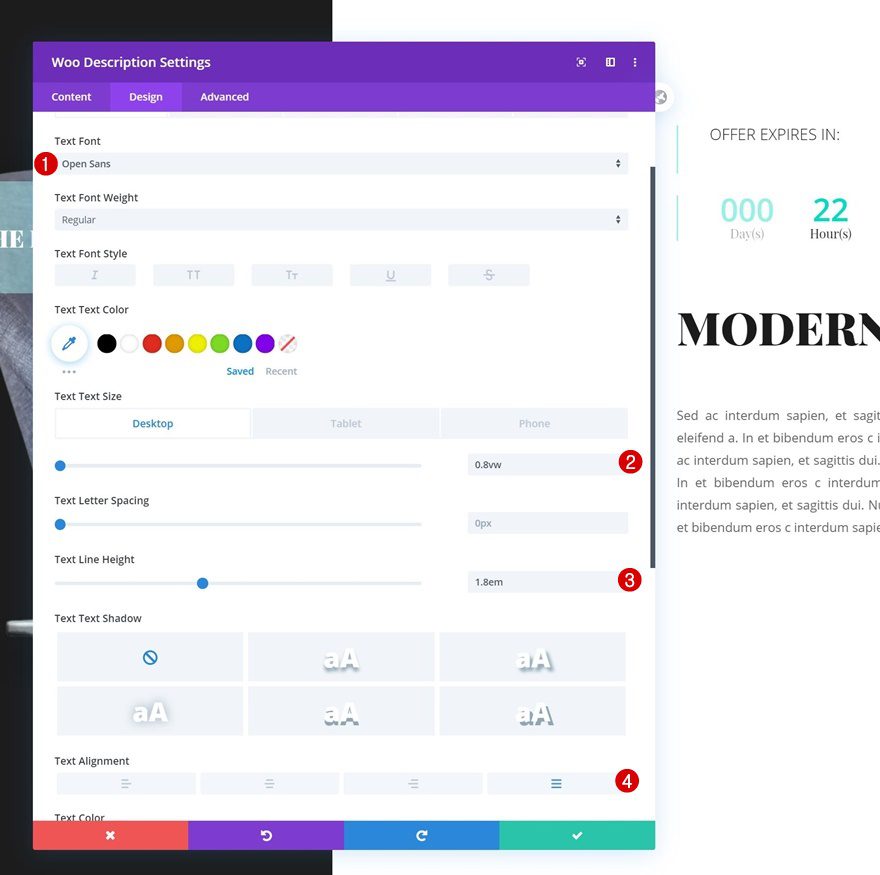
Text Settings
Move on to the design tab and change the text settings as follows:
- Text Font: Open Sans
- Text Size: 0.8vw (Desktop), 1.9vw (Tablet), 2.5vw (Phone)
- Text Line Height: 1.8em
- Text Alignment: Justify
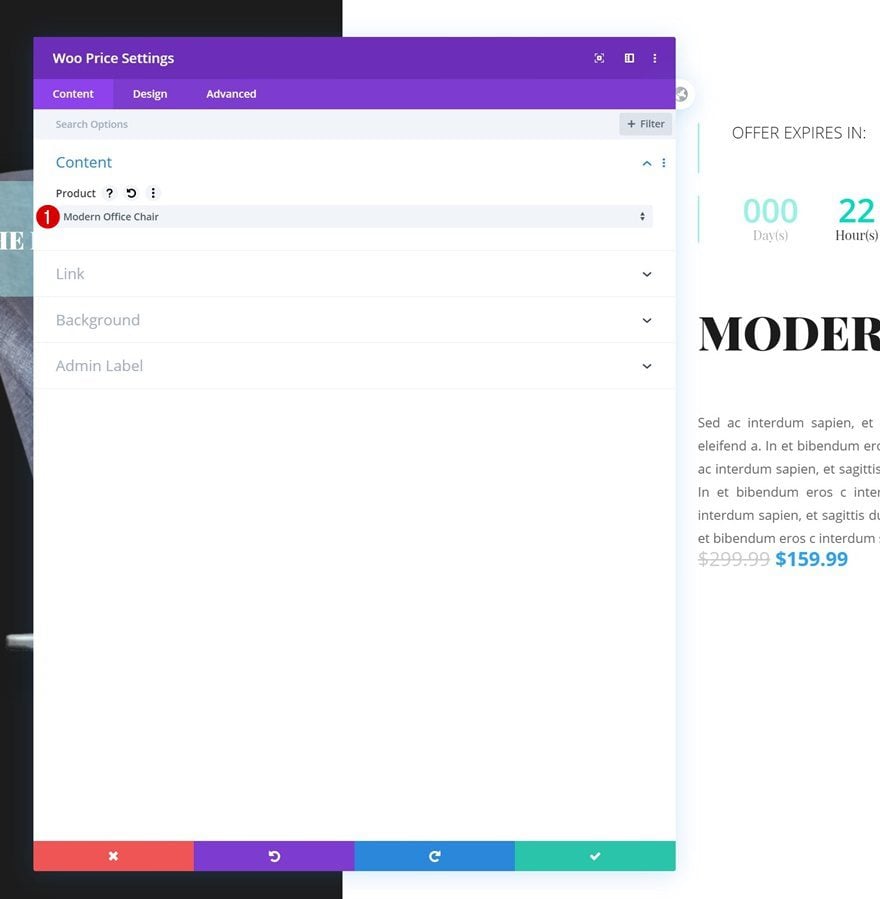
Add Woo Price Module to Column 2
Dynamic Content
Add a Woo Price Module right below the Woo Description Module and select your product.
- Product: Find in list
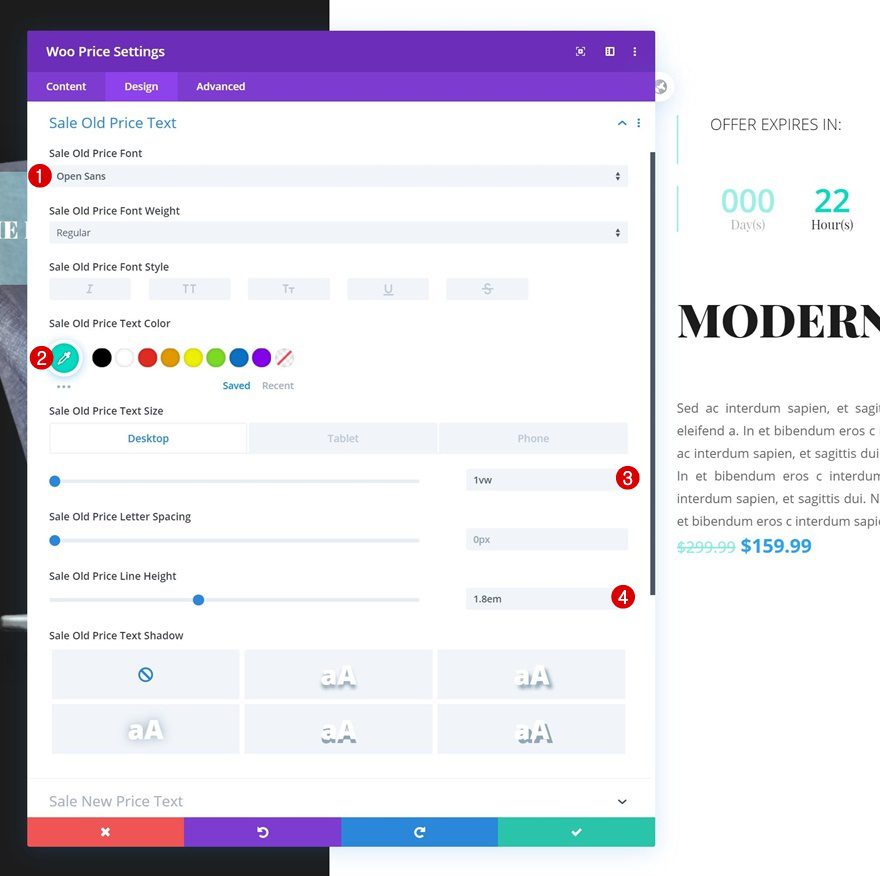
Sale Old Price Text Settings
Move on to the design tab and change the sale old price text settings as follows:
- Sale Old Price Font: Open Sans
- Sale Old Price Text Color: #00dbc1
- Sale Old Price Text Size: 1vw (Desktop), 4vw (Tablet), 6vw (Phone)
- Sale Old Price Line Height: 1.8em
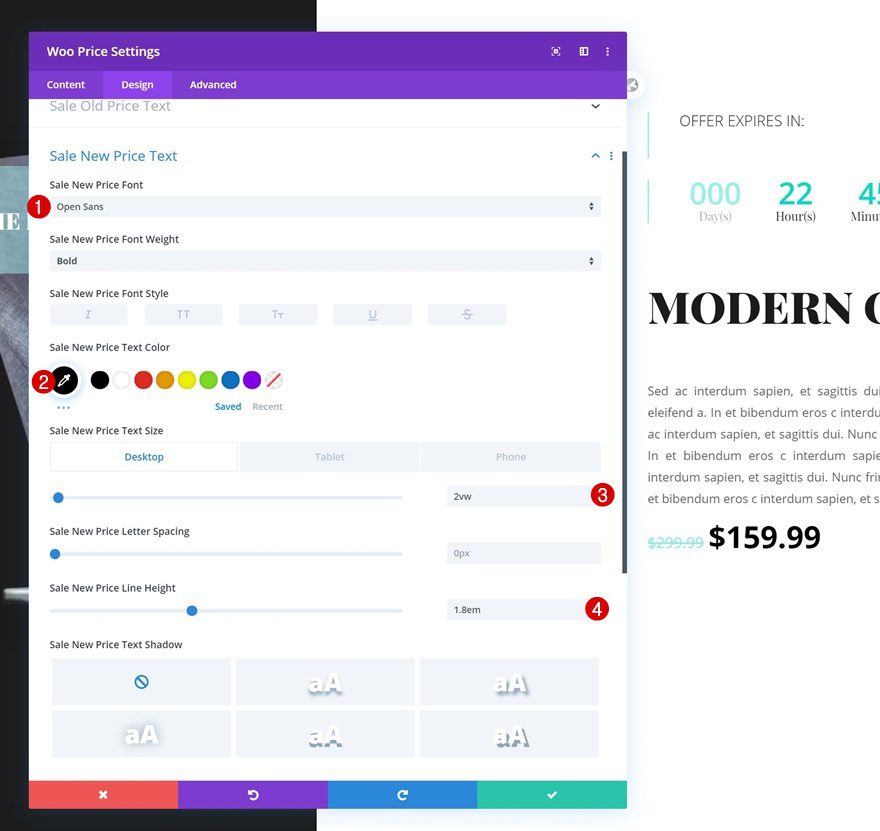
Sale New Price Text Settings
Continue by modifying the sale new price text settings too.
- Sale New Price Font: Open Sans
- Sale New Price Text Color: #000000
- Sale New Price Text Size: 2vw (Desktop), 6vw (Tablet), 8vw (Phone)
- Sale New Price Line Height: 1.8em
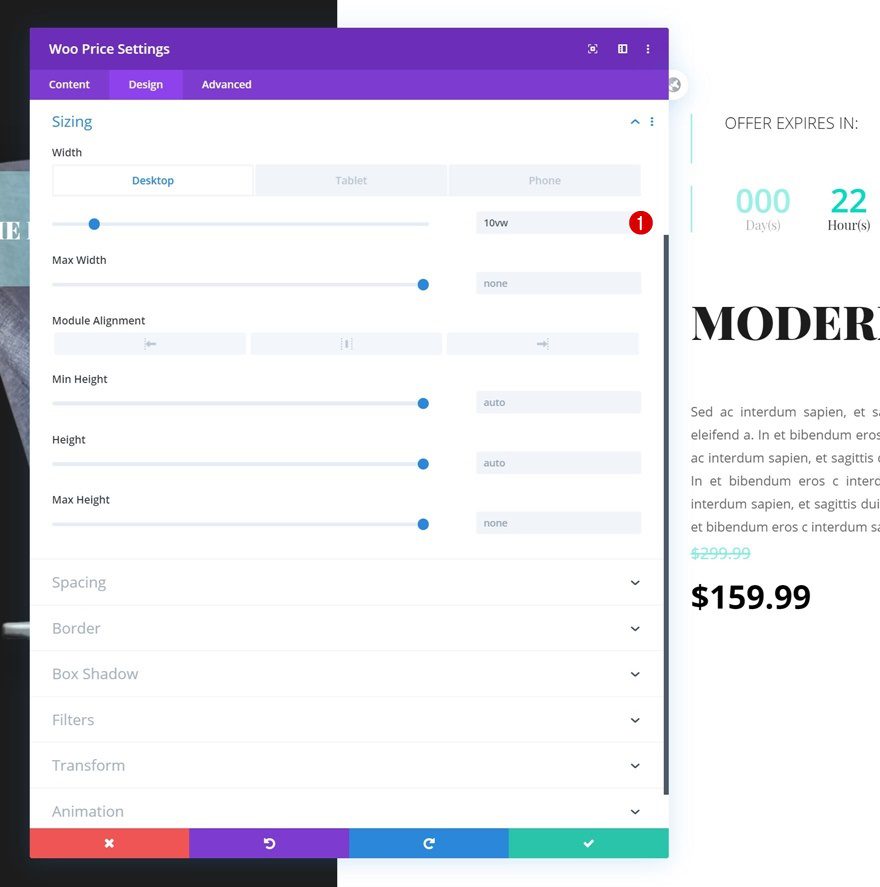
Sizing
Then, go to the sizing settings and modify the width across different screen sizes.
- Width: 10vw (Desktop), 35vw (Tablet & Phone)
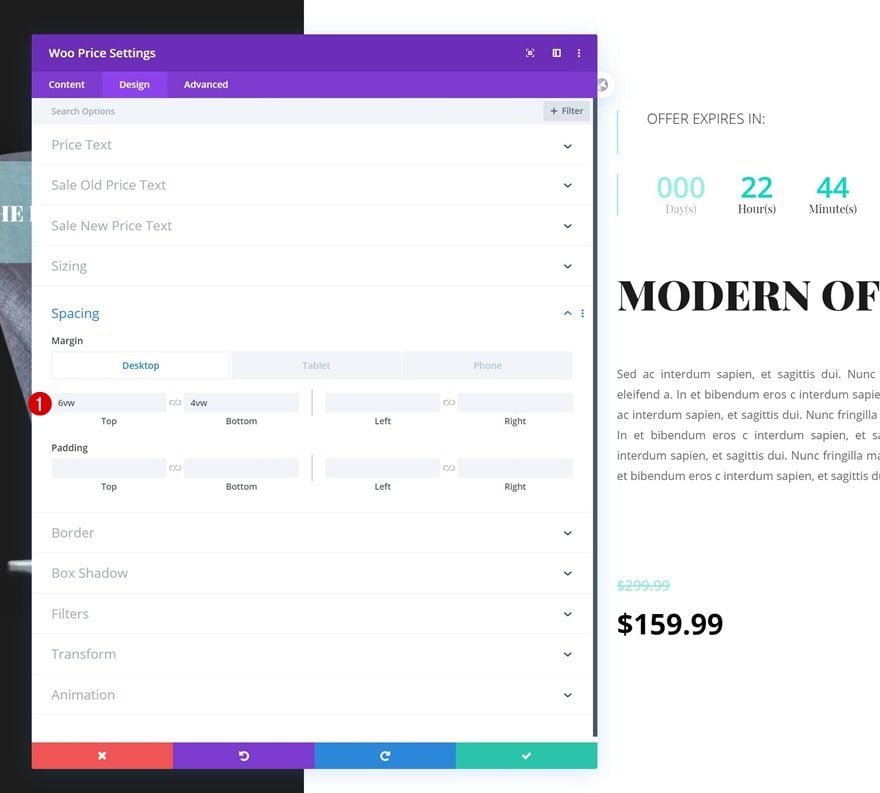
Spacing
Add some custom top and bottom margin values too.
- Top Margin: 6vw (Desktop)
- Bottom Margin: 4vw (Desktop), 10vw (Tablet & Phone)
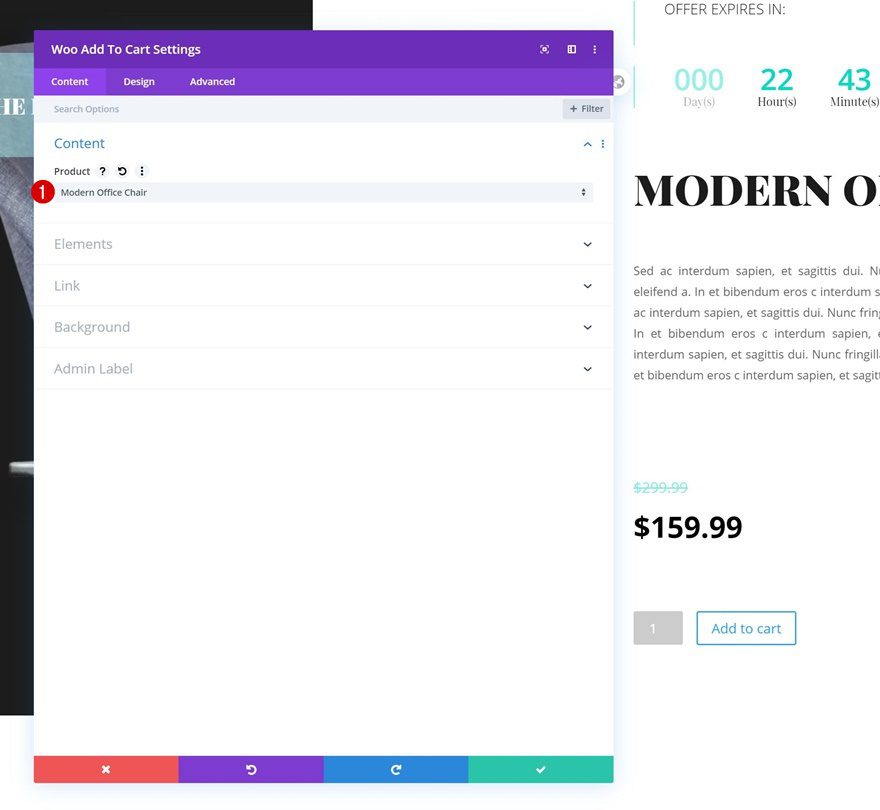
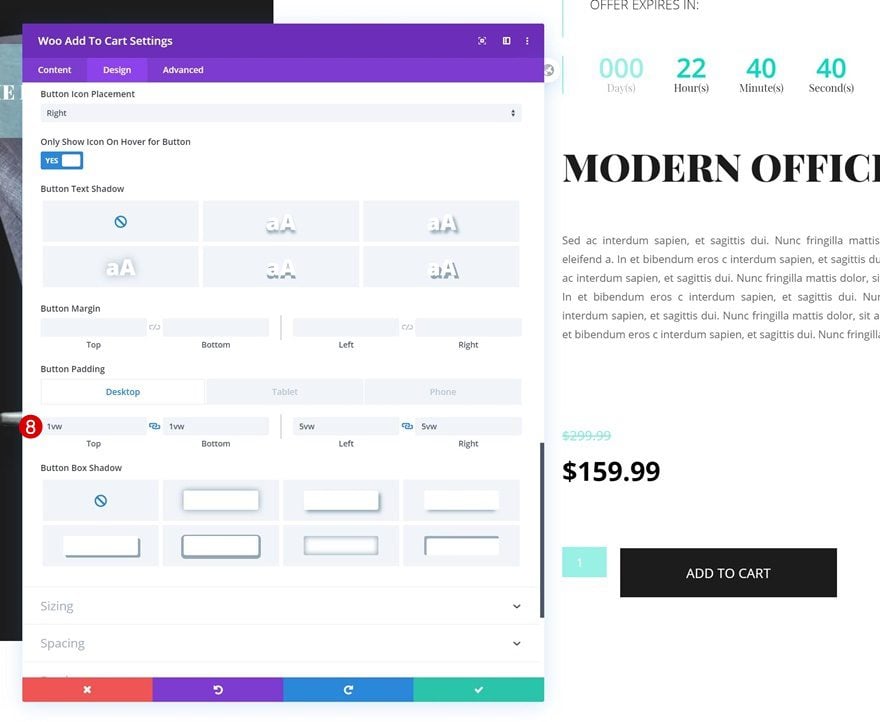
Add Woo Add To Cart Module to Column 2
Dynamic Content
On to the next and last module, which is the Woo Add To Cart Module. Select your product.
- Product: Find in list
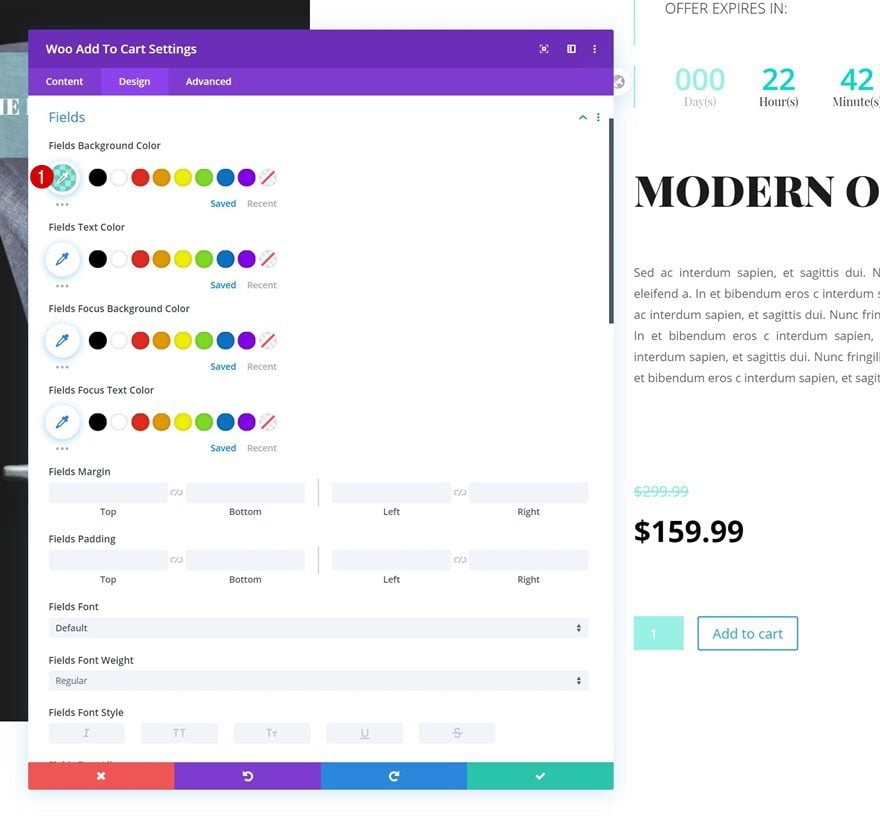
Fields Text Settings
Change the fields background color next.
- Fields Background Color: rgba(0,219,193,0.4)
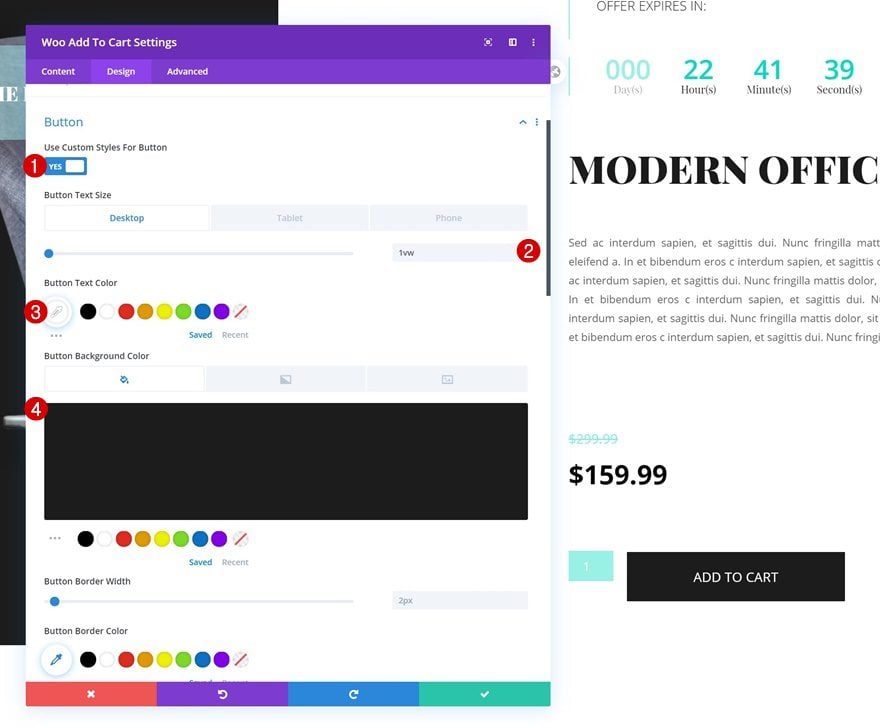
Button Settings
Complete the module’s design by styling the button and you’re done!
- Use Custom Styles For Button: Yes
- Button Text Size: 1vw (Desktop), 2vw (Tablet), 3vw (Phone)
- Button Text Color: #ffffff
- Button Background Color: #1c1c1c
- Button Border Radius: 0px
- Button Font: Open Sans
- Button Font Style: Uppercase
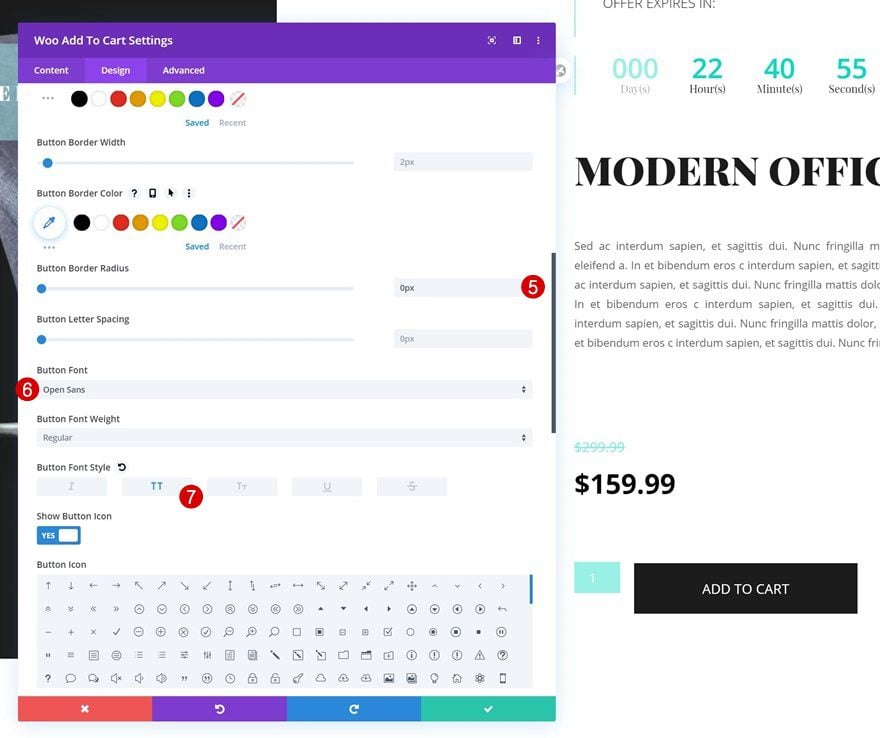
- Top Padding: 1vw (Desktop), 3vw (Tablet), 4vw (Phone)
- Bottom Padding: 1vw (Desktop), 3vw (Tablet), 4vw (Phone)
- Left Padding: 5vw (Desktop), 8vw (Tablet), 10vw (Phone)
- Right Padding: 5vw (Desktop), 8vw (Tablet), 10vw (Phone)
Preview
Now that we’ve gone through all the steps, let’s take a final look at the outcome across different screen sizes.
Desktop
Mobile
Final Thoughts
In this post, we’ve shown you how to create a stunning countdown deal of the day product section design. We’ve built this design using Divi’s built-in woo modules and options only. This is a great way to add a sense of urgency to your product. You were able to download the JSON file for free as well! If you have any questions or suggestions, make sure you leave a comment in the comment section below.
There are some plugins for sales countdown timers that connect with WooCommerce that might be of interest as well.
If you’re eager to learn more about Divi and get more Divi freebies, make sure you subscribe to our email newsletter and YouTube channel so you’ll always be one of the first people to know and get benefits from this free content.


can countdown timer use dynamic data from a custom field to set itself automatically?
This setup makes WordPress with Divi Woocommerce modules competitive with these shopify dropshipping stores.
The one thing that really annoys me with the timer module is that extra 0 in the days column.
ET team can that be removed? It looks really stupid. It should match the rest with 2 digits.
It should only apply when the user inputs something over 99 days.
I see in the comments somewhere that this should have some kind of logic functionality added to it.
That makes a lot of sense. As soon as the timer ends it should disable the page or render the product unavailable.
Nice work, thanks, Donjete!
I created the same page step by step and all is fine except one thing:
As a Woo Image, I used an image of the product (.png) of course, to have it transparent, and all looks the same as in the tutorial on the page.
But if to hover the image – I can see a white background behind it although there are NO white backgrounds created anywhere ( I checked the image and row and sections settings).
How it can be?
The cache was cleared many times.
Here two files:
Before “hover”
https://yadi.sk/i/ZGxNc6MHbGogZg
Hover
https://yadi.sk/i/MEWYX-SfBD5Ssw
Please help me to find the cause of the issue.
Very nice and effective features. Hope this will be better with time.
It would be really cool if we could show something else when the timer hits zero like a different price or a sign up ‘sorry you missed the deal sign up for when we run the next deal’ type of thing
Thank you for the detailed tutorial. Countdown feature is a must for deal of the day / week products. I’m glad Divi has this feature.
Where is the JSON file?
When the timer hits zero you can still purchase the product though based on a Default DIVI install.
The countdown timer can’t use dynamic data from a custom field to set itself automatically?
This needs Display Logic for sure…. That way when the timer is done the whole layout you made can go away and a new one can show up.
I’m really hoping the Theme Builder with introduce robust conditional display options. It’s been a year and a half so you’d think they’d deliver more than the bare minimum… but I have a feeling I’ll be disappointed in this regard.
I do not think the Theme builder will come with display logic. I would like a future release to do it though.
To be fair, every Divi new release they have delivered since then has been a huge. I don’t think u can be disappointed just because they are not focusing exactly on your needs, today’s Divi is waaaaaaaaaaay better than a year and a half before.
Looks really nice, but I also wonder what happens when the timer hits zero…?
Thank you Donjete!
Do you need to use woo commerce for this?
When the countdown timer goes to 0, i.e. deal is over, can the person still click the Add To Cart button to get the special pricing? Or is there a way to gray that out / make it visibly clear that you missed the deal, back to regular price?
I guess you can set the same time on this custom countdown timer as you set the finish date of the sale in the WooCommerce settings for the certain item.
It will stop giving a discount at the same time as WooCommerce will stop do it. A few seconds difference may be here but it means nothing.
What happens when the timer hits zero?
When the timer hits zero you can still purchase the product though based on a Default DIVI install.
In fact I only started to read the article to learn how to sync the woocommerce product price/visibility with the divi countdown, but it’s the only thing not explained.
Having a countdown separated from the woo product makes no sense to me, when hits 00:00:00 u’ll have to be there to manually hide the product? If u have only one product maybe, but if u have multiple will be a mess…
The timer will show 00 00 00 00. You’ll have to manually select a new date.
Being able to automatically reset the countdown timer is a feature that MANY would like to see in Divi.
Thanks for the suggestion, Britt 🙂