

Add 3D Motion Scroll Effects into your Divi website can easily be done by combining a few powerful built-in Divi features – scroll effects and transform rotation. The idea is actually a simple one. Before we move elements horizontally or vertically using scroll effects, we rotate the element’s container using transform rotate. This allows the motion (on scroll) to occur on a plane in 3D space.
In this tutorial, we are going to show you how to add 3D motion scroll effects to your Divi website. To do this we will build a simple page layout featuring two design examples that displays a 3D motion scroll effect.
Let’s get started!
- 1 Sneak Peek
- 2 Download the Layout for FREE
- 3 Download For Free
- 4 You have successfully subscribed. Please check your email address to confirm your subscription and get access to free weekly Divi layout packs!
- 5 What You Need to Get Started
- 6 The Concept Explained
- 7 Part 1: Adding 3D Rotation and Motion to a Heading and an Image
- 8 Part 2: Adding 3D Rotation and Motion to Images and Their Columns
- 9 Final Design
- 10 Final Thoughts
Sneak Peek
Here is a quick look at the design we will build together.
Download the Layout for FREE
To lay your hands on the designs from this tutorial, you will first need to download it using the button below. To gain access to the download you will need to subscribe to our newsletter by using the form below. As a new subscriber, you will receive even more Divi goodness and a free Divi Layout pack every Monday! If you’re already on the list, simply enter your email address below and click download. You will not be “resubscribed” or receive extra emails.

To import the layout to your page, simply extract the zip file and drag the JSON file into the Divi Builder.
Let’s get to the tutorial, shall we?
What You Need to Get Started

To get started, you will need to do the following:
- If you haven’t yet, install and activate the Divi Theme.
- Create a new page in WordPress and use the Divi Builder to edit the page on the front end (visual builder).
- Choose the option “Build From Scratch”.
After that, you will have a blank canvas to start designing in Divi.
The Concept Explained
Creating 3D Motion Scroll Effects in Divi really involves three steps:
- Add Perspective to the Row
- Add Transform Rotation to the Column
- Add Scroll Effects to the Module(s)
Here is a quick look at how to do this…
Add Perspective to the Row
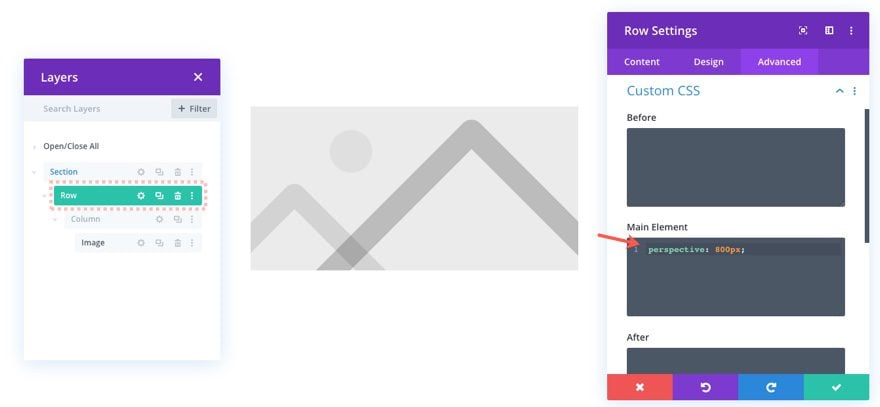
For the row settings add a custom CSS snippet that adds perspective with a value that determines how far you want the element to seem from the user/screen in 3D space once the child element is rotated.
Add Transform Rotation to the Column
Then we add rotation to the column by adding a degree value to the transform rotate option along the X or Y Axis.
Add Scroll Effects (motion) to the Module
Finally, we add scroll effects to the module inside the column which will move the module along the plane which has been rotated in 3d space. In other words, the module will appear to move “away from” and “toward” the user.
Keep this in mind as we tackle our design for this tutorial below.
Let’s dive in.
Part 1: Adding 3D Rotation and Motion to a Heading and an Image
For this first part of the design, we are going to add 3D rotation to a mock heading and an image. This would be a great design for featuring a product or case study in a unique way.
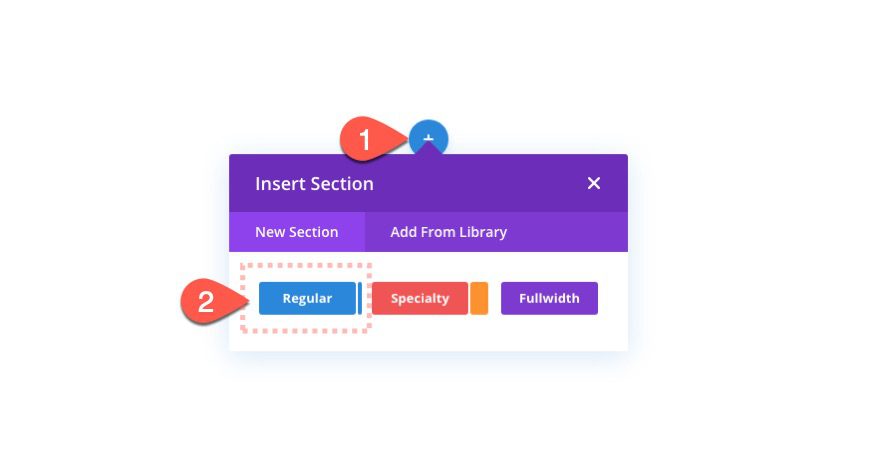
Add Section and Row
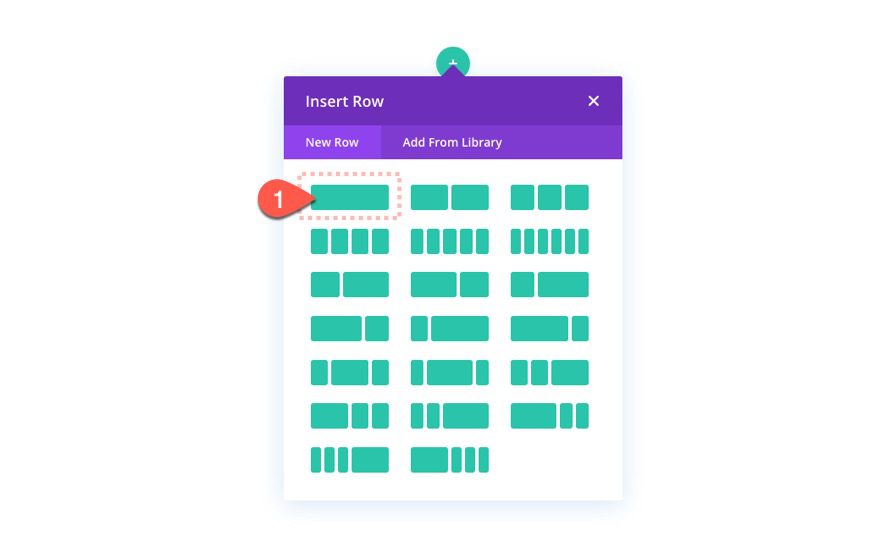
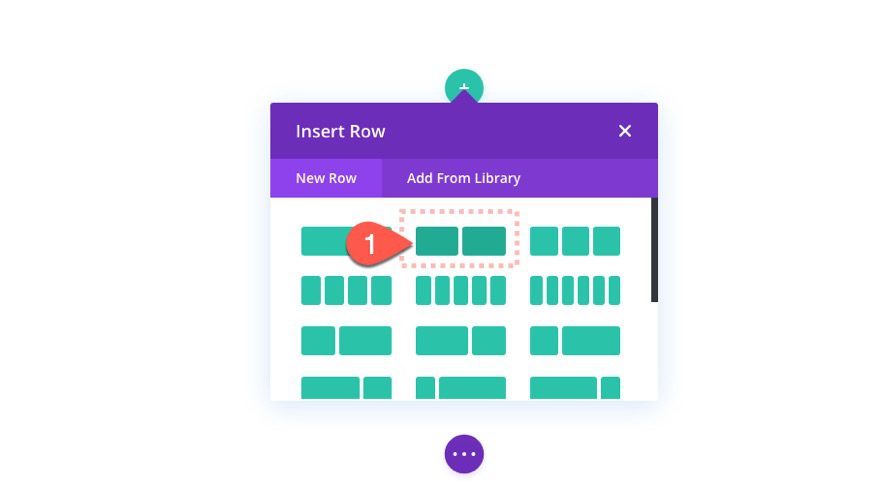
To start, add a one-column row to the default regular section provided.
Section Padding
Before adding any modules, open the section settings and update the following:
- Padding: 40vh top
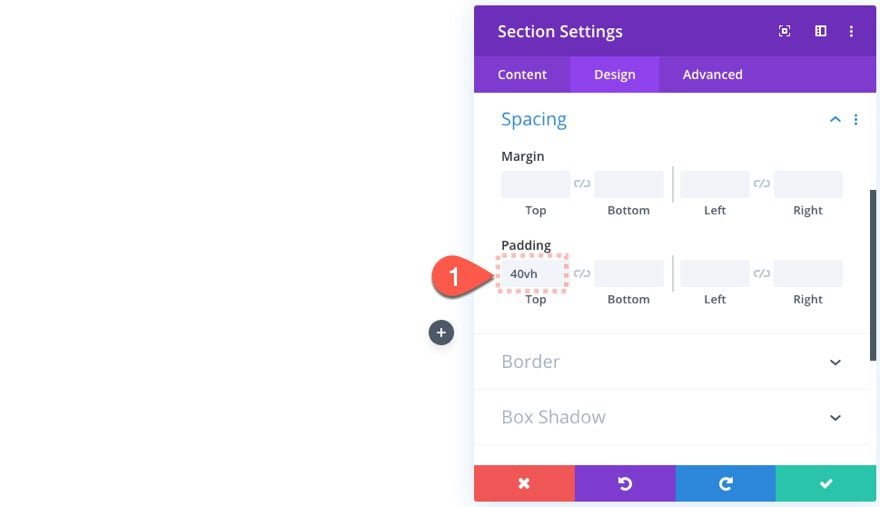
This will center the heading text vertically (more or less) and also give us room for the scroll effects to occur.
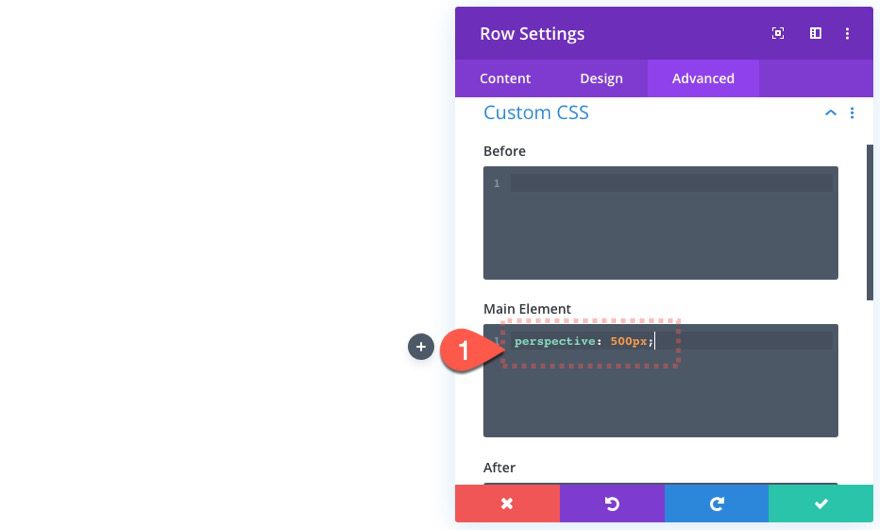
Add Perspective to the Row
For a more realistic 3D design, we need to add perspective to the parent container of the element we are going to rotate in 3D space. For this example, we are going to be rotating the column, so we need to add perspective to the row. For a more detailed explaination of how this works, check out our post on how to use perspective with transform options.
To add perspective to the row, open the row settings and add the the following CSS to the Main Element:
perspective: 500px
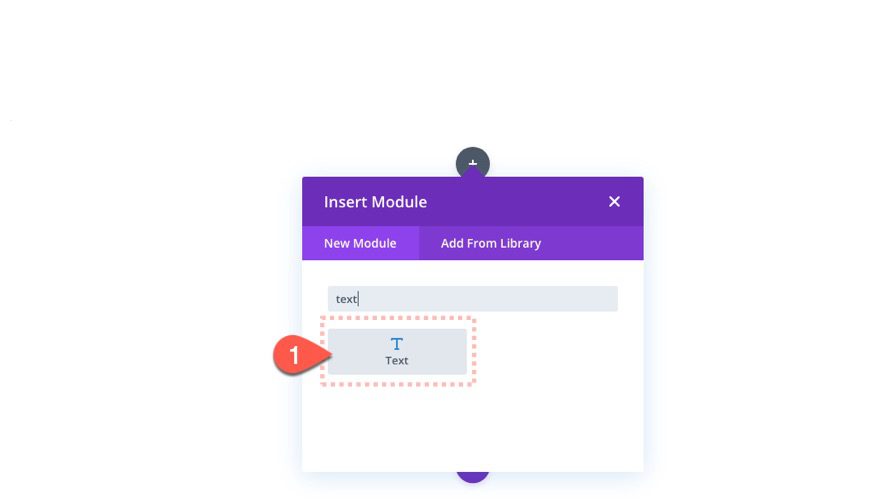
Add Text Module
Once the perspective has been added to the row, add a new text module to the column.
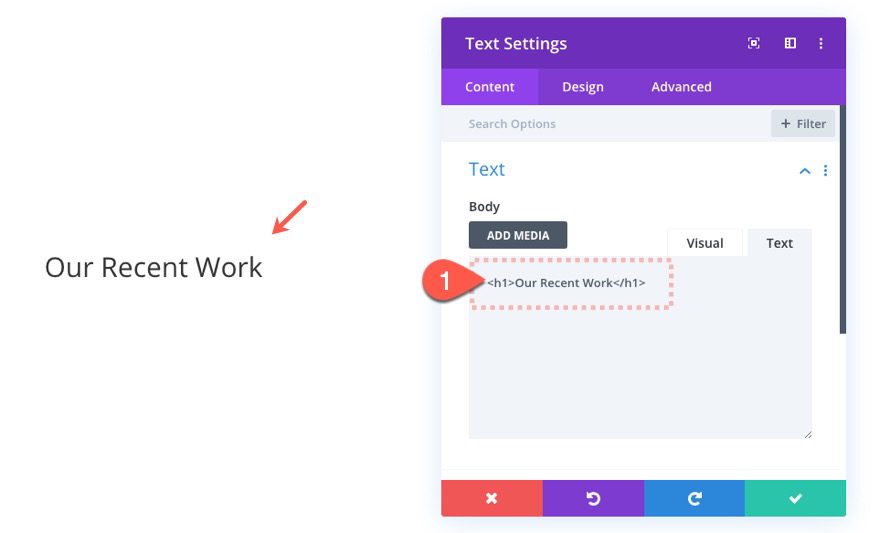
Text Content
Then update the text content with the following h1 heading:
<h1>Our Recent Work</h1>
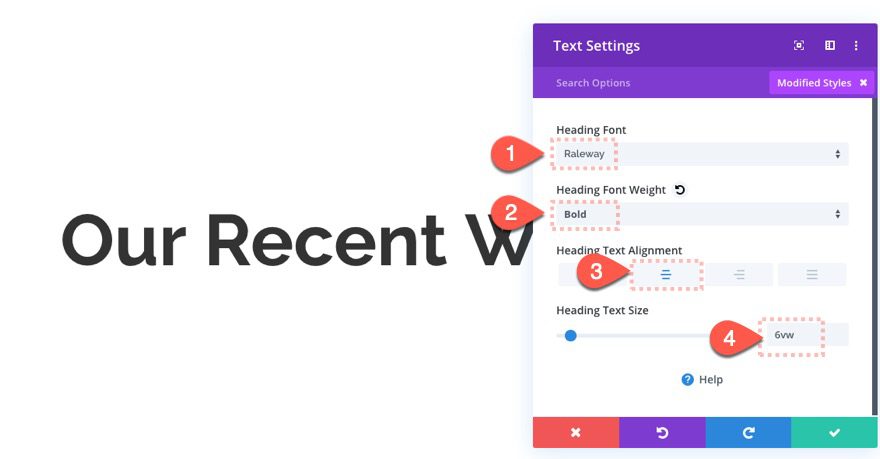
Text Design Settings
Then update the text design as follows:
- Heading Font: Raleway
- Heading Font weight: Bold
- Heading Text Alignment: Center
- Heading Text Size: 6vw
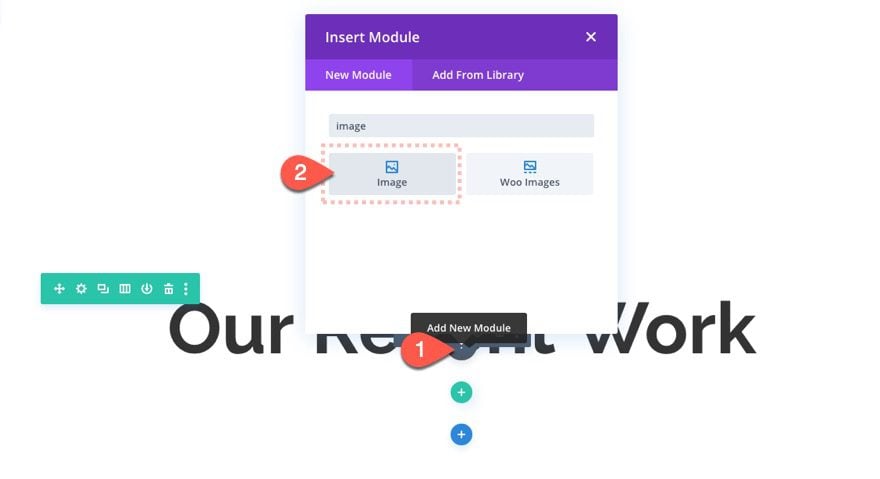
Add Image Module
Once the text is in place, add a new image module under the text.
Upload Image
For this design, we are going to use a mock screenshot of a webpage taken from the Web Freelancer Layout Pack. The image is 880px by 1260px. The size of the image will definitely effect the 3D design once we rotate the column so to get the same results, try to use similar dimensions for the image you use.
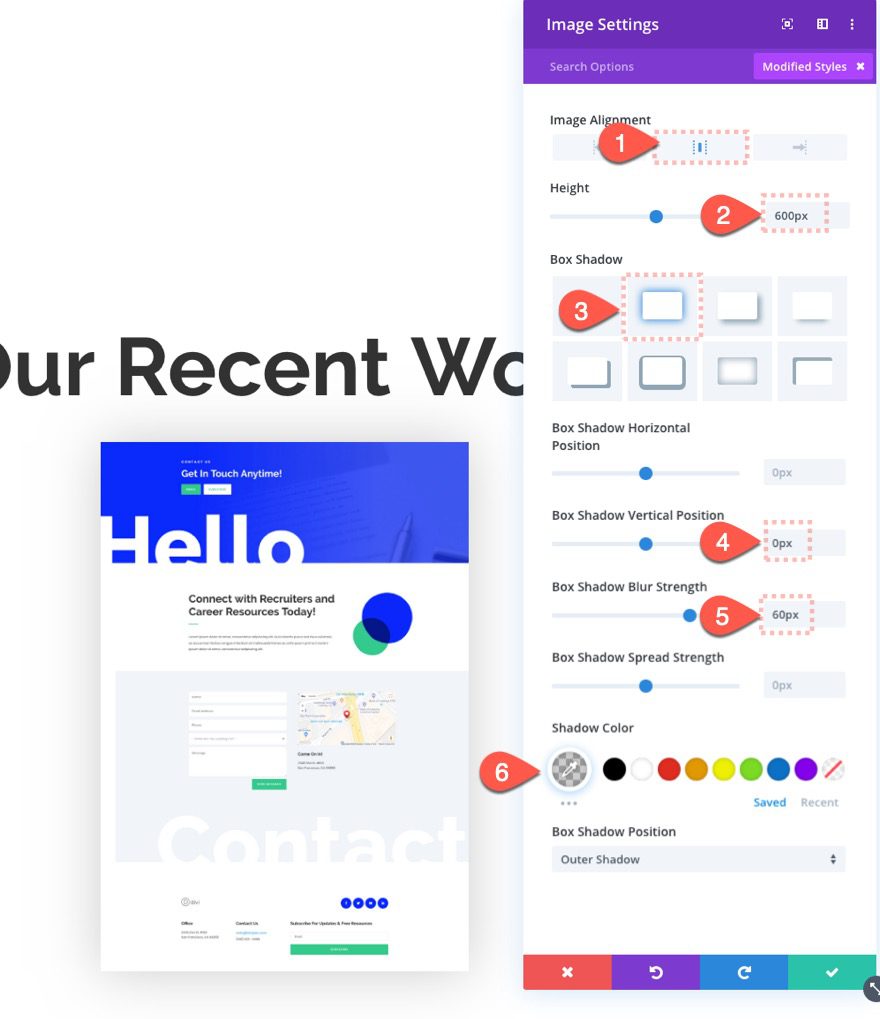
Image Settings
Update the image settings as follows:
- Image Alignment: Center
- Height: 600px
- Box Shadow: see screenshot
- Box Shadow Vertical Position: 0px
- Box Shadow Blur Strength: 60px
- Shadow Color: rgba(0,0,0,0.2)
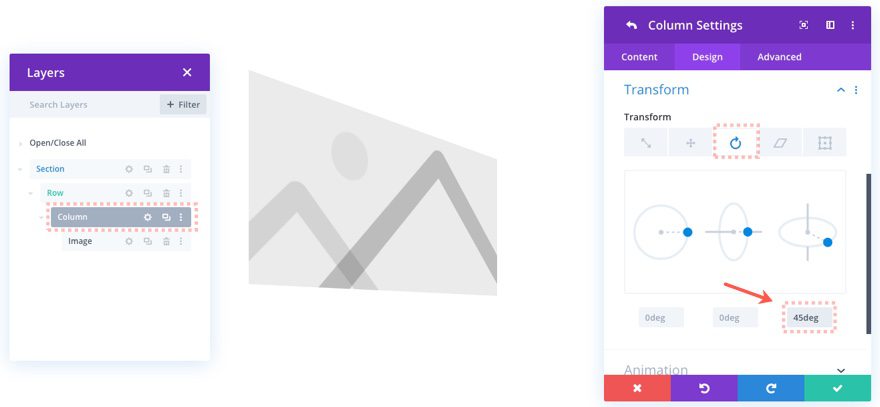
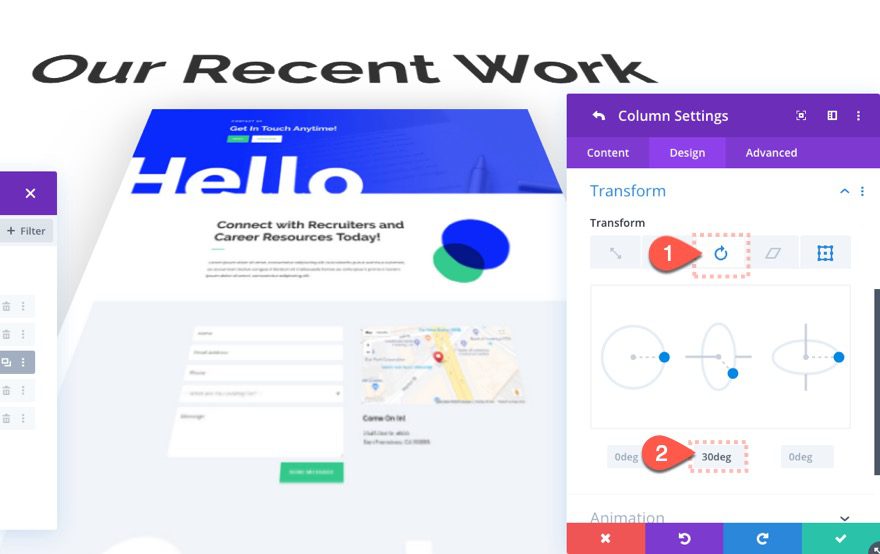
Rotating the Column
Open the layers box and then open the settings for the column.
With our text and image in place, we can now rotate the column in 3D space. To do this, open the layers box and then open the settings for the column.

Then update the following column settings:
- Transform Origin: top center
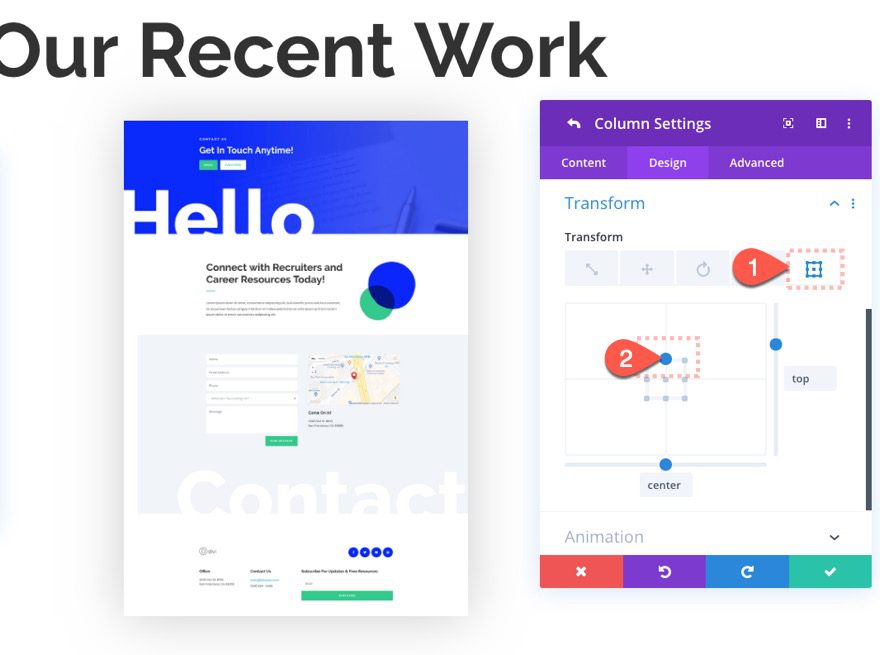
Now let’s add transform rotation to the column as follows:
Under the transform rotation tab…
- Transform Rotate Y Axis: 30 deg
Text Scroll Effects
Now that the elements or rotated in 3D space, we can add the scroll effects to each of the elements in our column. To start, open the settings for the text module and add the following:
Under the Vertical Motion tab…
- Enable Vertical Motion: YES
- Starting Offset: -4 (at 0% viewport)
- Mid Offset: 0 (at 50% viewport)
- Ending Offset: 4 (at 100% viewport)
Under the Scaling Up and Down tab…
- Enable Scaling Up and Down: YES
- Starting Scale: 100% (at 0% viewport)
- Mid Scale: 100% (at 50% viewport)
- Ending Scale: 50% (at 100% viewport)
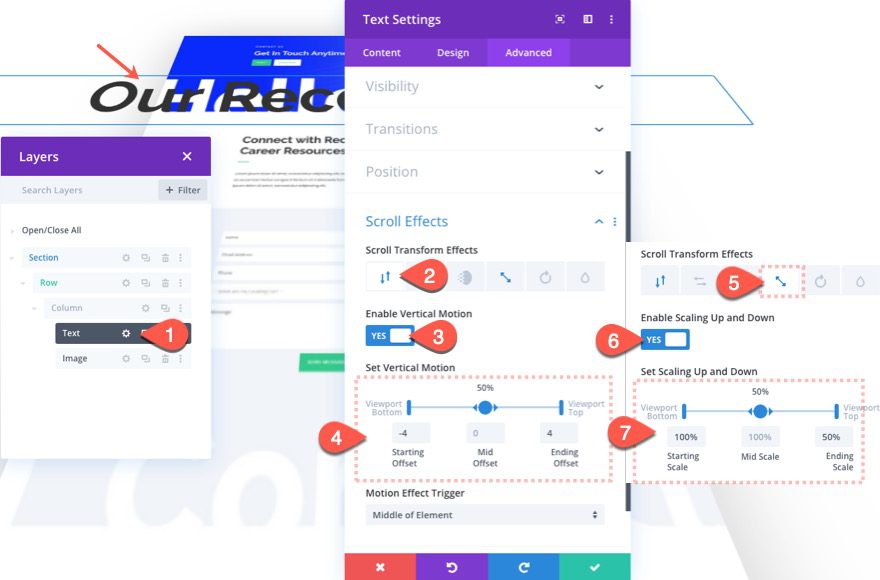
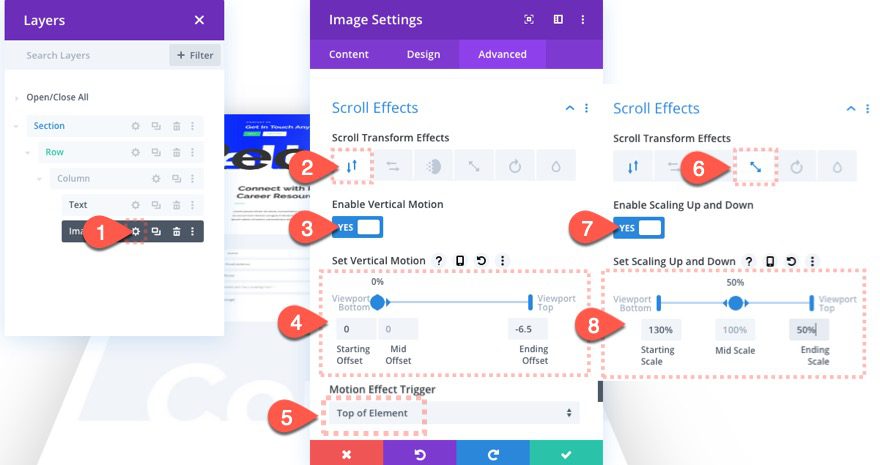
Image Scroll Effects
Next, open the settings for the image module and update the following:
Under the Vertical Motion tab…
- Enable Vertical Motion: YES
- Starting Offset: 0 (at 0% viewport)
- Mid Offset: 0 (at 0% viewport)
- Ending Offset: -6.5 (at 100% viewport)
- Motion Effect Trigger: Top of Element
Under the Scaling Up and Down tab…
- Enable Scaling Up and Down: YES
- Starting Scale: 130% (at 0% viewport)
- Mid Scale: 100% (at 50% viewport)
- Ending Scale: 50% (at 100% viewport)
Now let’s check out the result of part 1 of the 3D motion scroll effect.
Part 2: Adding 3D Rotation and Motion to Images and Their Columns
In part 2 of this tutorial, we are going to create a couple of rows that feature content with an image and column that both move in 3D space on scroll.
Add Section and Column
First, add a new regular section to the layout.
Then add a new two-column row to the section.
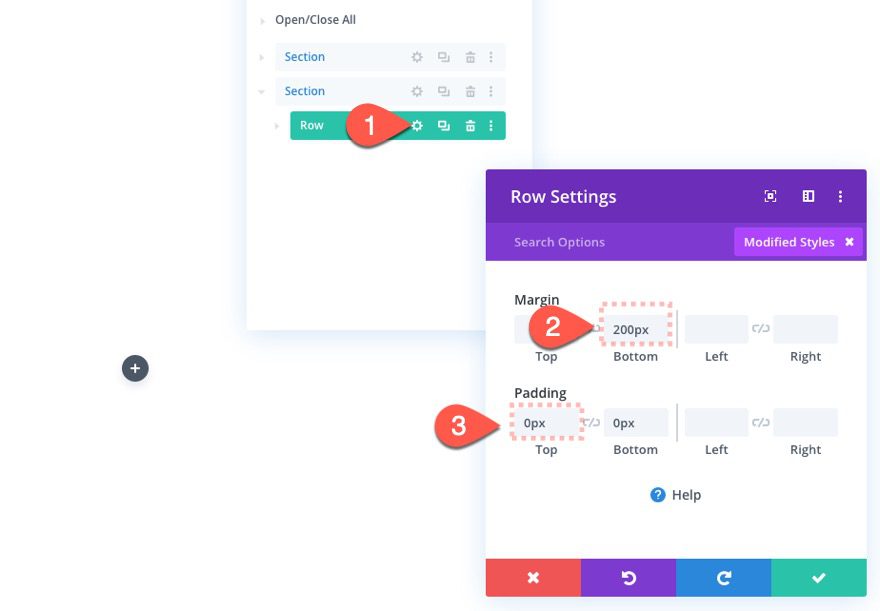
Row Settings
Open the row settings and update the following:
- Margin: 200px bottom
- Padding: 0px top, 0px bottom
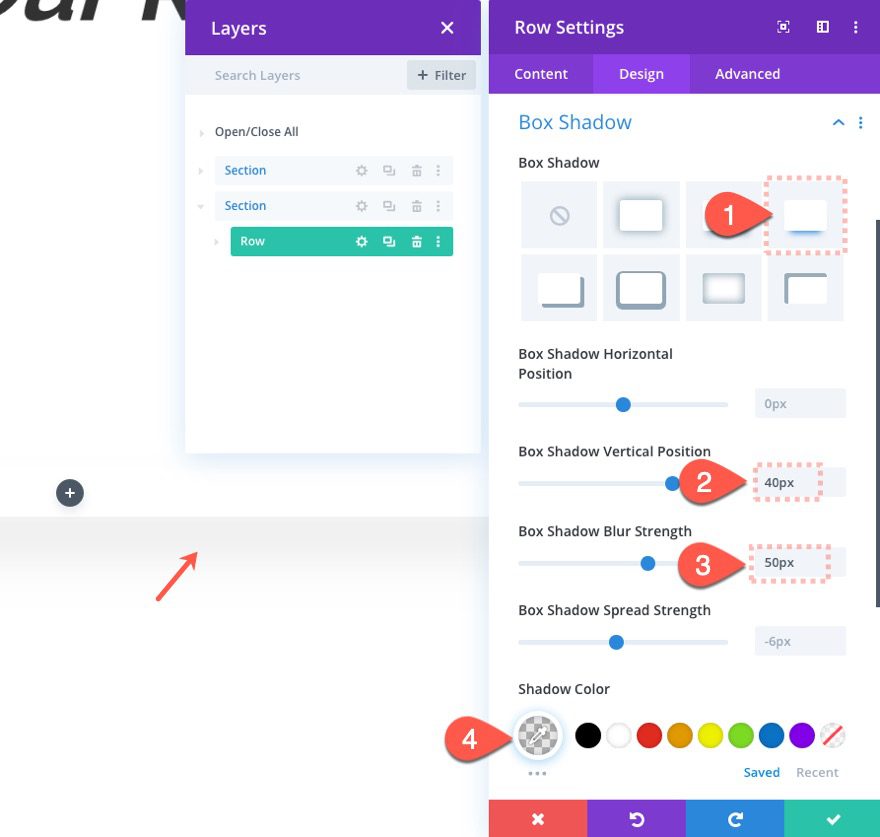
Then give the row a box-shadow:
- Box Shadow: see screenshot
- Box Shadow Vertical Position: 40px
- Box Shadow Blur Strength: 50px
- Shadow Color: rgba(0,0,0,0.2)
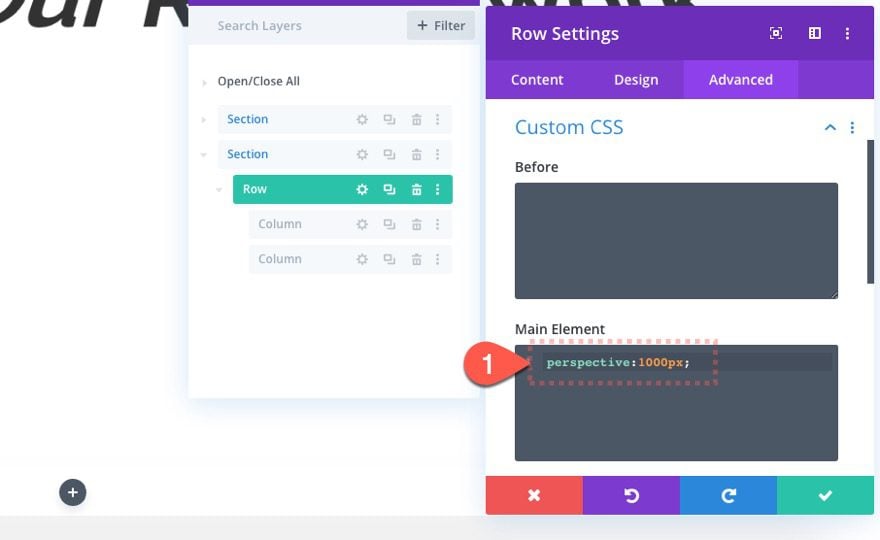
Next, like before, we need to add perspective to the row by adding the following CSS to the main element:
perspective: 1000px
This time we are using “1000px” so that the effect isn’t so drastic (the object will appear 1000px away from the screen rather than only 500px).
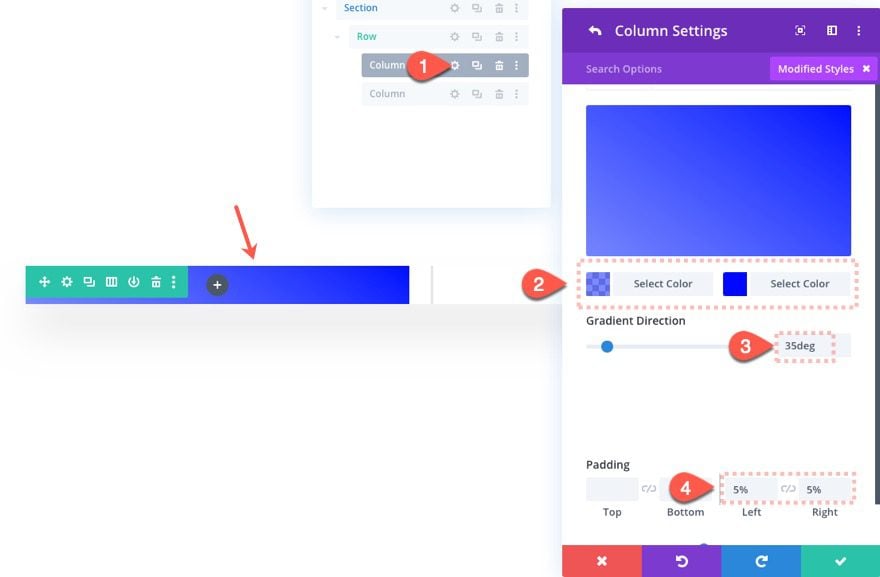
Column 1 Settings
Once the perspective has been added to the row, open the settings for column 1 and update the following:
- Gradient Background Left Color: rgba(0,13,255,0.53)
- Gradient Background Right Color: #000dff
- Gradient Direction: 35deg
- Padding: 5% left, 5% right
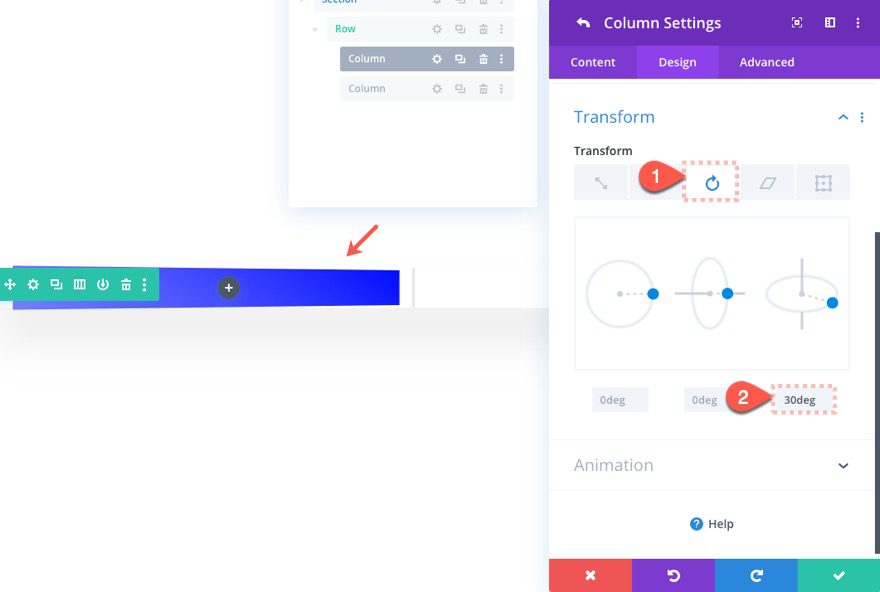
Rotating Column 1
Once the background gradient has been added to the column, add the following transform option:
- Transform Rotate X Axis: 30deg
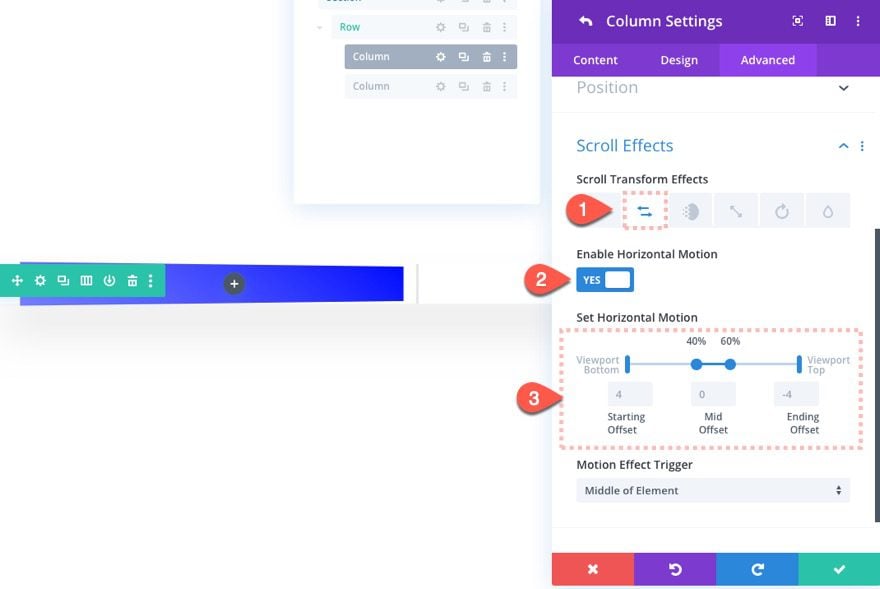
Column 1 Scroll Effects
This time, we are going to add scroll effects to the column as well.
Under the Horizontal Motion tab…
- Enable Horizontal Motion: YES
- Starting Offset: 4 (at 0% viewport)
- Mid Offset: 0 (at 40%-60% viewport)
- Ending Offset: -4 (at 100% viewport)
Add Image to Column 1
Next, add an image module to column 1.
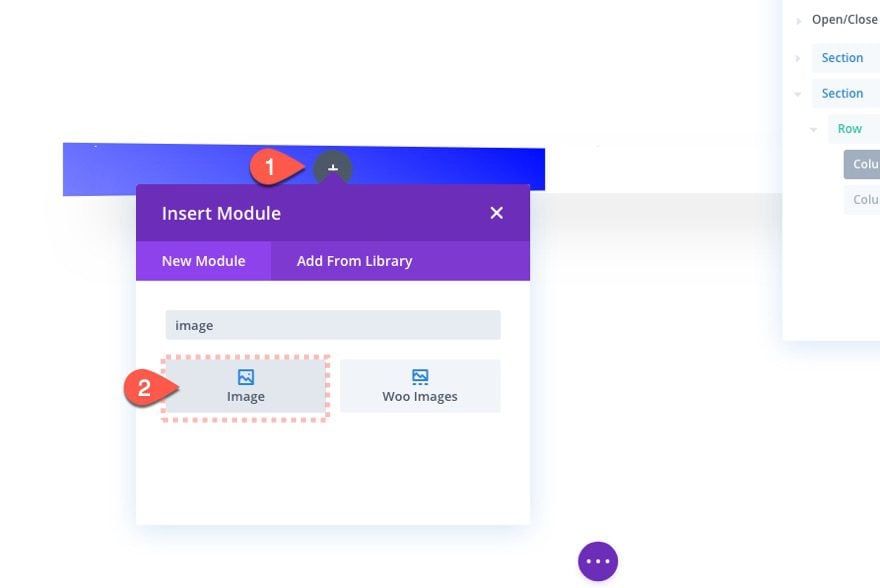
Then upload a new image for the module.
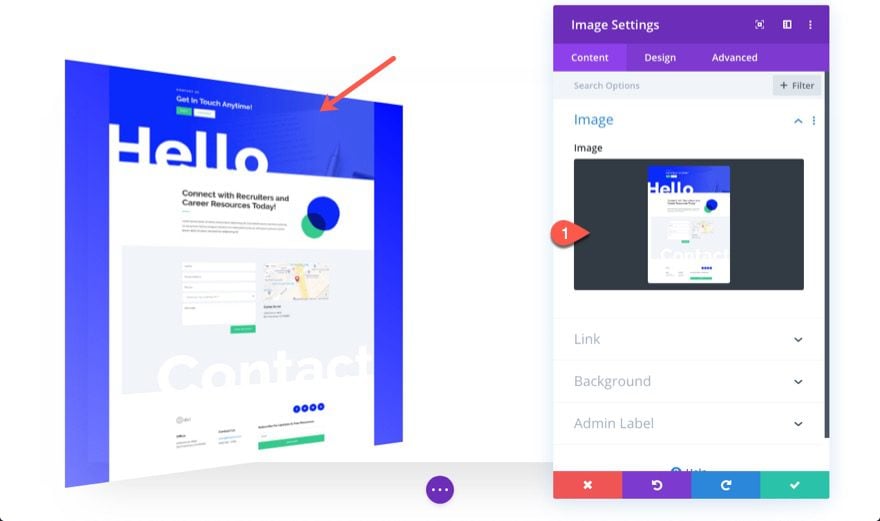
Image Design
Then update the image settings as follows:
- Image Alignment: Center
- Margin: -20px top, -20px bottom
- Box Shadow: see screenshot
- Box Shadow Horizontal Position: -40px
- Box Shadow Vertical Position: 0px
- Box Shadow Blur Strength: 40px
- Shadow Color: rgba(0,0,0,0.2)
The custom margin makes the image extend above and below the column nicely. And the box-shadow creates some separation from the column.
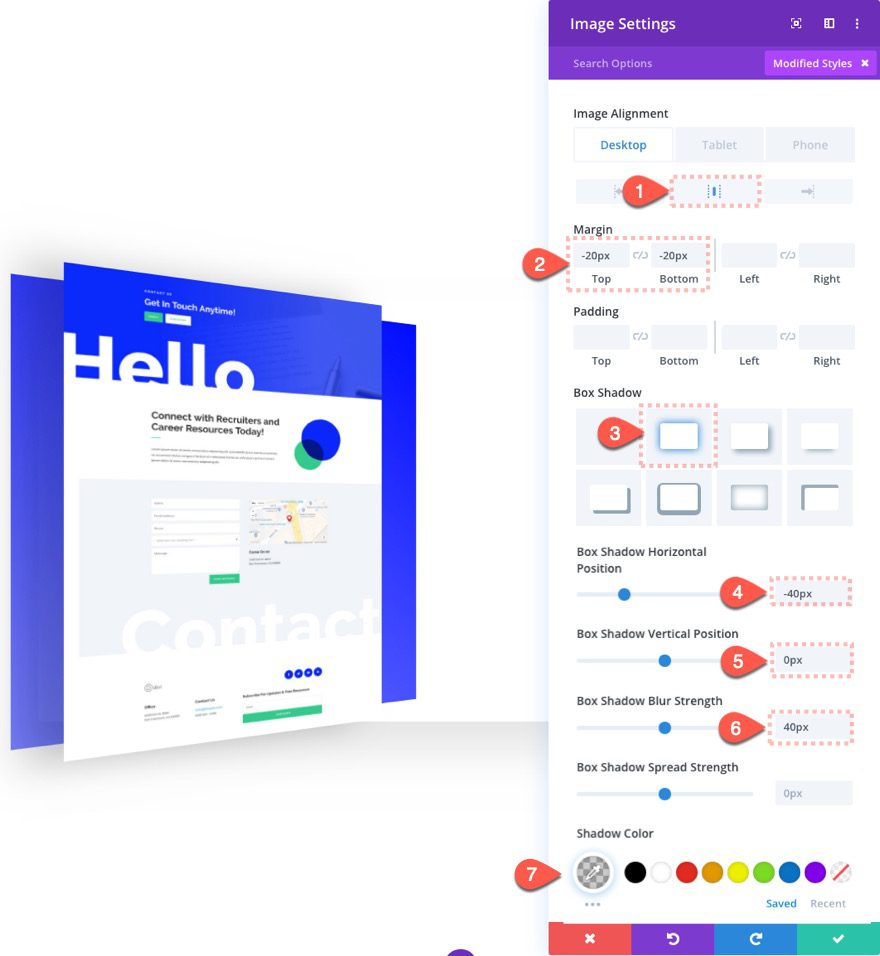
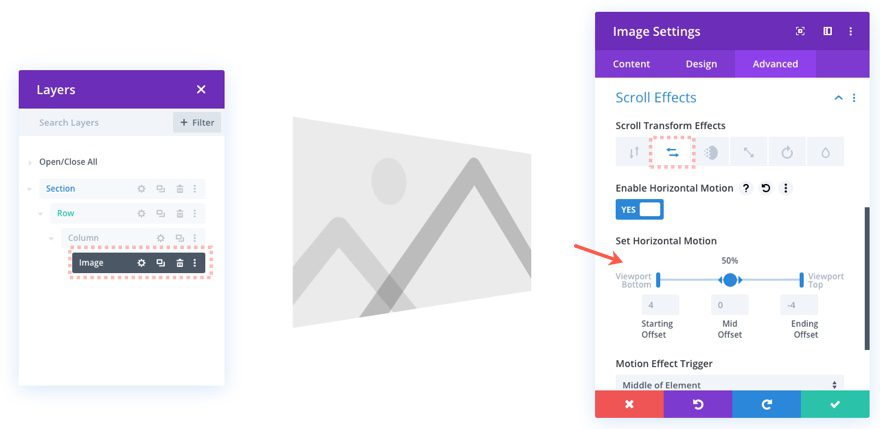
Image Scroll Effects
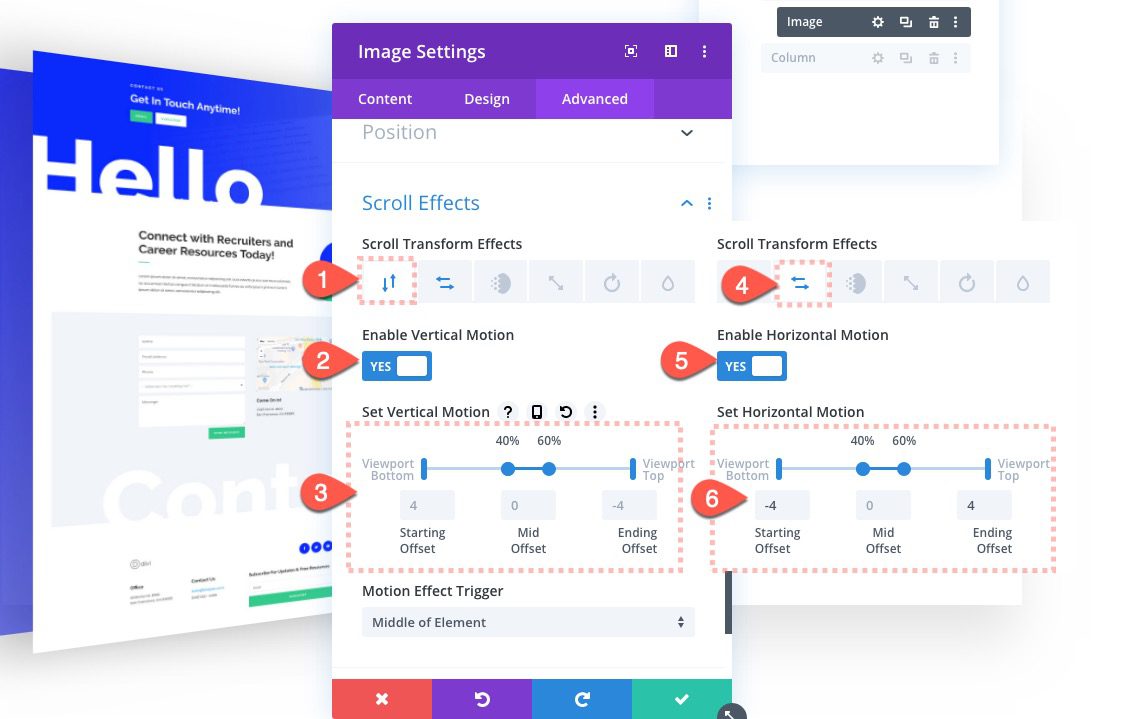
Now we add the scroll effects to the image that compliments the effects already added to the column behind it.
Under the Vertical Motion tab…
- Enable Vertical Motion: YES
- Starting Offset: 4 (at 0% viewport)
- Mid Offset: 0 (at 40%-60% viewport)
- Ending Offset: -4 (at 100% viewport)
Under the Horizontal Motion tab…
- Enable Horizontal Motion: YES
- Starting Offset: -4 (at 0% viewport)
- Mid Offset: 0 (at 40%-60% viewport)
- Ending Offset: 4 (at 100% viewport)
Here is the result so far…
Creating the Right Column Content (Optional)
This next step is optional because it isn’t featuring an 3D elements or scroll effects. However, it does complete the design of the layout.
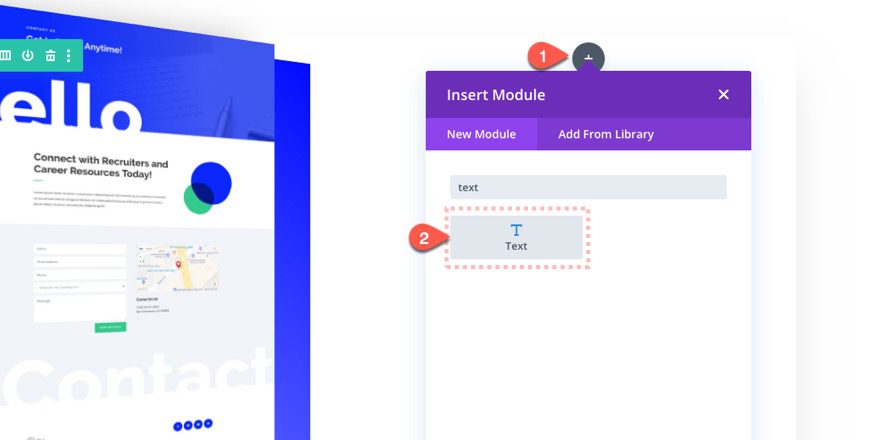
In the right column, we are going to add a new text module that will make up the mock content for the layout. Go ahead and add a new text module in column 2.
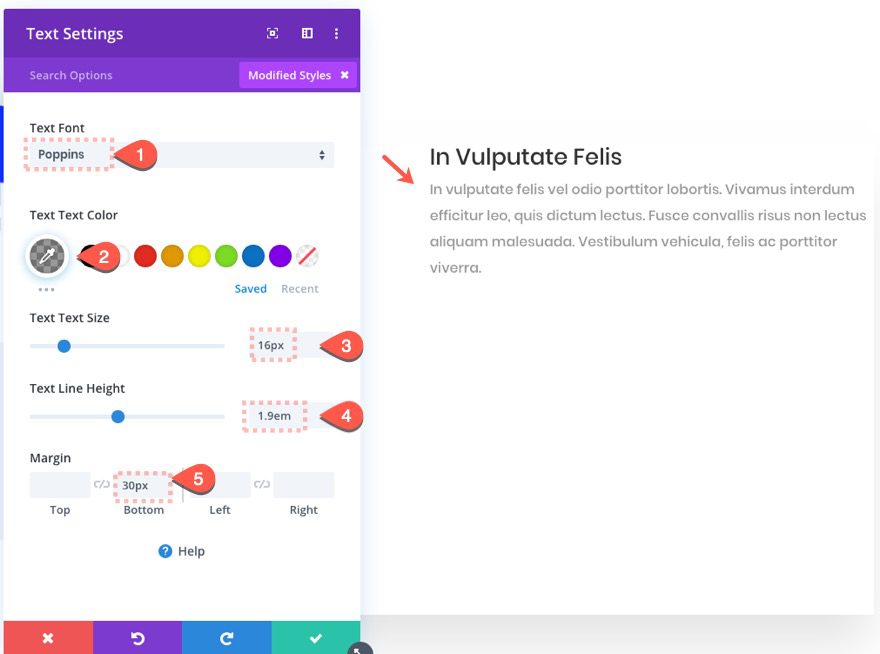
Text Settings
Update the text settings as follows:
- Text Font: Poppins
- Text Text Color: rgba(0,0,0,0.4)
- Text Text Size: 16px
- Text Line Height: 1.9em
- Margin: 30px bottom
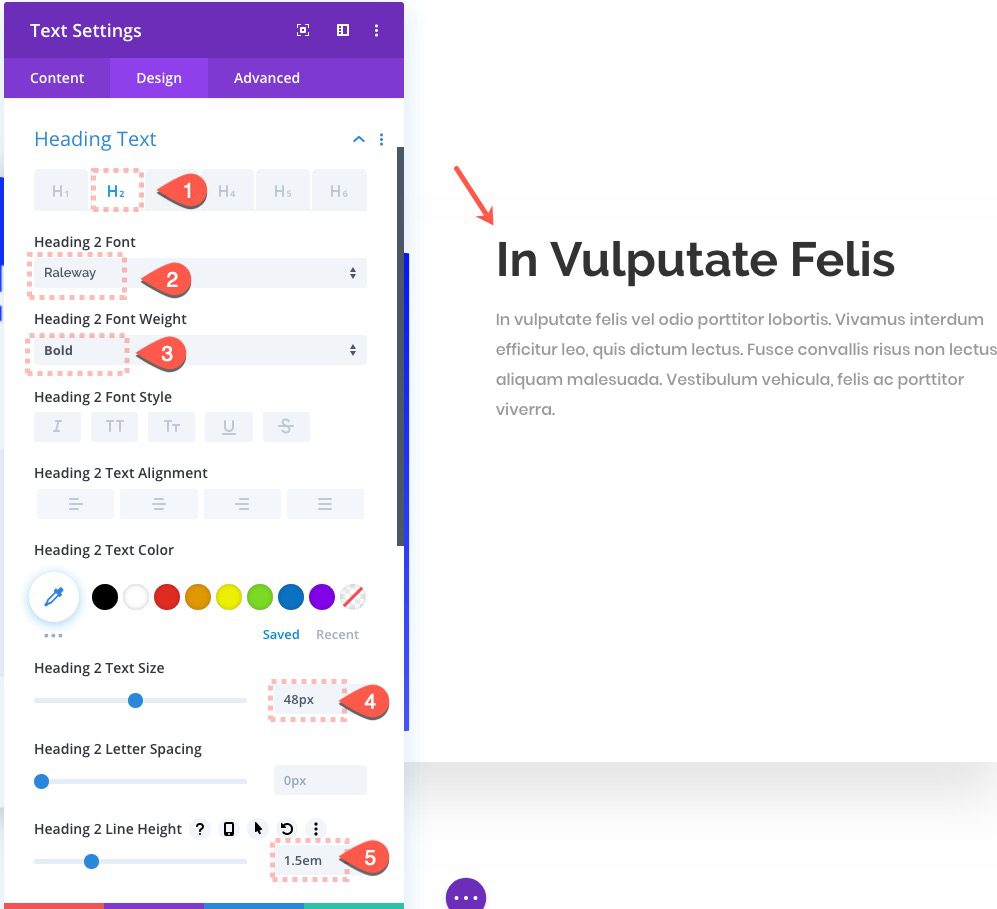
- Heading 2 Font: Raleway
- Heading 2 Font Weight: Bold
- Heading 2 Text Size: 48px
- Heading 2 Line Height: 1.5em
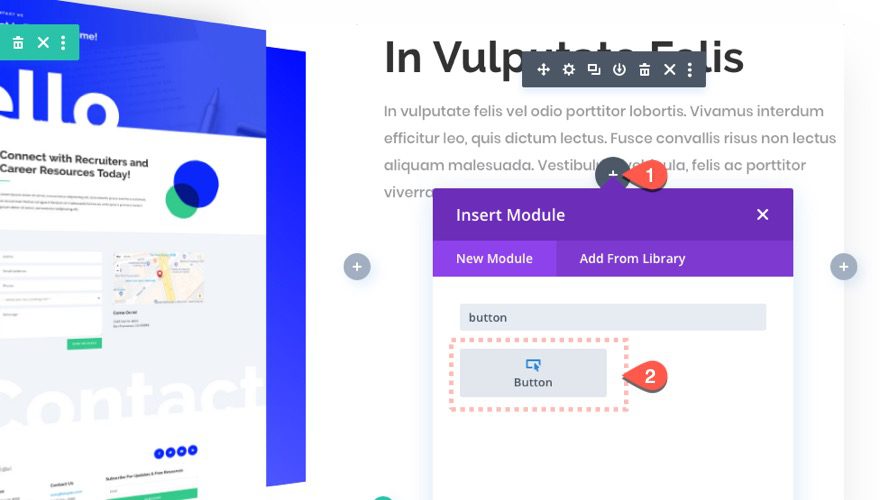
Button
Under the text module, add a new button module.
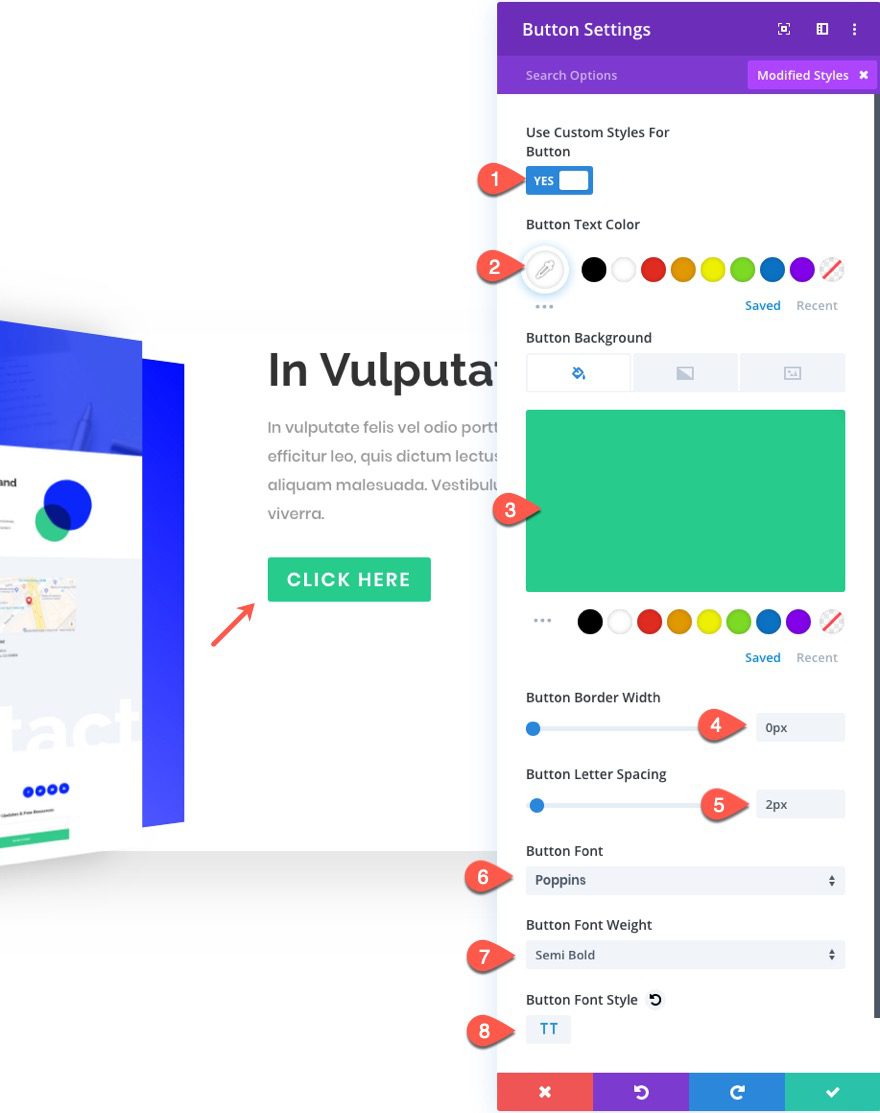
Button Design
Then update the button design as follows:
- Button Text Color: white
- Button Background Color: #29cb8b
- Button Border Width: 0px
- Button Letter Spacing: 2px
- Button Font: Poppins
- Button Font Weight: Semi Bold
- Button Font Style: TT
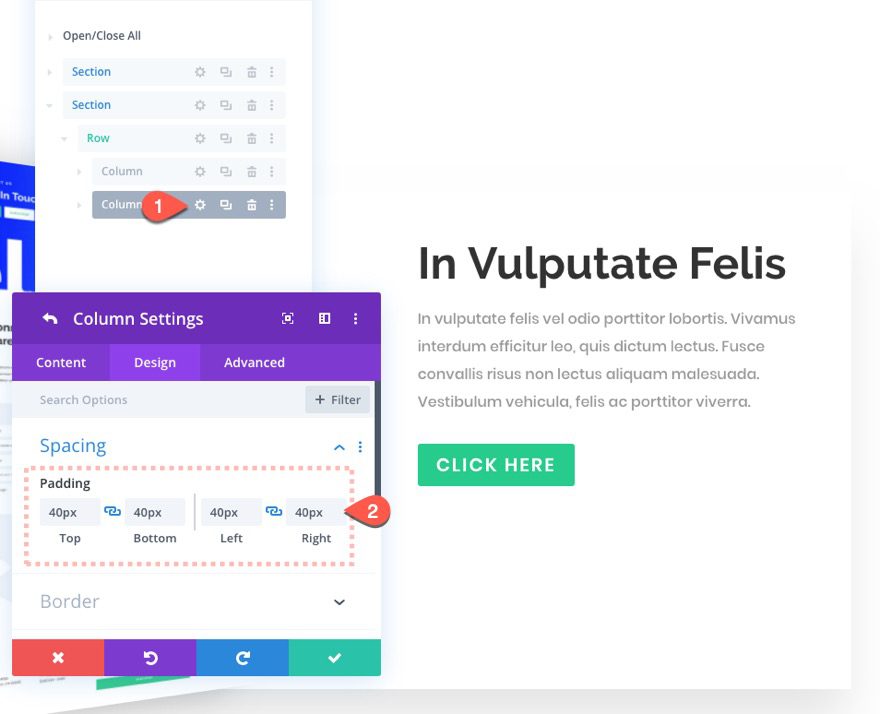
Column 2 Padding
Once the text is designed, add some padding to the column by updating the following:
- Padding: 40px top, 40px bottom, 40px left, 40px right
That takes care of our first featured content row. Here is what it should look like.

The scroll effects are there as well, but before we test that out, let’s add another complimentary featured content row below this one.
Adding Featured Content Row 2
Duplicate Row and Switch Columns
To create the next featured content row, duplicate the previous row.
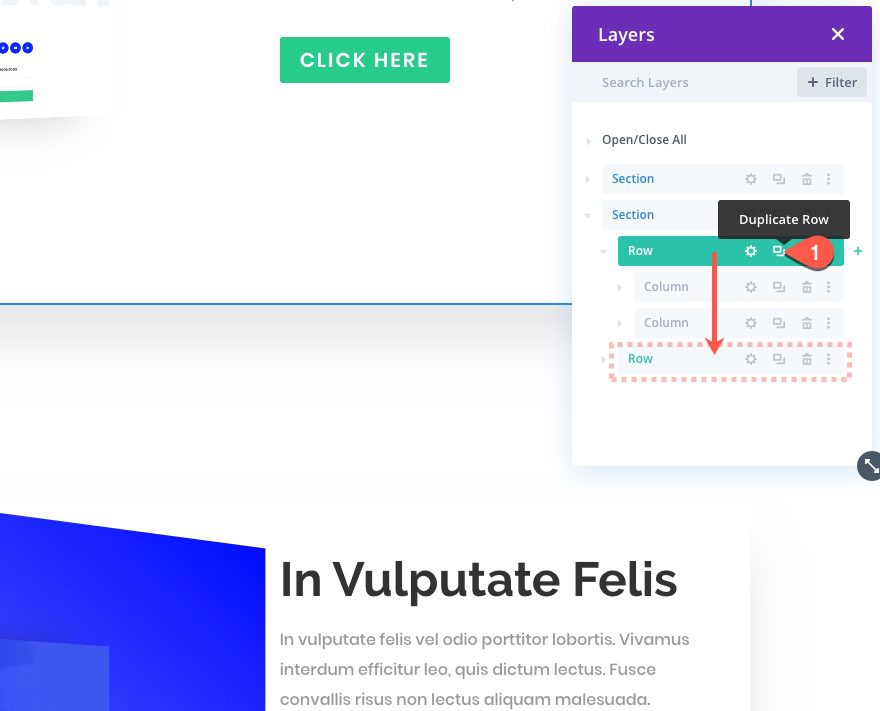
This will create a duplicate of the row and all of the content with it.
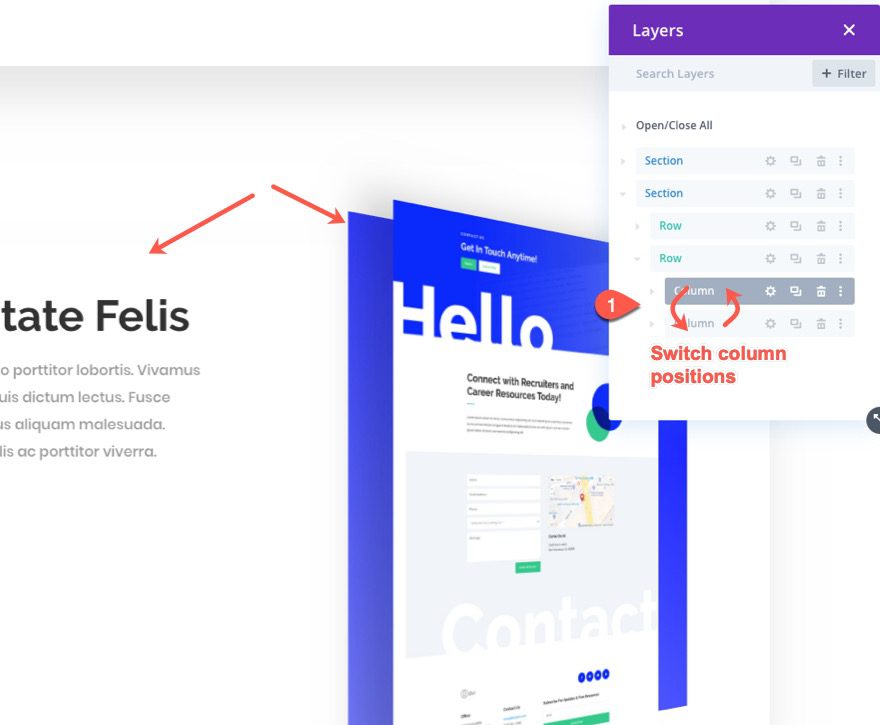
To create more balance in the design, switch the column positions by bringing the left column to the right (or vice versa). You can do this easily in the layers view by dragging the top column under the bottom column.
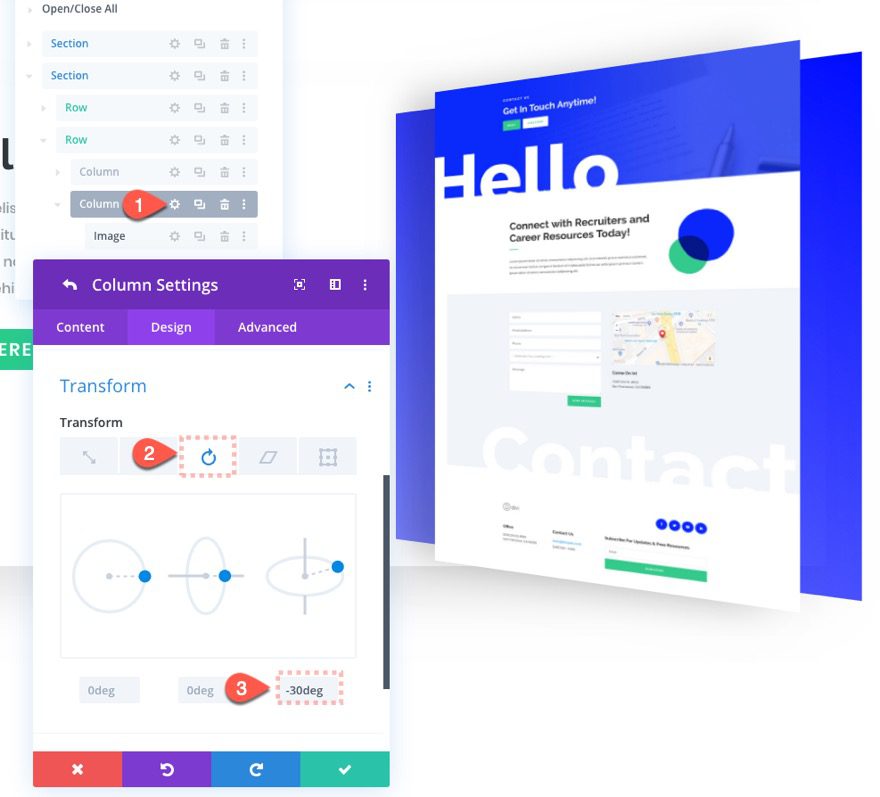
Update Column 2 Transform Rotation
Now that the 3D image and column or on the right side, update the transform rotation so that it rotates the opposite direction. To do this, open the settings for column 2 and update the following:
- Transform Rotate X Axis: -30 deg
Final Design
That’s it! Now let’s check out the final design of our 3D motion elements as we scroll down a live page.
Final Thoughts
Hopefully, this article was helpful for showing you how to add some 3D motion scroll effects to your Divi website. It really comes down to three simple steps:
- Add Perspective to the Row
- Add Transform Rotation to the Column
- Add Scroll Effects to the Module(s)
After that, you can have some fun exploring new designs by adjusting the settings and values in countless other combinations.
I look forward to hearing from you in the comments.
Cheers!


hello and congrats for the design.
Sorry for the probably stupid question, but i’m wondering how much all this 3D and in general all the “advanced” designs impact on the page loading speed.
Maybe there is some article about it? If so, I’ll be glad to read it!
Thank you
Alessandra
somehow i feel, its not that smooth, when you actually scroll, it feels like its scrolling in tabs
It’s really great! Thanks for that!
But on the mobile view the layout causes problems (for me). The whole page in mobile view can be moved to the left. Please have a look at this:
ddm.today/prov2
Do you have a solution for this?
Thank you!
Sorry. I think I might have left out a step. For the section, you should set horizontal and vertical overflow to hidden. This should fix it.
Am I wrong, but I don’t see anywhere on this post to download the layout as mentioned in the post?
See the Section toward the top of the article. Enter your email address and the download button will appear.
Nice topic its a very helpful.
Oh! loved this DIVI template collection. You guys always amazes with the support for their users. I’m gonna try out these on my new blog.
Great! I hope it works out well. Thanks, Nivin.
I am impressed with this 3D creation
I don’t think the download is the right download. It’s showing as “divi-row-content-appear-on-hover”
Sorry about that! I updated the link. Thanks for letting me know.
very impressive. brilliant!
Glad you liked it!
Wow! It is very nice and professional.
Thanks, Minh!
that’s absolutely sick! thanks for sharing
it would be great to have a json library with all these tuts where I can see a short animation and the option to download it or to import it directly from Divi
I hear you, Alex. That would be super convenient. Anyway, glad you liked the tut.
Thank you for this idea it’s very inspiring to highlight a part of the site bravo it’s a beautiful design
You’re welcome!