

Adding one-sided box shadows to various design elements in Divi is a subtle way to add a creative flourish without distracting from the content. In this tutorial, I’m going to show you how to add one-sided box shadows to Divi’s Therapy FAQ Page Layout. As a bonus tip, I’ll also show you how to combine blurb icons as a vertically centered graphic. By learning these Divi design techniques, you can add one-sided box shadows to any modules or columns you want.
Let’s get started.
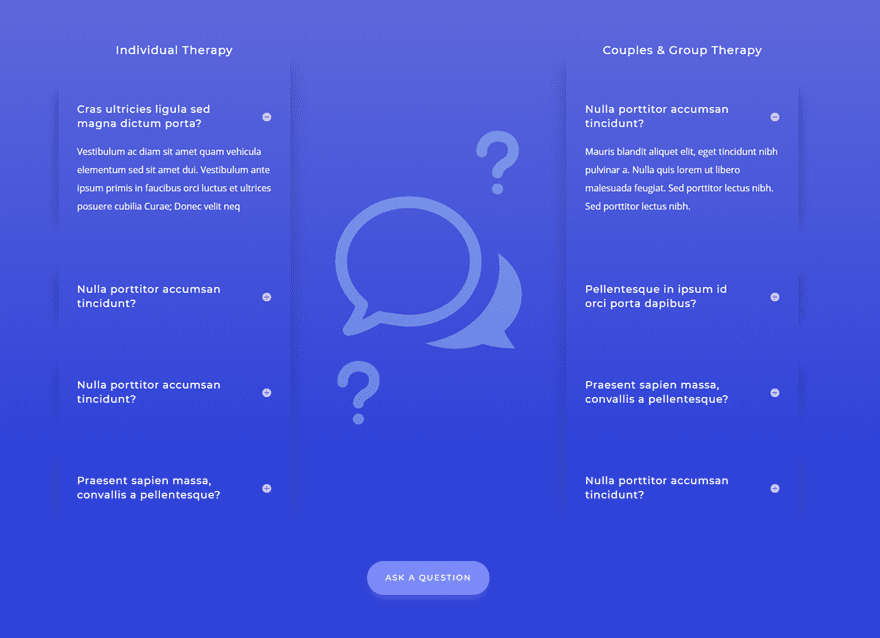
Sneak Peek
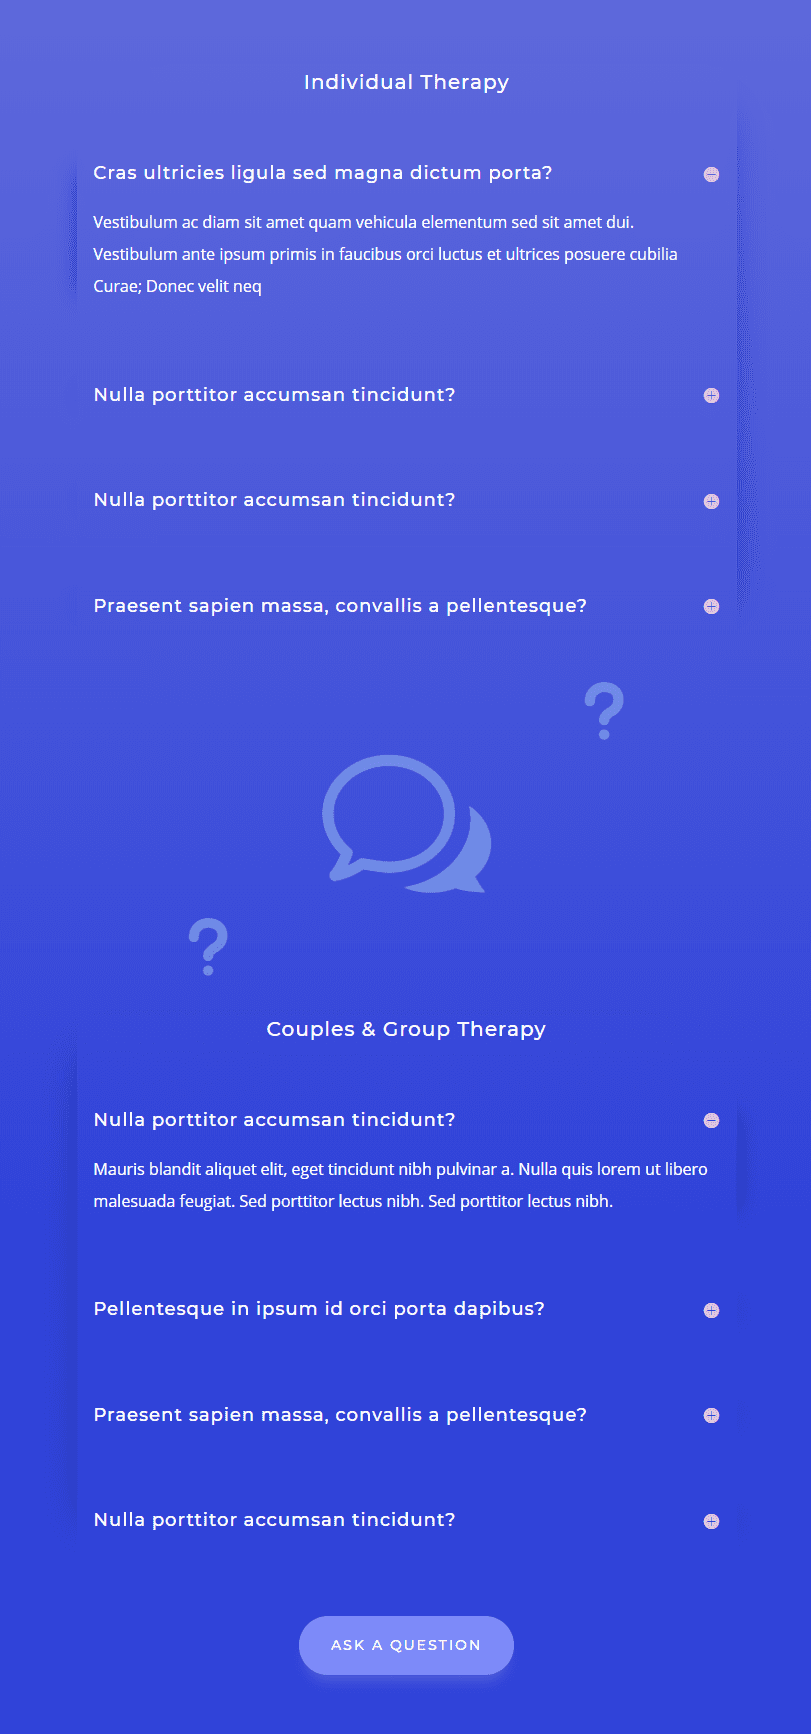
Here is a sneak peek of the FAQ Layout design we will build using one-sided box shadows.
Getting Started
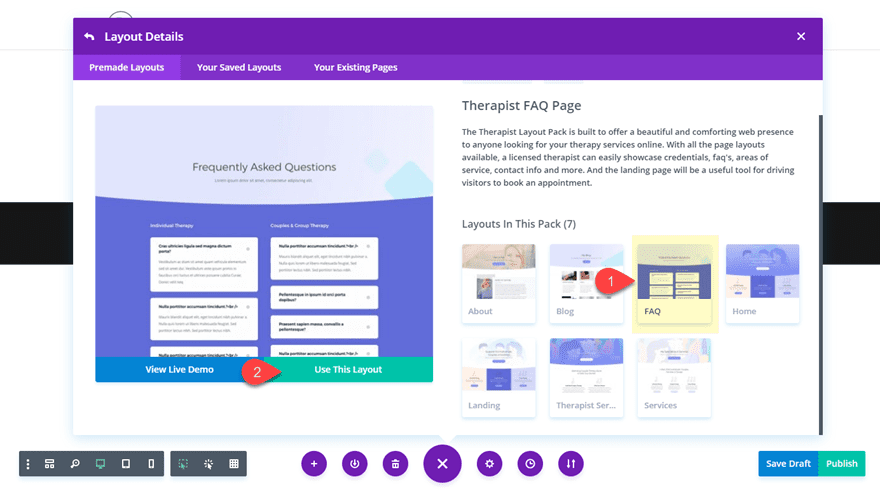
To get started, you will need to create a new page. From your WordPress Dashboard, navigate to Pages > Add New. Then give your page a title and deploy the visual builder. Select the option “Choose a Premade Layout”. From the Load from Library popup, find and select the Therapist Layout Pack. Then select the Therapist FAQ Page Layout and click “Use this Layout”.
Now you are ready to start designing.
Part 1: Organizing the Layout
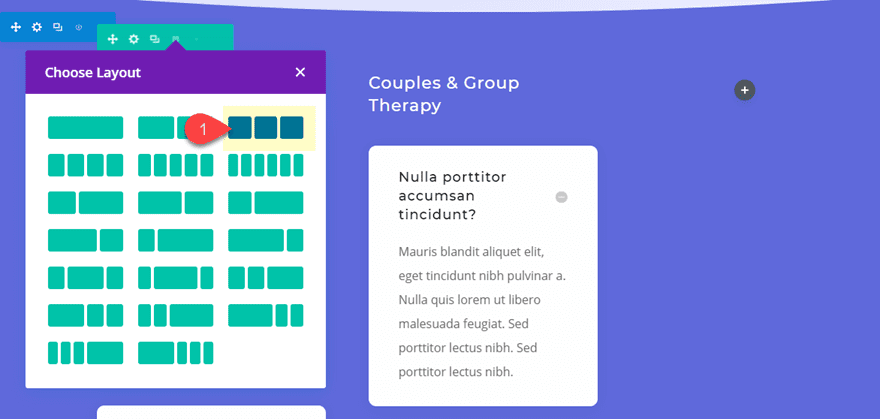
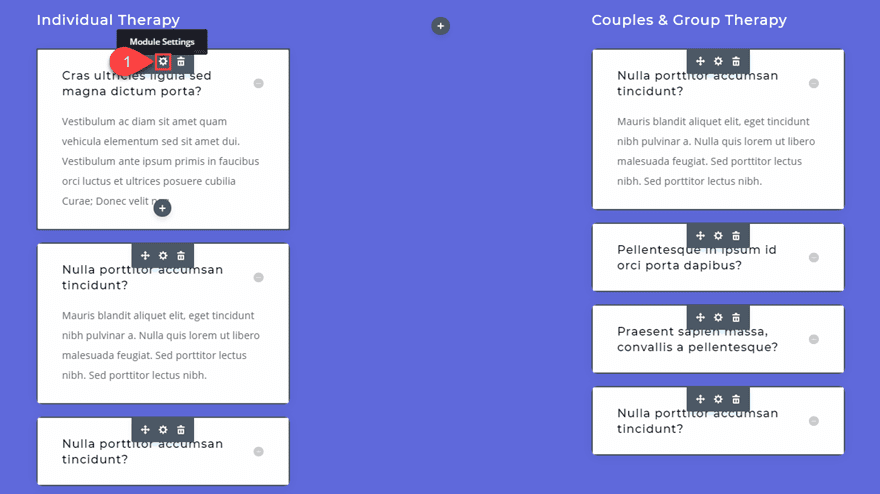
In this premade layout, we will focus our attention on the second section containing the mock questions inside of multiple toggle modules. For starters, let’s change the column layout of the row to three columns (1/3 1/3 1/3).
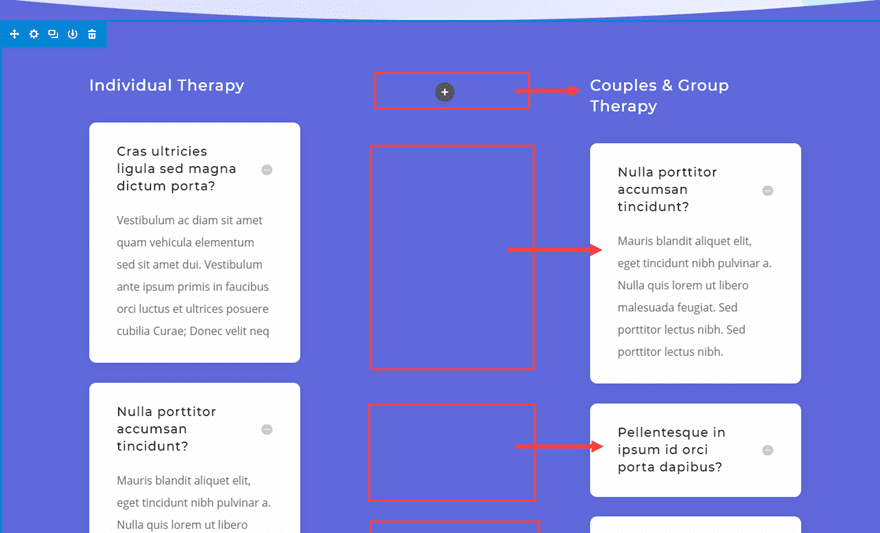
Next, move all of the modules in column 2 over to column 3 using Divi’s Multiselect feature. To do this, hold down Command (or Control) and click on each module in column 2 until all are selected. Then drag them over to column 3.
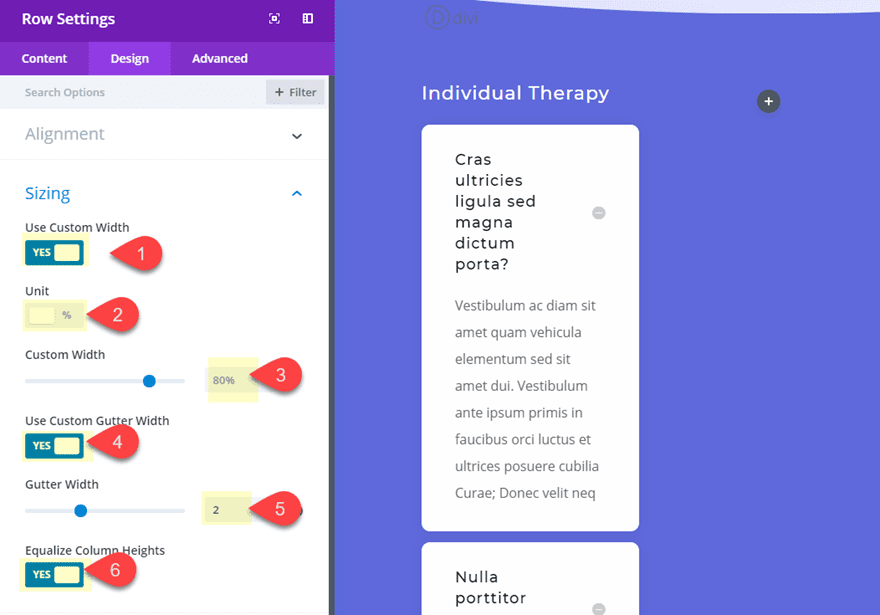
Now we need to give our row a bit more space. Open the row settings and update the following:
Width: 80%
Gutter Width: 2
Equalize Column Heights: YES
Part 2: Designing the Toggle Modules
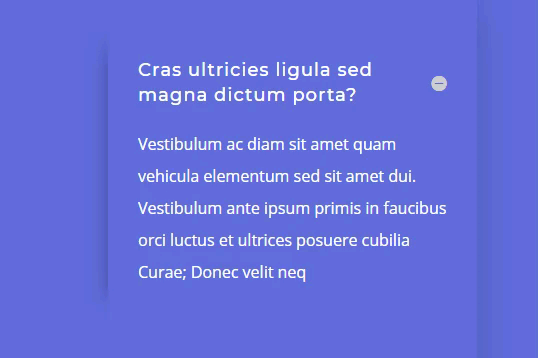
To customize the design of all the toggle modules in this section at once, use the Multiselect feature to select each of the toggle modules. Once all are selected, open the settings for any one of the toggle modules.
Then update the following:
Open Toggle Text Color: #ffffff
Open Toggle Background Color: rgba(0,0,0,0)
Closed Toggle Text Color: #ffffff
Closed Toggle Background Color: rgba(0,0,0,0)
Body Text Color: #ffffff
Custom Padding: 3vw Top, 3vw Bottom, 2vw Left, 2vw Right

Now we can add a box shadow on the left side of our toggle module by updating the box shadow options as follows:
Box Shadow Horizontal Position: -30px
Box Shadow Vertical Position: 0px
Box Shadow Blur Strength: 40px
Box Shadow Spread Strength: -35px
Shadow Color: rgba(0,0,0,0.4)
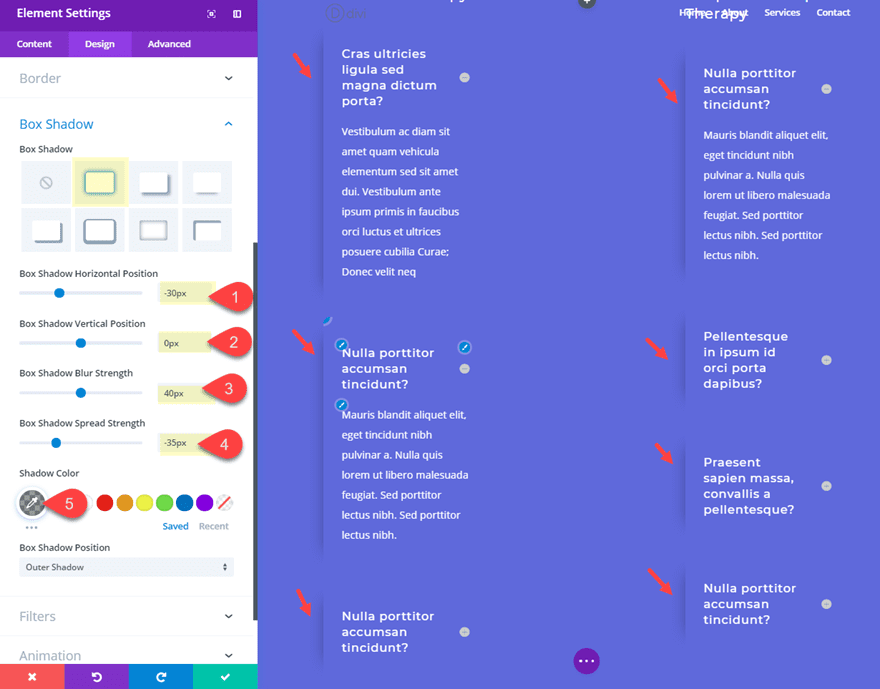
The trick to getting the box shadow positioned correctly is to move the shadow to the left by setting the horizontal position to -30px. After that, you need to find the right balance of blur strength and spread strength in order keep the box shadow visible on the left without it bleeding out onto the top and bottom of the module.
Save Settings.
Now all of your toggle modules have been updated with the new design.
However, we want the box shadow of the toggle modules in the right column to be positioned on the right side (not the left). To change this, use Multiselect to select all the toggle modules in the right column and open the element settings. Then change the horizontal position from -30px to 30px as follows:
Box Shadow Horizontal Position: 30px
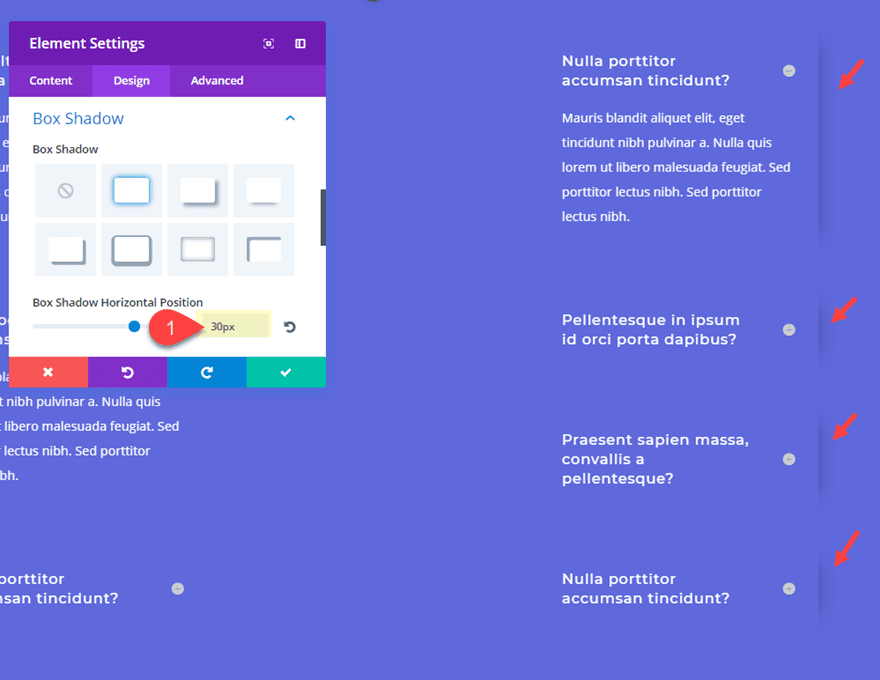
Then save settings.
That takes care of our toggle modules with their unique one-sided box shadows. Now we need to add similar one-sided box shadows to our columns.
Part 3: Adding One-Sided Box Shadows to Columns
To add one-sided box shadows to columns, we will need to add a few snippets of CSS under the advanced tab of the row settings.
Open the row settings and click the advanced tab. Inside the Column 1 Main Element, add the following CSS:
box-shadow: 30px 0px 70px -45px rgba(0,0,0,0.4)
If you aren’t familiar with CSS, you should be able to recognize the similarity of the code with the box shadow module settings available in the Divi builder. In the above code…
30px is the value for the horizontal position
0px is the value for the vertical position
70px is the value for the blur strength
-45px is the value for the spread strength
rgba(0,0,0,0.4) is the shadow color
I gave the column box shadow a larger blur strength than the toggle modules to create a slightly greater depth.
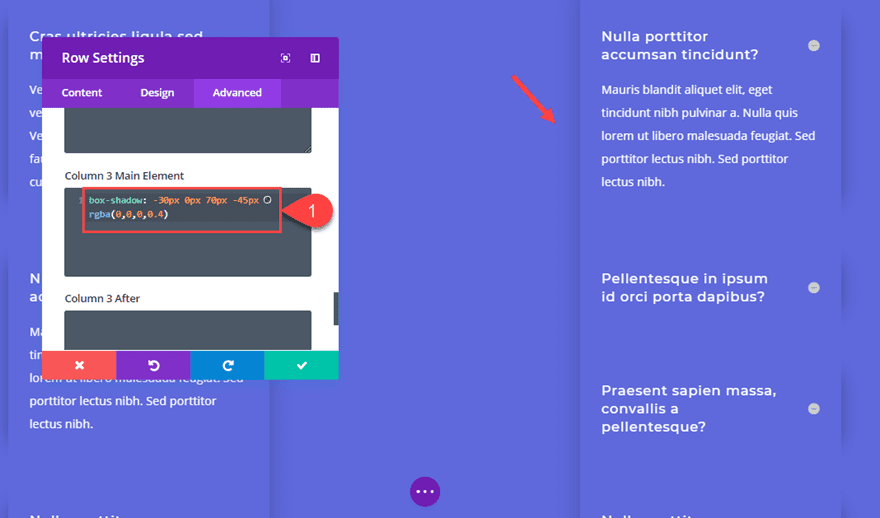
In order to add a left box shadow to Column 3, You will need to add the following CSS to Column 3 Main Element:
box-shadow: -30px 0px 70px -45px rgba(0,0,0,0.4)
Again, the only difference between this CSS and the one used for column 1 is the negative horizontal position.
Part 4: Adding Blurb Icons to Column 2
Now that our one-sided box shadows are complete, we have an empty middle column where we can combine a few blurb module icons to create a simple graphic design. To do this, first add a blurb module and delete the title and content. Then click to use an icon and select the following chat icon.

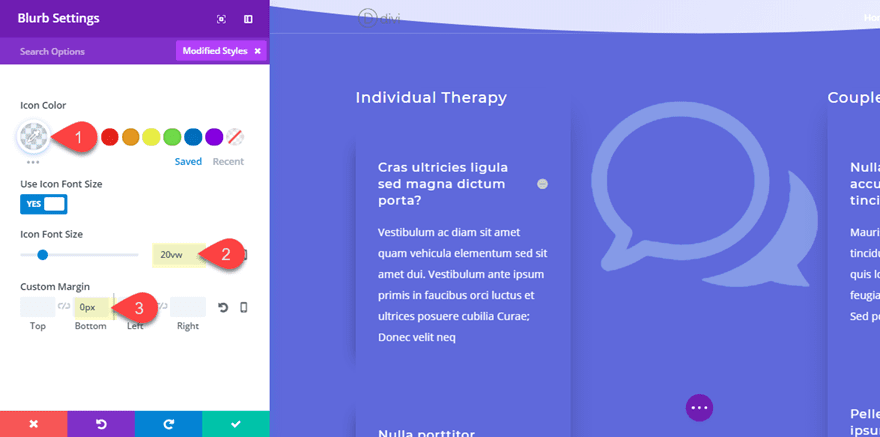
Then update the design settings as follows:
Icon Color: rgba(203,241,252,0.37)
Icon Font Size: 20vw
Custom Margin: 0px Bottom
Next, duplicate the blurb module to create an additional one underneath.
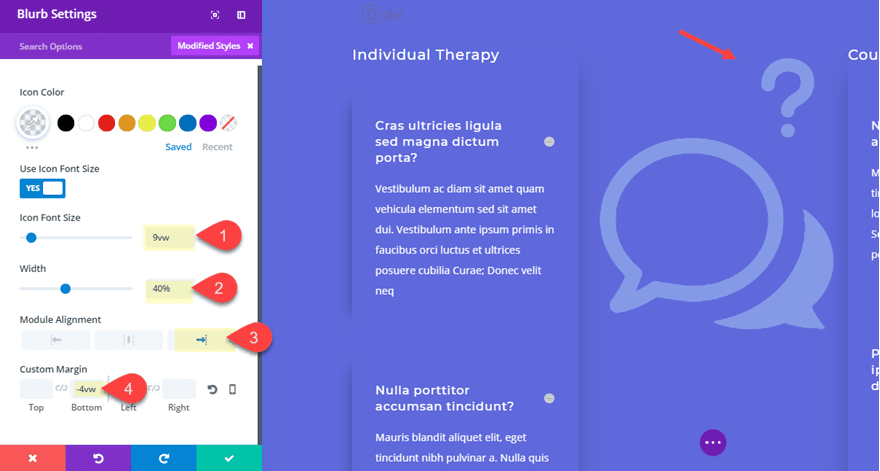
Then update the top blurb with a question mark icon and update the following design settings:
Icon Font Size: 9vw
Width: 40%
Module Alignment: Right
Custom Margin: -2vw
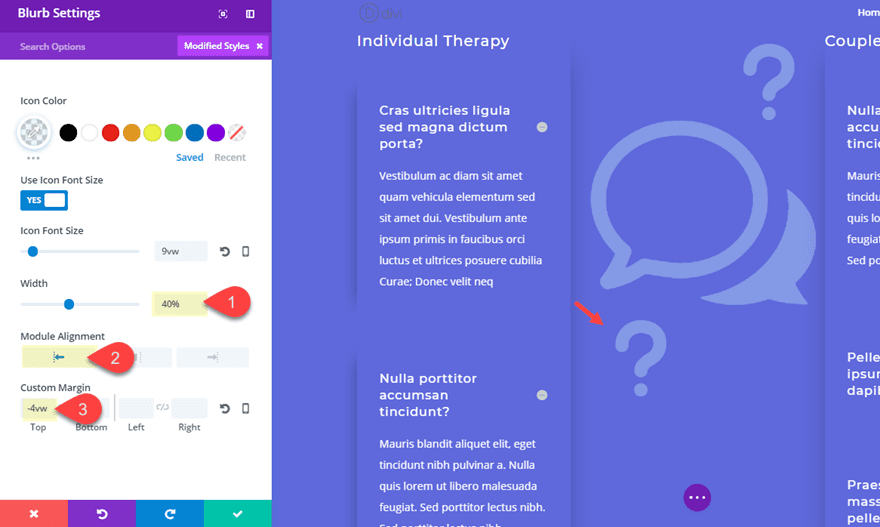
Finally, copy the question mark blurb module you just designed and paste it under the large chat icon blurb module. Then update the design settings for that blurb module as follows:
Part 5: Vertically Centering the Modules in Column 2
To finish off the design, we need to vertically center the blurb icons in column 2 so that they remain a centered design element for our layout. To accomplish this we are going to capitalize of Divi’s use of flex. Because we selected to equalize column heights for our row, we can use a simple snippet of CSS to center all modules within column 2. You can always learn more about how to vertically align content in Divi at your convenience. But for now, open the row settings and click the advanced tab. Then enter the follow css inside the Column 2 Main Element:
margin: auto
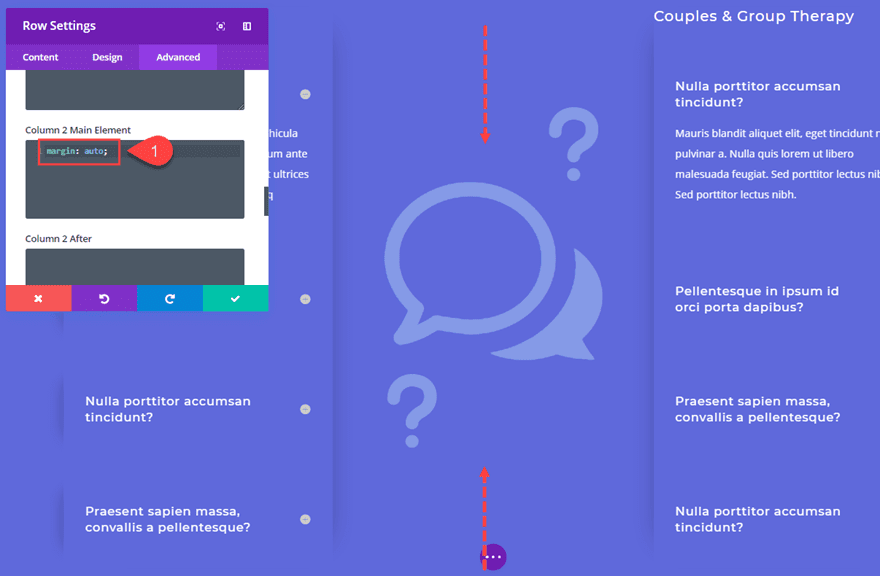
Now all the blurb modules will be vertically centered within column 2.
To make things easier on the eyes, go ahead a center the text on each of the text modules sitting at the top of column 1 and column 2. Then add a background gradient to the section as follows:
Background Gradient Left Color: #616ce1
Background Gradient Right Color: #3846e0
That’s it. Now the design is complete.
Check out the final result.
And, notice how the box shadow expands and contracts when opening and closing the toggles.
Final Thoughts
Adding one-sided box shadows to modules and columns can give your content depth in creative ways. The trick is to know how to adjust Divi’s box shadow design settings effectively. This FAQ page layout is just one of the many examples you can incorporate this design. But the overall process is quite simple and should be a nice technique you can keep in your design toolbox for future projects.
I look forward to hearing from you in the comments.
Cheers!


Great tutorial. Very helpful. No need for working example. I have my own cause I followed the tutorial and built one. Thanks for sharing. Keep up the good work.
I agree with Rob’s point. Would be extremely helpful.
How to Add One-Sided Box Shadows to Design Elements in Divi – I was really looking for this. Thanks for sharing this article.
Glad it was helpful, Isa.
Beautifully done.
Can I ask, why don’t any of the tutorials on here actually contain WORKING examples? You’ve got lots of great step-by-step instructions (thank you!) and lots of still and animated images (thank you again!), but no actual working examples. (Admittedly, not every tutorial would benefit much from working examples, but plenty would.)
You do use Divi for the ET site and blog, right? So no reason not to include actually include working examples? Or downloadable json files?
Thanks!