

Having a multipurpose sales banner will definitely come in handy (and save you time) during those crucial times of the year when promotions are all the rage. That’s why we are offering this multipurpose sales banner for Divi as a FREE download! This sales banner can easily be customized to fit your needs with only a few tweaks of some text and a background image. Designing the sales banner in Divi is easy enough that you won’t have to settle for image banners that often look a little grainy on the web. So, in addition to the free download, I’m going to show you how to design the sales banner in Divi from scratch.
Let’s get started!
- 1 What’s Included
- 2 Download The Sales Banner Design for FREE
- 3 Download For Free
- 4 You have successfully subscribed. Please check your email address to confirm your subscription and get access to free weekly Divi layout packs!
- 5 Loading the Layout to the Divi Library
- 6 How to Create the Sales Banner from Scratch in Divi
- 7 Adding the Top Border Frame with Adjacent Text
- 8 Adding the Text Modules to the Middle Row
- 9 Adding Different Section Backgrounds for Unique Designs
- 10 Final Thoughts
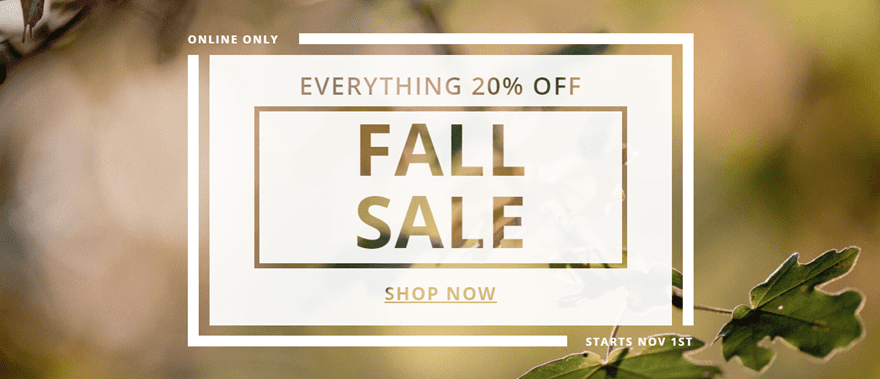
What’s Included
Here is a peek at the sales banner design included in the download.


To lay your hands on the sales banner design for free, you will first need to download them using the button below. To gain access to the download you will need to subscribe to our newsletter by using the form below. As a new subscriber, you will receive even more Divi goodness and a free Divi Layout pack every Monday! If you’re already on the list, simply enter your email address below and click download. You will not be “resubscribed” or receive extra emails.

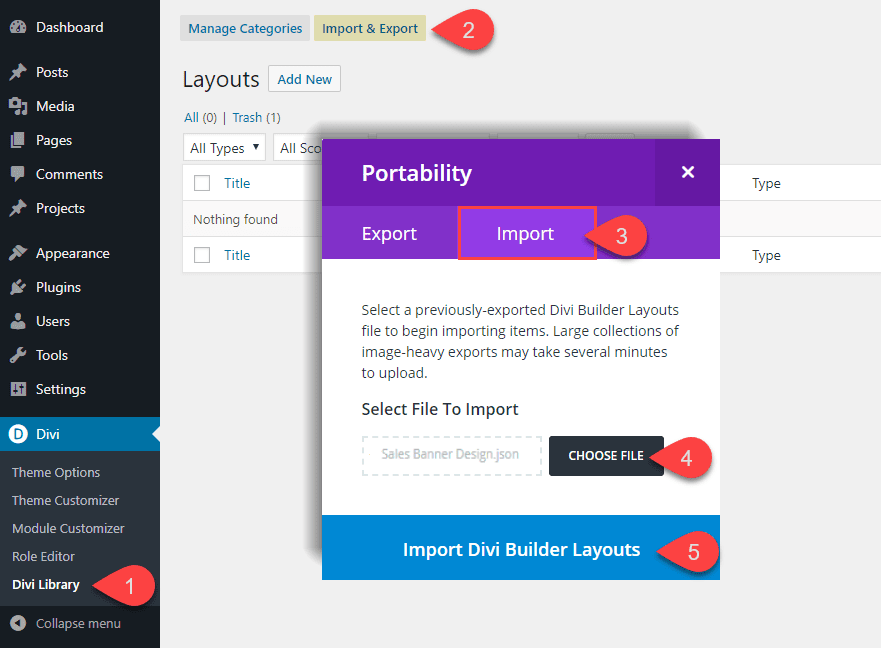
Loading the Layout to the Divi Library
After you download the file, unzip it. You will find that it contains a file named “sales-banner-design.json”. This is what you will load to your Divi library. Now go to your wordpress dashboard and navigate to Divi > Divi Library. Then click the import button at the top of the page. From the portability popup window, select the Import tab and choose the sales-banner-design.json file. Then click the Import Divi Builder Layouts button.
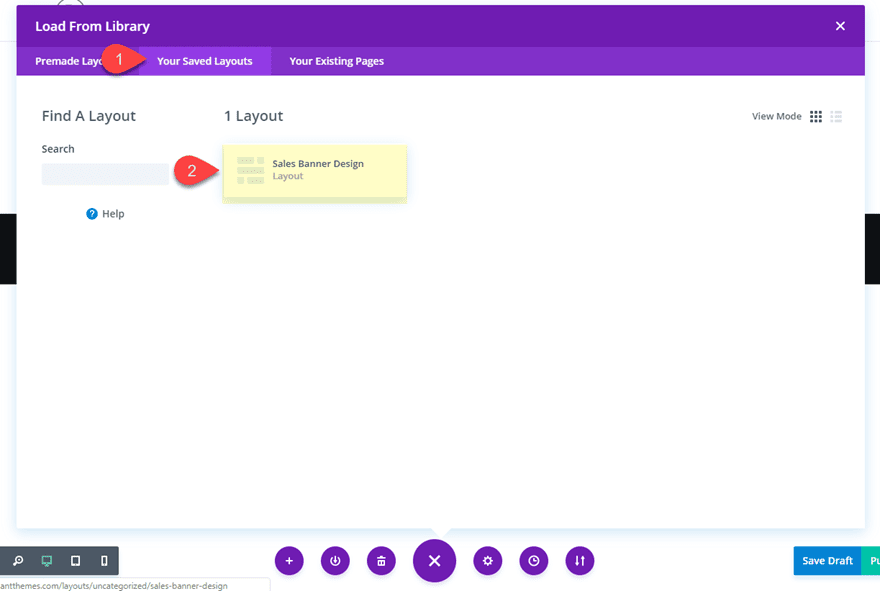
Now to import the layout to your page, simply create a new page and deploy the visual builder. Then select “Choose a Premade Layout”. From the load from library popup, select the tab “Your Saved Layouts” and then click on the Sales Banner Design layout from the list. That’s it!
Adding the Section Background
To get things started, create a new page. After you give your page a title, deploy the visual builder and select the “Build From Scratch” option. Then add a new section with a one column row.
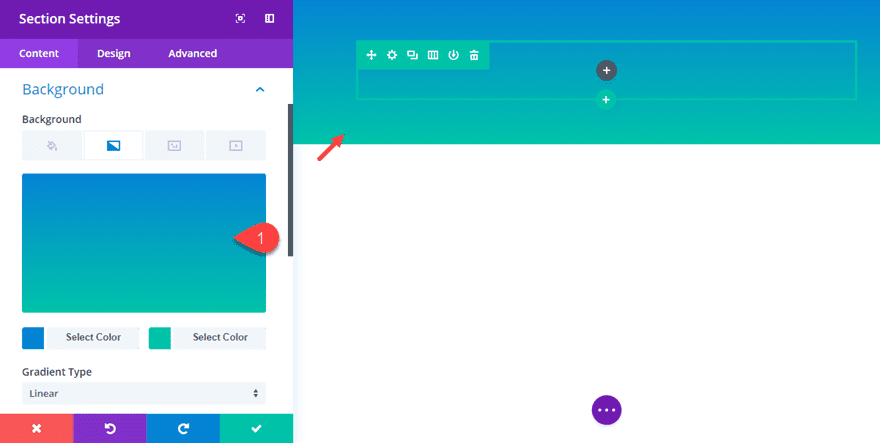
Before you start adding any modules to the row, give your section a background gradient color (The color doesn’t matter at this point. We just need a background color in order to see all the white design elements we will be using for our sales banner.)
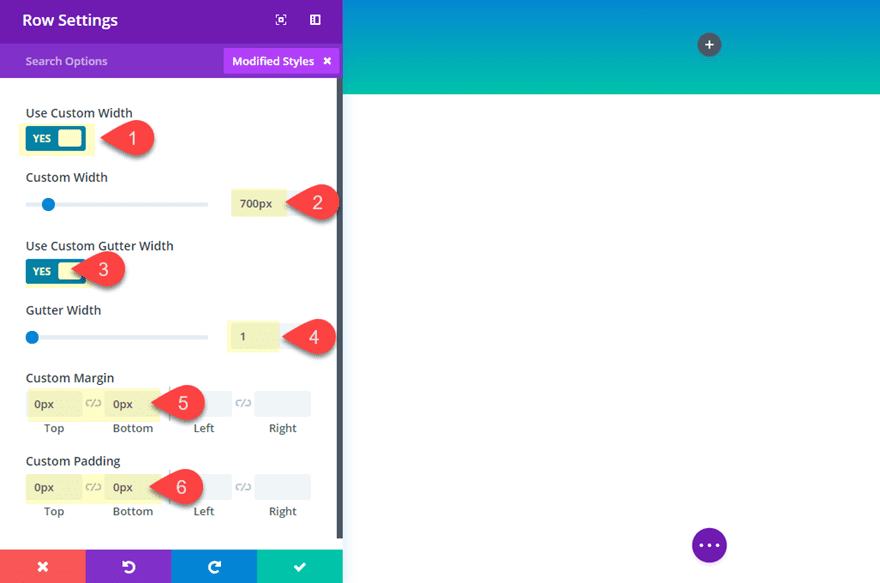
Before we add our modules to the row, let’s first give our row a custom width of 700px and take out any top or bottom spacing so that our row will sit nicely on top of the other row we will be adding underneath. Go to the row settings and update the following:
Custom Width: 700px
Gutter width: 1
Custom Margin: 0px top, 0px, bottom
Custom padding: 0px top, 0px bottom
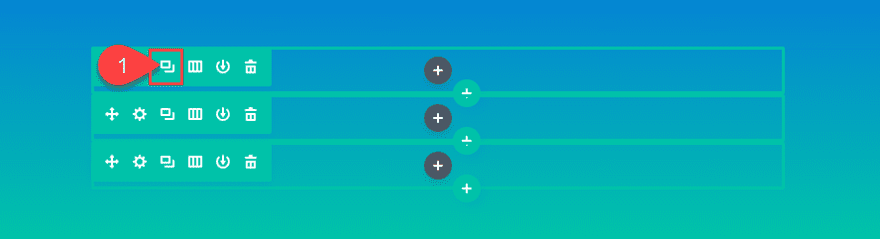
Now duplicate the row two times so that you have a total of three identical rows. These will be used to build our sales banner.
Adding the Top Border Frame with Adjacent Text
To build our sales banner, we begin with a top border with some text to the left. To do this we will be using a divider module and a text module. First, create a new text module and add a few words of content in the content box.
Content: “Online Only”
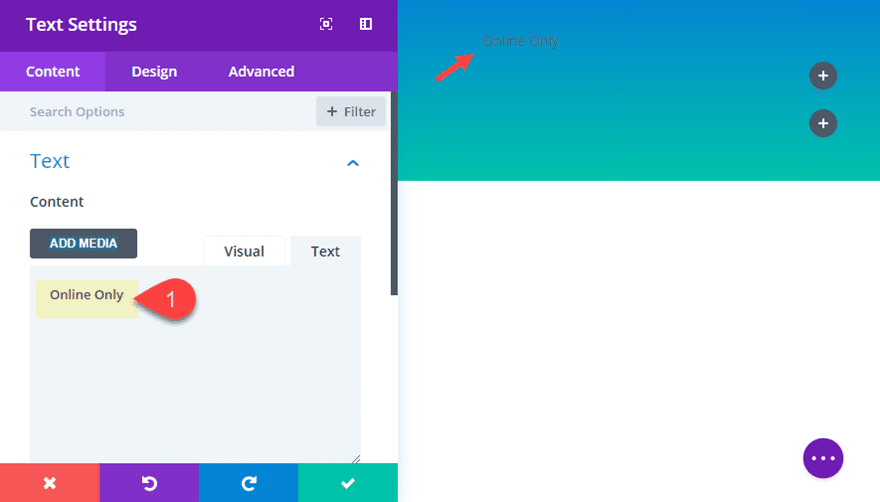
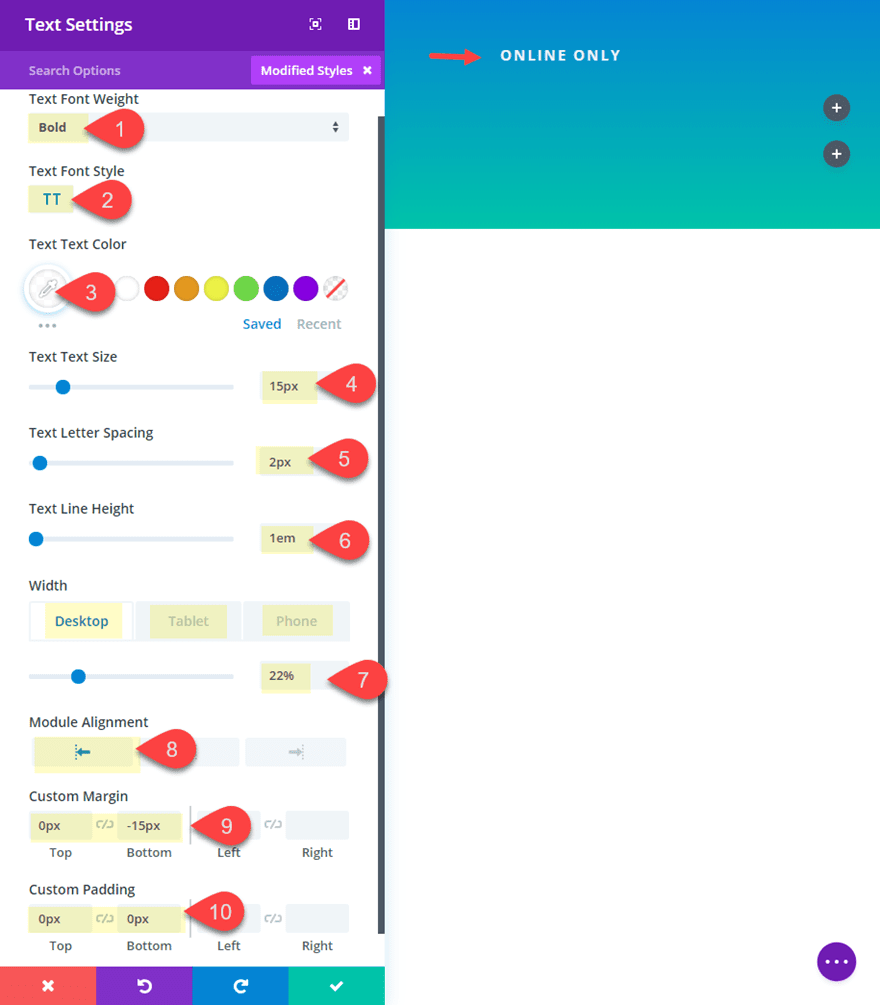
Continue to the design tab and update the following:
Text Font Weight: Bold
Text Font Style: TT
Text Text Color: rgba(255,255,255,0.9)
Text Text Size: 15px
Text Letter Spacing: 2px
Text Line Height: 1em
Width: 22% (desktop), 25% (tablet), 40% (smartphone)
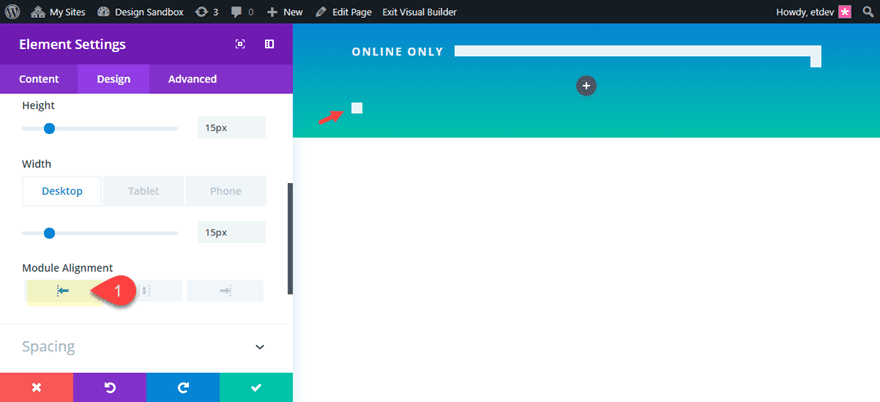
Module Alignment: left
Custom Margin: 0px top, -15px bottom
Custom Padding: 0px top, 0px bottom
This custom margin is a bit premature since our divider hasn’t been added yet, but it is necessary to line up the text so that it is perfectly adjacent to the divider soon to be added.
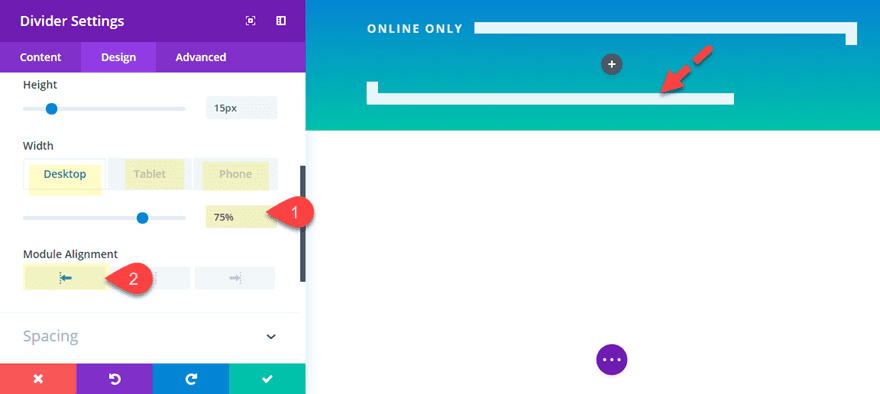
Now add a divider module under the text module in the same row. Then update the divider settings as follows:
Color: rgba(255,255,255,0.9)
Divider position: bottom
Divider weight: 15px
Height: 15px
Width: 78% (desktop), 75% (tablet), 60% (smartphone)
Module Alignment: Right
Custom Margin: 0px top, 0px bottom
Custom Padding: 0px top, 0px bottom
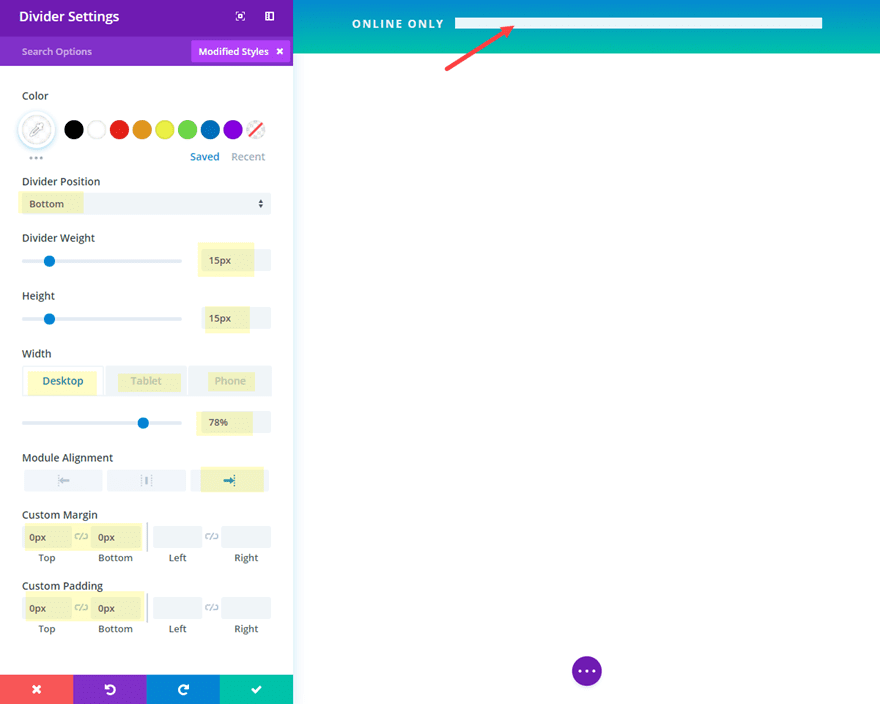
Of course, you will need to adjust the width of your border depending on the width of your text module when customizing the design for your own needs.
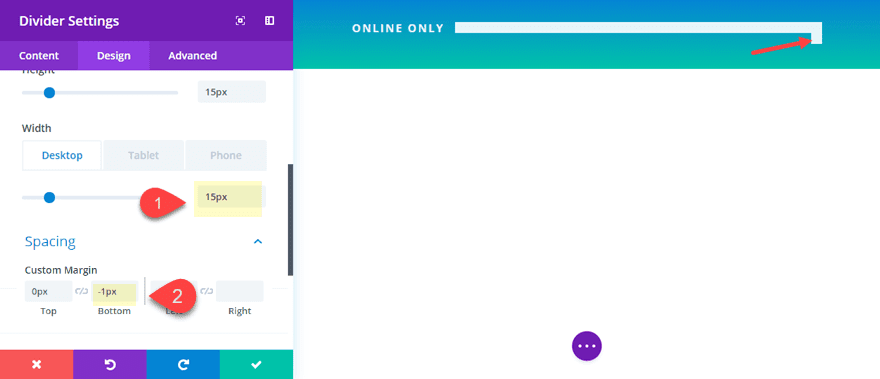
Next we need to add one more divider module to connect our divider to the right border of the row we will be designing next.
To to this, duplicate the divider module and update the following:
Width: 15px
Custom Margin: -1px bottom
Adding the bottom border frame with Adjacent Text
To create the bottom border frame, we can use the same element we created in the top border frame of our top row. Only this time we will start with the 15px wide divider module. Go ahead and copy the 15px divider module and paste it into the third (bottom) row. Then update the module alignment to left instead of right.
Next, copy the longer divider module from the top row and paste it under the 15px divider in the bottom row. Then adjust the following:
Width: 75% (desktop), 70% (tablet), 50% (smartphone)
Module Alignment: left
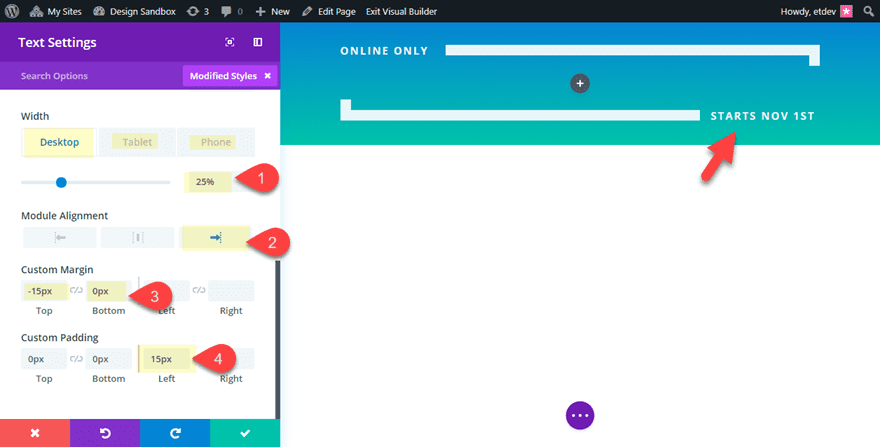
Finally, copy over the text module in the top row and paste under the two divider modules in the bottom row. Then update the following:
Content: “Starts Nov 1st”
Width: 25% (desktop), 30% (tablet), 50% (smartphone)
Module Alignment: Right
Custom margin: -15px top, 0px bottom
Custom Padding: 15px left
Adding the Text Modules to the Middle Row
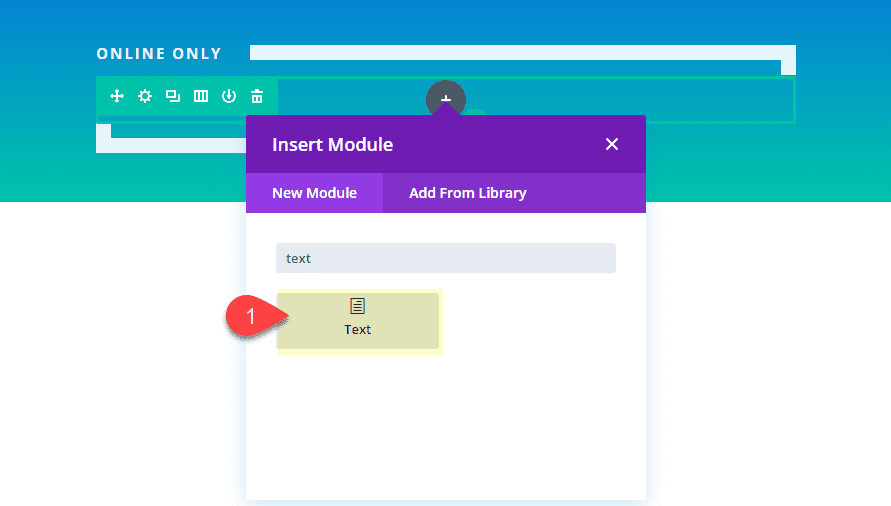
Now we are ready to start add the text modules to our middle row which will hold our main sales banner text. We will be stacking three text modules on top of each other. Go ahead and add the first text module to the middle row.
Then update the following:
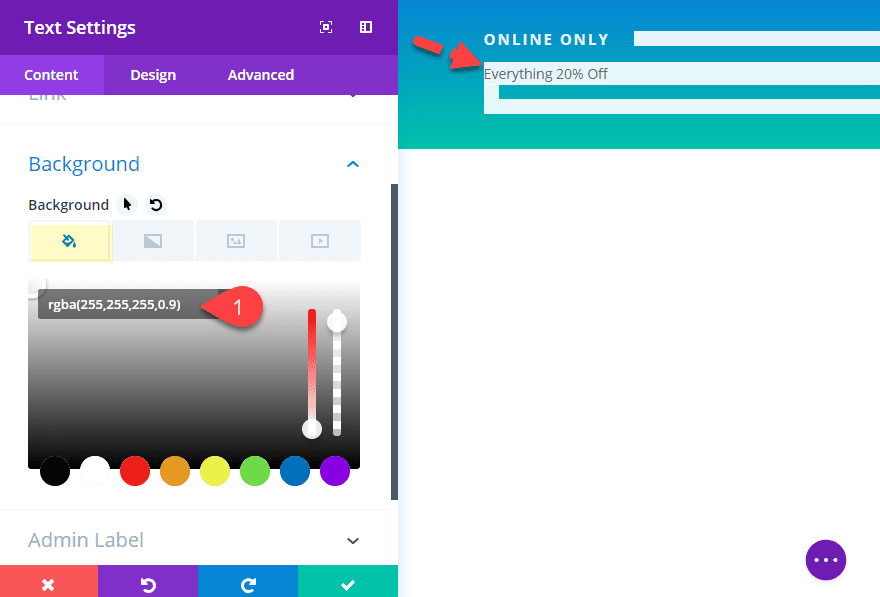
Content: “Everything 20% Off”
Background Color: rgba(255,255,255,0.9)
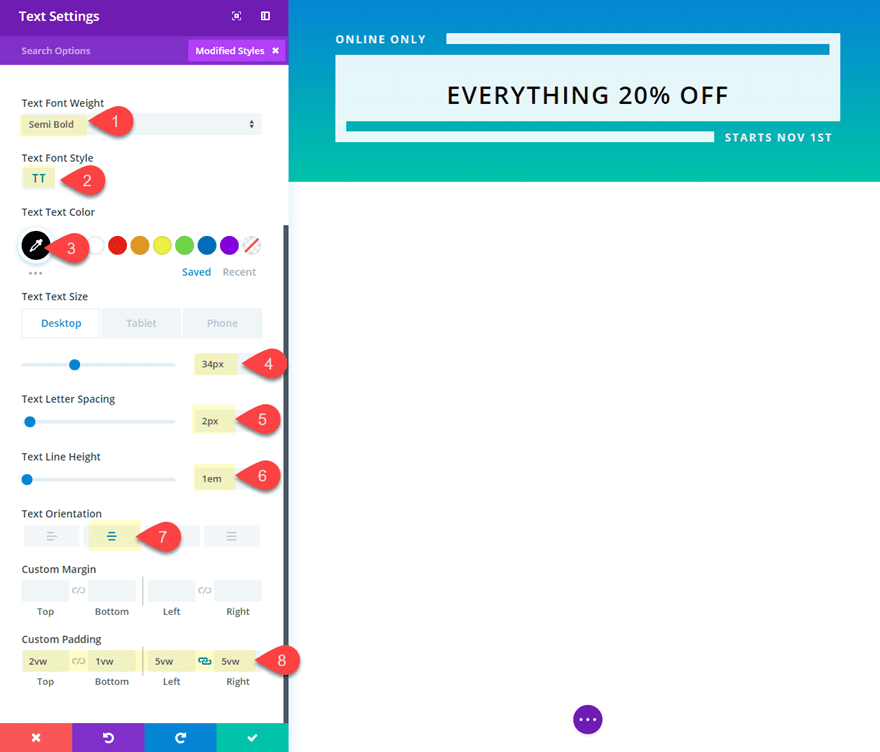
Text Font Weight: Semi Bold
Text Font Style: TT
Text Text Color: #000000
Text Text Size: 34px (desktop), 20px (smartphone)
Text Letter Spacing: 2px
Text Line Height: 1em
Text Orientation: Center
Custom Padding: 2vw top, 2vw bottom, 5vw left, 5vw right
Giving the text a black color over a white background is essential for maximizing the screen blend mode effect that will allow the text to blend with the section background. We will add the screen blend mode to the row a little later on.
Now duplicate the text module to jumpstart the design of the next text module. Then update the content with the following html:
<h2 style="border: 7px solid #000000;">Fall Sale</h2>
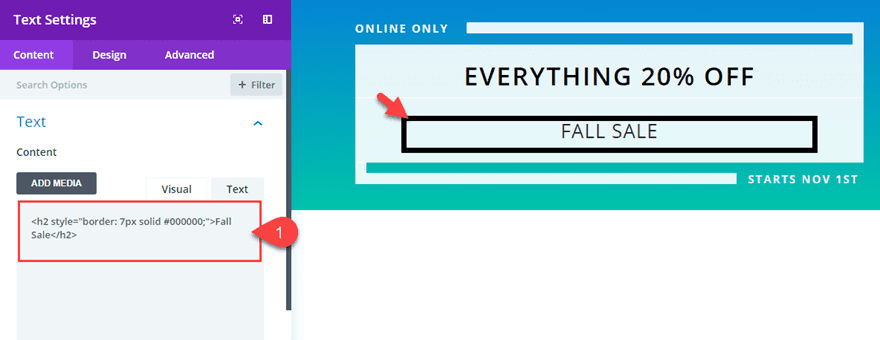
The inline styling simply adds a black border around the heading text. Again, the black color will work with the screen blend mode to expose the section background with the text.
Then update the following:
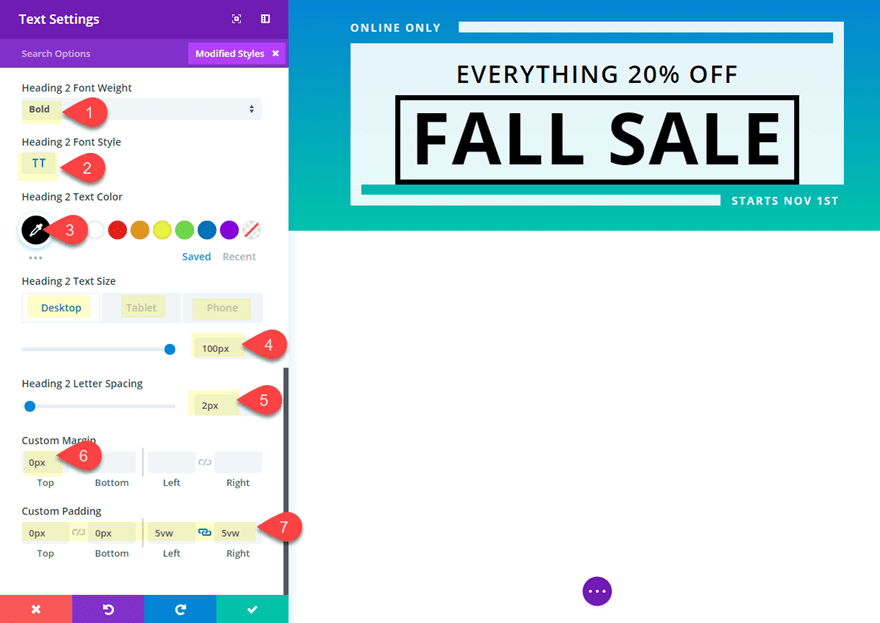
Heading 2 Font Weight: Bold
Heading 2 Font Style: TT
Heading 2 Text Color: #000000
Heading 2 Text Size: 100px (desktop), 80px (tablet), 60px (smartphone)
Heading 2 Letter Spacing: 2px
Custom Margin: 0px top
Custom Padding: 0px top, 0px bottom
For the last text module, duplicate the first text module in this middle row and paste it under the second text module.
Then update the following:
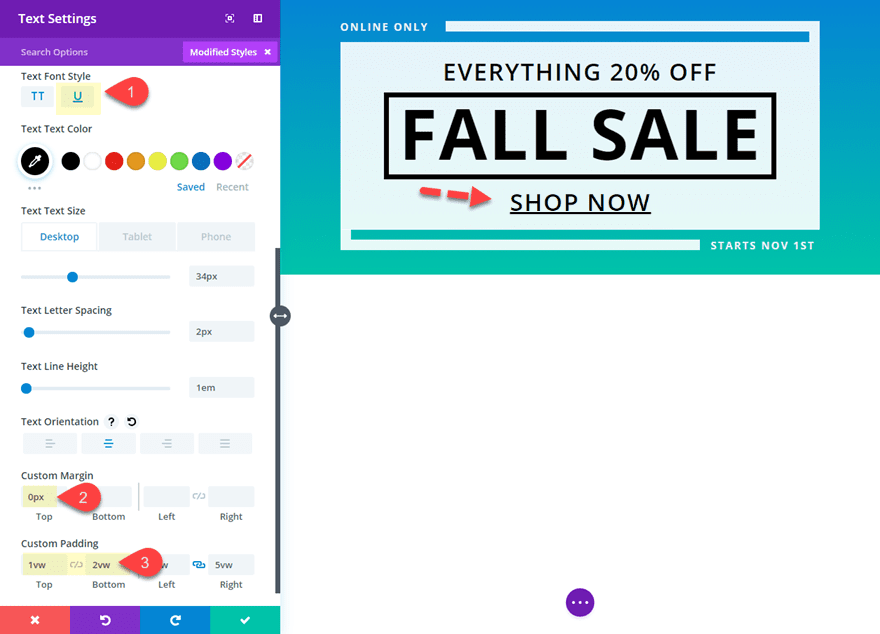
Content: “Shop Now”
Text Font Style: TT, U (underlined)
Custom Margin: 0px top
Custom Padding: 1vw top, 2vw bottom
Styling the Middle Row
The final phase of this design is to add a border to the middle row and a screen blend mode effect. To do this, open the middle row settings and update the following:
Custom Padding: 15px left, 15px right
Right Border Width: 15px
Right Border Color: rgba(255,255,255,0.9)
Left Border Width: 15px
Left Border Color: rgba(255,255,255,0.9)
Blend Mode: Screen

The screen blend mode allows the text to blend the background image to show through the text for a cool effect!
Check out the final result.

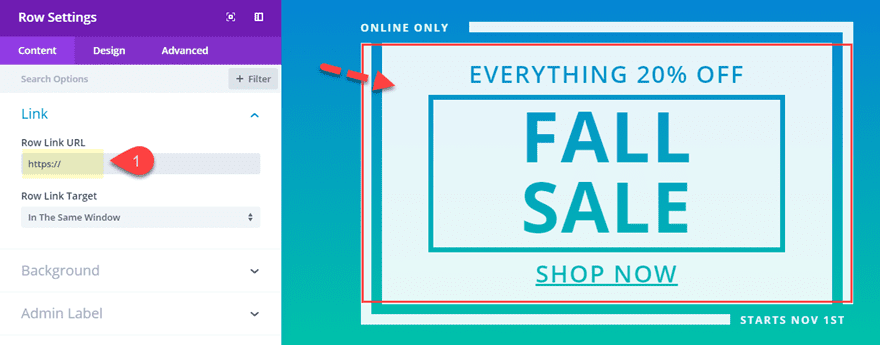
Since this is a sales banner, you will want to maximize the clickable space on the banner to increase conversions. To do this, you can add a link to the entire middle row. Simply open the middle row settings and enter a row link URL to redirect to your desired page.
Adding Different Section Backgrounds for Unique Designs
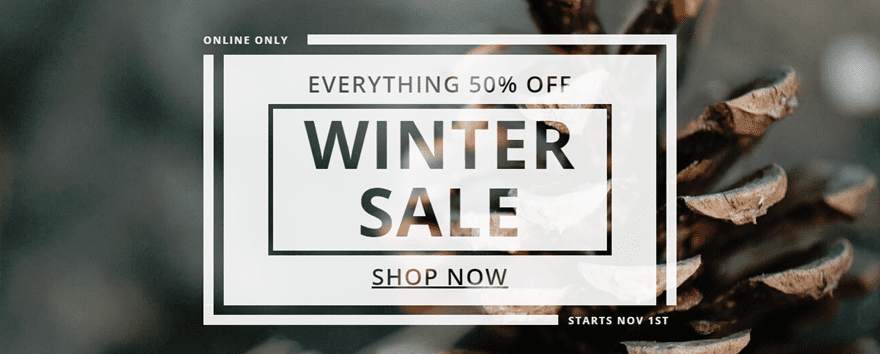
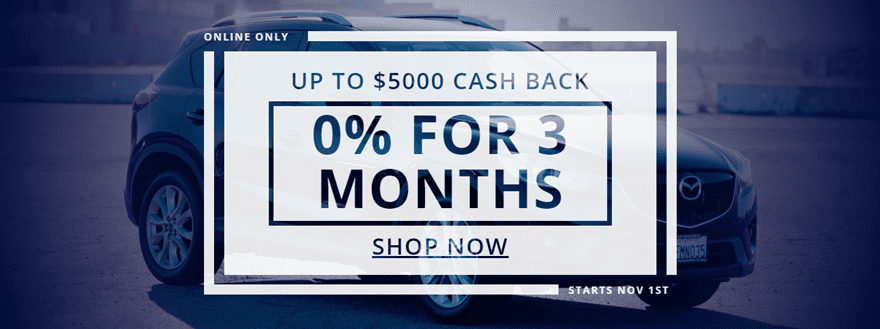
With this new sales banner design, you can easily update the background image to create unique designs.
Here are a few examples.
Final Thoughts
I hope this sales banner design comes in handy for all those web promotions needed throughout the year. The design is built to serve as a multipurpose sales banner that can easily be updated with new text and section background images for a completely new look. You can even add a video background as well!
I look forward to hearing from you in the comments.
Cheers!


JUST A TIP FOR THE PEOPLE WHO FOLLOW THE INSTRUCTIONS TO CREATE THEIR OWN BANNER AND NOW DOWNLOAD THE PRE-MADE ONE:
In the section:
Styling the Middle Row
The final phase of this design is to add a border to the middle row and a screen blend mode effect. To do this, open the middle row settings and update the following:
Blend Mode: Screen
For those who do not know, this blend mode is in the
ROW SETTINGS / FILTERS / BLEND MODE
Ok with that 🙂
Not only with web design, you teach us with banner design all the secrets of Divi! Thanks a lot!
Beautiful design, and I appreciate the tutorial for recreating it! Thank you very much!
I love the effect of the design of the text and the line, thank you very much, I will certainly use it in my next web design, greetings from Asturias.
As it says on the tin – a handy, versatile thing – ta
Why would you want to buy stuff that fell and was broken??
haha …not everything that falls breaks 🙂