

Divi and its Drag and Drop File Upload feature can be a wonderful tool to boost productivity as a web designer. In this tutorial, I’m going to walk you through 6 ways you can use the drag and drop feature to improve your Divi design workflow. I’ll be giving you some helpful tips, examples, and bonus code snippets along the way as well. If anything, it is always fun to drag and drop files just to see what happens.
Let’s get started!
- 1 A Brief Overview of Divi’s Drag & Drop File Upload Feature
- 2 #1 Drag in Custom CSS Snippets to Your Page as Needed
- 3 #2 Drag and Drop Custom Fonts to Your Page and Quuickly Replace Current Fonts
- 4 #3 Drag and Drop Multiple Images to Create Instant Photo Galleries with Titles
- 5 #4 Drag in MP3 Files to Your Page with a CSS file to Jumpstart the Design
- 6 #5 Create Reusable Blocks of Code that Can be Dragged into Your Page for Instant Implementation
- 7 #6 Create a Library of Divi Page Layouts (json files) on your Hard Drive to Drag into your pages for Faster Development
- 8 Final Thoughts
A Brief Overview of Divi’s Drag & Drop File Upload Feature
The Drag & Drop File Upload feature is an easy way to add content to your page when using the Divi Builder. As the name suggests, you can drag and drop files onto your page to add content without the normal process of setting up your section, row, and module beforehand. And Divi will place content differently depending on the file type. For example, txt files will be added to text modules, html files will be added to code modules, and css files will be added as custom CSS to your page.
Supported File Types and Their Drag & Drop Behavior
Here is a list of all the file types currently supported by the Drag & Drop feature. This may come in handy when thinking about ways you can take advantage of the feature in your design process. I’ve also added a brief description to help you understand what will happen when dragging in these file types.
Image Files
- gif
- jpeg
- jpg
- png
When dropping in a single image file, Divi will create a new section and one-column row and then add an image module with your image already uploaded to the module.
When dropping in multiple image files at once, Divi will create the same structure (new section and row) but will add your images to a gallery module.
Text Files
- txt
Dropping in a txt file will add the text to a new text module inside a new section and row.
Font Files
- otf
- ttf
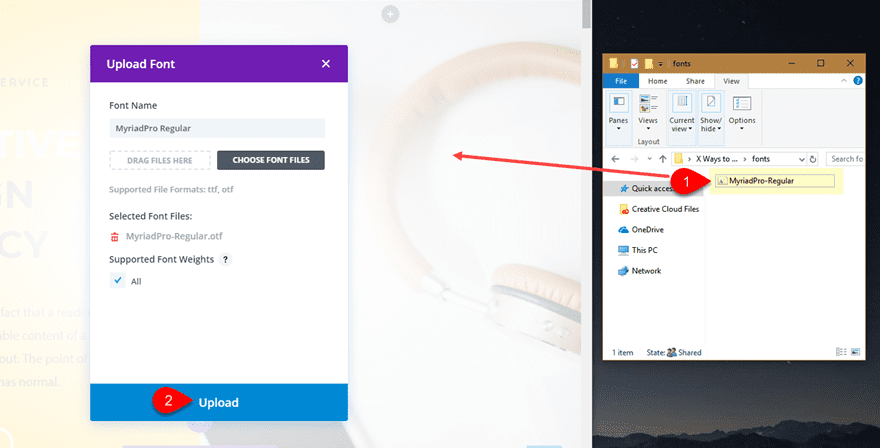
Dropping in a font file will initiate the Font Upload popup modal with your font name and font already loaded. All you need to do is confirm that you want to include all supported font weights before clicking the upload button.
Video Files
- m4v
- mov
- webm
- wmv
- mp4
Dropping in one or more video files will add each video to a new video module inside a new section and row.
Audio Files
- mp3
- wav
Dropping in one or more audio files will add each audio file to a new audio module inside a new section and row.
Web Files
- json
- html
- css
The json file is for any page layouts that you have exported. Dragging in the json file will automatically load the page layout to the page.
Dragging in an html file will add the html to a new code module inside a new section and row.
Dragging in a CSS file will automatically add the css code to the custom CSS for your page, which can be found under the advanced tab in your page settings.
Overall, the process is intuitive and has some great possibilities for improving workflow. Let’s get into some of the ways you may use the feature.
#1 Drag in Custom CSS Snippets to Your Page as Needed
Most of you Divi users out there love Divi specifically because you don’t have to use custom CSS. It is what makes Divi so great. However, when it comes to WordPress Theme customization, custom CSS (even within Divi) is still a valuable asset.
Like any good web developer, you should be saving your CSS snippets along the way so you can easily access them for future projects. This will not only make you more proficient in building websites, it will also allow you to take advantage of Divi’s drag & drop feature.
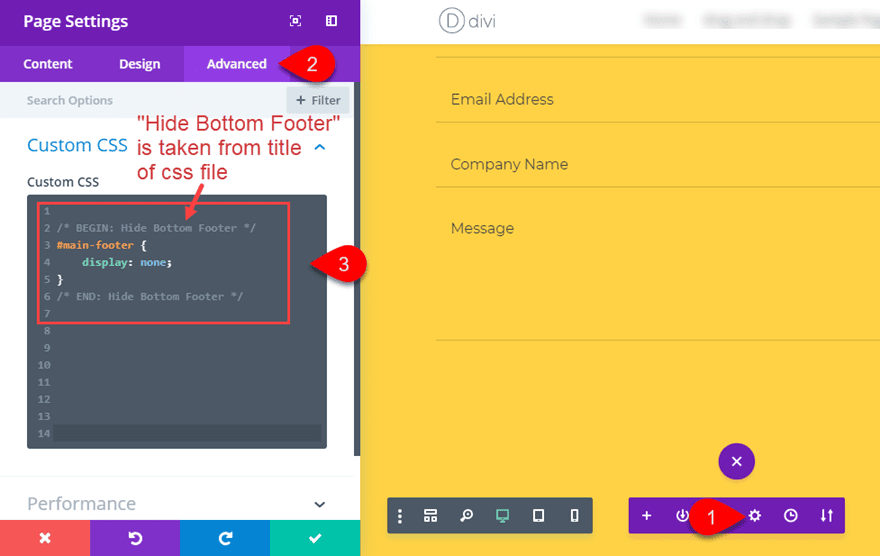
For instance, say you have a CSS snippet for hiding the bottom footer bar on your Divi page. If you save that snippet as a css file with the title “Hide Bottom Footer”, you can then grab that file and drag it to your page for instant results.
Divi Automatically Organizes Your Snippets with Each Drop
With each css file you drag to your page, Divi will extract the CSS and add it to your page. You can view this custom css at any time under the advanced tab of your page settings.
You will also notice that Divi will smartly organize your css snippet by wrapping it with comments. If you don’t know, comments are used within code to easily identify and/or describe certain blocks of code. Before your CSS snippet, Divi inserts a comment with the text “Begin” followed by the title of your CSS file, “Hide Bottom Footer”. After the snippet, Divi inserts another comment with the text “End” following by the title of the file.
Here is an example of what a snippet would look like in page settings after dragging in the “Hide Bottom Footer” CSS file.
/* BEGIN: Hide Bottom Footer */
#main-footer {
    display: none;
}
/* END: Hide Bottom Footer */
For those of you who don’t know how to create your own css, you may rely on those helpful tutorials out there on the web that provide it for you. That’s cool. We all do it. But if you want to take advantage of the drag and drop feature, you may want to start saving those snippets as indivdual files and naming them accordingly. That way each snippet is only a drag and drop away.
Two Examples of CSS Snippets You can Use for Hover Animation
With CSS, the possibilities are almost endless. But I thought I would give you a couple of examples of css snippets you can save to your library that will add animation to your site.
Save the following css snippet as a “.css” file (name it something like “Scale Icons on Hover”).
.et-pb-icon {
  -webkit-transition: all .2s ease-out;
  -moz-transition: all 0.2s ease-out;
  -ms-transition: all 0.2s ease-out;
  -o-transition: all 0.2s ease-out;
  transition: all 0.2s ease-out;
}
.et-pb-icon:hover {
-moz-transform: scale(1.2);
-webkit-transform: scale(1.2);
-o-transform: scale(1.2);
transform: scale(1.2);
}
Then save this following snippet as another “.css” file with the name “Blurb Shadow on Hover”.
.et_pb_blurb:hover {
    -moz-box-shadow: 0px 0px 20px #ccc;
    -webkit-box-shadow: 0px 0px 20px #ccc;
    box-shadow: 0px 0px 20px #ccc;
    -webkit-transition: all 0.5s;
    -moz-transition: all 0.5s;
    transition: all 0.5s;
}
Once you have both files saved to your computer. Select both of the files and drag them onto the page. You can of course drag only one if you want, but I thought I would show you that it works with multiple files as well. This will immediately cause all blurb modules to have a pop-up effect by adding a box shadow on hover. It will also cause all blurb icons to scale (get larger) when you hover over them.
Pretty cool stuff.
And you can imagine how helpful it will be once you have an arsenal of these css files at your disposal.
#2 Drag and Drop Custom Fonts to Your Page and Quuickly Replace Current Fonts
If you build websites, you are familiar with the need to have a wide selection of fonts available. Divi has hundreds of fonts built in to the Divi Builder which makes things a lot easier. And you can always use the option to upload new fonts from within the Divi Builder. But with Divi’s new Drag and Drop functionality, adding new fonts to your site is ridiculously simple.
Let’s say you are using one of the premade layouts but would like to try out a new font that Divi doesn’t already have available. Here is how easy it is to change the font:
Make sure the visual builder is activated and you have your premade layout uploaded. Then all you have to do is drag your font file from your computer onto the page/visual builder inside the browser window. Then click the upload button.
Drag & Drop with Find & Replace is a Powerful Combo
To take it one step further, you can use Divi’s Find & Replace feature to replace the font used in the premade layout headings with the new font your just dropped in.
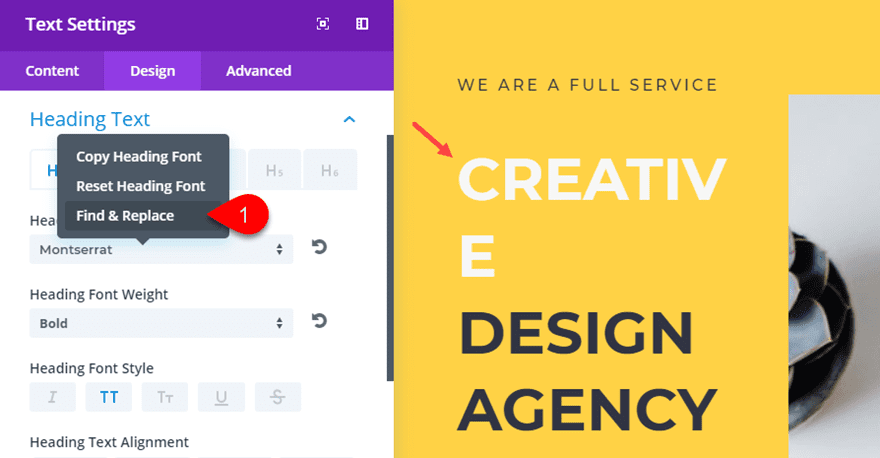
Using the Creative Agency Landing Page layout, open the text module containing the header text in the top section. Then right click on the heading font option. In the right click menu, select Find & Replace.
In the Find & Replace popup, select your new font under the “Replace With” option and click the blue Replace button.
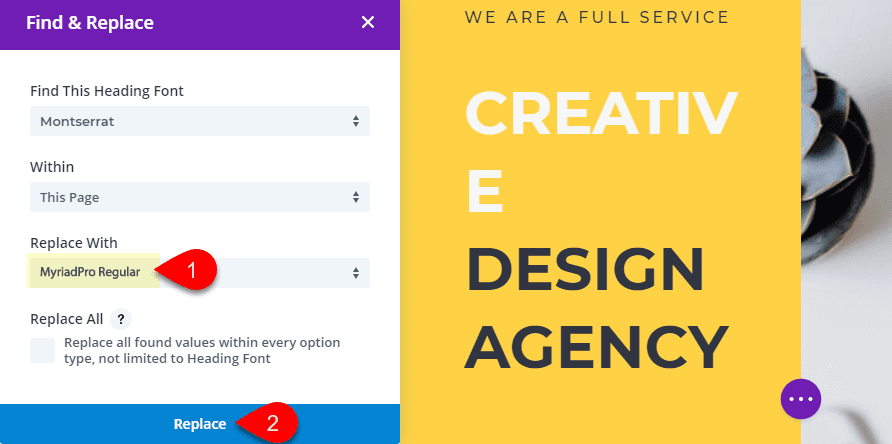
Now all your headers have the new font in place!
#3 Drag and Drop Multiple Images to Create Instant Photo Galleries with Titles
Divi’s Drag and Drop functionality allows you to drag images to your site with ease. This really comes in handy when building websites with a lot of images. And since most people keep saved images in a folder on their computer, it is extremely convenient to be able to select those images and drag them into your page.
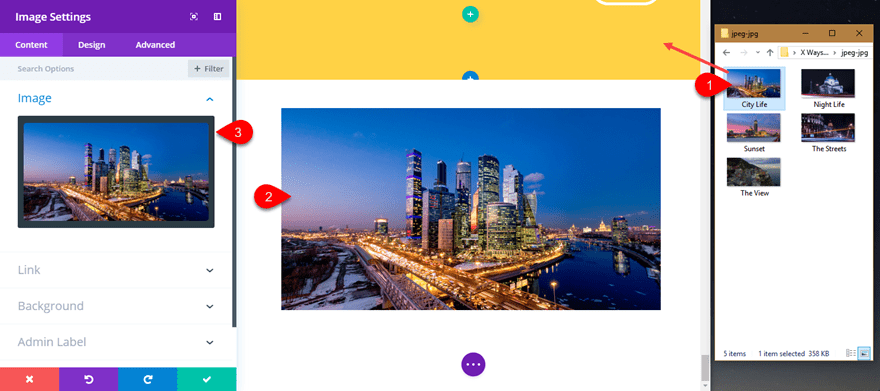
Here is how it works when dragging and dropping in a single image.
When you drag a single image over to the visual builder, it will automatically do the following:
1. Create a new regular section with a one column row
2. Add an image module to the row
3. Insert the image into that image module
4. Open the image settings as a convenience to start the editing process.
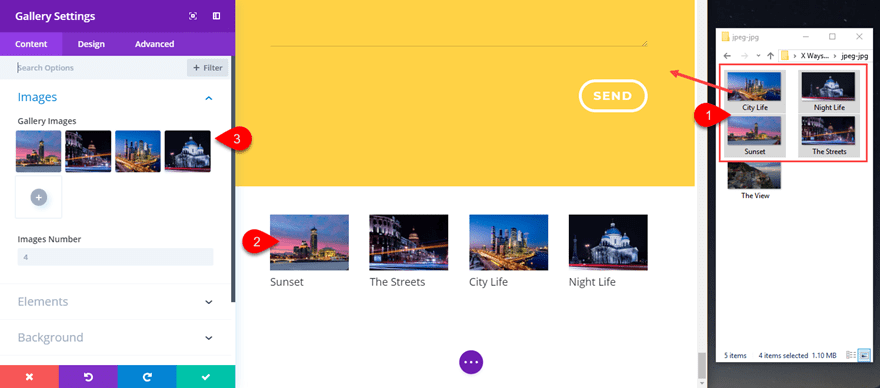
Here is how it works when dragging in multiple images.
When you drag in multiple images into your visual builder page, Divi will automatically do the following:
1. Create a new regular section with a one column row
2. Add a Gallery Module to the row
3. Insert the new images into the Gallery module
4. Open the Gallery Module settings to help jumpstart the editing process.
Prepare Your Images Before Dragging Them to Your Page
In order to make sure your image gallery looks great, it helps to perform a few optimizations beforehand.
Image Size
First off, make sure your images are all the same size. I would suggest using images that are around 1500px by 800px. This provides a nice size for the images when they are deployed in a lightbox. Also, Divi will use a smaller version of the image for the thumbnail in the gallery. While we are on the subject, it might help to review some recommended images sizes for Divi Modules. After that, you can shrink the file size a bit more by dragging it into TinyPNG or use your photo editor to save it for web specifications.
Image Titles
By default, Divi will display the title of your image under each thumbnail in your gallery. So, it makes since (if you want this title displayed), to give your images a the correct title before dragging them over.
#4 Drag in MP3 Files to Your Page with a CSS file to Jumpstart the Design
For you podcasters out there, this could definitely boost productivity. Since Divi’s Drag & Drop feature supports mp3 and wav file formats, you can easily drop those into the builder to jumpstart the building process.
When you drag a single mp3 or wav file into the page, Divi will automatically do the following:
1. Create a new regular section with a one column row
2. Add a new audio module with your audio file attached
3. Open the autio settings modal to begin the editing process.
When you drag multiple mp3 or wav files to the page, Divi will do the same thing it does when dragging a single audio file over, except it would do this multiple times. So if you drag in 4 audio files, Divi will create 4 different sections with a one column row containing the audio module with the audio file attached. The audio setting modal will also pop up to start editing the last audio module added to the page.
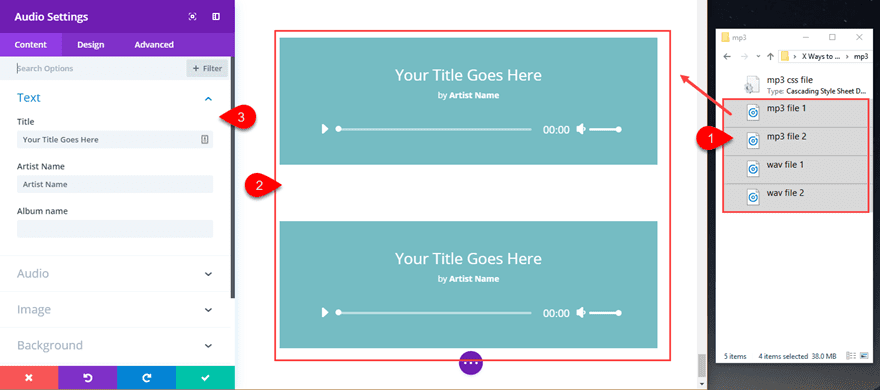
Drag in a CSS file to instantly style all audio modules at once
If you are accustomed to using custom CSS to add additional styling to your Divi pages, I suggest that you save those snippets in a css file to be used for future builds (although I’m sure you already knew that). So if you have a css snippet to style audio modules a certain way, save that css in a separate css file. Then you can simple drag that css file into the page to instantly style all of your audio modules.
The CSS I used in the illustration above is a quick example, but if you want to try it out, copy the following custom CSS:
.et_pb_audio_module_content h2 {position: absolute;
    top: -40px;
    background: #c5310d;
    padding: 0.6em;
    left: 50px;}
.et_audio_module_meta {
    position: absolute;
    bottom: -45px;
    right: 30px;
    background: #c5310d;
    padding: 1em !important;
}
.et_pb_audio_module {
background: #888 !important;
}

.et_audio_container .mejs-playpause-button button:before, .et_audio_container .mejs-volume-button button:before {
    color: #c5310d;
}

.mejs-time-handle-content {
    border: 4px solid #c5310d;
    height: 14px;
    left: -7px;
    top: -6px;
    width: 14px;
    background: #c5310d;
}
.et_audio_container .mejs-controls .mejs-time-rail .mejs-time-total
{
background: #222;
}
Then paste it into a text editor and save it with a css file format (it must have the extension “.css”). Once you save it to your computer. Drag it into the visual builder containing your audio blurbs.
#5 Create Reusable Blocks of Code that Can be Dragged into Your Page for Instant Implementation
Divi’s Drag & Drop feature does support CSS and HTML files (sorry no javascript files allowed). Although for those who know what they are doing, you may be able to add scripts into the HTML file that will add that javascript functionality for you. But this does leave opportunity to combine these files to create useful blocks of code that you can drag into a page for instant results.
Example 1: Drag and Drop Exported Code Pen files to your Page
If you are a fan of codepens, you may already be setup for some useful drag and drop magic. Before you get too excited, I must warn you that in order to create files that will instantly effect your site when dragging them in, you will be limited to codepens that use a combination of html and css only.
Here is how this process may work for you.
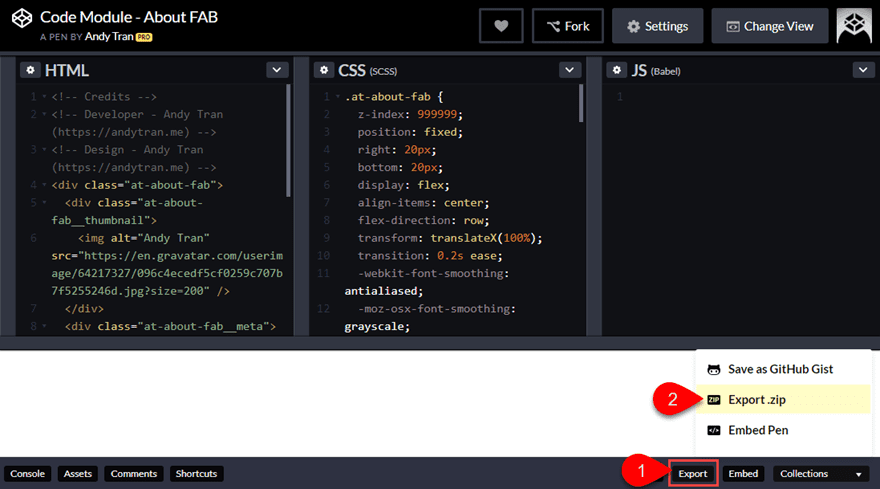
Go to the page that features the Codepen you want to export and click the export button at the bottom right of the page.
Extract the files on your computer and locate the html file and the css file. Use a text editor to view your html file and take out all the tags that you don’t need (doctype, html, header, body) so that all that is left is the html that you see in the the html box of the codepen. Then save the file.
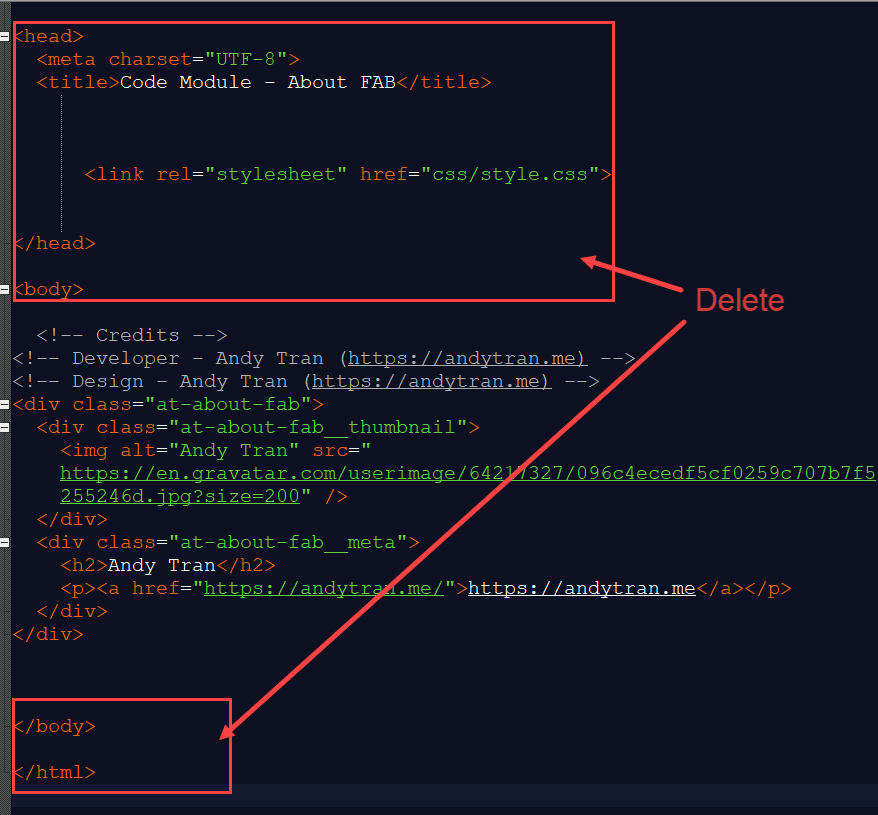
In fact, for the HTML file you may be better off just copying the HTML directly from the pen and creating your own html file.
Now find the CSS file (should be located inside the CSS folder). Make sure you use the CSS file and not the SCSS file (This filetype isn’t supported by the Drag and Drop feature).
Now drag both files into the page with you visual builder active.
This is what happens automatically:
1. Divi creates a new section with a one-column row.
2. Divi add a code module to the row with your html as the content.
3. Divi adds the custom css to your page settings custom CSS block.
If you get an error, that means either you don’t have the right file type or the content of the file has code that is unsupported. For example, if the html file has the doctype and html tags, the file will not work. Also, if your css file has SCSS code, it may also trigger an error.
Granted, this is not the smoothest process initially. You will have to organize your code and files a bit. So if you aren’t familiar with html and CSS this may be a struggle. But the end result could prove very valuable in that you will be able to stock up on some reusable blocks of code that are only a drag and drop away.
I should also note that you should be familiar with Codepen’s licensing before copying code that isn’t your own.
Example 2: Drag and Drop Isolated Instances of Font Awesome to Your Page
If you are accustomed to using Font Awesome on your Divi site, you may benefit from a have a few “drag-ready” files on hand that will allow you to insert Font Awesome instances to your page. This can actually be done with one single HTML file.
Here is how this process may work for you.
Grab the Font Awesome script from their website. Make sure it is the SVG + JS version. Then copy the script to your clipboard.
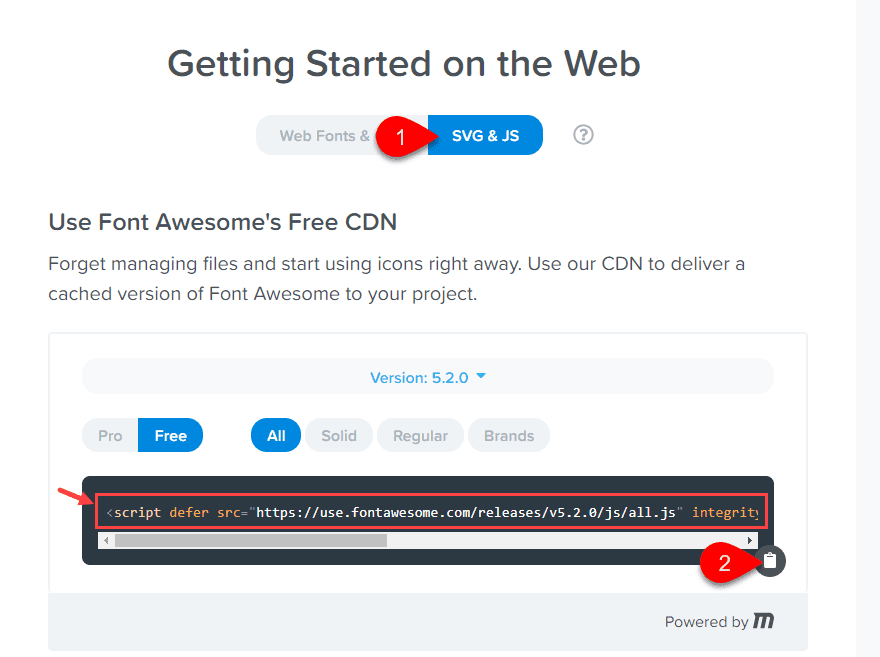
Then create a new text file and paste in the code. Under the script, add the the html and font code you want to deploy to your page.
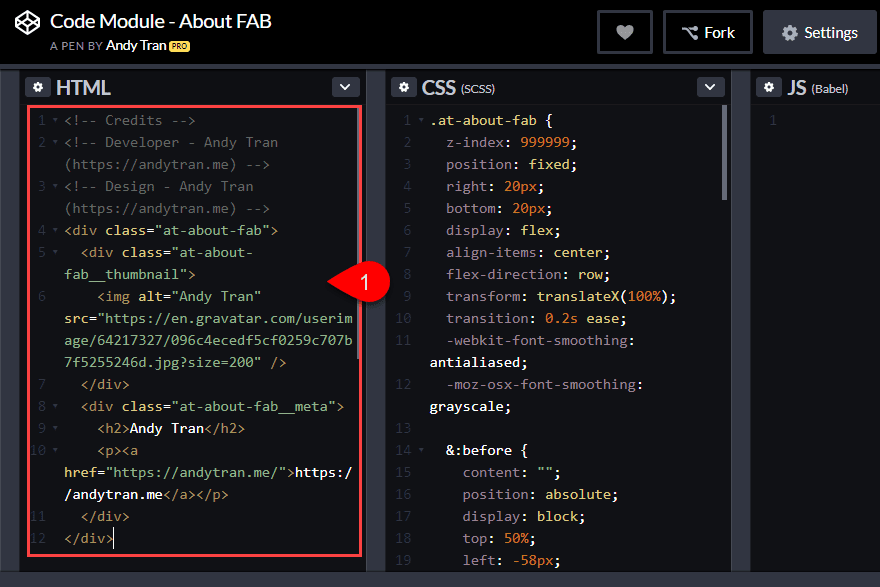
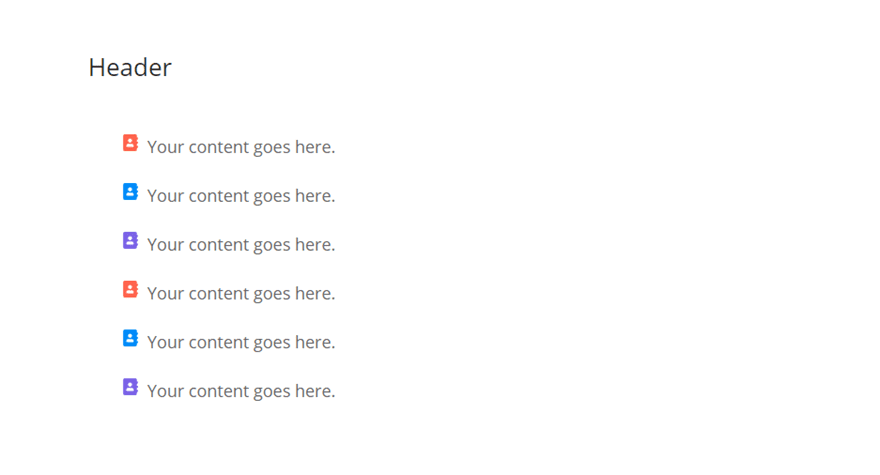
Here is an example of a “drag-ready” html code with a list using font awesome icons:
<script defer src="https://use.fontawesome.com/releases/v5.2.0/js/all.js" integrity="sha384-4oV5EgaV02iISL2ban6c/RmotsABqE4yZxZLcYMAdG7FAPsyHYAPpywE9PJo+Khy" crossorigin="anonymous"></script>

<h2>Header</h2>
<ul class="fa-ul" style="list-style:none; font-size: 18px">
<li><i style="color: Tomato; " class="fa-li fas fa-address-book"></i>Your content goes here. </li>
<li><i style="color: Dodgerblue; " class="fa-li fas fa-address-book"></i>Your content goes here. </li>
<li><i style="color: Mediumslateblue; " class="fa-li fas fa-address-book"></i>Your content goes here. </li>
</ul>
Make sure you save your file as an html file. Then drag it into your page with the visual builder.
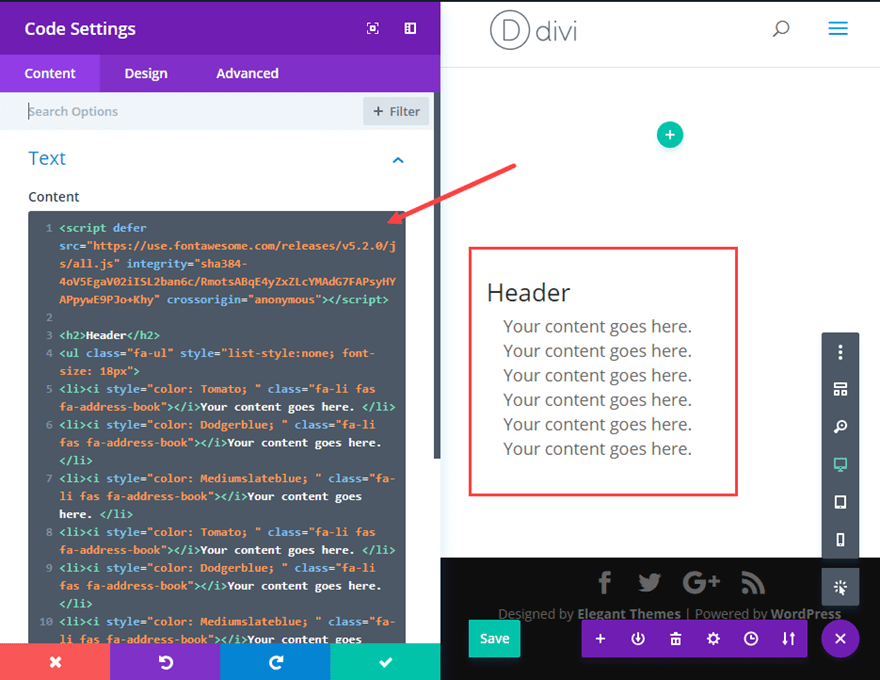
Divi will automatically add the html to a code module for you and now you have a font awesome list ready to edit for your page.
You are probably wishing that the list was put in a text module so that you can use the text settings the content. But since this doesn’t happen automatically, you may want to limit your html file to include the script. And then paste in your html to a text module. But for those of you who have a css file on hand to handle the design, it is nice to be able to drag that in with your html file.
#6 Create a Library of Divi Page Layouts (json files) on your Hard Drive to Drag into your pages for Faster Development
With Divi, you can easily save and export entire page layouts that you have designed. There are two really big benefits to this functionality. The first benefit is having the ability to save page layouts inside the Divi Library to help speed up the design process when building a website. The second benefit is having the ability to export page layouts to your own computer. This allows you accummulate a valuable collection of page layouts (json files) to kickstart your next project.
And the new Drag and Drop feature allows you to quickly drag in those saved layouts to the visual builder for even faster development.
Here is how this process might work for you.
Let’s say you want to save only the header section of the Design Agency Landing Page layout (This could be any design you like, but for this example, I’m using a premade layout). Once you load the layout to your page, delete every section in the layout except for the top header section. Then you would export the layout to your hard drive.
To export a page layout using the visual builder, open the settings menu and click the portability icon. Then in the portability popup, enter a name (“Design Agency Header Layout”), and click the Export Divi Builder Layout button.

This will save the layout to your computer as a json file.
Now if I delete the header section on my page so that my page is now empty of any sections, I can easily add that header back to my page by dragging the json file into the page.
When I drag the json file, the portability modal pops up autmatically to allow me to choose the option to replace existing content, or create a backup beforehand. Since I don’t need to replace any content, all I have to do is click the import button and it is instantly loaded to the page.
This may not seem all that impressive, but it has the possibility of really speeding up the design process. If I had a large collection of json files with different page layouts (each with specific elements I liked). I can then use those files like building block and drag them onto the page one by one. Just make sure you are descriptive in the titles you give them when exporting them.
Final Thoughts
Divi’s Drag & Drop feature can definitely be a useful tool for boosting your web design workflow. There are some limitations that may cause some frustration at first, but hopefully this article will help you understand how to capitalize on this feature to create a personal library of draggable files that will increase your productivity in web design.
I would love to hear your own ideas in the comments below.
Cheers!


This is a pretty cool feature, especially CSS integration. Only thing I’m wondering about is whenever I add a photo to media on the desired page rather than dragging and dropping, it still automatically adds a new section and module with the photo. I’d rather not have to delete sections every time I add a photo to media, even when not using the drag-and-drop feature.
Is there a way you can eliminate this from happening? I pretty much just don’t want a new section and module every time I add a new image since it’s been slowing things down when designing sites.
The only real use I could ever see for this feature is dropping photos quickly. I write all of my own code and use a child-theme. Adding the code to each page would ruin load speeds unless it is sending the CSS to an external file and not embedding it in the head of the site for each page. Not to mention if it is sending it to an external file, why would you need to add the CSS to every page that you want it on? This is defeating the purpose of CSS. I can make changes faster through my child-theme and reuse them on any other site quicker than the JSON backups can be exported and imported. I guess this is just another feature for the wannabee web designers. This doesn’t give me any true advantage. It feels more like it is just causing bloat for no real reason.
A certain amount of truth in this.
I keep saying that ET needs to take a break for a week or two from the feature updates and address a pile of the small but important things that many keep highlighting for the last number of years.
Game changing! Looking forward to testing these out.
Hi! This post deserves a video demonstration in my humble opinion to ilustrate live how the drag and drop works live! Thanks!
A great extension to this, if the ET devs are up to the challenge, would be say you drop 4 images a dialogue asks if you want a gallery or slider.
Yes. That is a good idea. Thanks for the suggestion.
I use WP Engine to host and I have to manually edit my .htaccess file everytime to get the drag and drop image upload feature to work (I get a http error from the media upload screen). It’s a huge pain and keeps me from doing a lot of layout in the visual builder.
I’m sure there are a lot of people using WP Engine/Divi combo. You guys should look into that.
Thanks for letting us know Elliott.
The most common cause of this error is the lack of memory available for WordPress to use. To fix this, you need to increase the amount of memory PHP can use on your server. This has happened to me in the past. I just called my hosting provider, told them what my problem was and bumped the memory up to 256 and that fixed it. Haven’t had an issue since. Also, make sure you are using the current PHP version, should be 7. something.
Impressive…
This is all a point-n-clicker/drag-n-dropper like me can say, because you my friend are far beyond my abilities.
Thanks Frank!