

Have you chosen WordPress as your website platform? If so, you’ve made a fantastic decision! WordPress is not only a very user-friendly platform but it’s also straightforward to install. You don’t need great technical skills or a degree in computing to install WordPress – simply follow my walk-through and you’ll have it ready to go in no time.
WordPress 5 Minute Install – Is it Really That Simple?
A speedy installation process will sound very appealing to the majority of users but does WordPress’ 5 Minute Install live up to its claims? Well the truth is that yes, the 5 minute installation process is super quick; however beginners may struggle to understand some of the terminology used on the WordPress Codex page. With this in mind, I decided to pick apart the 5 minute installation process and offer a step by step guide for those who may not know all of the technical terms.
What You Will Need First
Before you get started, you’re going to need to collect a few tools and some information to give you a helping hand. The process will involve moving data from the WordPress.org website (where the core software is located) to and from your computer. You will also be moving it to your server, which is where your website files and database will live.
Hosting Information
To complete the installation, you’ll need your hosting information. When you signed up for your hosting account, your provider should have sent you an email containing the information that you’ll need to connect to your server. Popular WordPress hosts include HostGator, BlueHost, and DreamHost.
Text Editor
You’re also going to need to edit some files (containing code) so you’ll need software that is capable of making and saving these changes. This is what’s known as a text editor. There are a number of free text editors available, such as NotePad++ (for Windows) and Text Wrangler (for Mac).
FTP Client
As I mentioned above, the installation process is going to involve moving data from one place to another, so you’ll need FTP software. This type of software is known as an FTP (File Transfer Protocol) client. FileZilla from Mozilla is the most popular choice, as it works for both Windows and Mac and is free to use.
Web Browser
Finally, you will need a browser that lets you access the internet, such as FireFox, Chrome, Safari and Opera. You can also use Internet Explorer but please make sure you are using the latest version.
The Steps
Step 1
The first step involves downloading the WordPress package. As long as you are downloading the WordPress software from the official WordPress website, there’s no real need to worry about viruses or malware. The address for the WordPress official download service is https://wordpress.org/download/
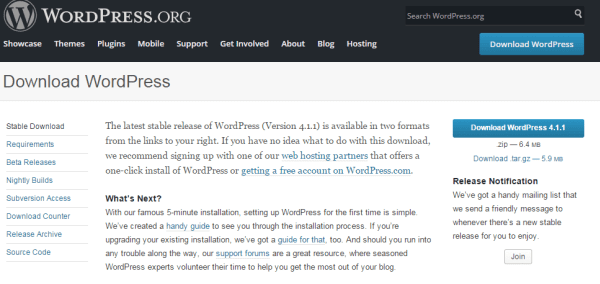
When you press download, it’s important to make note of where your download is saved. Unless you’ve configured the settings of your computer, it’s most likely to be in the Downloads folder. Once you’ve located it, you’ll be able to unzip it later on.
Step 2
The next step is to create a database for WordPress on your web server, in addition to a MySQL user, who will be able to access and modify it.
Don’t panic – I’m going to break it down for you. Keep in mind that your database will live in one area of your server, while your files will live in another. At the moment we need to be concentrating on where the database will live.
You’ll be able to find your server by following the directions that your hosting provider sent over to you in an email. Simply type the URL into your browser and you’ll be taken to the login page, where you can type in your username and password. Click the submit button and you’ll be taken to your server.
Now, all servers are slightly different, so it may take you a minute to find the place where you need to create a database. Simply look for somewhere that says “databases” or “MySQL databases.”
The next part involves filling out some information that will create your database and set the privileges. My advice is to keep a copy of the information you type in, as you’ll need some of it later on to complete the WordPress 5 minute installation. The sections you’ll need to fill in include:
- Database name
- User information
- Password for user (make it unique and strong)
Afterwards, you’ll need to select the permission privileges for the user account you have just created. This will involve clicking on your database name, selecting Add to open the privileges page and checking All privileges. Once you’ve done that, simply click Make Changes and your database will be complete.
Step 3
The next task the WordPress Codex instructions will ask you to do is rename the wp-config-sample.php file to wp-config.php. Don’t worry; this isn’t as scary as it sounds. Let me talk you through it.
Remember when I told you to note down the location of the WordPress package you downloaded in step 1? Well now you need to find it and unzip it! Simply click on the file and unzip it. You can then double click on the WordPress folder to reveal all of its contents. These files are required to get WordPress to work.

While there will be many files in front of you, the only one you need to concentrate on at the moment is the one that says wp-config-sample.php. Now place your cursor over the file name and click just before the extension (.php) and delete the letters and hyphen to leave the desired file name. Press enter and the change will be complete.
And that’s step 3 completed – I told you there was nothing to be worried about!
Step 4
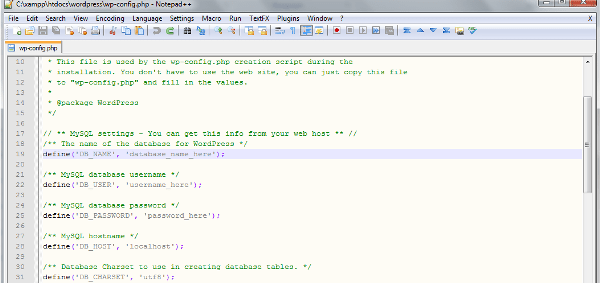
The next step that WordPress.org will ask you to do is open the wp-config.php file in a text editor (NotePad++ or Text Wrangler) and fill in your database details to generate a secret key password.
So for this section you will need your text editor (which should be downloaded on your computer) and the database information I asked you to write down (full database name, full username, and password).
First find the config.php file on your computer – unless you’ve moved it, it’s likely to still be sitting in your WordPress folder in Downloads. Once you’ve located it, right click on it and look for Open with. Click on it and locate your text editor. The program will then open up on your computer.
Right now you’re probably thinking, “I don’t understand any of this gibberish,” but don’t worry, you don’t really need to. Trust me; the code isn’t as bad as it looks!
All you need to do is find // ** MySQL settings – You can get this info from your web host ** // and you will see it says
- Database_name_here
- Username_here
- Password_here
These are the bits you’re going to edit:
- Where it says Database_name_here you will need to paste your full database name.
- Where it says Username_here, you need to paste your full username.
- Where it says password_here you need to paste your password.
Make sure you keep the single quotation marks (‘’) around each one. Once you’ve done this click Save.
You can leave the editing here but it is recommended that you make one more edit, which will add another layer of security to your WordPress website. All you need to do is look for *Authentication Unique Keys and Salts. Next click on this link to generate your own unique salt keys (it’ll do it automatically). Copy the entire block of text and paste it into your file where there are a number of rows saying define at the start. Press Save to complete step 4.

Step 5
This step involves uploading your WordPress files to the right location on your web server, which may sound a little daunting but I’ll show you where they need to go below.
Here’s what you’re going to need to do:
- Locate the WordPress files (from your WordPress folder in Downloads)
- Move the files from the computer to your server using the FTP client tool
Look at your WordPress files and you’ll see there are three folders (wp-admin, wp-content, and wp-includes), as well as a number of WordPress files. The WordPress website address will be determined by where you place these folders and files on your server. This will also build the path your visitors will be taken on to reach your website.
Most people want users to reach their main page first e.g. http://yourdomain.com/. This will create the shortest path to your content.
So now you’ve sorted that in your head, you can open your FTP, which if you’ve followed this walk-through since the first step is likely to be FileZilla. You will then need to configure your FTP settings in order to connect your server with your computer. Start the process by typing in the same information that your hosting provider sent you in an email. If you struggle with FTP access, it’s best to get in touch with your hosting provider and let them know that you haven’t done this before, so they can walk you through the process.
Once correctly configured, your FTP software will show a list of the files on your computer on the left side of your display and the list of the files on your server on the other side. The idea is that you are going to find the right files on your computer and move them over to the right level directory on your server to create the path you want your visitors to take.
First you need to locate the WordPress files on your computer. Go to Downloads > WordPress. On the other side of your screen, you need to find the location where you want your WordPress files to live. In most cases the root level directory will be in the public_html directory. This is something you may need to check with your host.
From there, you will need to select all of the WordPress files and folder from the computer side and drag and drop them into the Remote (My Server) window of your FTP. The FTP client will then begin moving all the files. As they move across, you’ll see them being added to the server side. Once your file transfer has finished, the FTP client will let you know and step 5 will be complete.
Step 6 – The final step
You’ll be pleased to hear you’ve reached the final step! The last task you’re going to need to do is execute the WordPress install script. This can be achieved by accessing wp-admin/install.php through your web browser. You will need to type your path into your browser using your site information. The path will be http://yourdomain.com/wp-admin/install.php. Obviously you need to replace the yourdomain bit with your actual domain name.
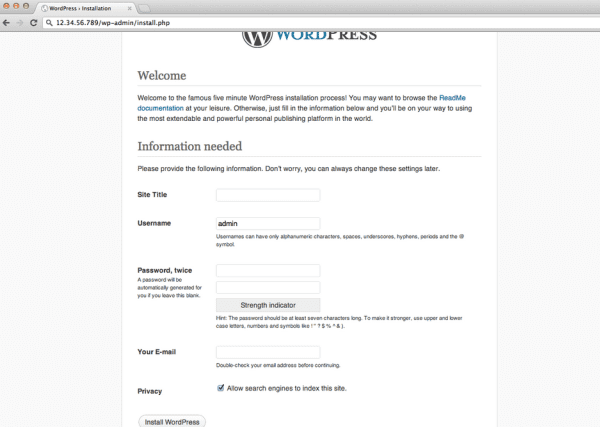
From there you will need to complete the form with information you want your new website to display, such as your site title. You’ll also need to change the username. Don’t keep it as admin as this can make you vulnerable to being hacked.
The information you input for your username and password will be the same you use to login into the admin / backend of your site. Choose a password (make sure it’s strong) and pick a valid email address. WordPress will email you from time to time with important information that can help improve your website.
You’ll then need to choose your privacy. Make sure that the box is checked to allow search engines to index your site. If you uncheck it, search engines won’t crawl or index your site and you’ll struggle to get organic search traffic.
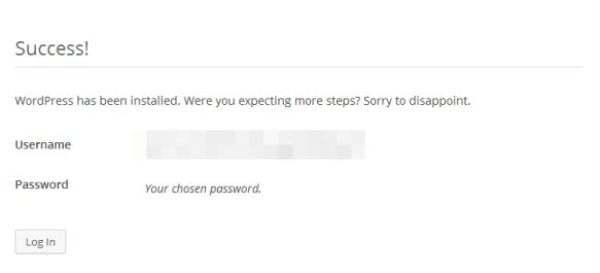
Now click on the Install WordPress button and a page will show up saying that you’ve successful installed WordPress. Congratulations!
After this you will be able to verify your username and then use your password to gain access to the backend of your WordPress website.
And that takes just 5 minutes?
You’re probably wondering how on earth all that takes 5 minutes but trust us it will be super quick! As a beginner, it may take a little longer but it’s still going to be very speedy compared to other methods of installing WordPress.
Article thumbnail image by zaniman / shutterstock.com


Quite frankly I think your post complicates things. The 5 minute install by WordPress is fine. Don’t try and mess with it.
Hi Brenda,
Let me first say, what a great piece of content you have written, well crafted and good use of images to encourage the reader to continue reading below the fold.
Great read and I thoroughly enjoyed it, it’s a shame the content was slightly outdated.
But I think some of the comments were a bit harsh – Let me explain:
It’s easy for us seasoned marketers to say there’s an easier & faster way to accomplish this task but we’ve gone through this process countless times.
I know the steps like the back of my hand…
Buy New Domain
Change nameservers to existing hosting account
Log into CPanel
Add an add-on domain
Create site email
Install WordPress – 1 click process
Done in this order I know when I visit the site after going through this list, I will see the default WordPress template, live on the internet.
However, when I did this for the first time, I had to get someone from my hosting company to help me install it.
I wish this content existed when I was setting up my first WordPress site, Maybe it was, I just hadn’t discovered it yet.
This post will help newbies understand the process of installing WordPress so if they have any issues later down the line, they will have a good idea where in the process the problem lies.
I recently wrote a post talking about why I use WordPress for my CRM and linked to you as a resource for quality WordPress information…
You can check out the post below:
http://clicksendcash.com/how-to-start-from-scratch/the-beginning/
My first install took about 40 minutes. I was reading a how to book on my Kindle and I read and reread the instructions just to make sure I got it right.
Now, I can do an install in about five minutes. The biggest issue is making sure I have the right database name, user name and password.
I still get a charge of seeing that after the final step is a new website. The feeling never gets old.
no – that’s not true. I did about 100 WP installations so far and if you know what you are doing it takes about 15-20 minutes…
Actually, if you look closely at the screen in Step 6 – The final step, THIS is where the ‘Famous Five Minute Install’ starts! 🙂
Talking about the fast installation of WordPress can’t hide the fact that a real complete installation of a Website using WordPress asks a few days or more depending on the project. Drupal and Spip are also installed in 5 minutes but are much more harder to customize.
Fast and easy to customize , that’s the real advantage of WordPress in my humble opinion 🙂
WP Install sounds very promising, but I wasn’t able to get it working on a Godaddy account. All I got was a short flurry of error messages – mainly regarding insecure file/folder permissions. Then Godaddy guys help me out and working perfectly now.
I had the same problem with Godaddy and aren’t really a fan of this webhosting. But they developped a plugin called “P2 by Godaddy” wich helps you to manage the memory occupation of your plugins. A lighter WordPress installation is always something good for a web hoster like Godaddy 😉
Thanks for letting me know about this solution.
Why let newbys any where under the hood or near MYSQL etc. Most hosts have a one click quick install.
The thing that takes the time with creating lots of WP sites is removing the bloat of stuff included in the standard install. Isn’t time for a diet?
Anybody for a WP Pro which is lite on Jet Pack etc.
Maybe an article would be starting point.
I’m using another faster way: once you have at least one wordpress website installed. I use DUPLICATOR plugin. It reinstalls all plugins and settings that I need (or not). It only requires to create database + access and upload Duplicator files on your hosting root.
I use a hosting service that does not give immediate access to create the database. I have to send a request and they always respond quickly that it has been set up. Once everything is in place, the install goes like a flash. Although there may be more WordPress friendly hosts, these guys are local and I have worked with them for many years.
Brenda, I forgot to thank you for such a detailed and easily understandable post. It is very helpful helping to guide people through what is incorrectly perceived as a complicated process.
Yep, some of the steps here are out of date, as others are noted.
Perhaps the author has done it this way from older versions of WP and has not kept up to date with more recent releases…
Cheers, Dave
Thank you for this. Detailed and easy-to-follow. I have been a WordPress user for years and always recommend it but don’t always have time to explain to people how to install it. Now I have a place I can direct them!
My first WordPress install took about ten minutes. Then about an hour of re-installing, Googling, and trying to figure out what I did wrong. . . followed by about two minutes on the phone with my web designer friend, about half an hour cutting and hanging new drywall in his laundry room, and about twenty minutes for him to patiently walk me through how it all worked.
My second WordPress install took me 10-15 minutes. Once you learn how to do it, it’s pretty straightforward, even for a beginner. Sure, most hosting options can do it for you, now, but why not take the time to learn how it all actually works?
There has been no need to create or edit wp-config.php for many years now. You article makes the whole process more complicated than it needs to be.
If you had updated the Codex to make it more accurate and up-to-date, you would have generated much more benefit to the WordPress community than this article.
Exactly – how old is this article? Nicely written, but incorrect information.
What is the exact dessin fit entering the database credentials directly into the Wp-config file? Pure security?
Most of the time I simply upload the core files, open the site in my browser an the install will ask for the credentials.
Regards,
Herre
Completely agree with @Michael. There are so many quick install options available that take 1-2 minutes only..
Why make the process so complicated? The hosting companies you list have an auto WP install that takes less than 1 minute – then it is just a couple of clicks to install. hardest part is remembering the password that the auto install gives you – no databases, ftp, codex or anything else to learn.
AND the auto installer creates an admin with the Username ‘admin’, which you’d then need to change in phpMyAdmin unless you like being the target of every hacker under the sun …
Fully agree with Michael, there are so many other quick install scripts are available.. specially with cpanel hosting its really easy to install the wordpress takes only 1- 2 mintues.
The one-click installs do not setup the added layer of security of adding in the “Authentication Unique Keys and Salts” – at least the ones I’ve seen don’t.
Hostgator uses QuickInstall to install WordPress, unique authentication keys salts are generated automatically and placed into your wp-config.php file on your account. You can also, of course, change these values manually once the WordPress is installed. , (you can generate these using the following link: https://api.wordpress.org/secret-key/1.1/salt/ if you’d like).
Other – cheaper hosting companies – of course may not do this.
Hi Brenda
My first install was via softaculous or some other script but now I do it in easy stages.
Domain name, create database, FTP WordPress files, transfer DNS and then start working on the site.
I also run a local install of all my sites using DesktopServer, which allows me to play with settings and try out plugins.