

You’ve spent some time on WordPress.com, customized your site and sank countless hours into creating interesting posts for your readers. But now that you’re growing a little, you’ve started to realize that using WordPress.com to host your blog may not be the best idea if you’re serious about long-term growth.
Even if this scenario doesn’t describe your situation, it should come as no surprise that WordPress.com, while being a fantastic introduction to the platform, doesn’t offer the same advantages as self-hosting. Switching to a self-hosted WordPress blog will, for example, enable you to run ads on your site and experiment with all sorts of plugins and themes without any limitations.
If any of those seem like good enough reasons to make the switch, then stick around and go through our step by step guide to migrating your WordPress.com in a matter of hours (tops!).
- 1 Before We Get Started
- 2 Step 1: Export Your WordPress.com Content
- 3 Step 2: Install the WordPress Importer on Your New Site
- 4 Step 3: Import Your Content
- 5 Step 4: Redirect Users to Your New Domain
- 6 Step 5: Install Jetpack by WordPress.com (If You Want To)
- 7 Can I Hire Someone to Do All of This?
- 8 Conclusion
Before We Get Started
First things first. If you’re serious about making this move, you’ve probably already spent some time checking out what’s out there in terms of hosting and may be a little lost. If that’s the case, we recommend taking a look at a couple of our past articles: WordPress Hosting Review – Choose the Best Web Host for You and Is Managed WordPress Hosting Really Worth the Cost?.
We won’t go into details here about how to pick a good host since we’ve already written about it extensively in the past, but rest assured, we made sure to vet our picks while writing those articles.
Now, aside from hosting, you’ll also need to secure a domain. Sadly, the best ones (such as elegantthemes.com and ninjabunnies.com) are already taken. However, you can always go with your site’s name, look around for somewhat unconventional domains such as .io (which is really blowing up in the tech world nowadays), or just try random nonsense words until something sticks, like Google did (please disregard that last piece of advice).
Finally, you’ll need to install WordPress on your new host, which as luck has it, is another process we’ve written about in the past, in A Complete Guide To Installing WordPress. Once you’ve done that, feel free to take a look at The 10 Most Important Things You Should Do Immediately After Installing WordPress.
Once you’ve covered all of the above, you’re ready for the migration process itself, so let’s get to it!
Step 1: Export Your WordPress.com Content
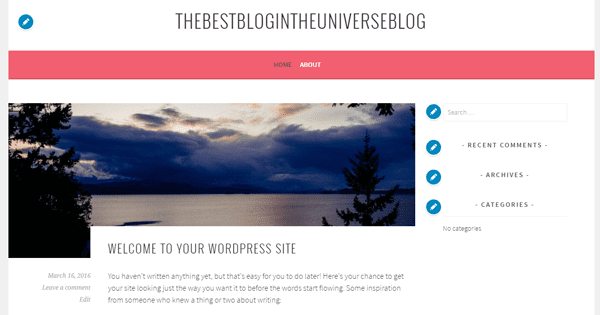
Alright, to pull this off you will require a WordPress.com blog, much like the one below, only hopefully full of actual content instead of placeholders.
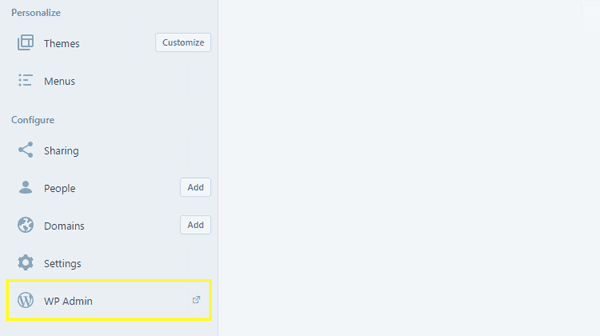
Once you’re logged in, go to the My Site tab and then click on WP Admin.
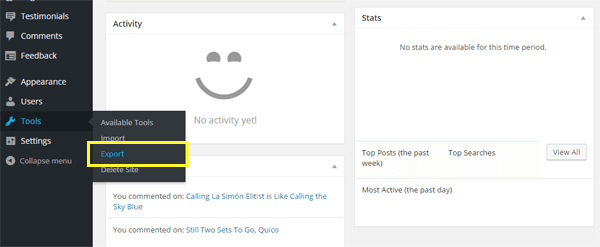
Now we’re inside the WordPress Dashboard, let’s find the Tools tab and the Export option within.
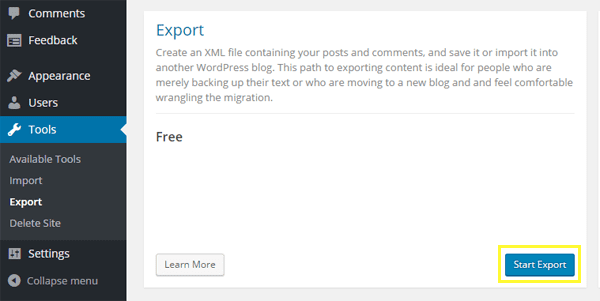
Inside, you’ll see two options. One for the regular Export and a second for a Guided Transfer process, which we will talk about later. For now, just click on Start Export.
On the following page, you’ll be asked exactly which content you want to export. For the purposes of this guide, we’re going to do a full export including posts, pages, testimonials, feedback, and media. In your case, feel free to choose exactly which content you want to export and then proceed to click on Download Export File.
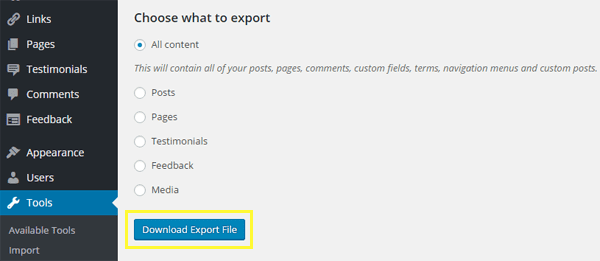
Afterward, the WordPress.com elves will start working on your unique XML file, which will be written in WordPress eXtended RSS (WXR) format, and will contain all of the content of your site (sans images – we’ll get to those in a bit) in one compact package.
One final warning: If your export file happens to exceed the 32mb threshold (in which case, you probably have been spending too much time on WordPress), you’re going to run into problems during the next few steps due to a limit on the size of files that can be imported into your new WordPress install. In that case, you’ll need to use a WXR WXR file splitter to split that file into more manageable pieces. It’s unlikely this will occur to you, but we consider it our duty to warn you nonetheless – we’re just great like that.
Step 2: Install the WordPress Importer on Your New Site
Now that your export file is ready, you need to get your new install ready to process it. For that, you’ll have to go into your Dashboard (at your self-hosted install) and click on Tools > Import.
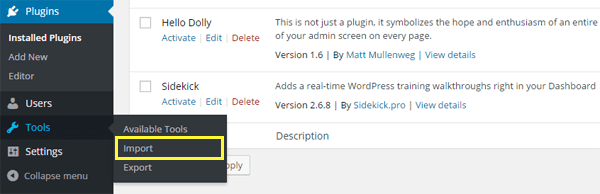
Choose the last option – Install the WordPress Importer – to import posts, pages, comments, custom fields, categories and tags from a WordPress export file.
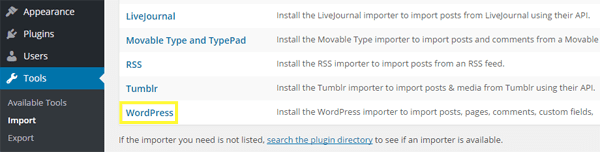
A new window will appear showing the WordPress Importer plugin. This is the tool we’ll use to process the XML file we created during the last step and get all of your content migrated, and don’t worry, it’s an official plugin developed by the WordPress.org team. Now that we’ve cleared that up, feel free to click on Install Now:
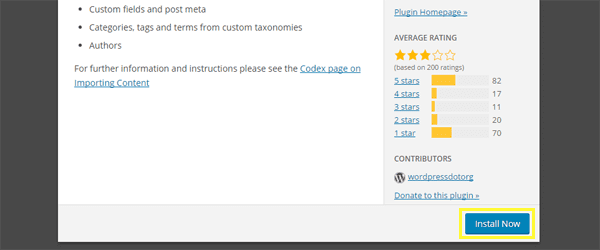
A new page will appear confirming that the plugin was downloaded, unpacked and installed without any issues. You’ll want to click on Activate Plugin & Run Importer for the next step.
Step 3: Import Your Content
Now that the WordPress Importer plugin is activated and ready to go, it’s time to upload your WordPress.com export file by clicking on Upload file and import as shown below. In case you somehow got turned around in between steps, just go back to the Import tab under Tools within your Dashboard and if the plugin is already installed, you’ll be redirected directly to the import page.
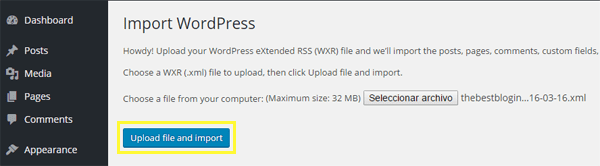
Do note the Maximum size: 32 MB warning as we mentioned earlier.
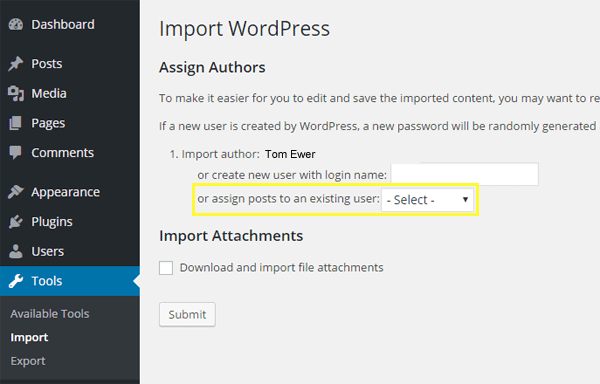
On the next screen, you’ll be asked whether you want to reassign your posts to new authors. For example, if you posted everything under a single account in your WordPress.com site, you’d simply have to choose whether to import that same username or create a new one.

Otherwise, you can also assign posts to an existing author on your new site by choosing from the drop-down list below.
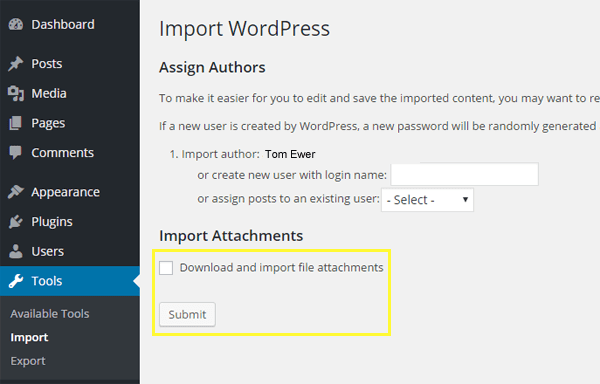
Once you’re done with that, check the box below where it says Download and import file attachments. This will pull over all of your images and other attachments from WordPress.com to WordPress.org. Then wrap things up by clicking on Submit.
Now importing images can be a little tricky, so let’s take a small detour and double check if everything is working properly after you clicked on Submit.
Step 3.1: Make Sure All Your Images Are There
This is the part of the migration process where most errors tend to occur. If you happen to have a lot of images over at WordPress.com, some of them may not migrate properly and you could be left with a new blog with images, or faced with the possibility of having to upload everything manually.
Now, we’re not saying this happens all the time, but since it’s been known to occur, we’re going to introduce you to a handy little plugin which can help you in this scenario. Import External Images analyzes the code of your posts, pulls the accompanying images if it detects linking to sources outside of your site, then it uploads them to your local install and voilà – you’re fully migrated.
Using this plugin should be a cinch, but just in case, feel free to take a look at How to Import External Images in WordPress, which is a tutorial focused on the plugin itself written by the folks over at WPBeginner.
Step 4: Redirect Users to Your New Domain
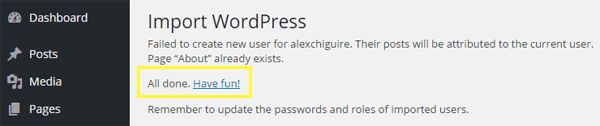
If you managed to make it through the entirety of step three (with your images included), you’re just about done. In fact, the confirmation screen will helpfully tell you All done. Have fun! as seen below:
However, here at Elegant Themes, we like to be thorough, so we’re going to tackle a couple of extra points to wrap up all the loose ends of your migration – the first of which is what will happen to your former WordPress.com site. After all, if you simply move without informing your visitors, you’re most likely going to lose them for good.
There are a few ways to tackle this issue – the most common of which would be to make a post specifically to inform them you’ve moved your website to a new domain and point them in that direction.
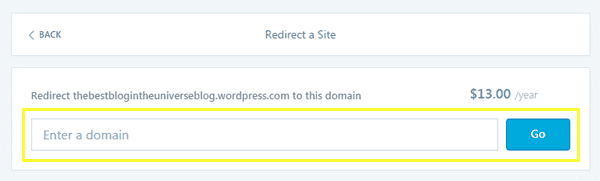
The second option is using the WordPress.com paid Site Redirect service ($13 per year), which as its name implies, will outright redirect all visitors to your new domain. If you want to choose this method, go straight to the Site Redirect service page, which will automatically redirect you to your own account.
Once you’re in there, simply select the blog you want to redirect, type out your new domain name and click on Go:
Afterwards, you’ll be asked for your payment details in order to complete your purchase of the service, and that’s pretty much it.
Step 5: Install Jetpack by WordPress.com (If You Want To)
This final step is completely optional, since by now your site should be fully migrated and the redirect issue should’ve been taken care of. However, we thought it pertinent to include it, since the Jetpack plugin essentially brings over certain features that you might have grown accustomed to during your stay at WordPress.com.
Just to name a few features, Jetpack can provide you with traffic stats, protect you from brute force attacks, and speed up your loading times among other features. However, these are all features that can be handled via other plugins now that you’ve got your own self-hosted WordPress install, so the choice is up to you.
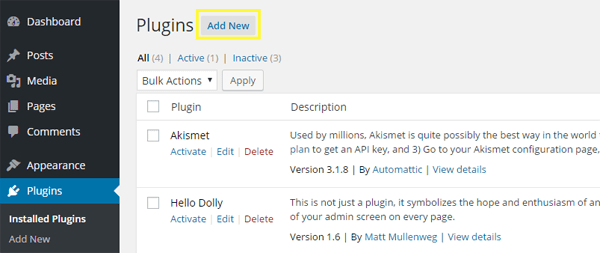
If you do decide to stick with Jetpack, all you have to do is go to your Plugins tab within your Dashboard and then click on Add New:
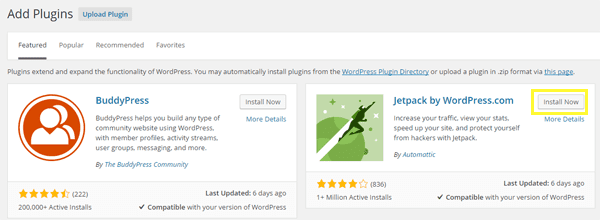
Jetpack should be one of the first choices on the next page, so just go ahead and click on Install Now:
You know the drill here – click on Activate the plugin and you’ll find yourself once more on the Plugins tab with a big Jetpack notification at the top of your screen. Click on Connect to WordPress.com to finish the installation process, and you’re all set!

We won’t be going into details in this guide about how to use Jetpack to the full extent of its capabilities, but do feel free to check out our past article on the subject: Using the Jetpack Plugin to Supercharge Your WordPress Website.
Finally, once you’ve installed Jetpack, you can also import your former WordPress.com subscribers over to your new site using its integrated subscription migration tool, following these simple instructions.
Can I Hire Someone to Do All of This?
You sure can! That’ll only be a cool grand – just leave your email in the comments section below.
All kidding aside, there are plenty of hosting services that offer migration services, either paid or free (if you sign up for their services in the first place, of course). WordPress.com itself offers a Guided Transfer program for which they charge a one-time fee of $129 per blog, but only to Bluehost.
While the temptation may be strong to take this route, if you took the time to read over all the steps of the guide then you should have realized by now that the process is actually quite simple. At the very worst you may run into a problem importing your images into your self-hosted WordPress site, and that can be easily taken care of.
So, don’t be scared to give it a shot if you think you can handle it!
Conclusion
Migrating your site from WordPress.com may take a little work, but it will immediately open up an entire universe of possibilities when it comes to development and customization, which makes it well worth the effort.
Just remember these key steps:
- Export your content (and consider sectioning it if the resulting file is too large).
- Install the WordPress importer plugin on your new site and use it to upload your export file.
- Make sure none of your images are broken. If any are, we recommend using the Import External Images plugin (which you can do now since you’re no longer limited by WordPress.com).
- Install the Jetpack plugin and migrate your WordPress.com subscribers.
Have you ever had to migrate a site from WordPress.com? If so, did you run into any issues? Let us know and subscribe to the comments section below!
Article thumbnail image by Kit8.net / shutterstock.com


I’m having some trouble figuring out what to do when I have a registered domain at WordPress.com already. When I try to install wordpress from my cPanel I get told that the website already has wordpress, which obviously makes sense. However, does that mean I have to ‘uninstall’ or delete my website first, and then install it again via my new web hosting site? I have spent some time getting around this, but I can’t seem to find any other answer than to try and delete the site, after I make the XML-file of course, and then install it again and import the XML.
I hope that you can help me a little with this. Very nicely detailed guide by the way.
– Jacob
I think you’ll need to look at transferring or deregistering the domain with WordPress.com first, Jacob. This article – https://en.support.wordpress.com/cancel-domain/ – may help you.
Hi, that’s a very detailed article! This might be a silly question, but how does the WP theme installation fit into the migration process? I’m using one of WP free themes on wordpress.com, but I want to buy a premium third-party theme when I move my site to a new host. Does the content need to be migrated first and the new theme installed after that or the other way round? Ideally I’d like to install the new theme on my new domain and host, and play around with demo content before transferring my real website over, but is that possible if I’m not a techie at all? Do you have any in-depth articles such as this one that could help me?
Thanks for your questions, Auste!
The process I would follow is to migrate your content first, then search for a new theme (such as Divi). Purchasing themes for self-hosted websites is a slightly different beast to WordPress.com, so concentrate on the migration first. Good luck 🙂
Thanks for sharing this information. Too much people doesn’t know how to 🙂 A great resource for WordPress migration
Thanks, Santi. 🙂
Thanks Tom Ewer for such a great article. Within a week I will be shifting to a new domain.
.
Thanks, Anand!
Thanks Tom Ewer for such a great article. Within a week I will be shifting to a new domain.
thanks alot.
I have done all of the above and am now trying to load my Divi theme onto my blog but having no luck, HELP!
Hi Whitney, since you’re a member the best way for us to help you out with that will be if you create a ticket in our support forum here http://elegantthemes.com/forum
Thanks for this article. Before migrating to any platform it is important to identify the pros and cons of a platform and see whether the new platform cam satisfy business needs or not. Before migrating a WordPress site, explore other enterprise web content management service alternatives like Sitefinity CMS, Drupal etc. and decide about what suits you the best. Consider the security measures and adaptivity of that platform.
Back up the data before migrating. Consider migrating in small parts so that no data is lost or misplaced. Ensure security at every stage of migration.
Awesome article on migration from WordPress.com to WordPress.org. I searched a lot about this but I can’t proper article..And finally I got this here…Thanks for sharing this awesome article bro…
Thanks Anshul!
Hey – what a very detailed guide. I love it and will sure be using your guide for my next project.
Thanks, Toni!
Thank you very much for this explanation and your nice efforts . I use wordpress and i like these kinds of articles because i can make it as a reference for me .
Thanks, Elnaseh!
This is amazing guide for beginners and also for those people who pays money for doing this simple task.
Thanks for the valuable post!!!
No problem, Emil! Glad you enjoyed it!
I always enjoyed to read and use Elegant Themes 😀
Awesome guide with explaining every single thing in detail. Informative post for newbie and experienced as well. I also started with wordpress.com to see how to use WordPress for publishing blog but I moved to self-hosted wordpress blog later.
Glad you enjoyed it, Deepanker!
Nice guide because last time I tried to move a site, it failed totally 🙂 Maybe now is the time to try with another blog that just been lying there
Morten, the time is now! Good luck 🙂
If we don’t impose a redirect from wordpress.com to a selfhosted blog. won’t it create duplicate content issue?
It depends what you mean by “issue” NIkhil. Google doesn’t penalise duplicate content; it simply prioritises it. So if you keep your old site online but not updated, and your new one is updated, Google will be likely to rank your new site over the old one in short time.
Thank you so much for such a detailed “How To”. This is a resource I would be happy to direct my readers to.
It’s funny, I never even considered the possibility of migrating one to the other. I always considered them as two total separate entities and I have always advised anyone who asked, to start with a self hosted wordpress without any thought of the possibility they could migrate their existing blog/site.
Thanks a million.
Thank you for the kind words, Graham! As you can see, WordPress makes it easier than ever to migrate!
Year ago I used WordPress.com, as most of us, I guess. When the time to move to WordPress.org has come, I found it quite difficult to make the move with the tools I had that time. Especially the photos were awful to move. So it was so difficult I decided to quit and start it over from zero on WordPress.org. But that was about 5-6 years ago. Now it looks really easy to move it.
It is, Jordan – as we’ve proven! Maybe it’s time to give it a go with your current website?